ASUSTeK Computer C300MA NotebooK PC User Manual C300MA UseManual 20141106
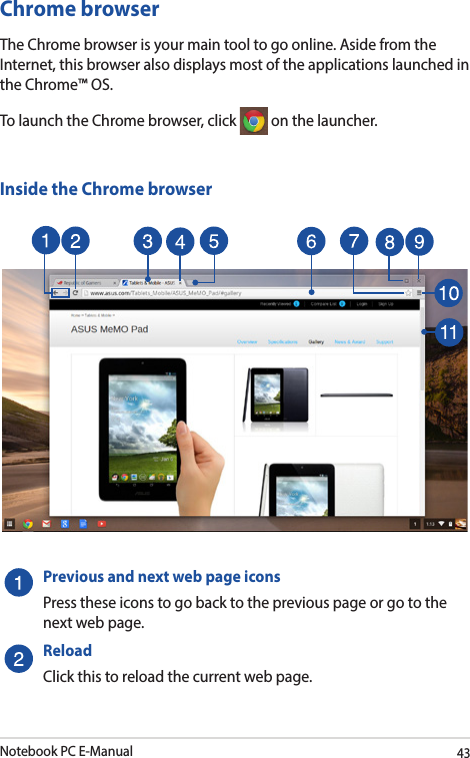
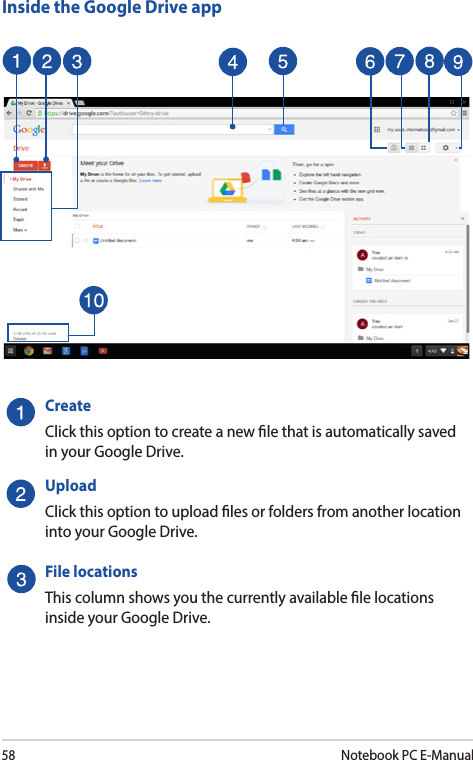
ASUSTeK Computer Inc NotebooK PC C300MA UseManual 20141106
UserManual.wiki
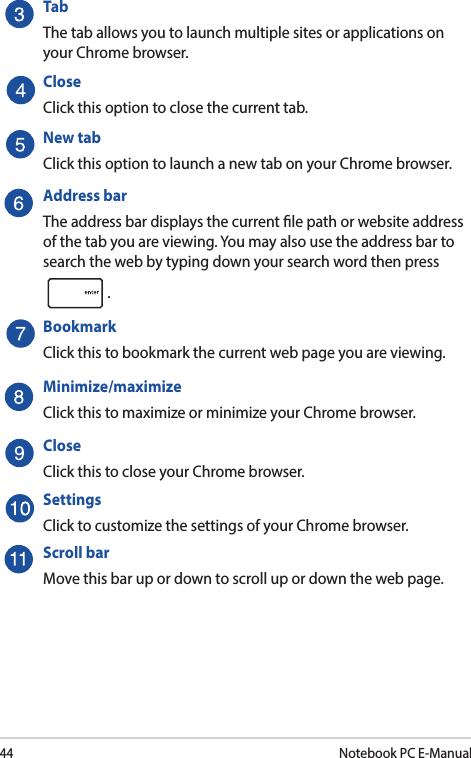
>
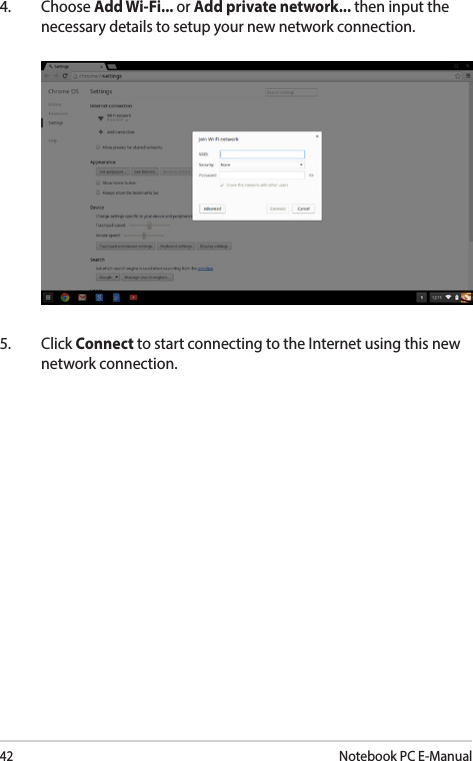
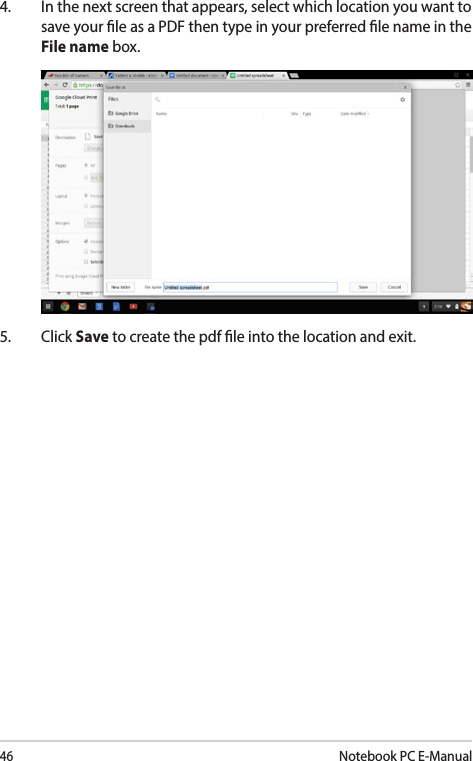
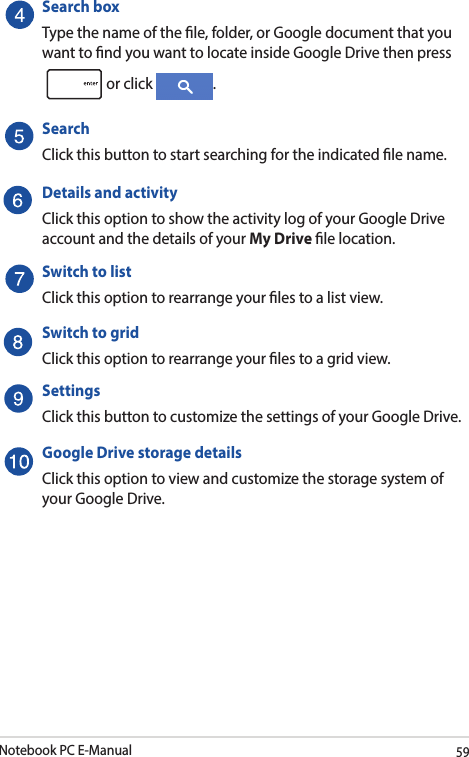
ASUSTeK Computer
>
C300MA User Manual
(C300MA) UseManual_20141106
Navigation menu
Upload a User Manual
Namespaces
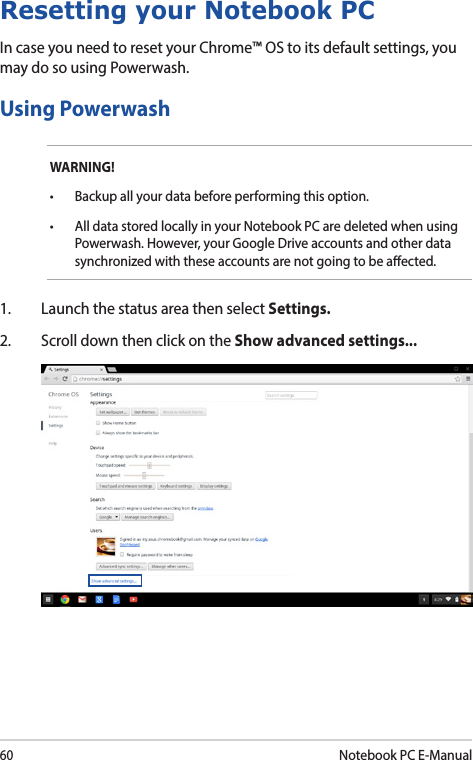
Wiki Guide
HTML
PDF
Info
Views
User Manual
Discussion / Help
Navigation

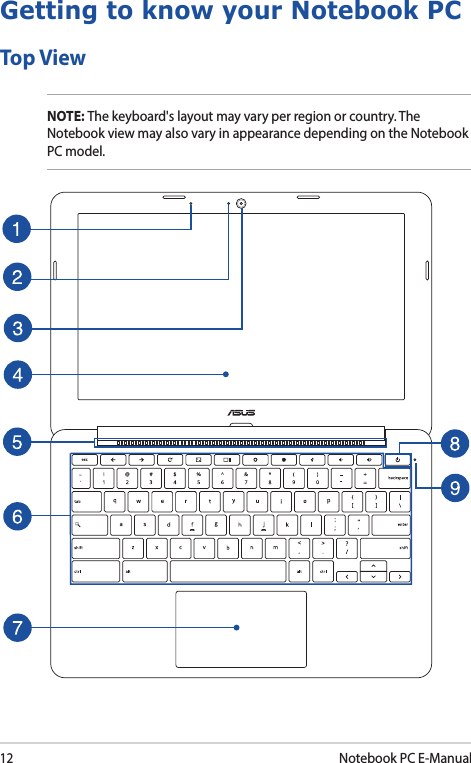
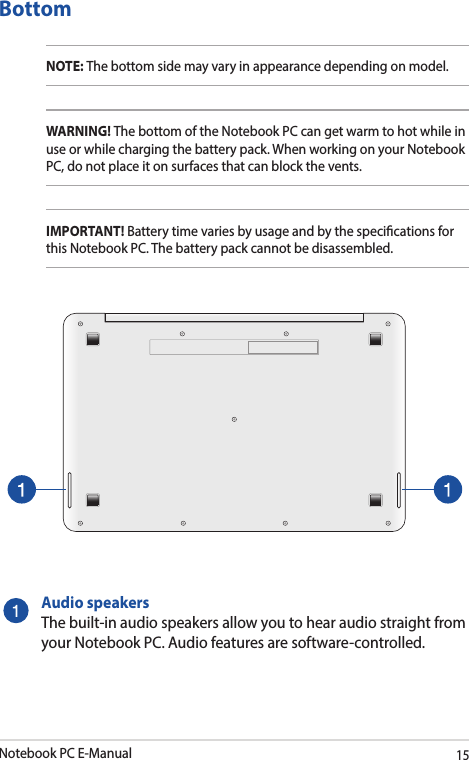
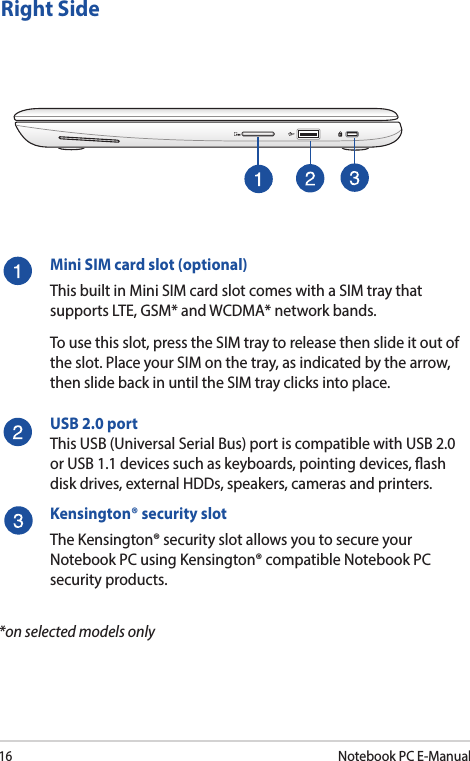
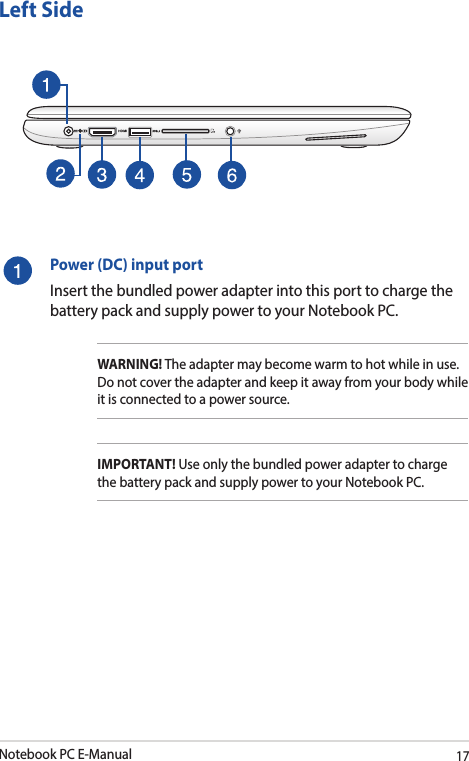


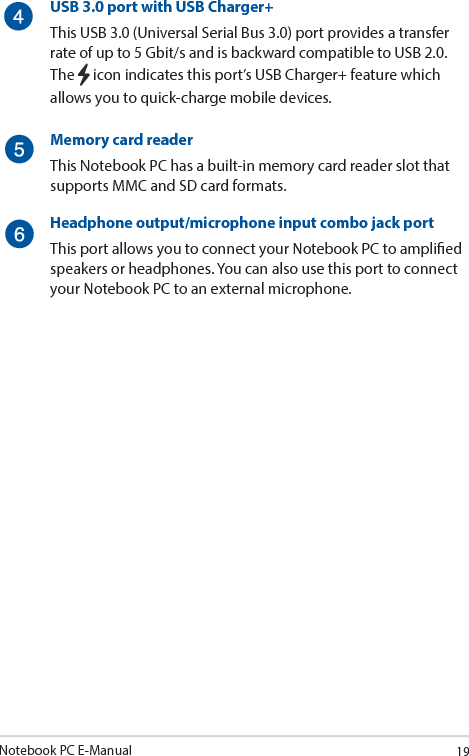


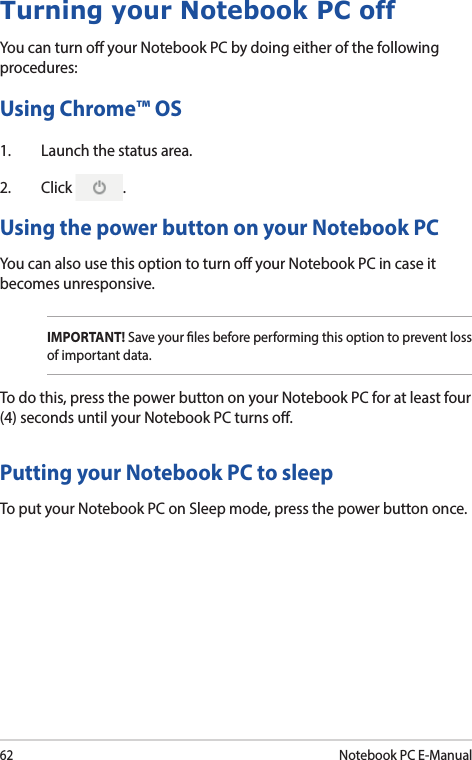

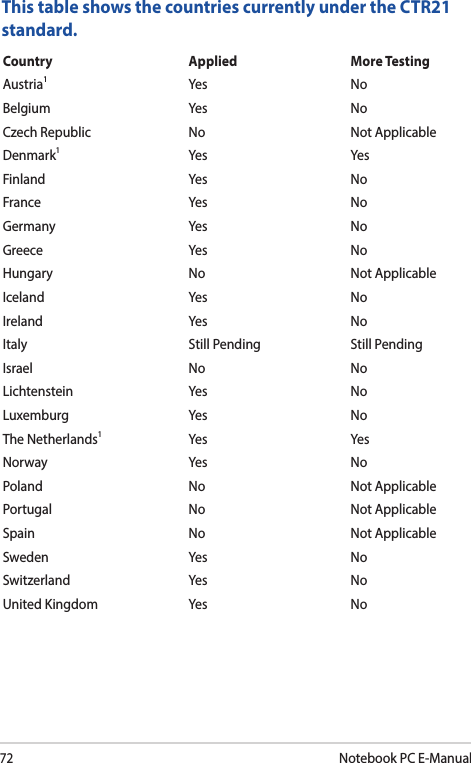
![Notebook PC E-Manual75Declaration of Conformity (R&TTE directive 1999/5/EC)The following items were completed and are considered relevant and sucient:• Essentialrequirementsasin[Article3]• Protectionrequirementsforhealthandsafetyasin[Article3.1a]• Testingforelectricsafetyaccordingto[EN60950]• Protectionrequirementsforelectromagneticcompatibilityin[Article3.1b]• Testingforelectromagneticcompatibilityin[EN301489-1]&[EN301489-17]• Eectiveuseoftheradiospectrumasin[Article3.2]• Radiotestsuitesaccordingto[EN300328-2]CE MarkingCE marking for devices without wireless LAN/BluetoothThe shipped version of this device complies with the requirements of the EEC directives 2004/108/EC “Electromagnetic compatibility” and 2006/95/EC “Low voltage directive”.CE marking for devices with wireless LAN/ BluetoothThis equipment complies with the requirements of Directive 1999/5/EC of the European Parliament and Commission from 9 March, 1999 governing Radio and Telecommunications Equipment and mutual recognition of conformity.](https://usermanual.wiki/ASUSTeK-Computer/C300MA/User-Guide-2437789-Page-75.png)