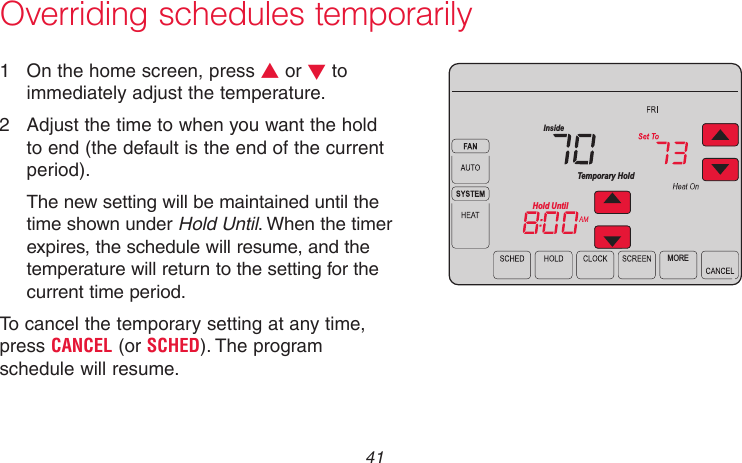
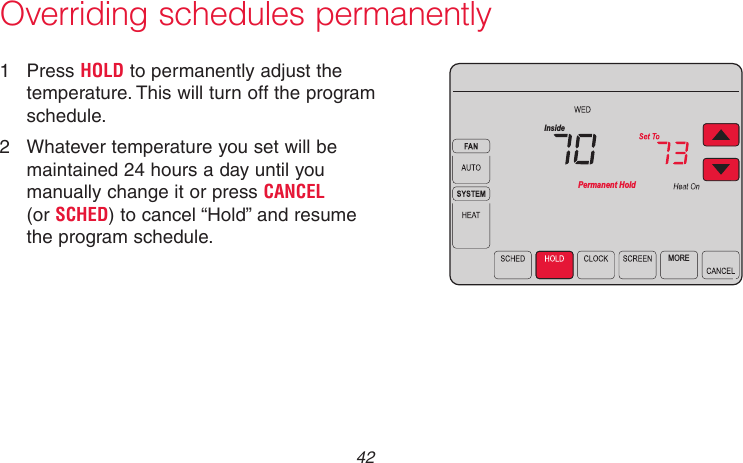
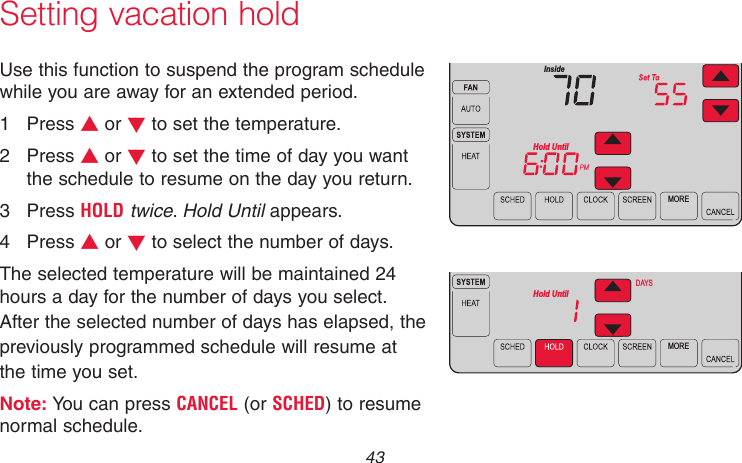
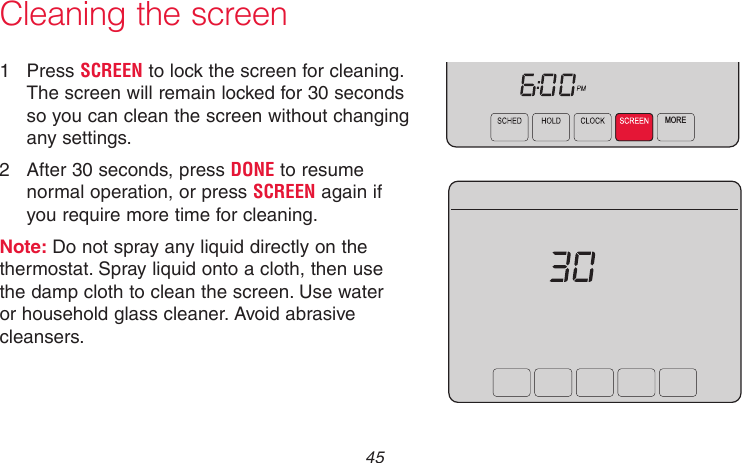
Ademco TH8320WF01 WiFi Thermostat User Manual manual
Honeywell International Inc WiFi Thermostat manual
UserManual.wiki
>
Ademco
>
TH8320WF01 User Manual
manual
Navigation menu
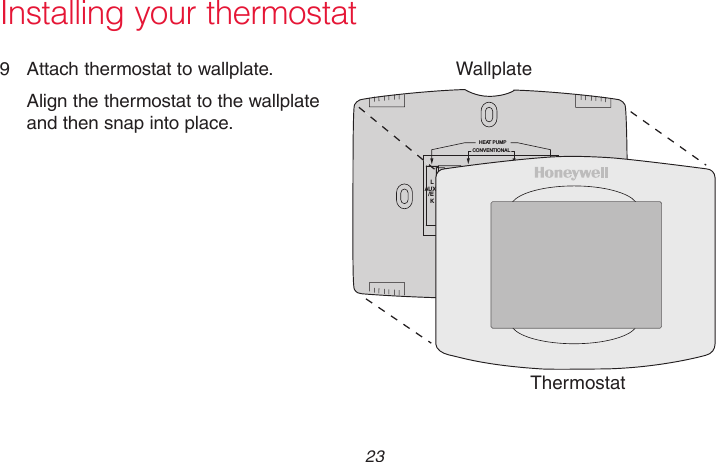
Upload a User Manual
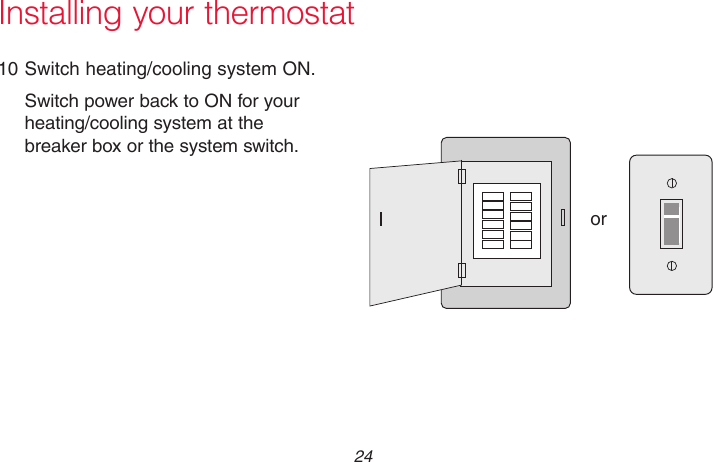
Namespaces
Wiki Guide
HTML
PDF
Info
Views
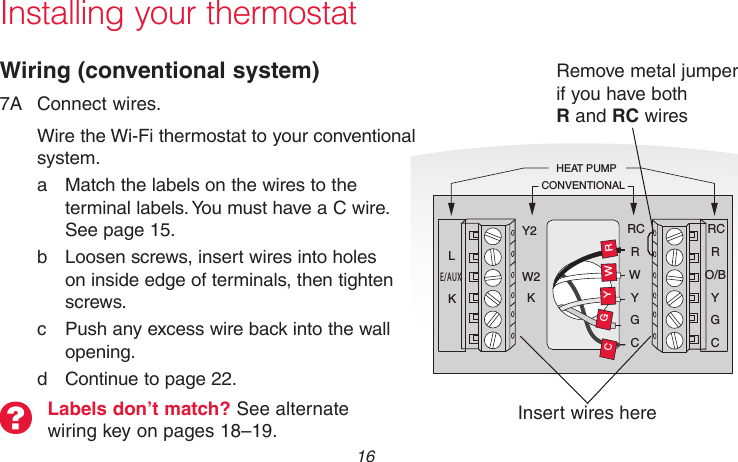
User Manual
Discussion / Help
Navigation
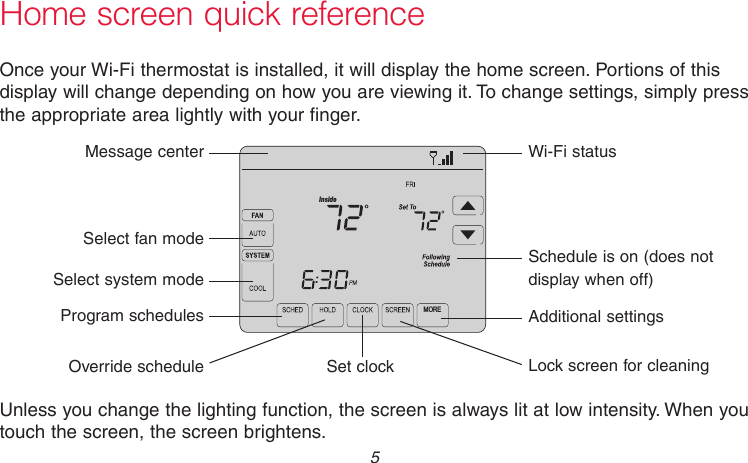
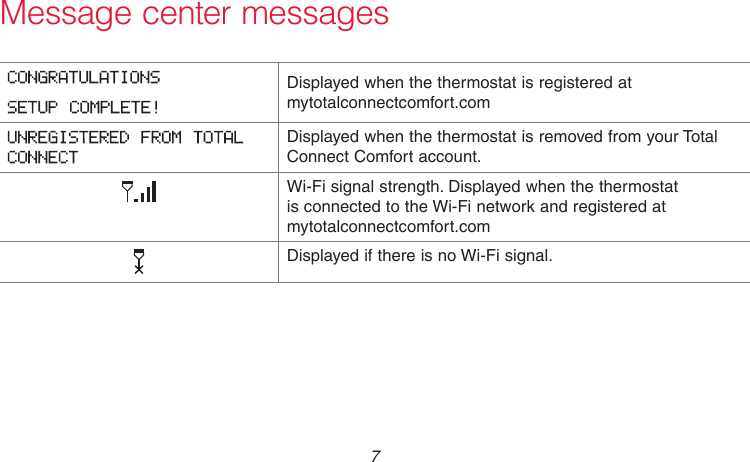
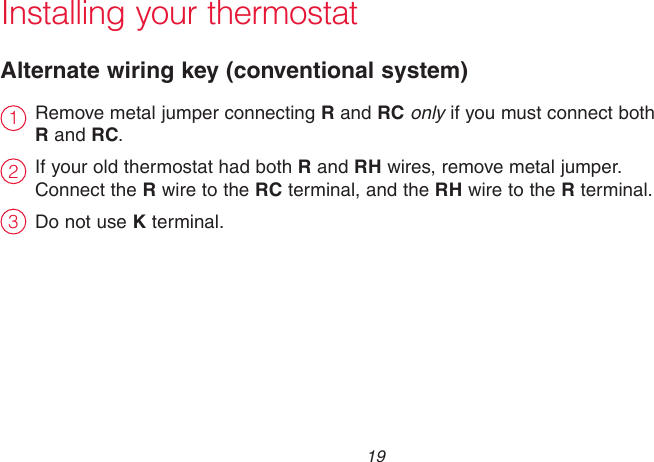
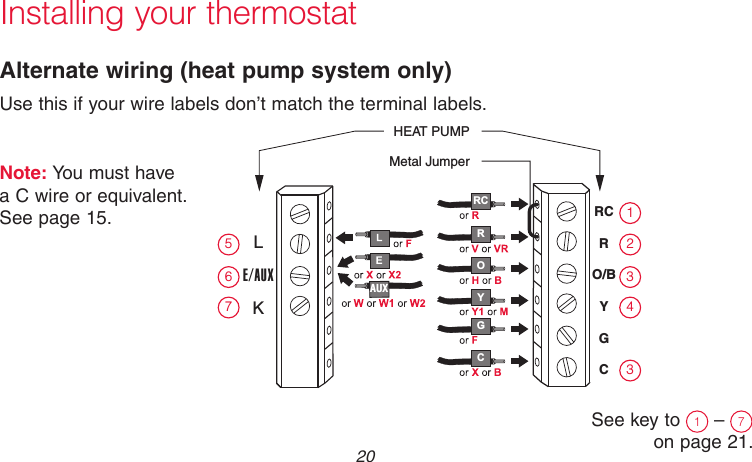
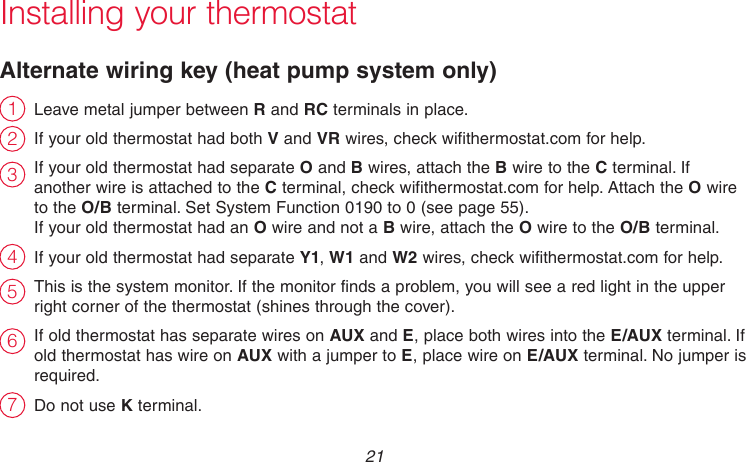
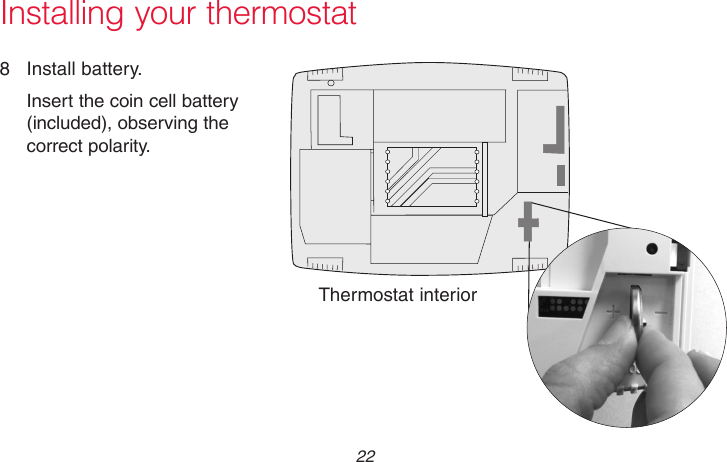
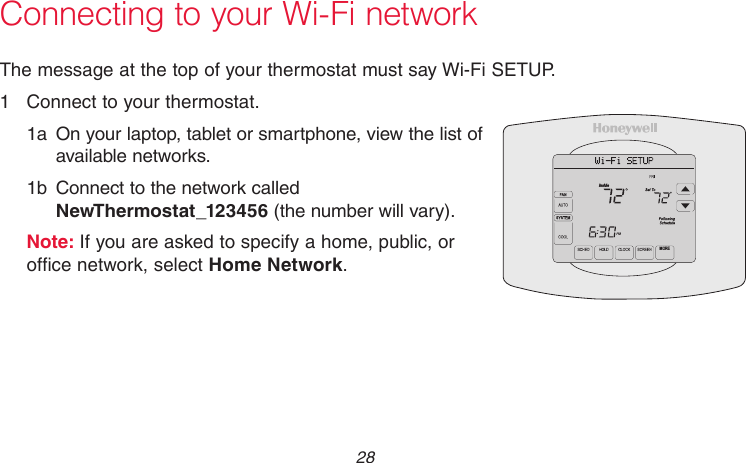
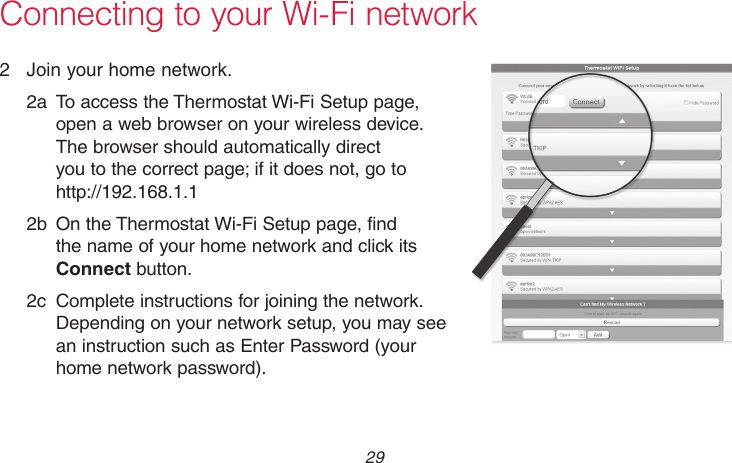
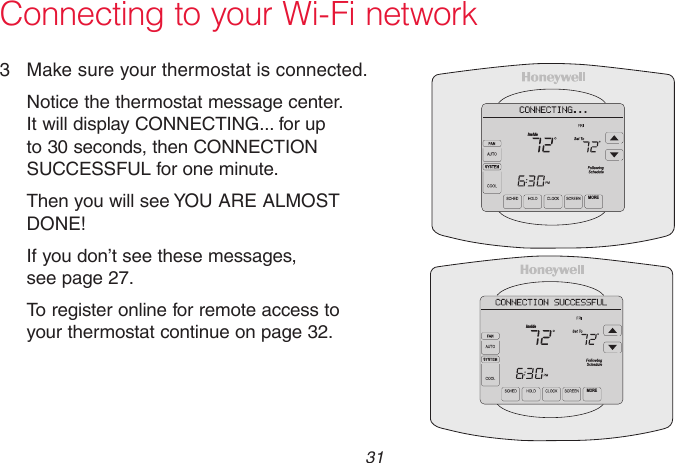
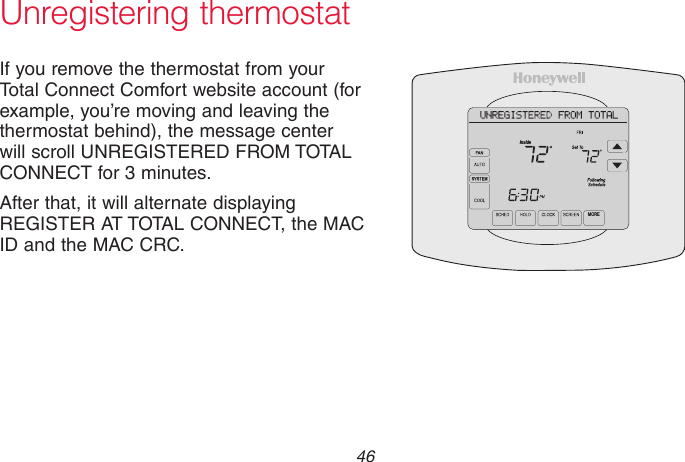
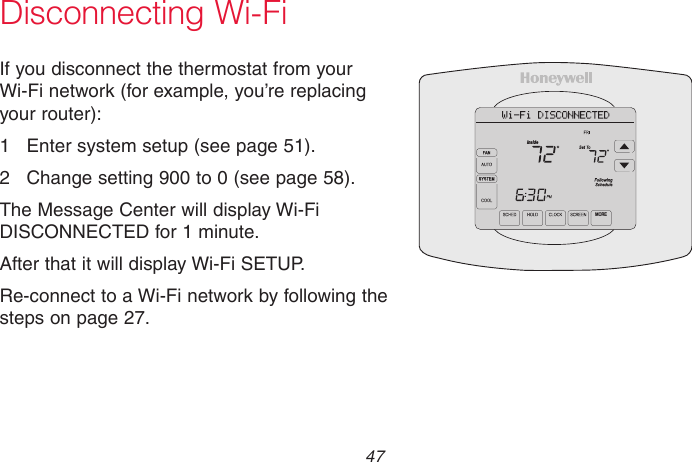
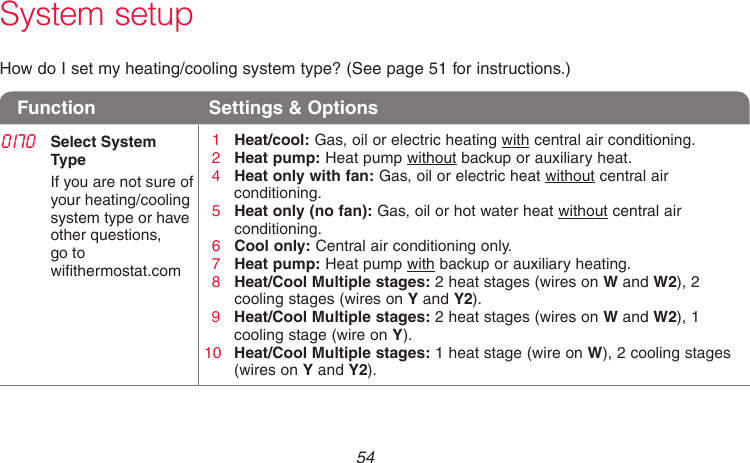
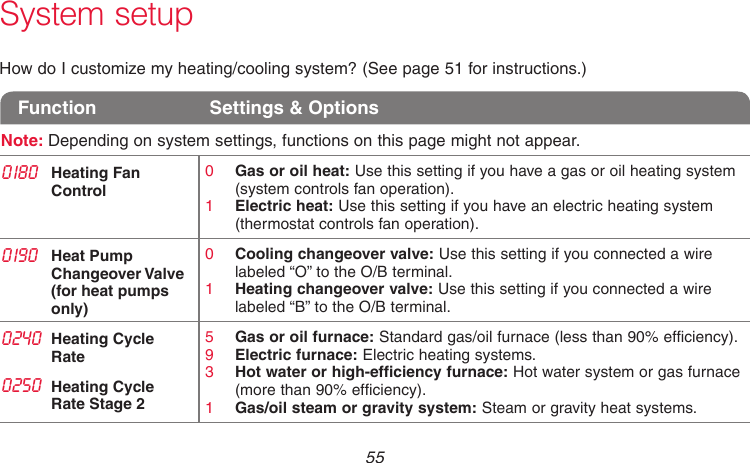
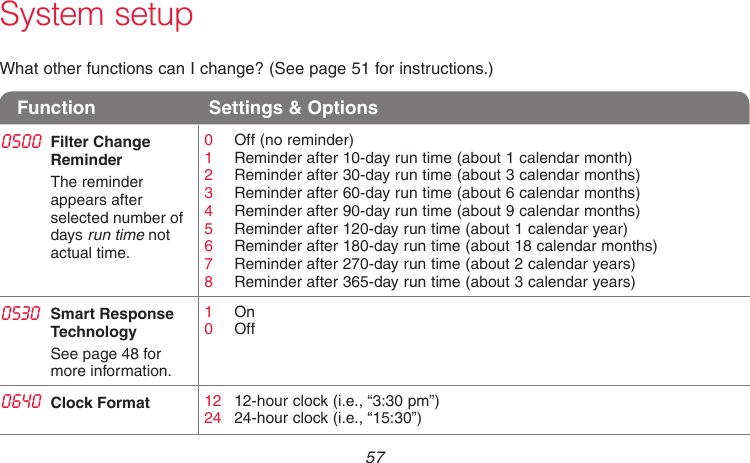
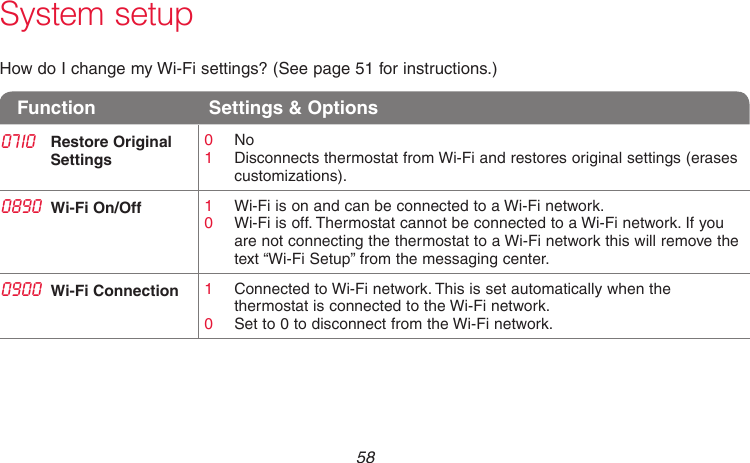
![69-2715EF—01 6 Message center messagesThe Message Center at the top of the screen communicates Wi-Fi connection and registration status. It also displays the MAC ID and MAC CRC for registering the thermostat at mytotalconnectcomfort.comDisplayed before you begin Wi-Fi setup.Displayed while connecting to the Wi-Fi network.Displayed after connecting to the Wi-Fi network. [Wi-Fi network name] Displayed when connected to the Wi-Fi network.Displayed when Wi-Fi connection is complete.Displayed when the thermostat fails to establish a connection to the Wi-Fi network.Displayed when the thermostat is connected to the Wi-Fi network but not registered at mytotalconnectcomfort.comDisplays the thermostat’s MAC ID and MAC CRC for registering at mytotalconnectcomfort.com [Found on your ID card] [Found on your ID card]](https://usermanual.wiki/Ademco/TH8320WF01/User-Guide-1740238-Page-8.png)