Advanced Sterilization 02532481 RFID Module User Manual M 99994 04 100NXUser indb
Advanced Sterilization Products RFID Module M 99994 04 100NXUser indb
UserManual.wiki
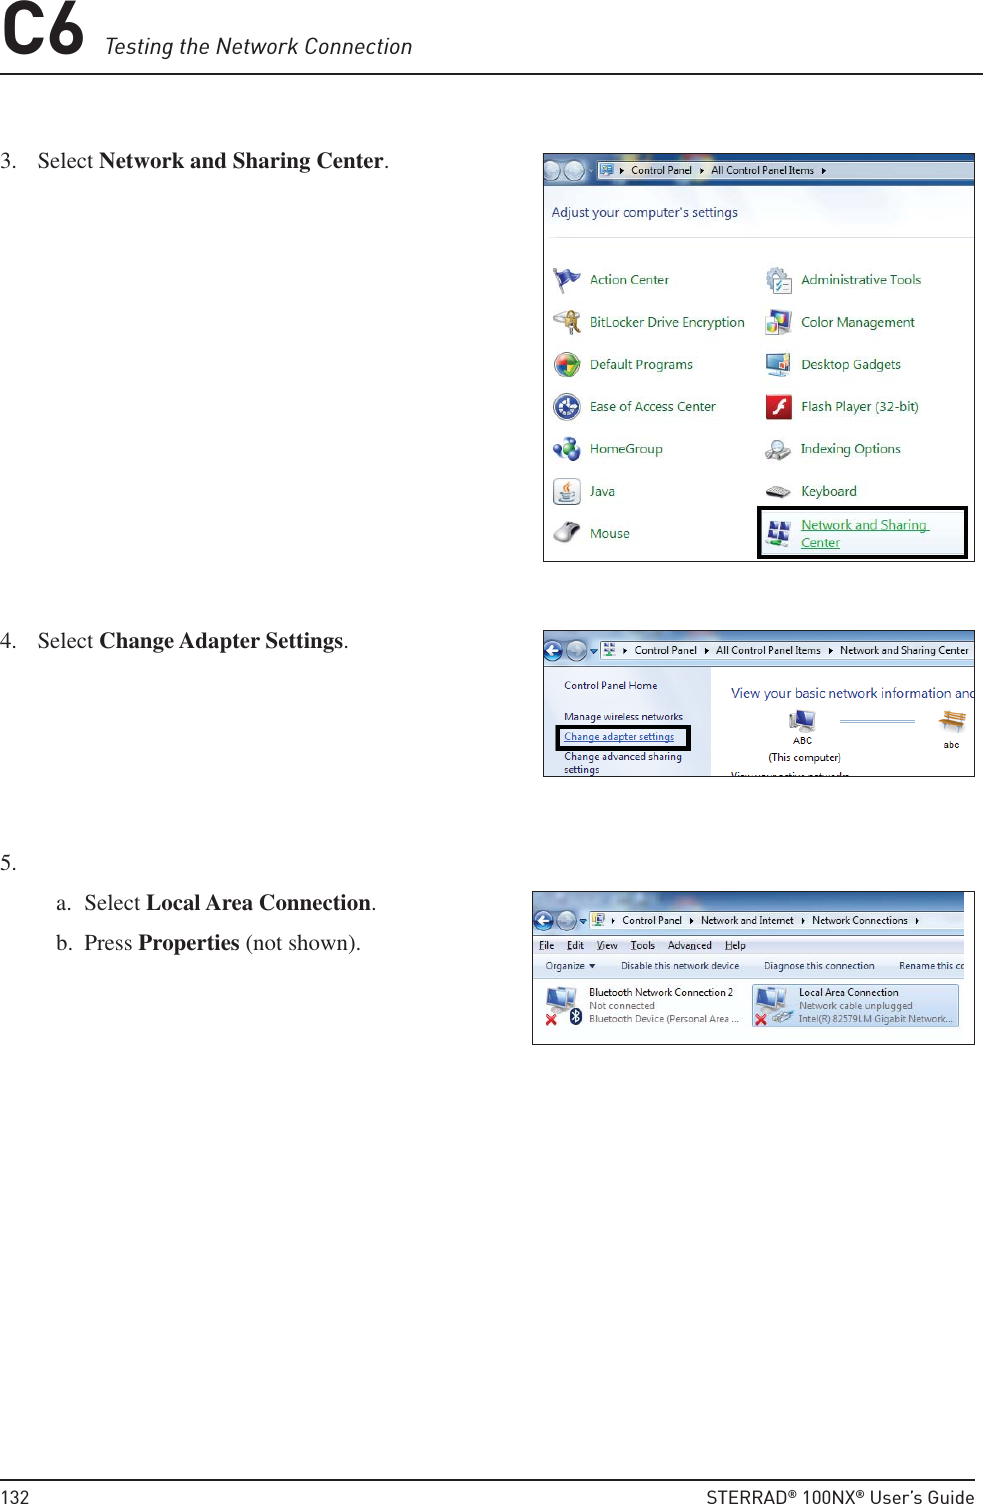
>
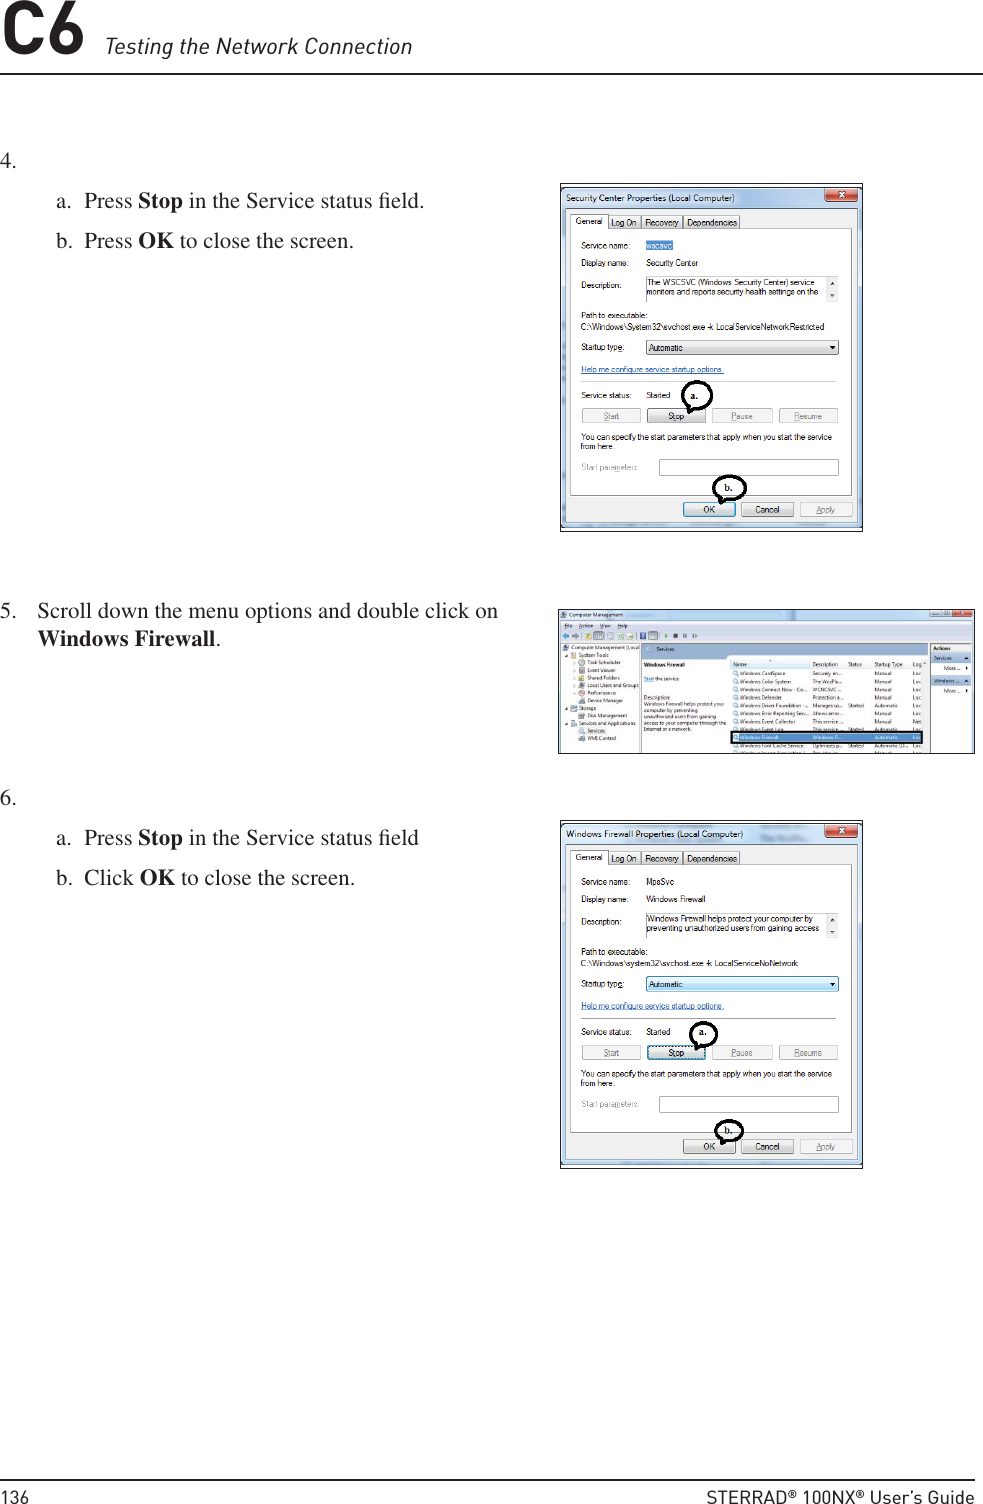
Advanced Sterilization
>
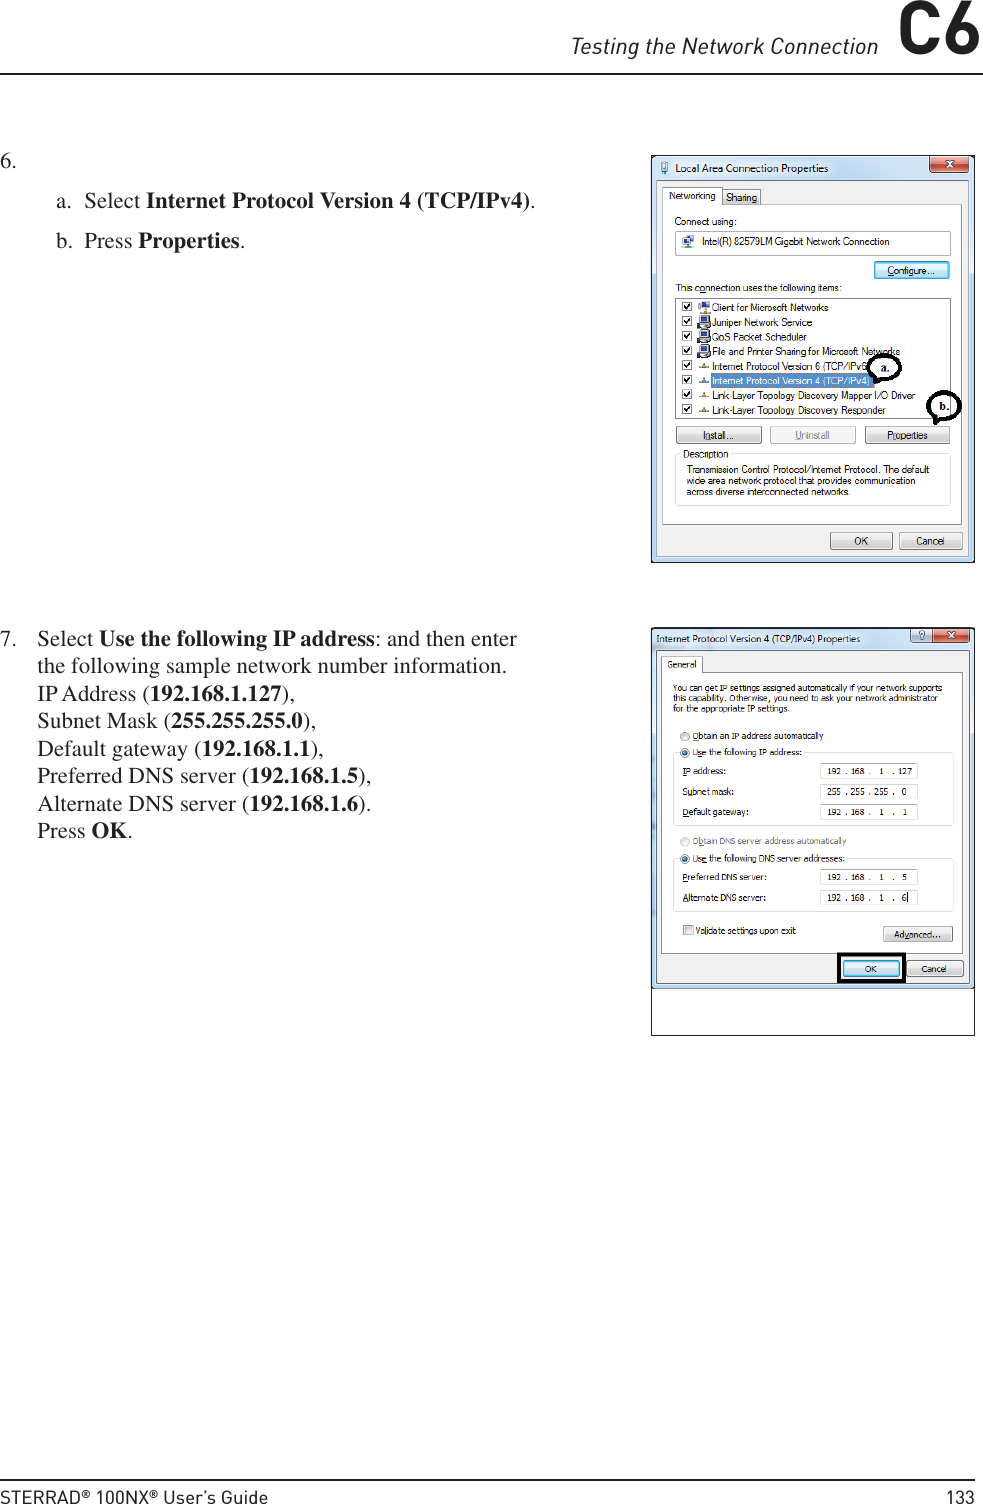
02532481 User Manual
User Manual
Navigation menu
Upload a User Manual
Namespaces
Wiki Guide
HTML
PDF
Info
Views
User Manual
Discussion / Help
Navigation


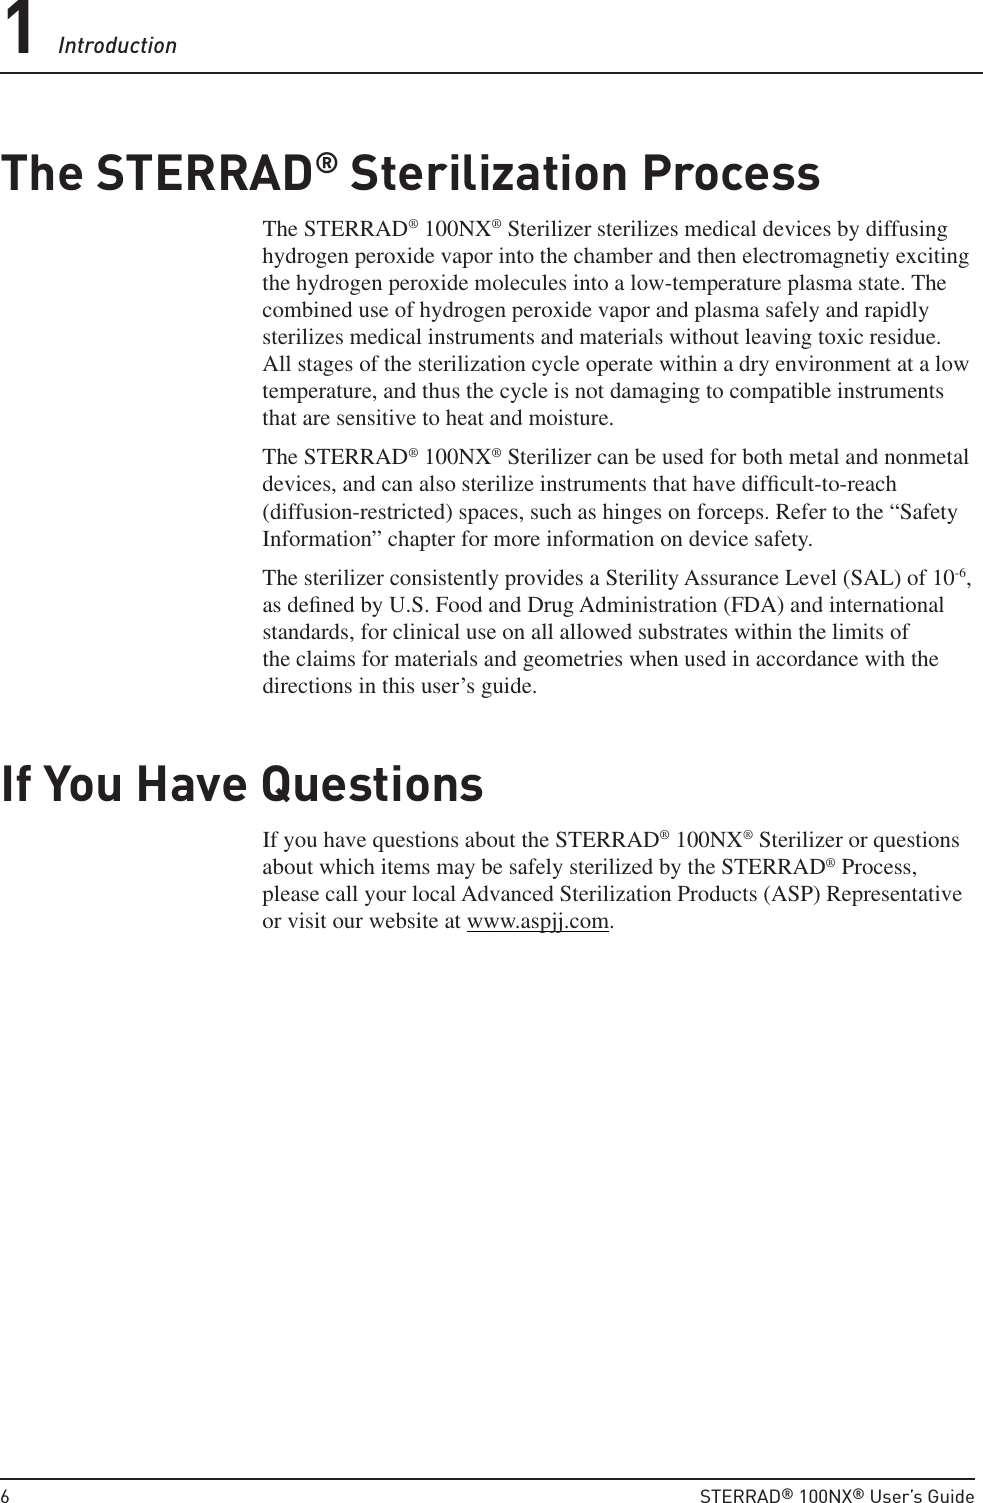

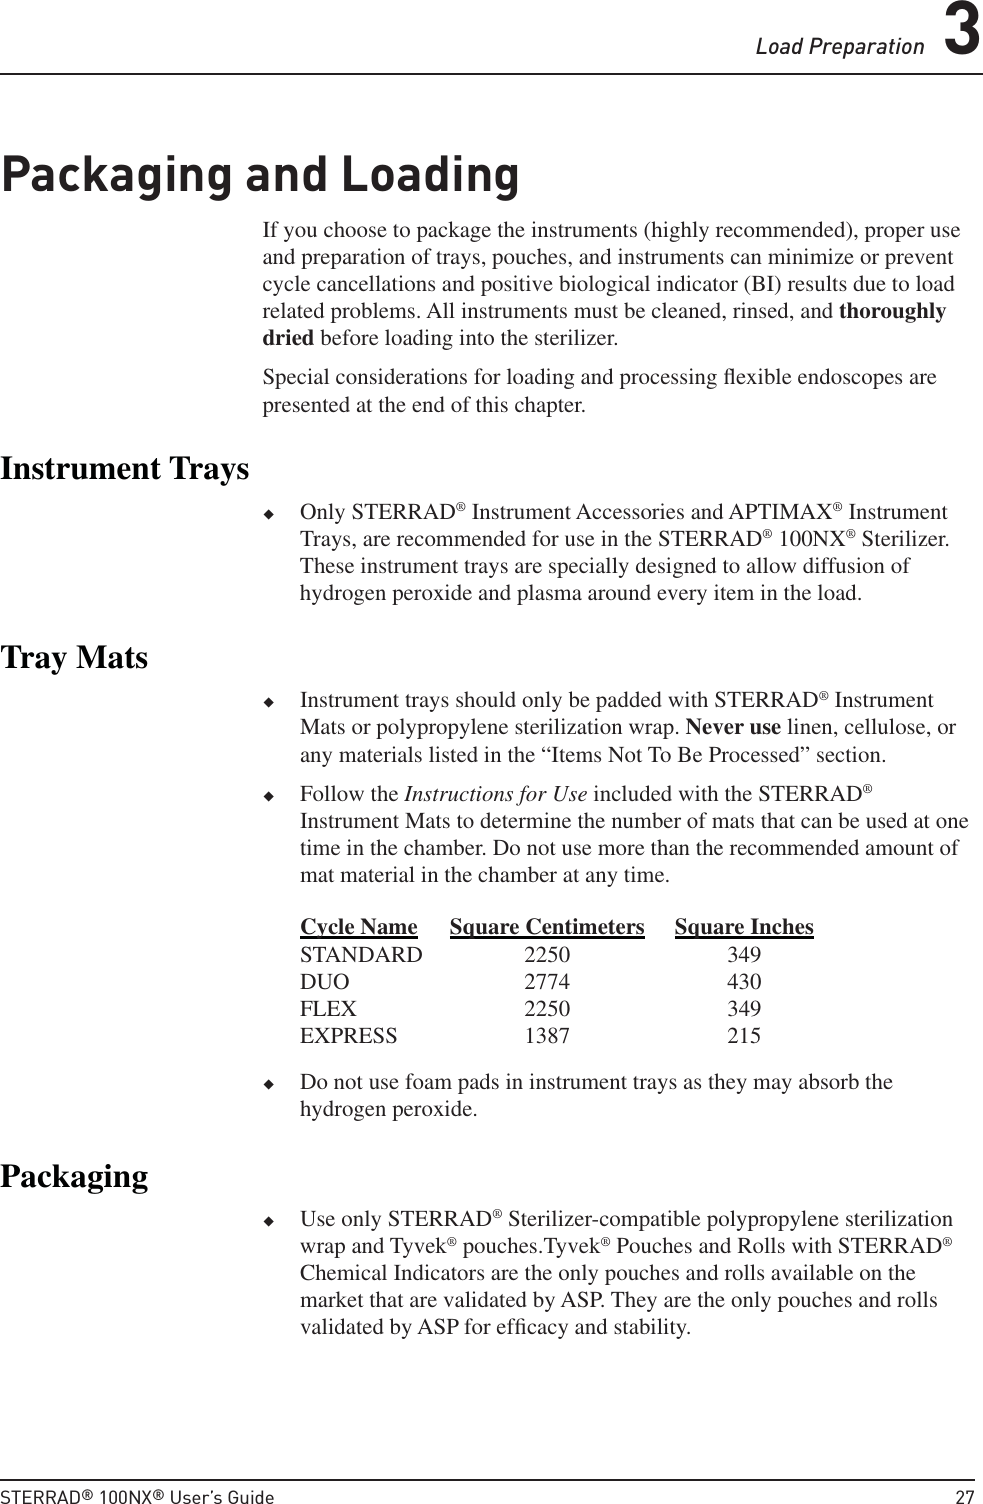
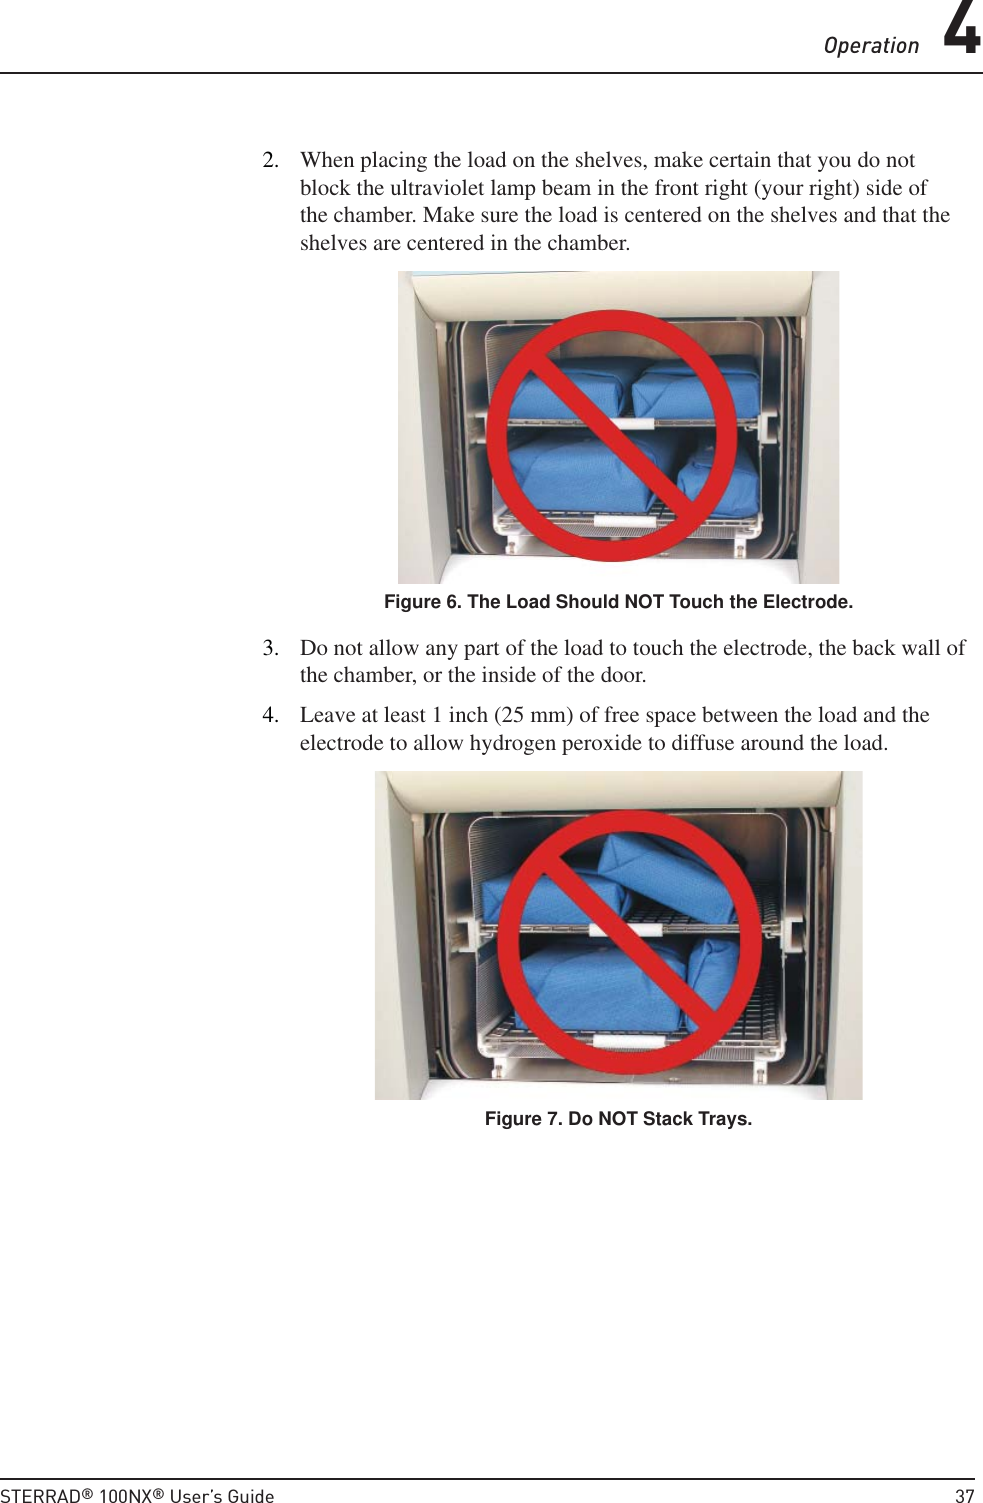


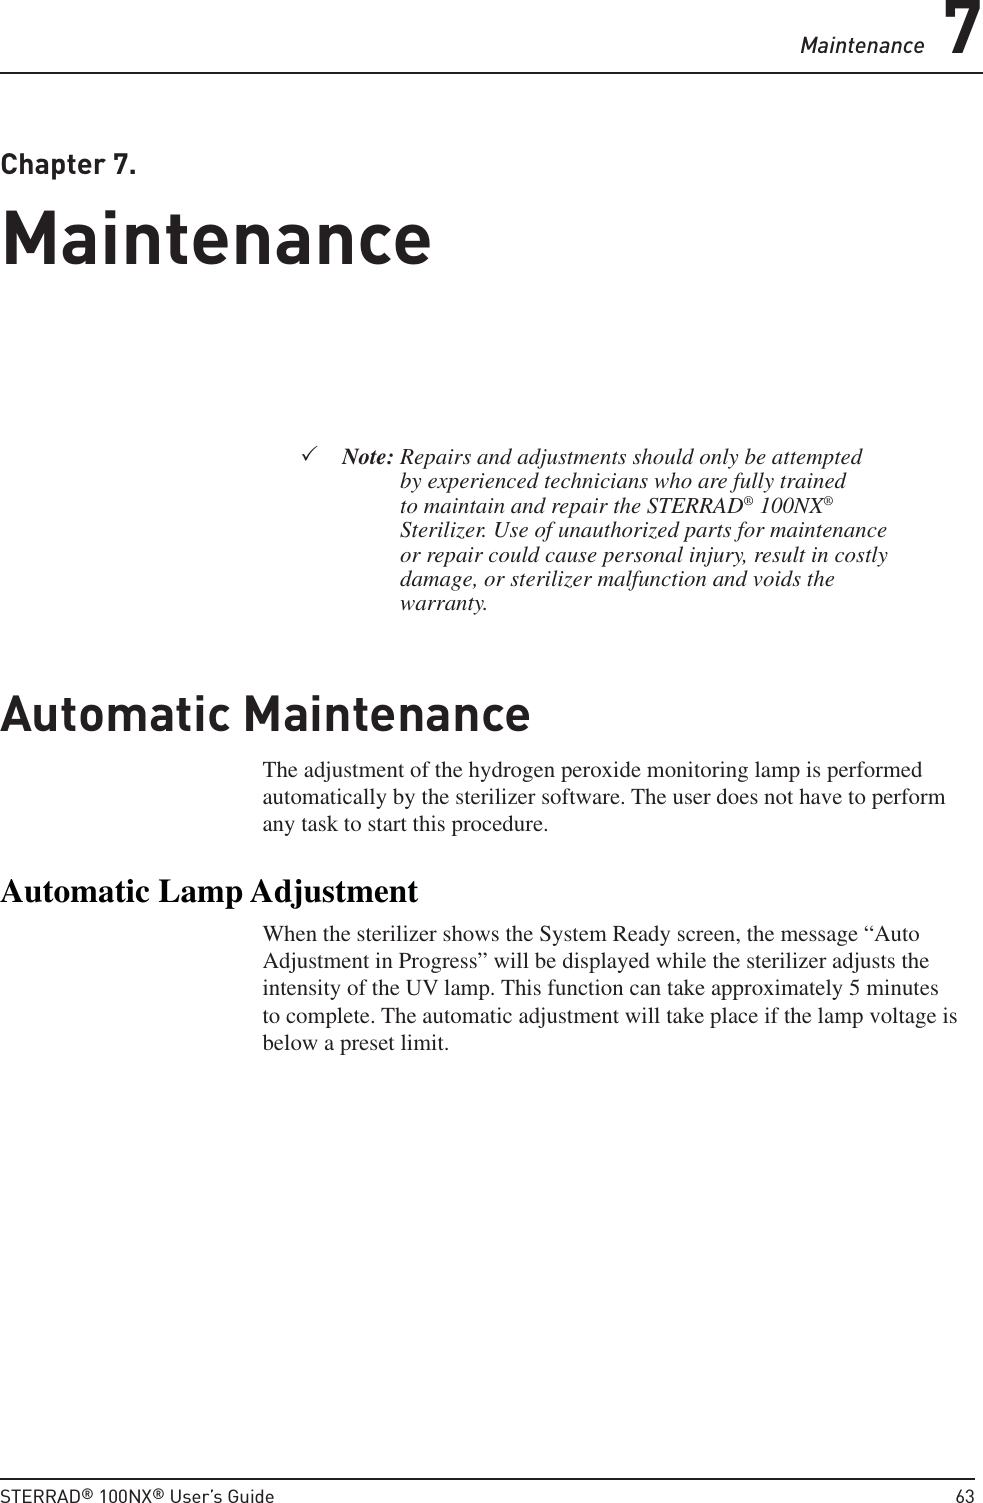

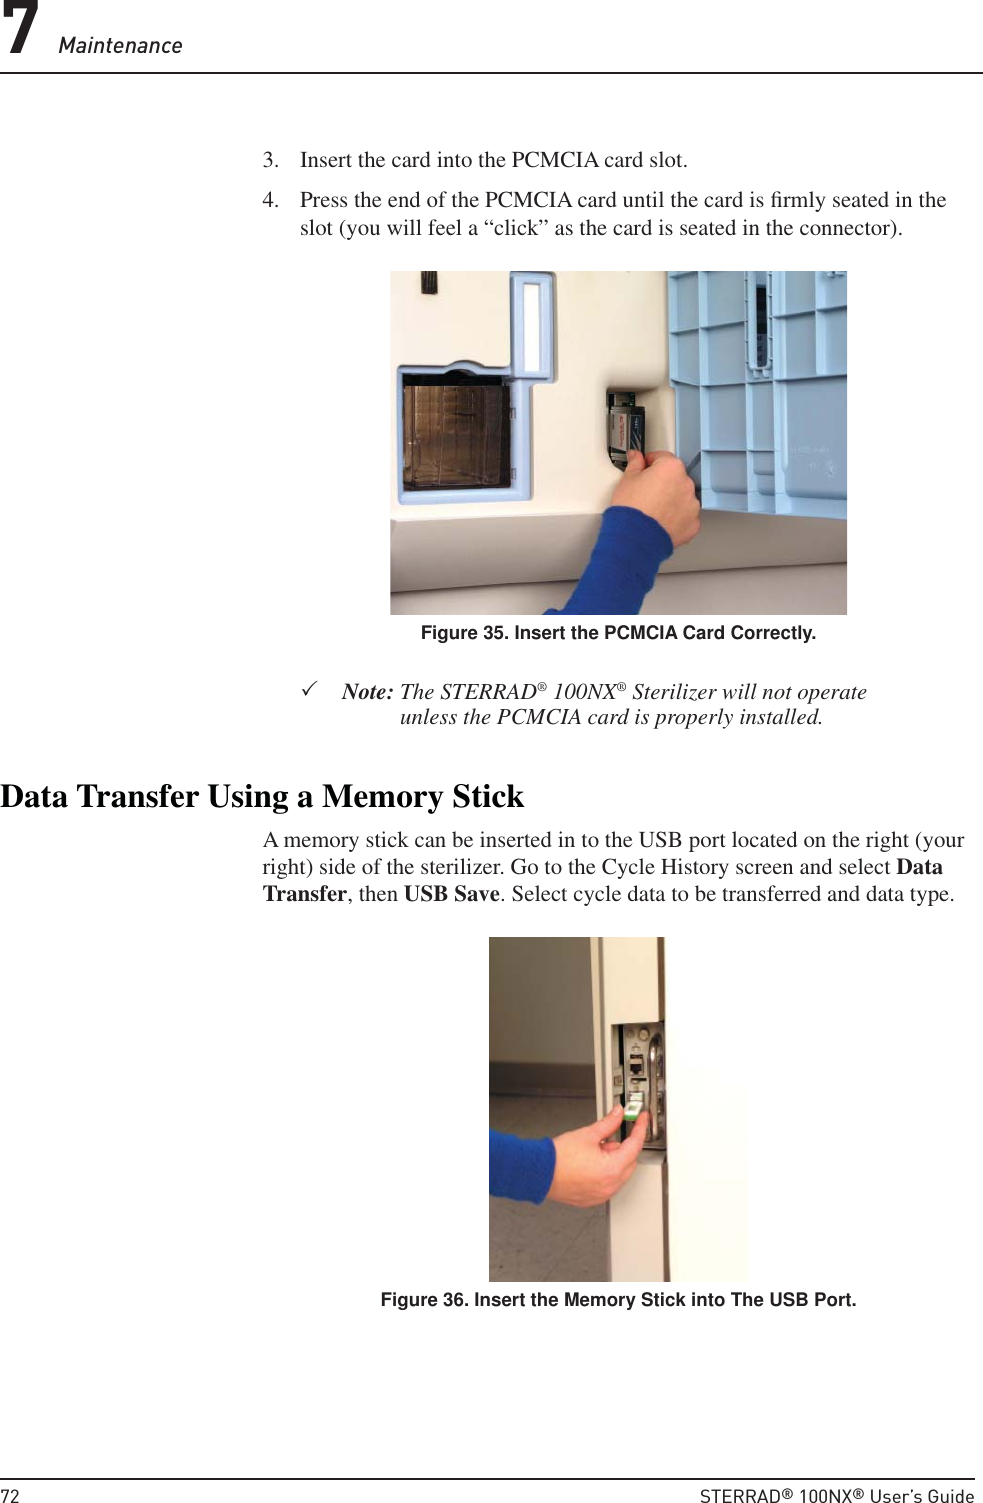

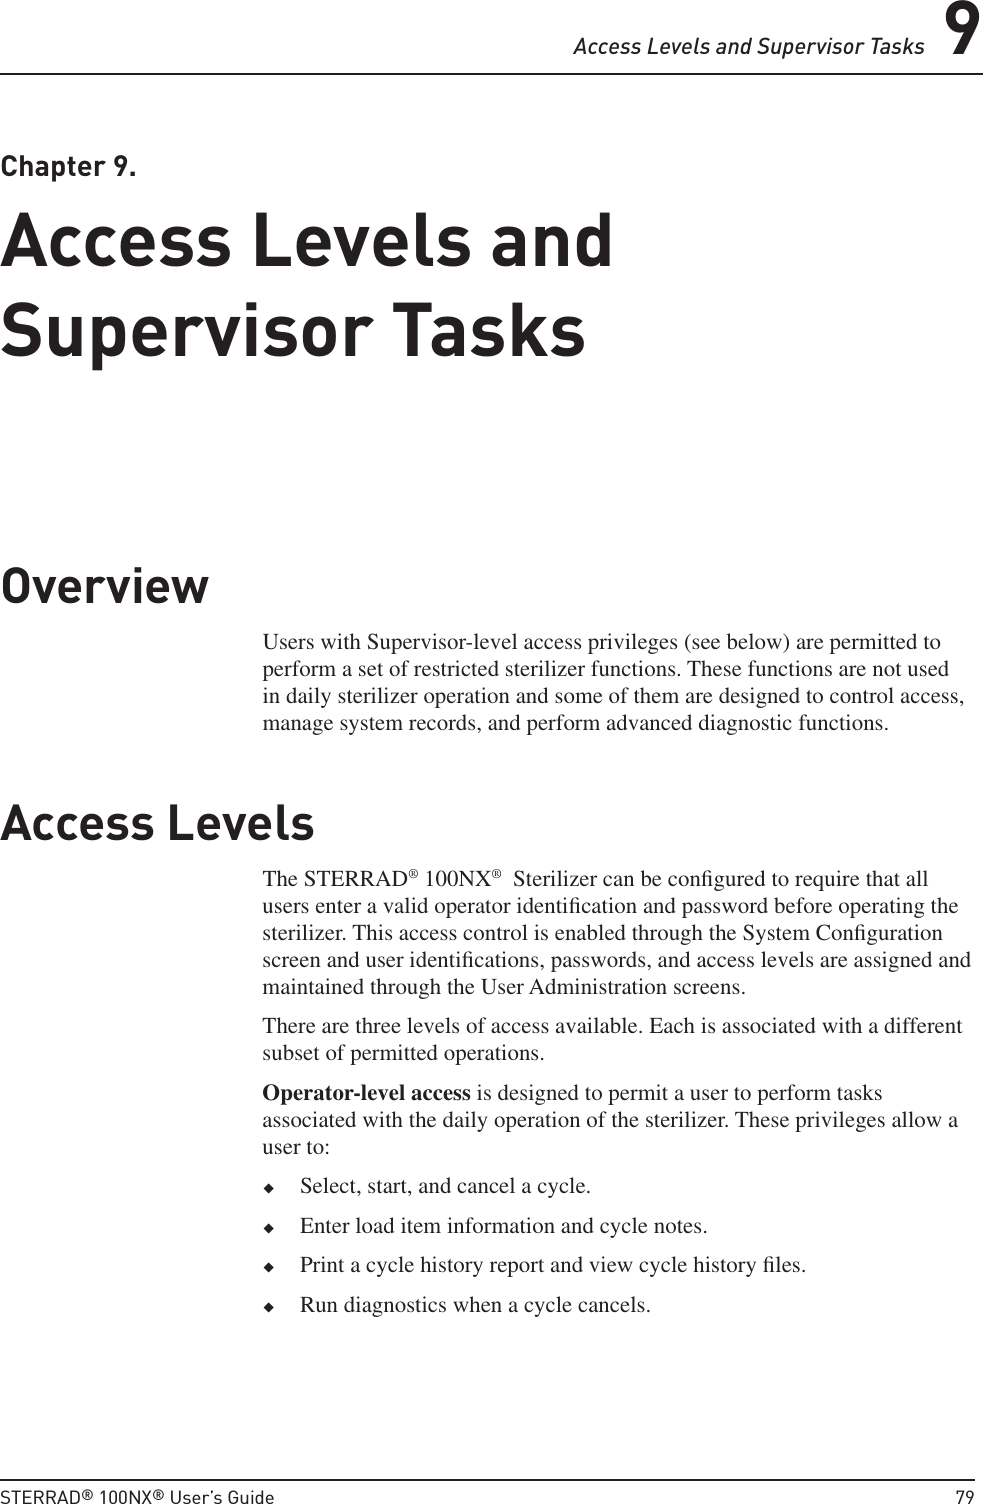

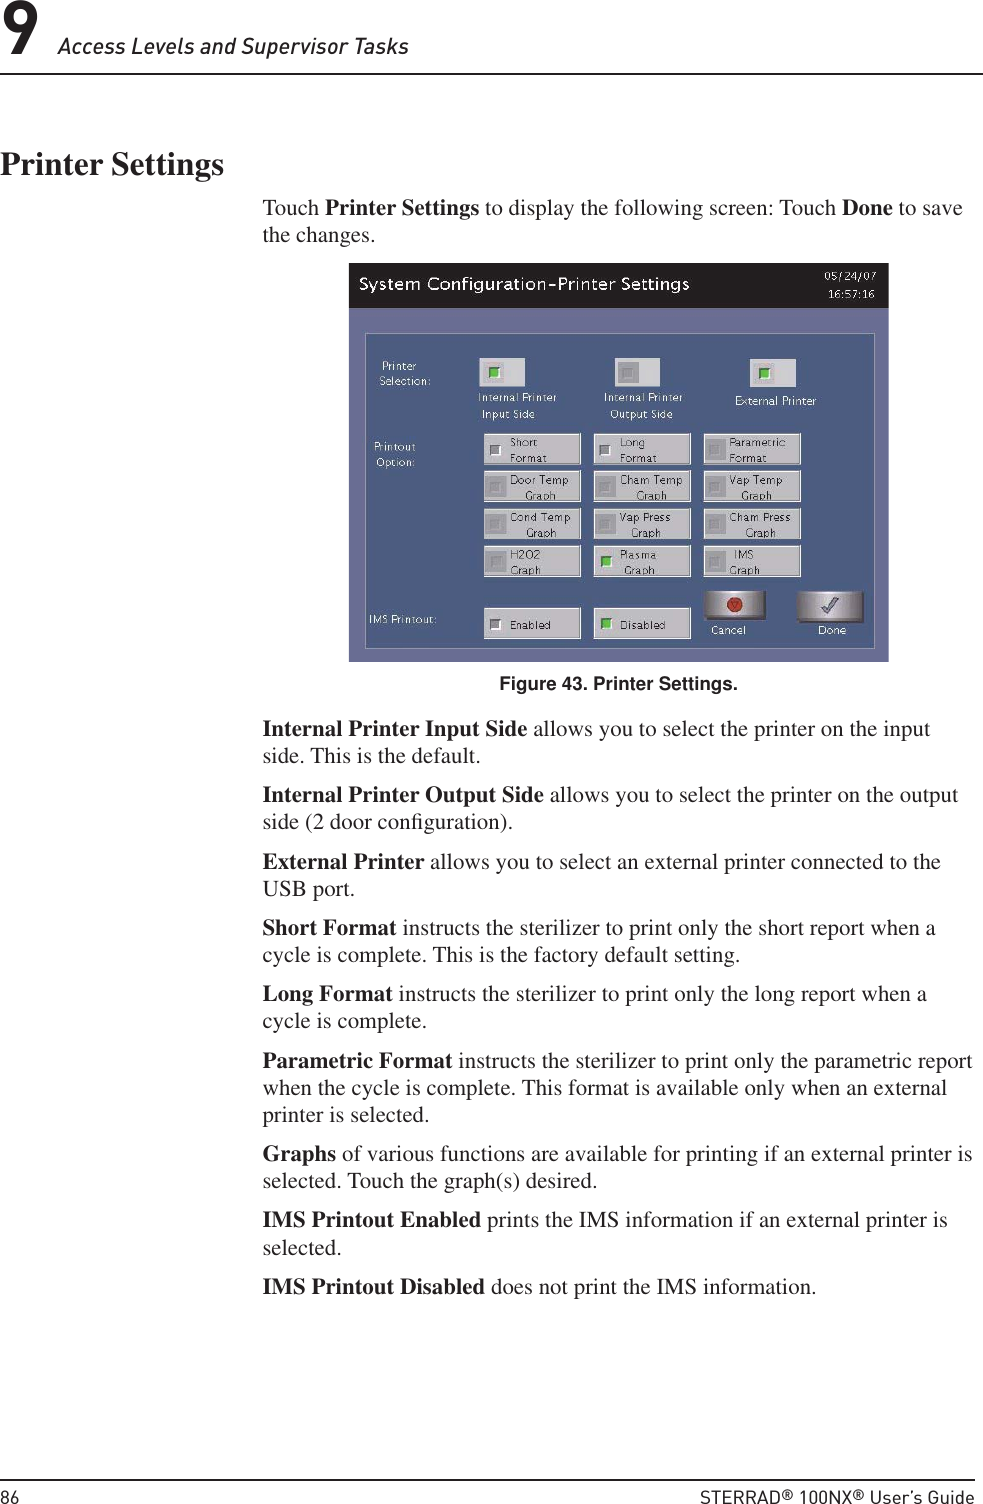

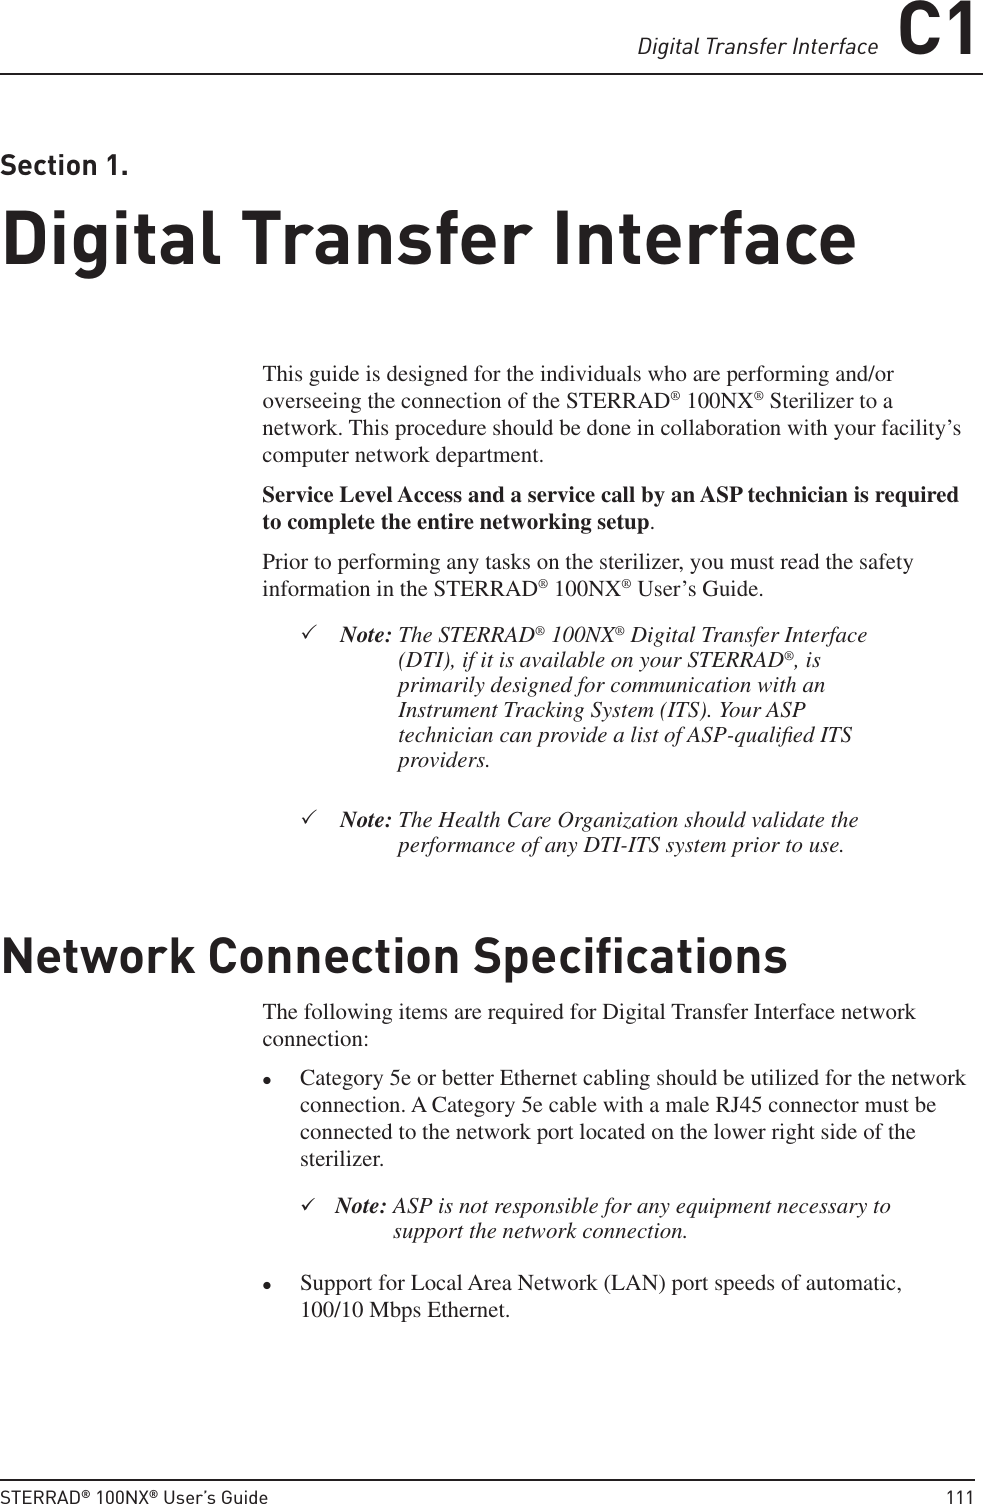
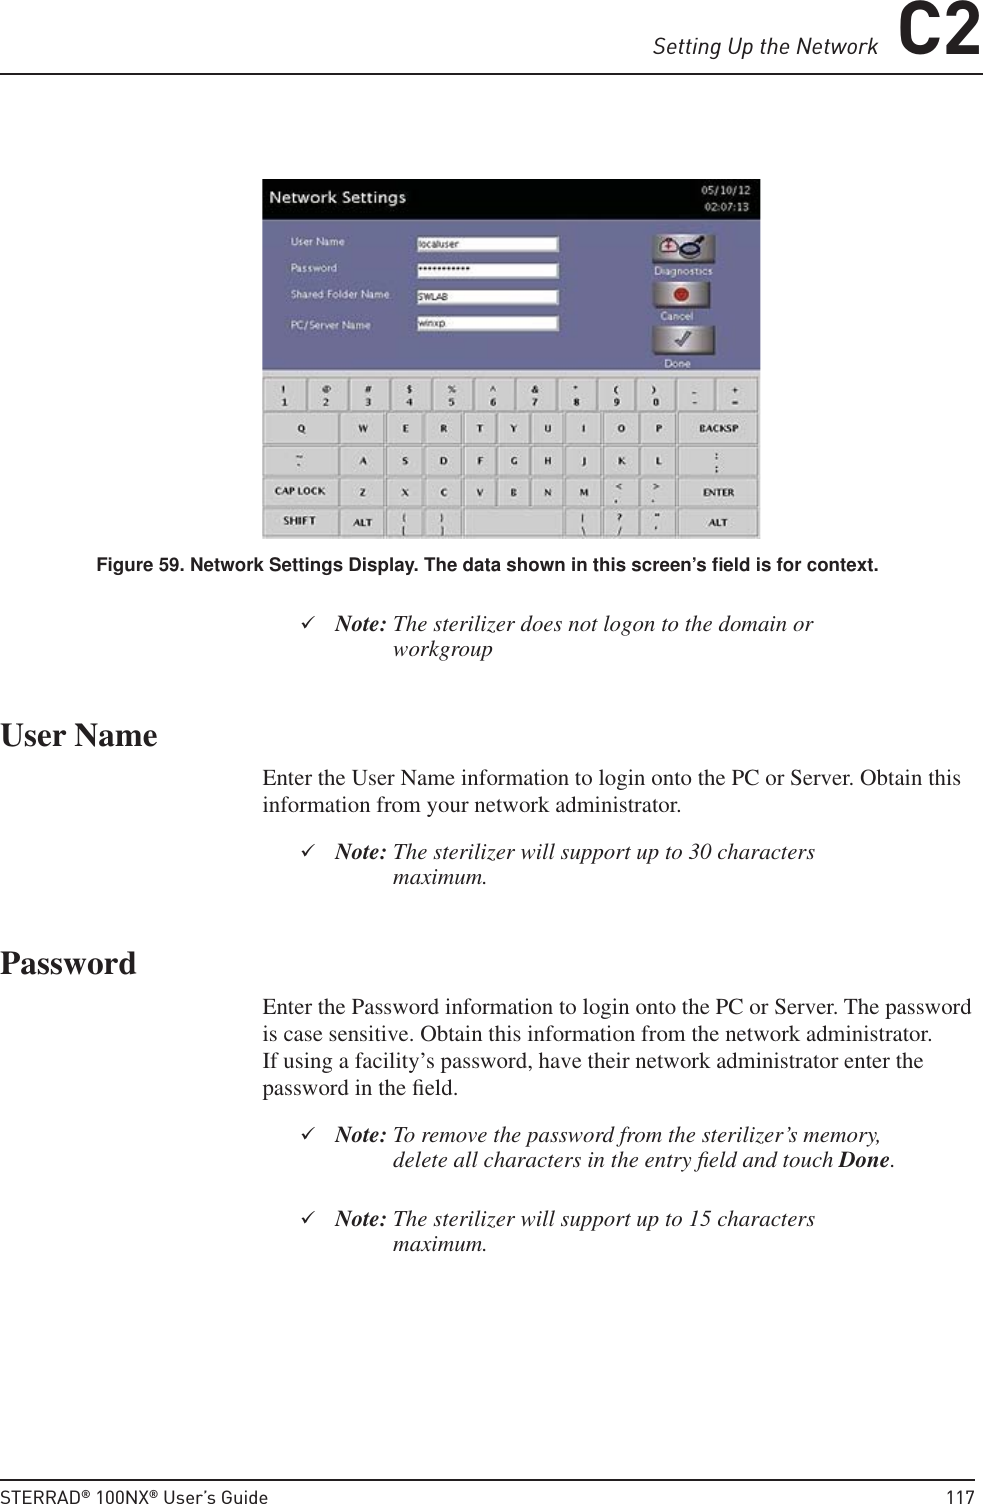
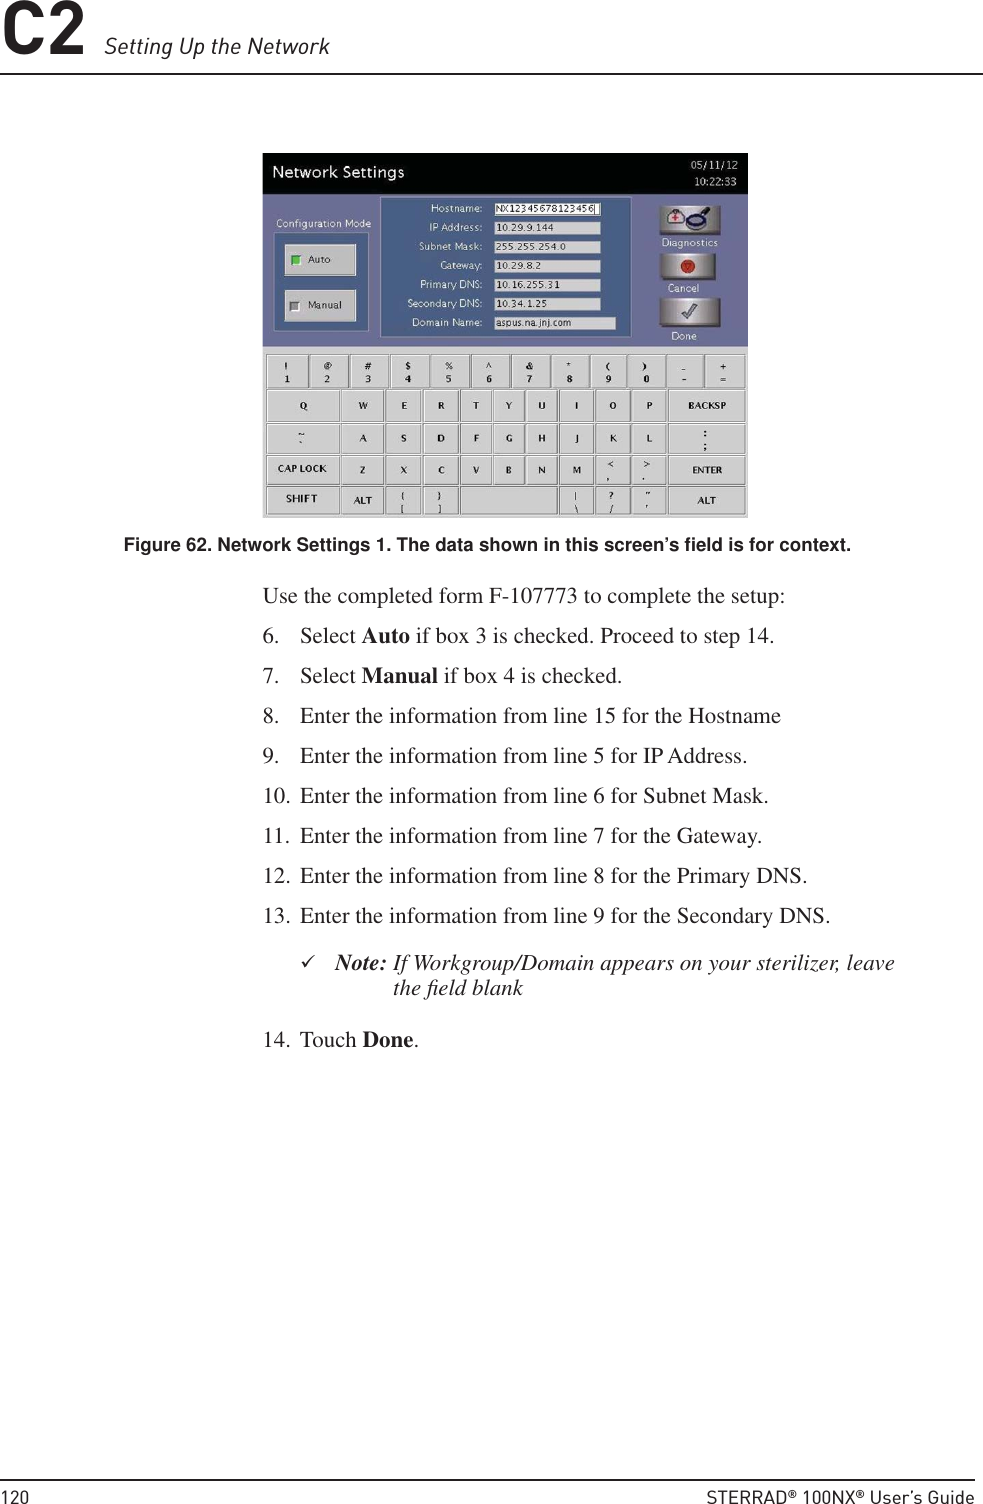
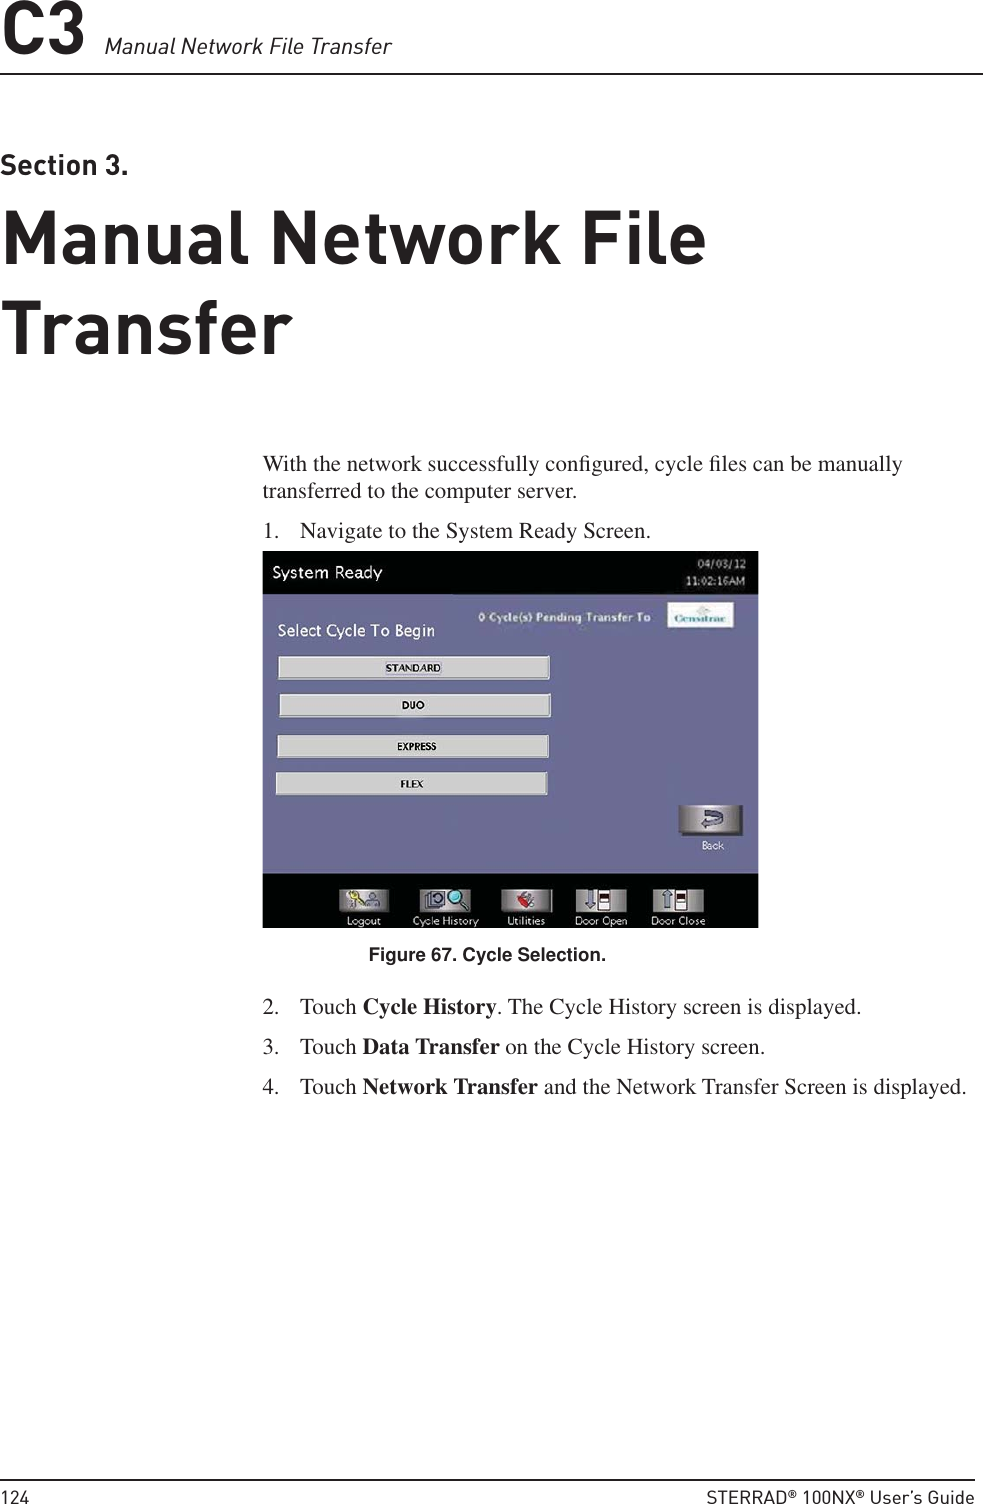
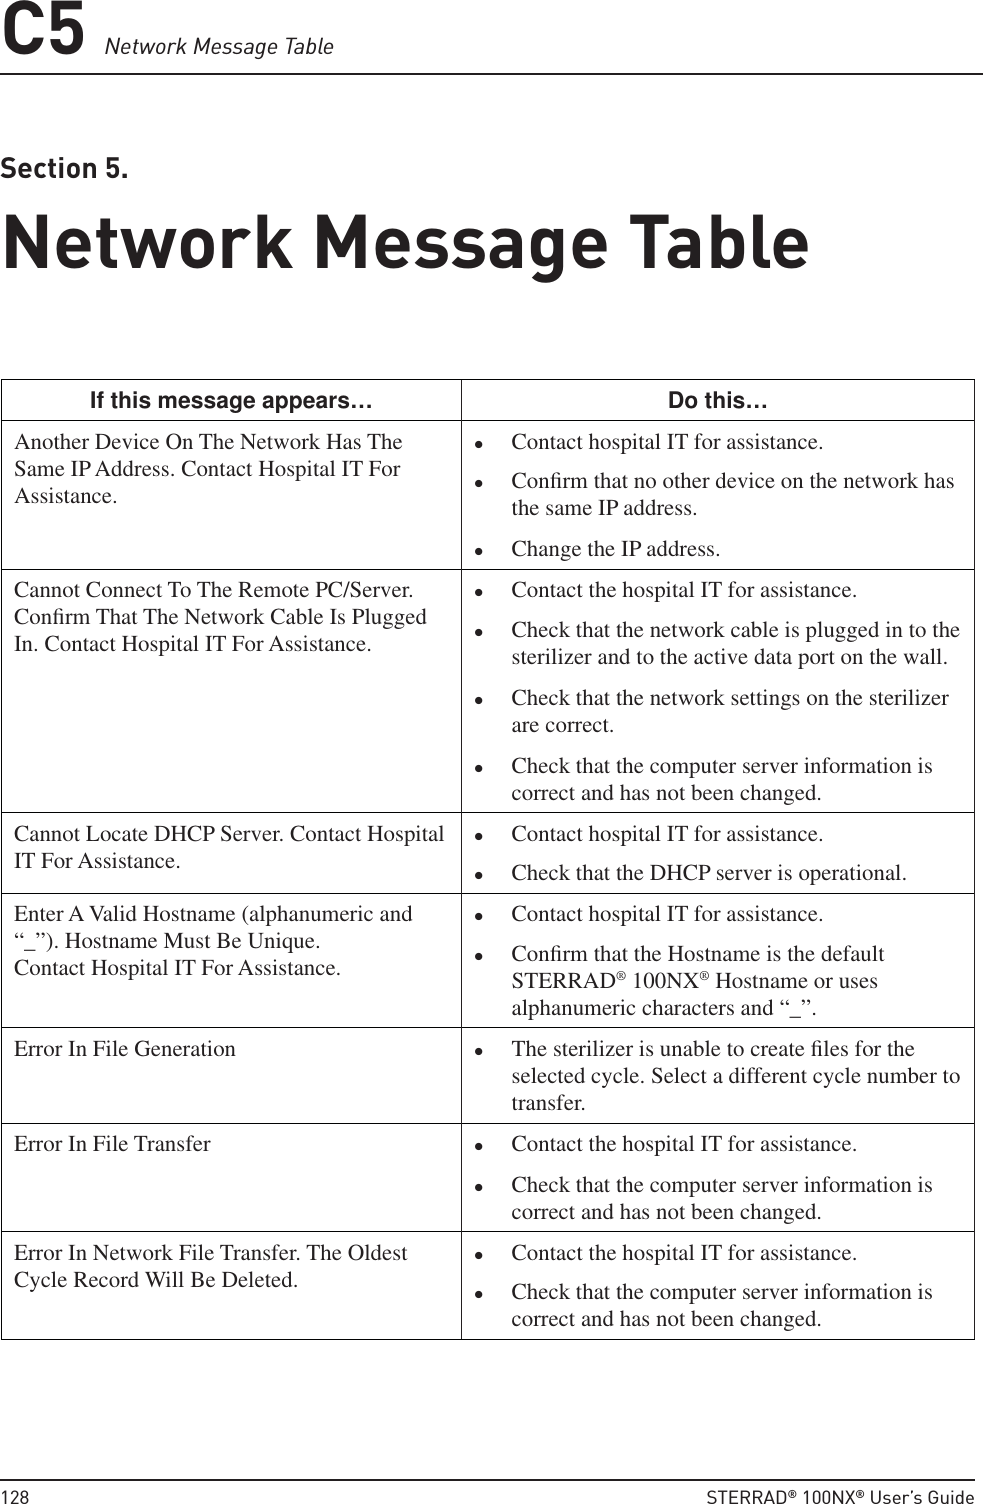
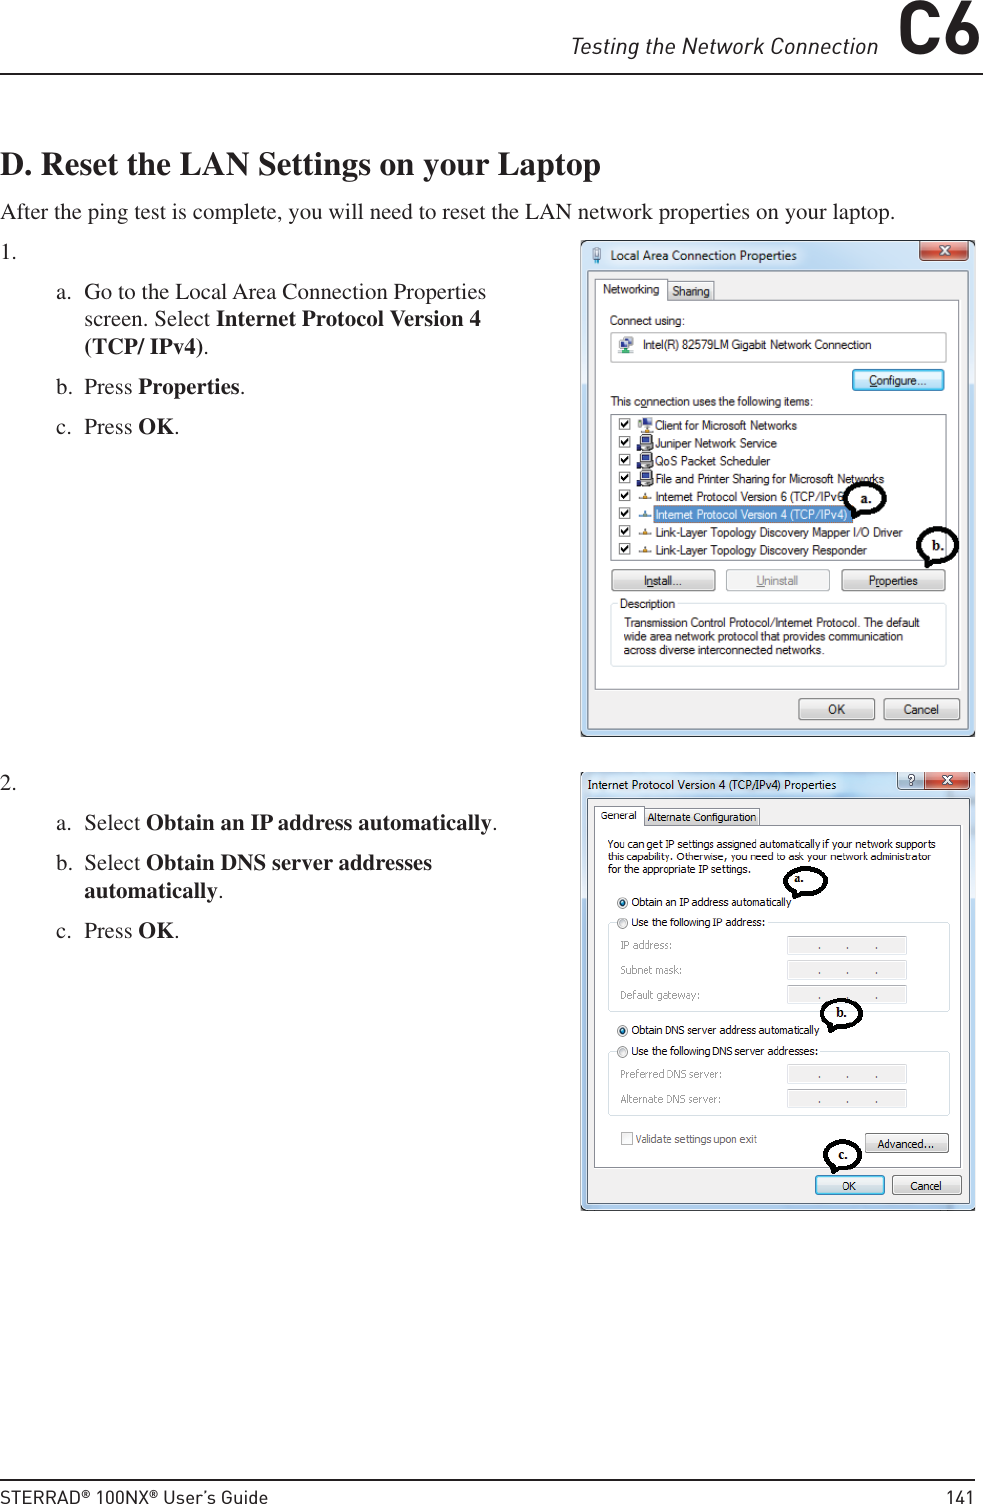
![C1 Digital Transfer Interface112 STERRAD® 100NX® User’s Guide Use of DHCP IP Addressing (“Auto” mode) is highly recommended. Static (“Manual” mode) confi guration (IP Address, Subnet Mask, Gateway, Primary Domain Name System (DNS), and Secondary DNS assigned by the Information Technology [IT] department) will also be supported. The default Host Name assigned to the sterilizer is “100NX” followed by the sterilizer’s serial number and can be customized. The sterilizer Host Name must be no more than 20 characters long. The port speed will be set automatically. Microsoft® Distributed File System (DFS) is not supported. Customer IT must provide a local user account with full administrator rights on the computer server using any of these Windows® operating systems: Windows XP, Windows 7, Windows Server 2003 or Windows Server 2008 R2. For other versions, please contact your local ASP representative. The account should be authenticated with a password.Note: If the password of this local user account expires, the DTI of the sterilizer will not be able to access the shared folders and cycle fi les will not be transferred correctly. To avoid this issue, hospital IT staff can disable password expiration for this account. Provide one shared folder per connected sterilizer. Complete form F-107773 prior to the ASP technician’s installation visit. The completed form contains information needed by the ASP technician for network setup.Security Reminders Your hospital LAN should be isolated (i.e. fi rewalled, using Virtual LANs [VLANs]) from the public internet. Access to your hospital LAN should be controlled physically and logically (e.g., using logins and passwords). ASP medical devices do not run Windows Operating Systems (OS) and do not require regular security updates when operated in the intended use environment (a hospital LAN).](https://usermanual.wiki/Advanced-Sterilization/02532481/User-Guide-3277704-Page-114.png)
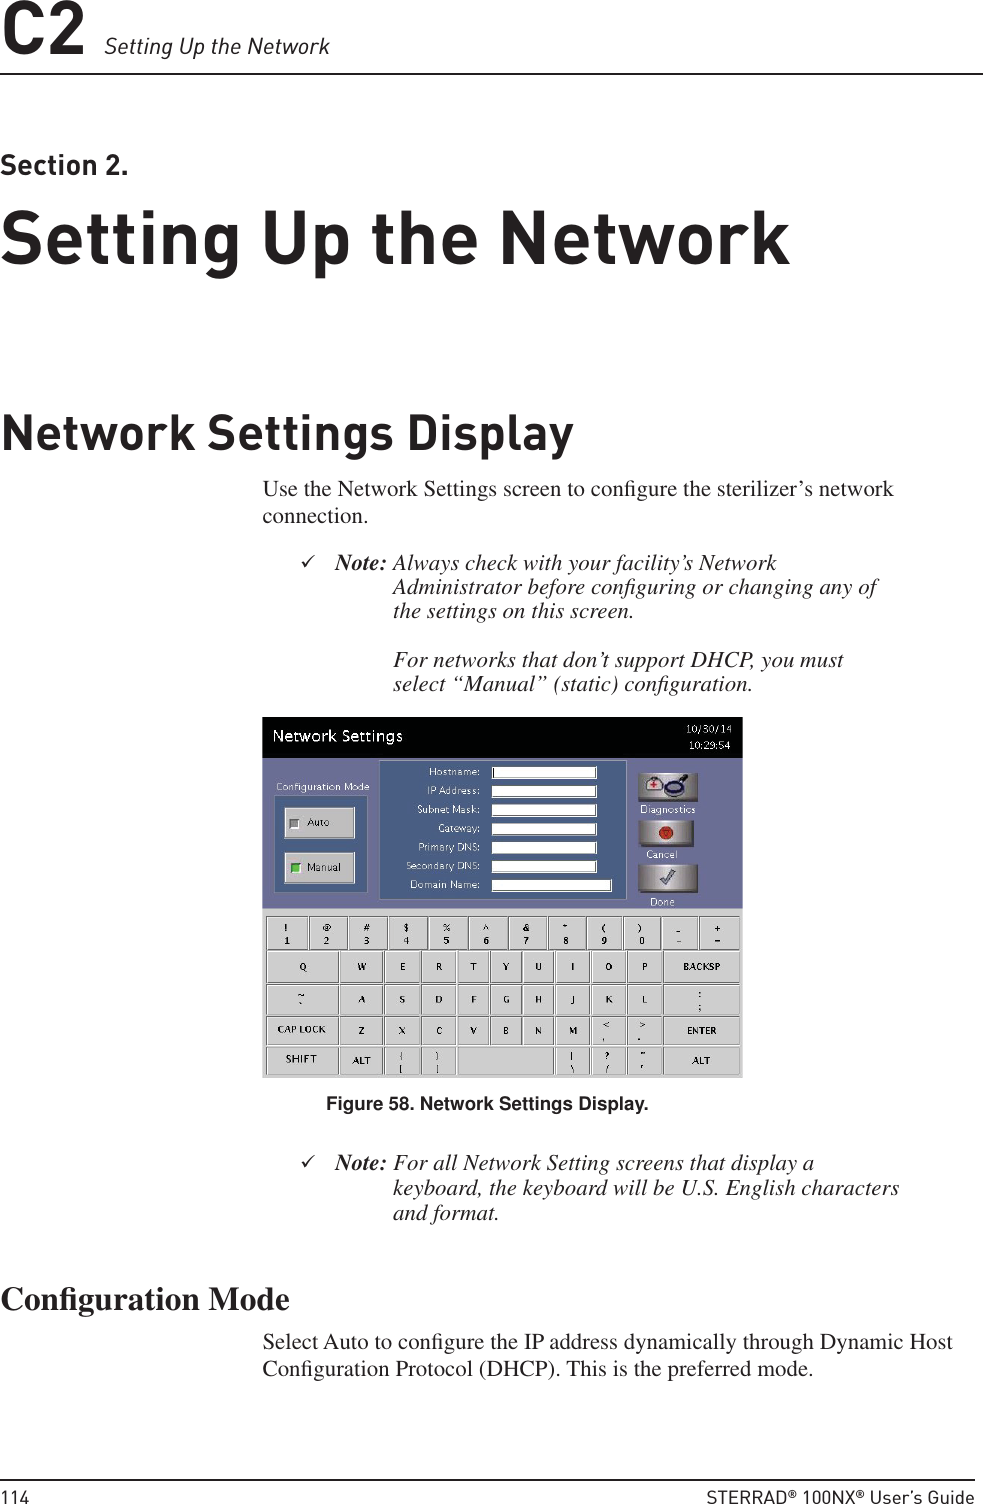
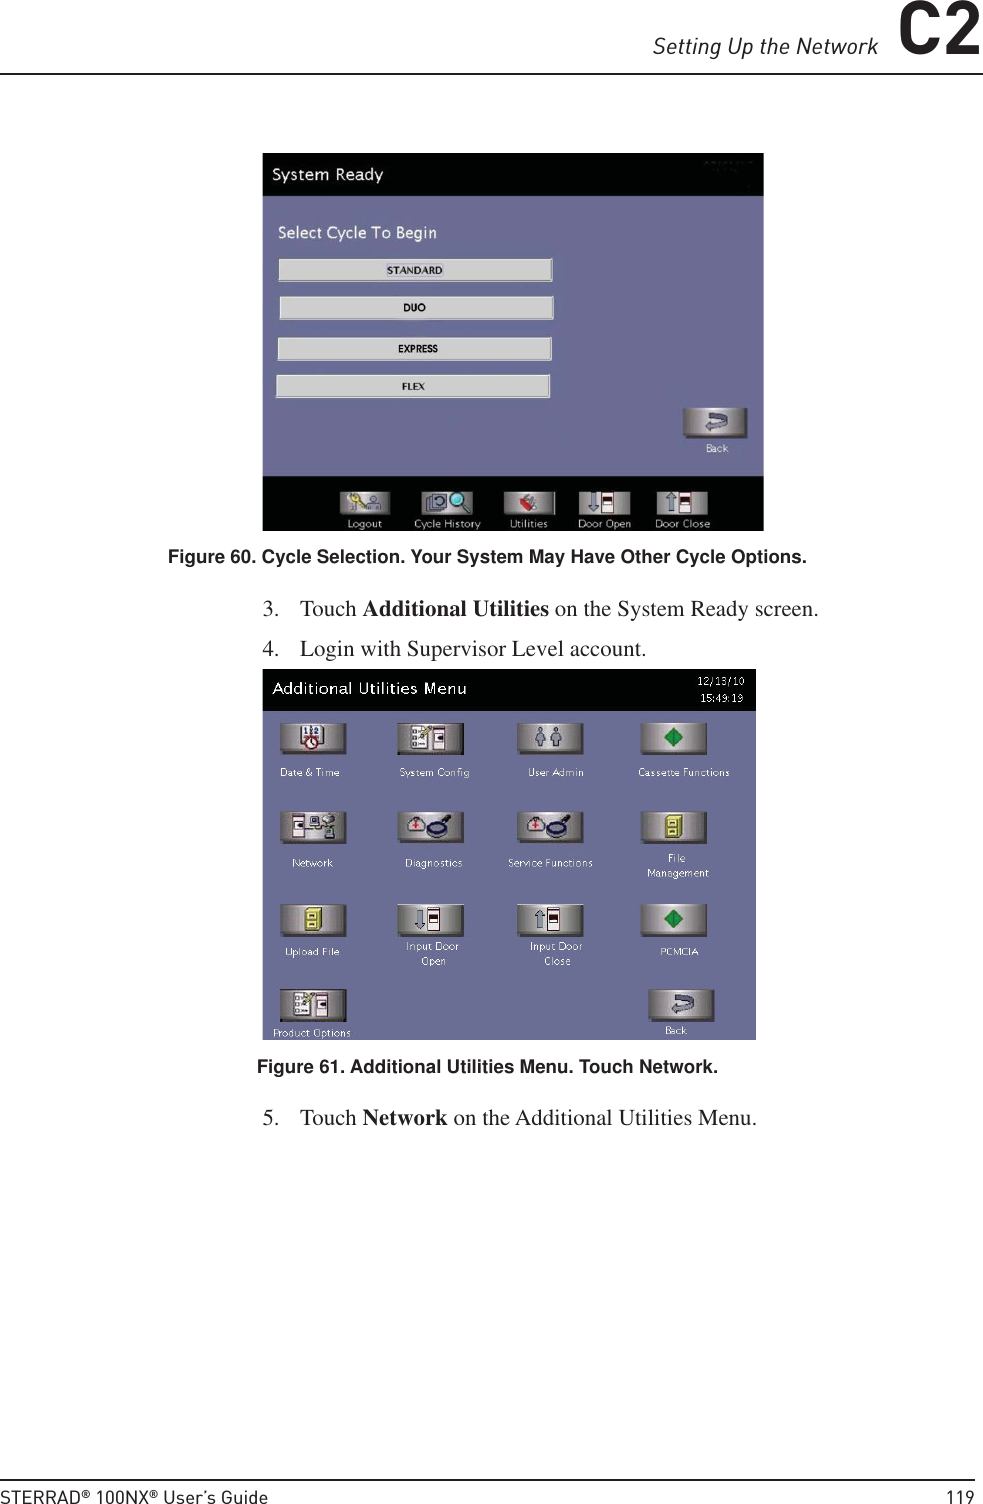
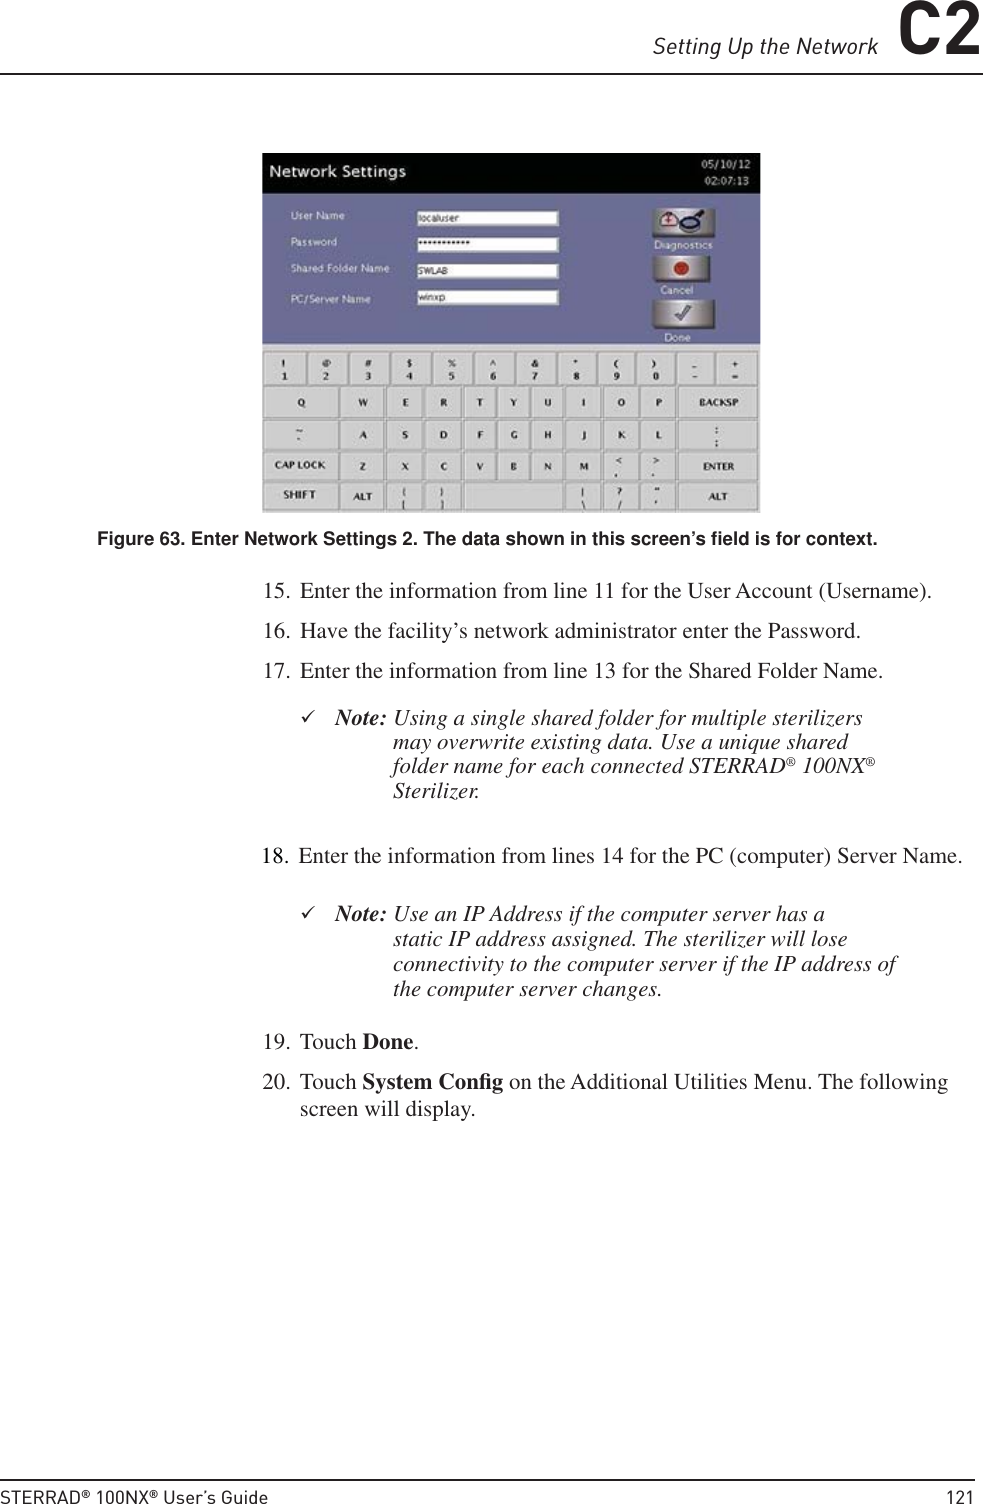
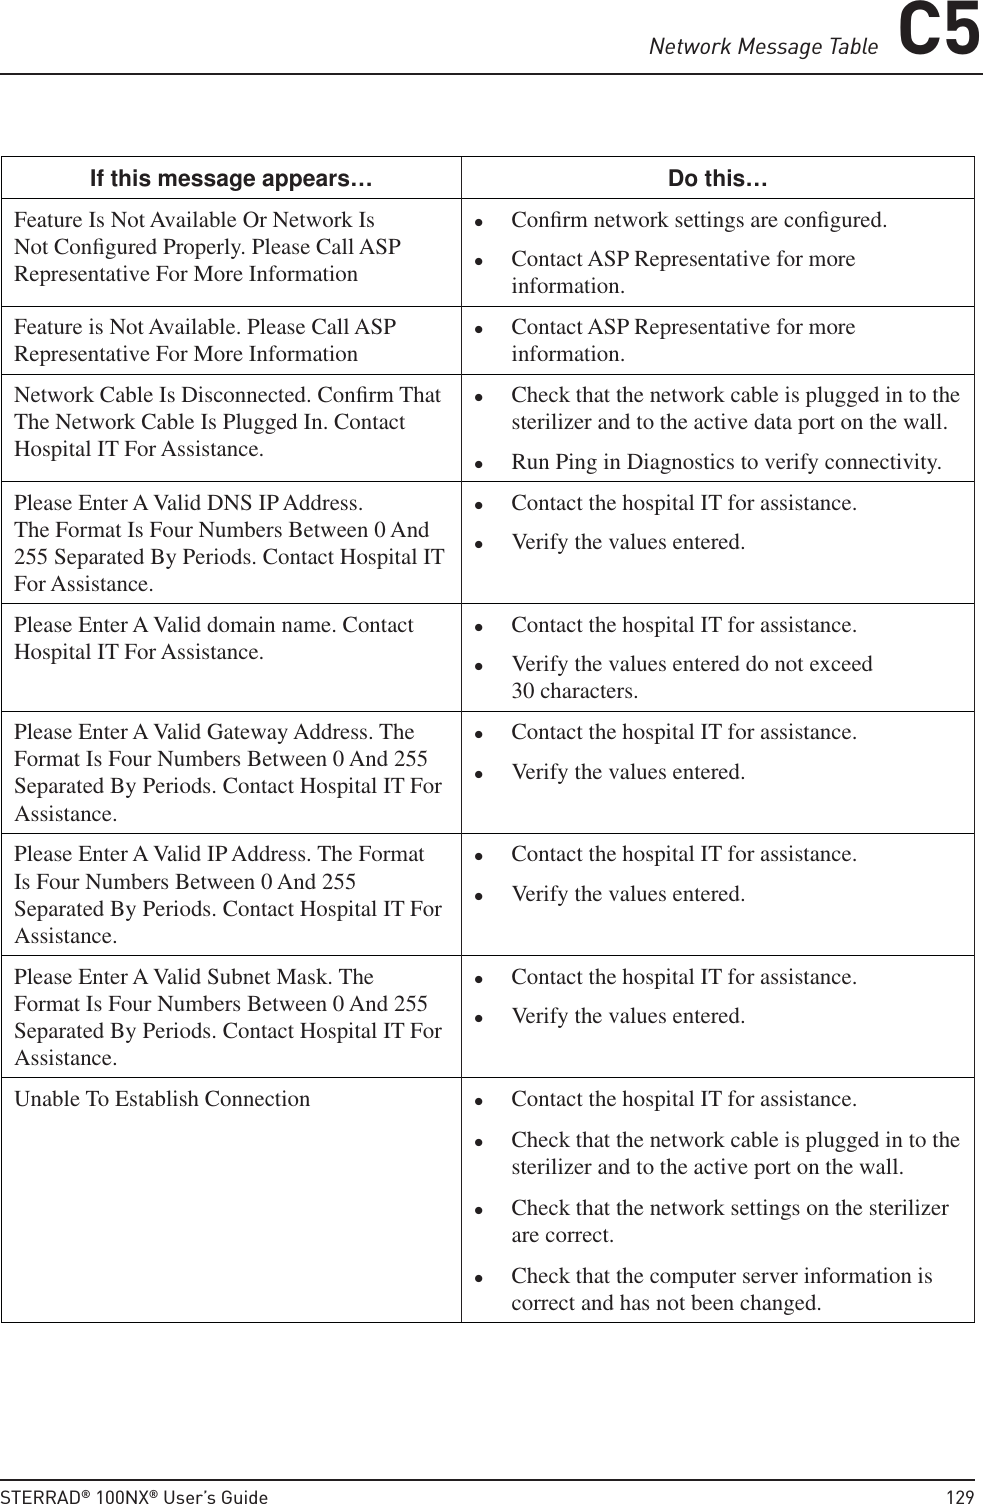
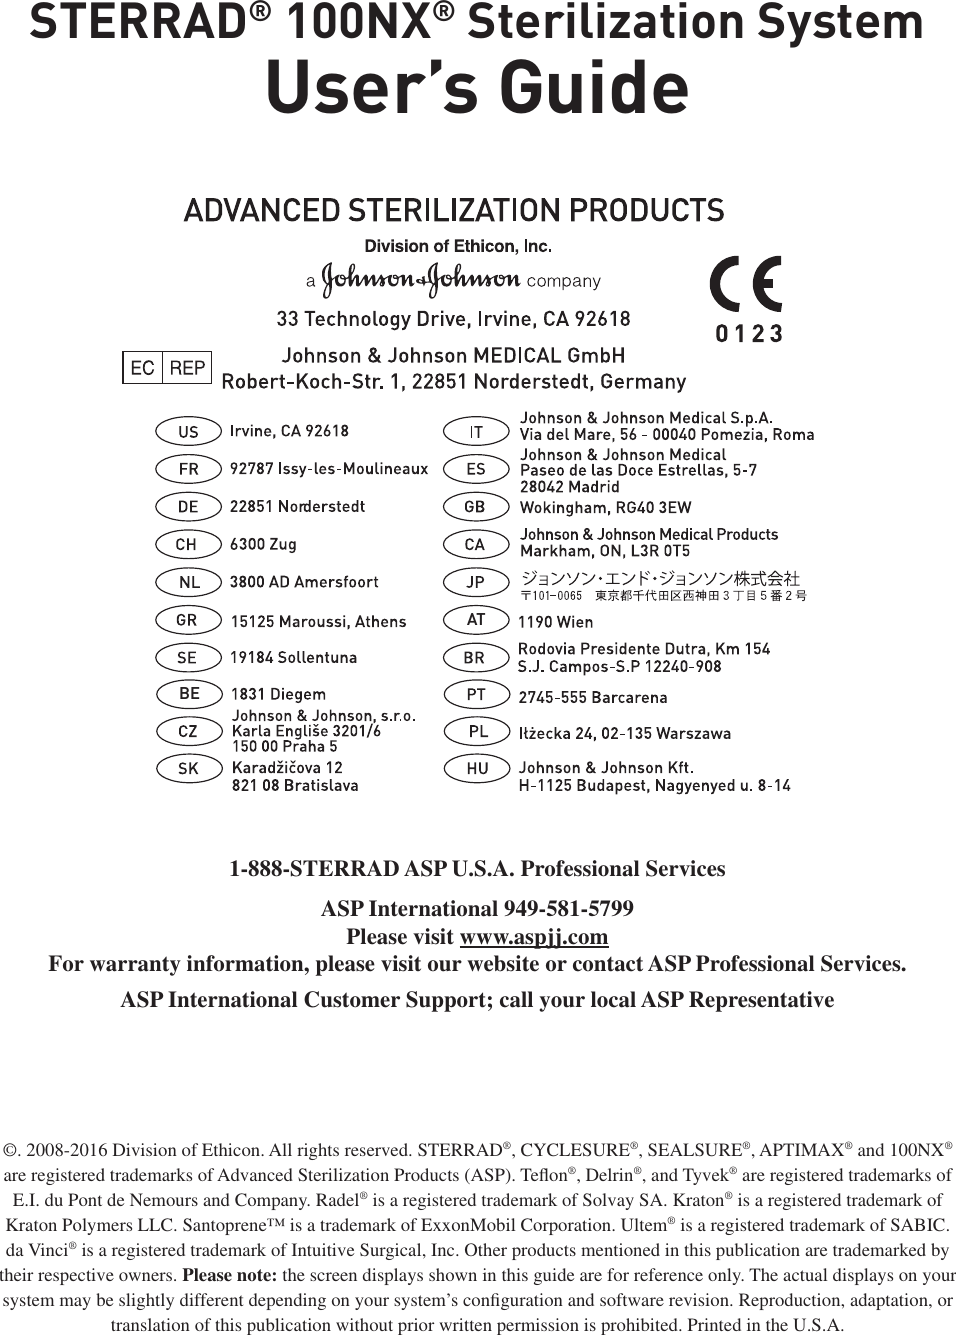
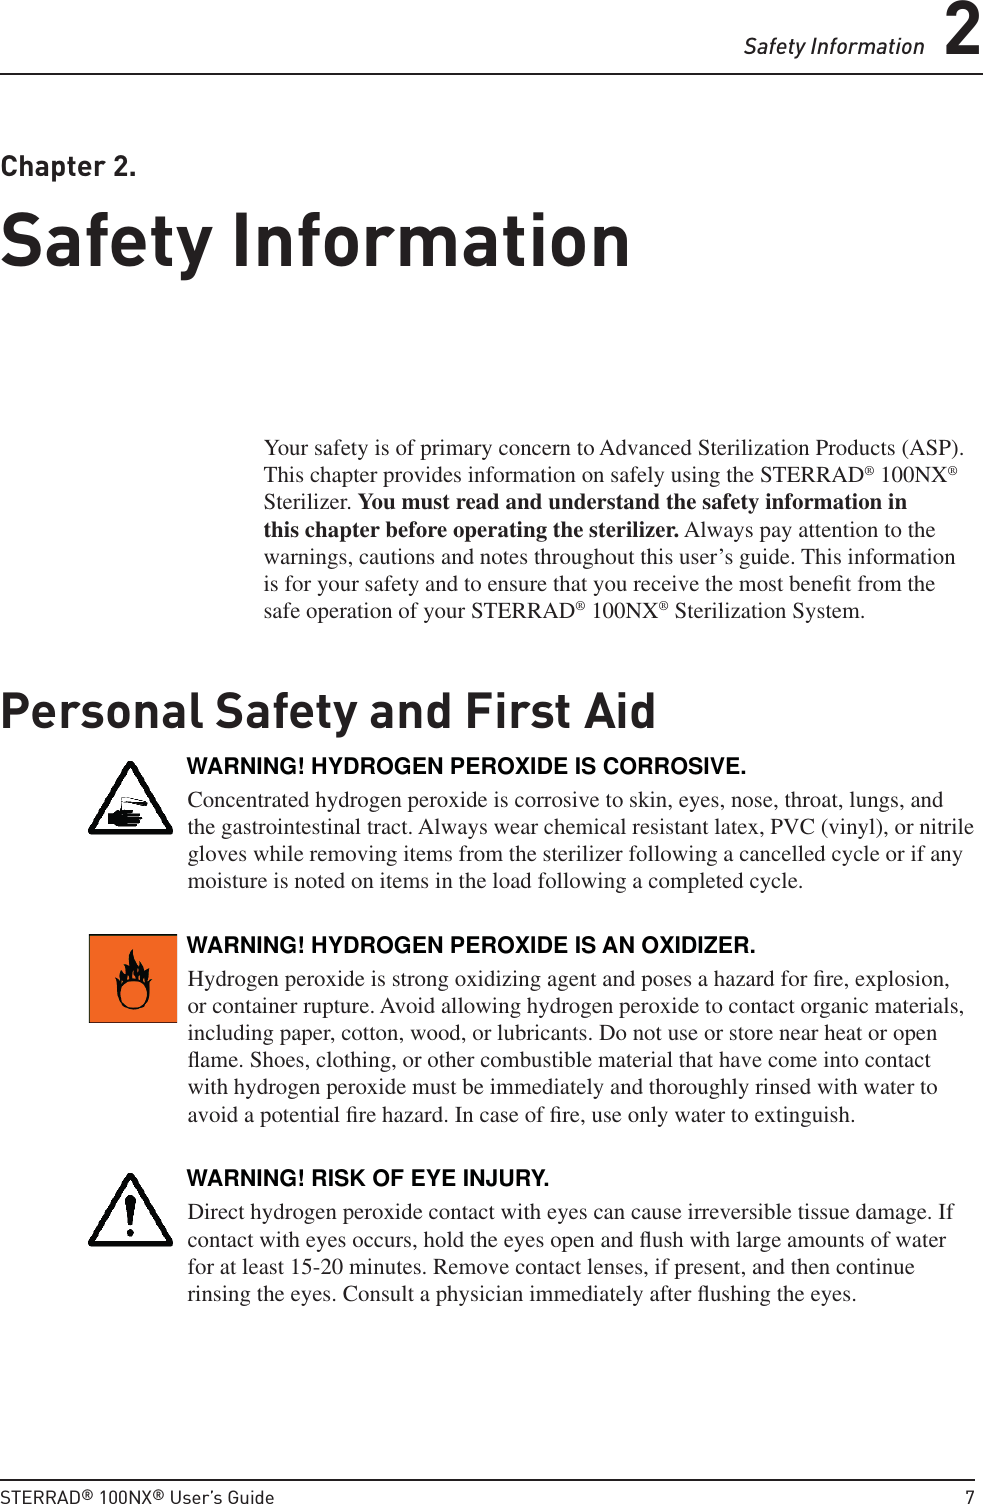
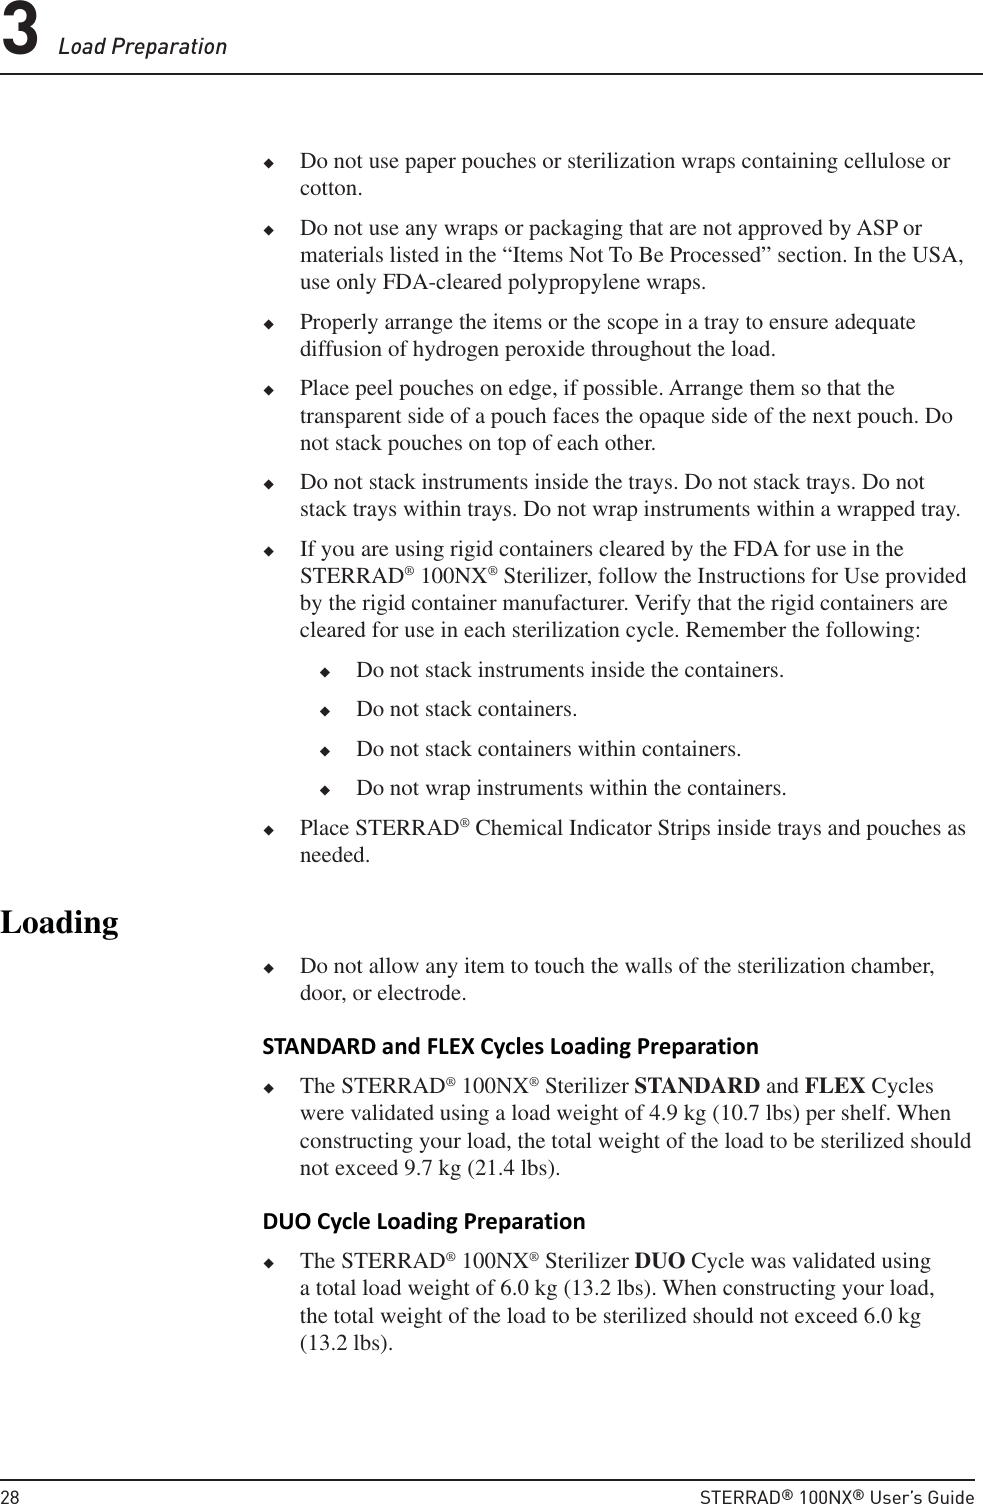
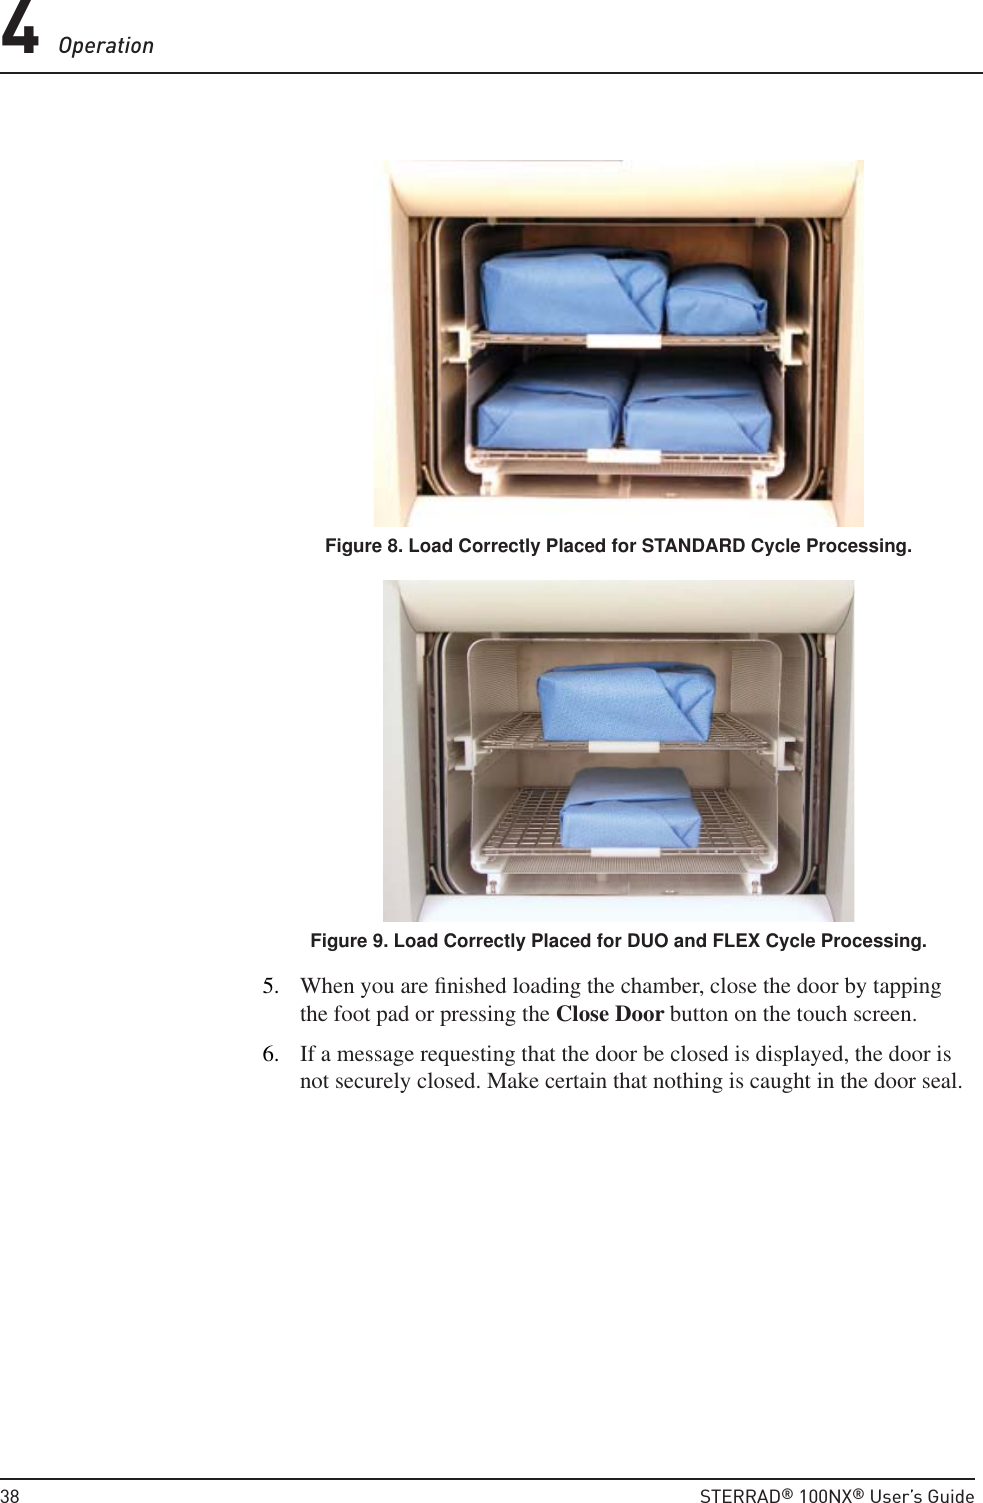
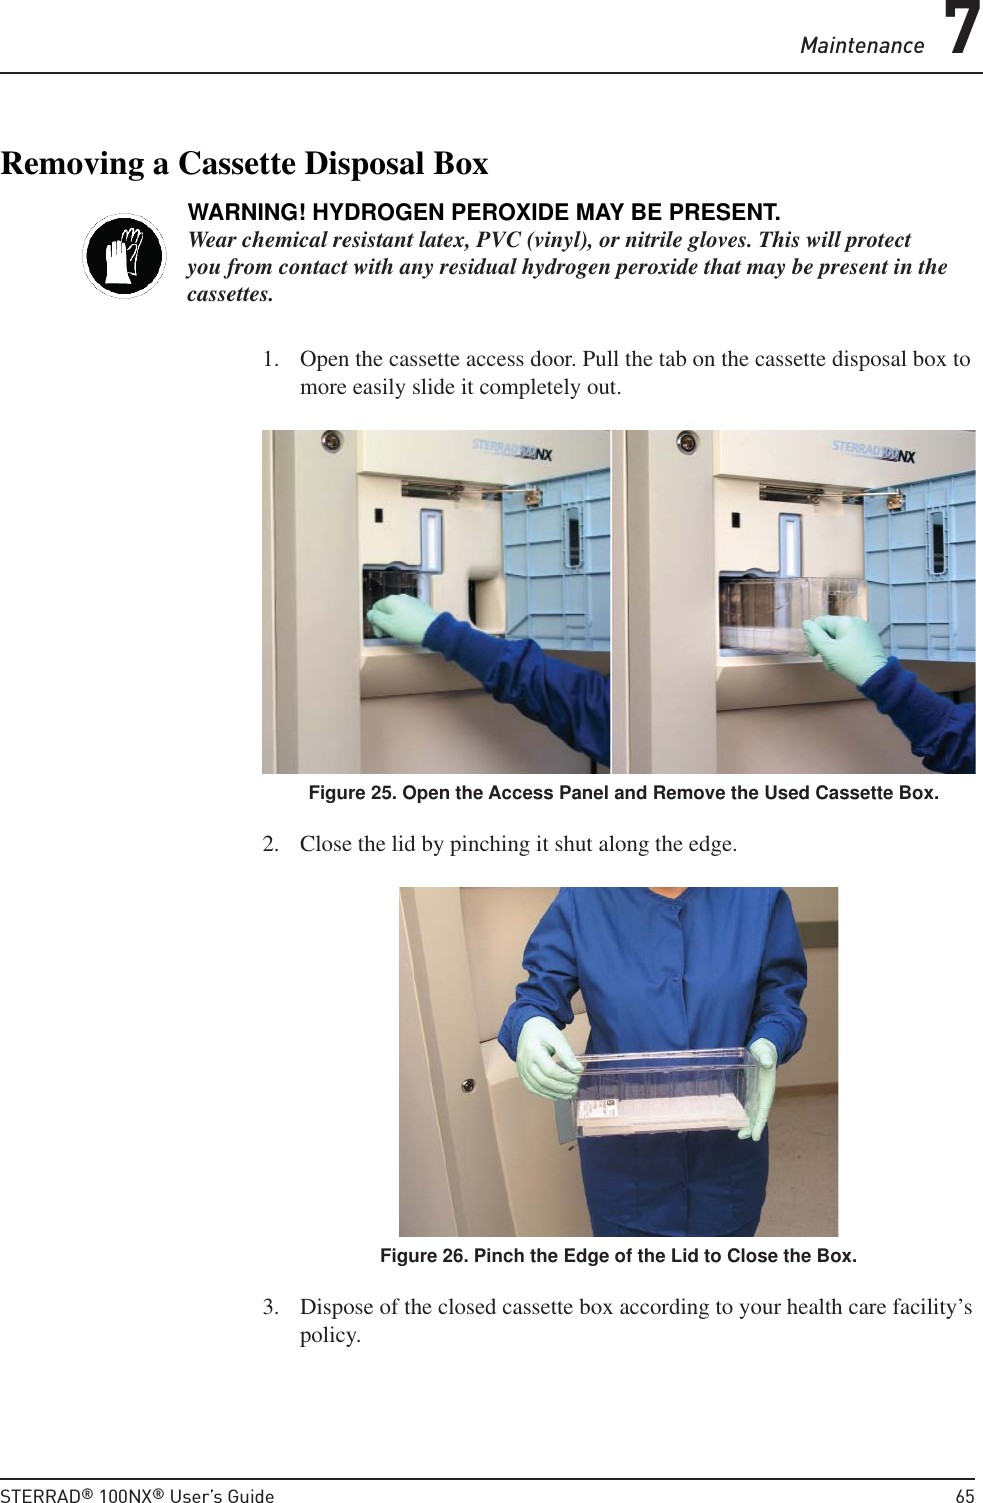
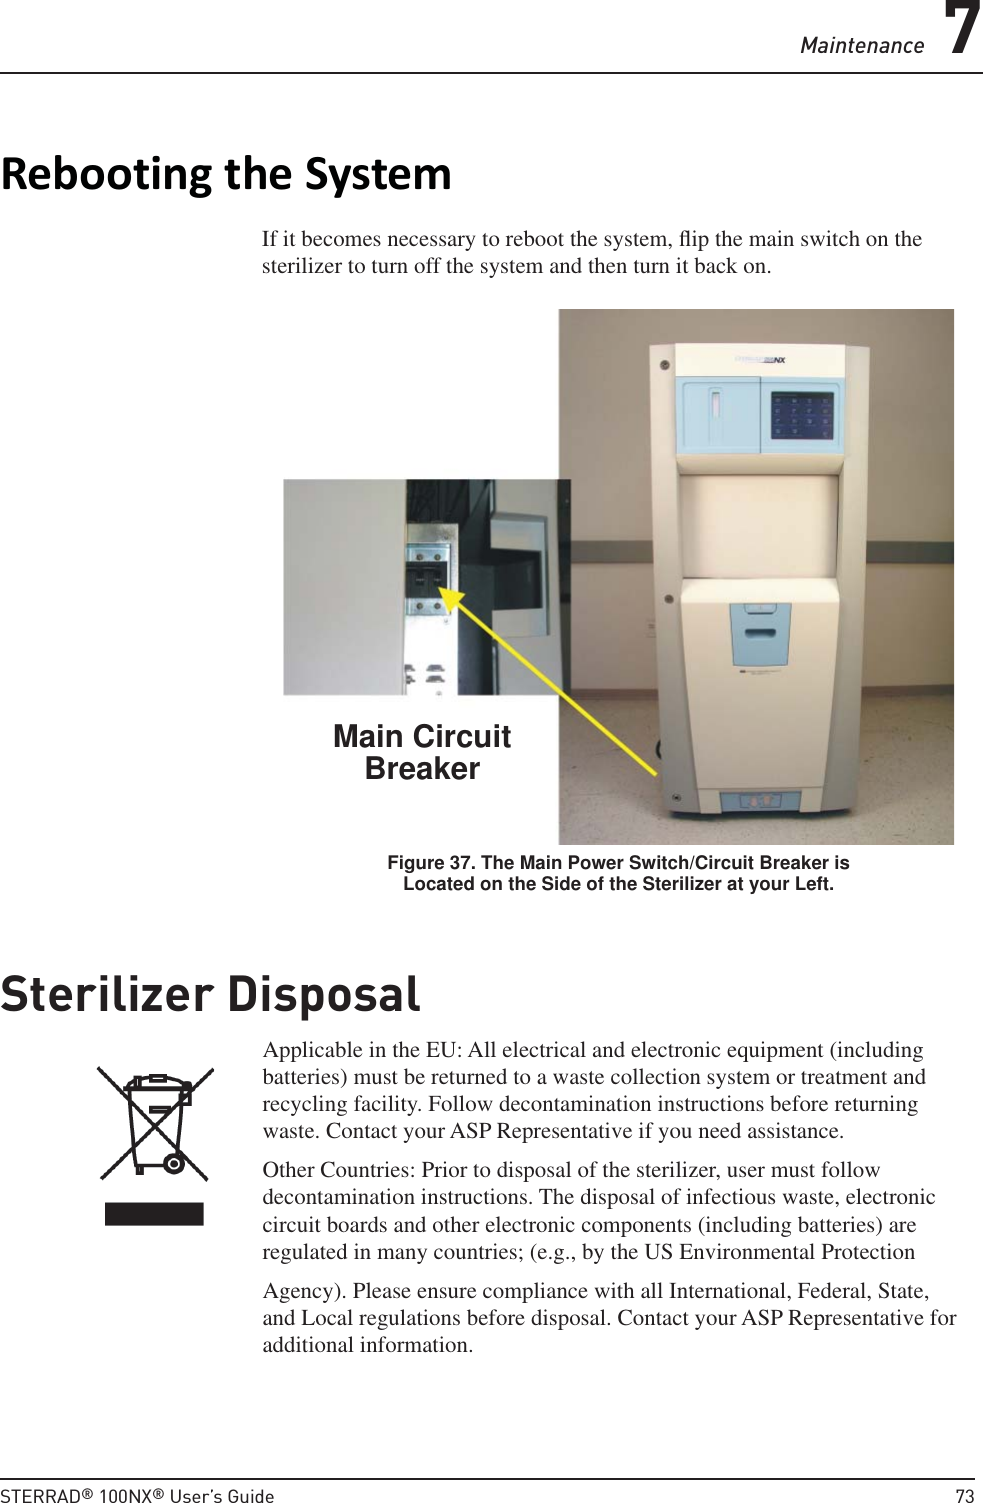
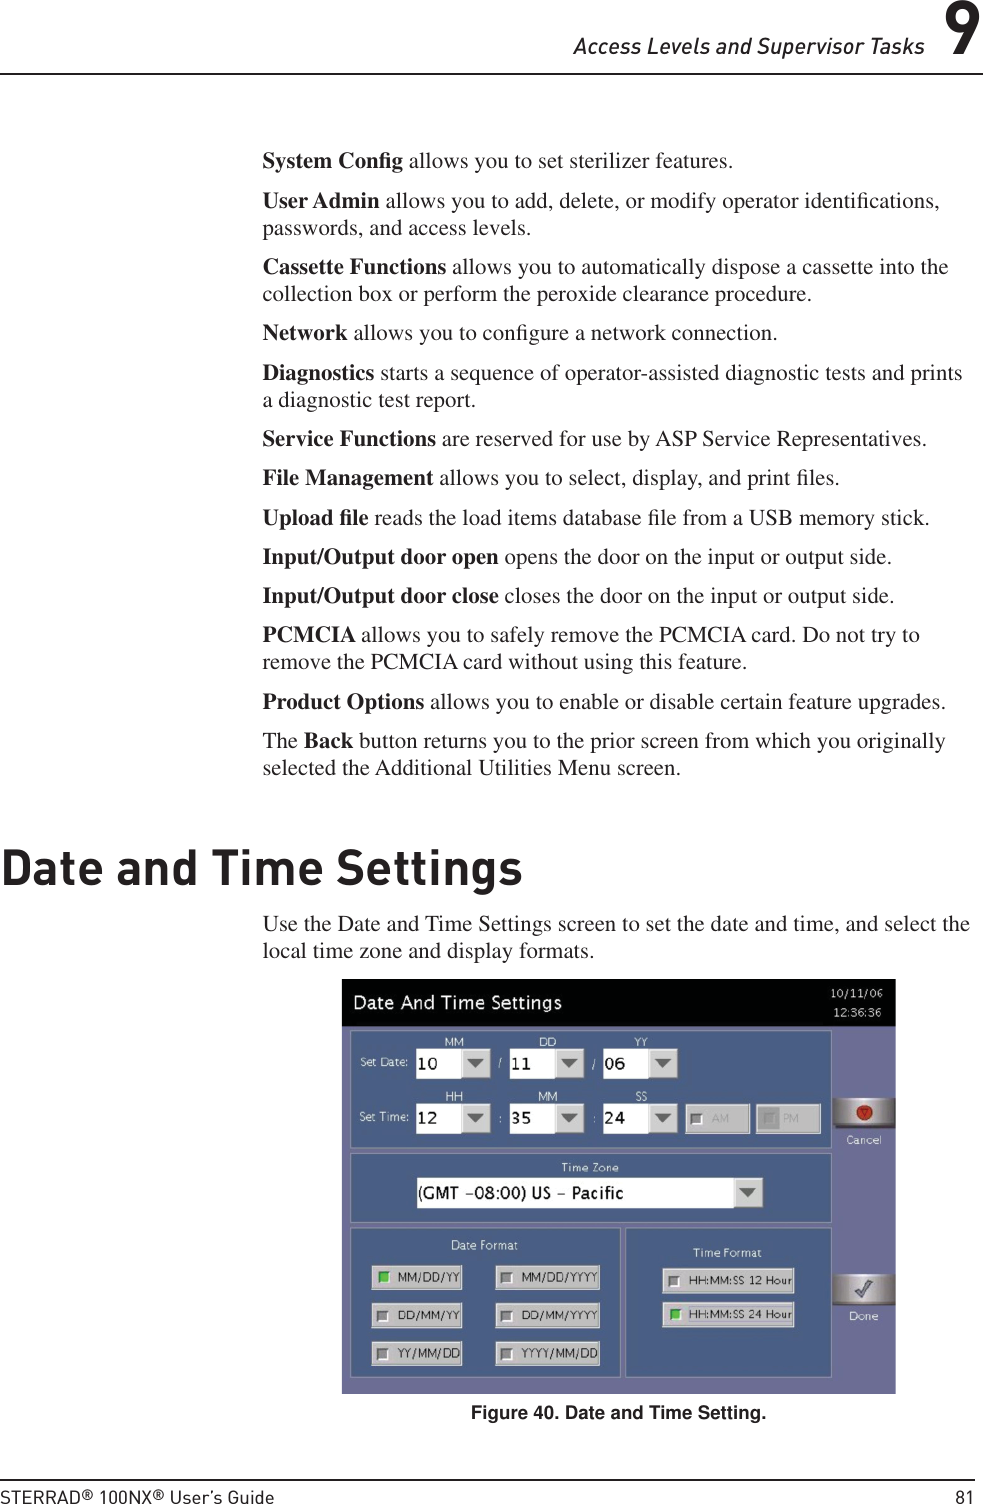
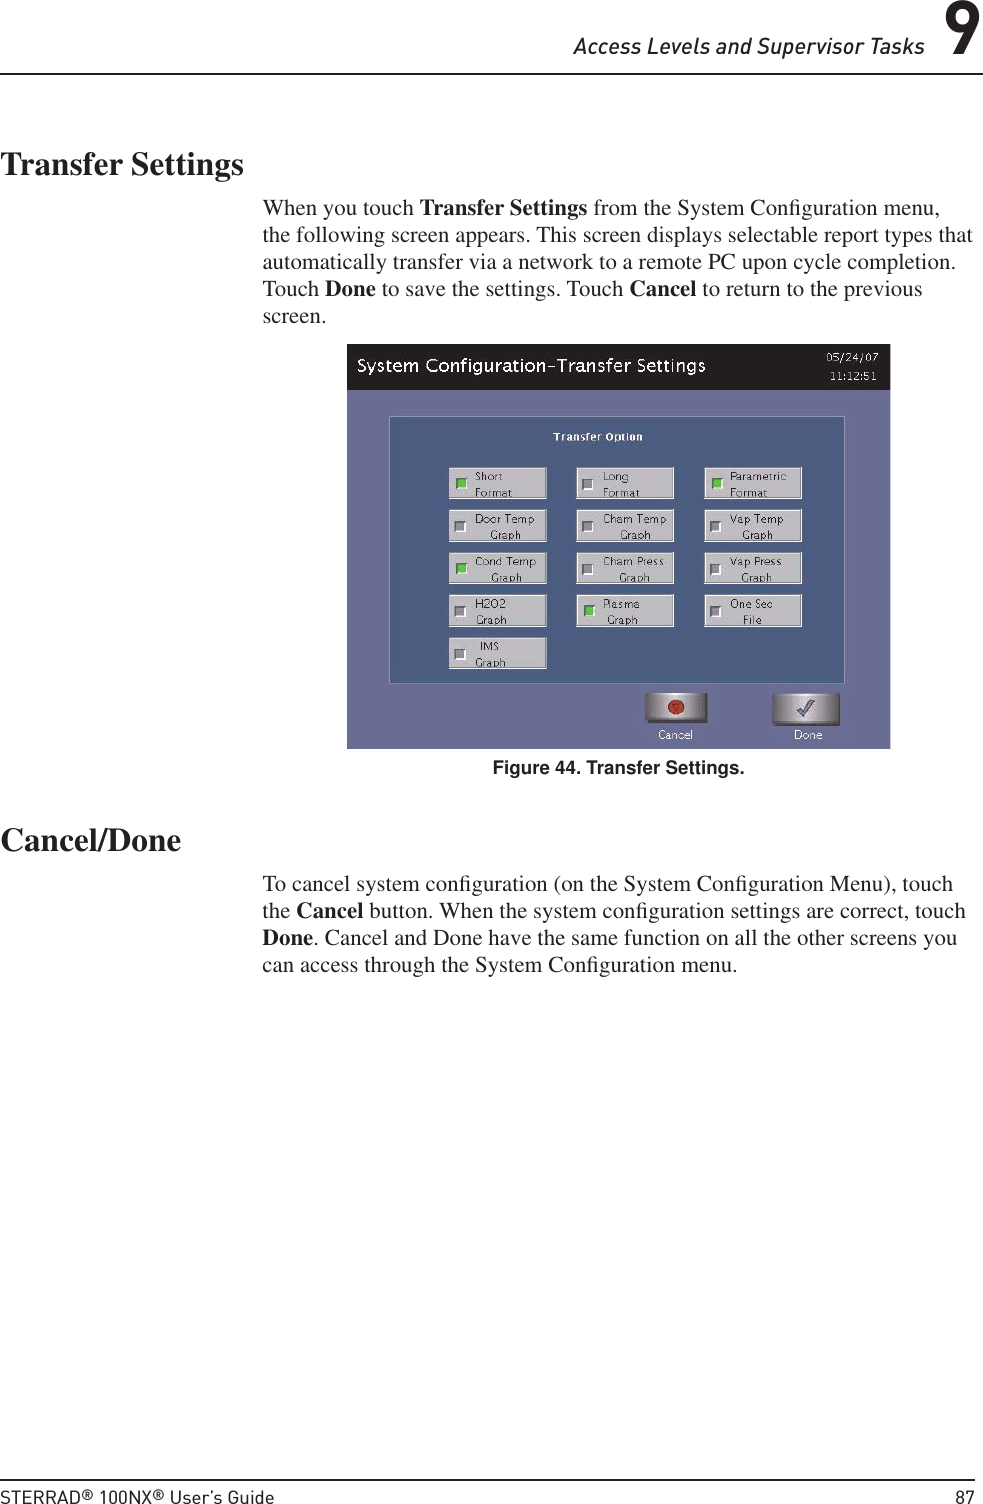
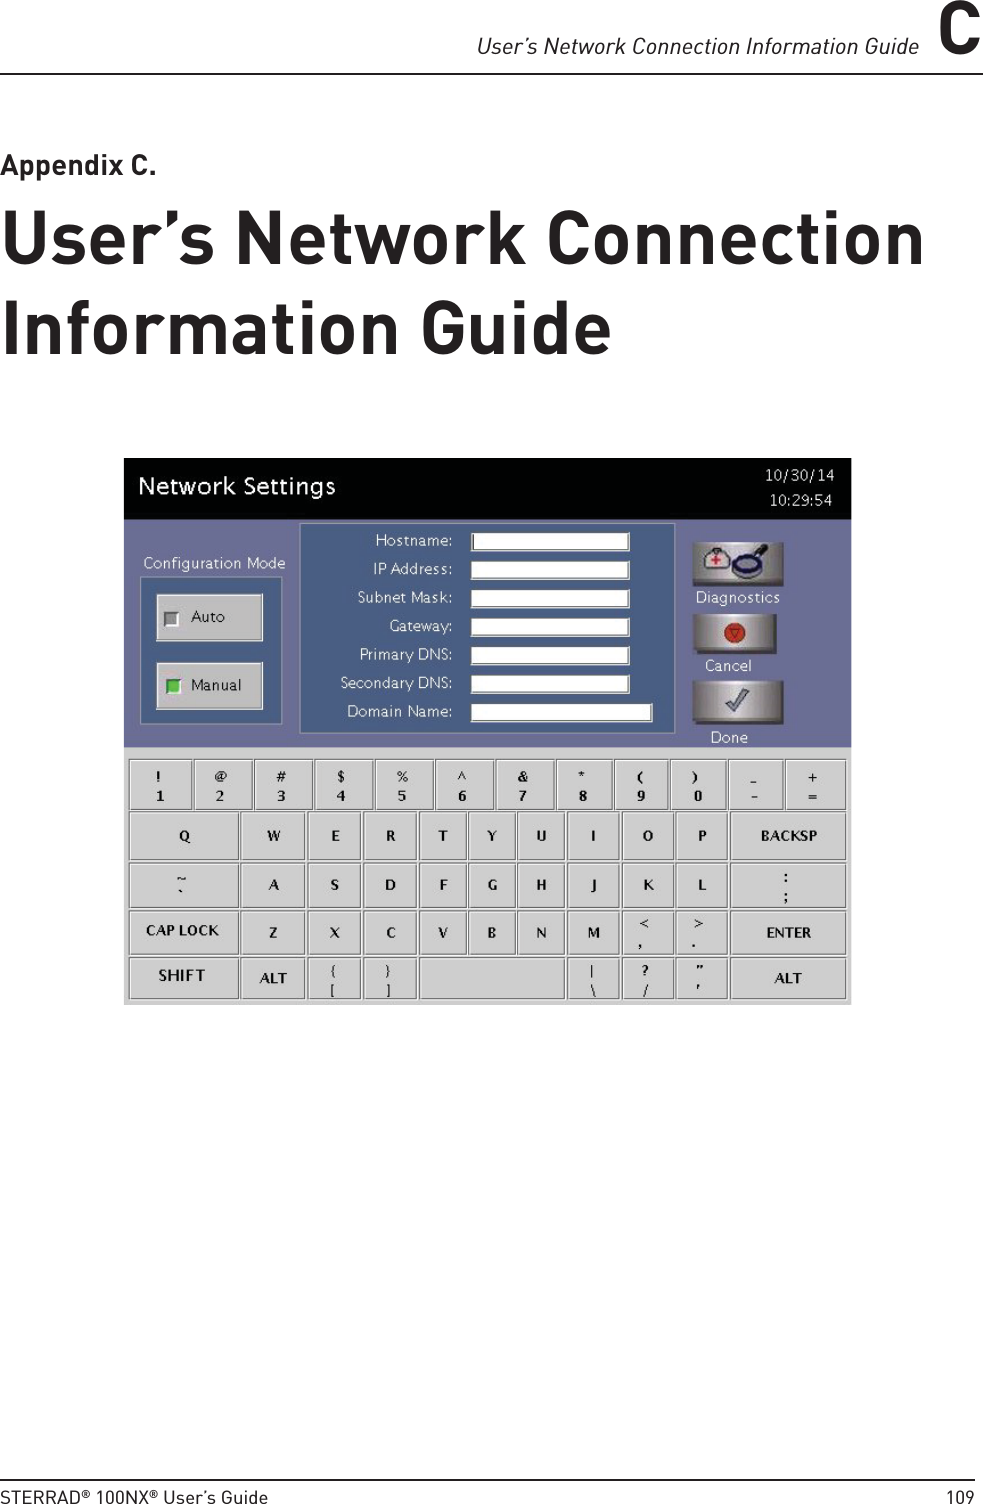
![Setting Up the Network C2STERRAD® 100NX® User’s Guide 115Or, Select Manual to confi gure the IP address manually. Obtain the static IP settings; (e.g., IP Address, Subnet Mask, Gateway, Primary, and Secondary DNS IP addresses) from your Network Administrator.Refer to the table below for acceptable character use for each parameter.Parameters Acceptable CharactersHostname Alphanumeric and _ (underscore)IP AddressSubnet MaskGatewayPrimary DNSSecondary DNSNumeric and . (period)Domain Name Alphanumeric and - @ < > | ? “ ` _ \ / ‘. , ; : [ ] { } _Username PasswordAlphanumeric and ~ ! @ # $ ^ & ( ) _ { } `- % * = + [ ] ; : “ ‘ . , < > ? / \ |Shared Folder NamePC ServerAlphanumeric and @ _ ; , . ` [ ] { } | : ; “ ‘ < > ? / \ . , -HostnameThis is the DNS name of the sterilizer on a network. A Hostname is created by default. To change the default, edit the Hostname fi eld as needed. The Hostname must be a unique name on your local network. In Manual confi guration mode, enter the Hostname assigned to the sterilizer. Obtain this information from your network administrator.Note: The sterilizer will support up to 20 characters maximum.IP AddressA 32-bit address used to identify a node on a Transmission Control Protocol/ Internet Protocol (TCP/IP) network. Each node on the IP network must be assigned a unique IP address, which is made up of the network ID, plus a unique host ID. This address is typically represented with the decimal value of four octets separated by a period (for example, 192.168.1.127). This fi eld cannot be changed in Auto confi guration mode.In Manual confi guration mode, enter the static IP Address assigned to the sterilizer. Obtain this information from your network administrator.](https://usermanual.wiki/Advanced-Sterilization/02532481/User-Guide-3277704-Page-117.png)