Carestream Health 4901 DRYVIEW CHROMA Imaging System incorporating RFID User Manual 9G4260
Carestream Health, Inc. DRYVIEW CHROMA Imaging System incorporating RFID 9G4260
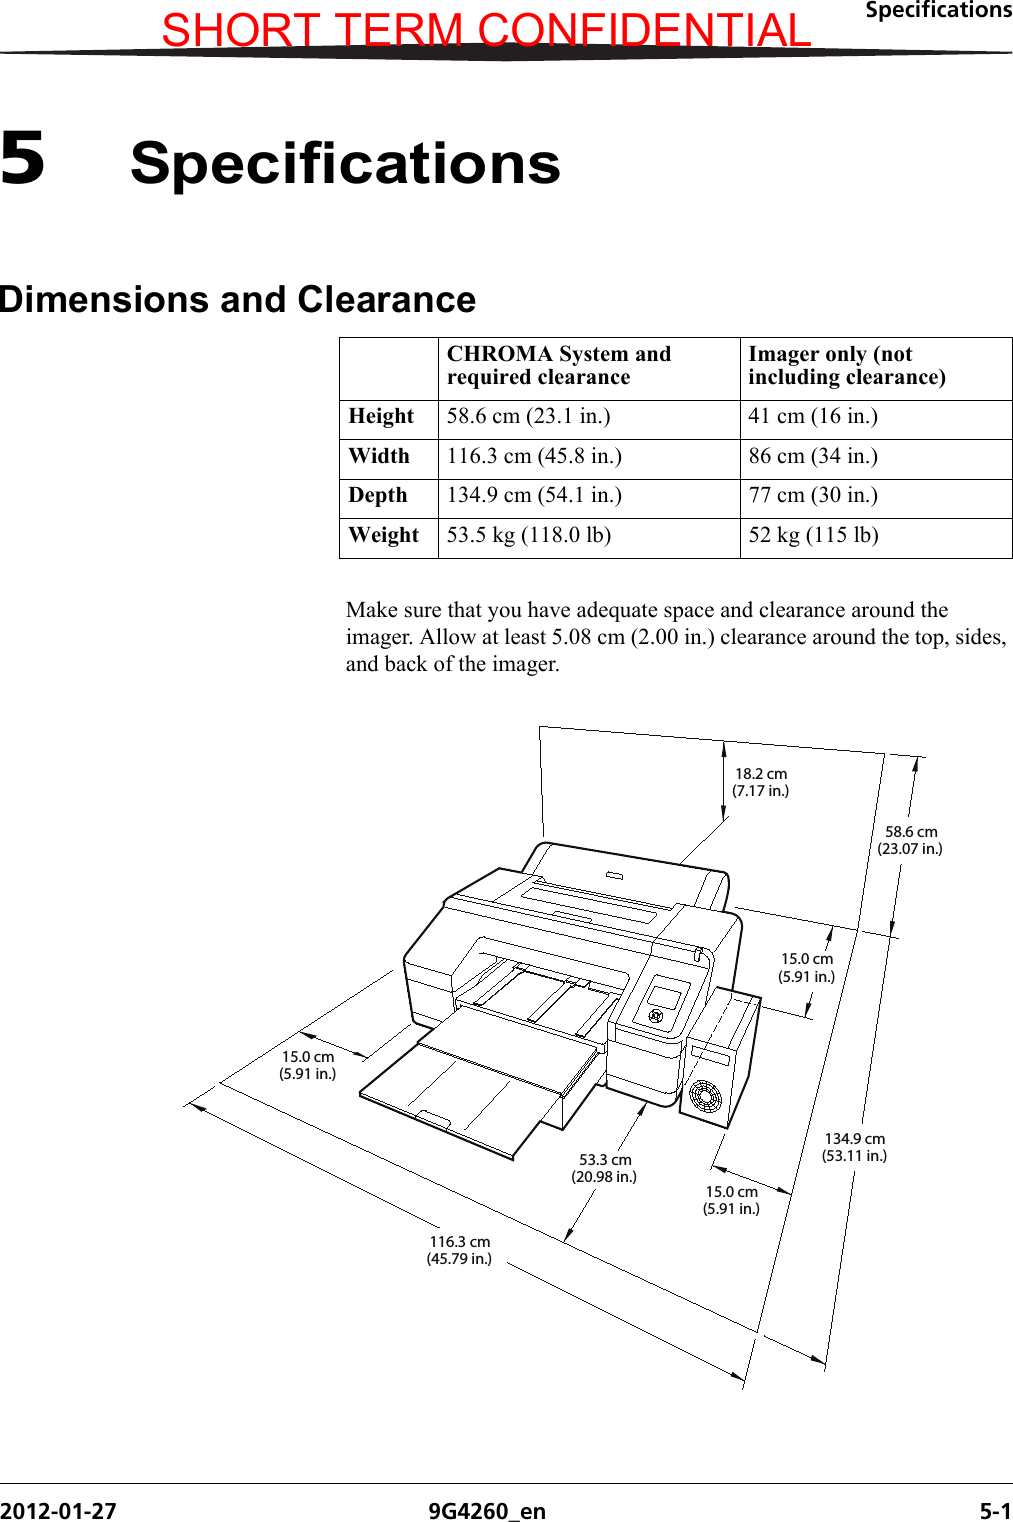
Contents
- 1. Carestream DV CHROMA Manual-ST CONFIDENTIAL
- 2. Carestream DV CHROMA User's Guide-ST CONFIDENTIAL
Carestream DV CHROMA User's Guide-ST CONFIDENTIAL
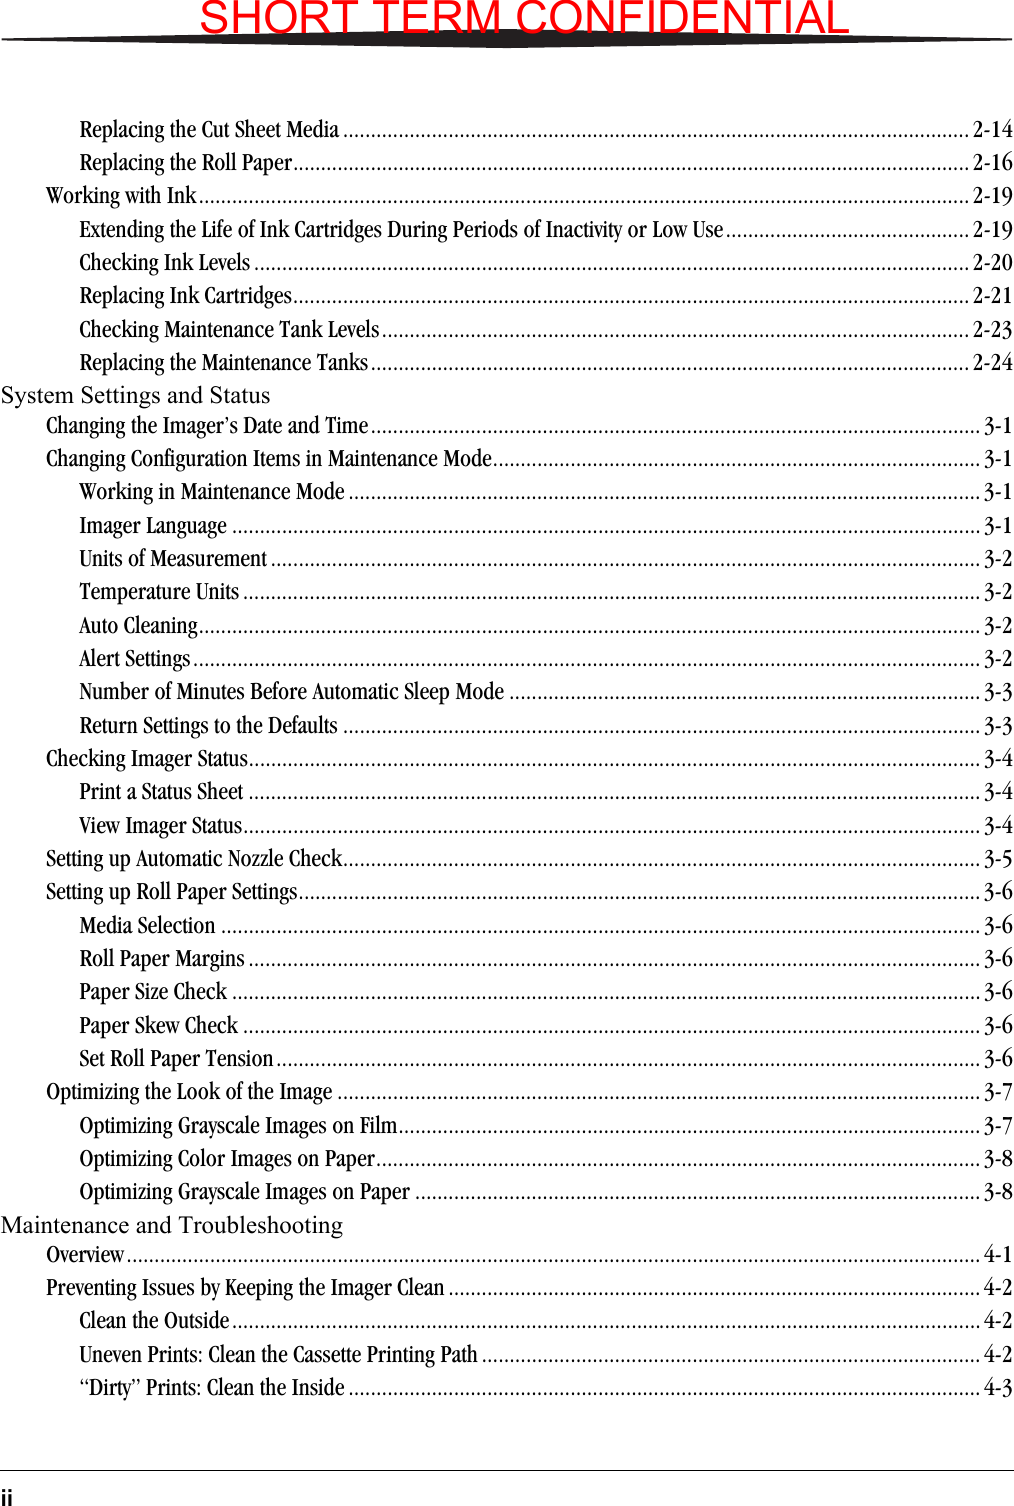


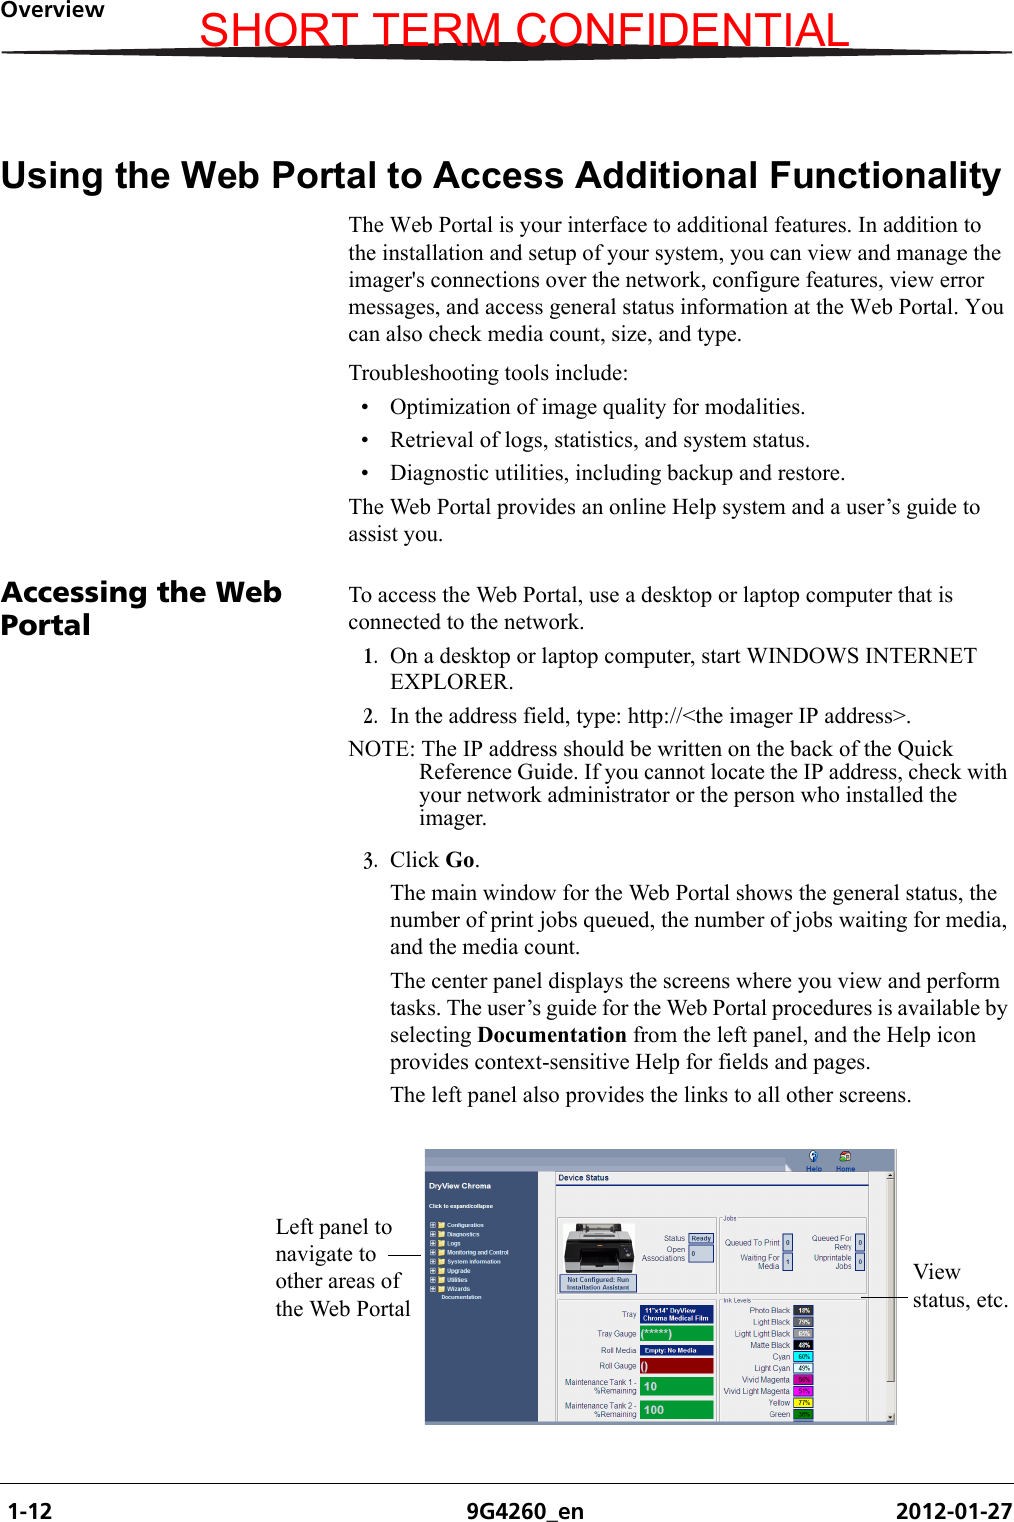

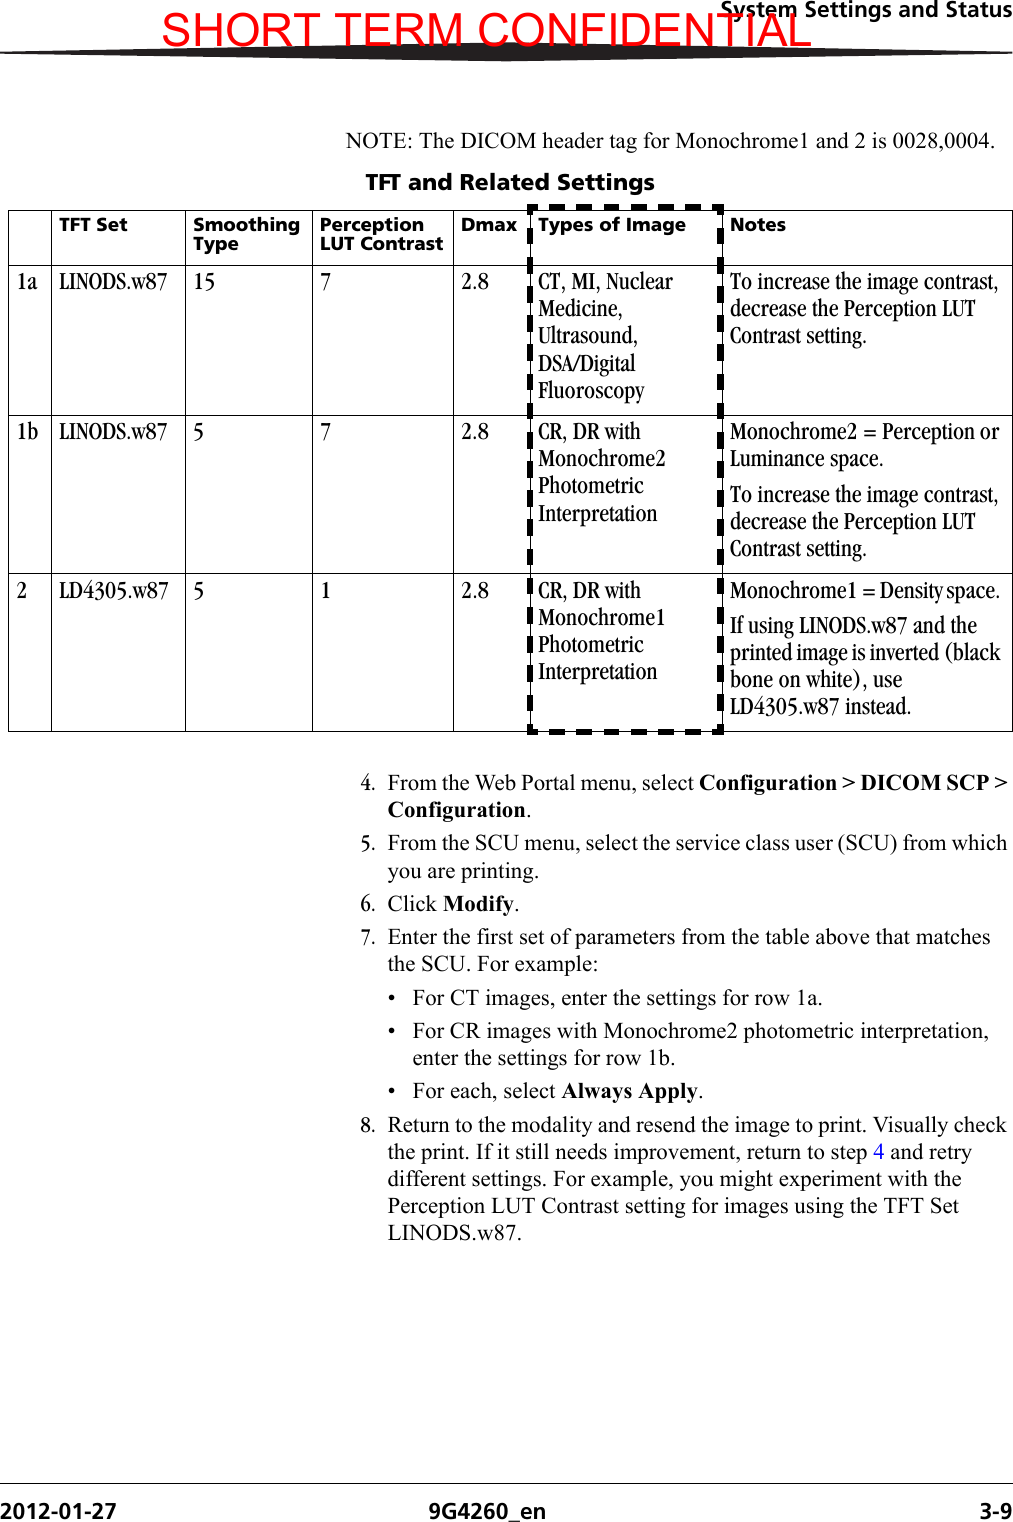
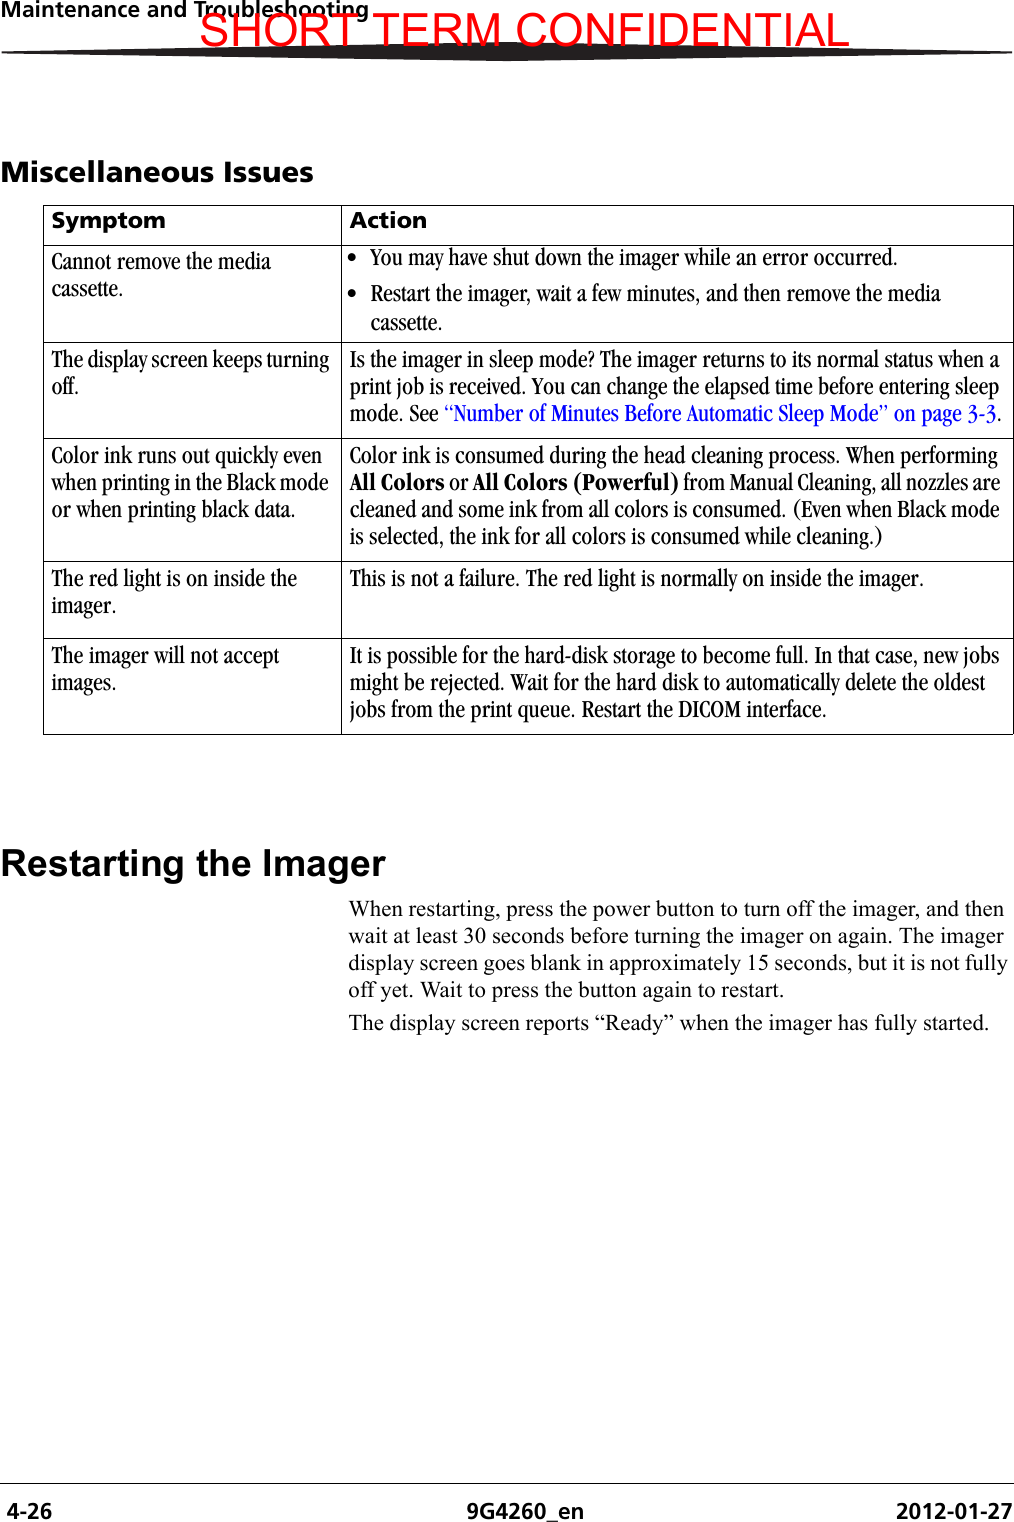
![2-2 9G4260_en 2012-01-27Working with the Media and InkWorking with the Loaded MediaViewing the Loaded Media SizeThe DICOM interface screen displays the loaded media size by dimension, for example, “8.5 x 11” or “A4.” The dimensions are represented in inches with the exception of “A3” and “A4.”Monitoring the Amount of Loaded MediaThe DICOM interface screen displays a gauge to help you monitor the amount of loaded media that remains in the media carrier or on the roll.A full carrier or roll is represented by the following:[ * * * * * ]The asterisks decrease as the carrier or roll is emptied. This example shows a nearly empty carrier or roll:[* ]Checking the DICOM Interface for the Requested Media SizeIf a print request has arrived at the imager with a different media size than the loaded media, the new size appears on the DICOM interface screen to alert you to install the requested size. The DICOM interface screen displays the loaded size on the top row and the requested size on the lower row. For example:See “Changing the Media in the Imager” on page 2-12 for instructions to change the loaded media.Output tray and media cassetteThe DICOM interface screen displays information about the loaded and requested mediaRoll feeder and roll paper11 x 14 [*** ]A3The loaded media size is 11 x 14 in.The requested media size is A3. You must unload the 11 x 14 in. media and then load A3 media to let the job print.SHORT TERM CONFIDENTIAL](https://usermanual.wiki/Carestream-Health/4901.Carestream-DV-CHROMA-User-s-Guide-ST-CONFIDENTIAL/User-Guide-1651257-Page-22.png)


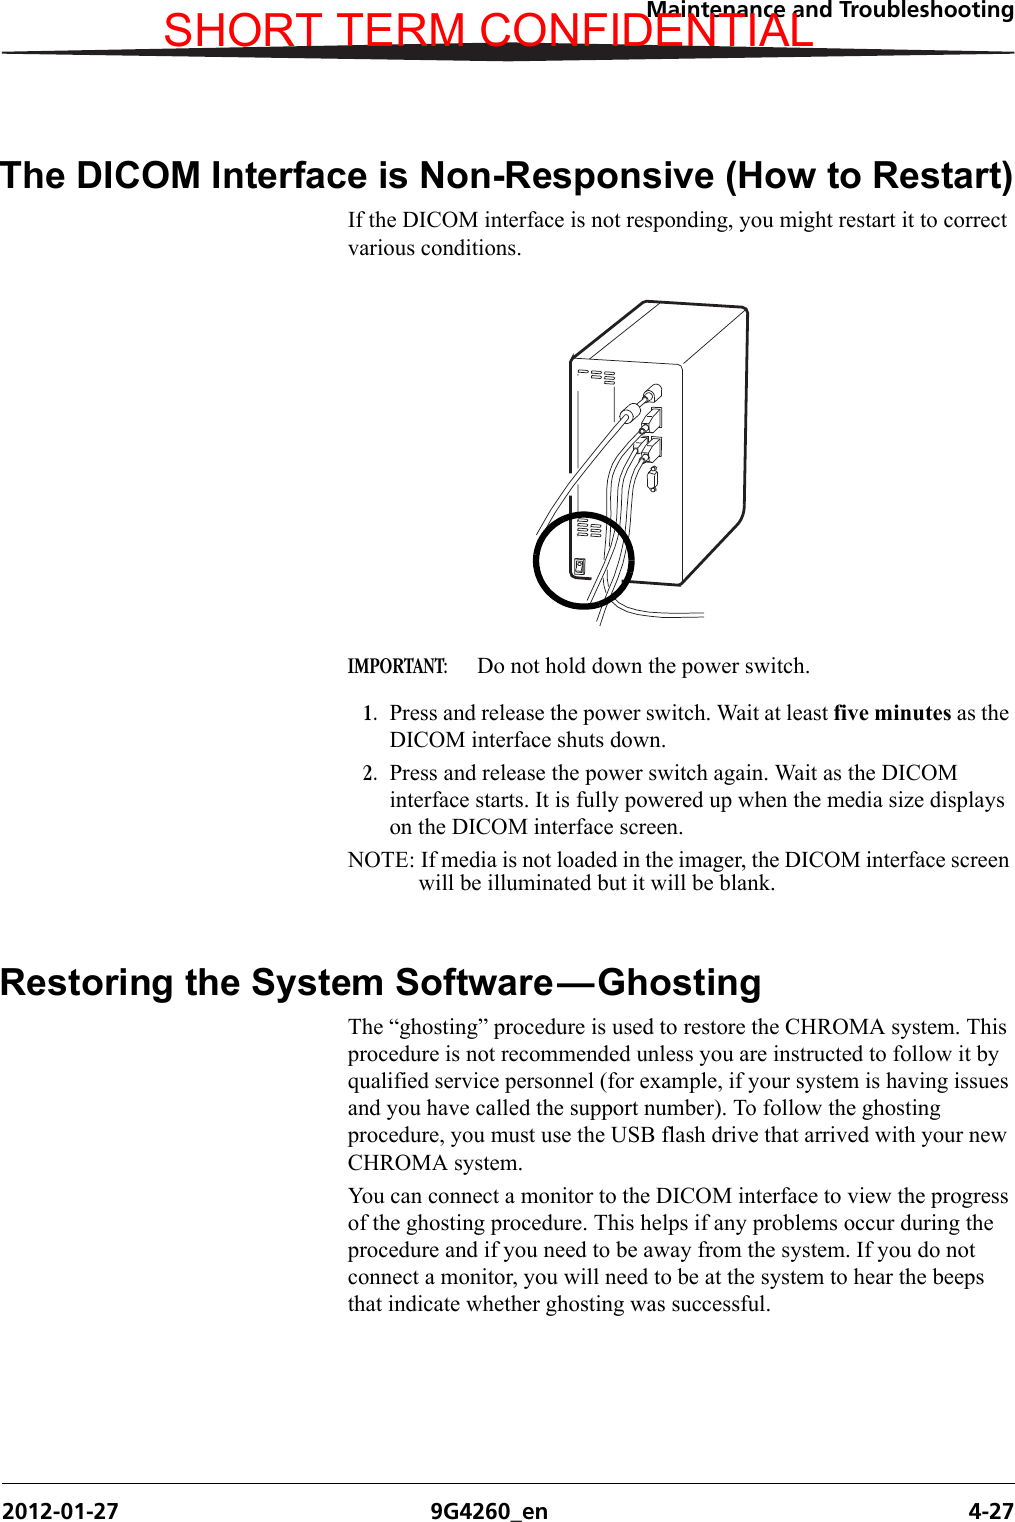
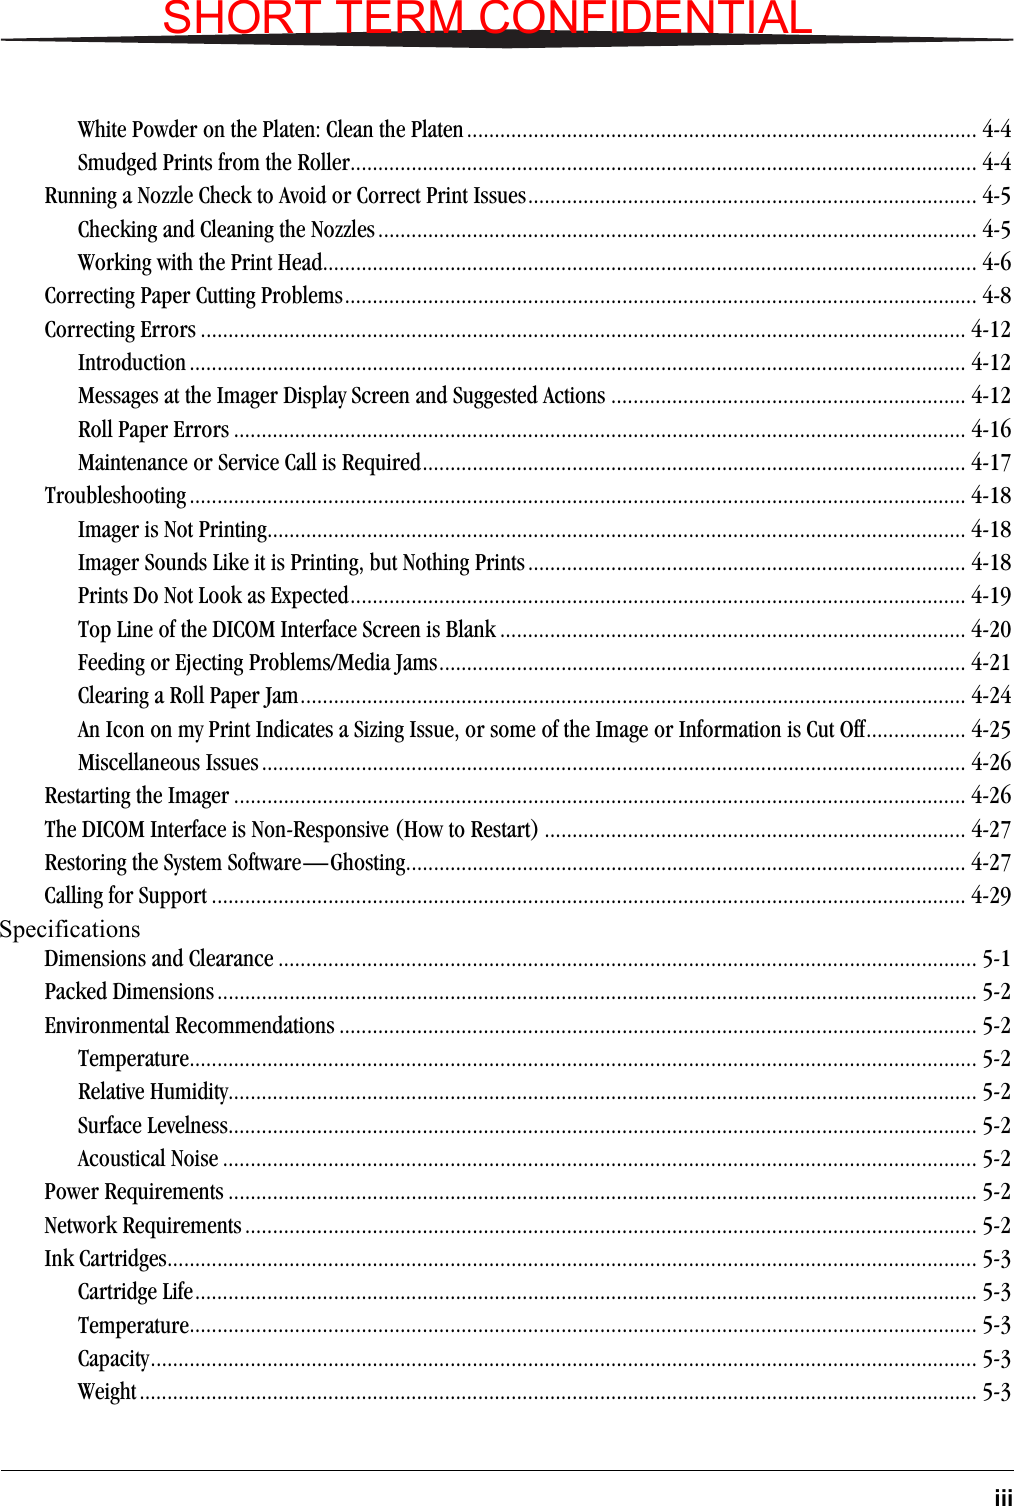
![2-12 9G4260_en 2012-01-27Working with the Media and InkChanging the Media in the ImagerHandling a Print Request with a Different Requested MediaIf a print job requires a different media from the media that is currently loaded in the imager, the new size appears on the DICOM interface screen to alert you to install the requested size. See “Understanding How Media is Selected for Print Requests” on page 2-3 for more information about image sizes and requested media sizes.The DICOM interface screen displays the loaded size on the top row and the requested size on the lower row. For example:In this example, the 28 x 35 cm (11 x 14 in.) media is loaded, but a print job has arrived at the CHROMA imager requesting A3 media. If there are current jobs to print on the loaded media...If there are no current jobs for the loaded media...1. Wait until the current jobs finish printing.2. Replace the loaded media with the requested media. See “Replacing the Cut Sheet Media” on page 2-14 or “Replacing the Roll Paper” on page 2-16.The DICOM interface senses the change; the DICOM interface screen changes, and the new job automatically prints.Replace the loaded media with the requested media. See “Replacing the Cut Sheet Media” on page 2-14 or “Replacing the Roll Paper” on page 2-16.The DICOM interface senses the change; the DICOM interface screen changes, and the new job automatically prints.11 x 14 [*** ]A3Represents the amount of the loaded media remainingThe loaded media size is 28 x 35 cm (11 x 14 in.)The requested mediasize is A3SHORT TERM CONFIDENTIAL](https://usermanual.wiki/Carestream-Health/4901.Carestream-DV-CHROMA-User-s-Guide-ST-CONFIDENTIAL/User-Guide-1651257-Page-32.png)