Control Bionics PL-27-1100 The NeuroNode is a Bluetooth Low Energy device allowing alternative computer input. User Manual 27 3500 C
Control Bionics The NeuroNode is a Bluetooth Low Energy device allowing alternative computer input. 27 3500 C
Contents
- 1. Manual
- 2. Operator Manual
Manual


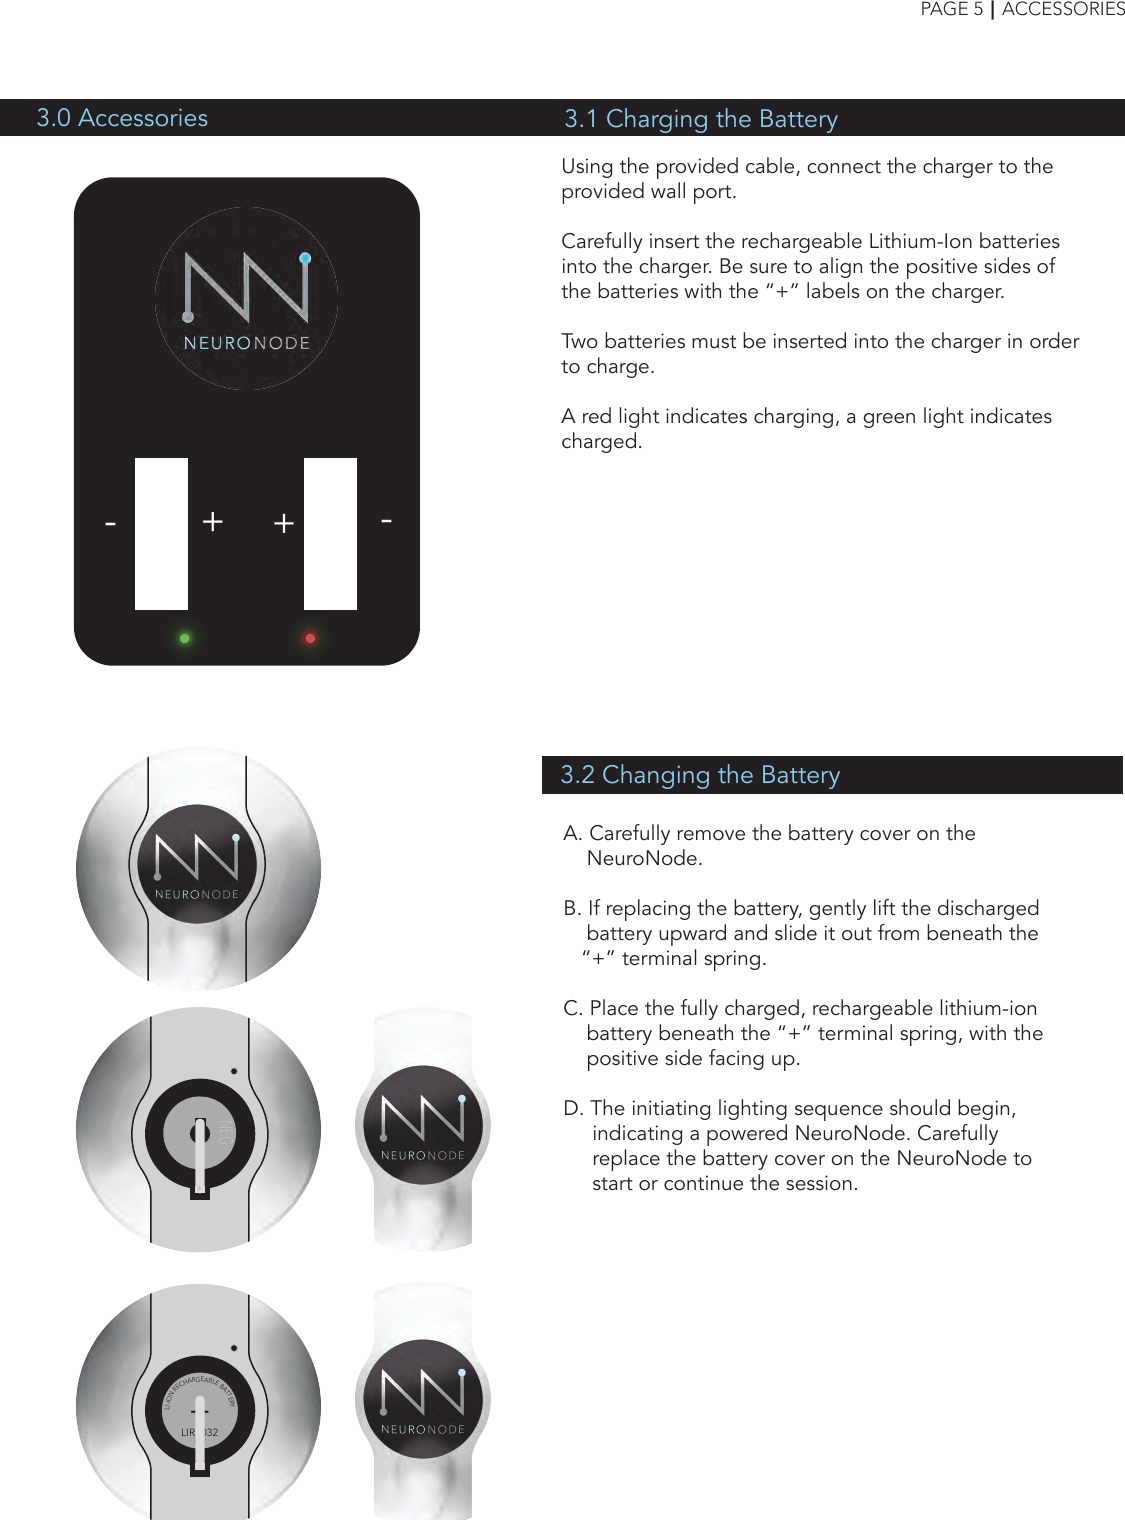
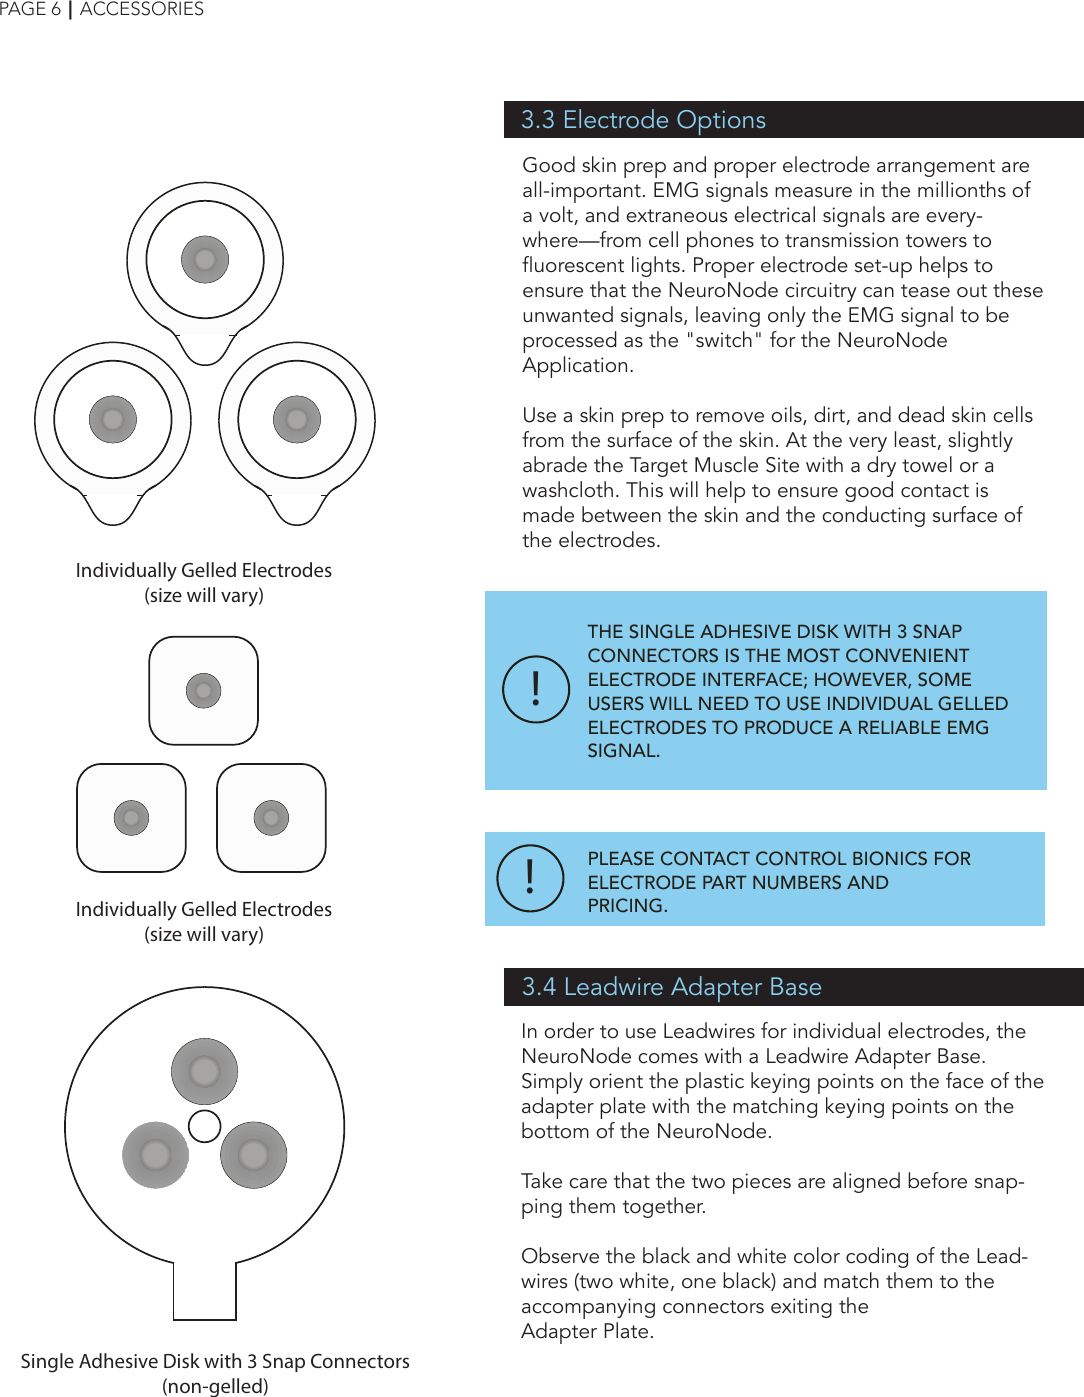
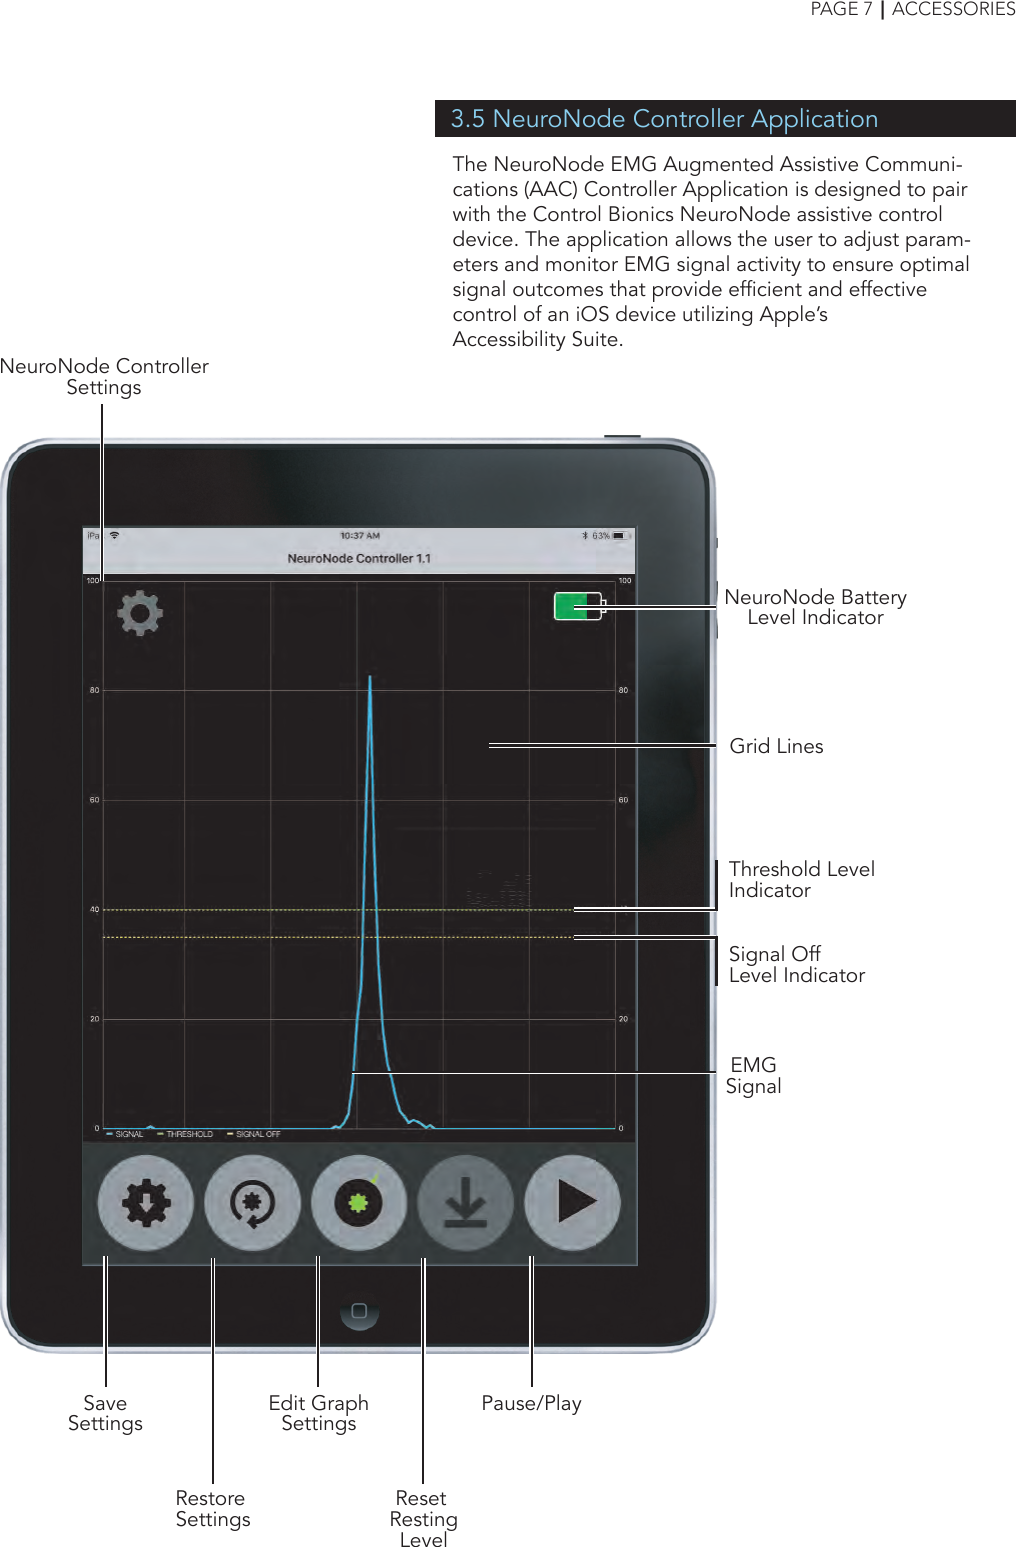
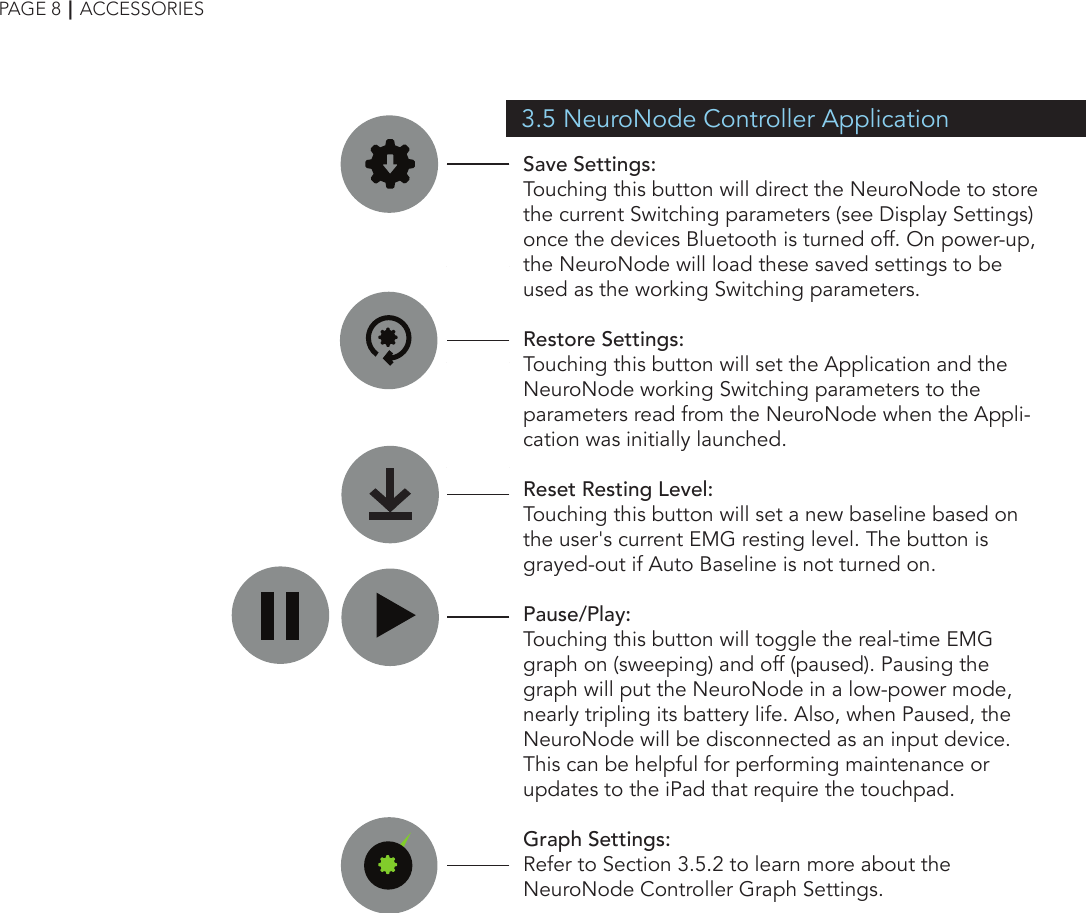
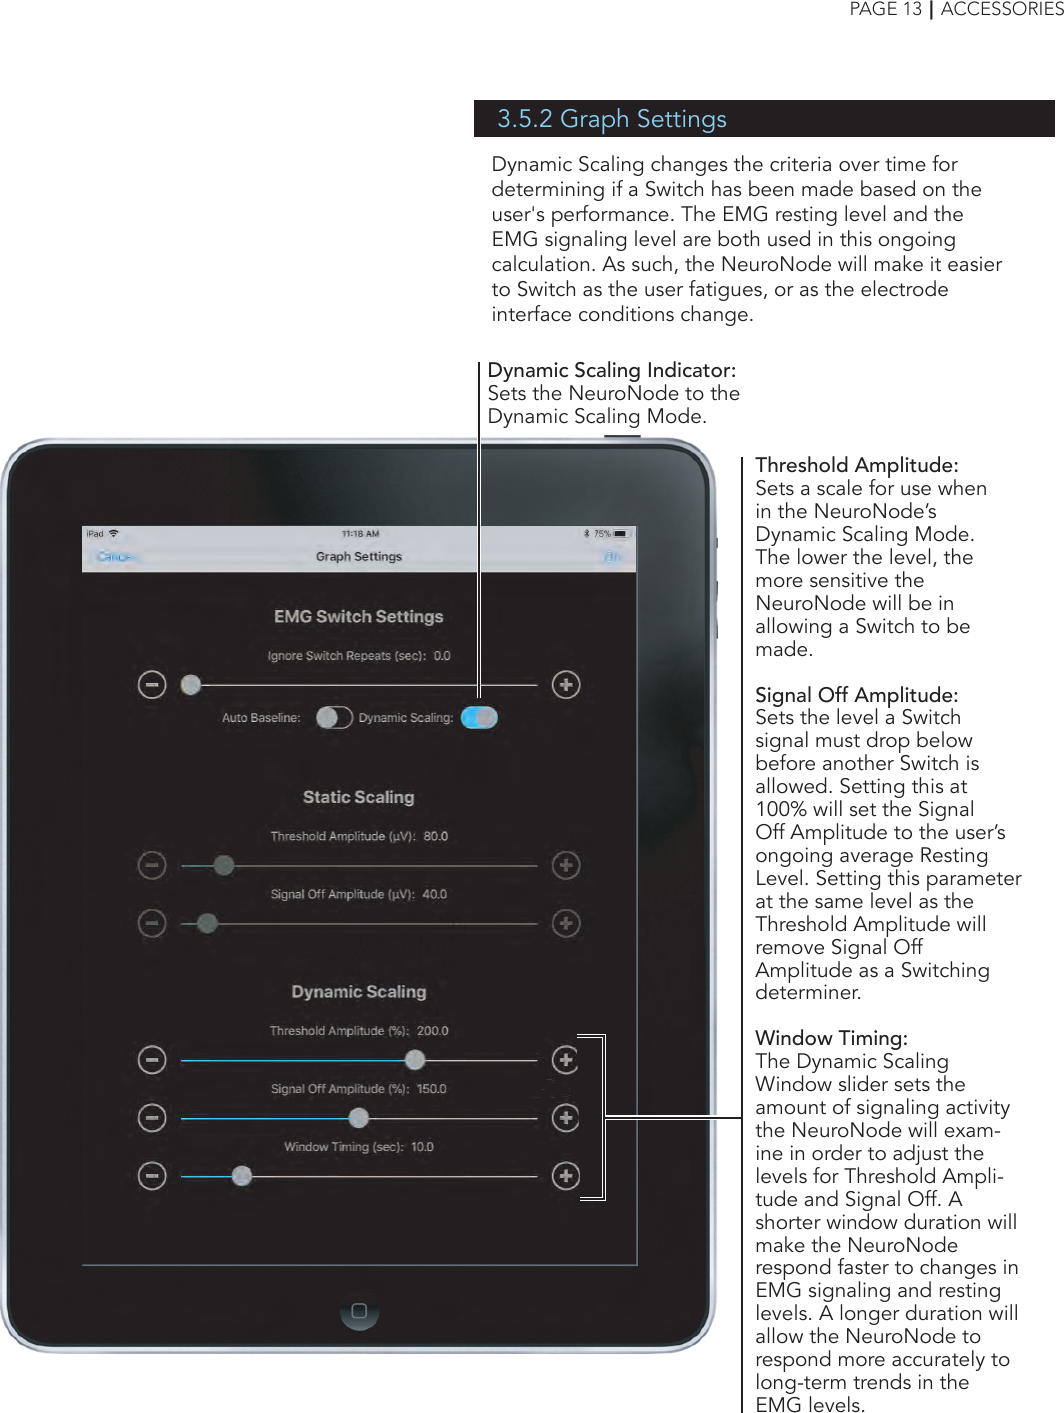
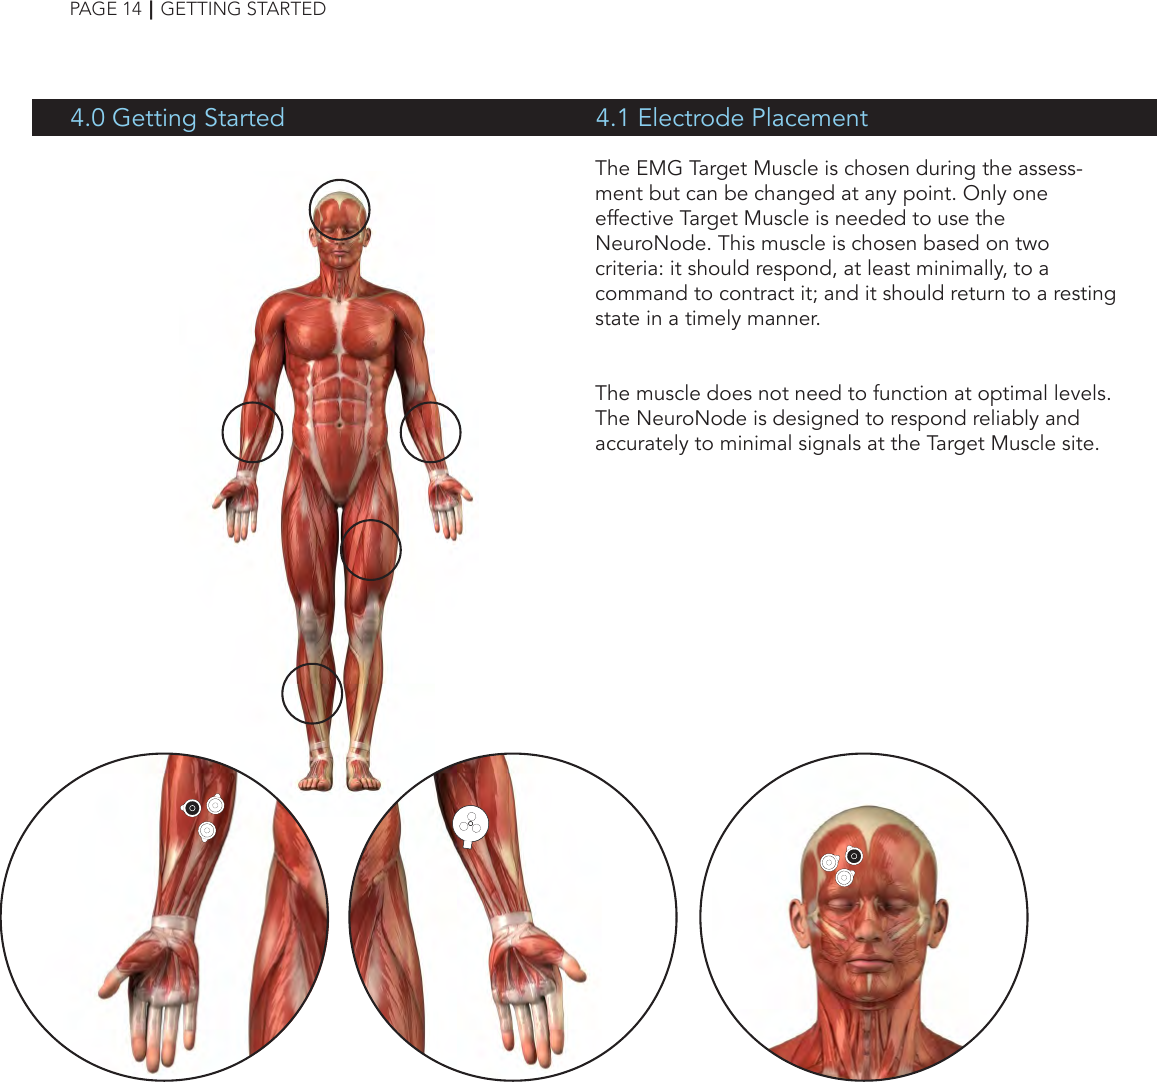
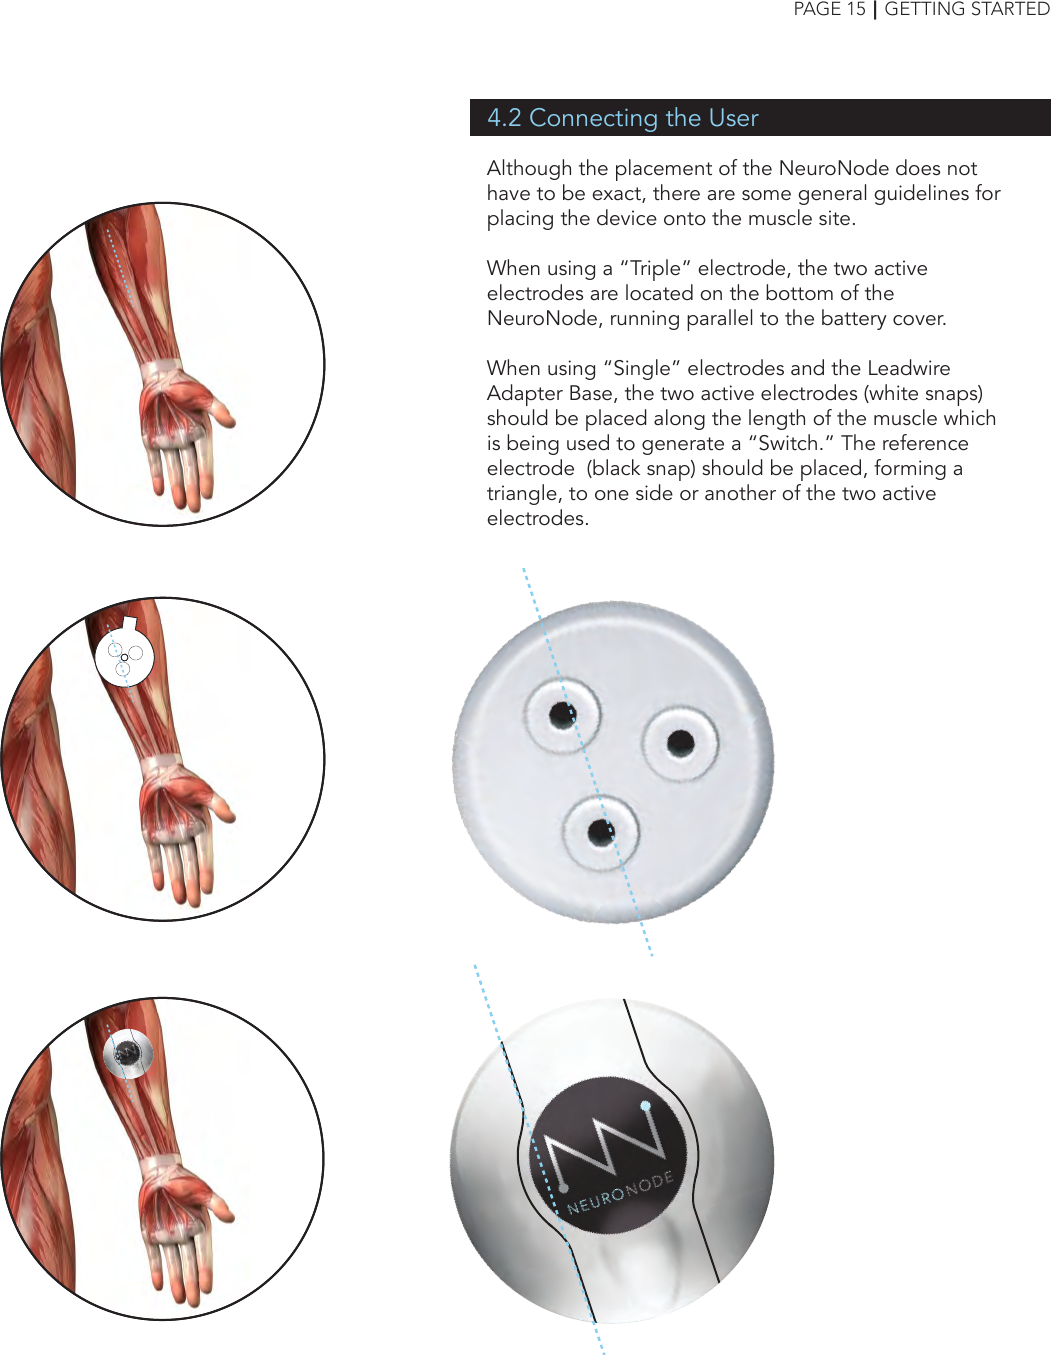
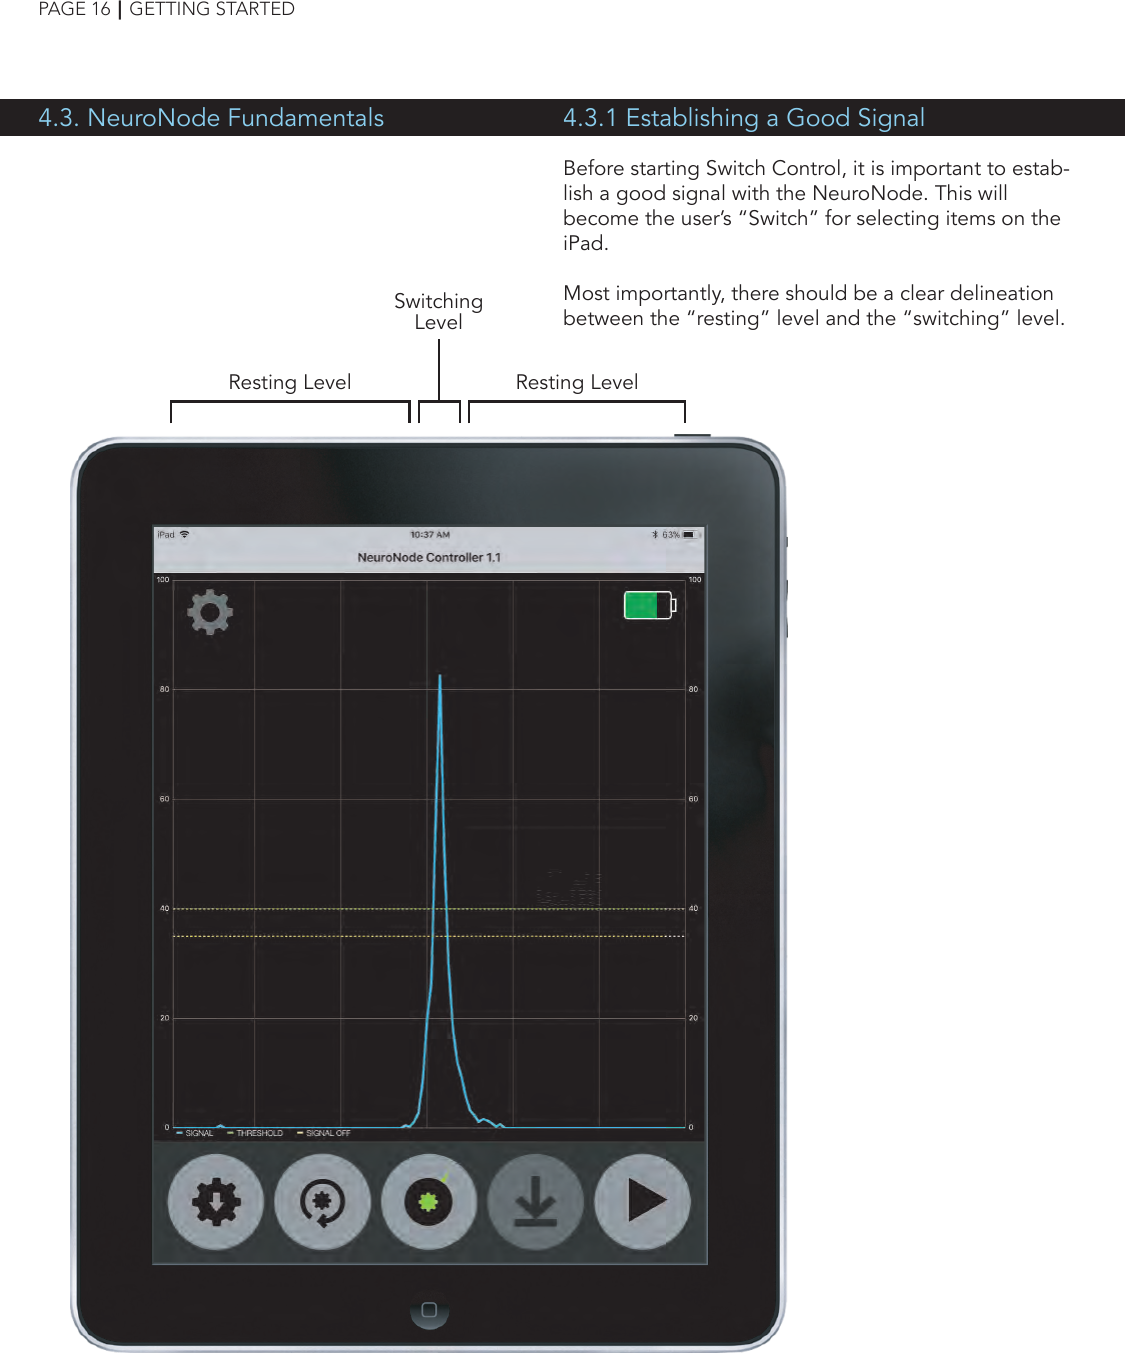
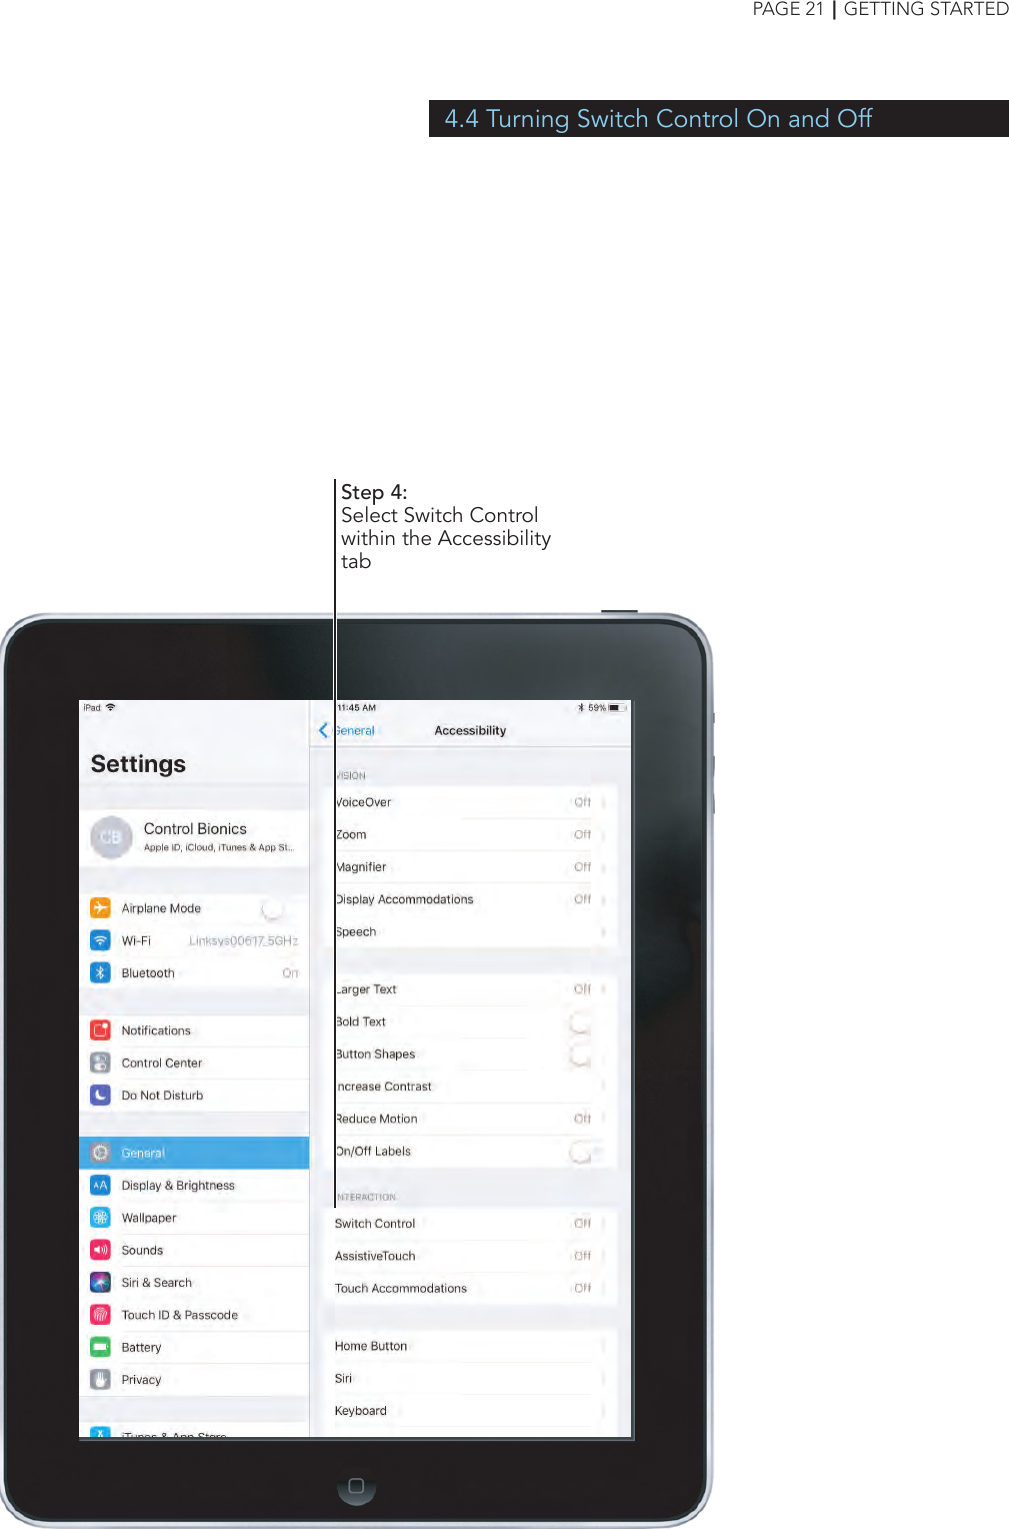
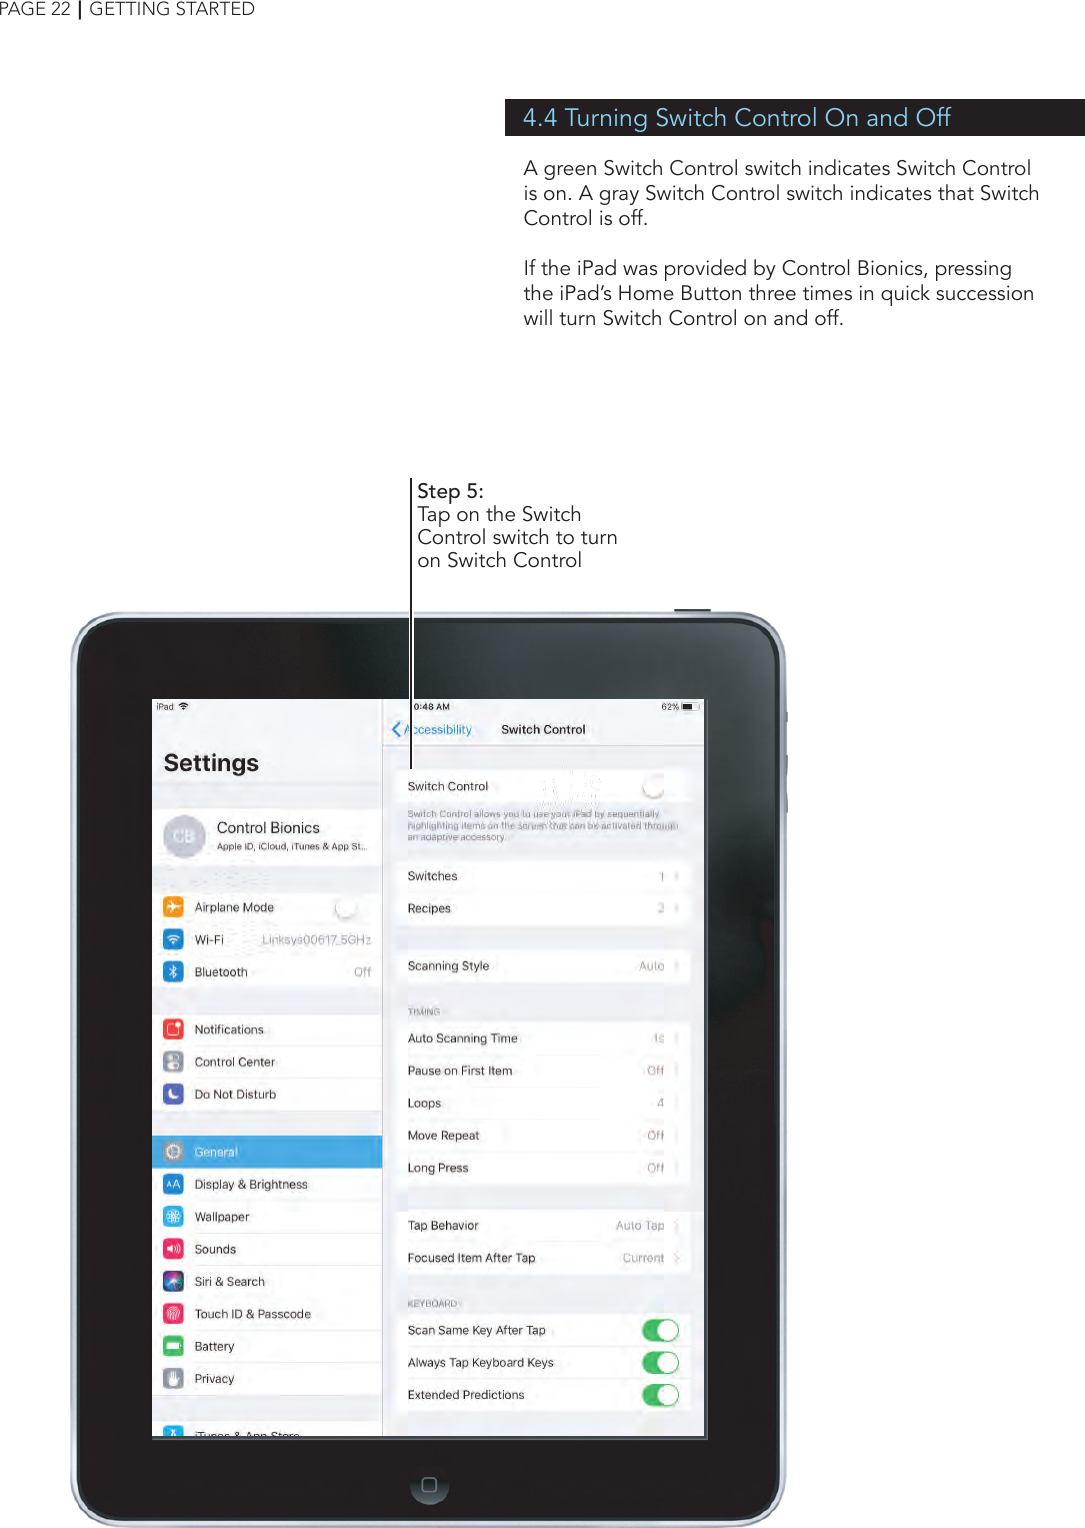
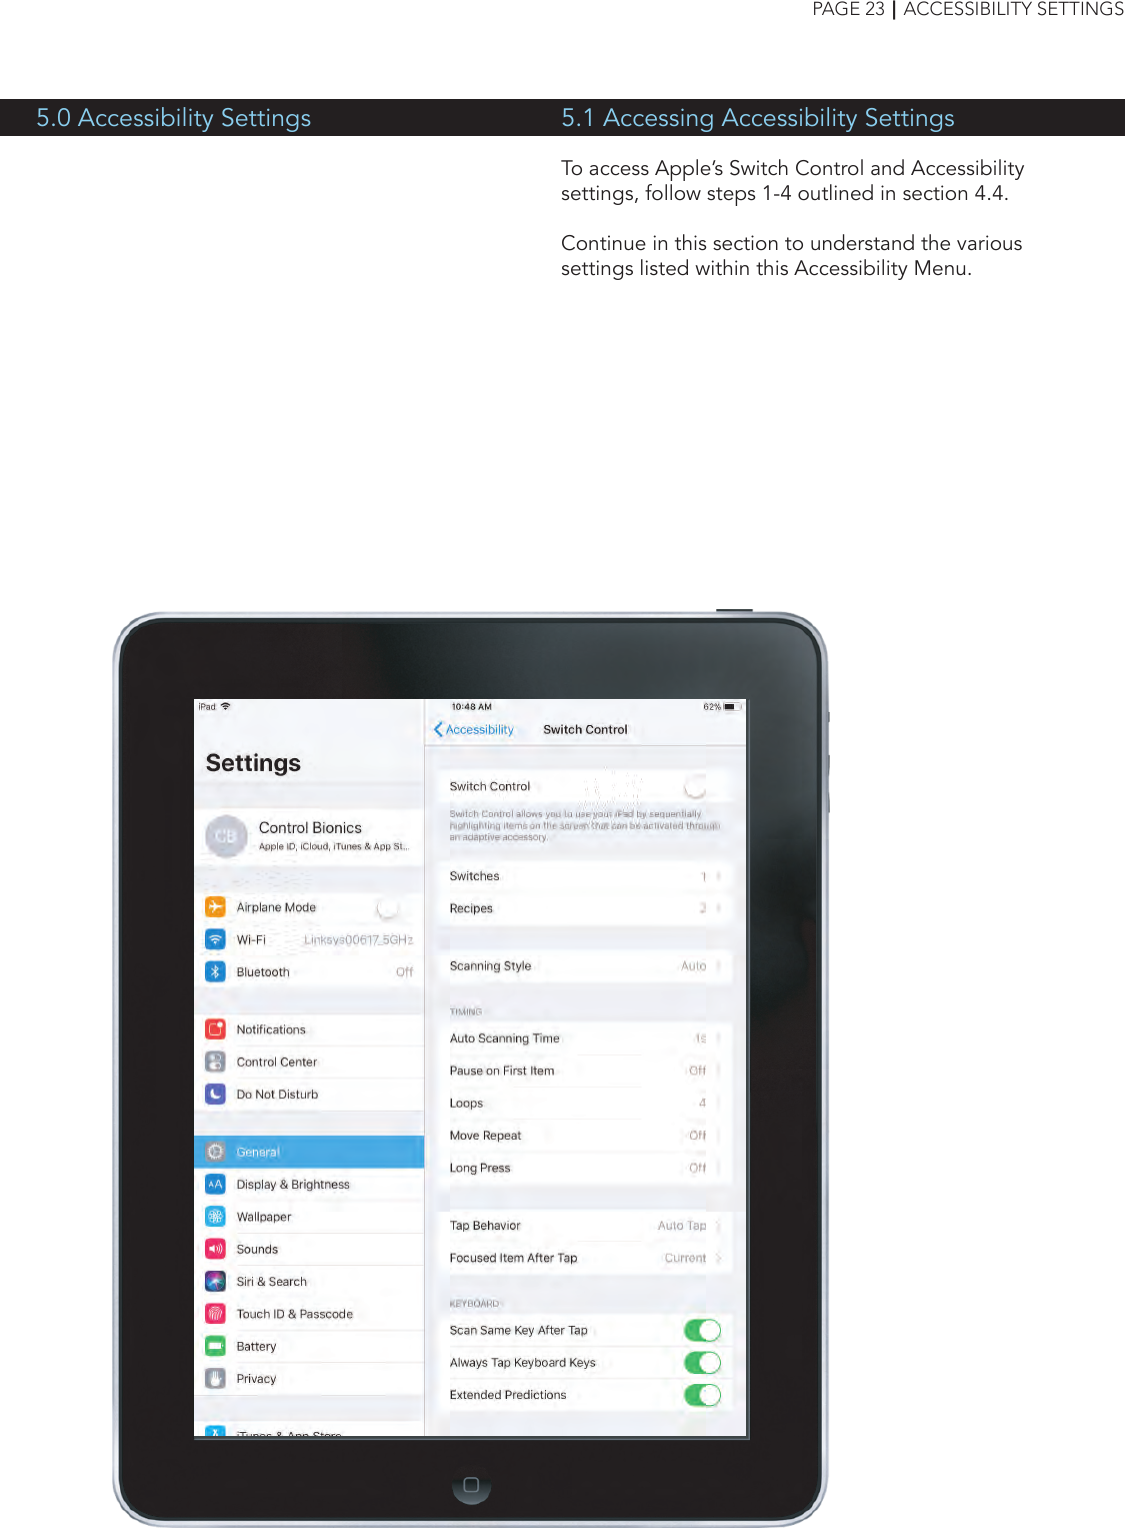
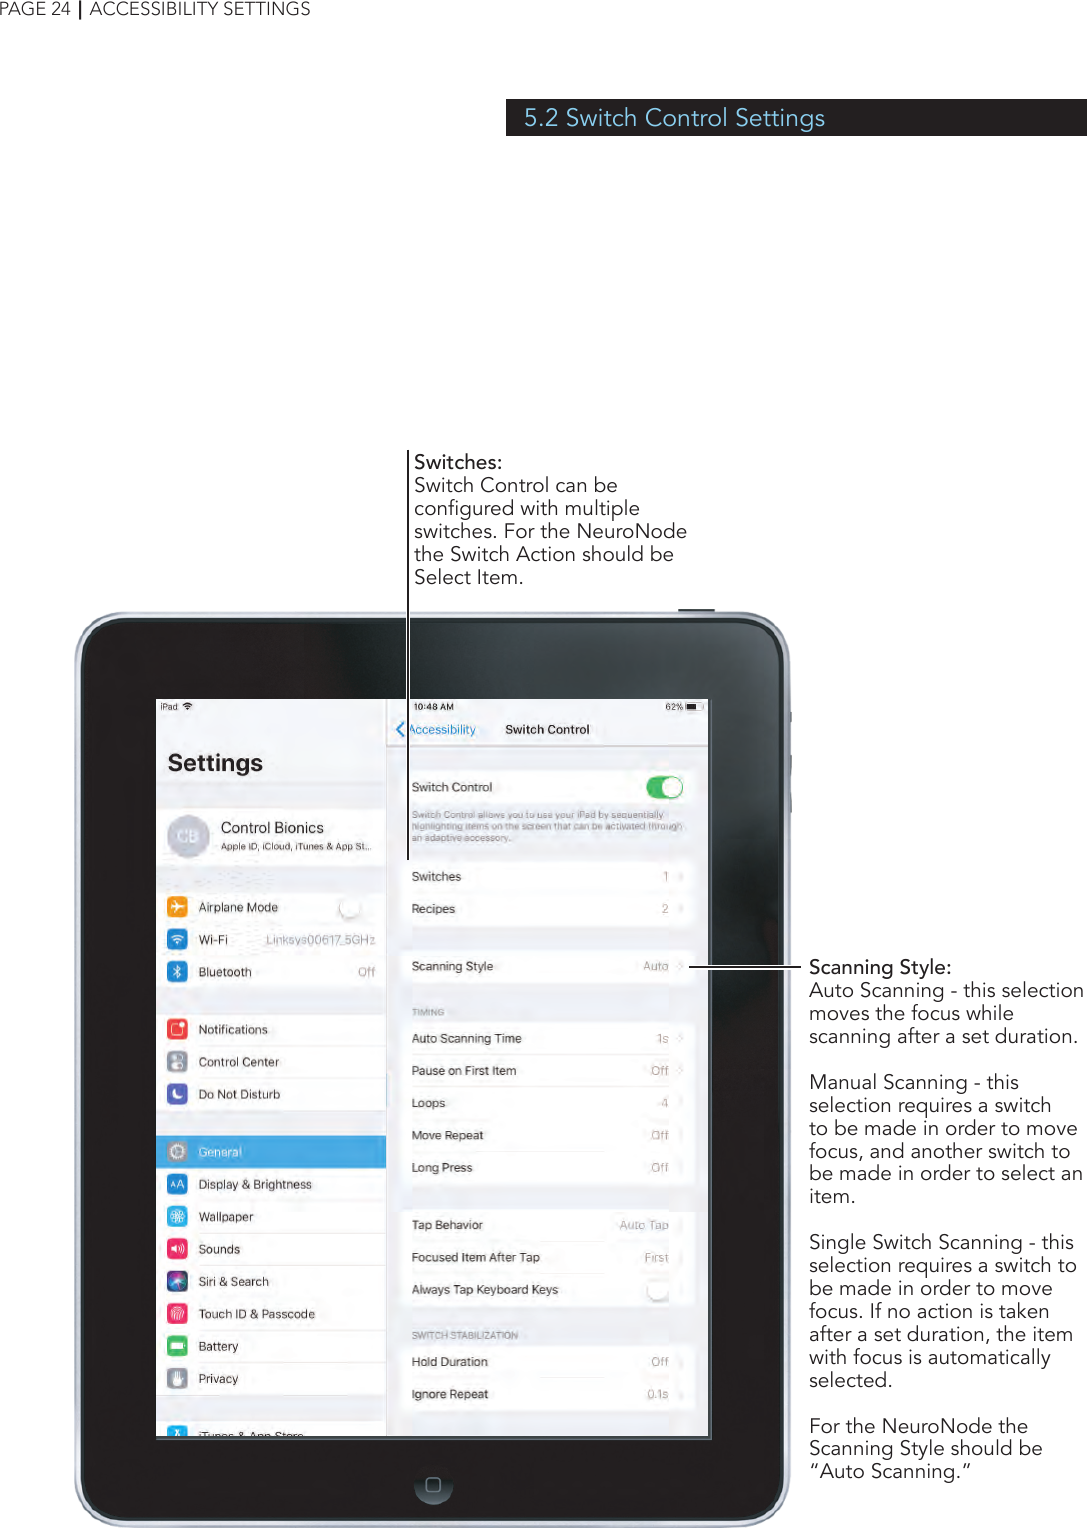
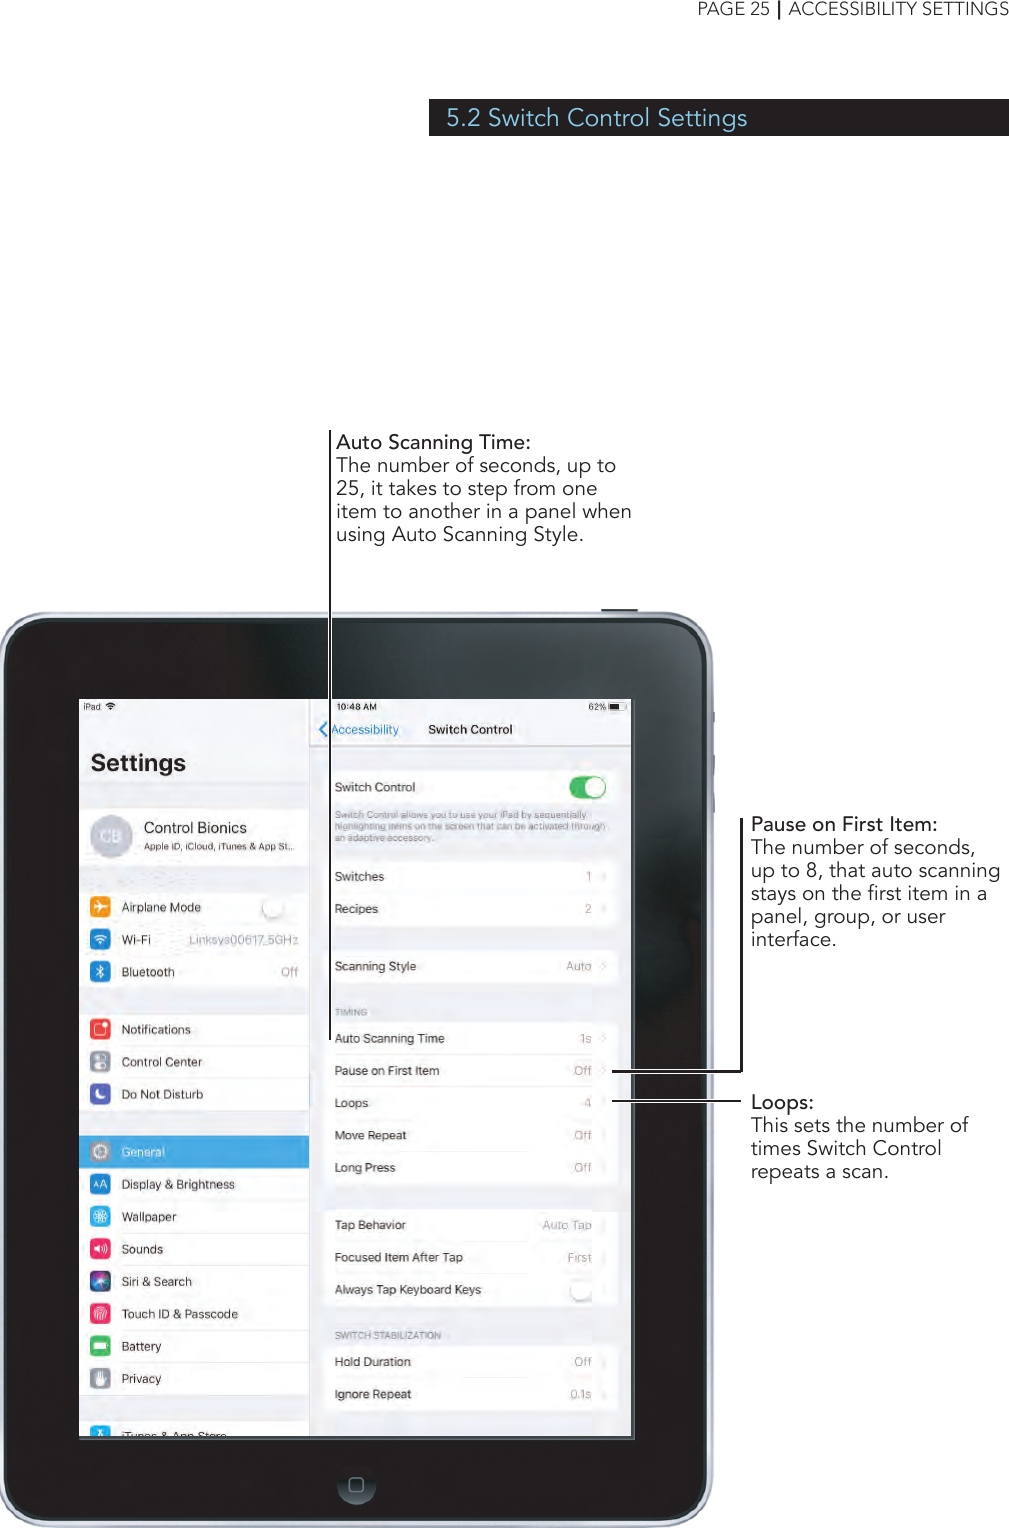
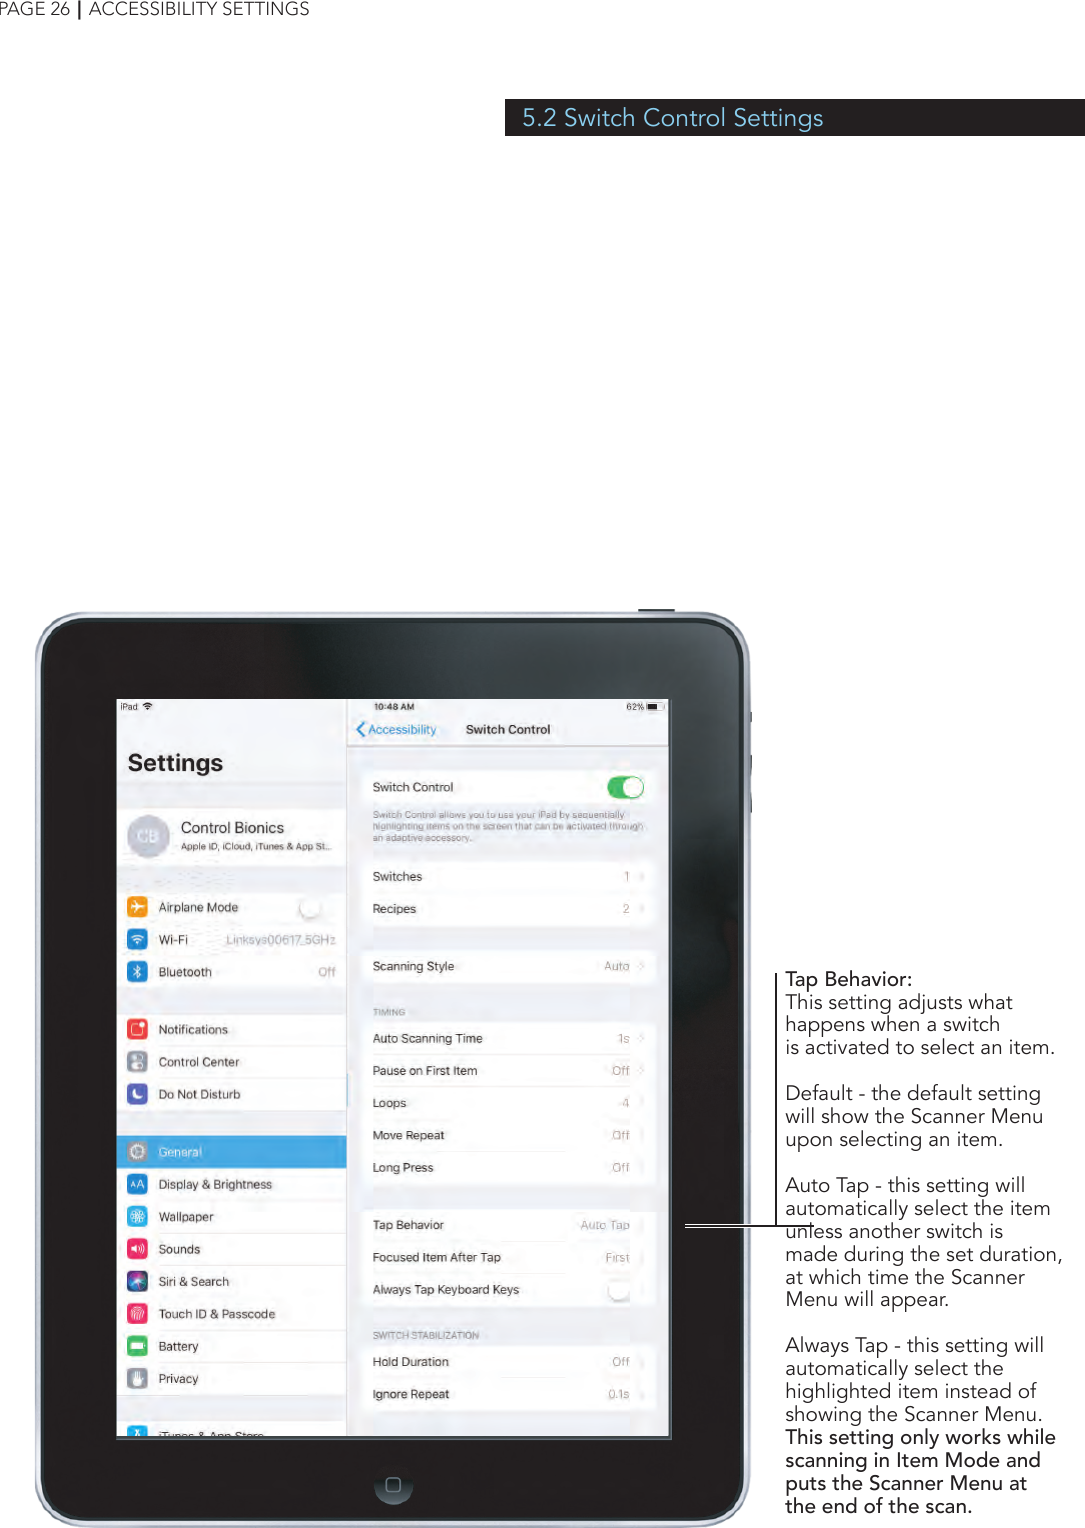
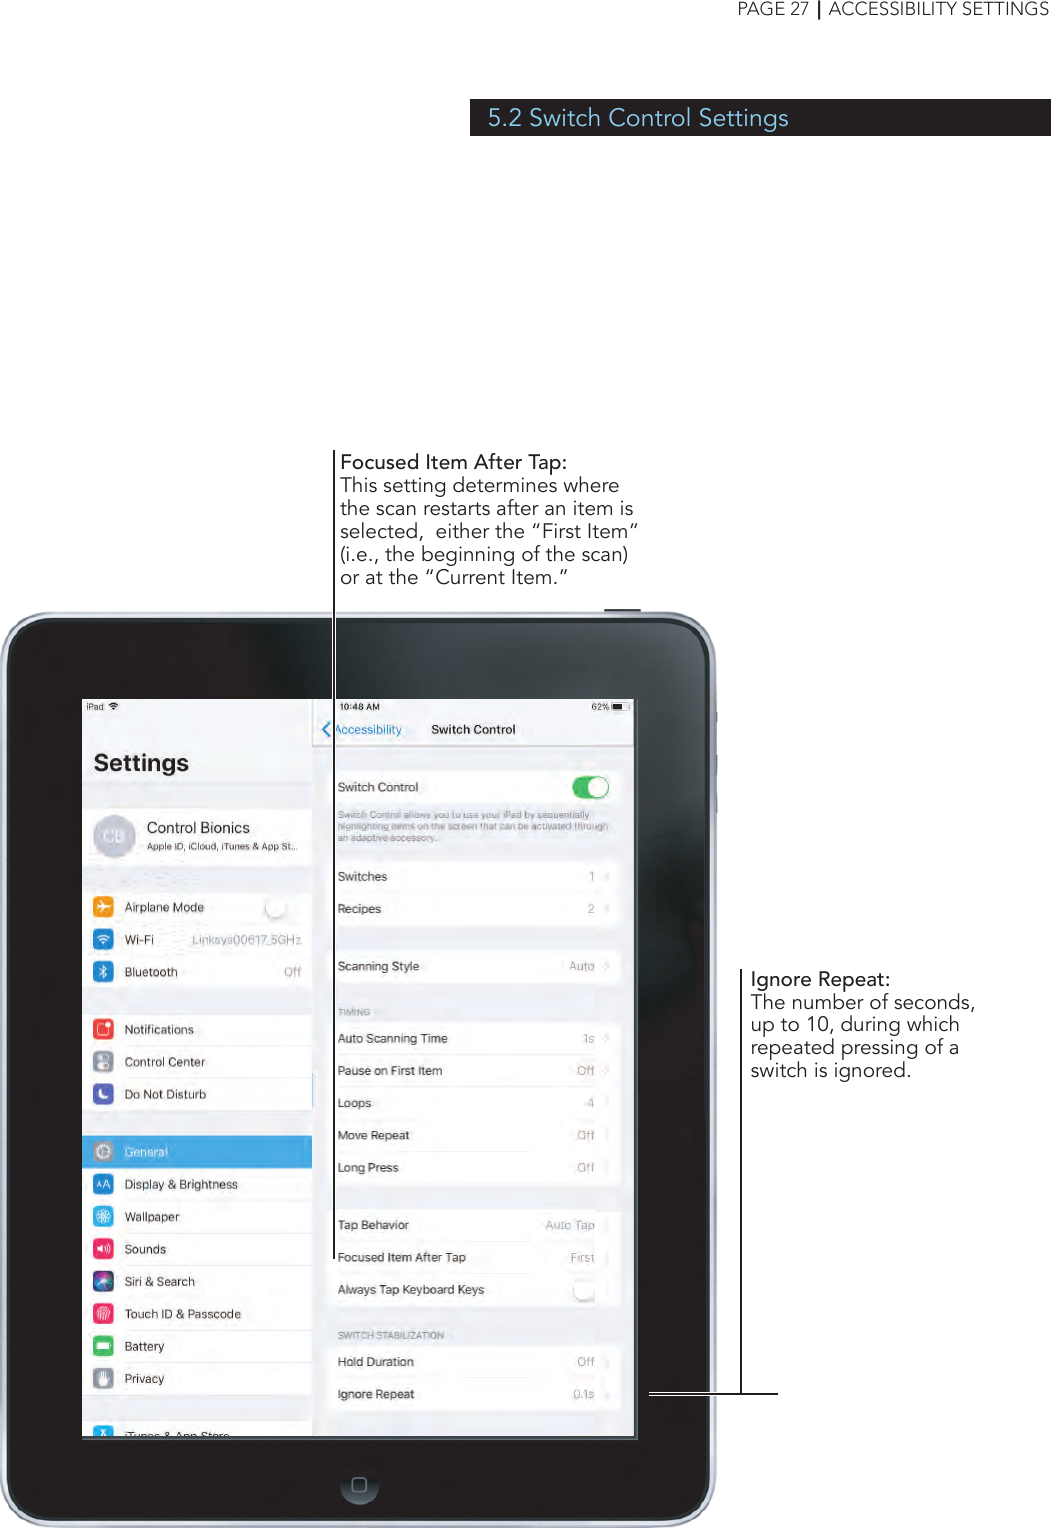
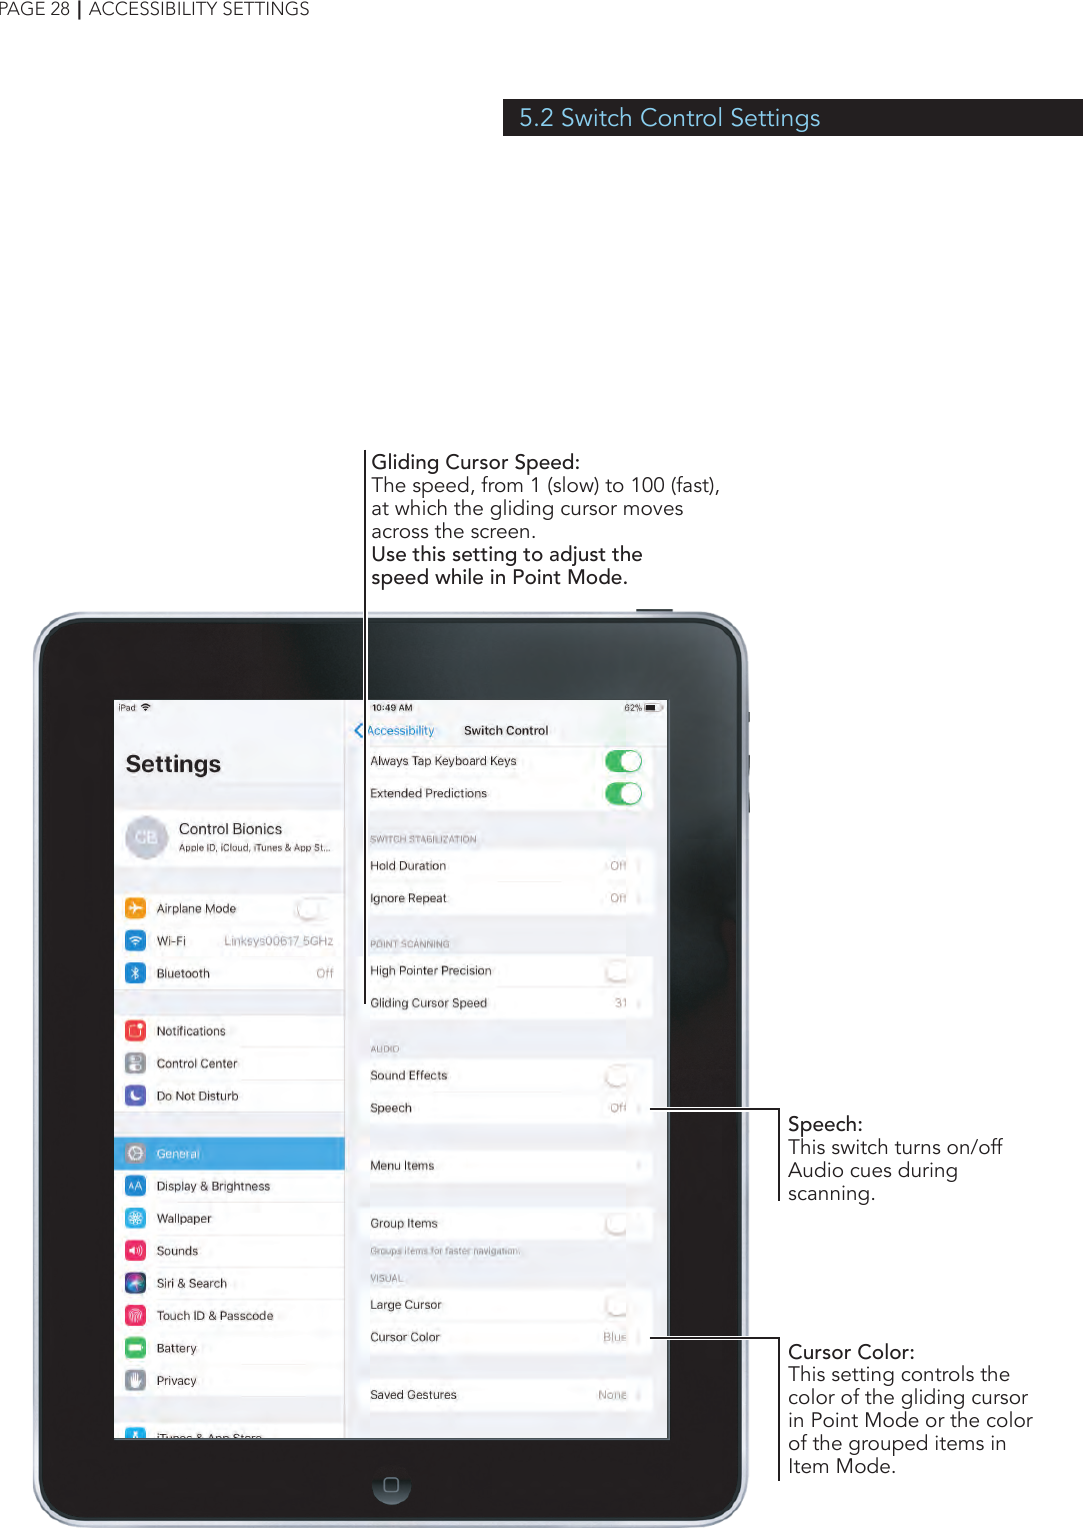
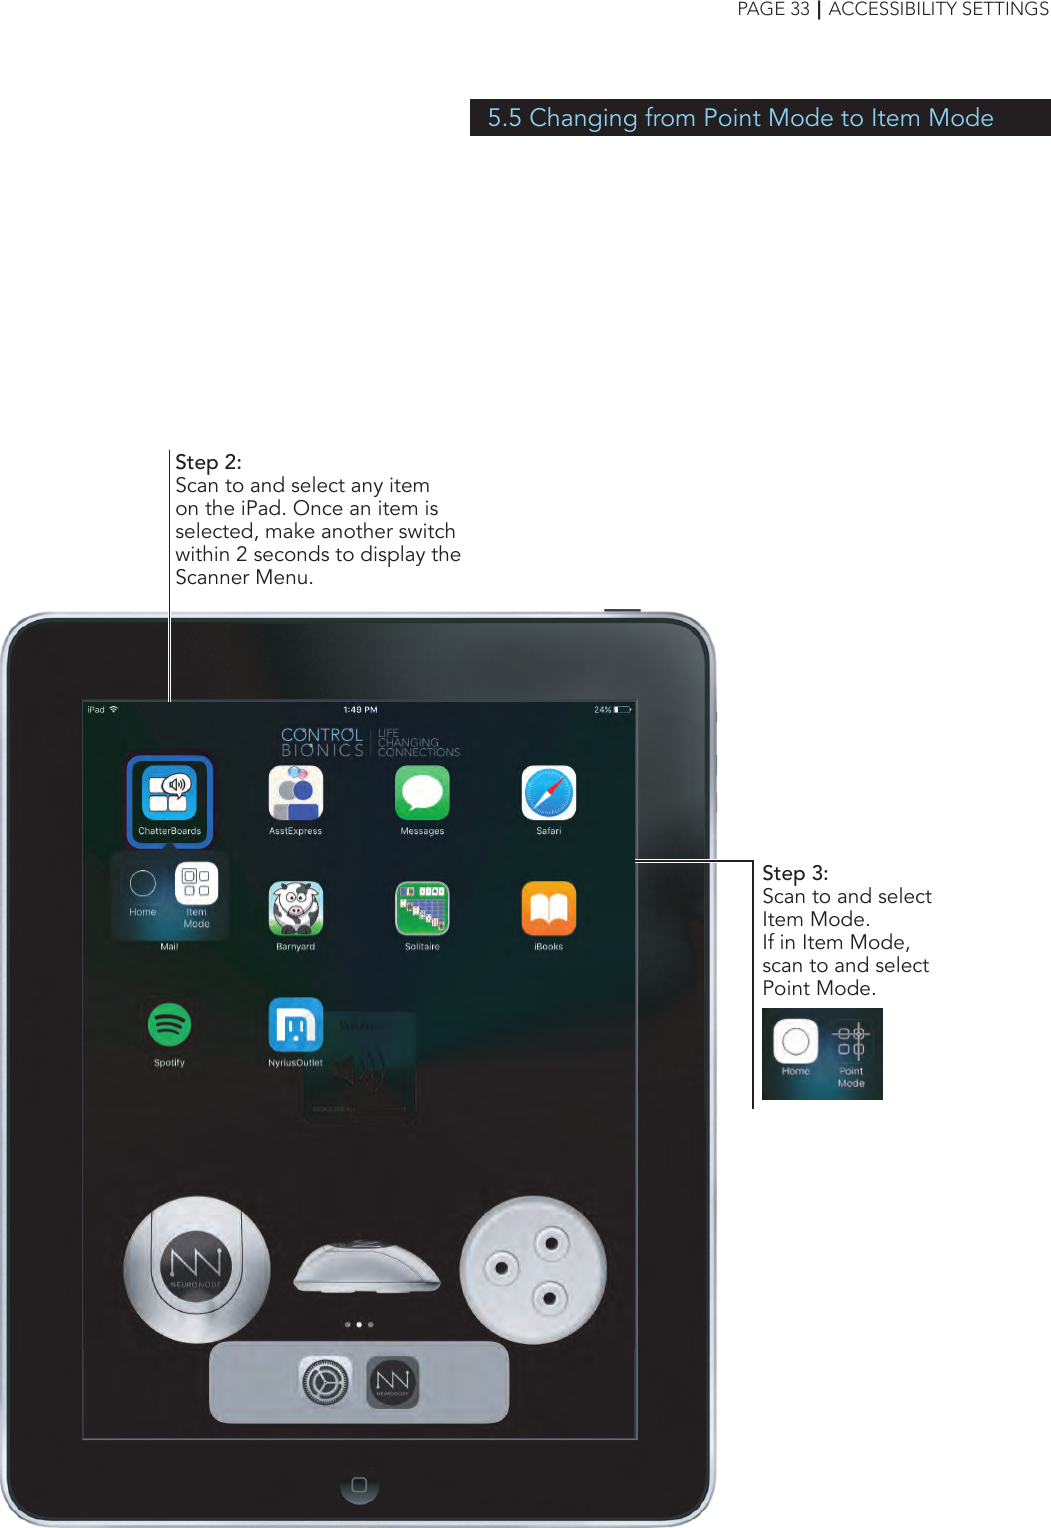
![2.1 Overview of Accessories Leadwire Adapter BaseElectrode KitRechargeable BatteriesBattery ChargerItem What it doesThe Leadwires connect to the Leadwire Adapter Base of the NeuroNode. The three snap-leads on the other end of the Leadwires attach to electrodes on the user’s skin.Rechargeable Lithium-Ion Battery (4)The NeuroNode comes with 4 rechargeable lithium-ion batteries.Battery Charger The lithium-ion Battery Charger allows for charging two batteries while using the previously charged batteries.Electrode Kit A starter electrode kit is included with the NeuroNode System. Ideally the optimal electrode type will be determined by the clinician. Apple iPadApple iPadApple Switch ControlItem What it doesItem What it doesThe NeuroNode gives the user complete control over the device without requiring extensive computer experience. Here are just a few examples of what persons with paralysis, loss of speech, or loss of motor control can do with the NeuroNode: Communicate with family, caregivers, and clinicians using text-to-speech [TTS]; send text messages and email; surf the web; watch videos and movies; listen to music, radio, and podcasts; read the news; play video games; use environmental controls; and participate in the classroom using telepresence robots and assistive technology.Apple Switch Control The Apple iPad comes with Apple’s Switch Control word prediction and text-to-speech software. With Switch Control, NeuroNode enables users to write and have their words spoken by a choice of voices. The prediction accura-cy will increase as the software learns the words and phrases that are used most often. Switch Control features include: Self-learning word prediction, history and sentence prediction, with a choice of an English, Spanish, French, German, Italian, Swedish, Norwegian, Danish or Dutch user interface.+LIR20323.6vLI-ION RECHARGEABLE BATTERY+LIR20323.6vLI-ION RECHARGEABLE BATTERY+LIR20323.6vLI-ION RECHARGEABLE BATTERY+LIR20323.6vLI-ION RECHARGEABLE BATTERY- +- +PAGE 4┃OVERVIEW](https://usermanual.wiki/Control-Bionics/PL-27-1100.Manual/User-Guide-3856531-Page-8.png)