EMS Technologies Canada JETWAVE KA Band Aviation Radio User Manual 23 15 29R001
EMS Technologies Canada, Ltd. KA Band Aviation Radio 23 15 29R001
UserManual.wiki
>
EMS Technologies Canada
>
JETWAVE User Manual
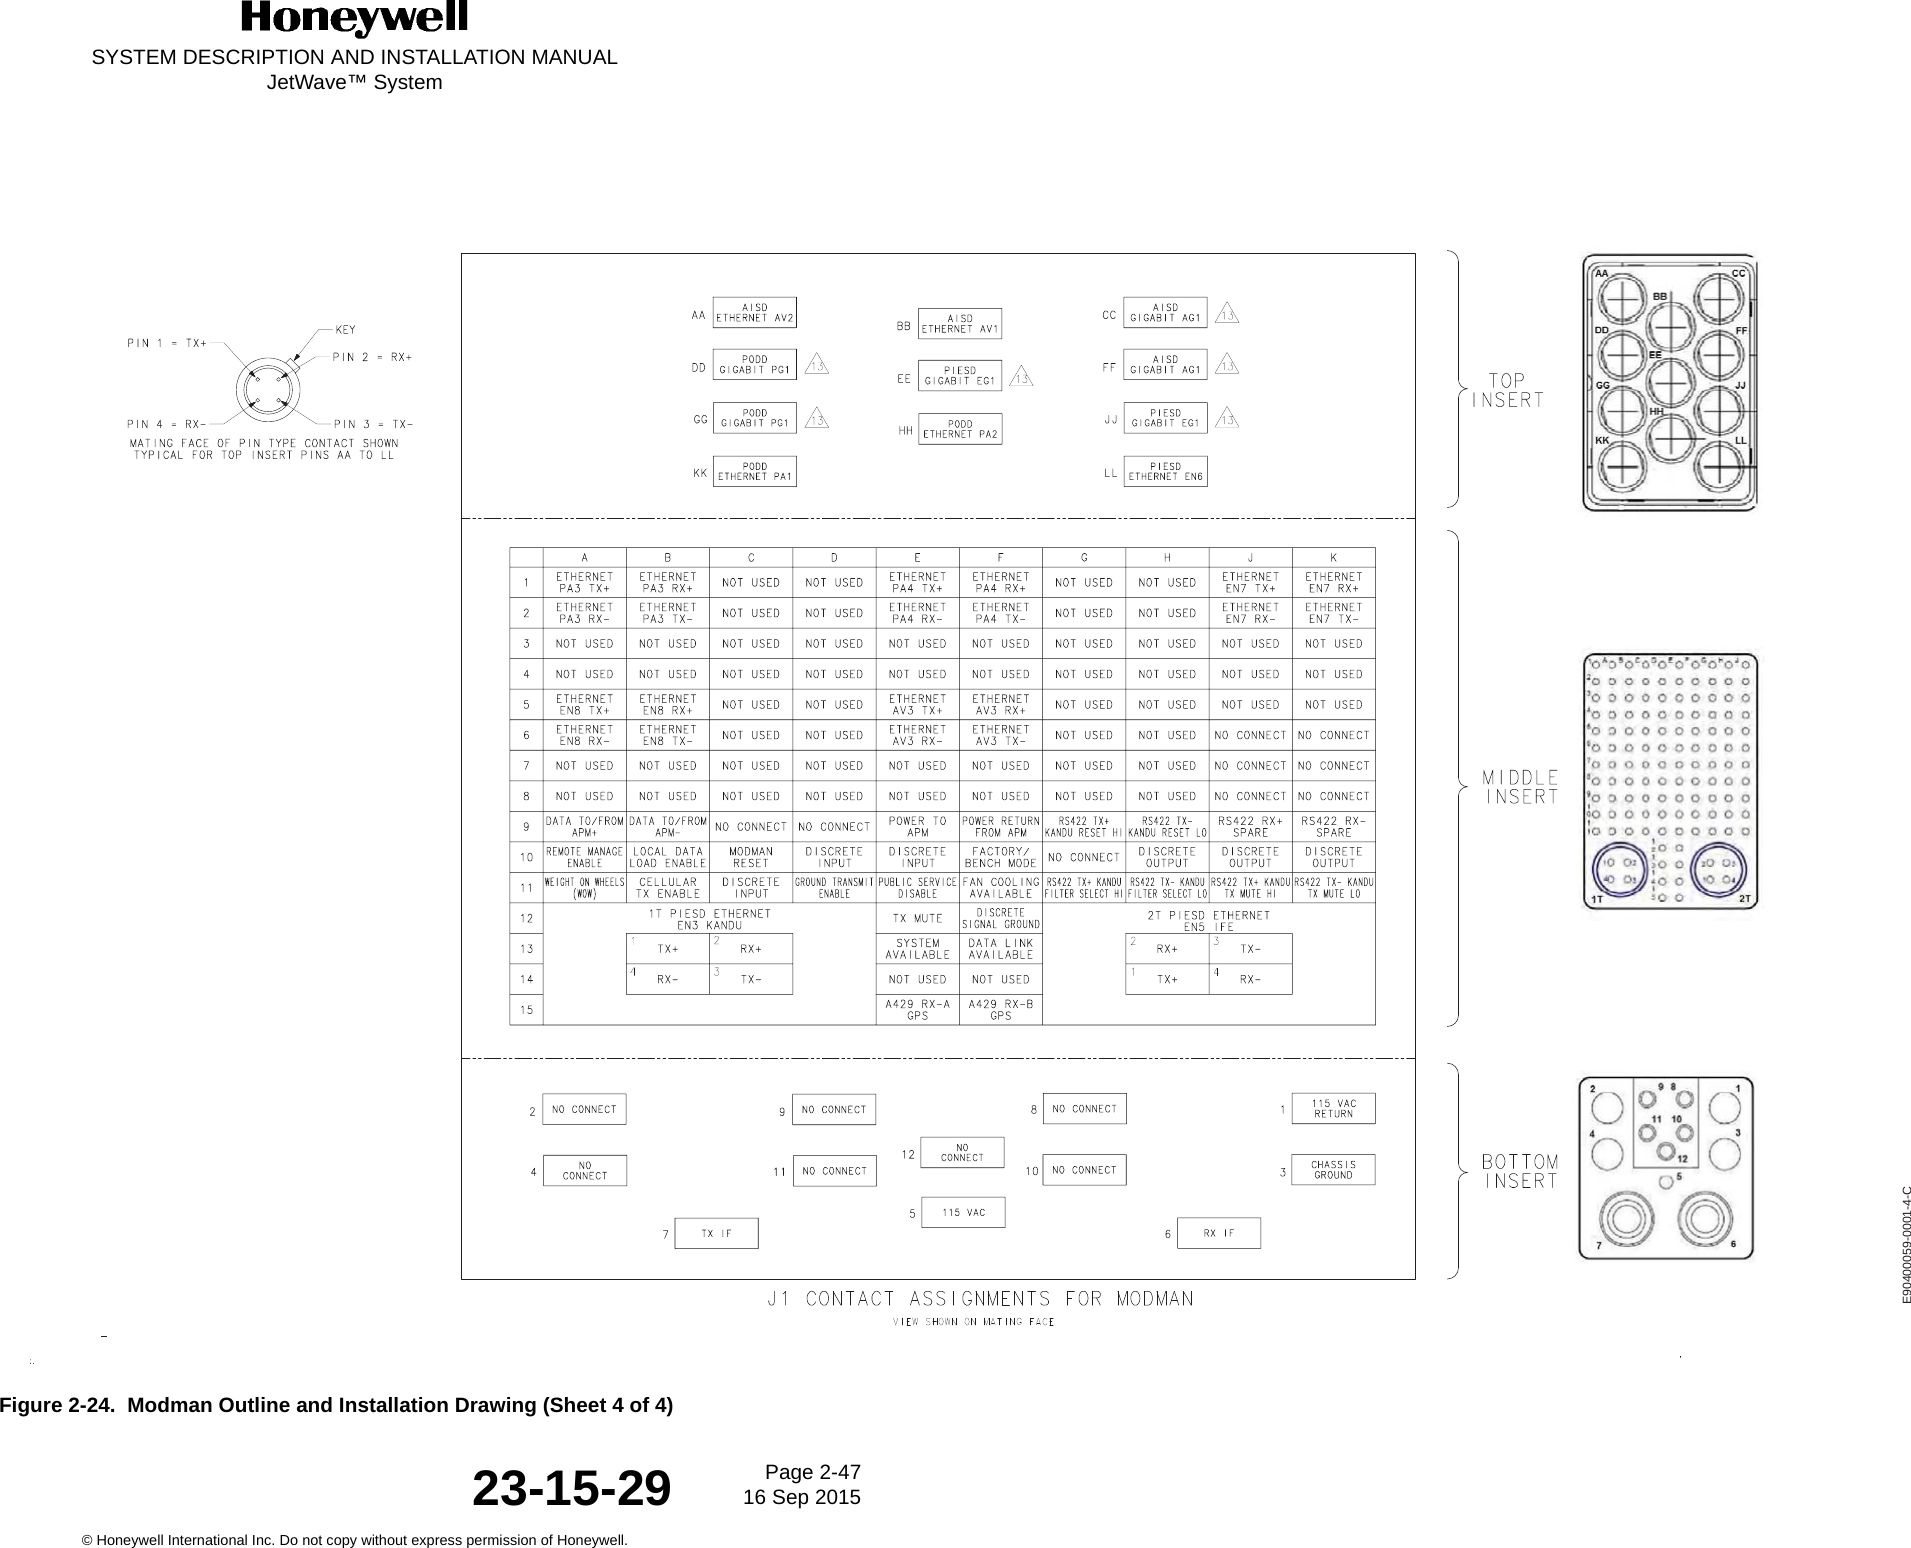
>
Manual part1
Contents
1.
Manual
2.
Manual part1
3.
Manual part2
4.
Manual part3
Manual part1
Navigation menu
Upload a User Manual
Namespaces
Wiki Guide
HTML
PDF
Info
Views
User Manual
Discussion / Help
Navigation


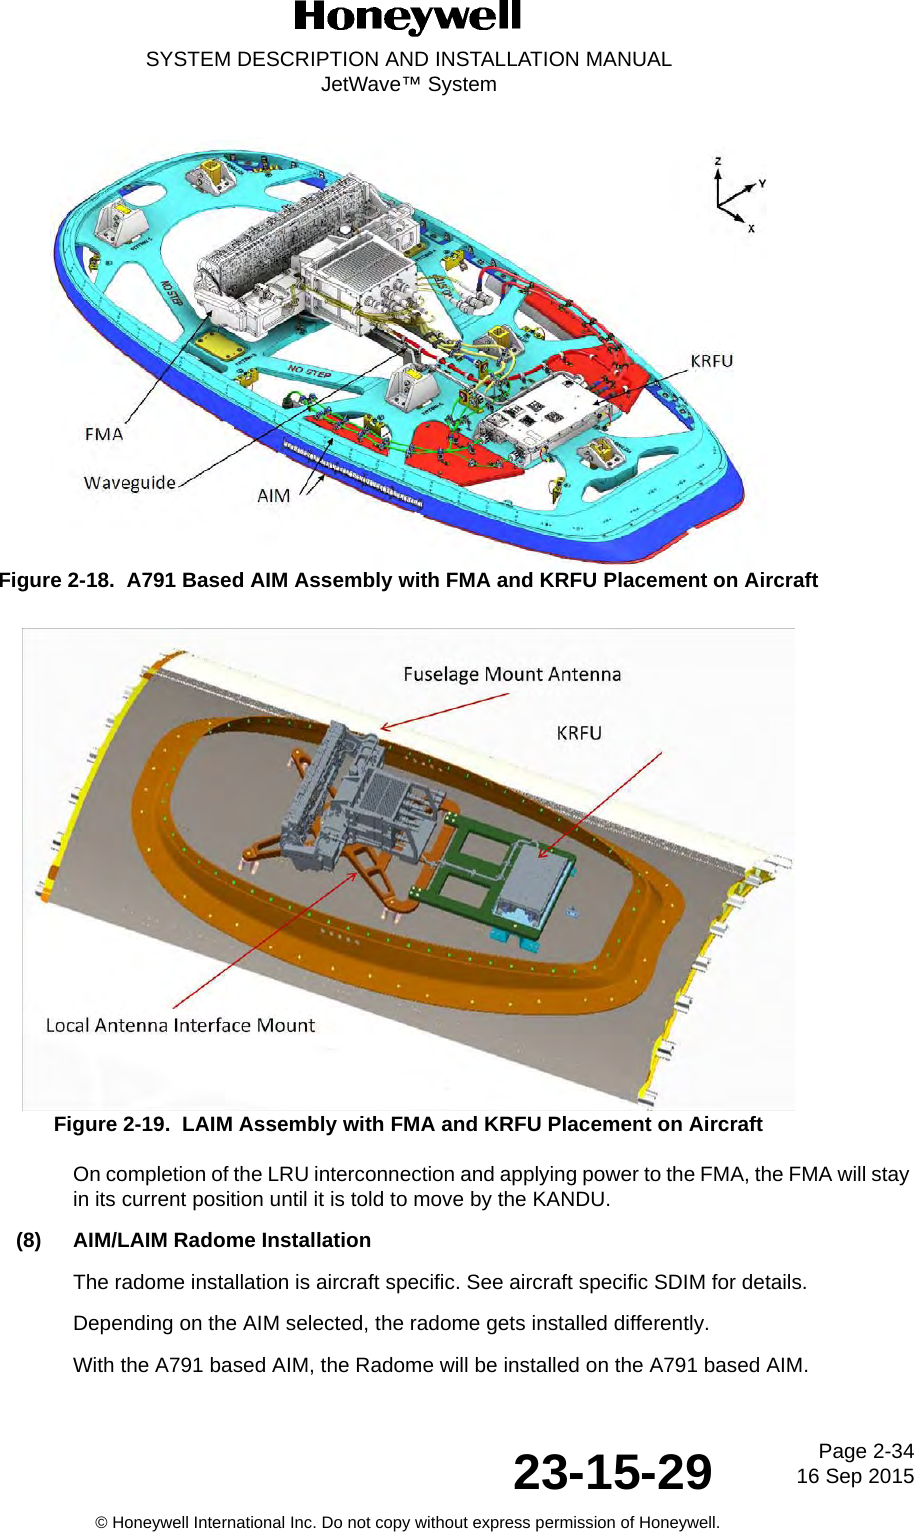
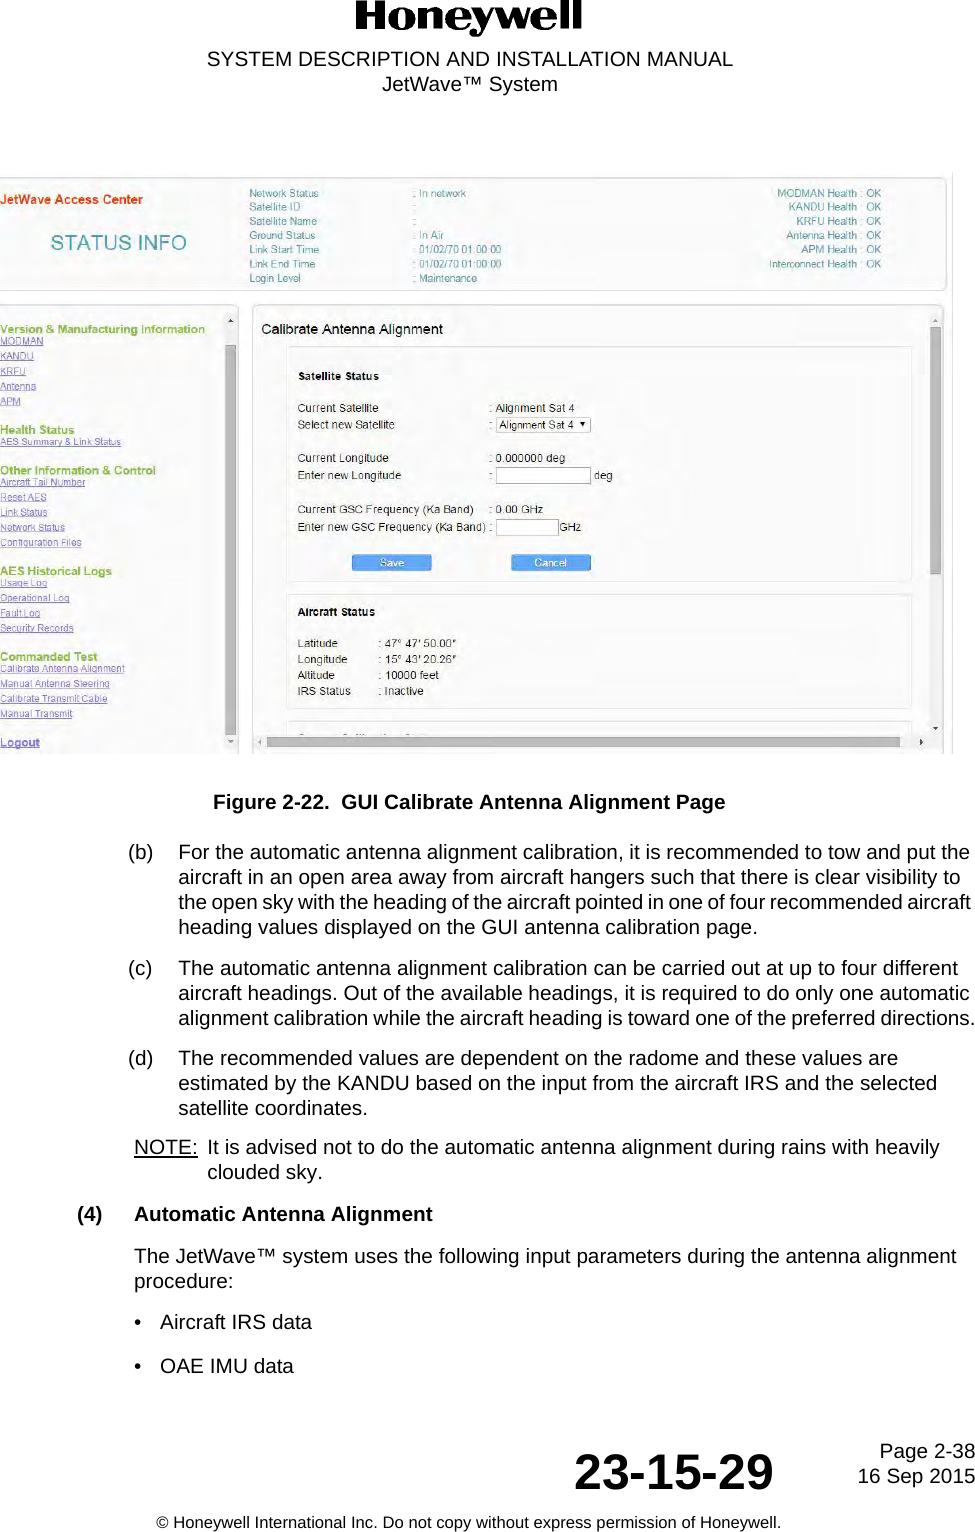
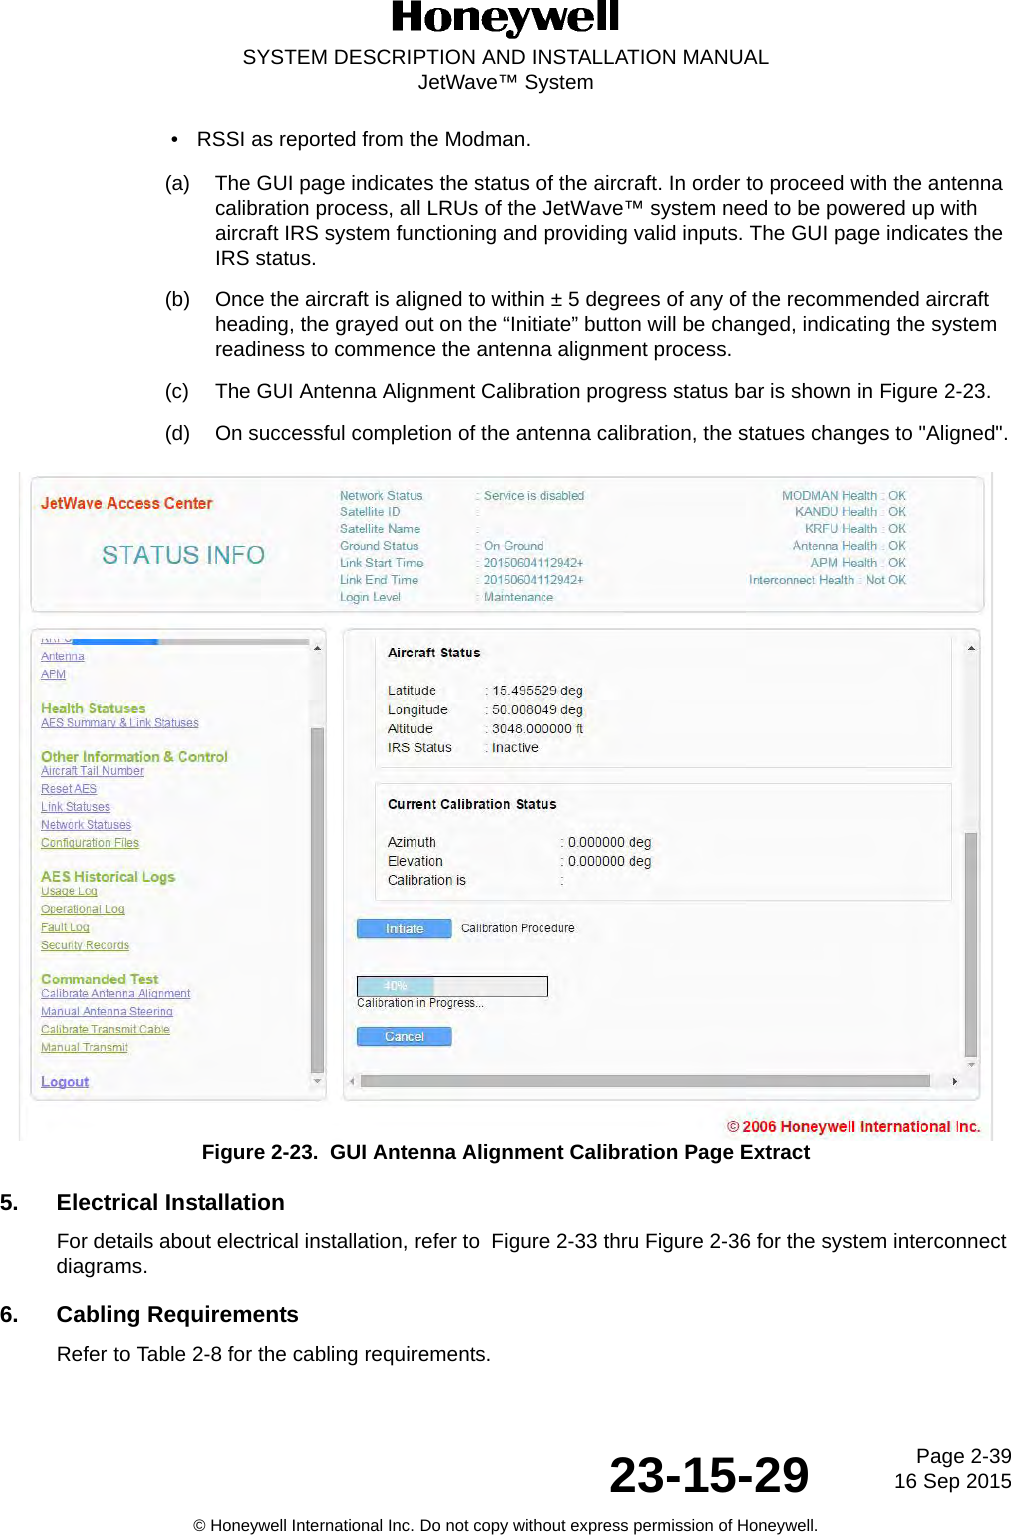
![Page 2-2 16 Sep 201523-15-29SYSTEM DESCRIPTION AND INSTALLATION MANUALJetWave™ System© Honeywell International Inc. Do not copy without express permission of Honeywell.A. Testing and Commissioning Process with Restrictions(1) The JetWave™ system under normal operating conditions mutes and disables the modem when the Air/Ground status in "On Ground". (2) The Air/Ground status will be set to "On Ground" when one of the conditions that follow are met:• Weight on wheels discrete is enabled in the system configuration and is indicating "Weight on Wheels”.•The ground speed is less than 50 knots. • The JetWave™ system is configured to receive ground speed labels on an ARINC 429 bus but the ground speed readings have not been available for longer than 20 seconds.(3) Ground transmission can be enabled by asserting the ground transmit discrete of JetWave™ system.(a) The ground operation depends on location and country of aircraft registration.(b) The reason for restrictions on transmission from the current aircraft location can be accessed through the GUI Home page under text display “Reasons for Transmission mute”. (4) On completion of JetWave™ LRU installation activities, the AES system needs to be commissioned by associating the installed JetWave™ AES system to a specific SSPP. This SSPP may correspond to an actual VAR but may also point to a test VAR in case the actual VAR or SSPP is not known at the time the terminal integration is finalised. The operational life commences once the AES system is commissioned.(5) For the testing and commissioning process, the aircraft must be positioned so to have a clear line of sight to the satellite. (6) To control the transmission of the terminal within certain locations and at different heights, the terminal stores and uses a geographical map. The map indicates regions around the globe where the terminal may legally transmit. The map is provided by Inmarsat and requested by the terminal when it first enters the network. The terminal will retrieve the map file from the Inmarsat server using the FTP protocol over a SVN. The SVN used for the geo restrictions maps shall be [2] NSD Management VLAN.(7) The APM is configured with information pertaining to the aircraft and the terminal installation. The two important aspects of APM configuration with respect to commissioning of the terminal are as follows:• The private authentication key which is used to uniquely identify the logging data transmitted by the aircraft to the regulatory server on the ground.• The aircraft identification “Tail ID”. (8) The Modman houses the ACM. (a) The ACM directly connects and interacts with the JetWave™ NMS. (b) The ACM embeds a private secret key that allows it to be recognized by the NMS as a “Satellite Router”.](https://usermanual.wiki/EMS-Technologies-Canada/JETWAVE.Manual-part1/User-Guide-2844464-Page-52.png)