Ericsson LG Enterprise LIP9071 IP Gigabit Video Phone User Manual Confidential LIP 9071 User guide rev1
Ericsson-LG Enterprise Co., Ltd. IP Gigabit Video Phone Confidential LIP 9071 User guide rev1
UserManual.wiki
>
Ericsson LG Enterprise
>
LIP9071 User Manual
Confidential_LIP-9071 User guide_rev1
Navigation menu
Upload a User Manual
Namespaces
Wiki Guide
HTML
PDF
Info
Views
User Manual
Discussion / Help
Navigation
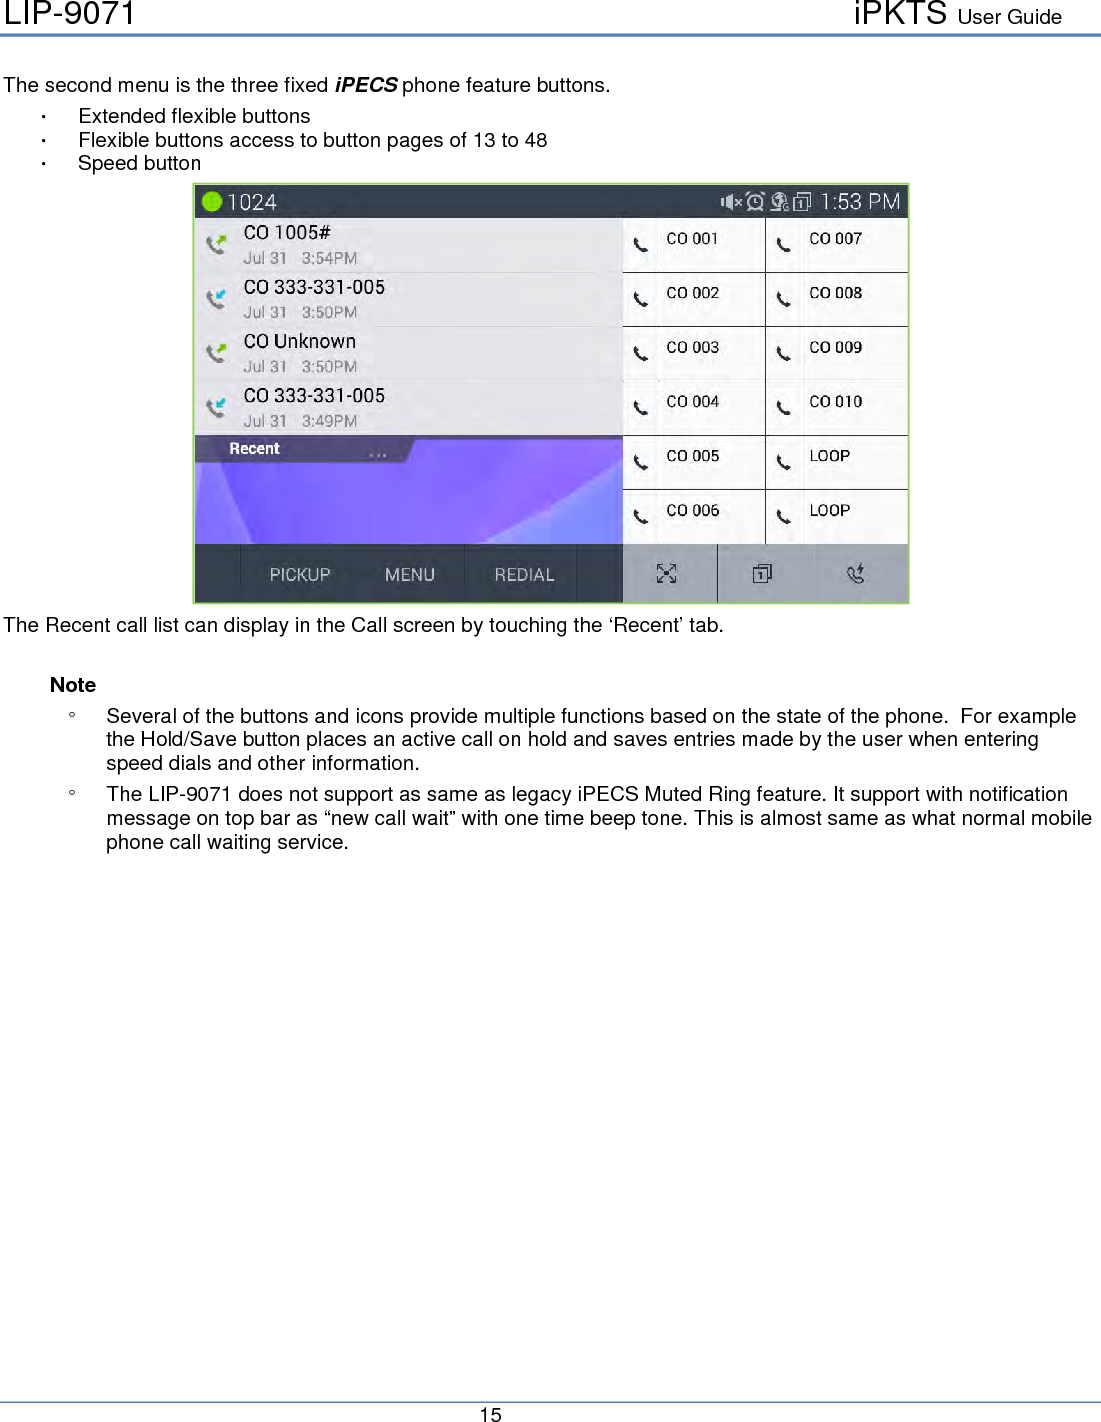
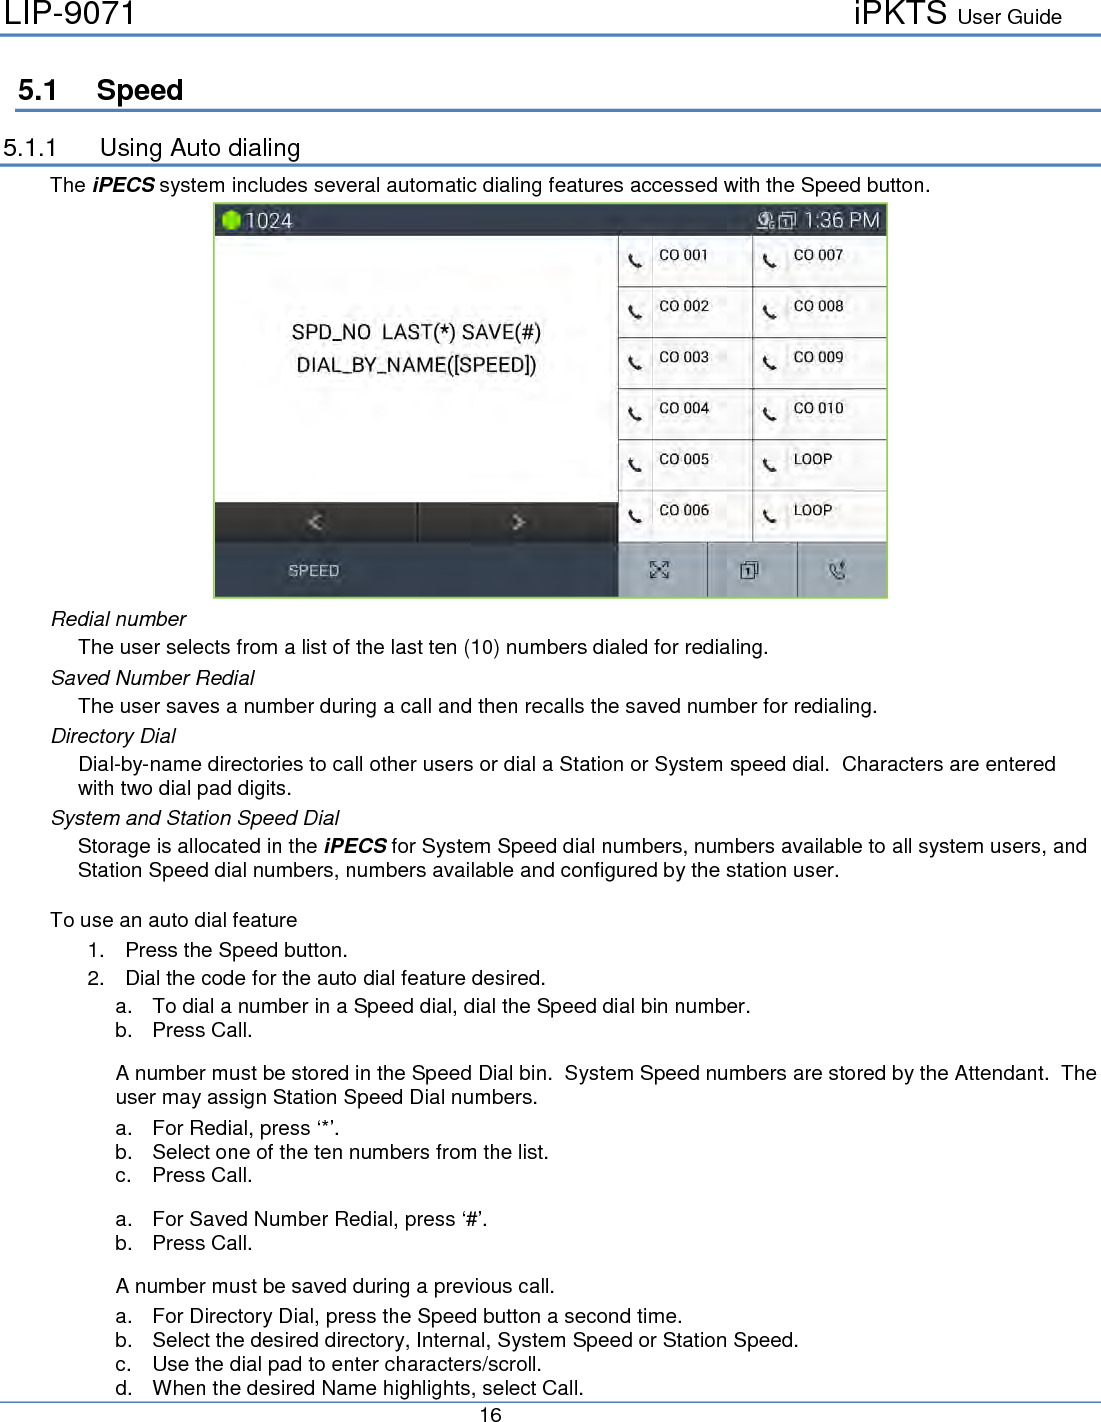
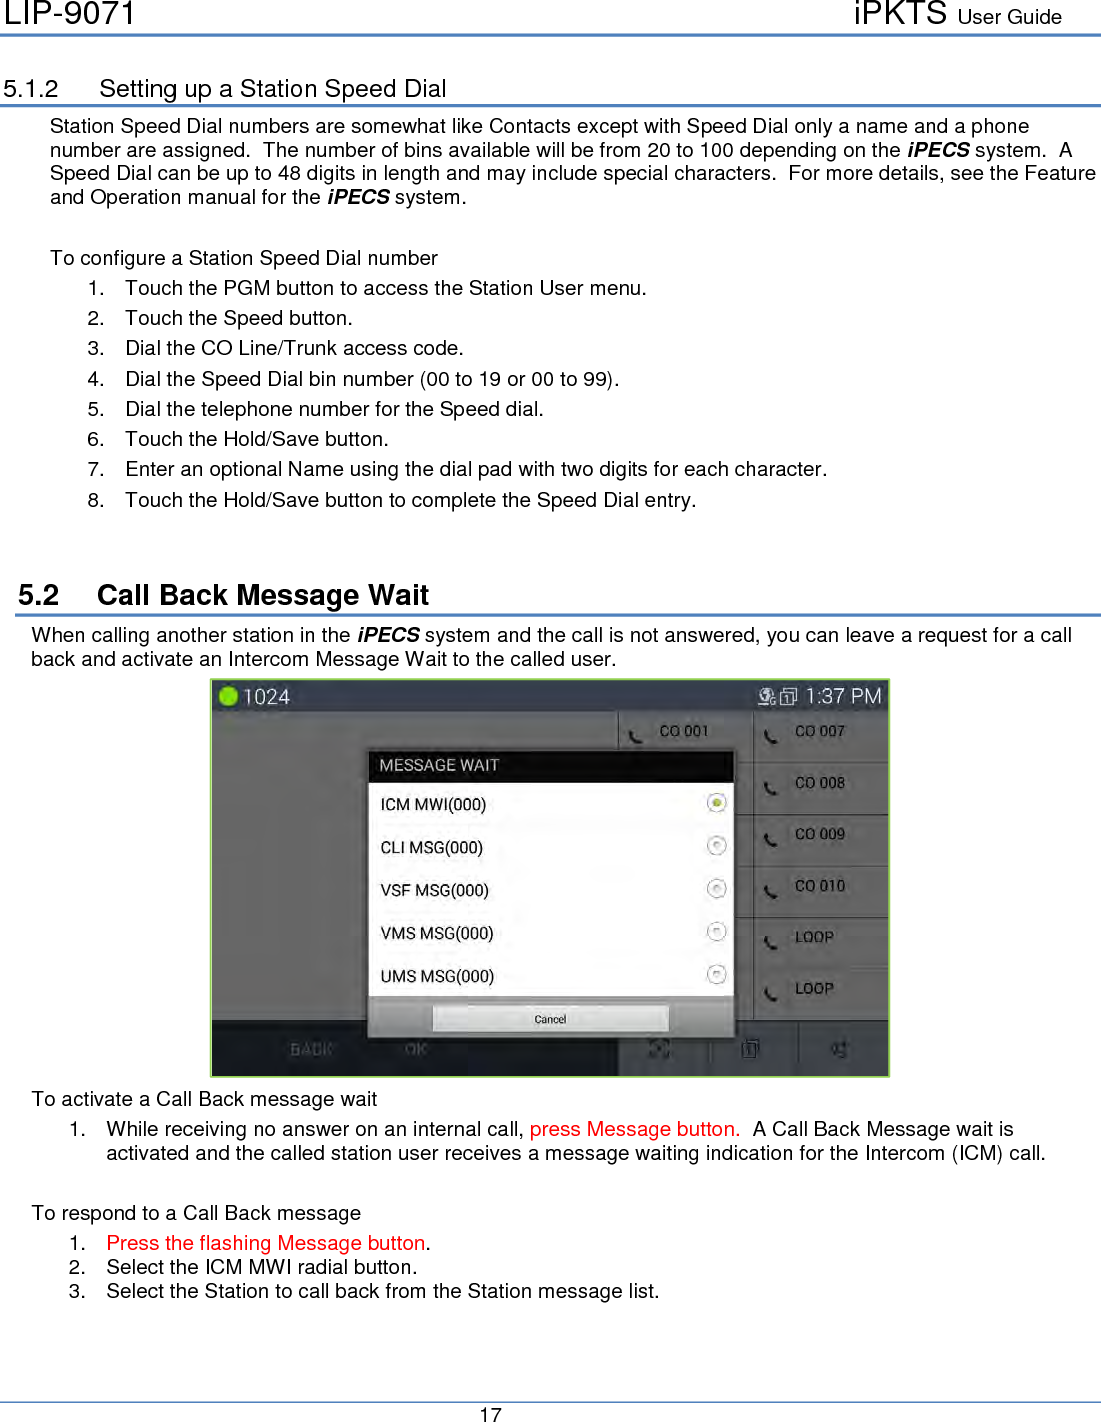
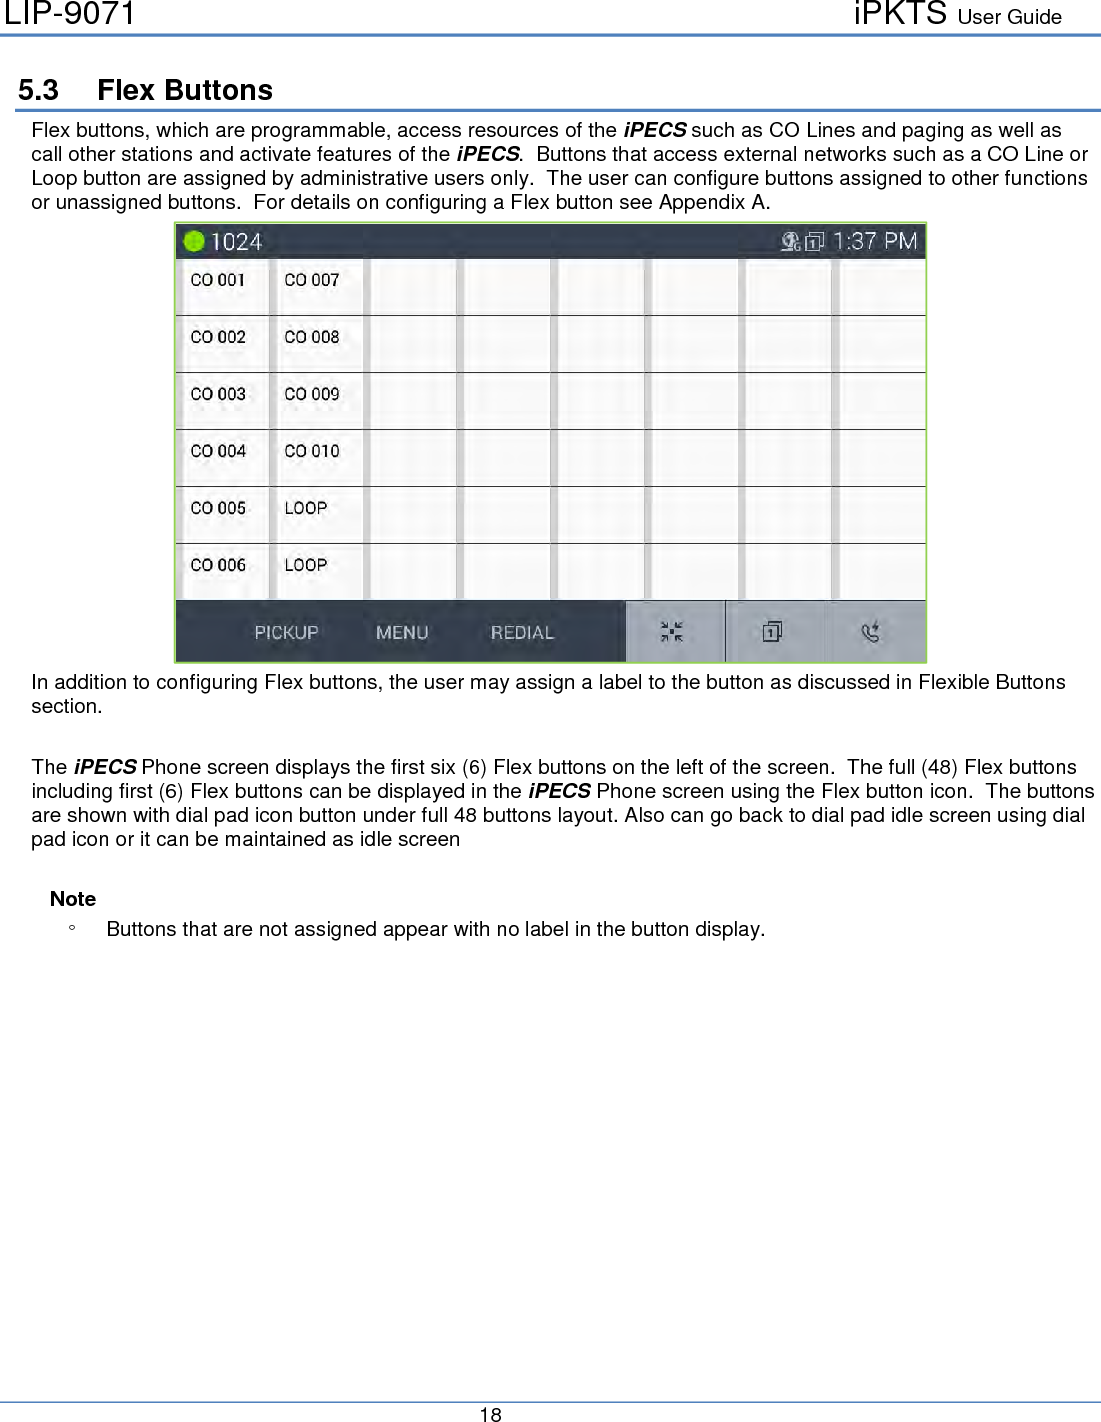
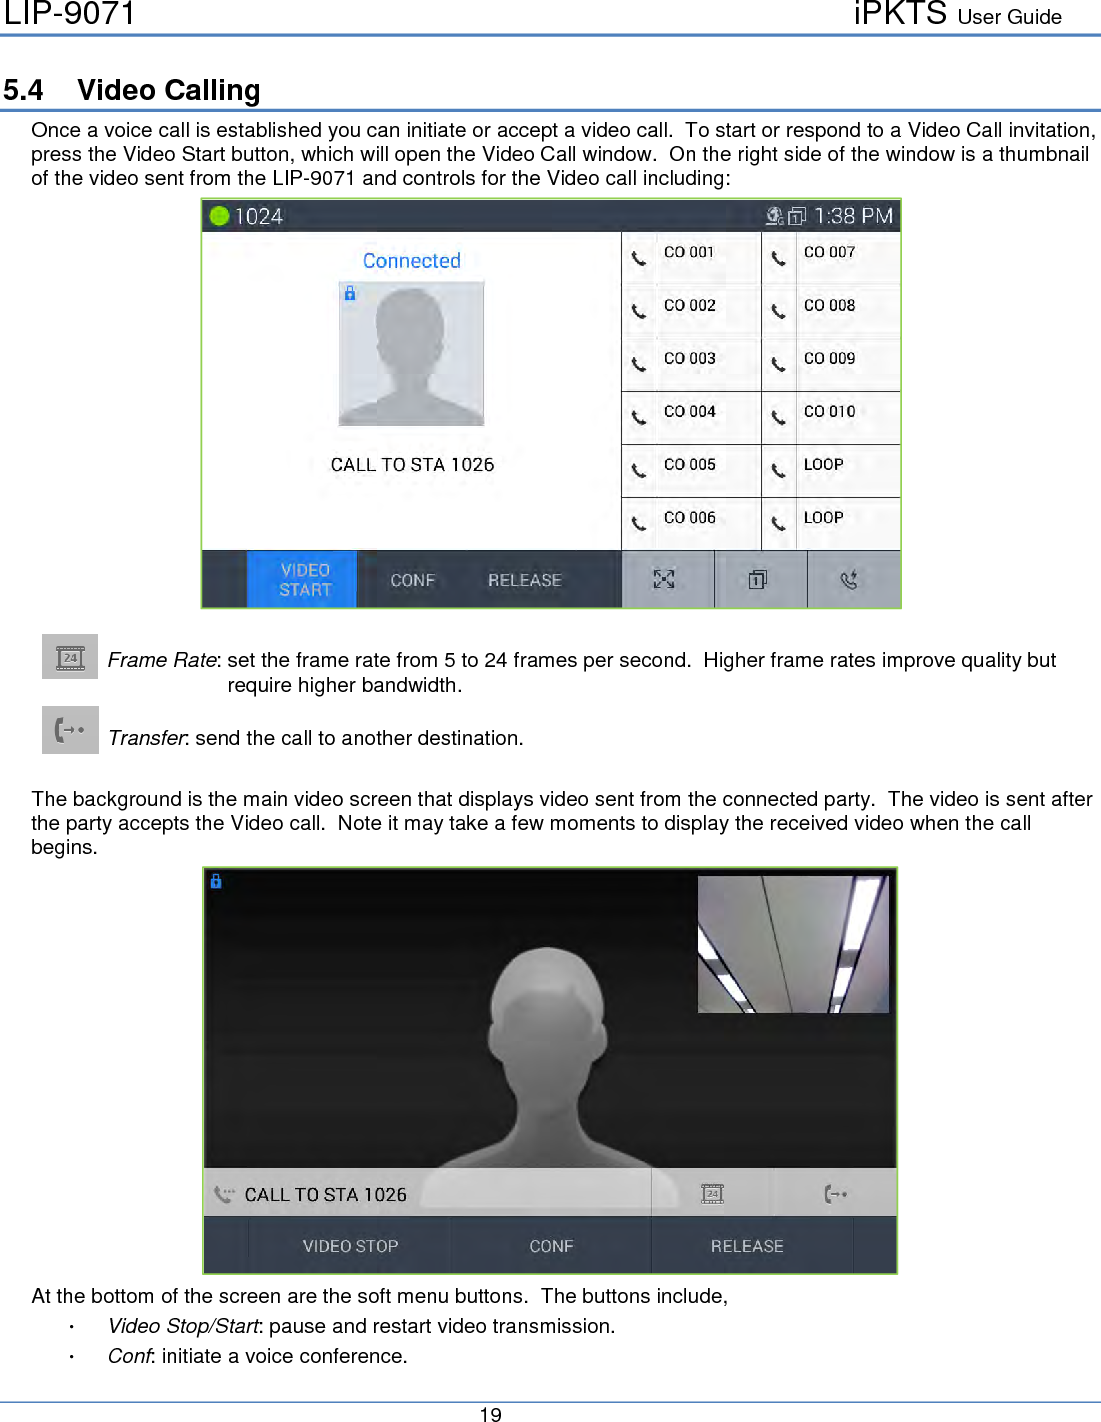
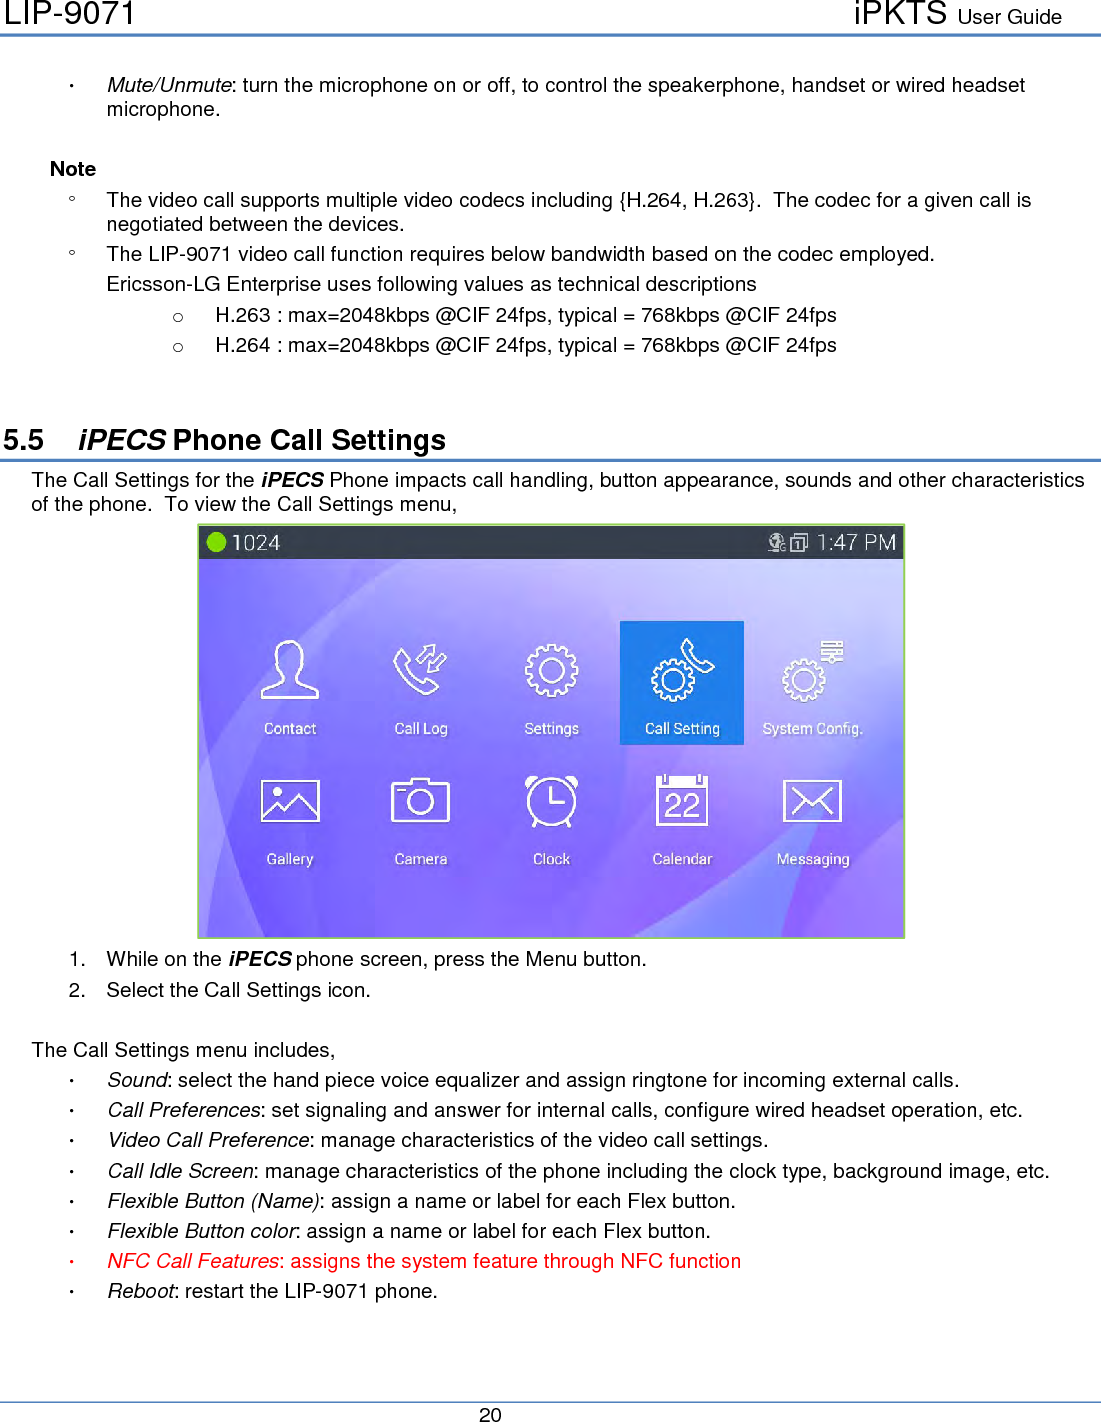
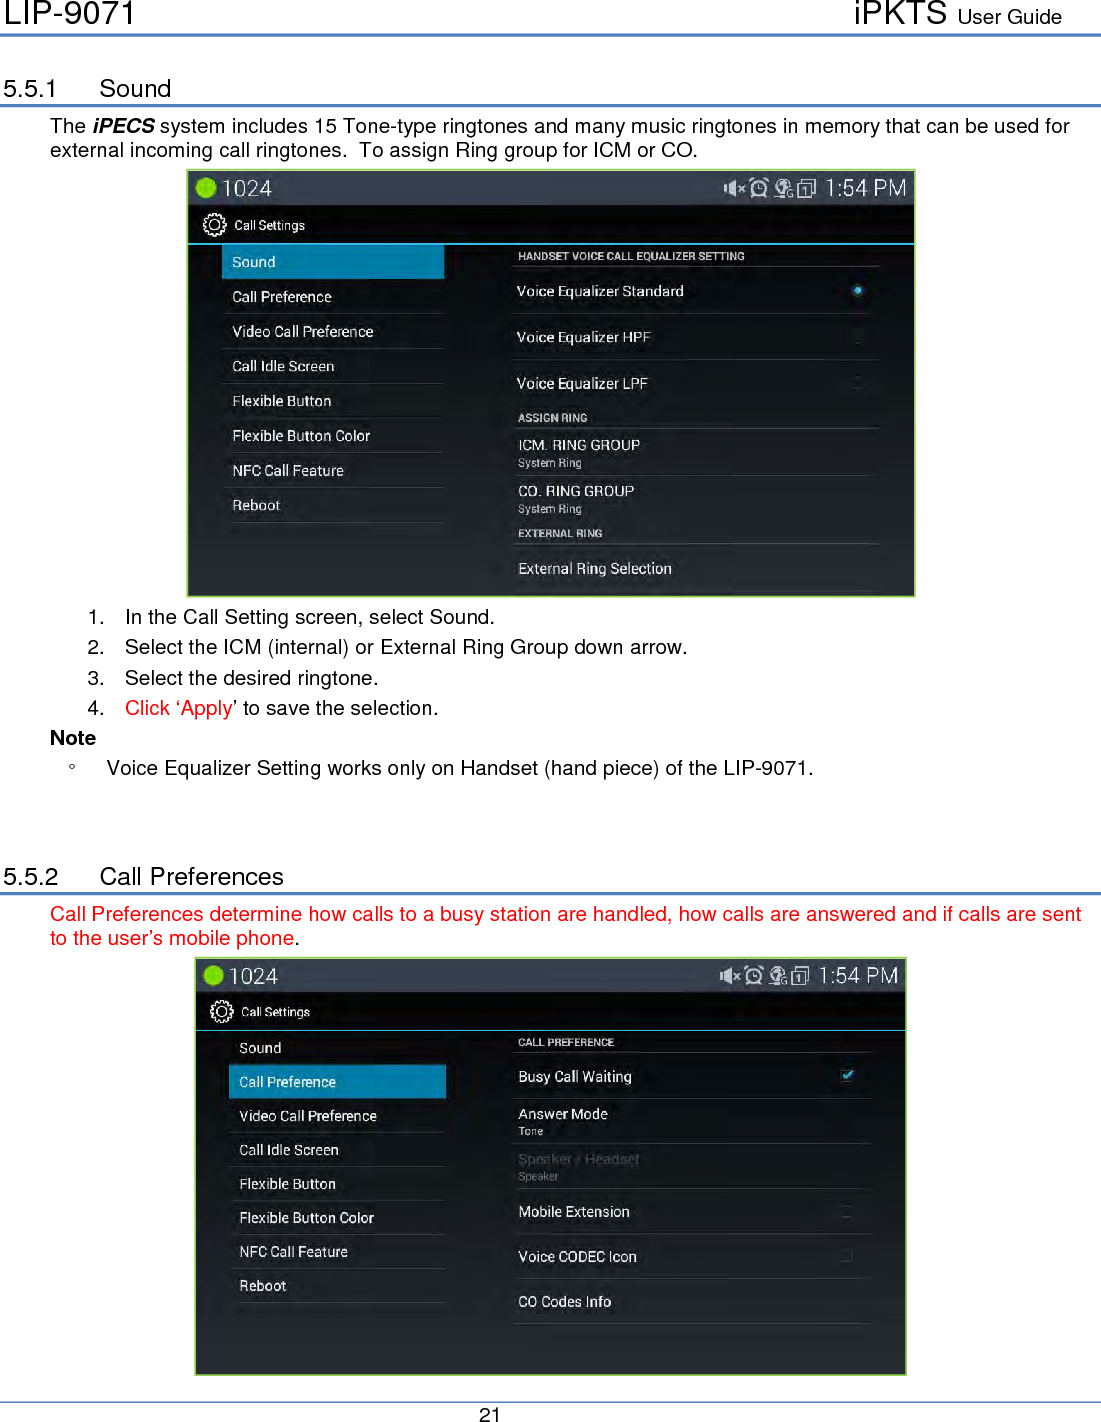
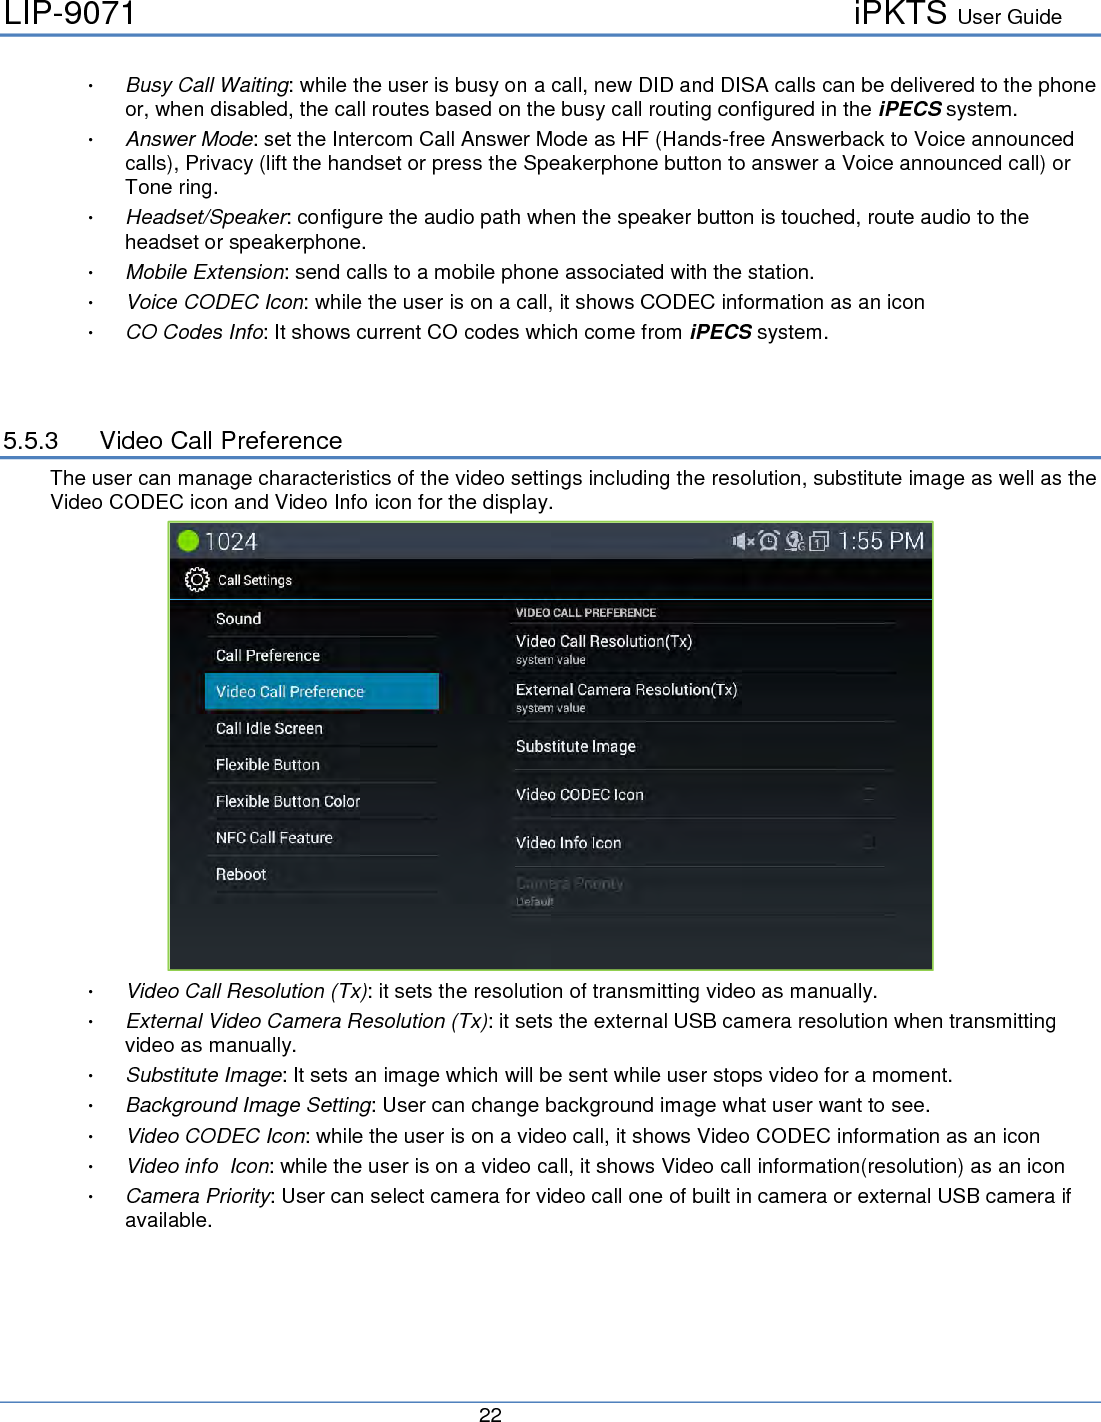
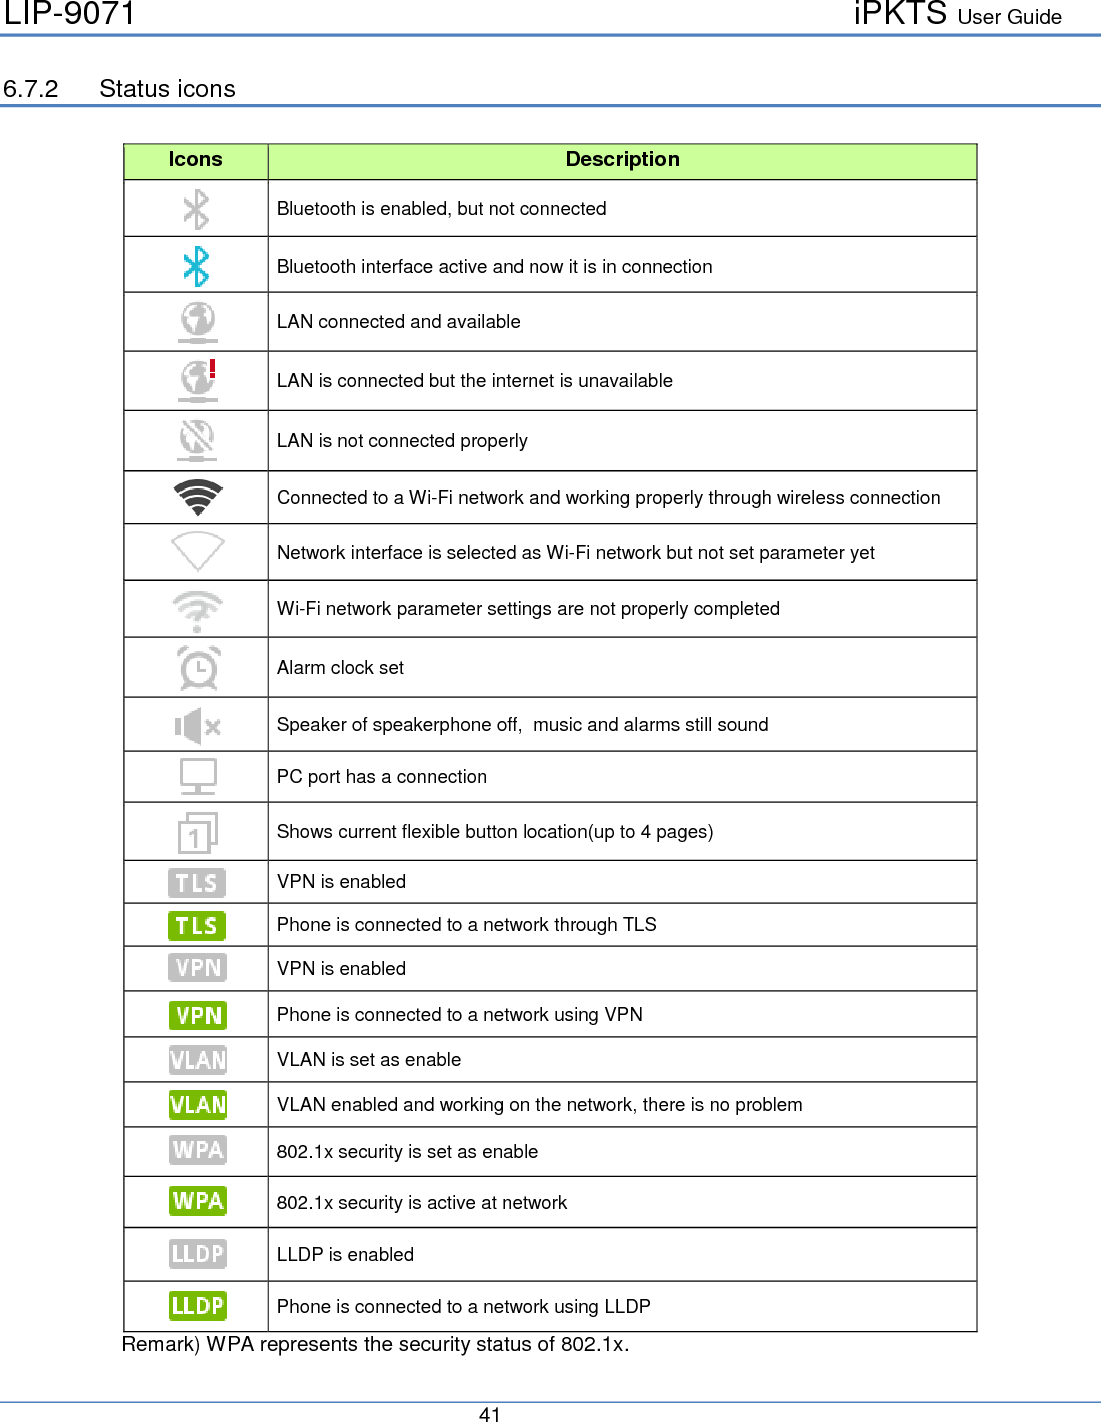
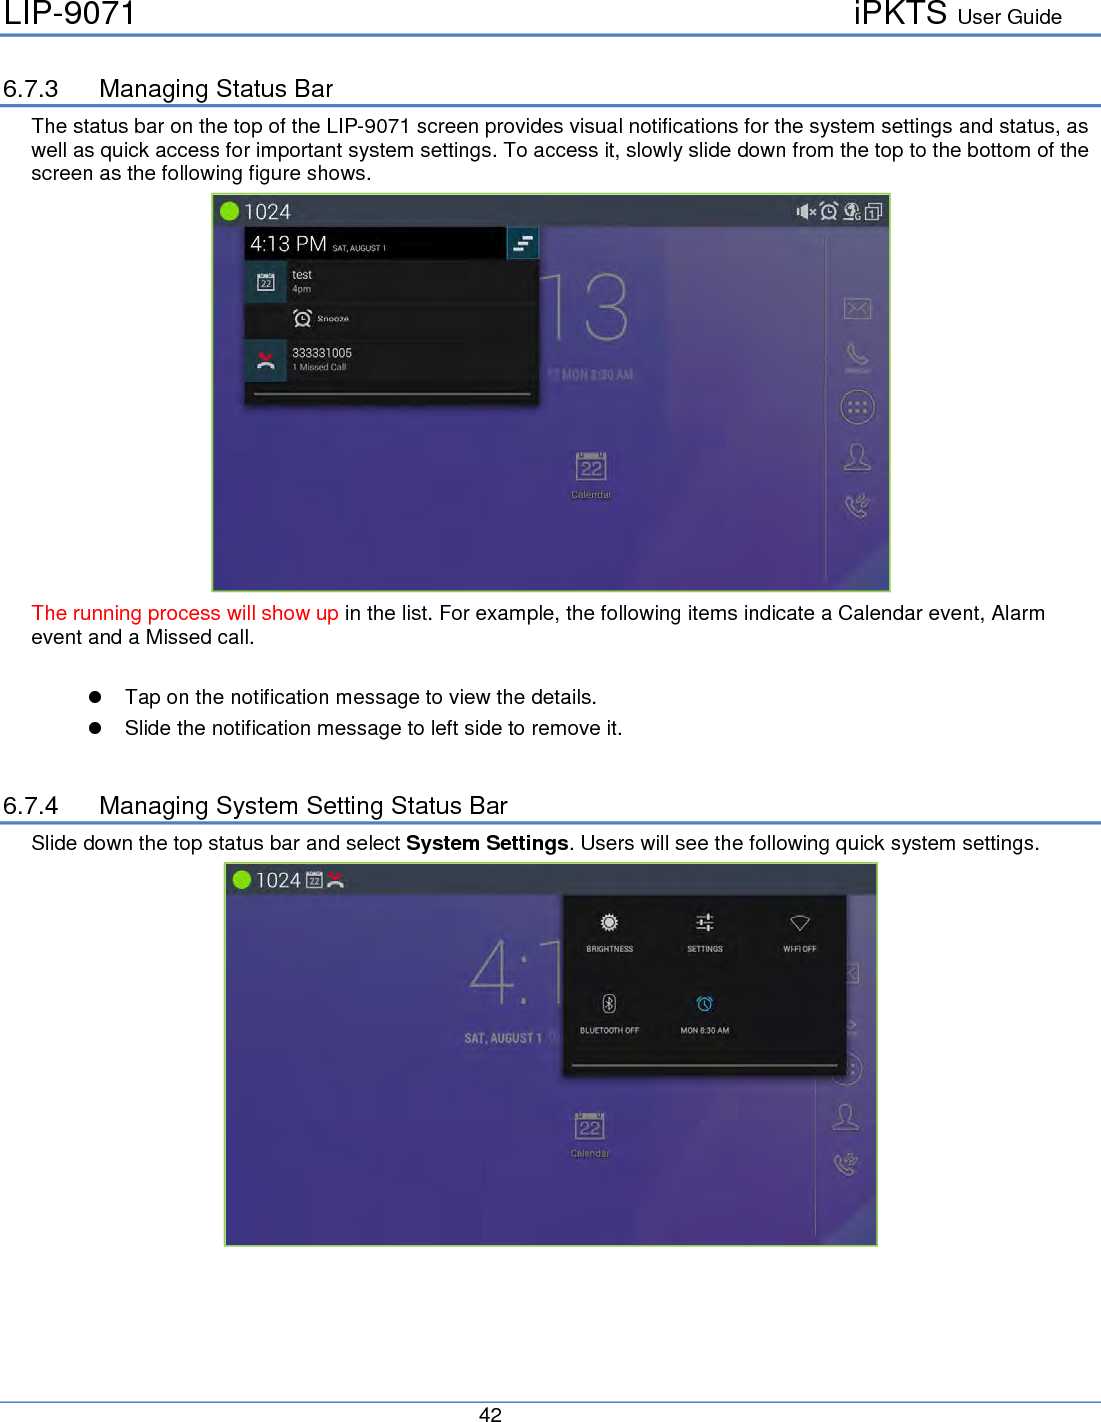
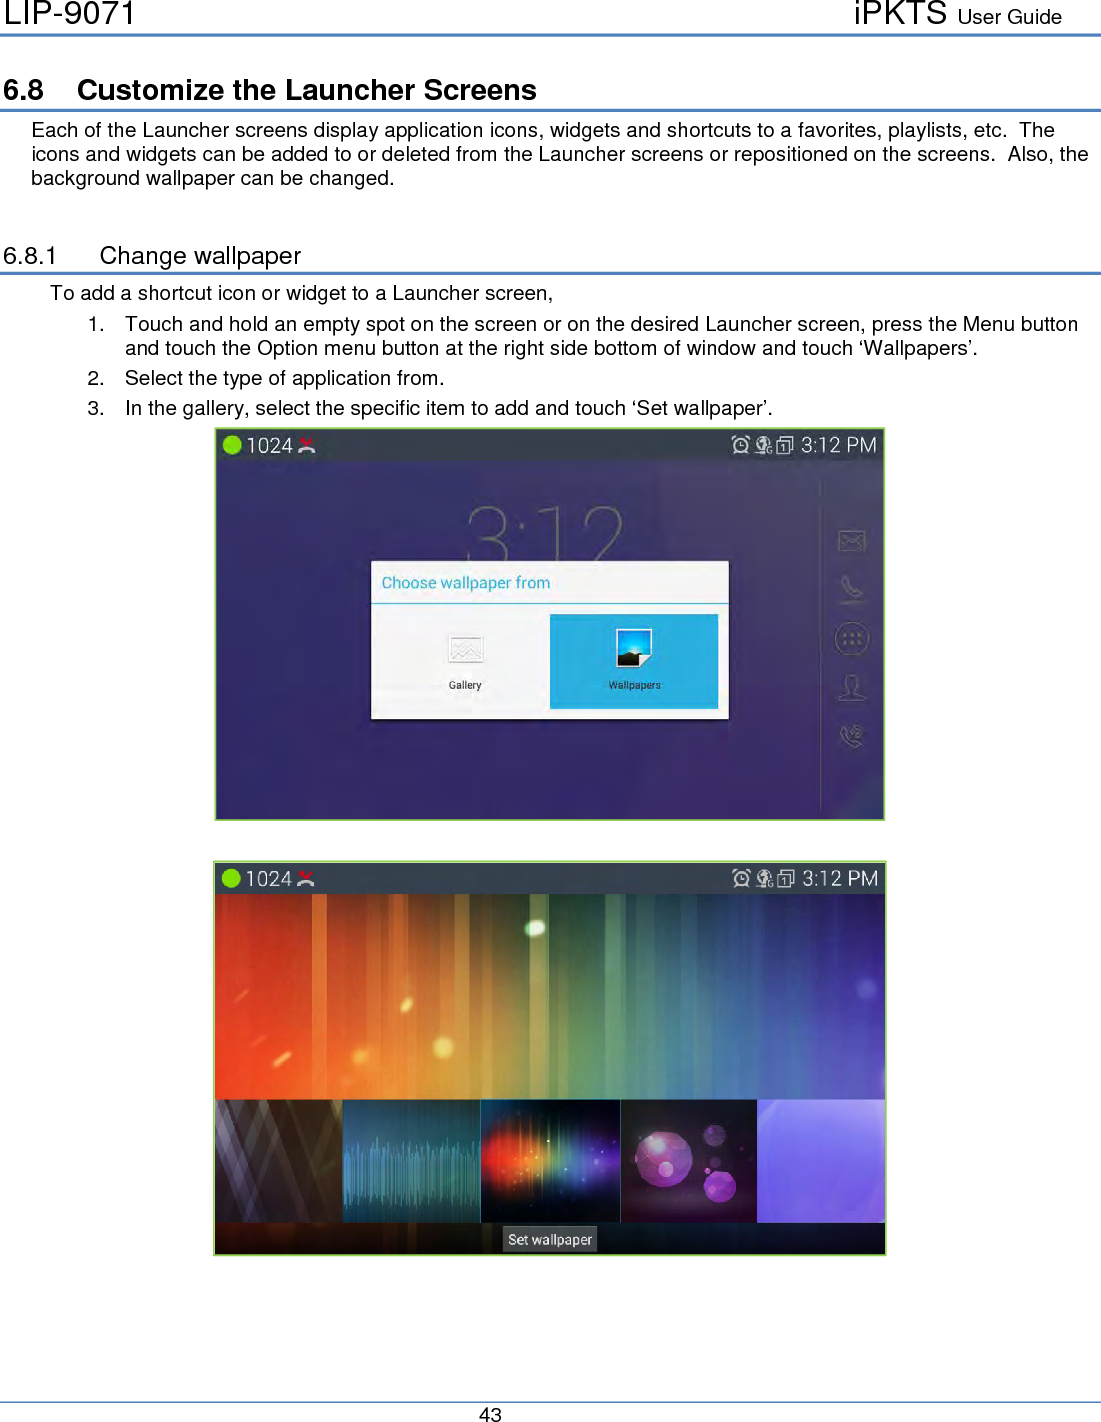
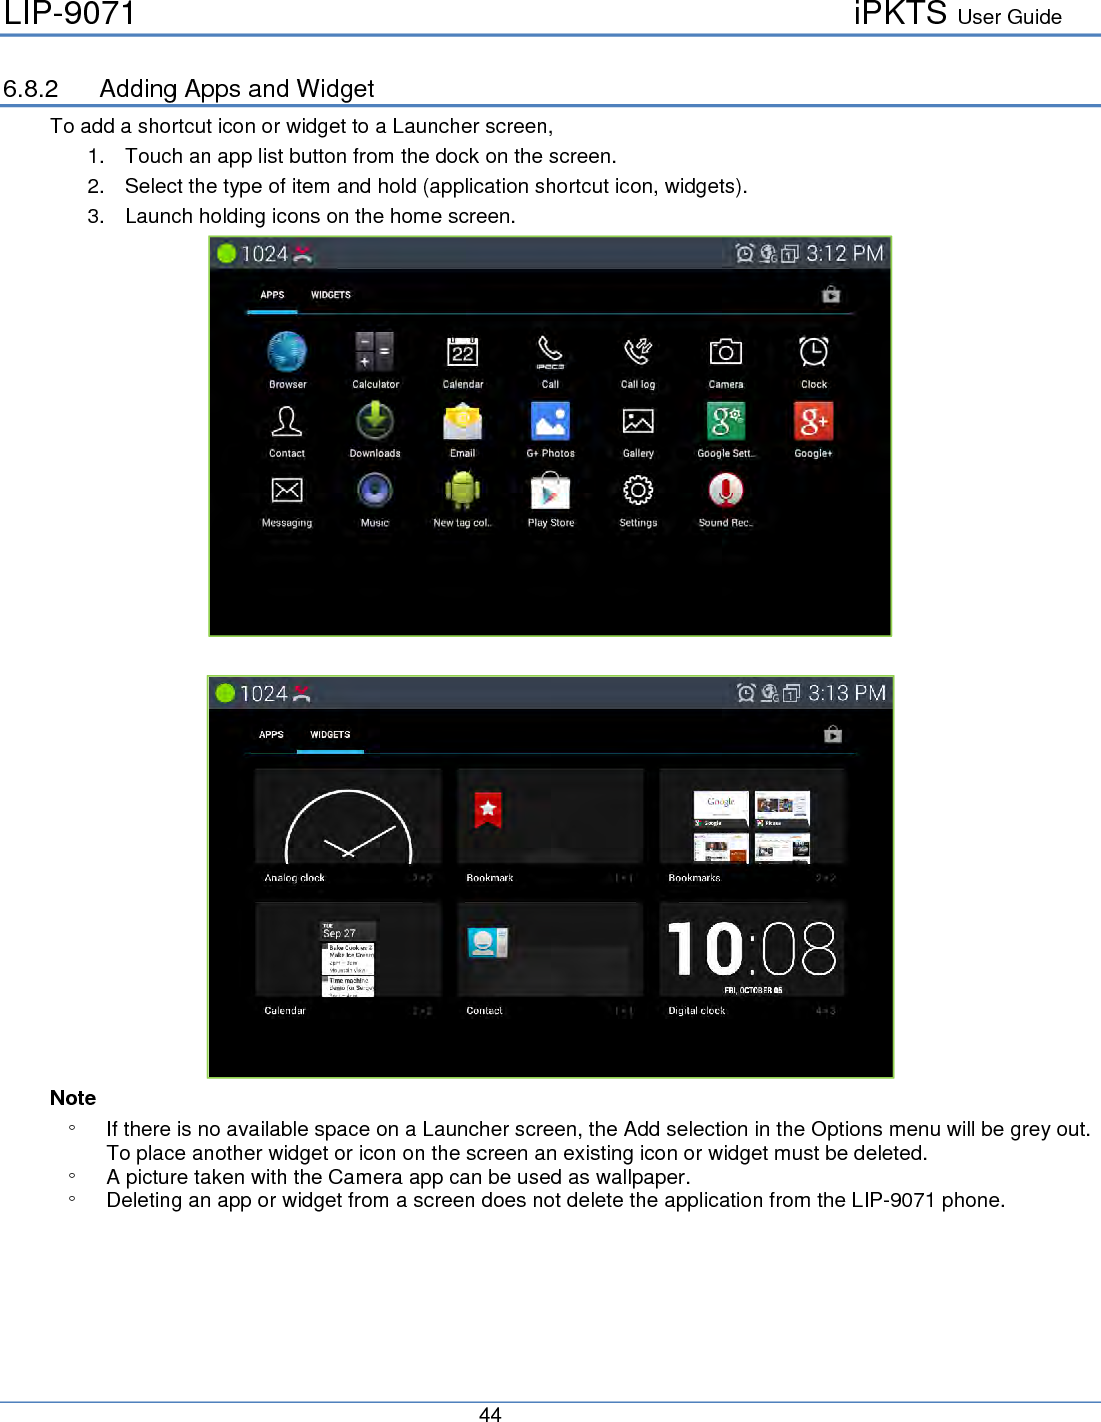
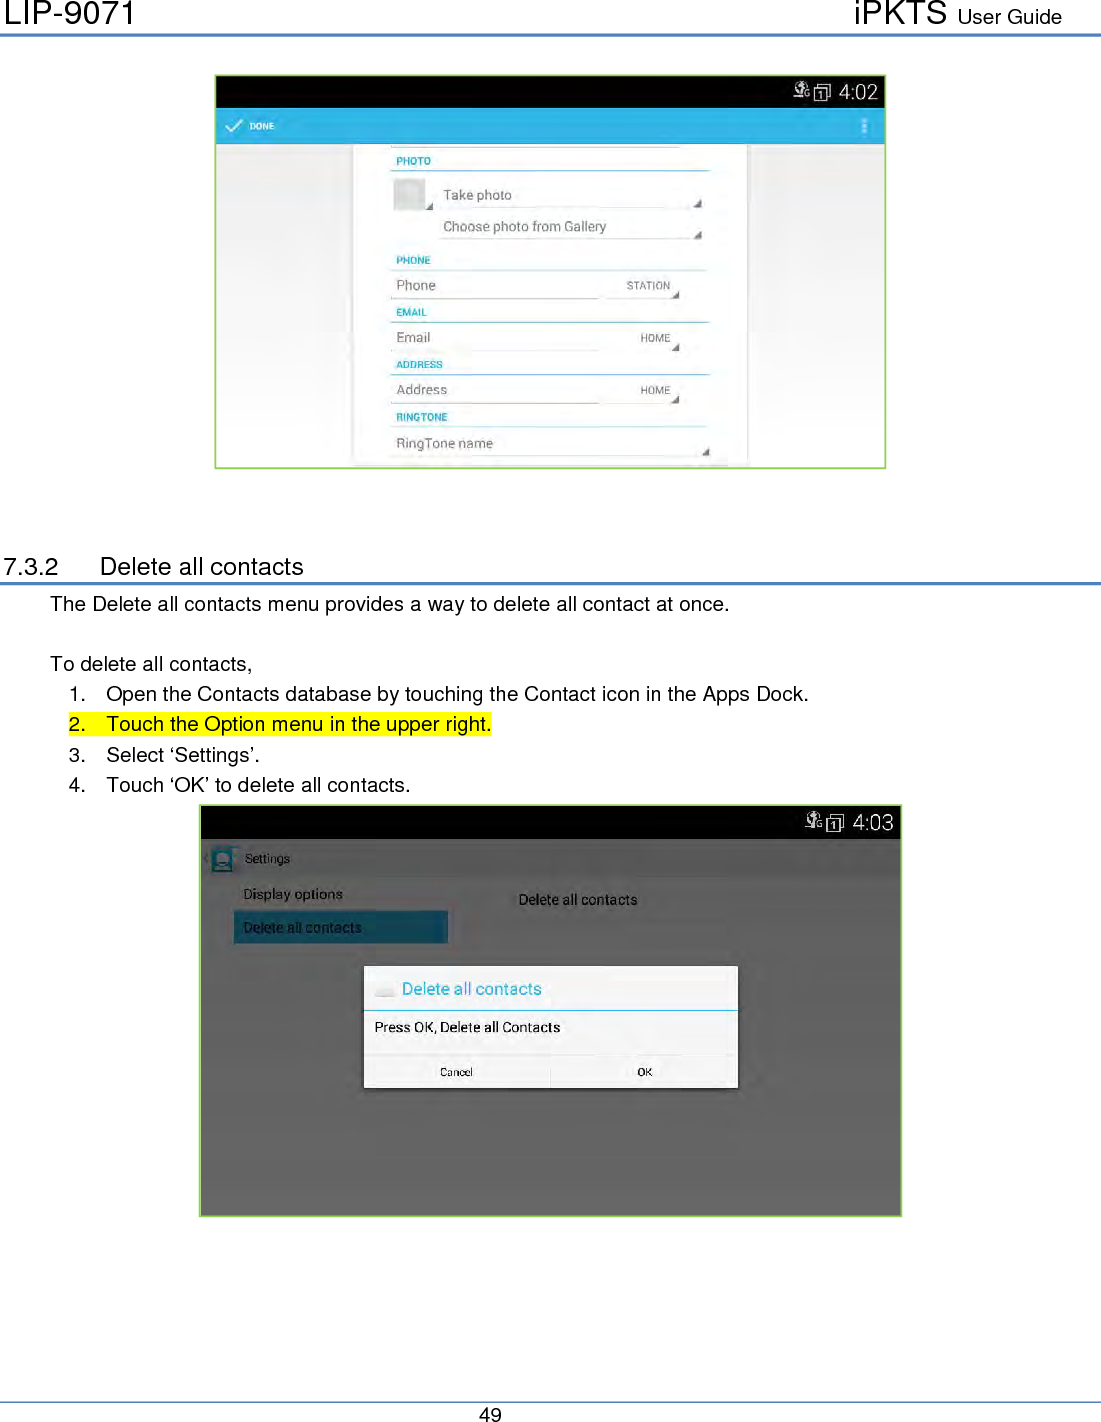
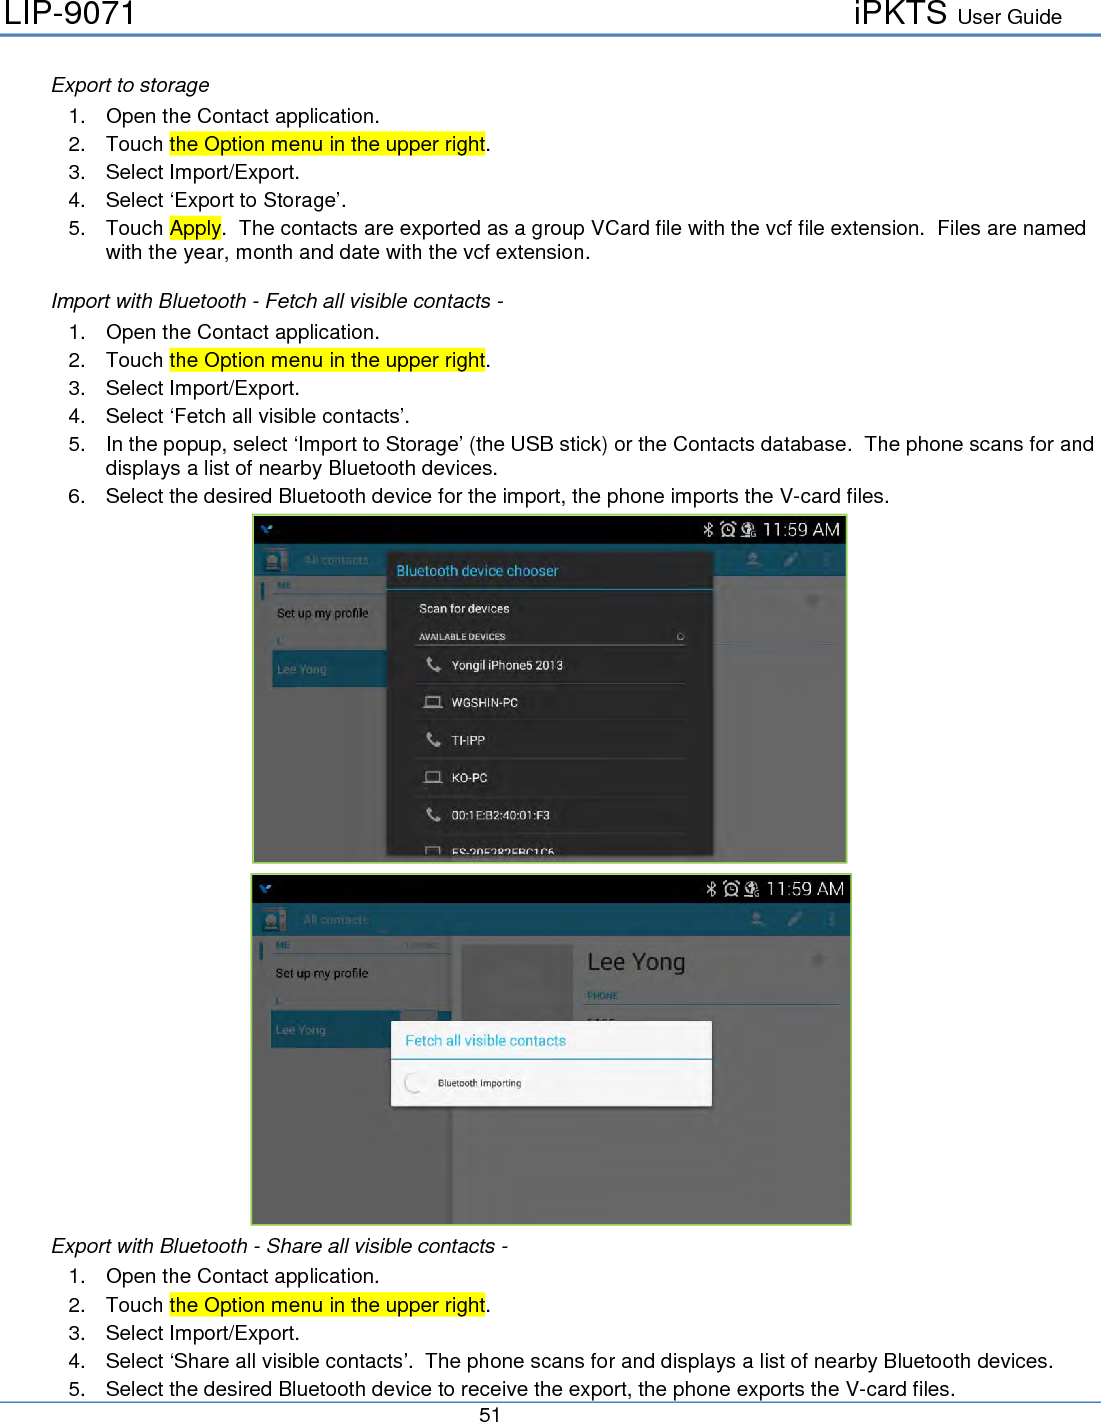
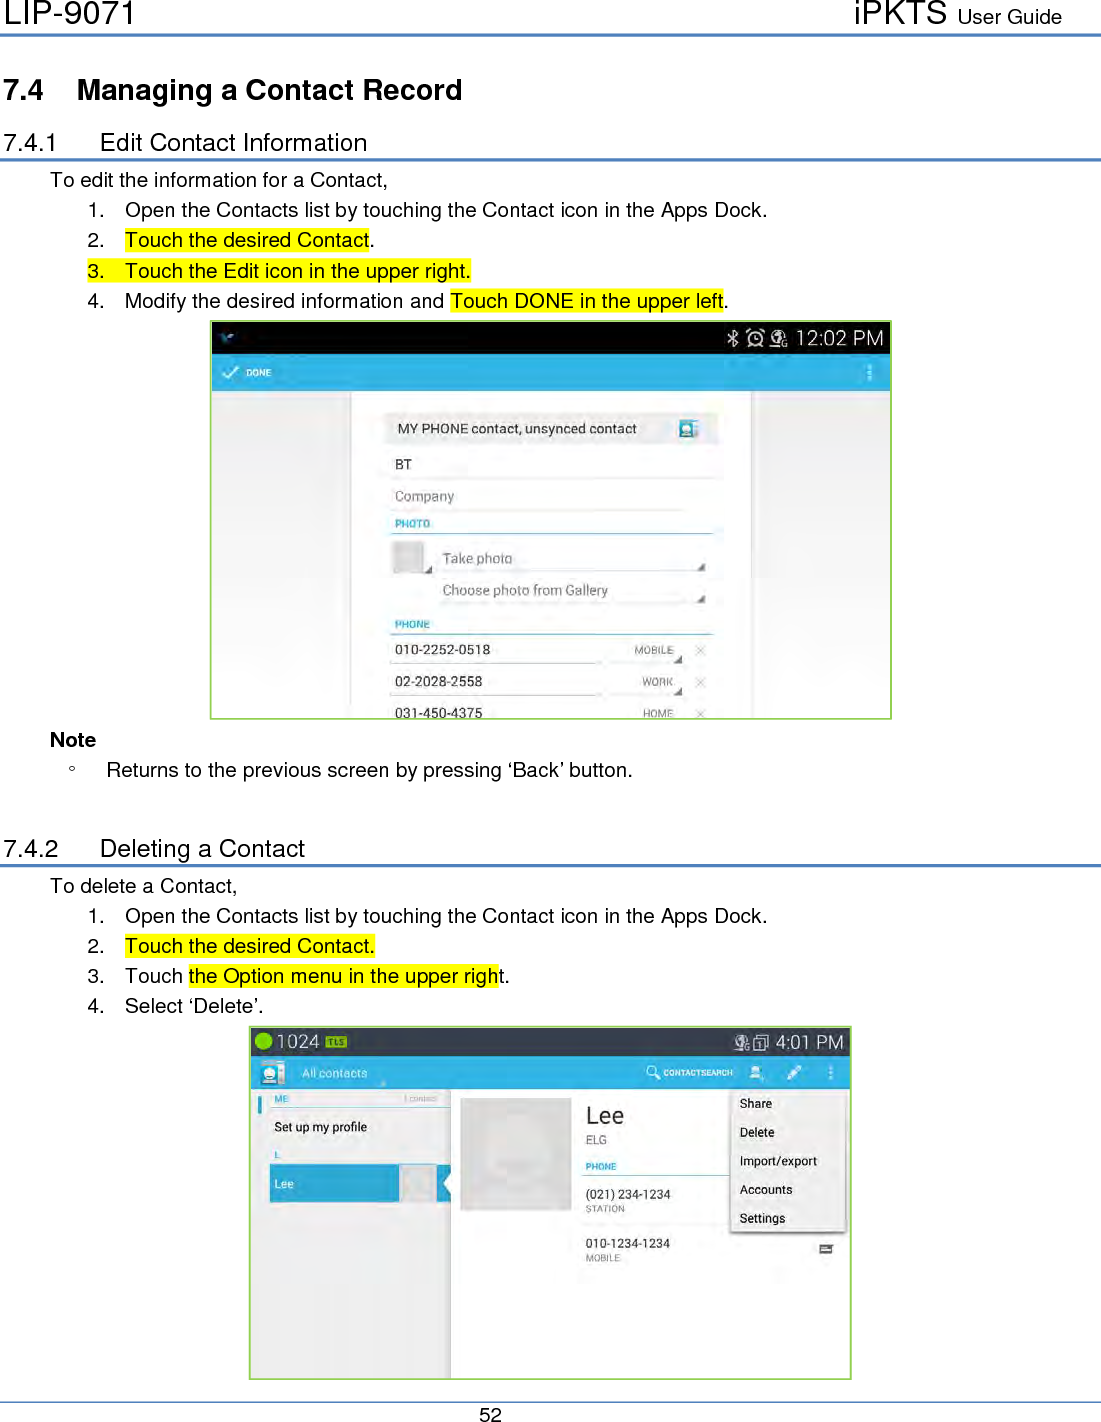
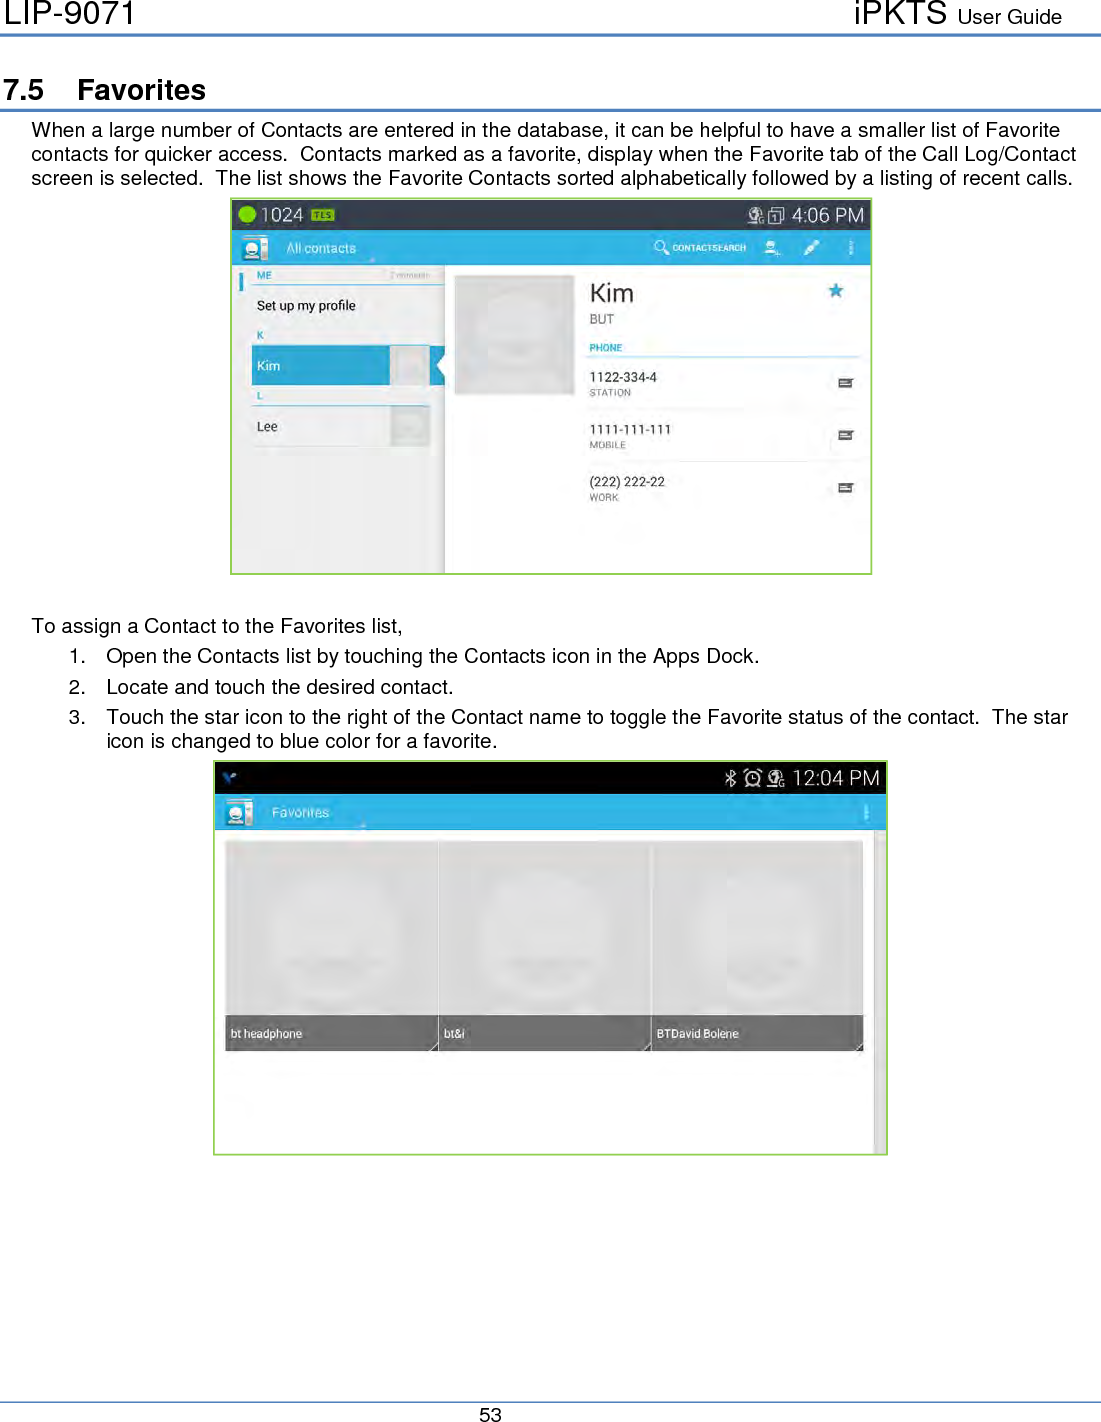
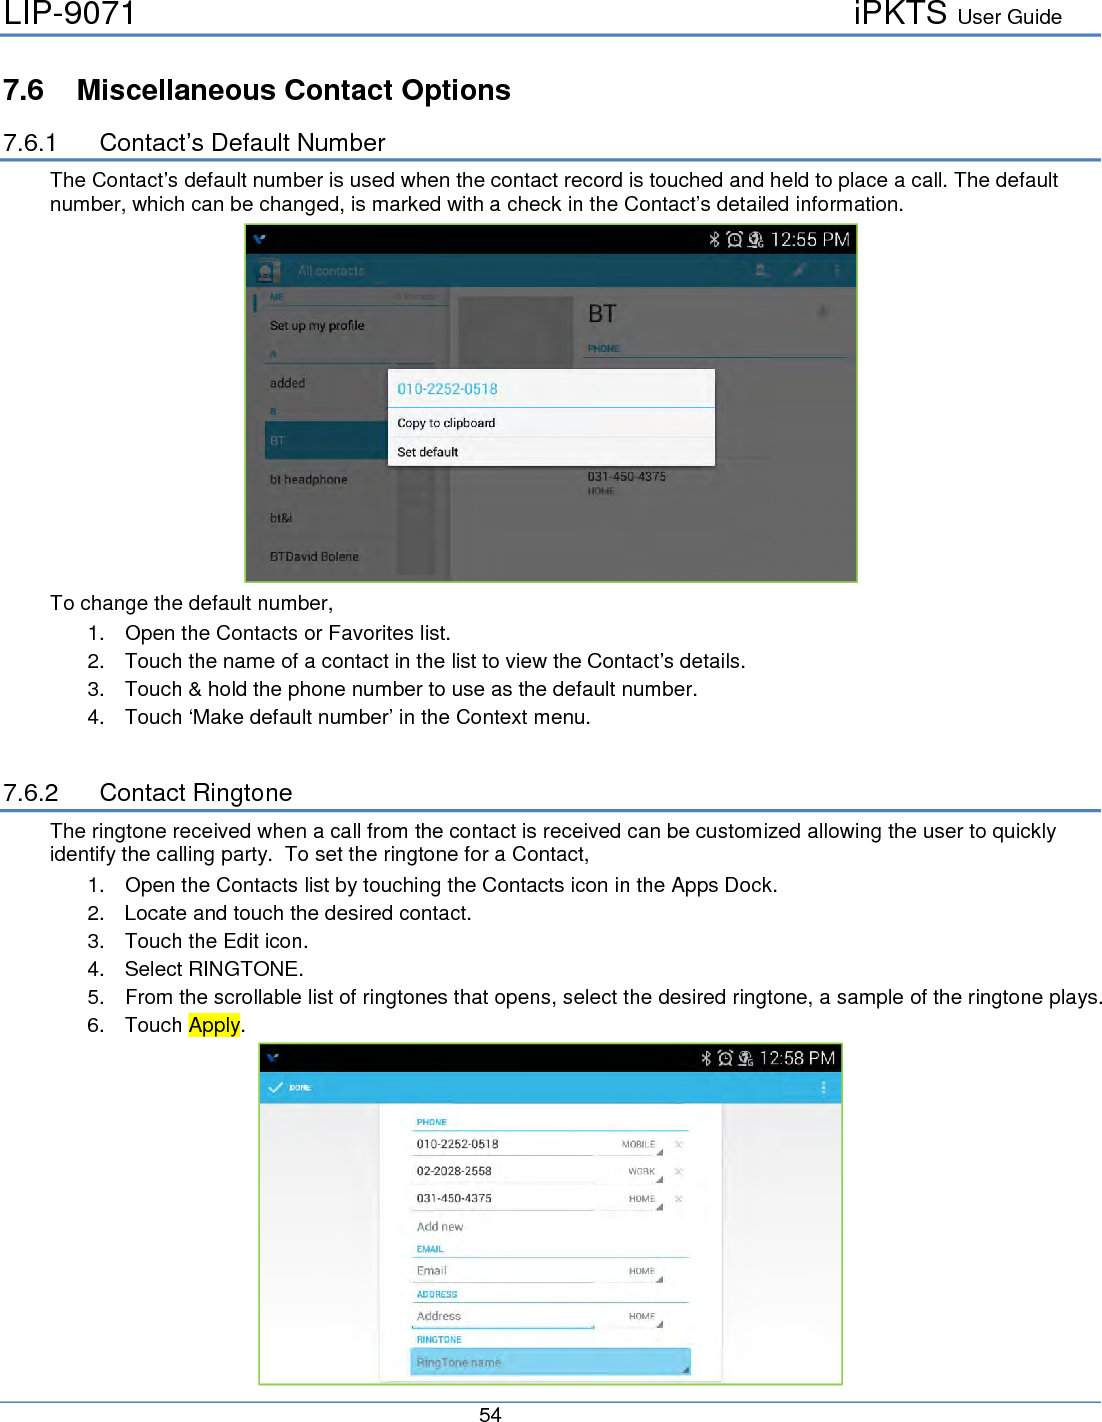
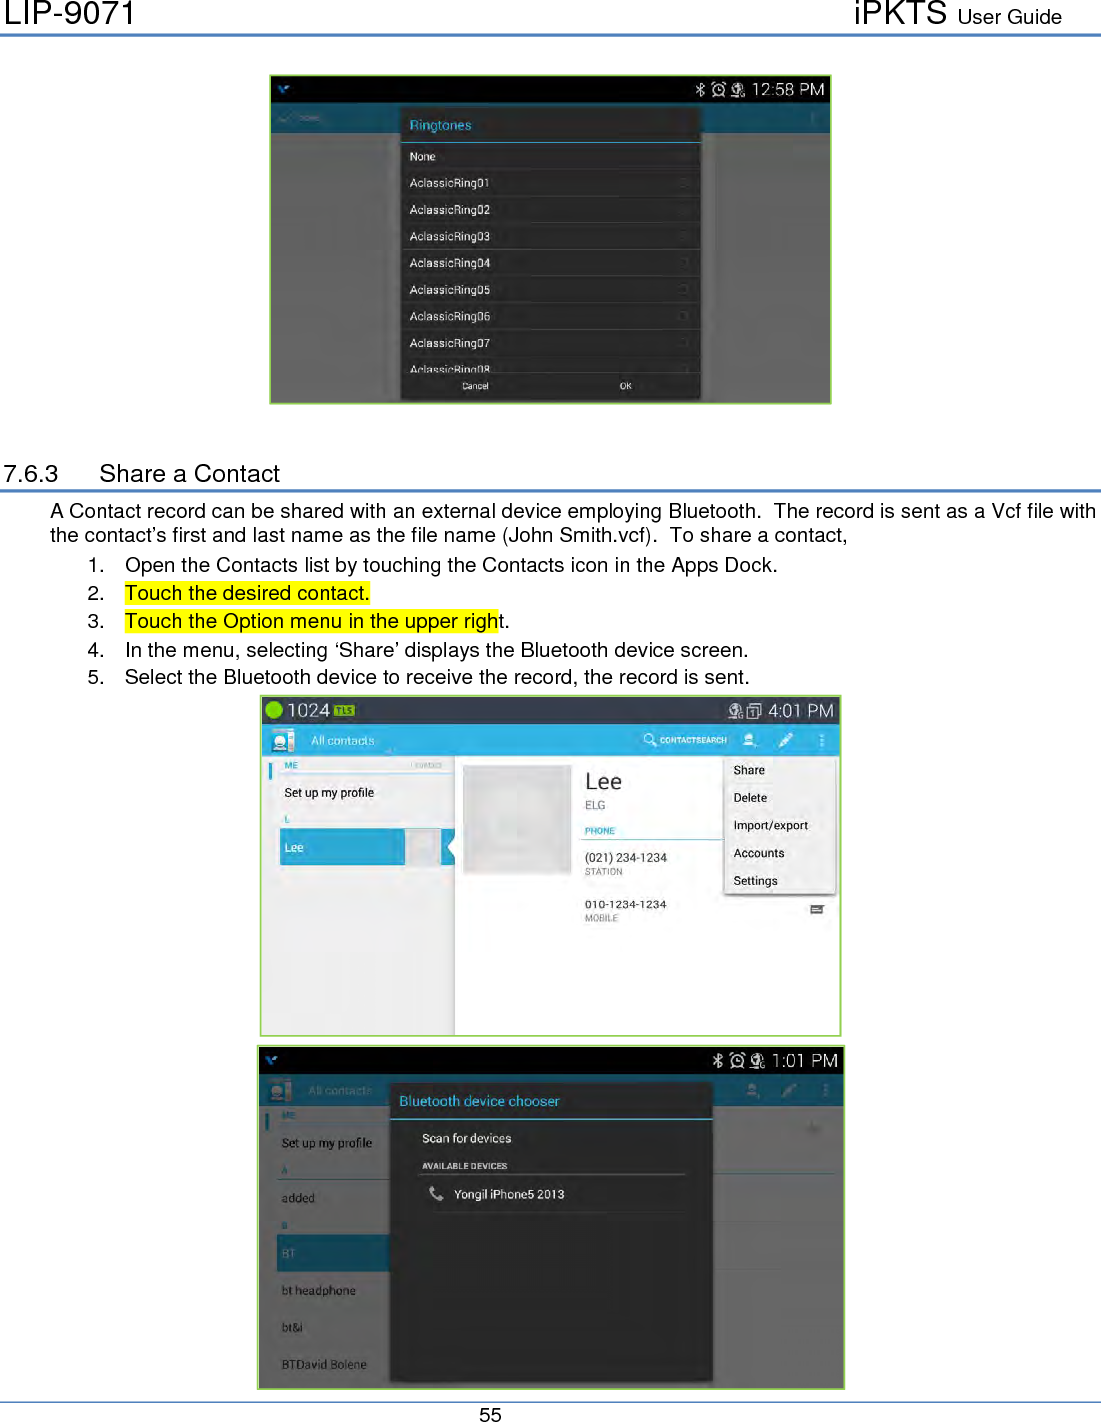
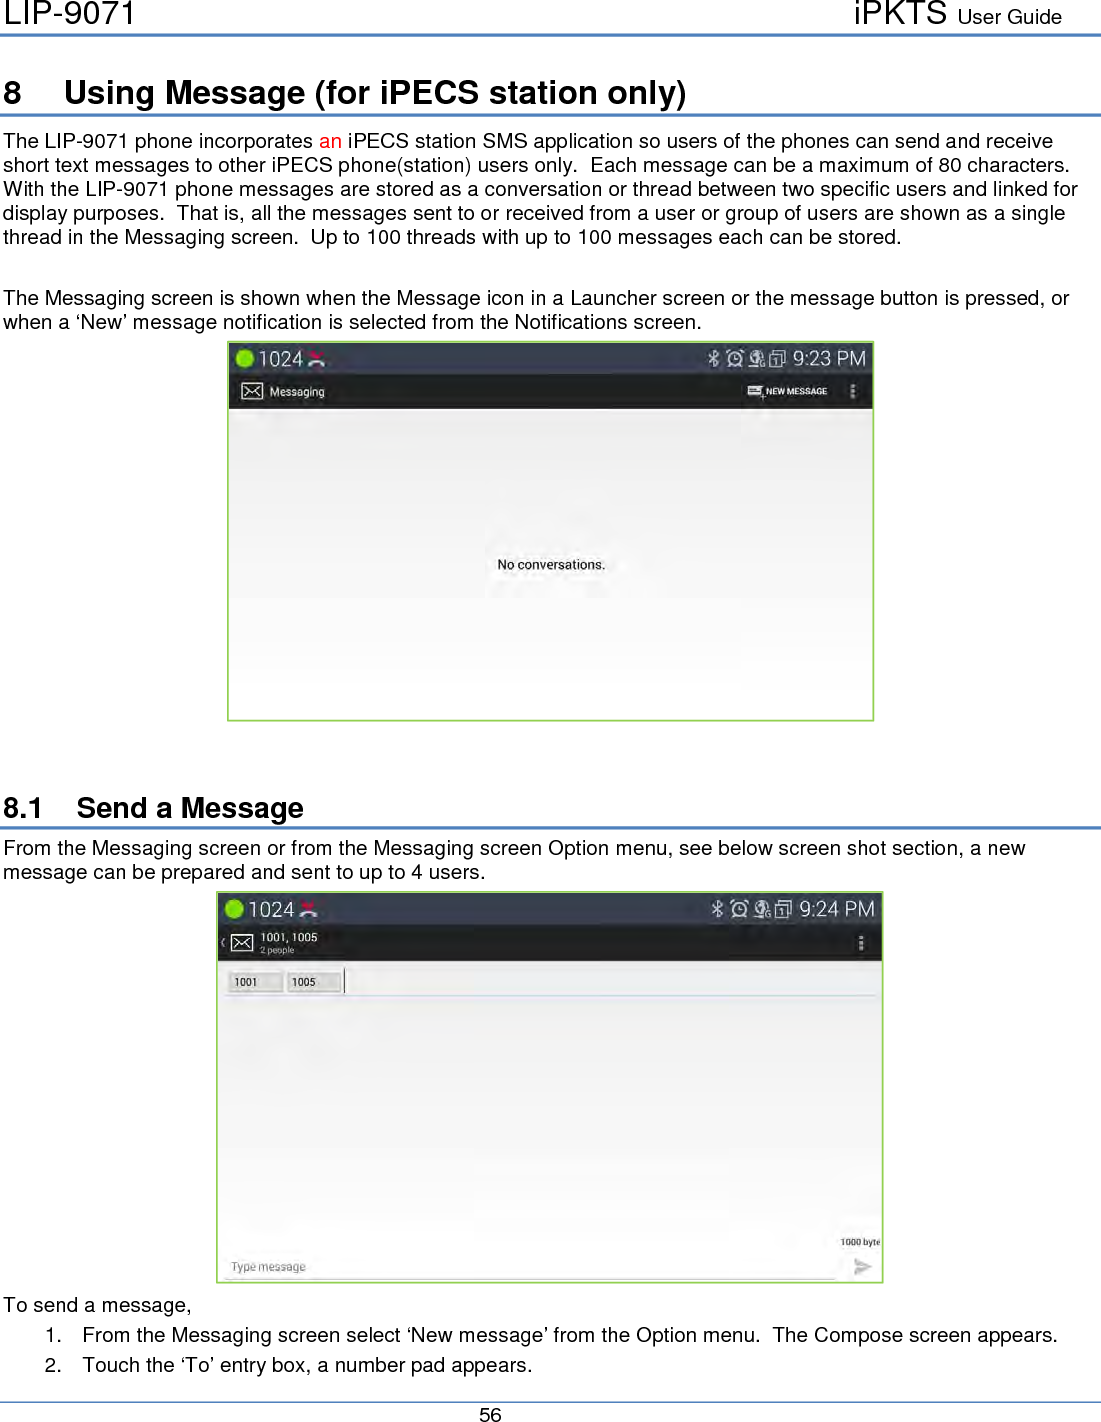
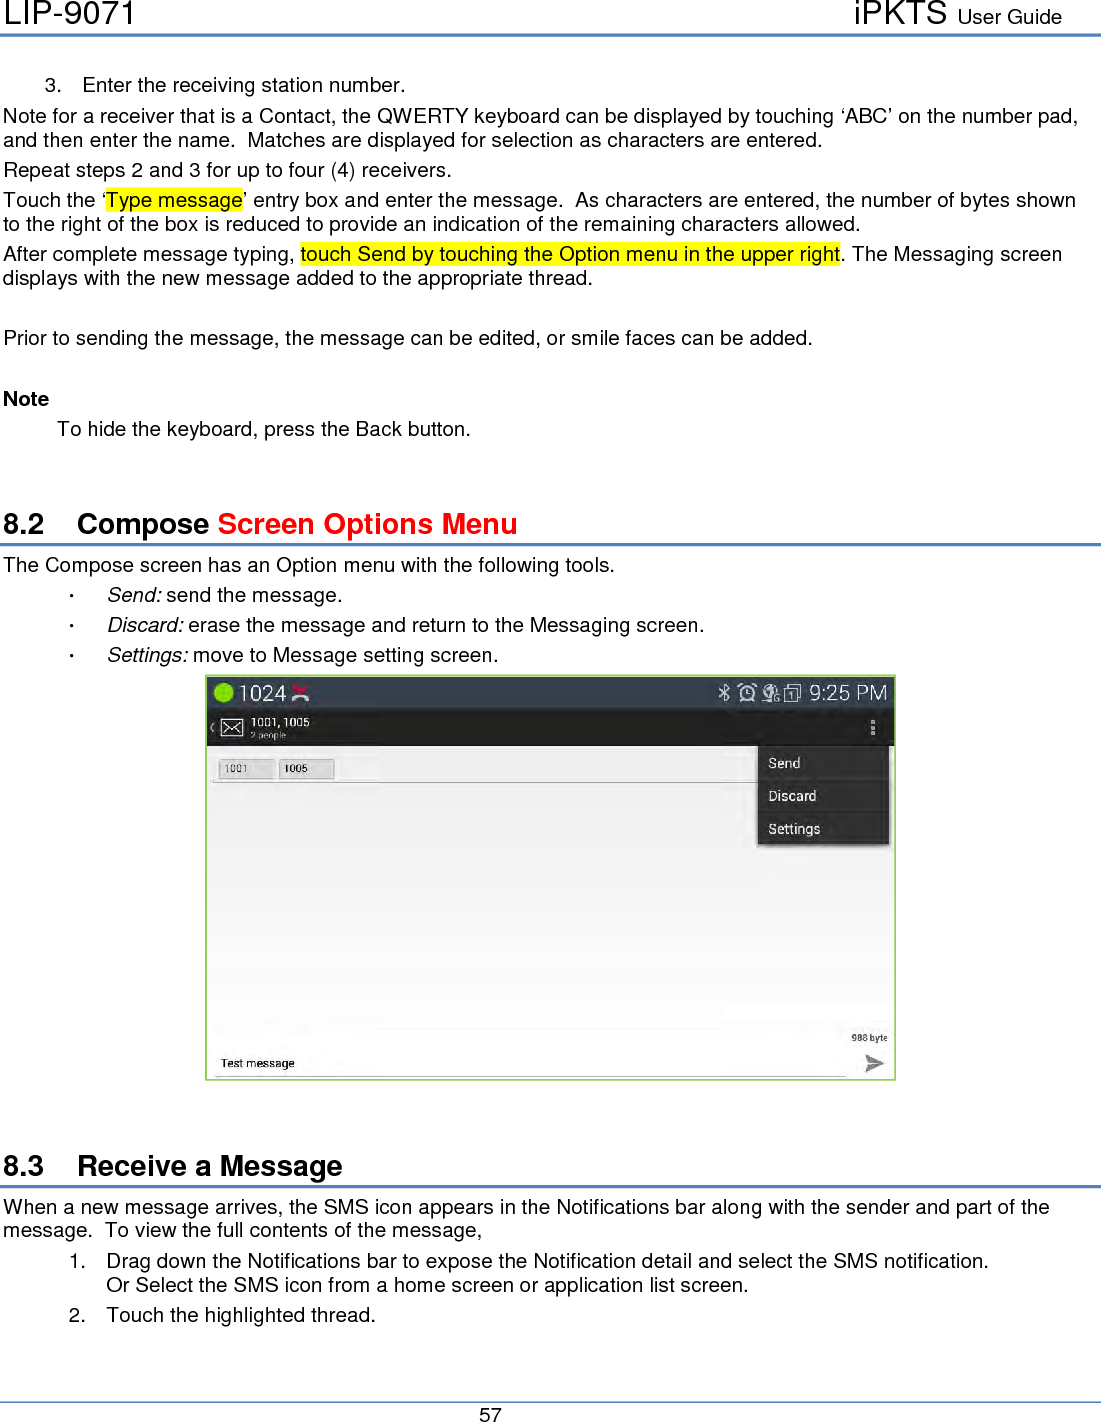
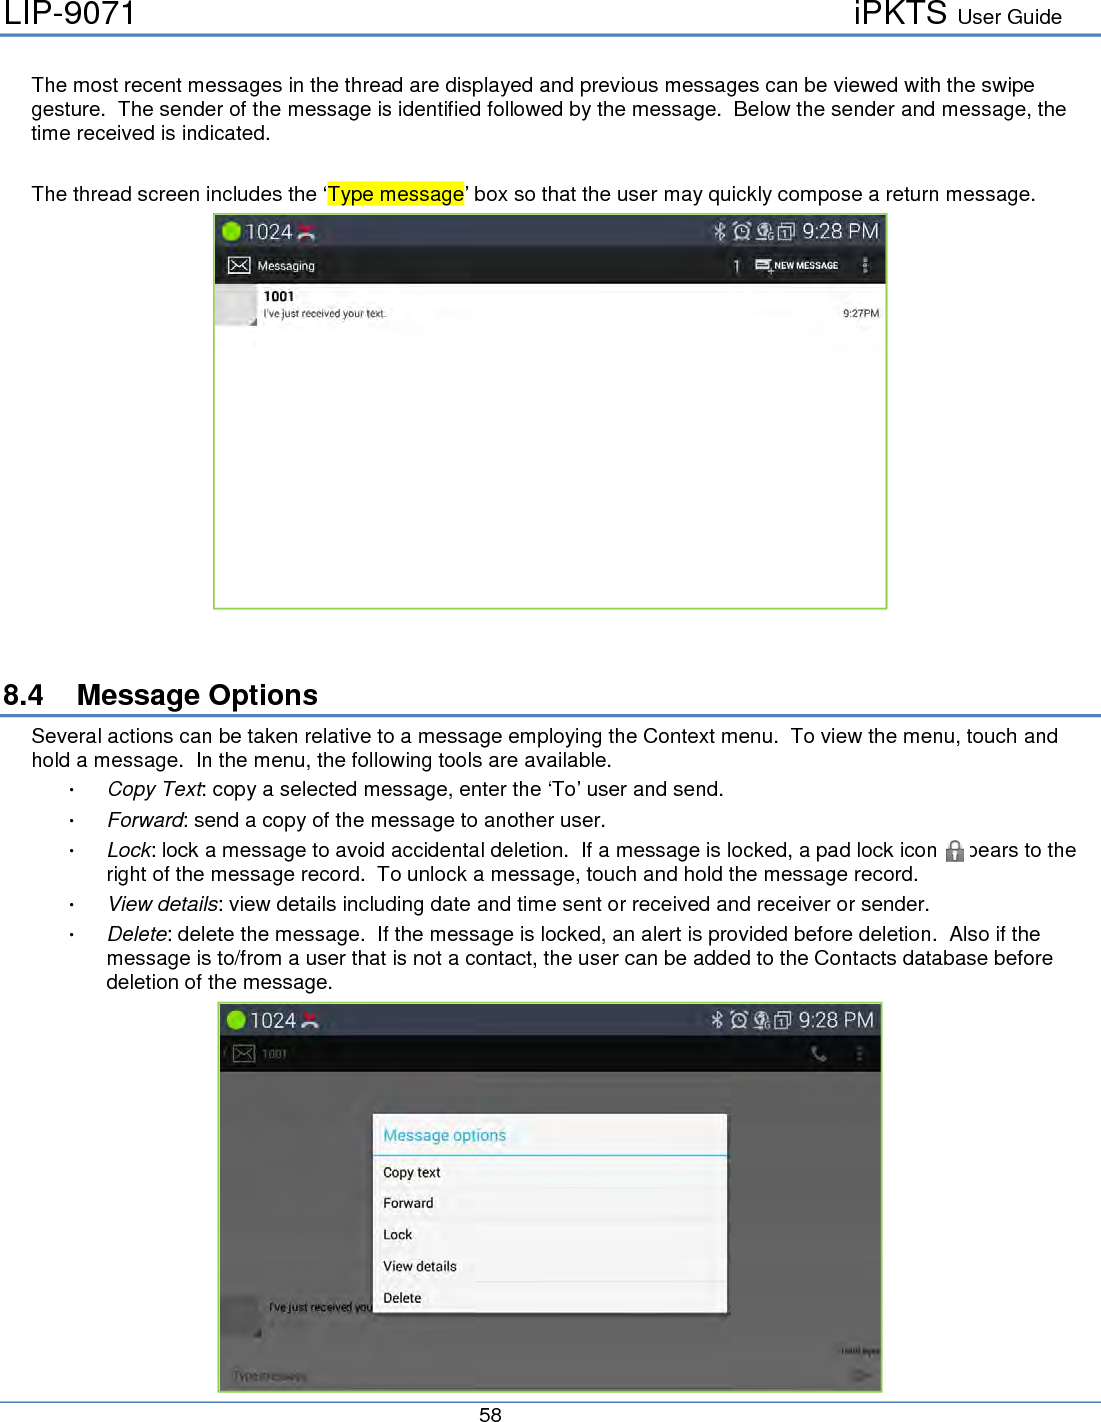
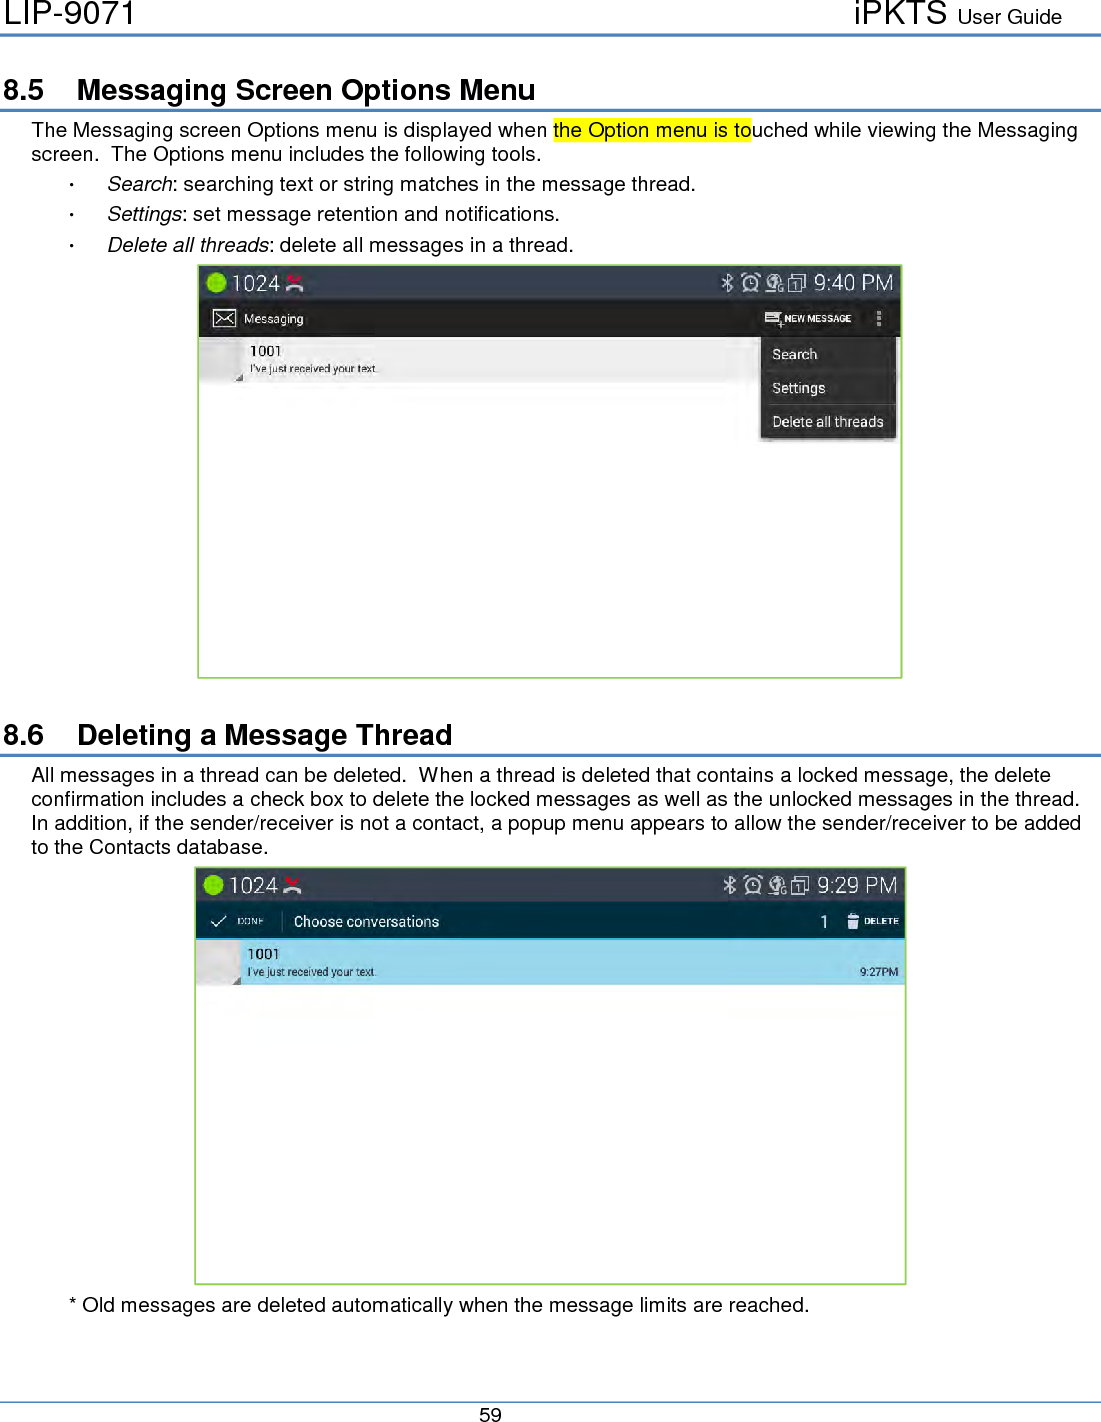
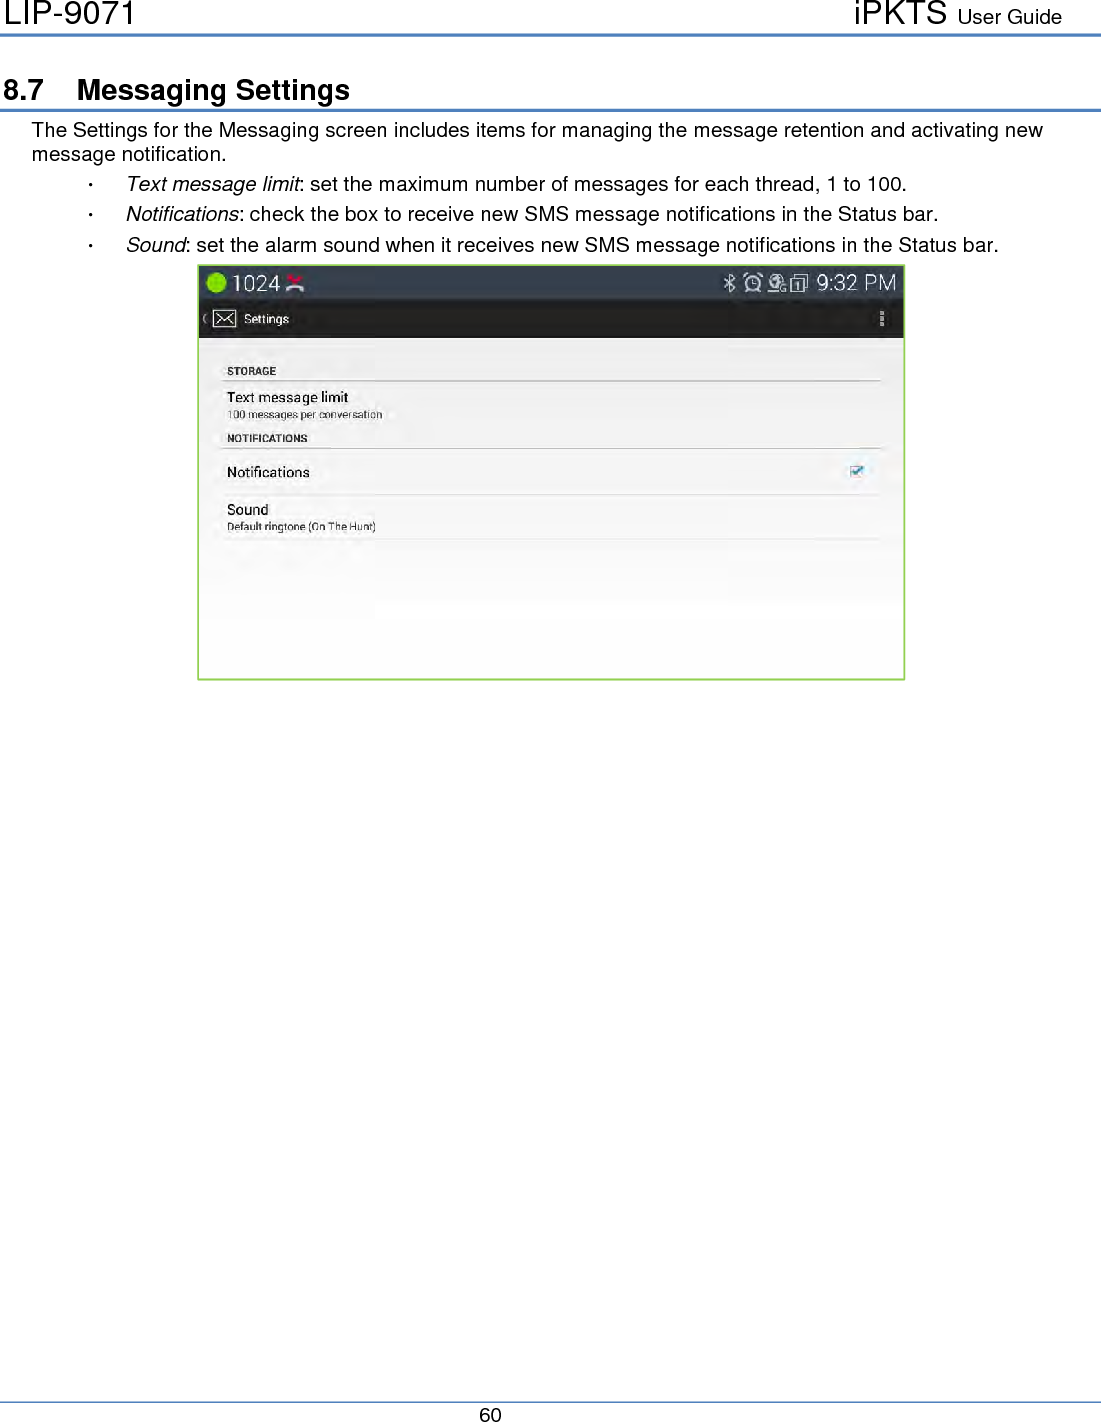
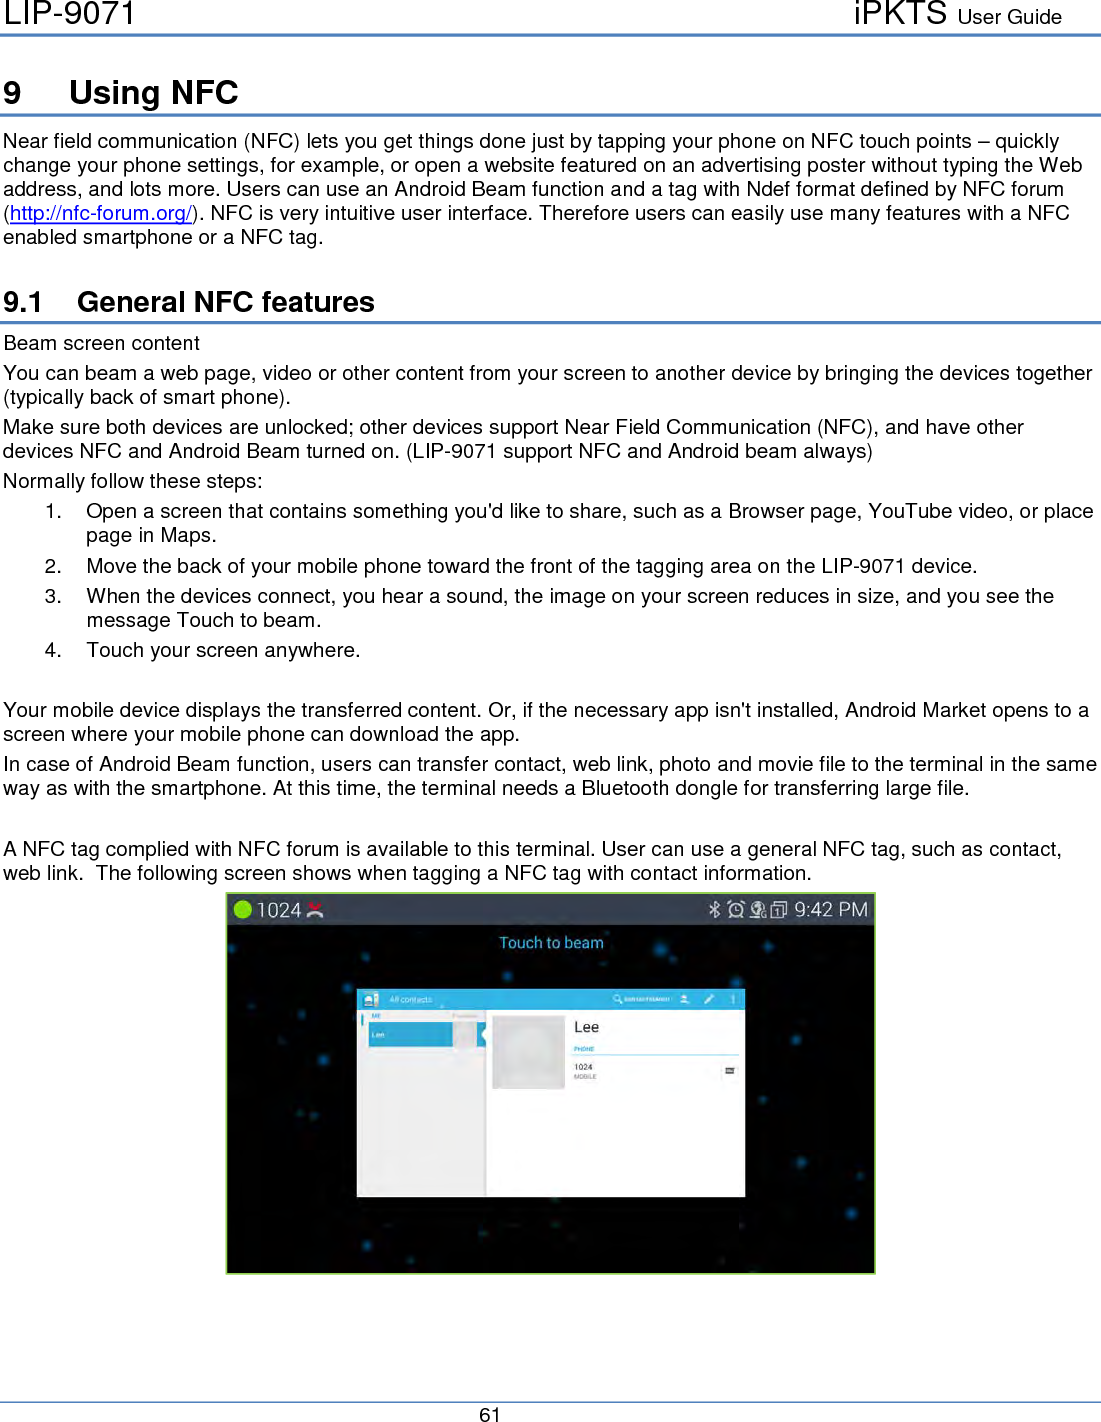
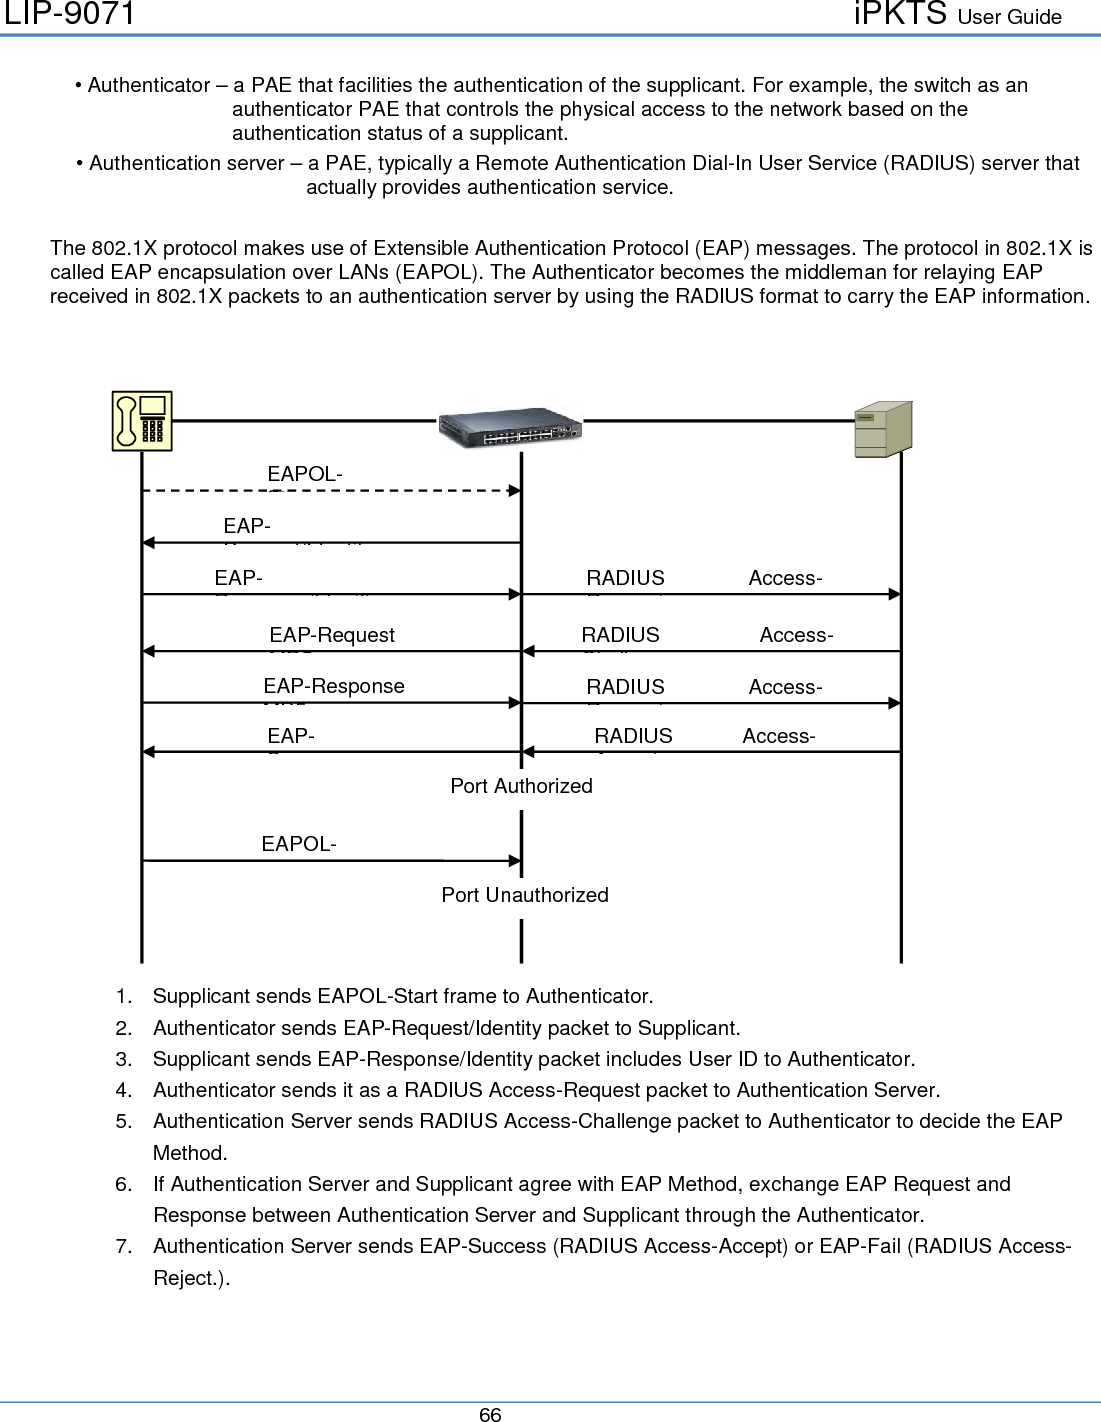
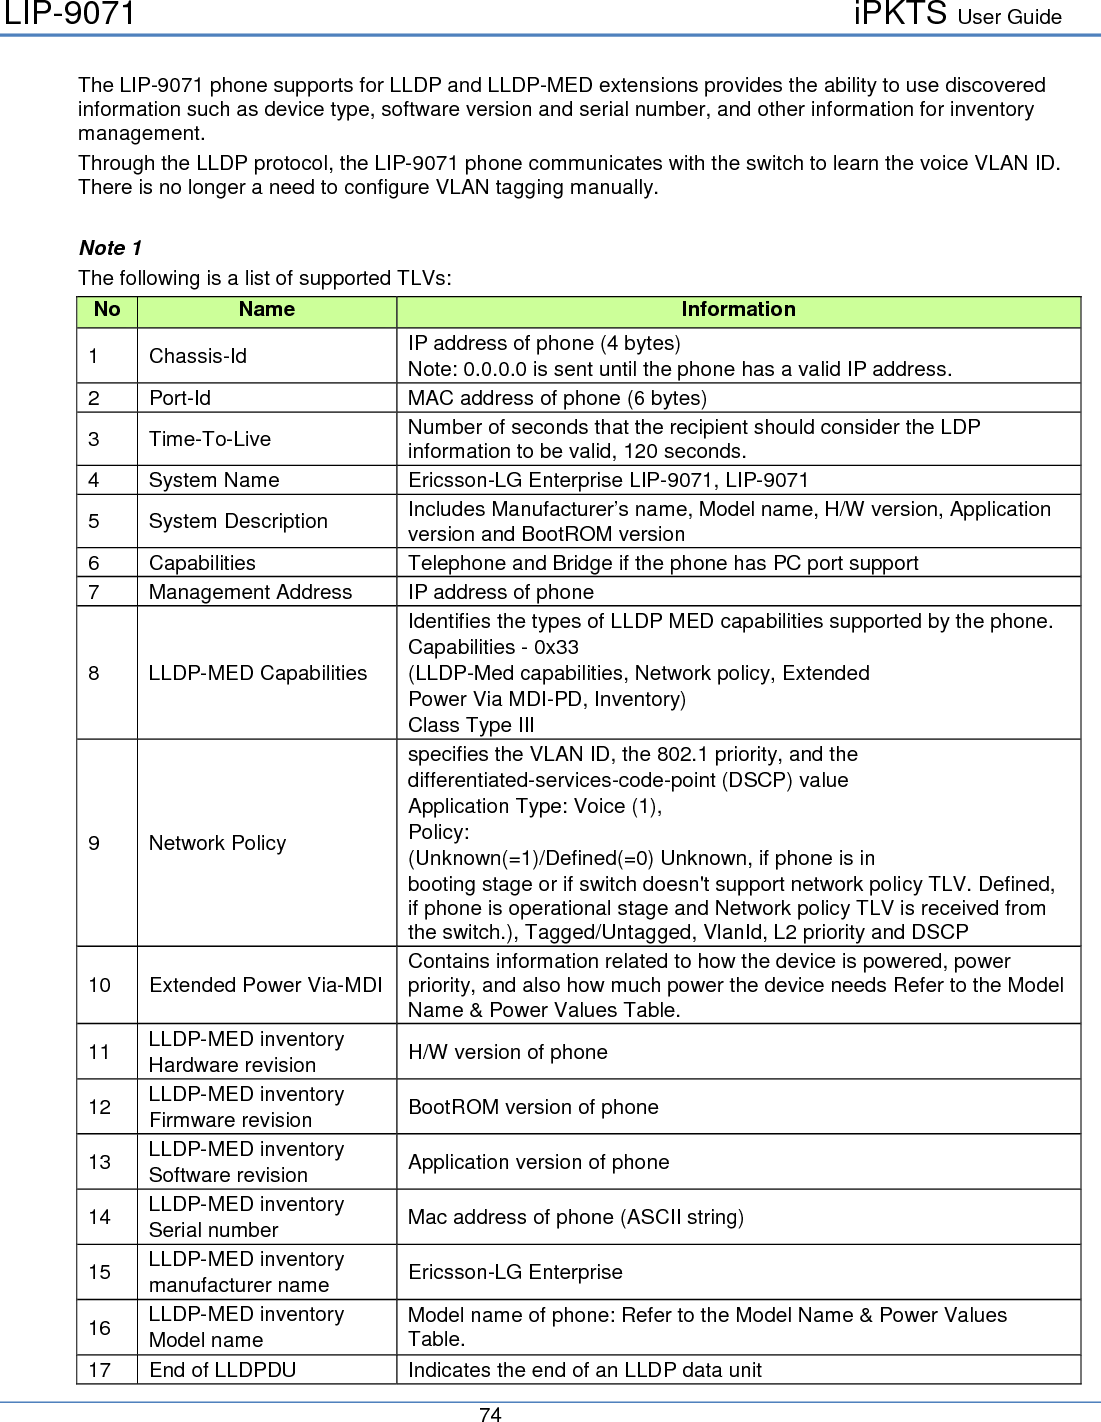
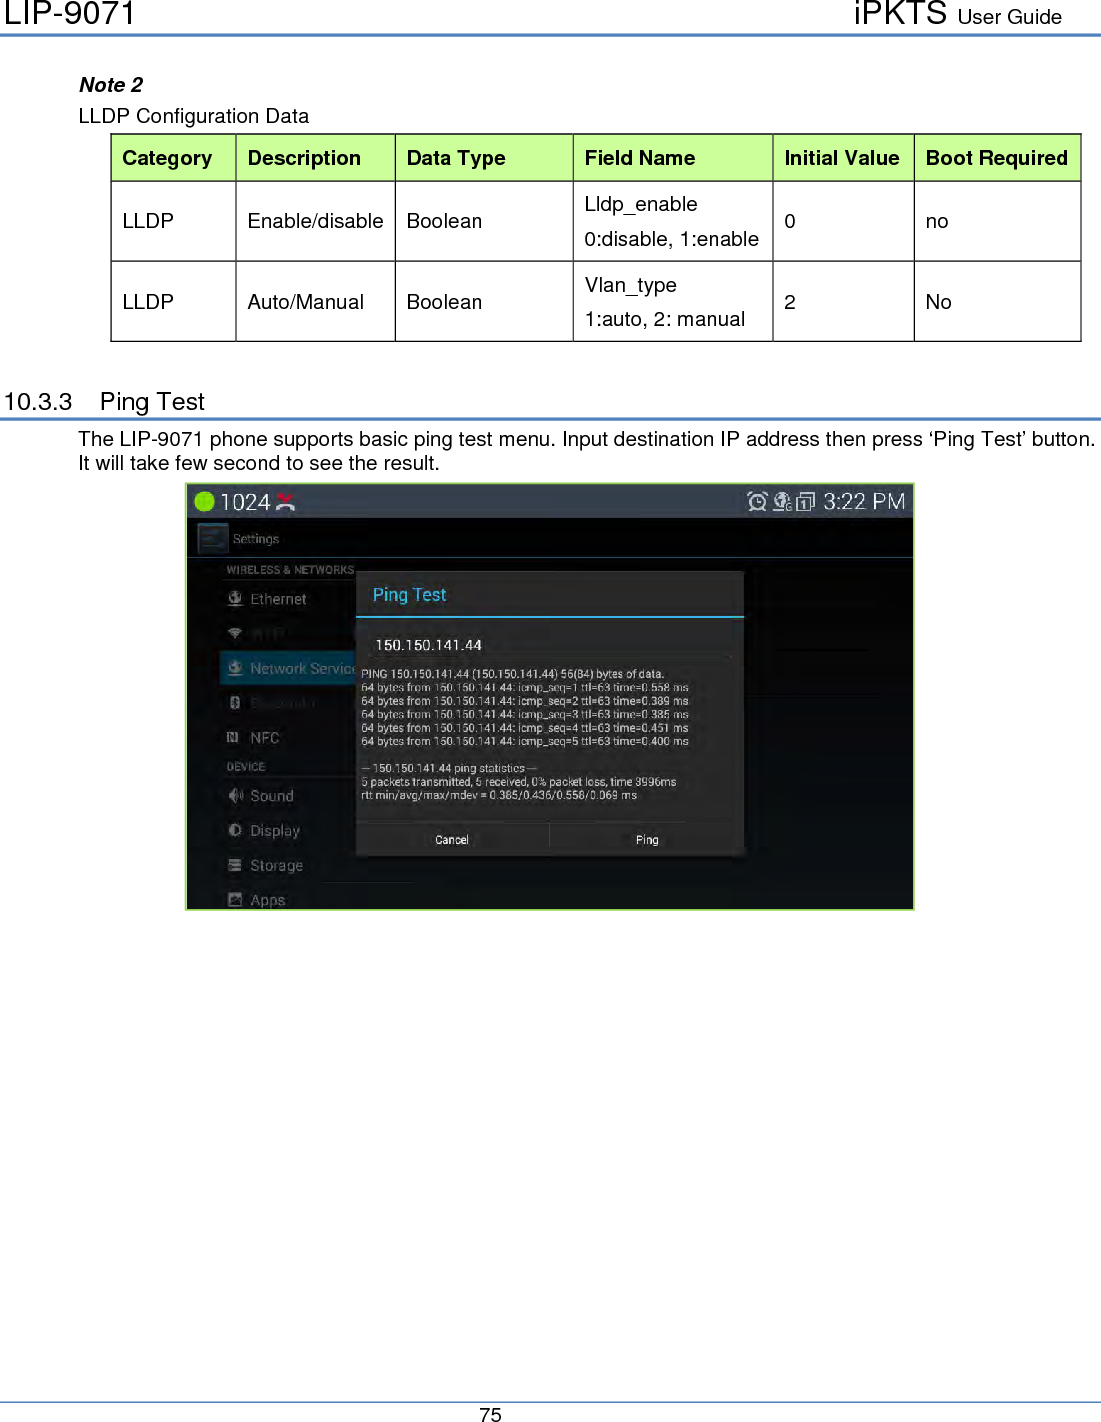
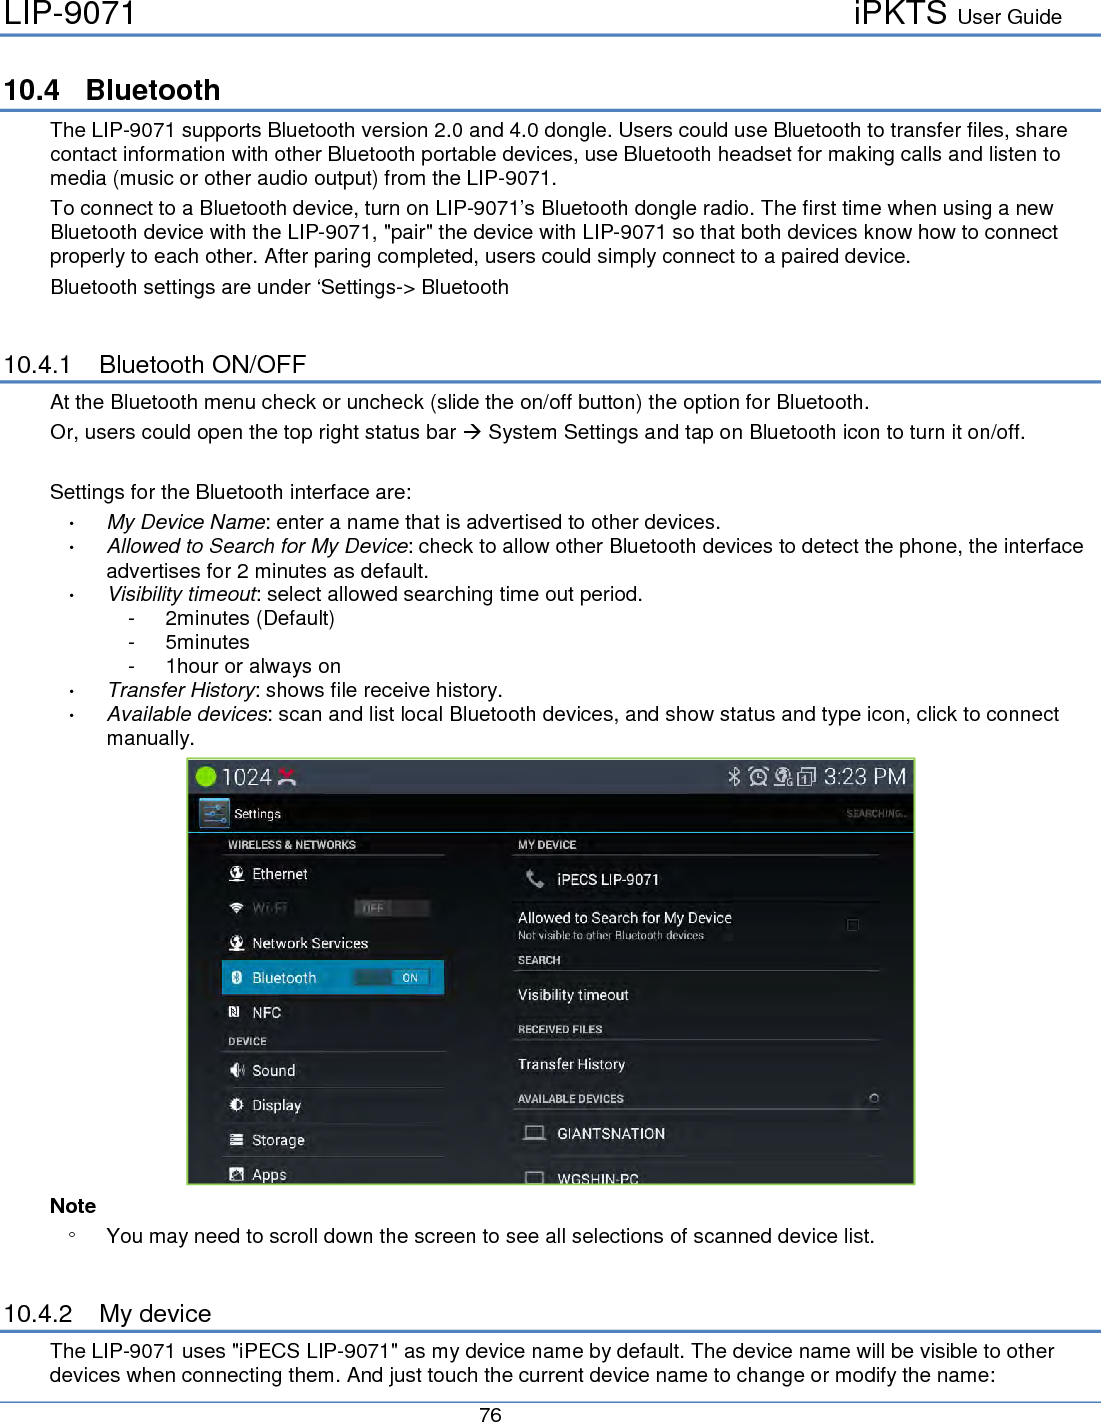
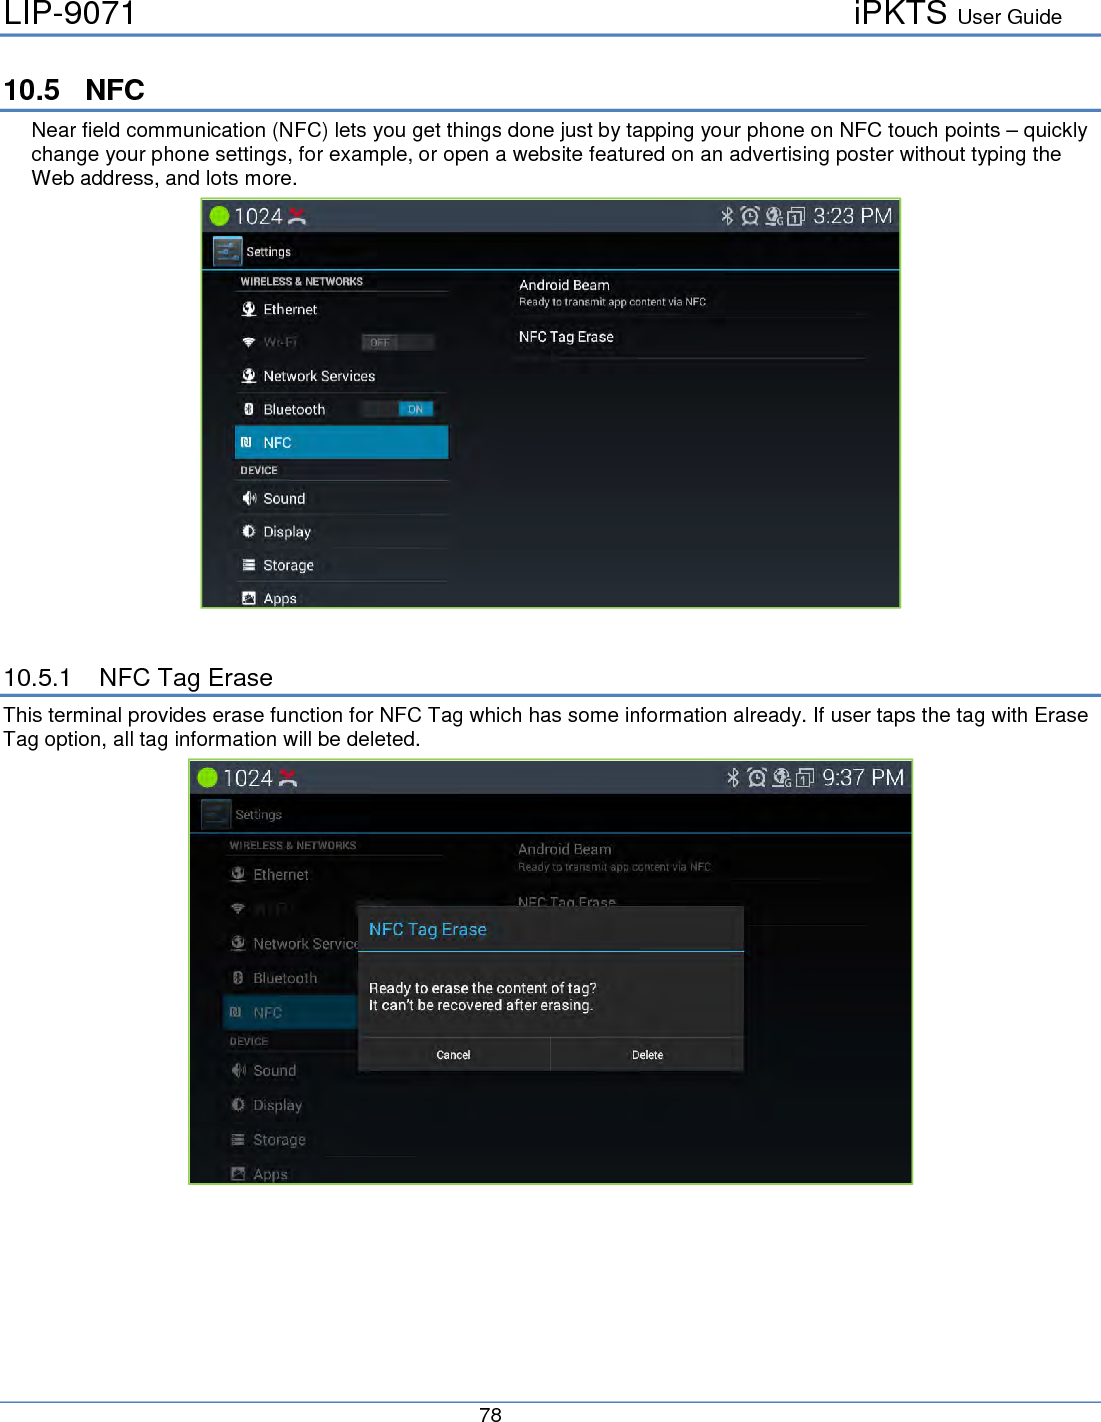
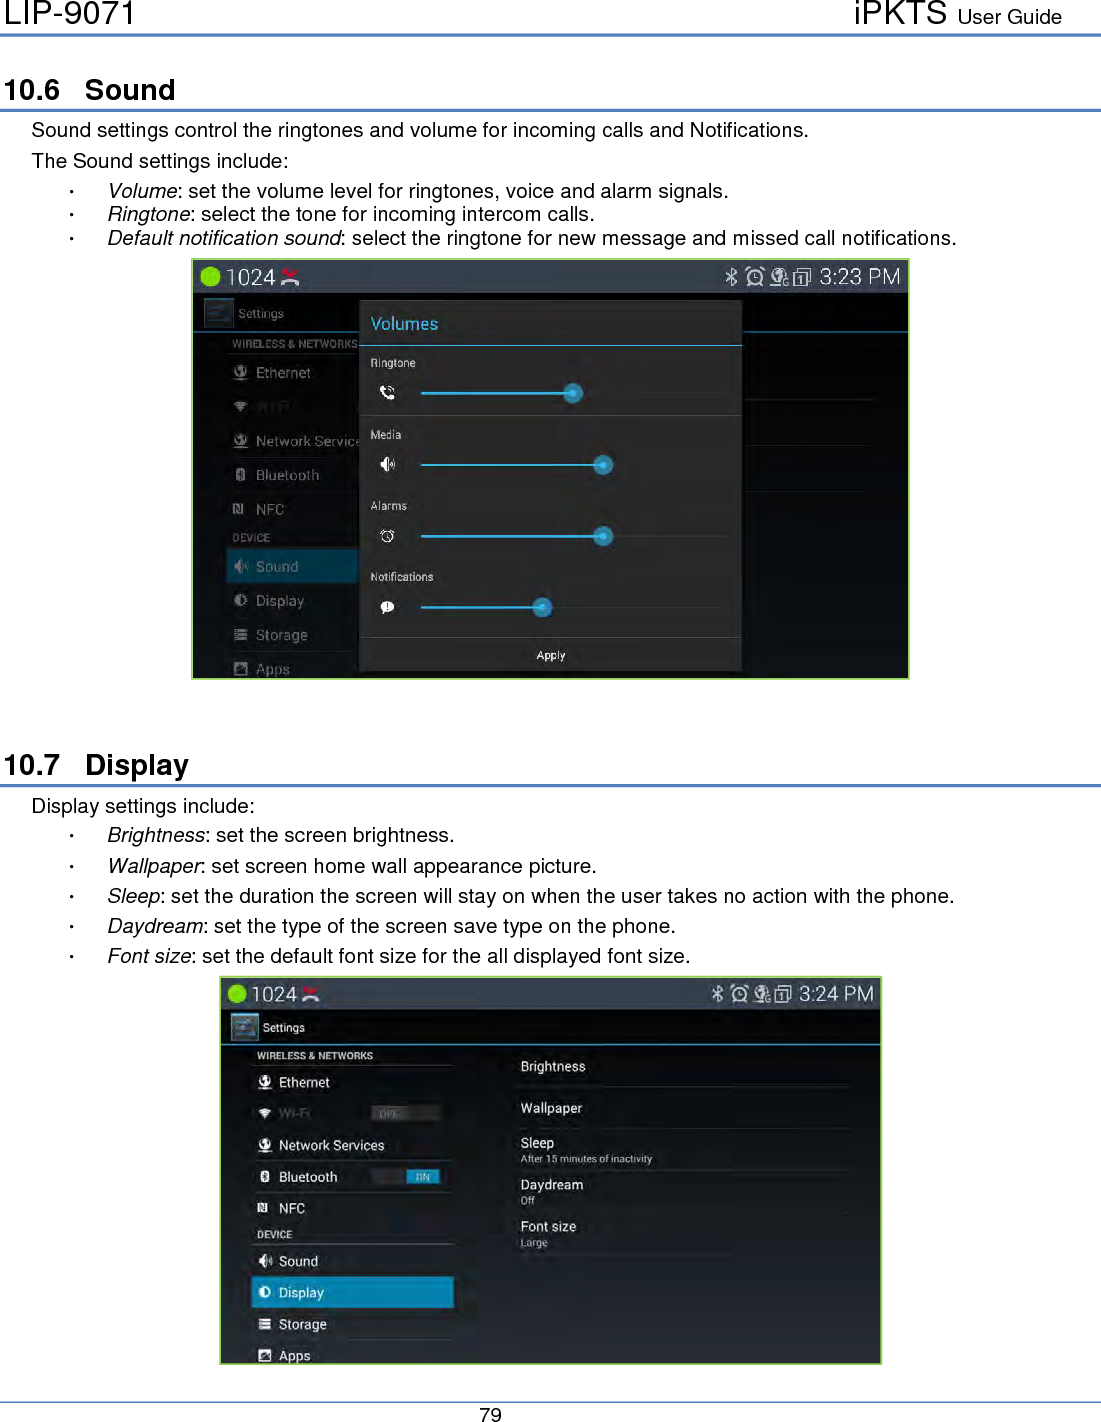
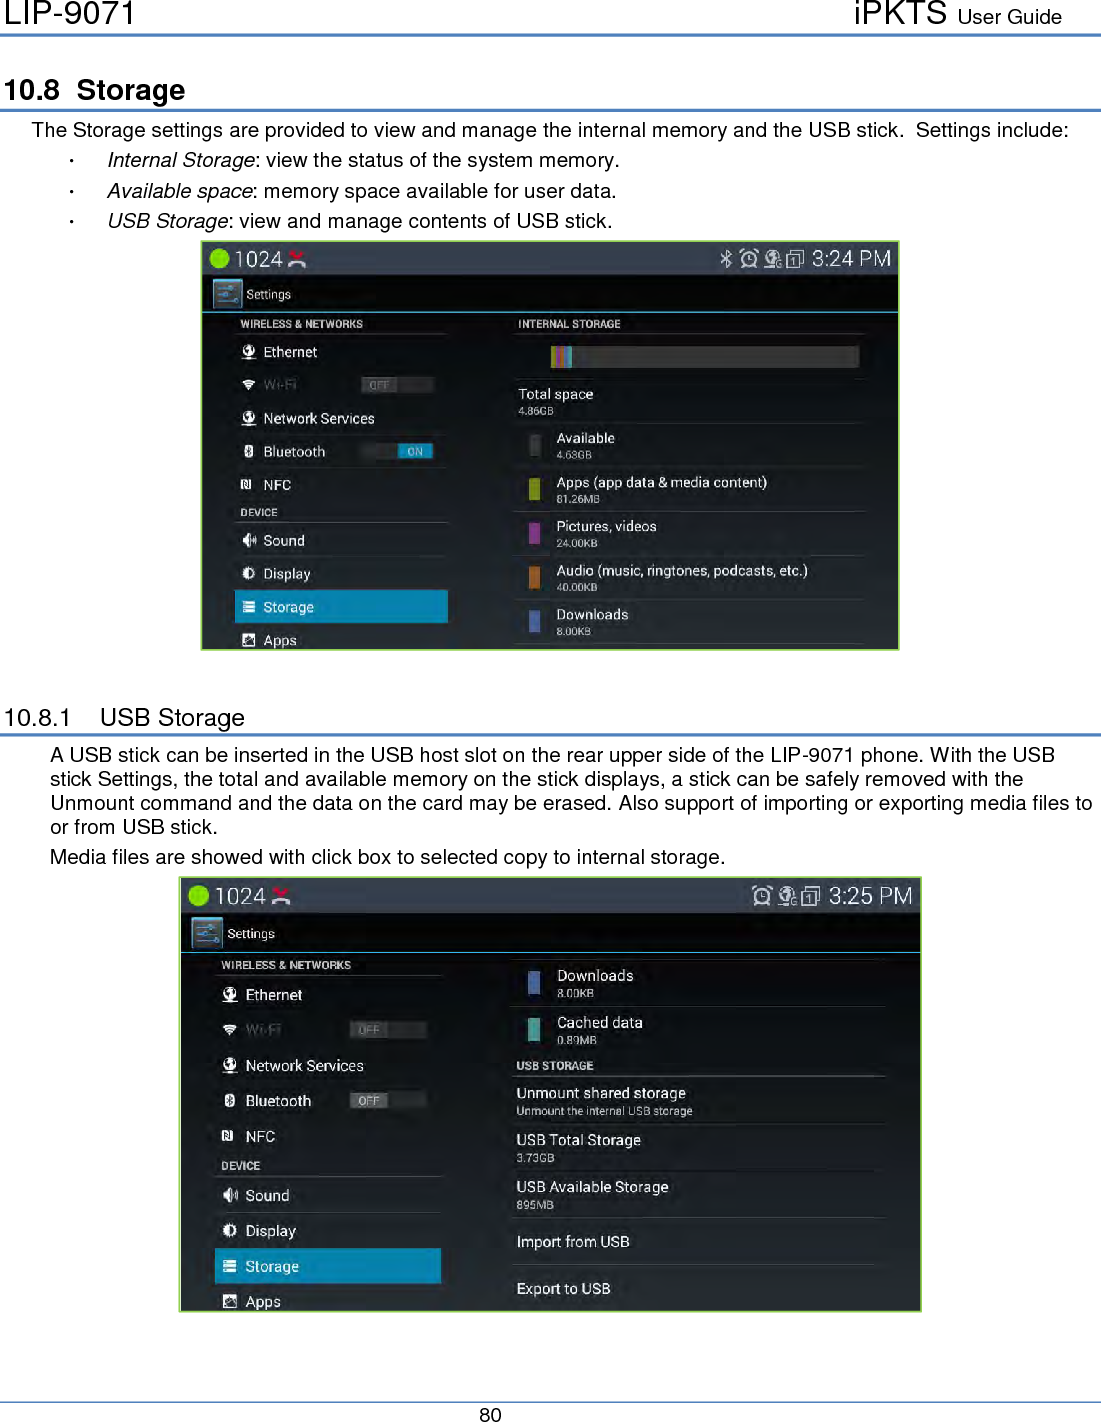
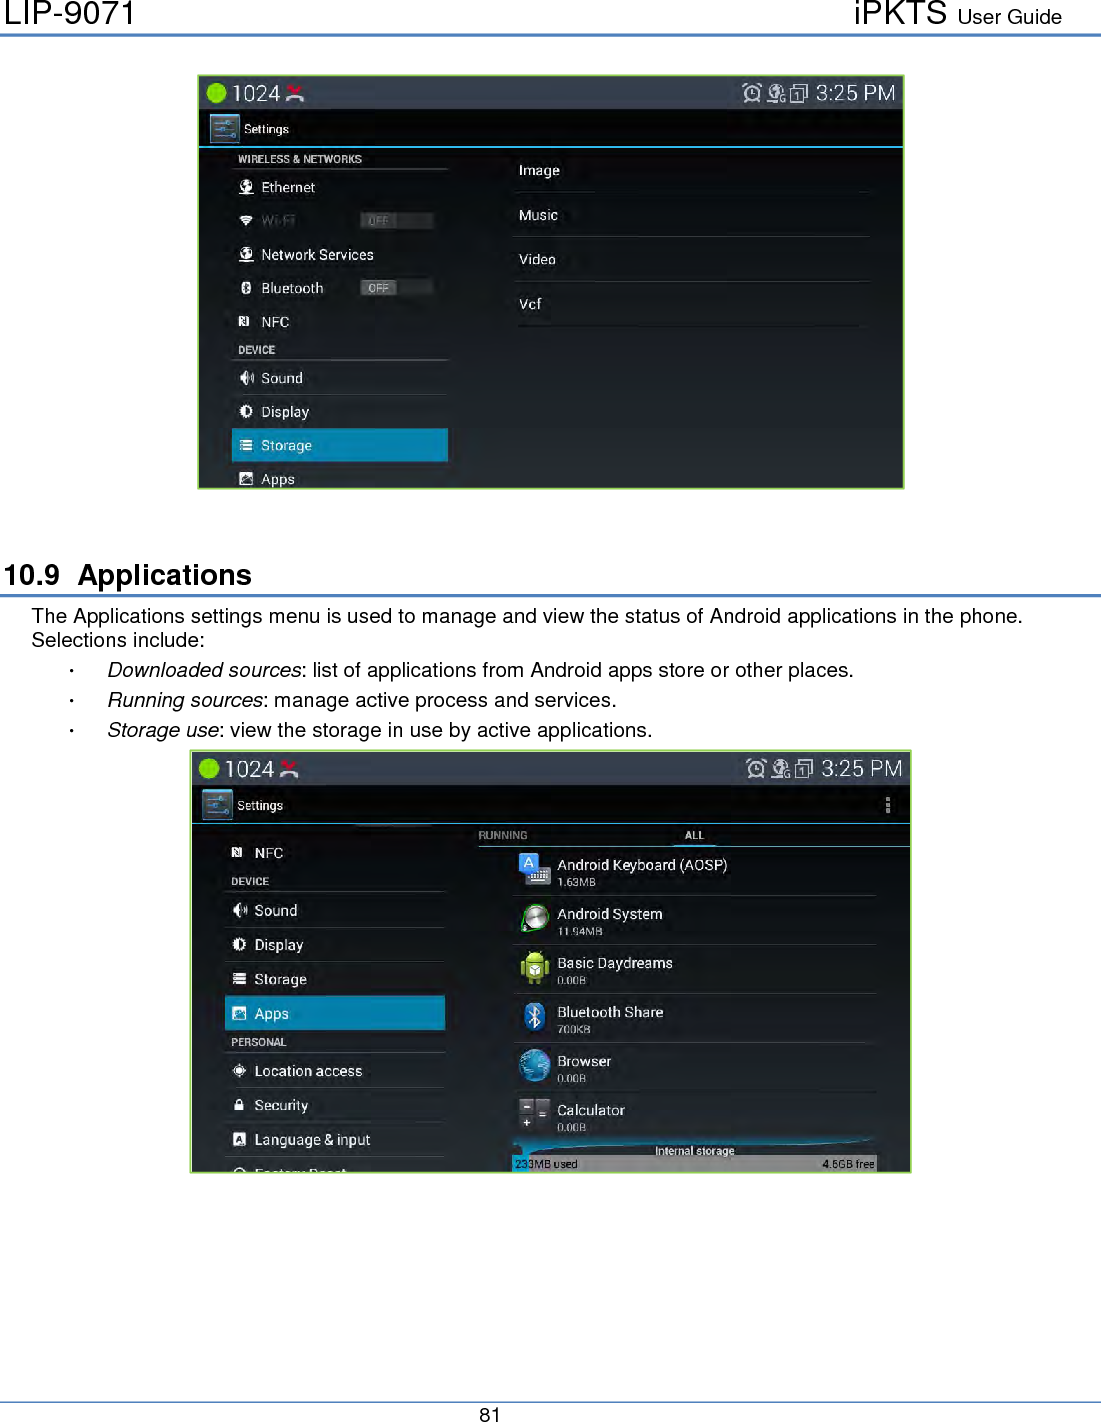
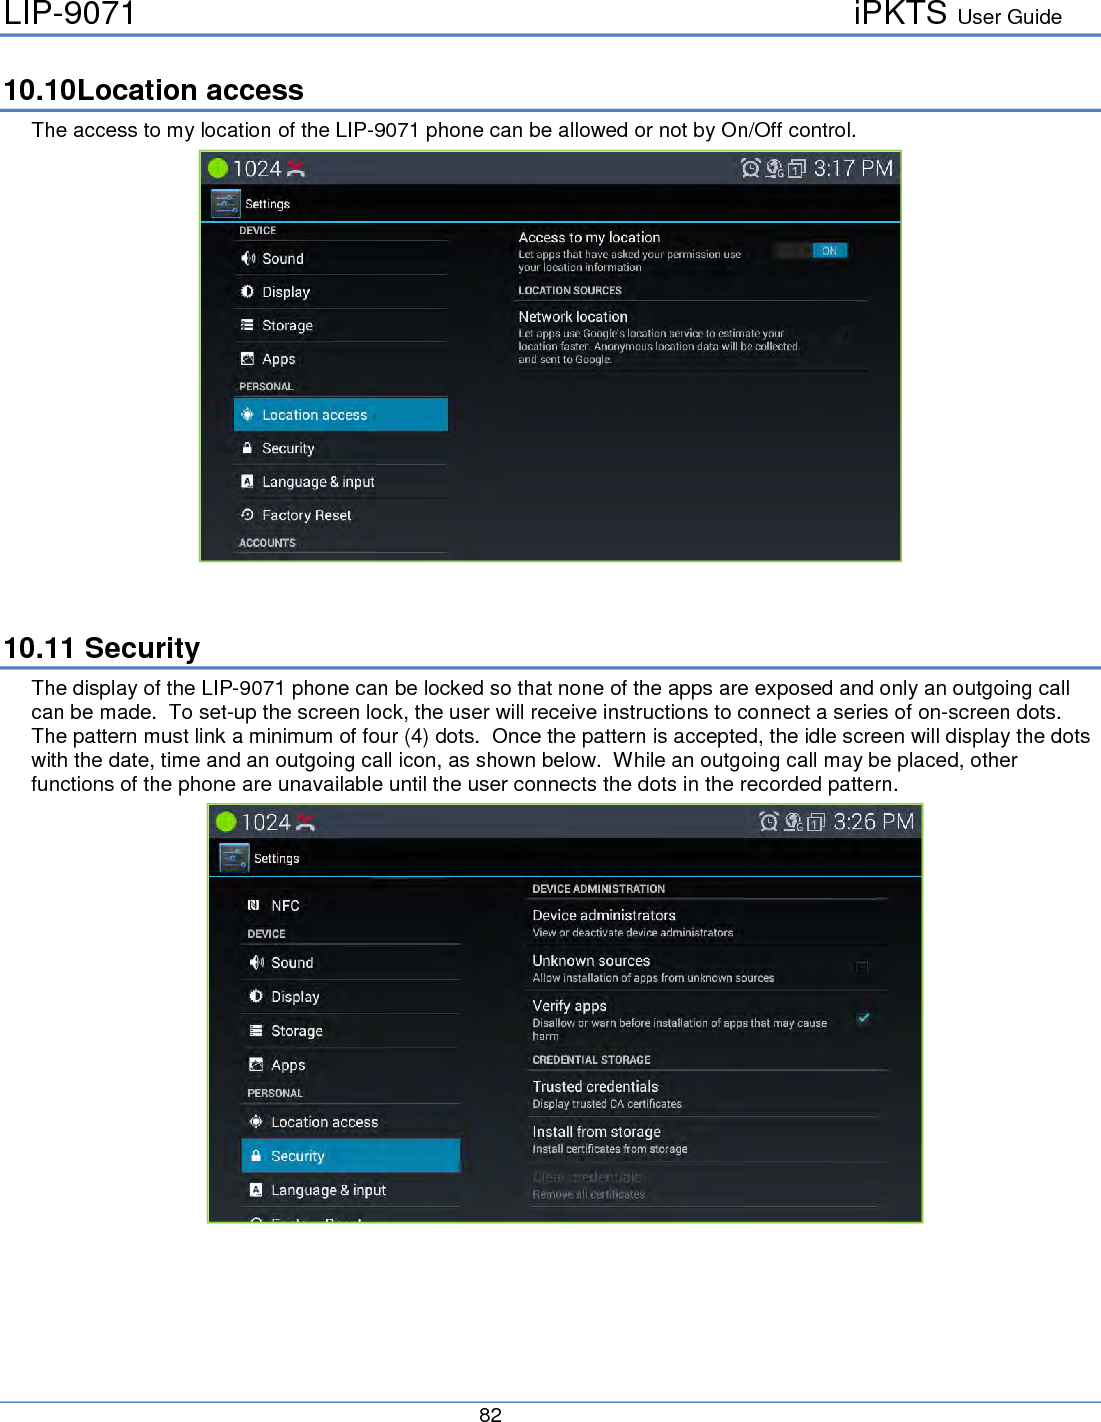
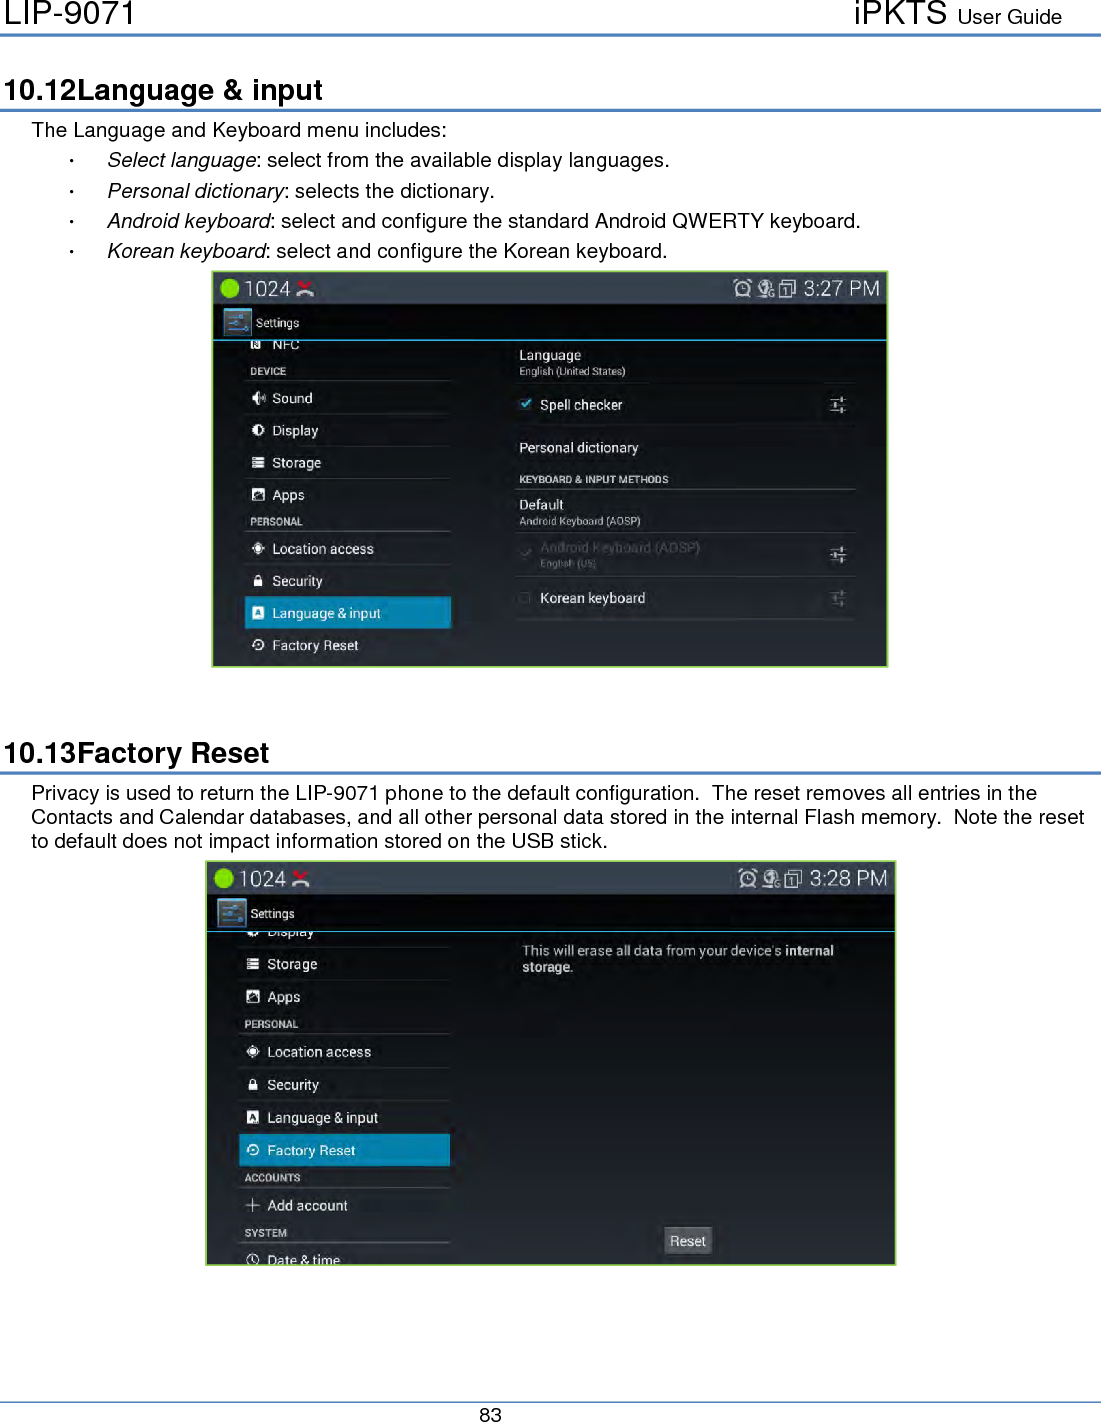
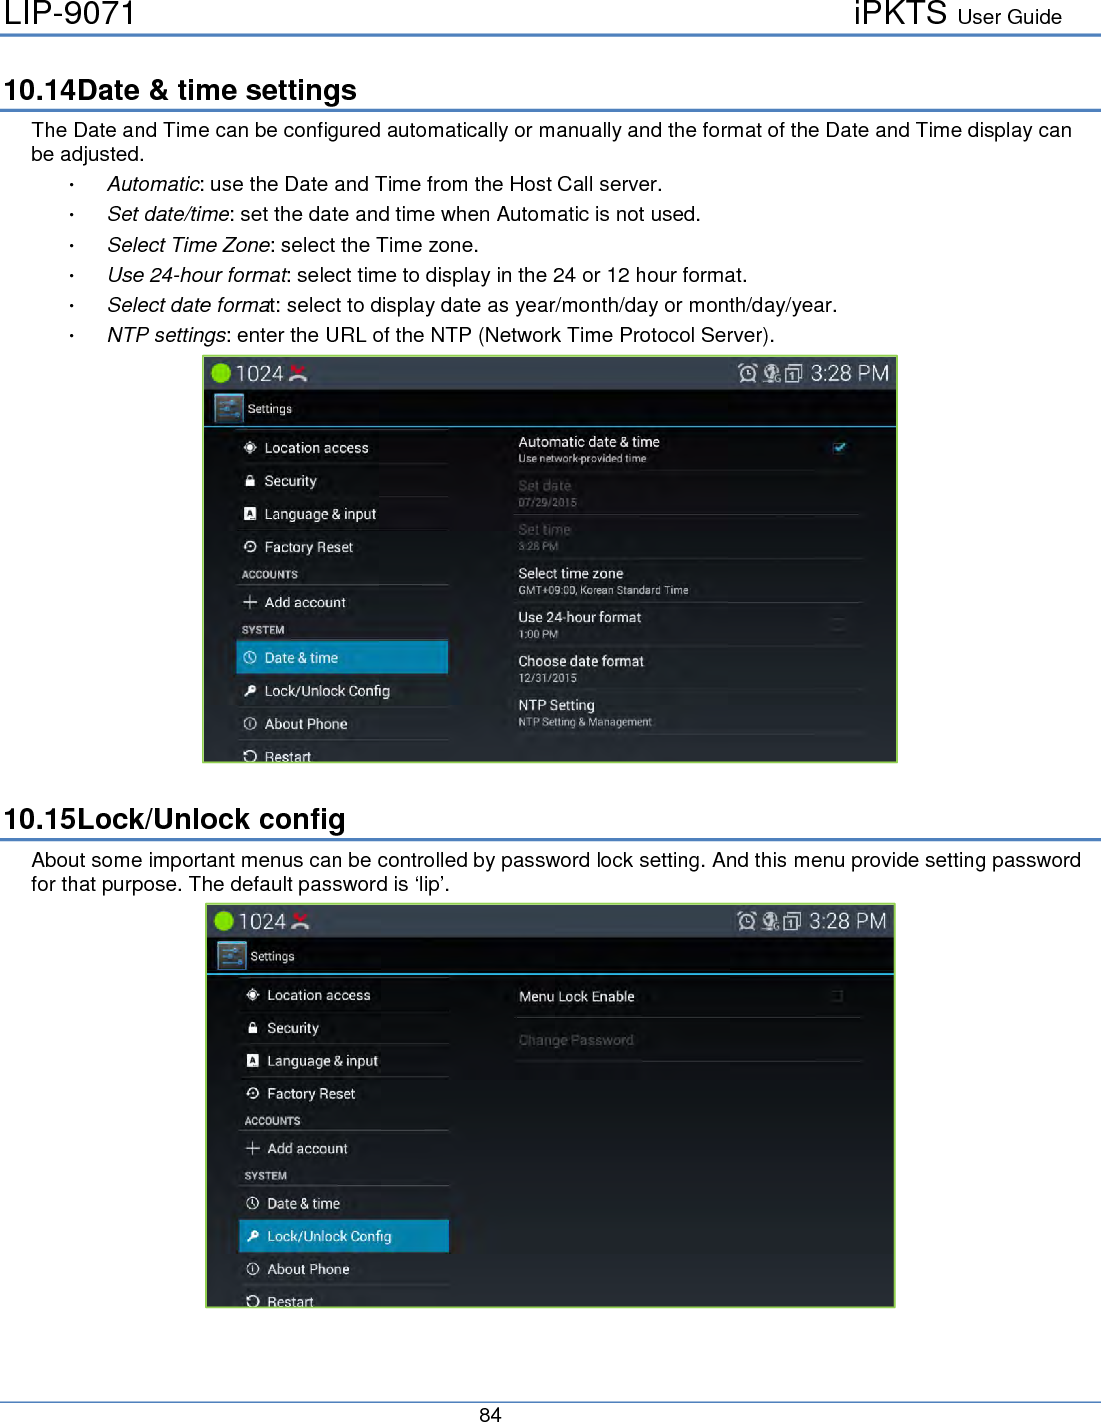
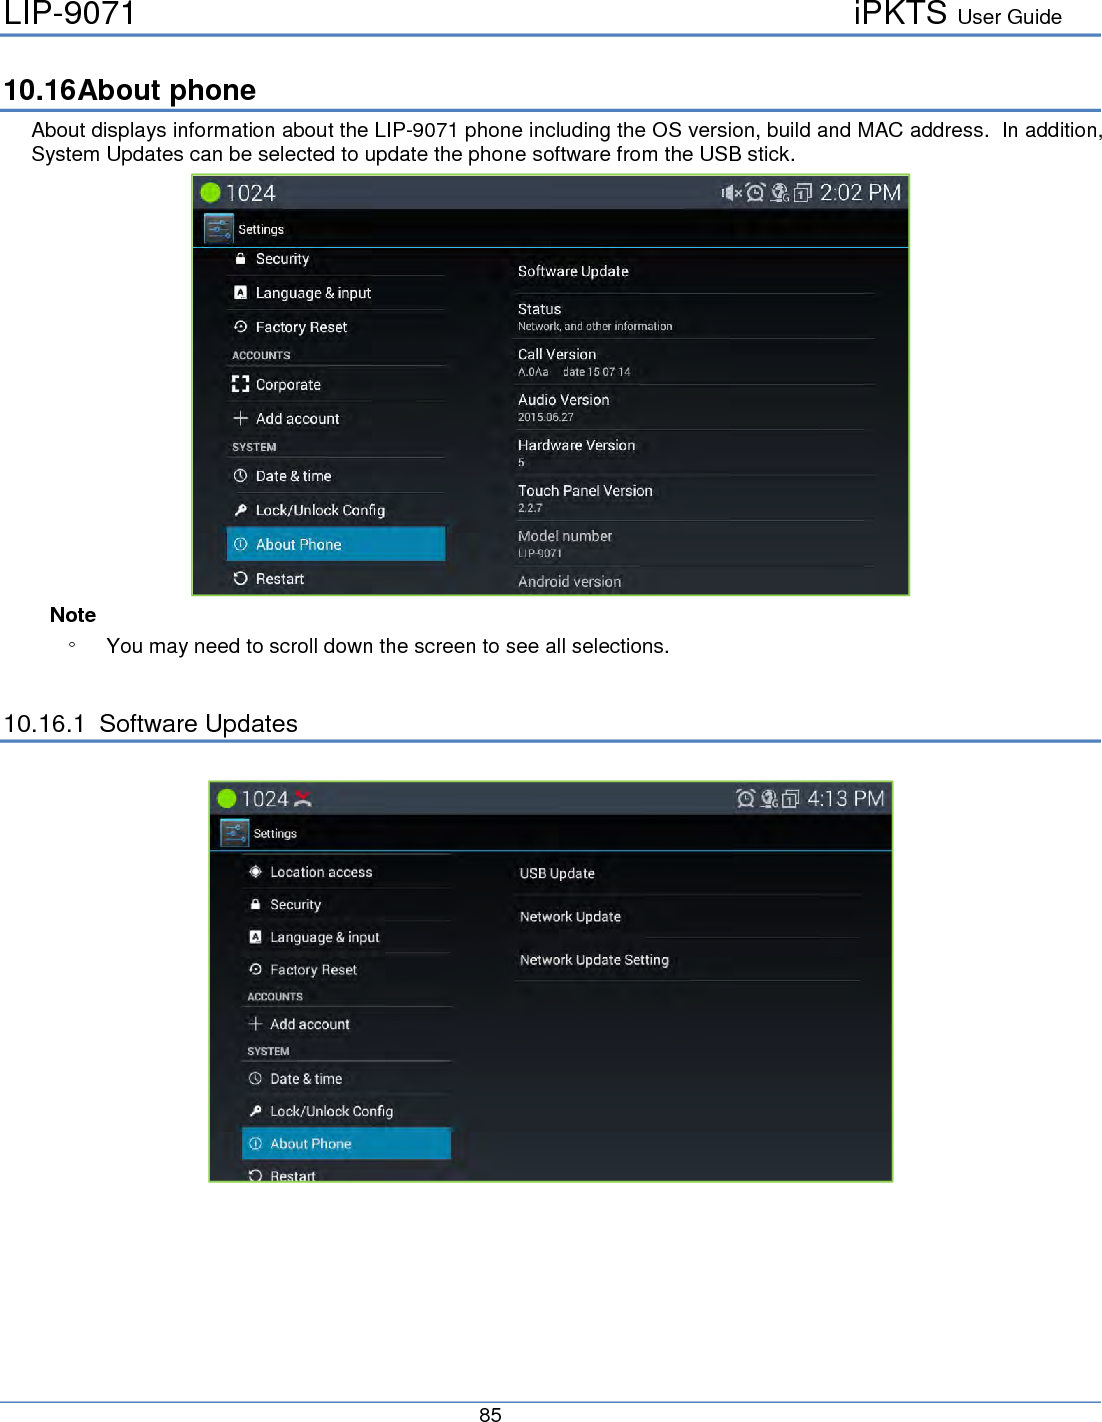
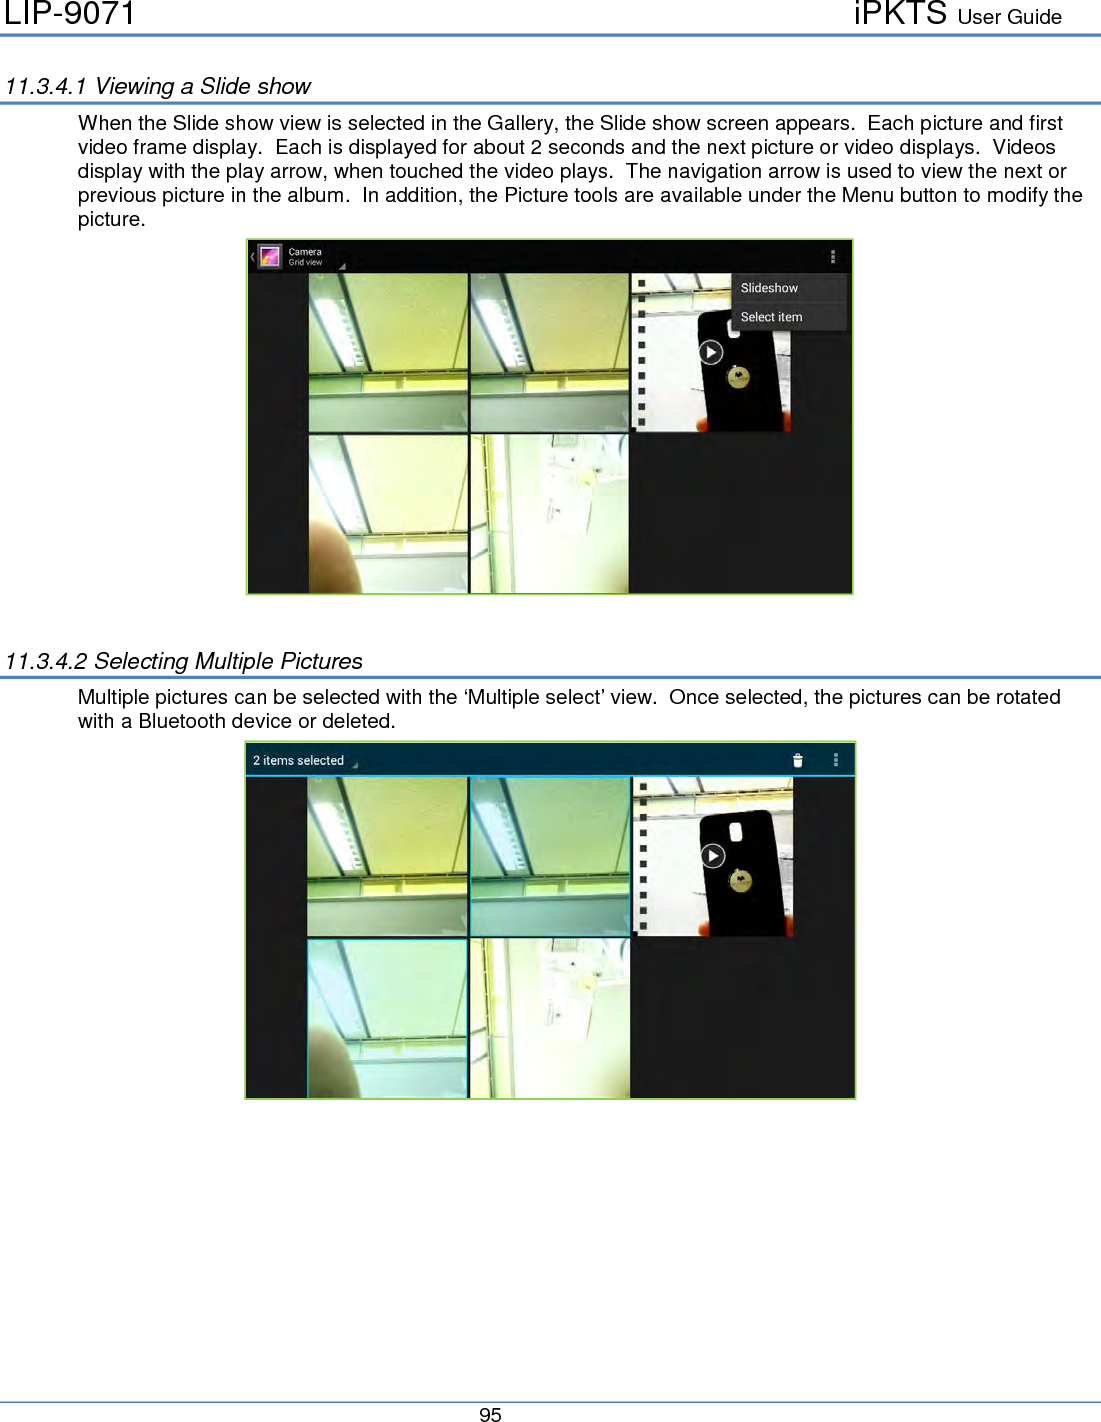
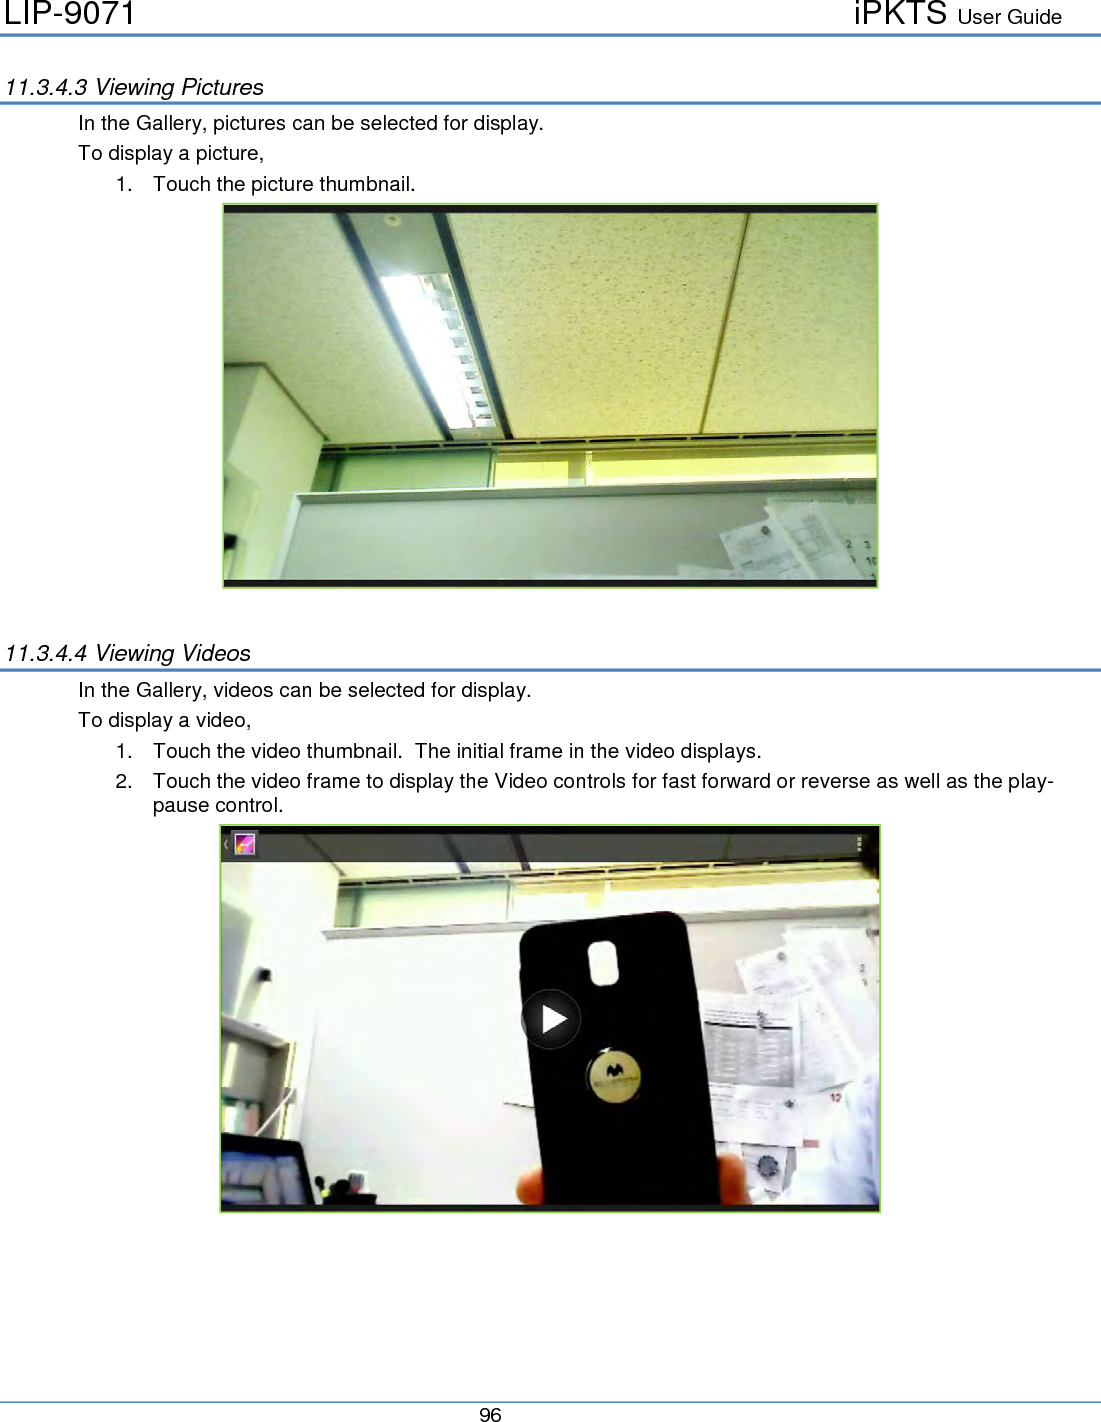
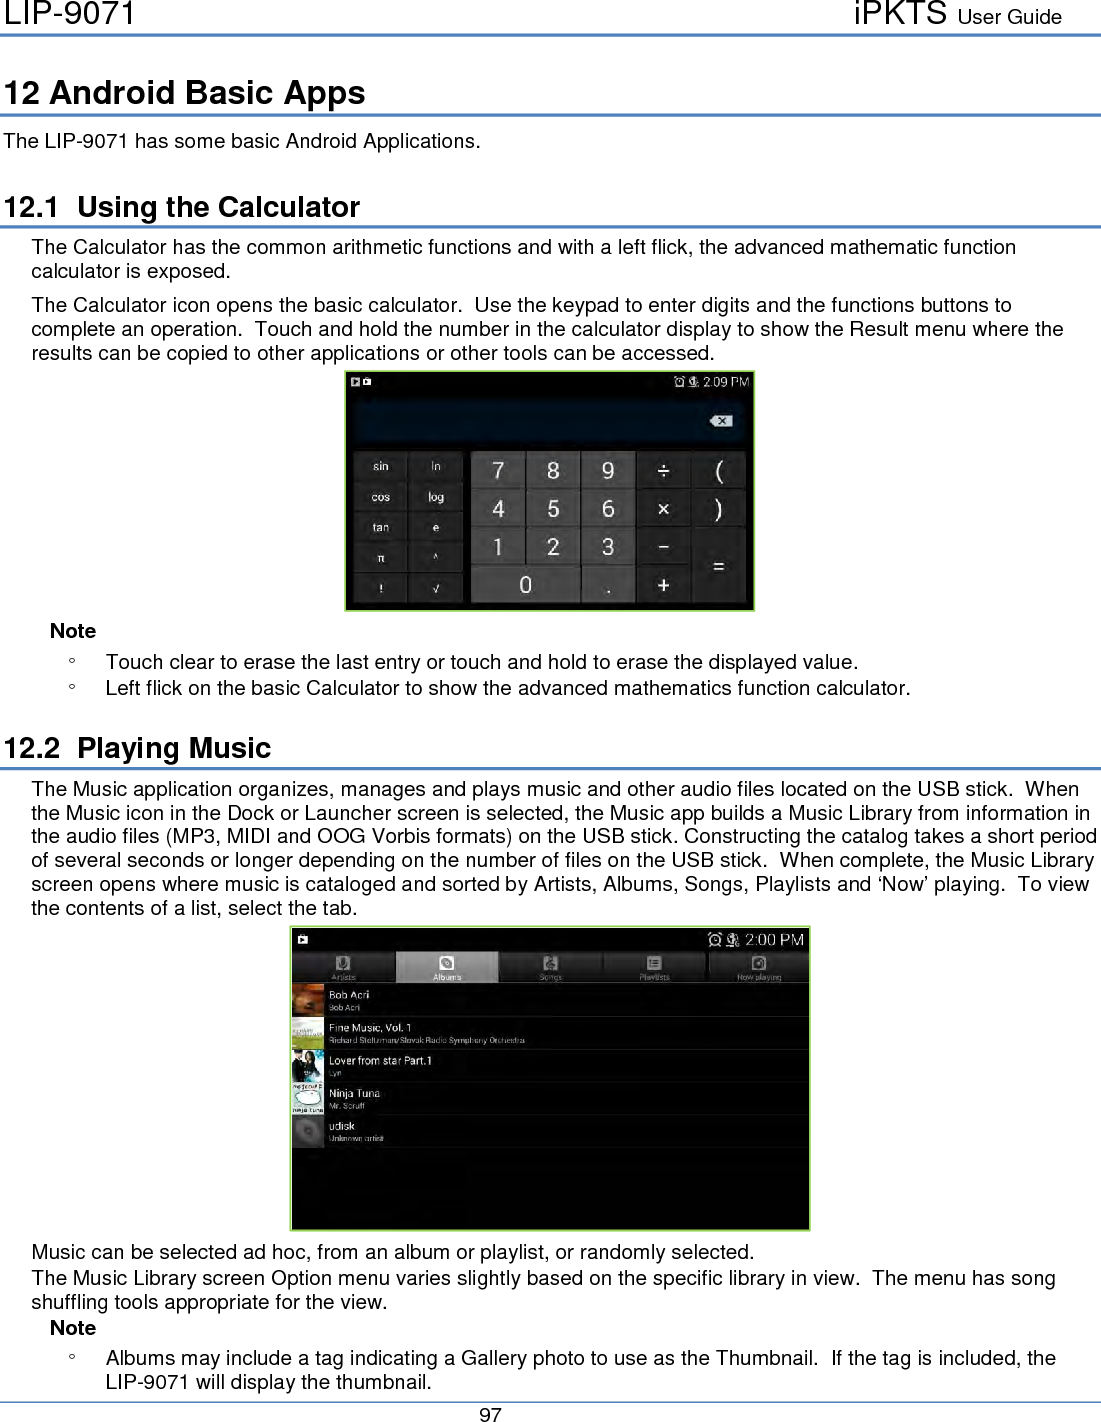
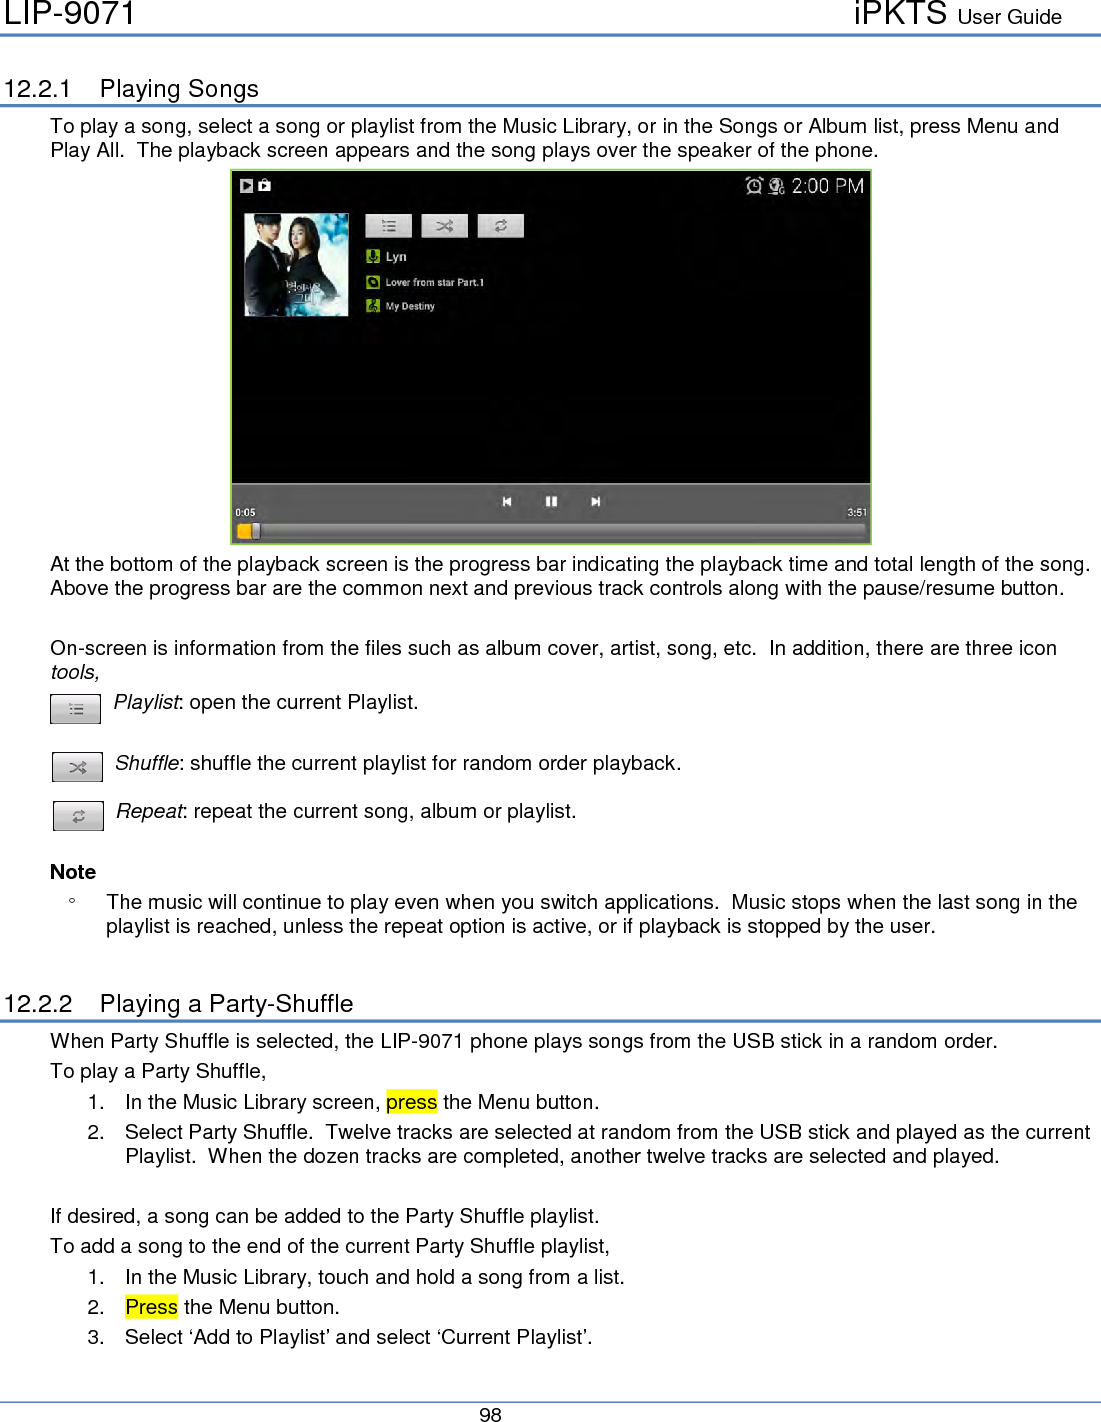
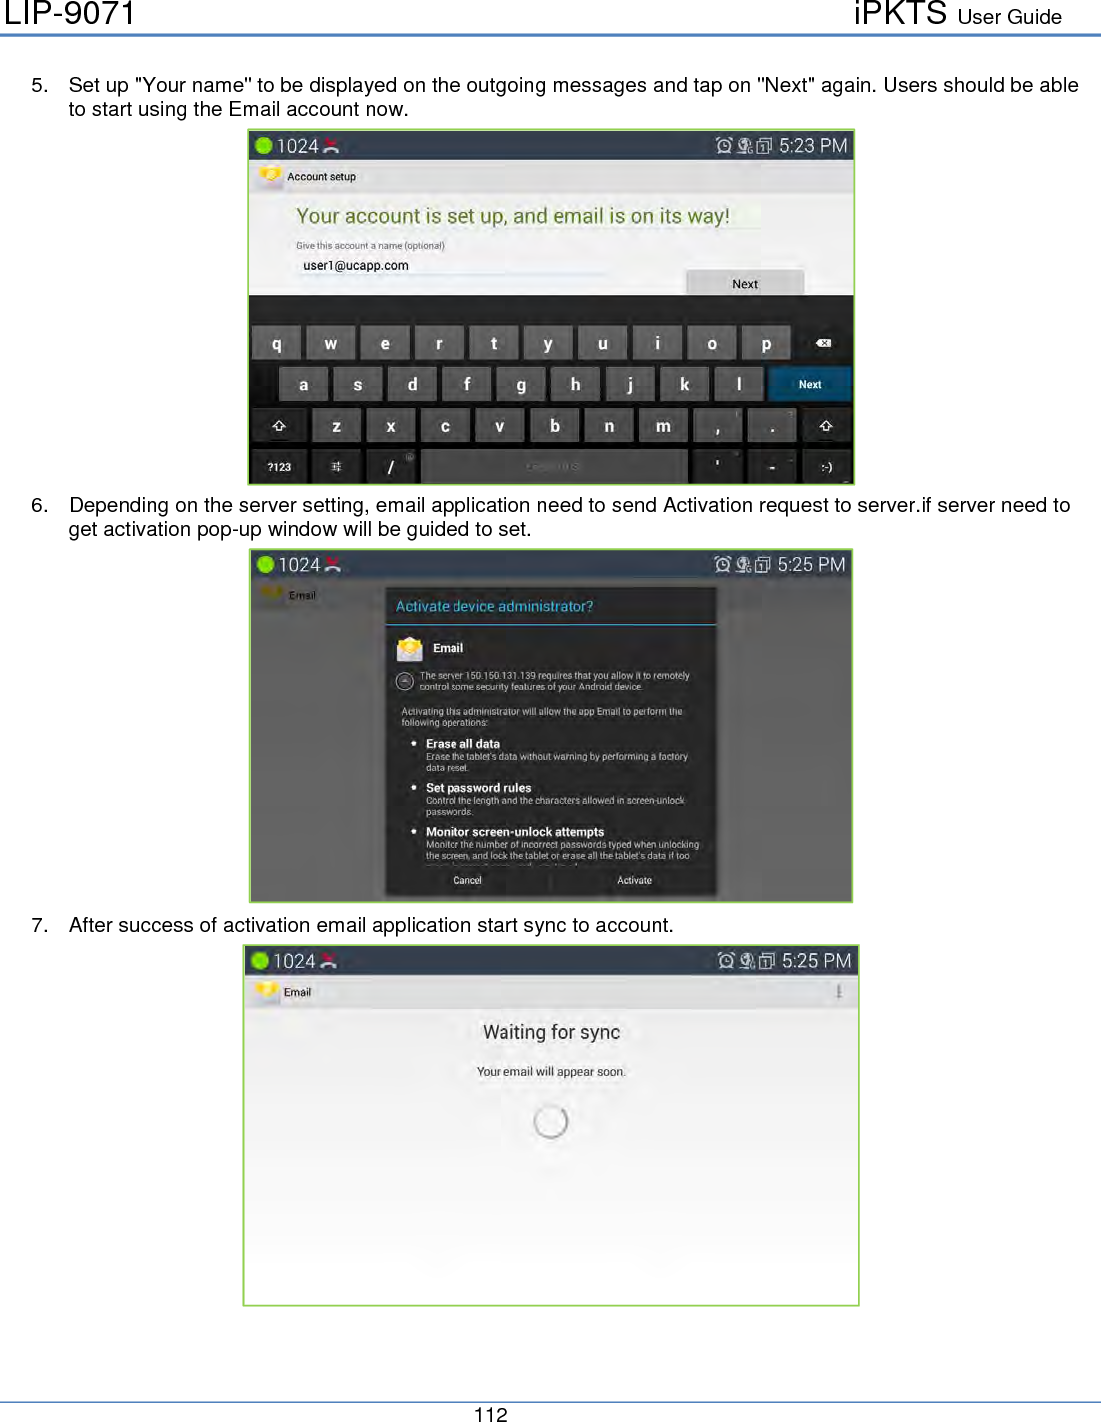
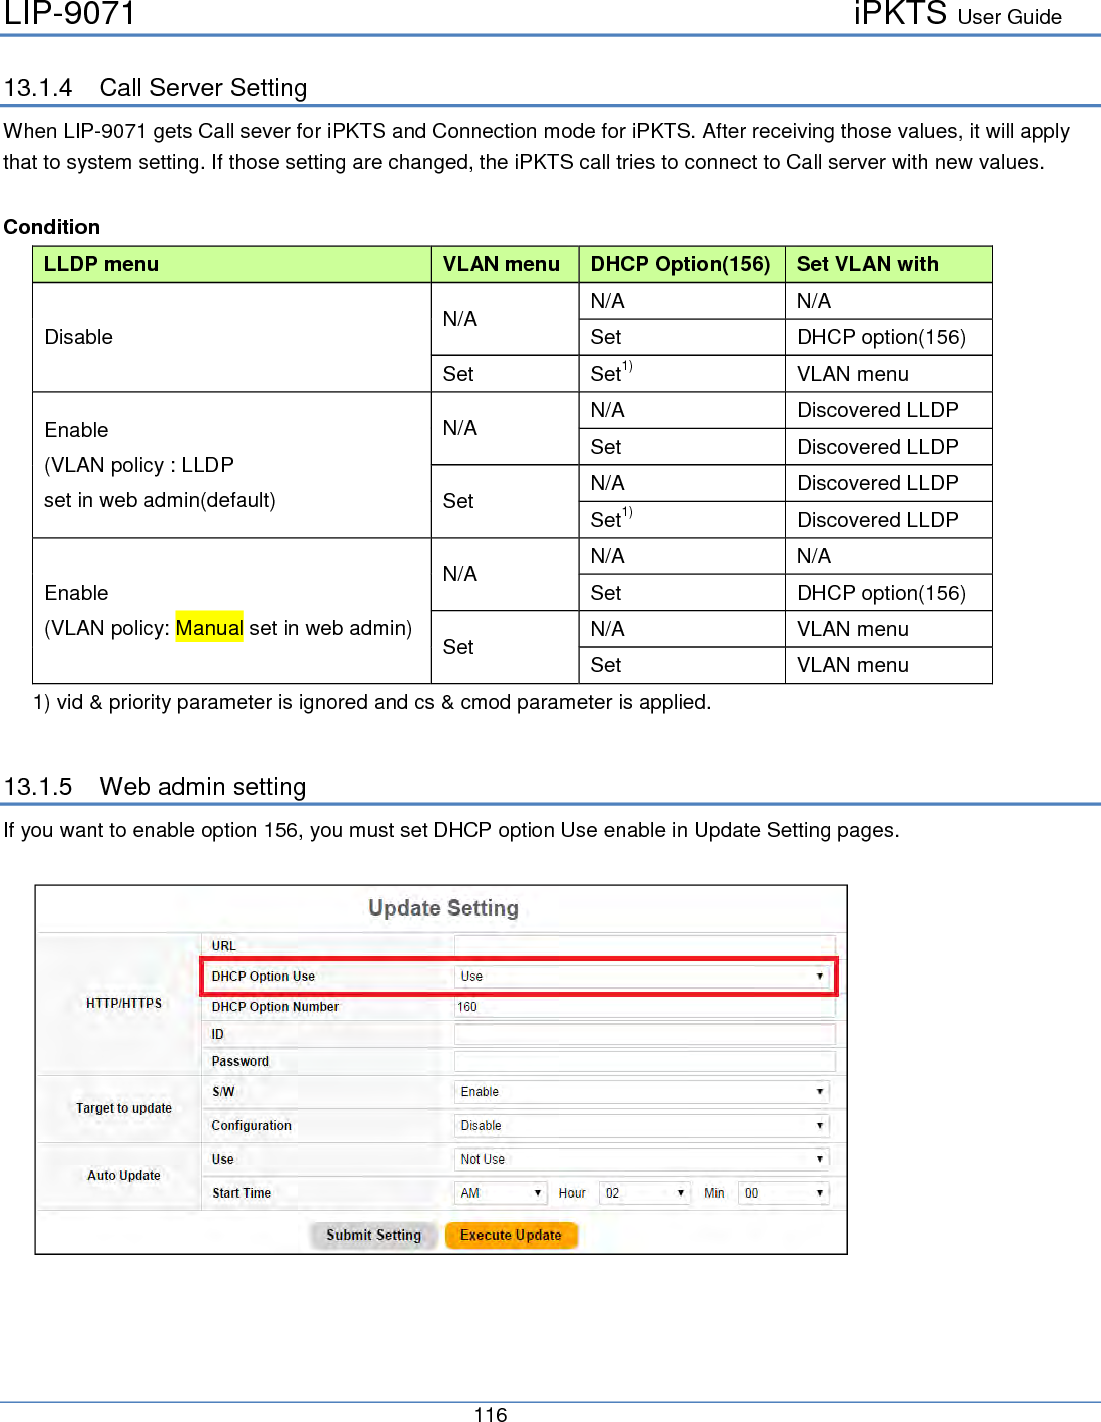
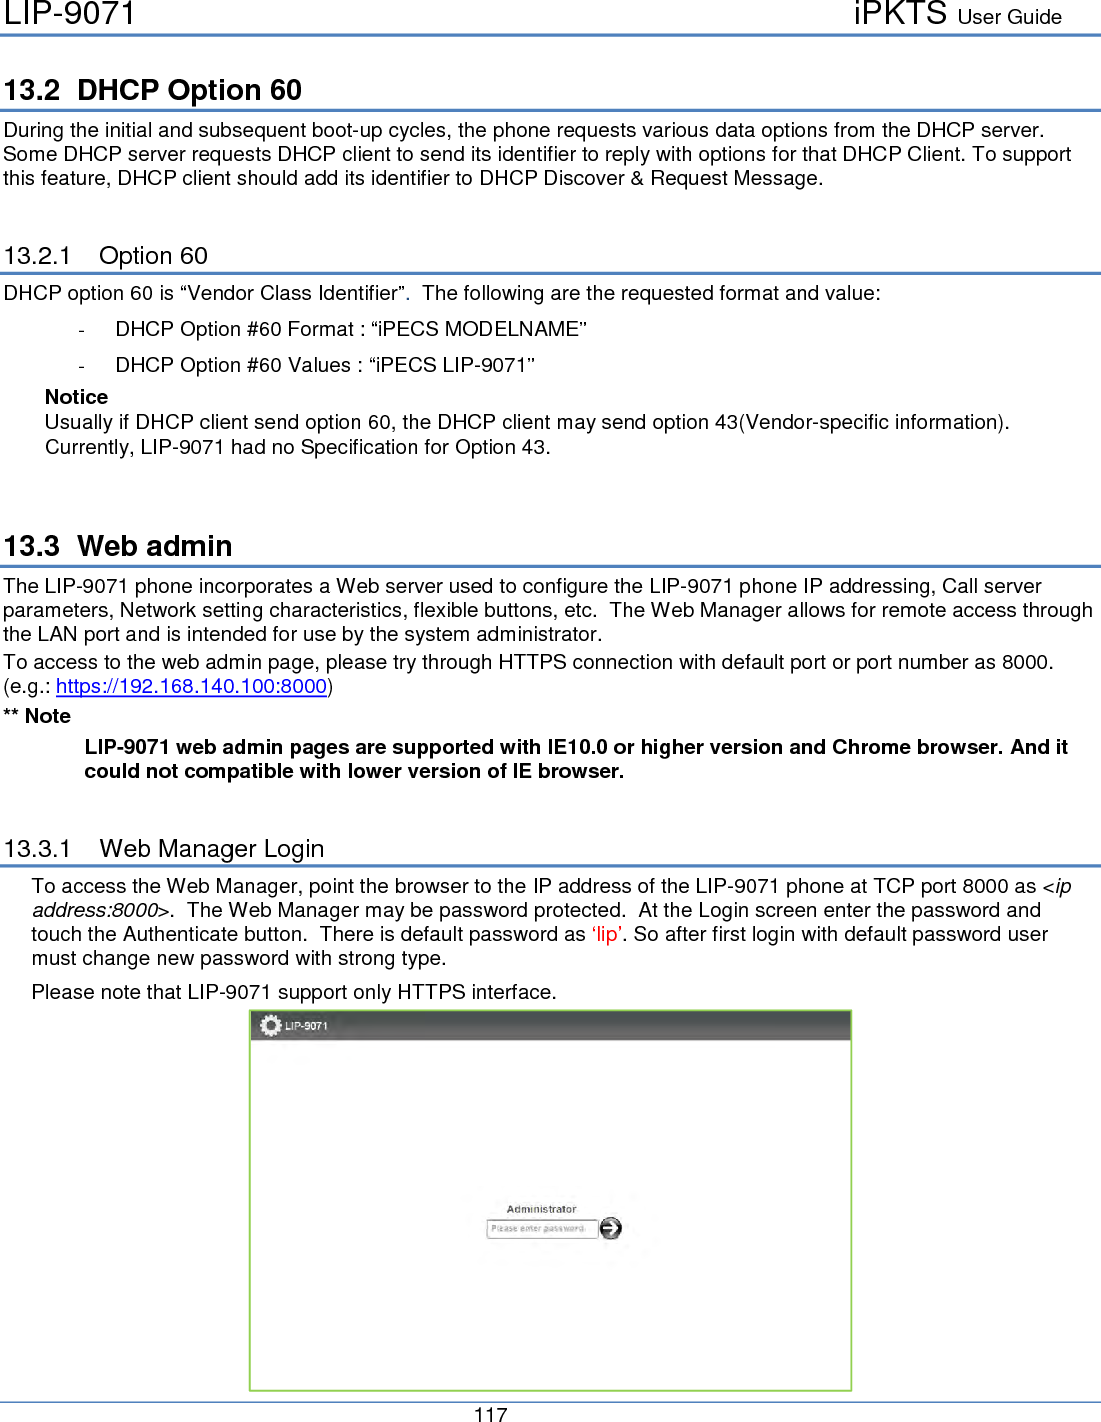
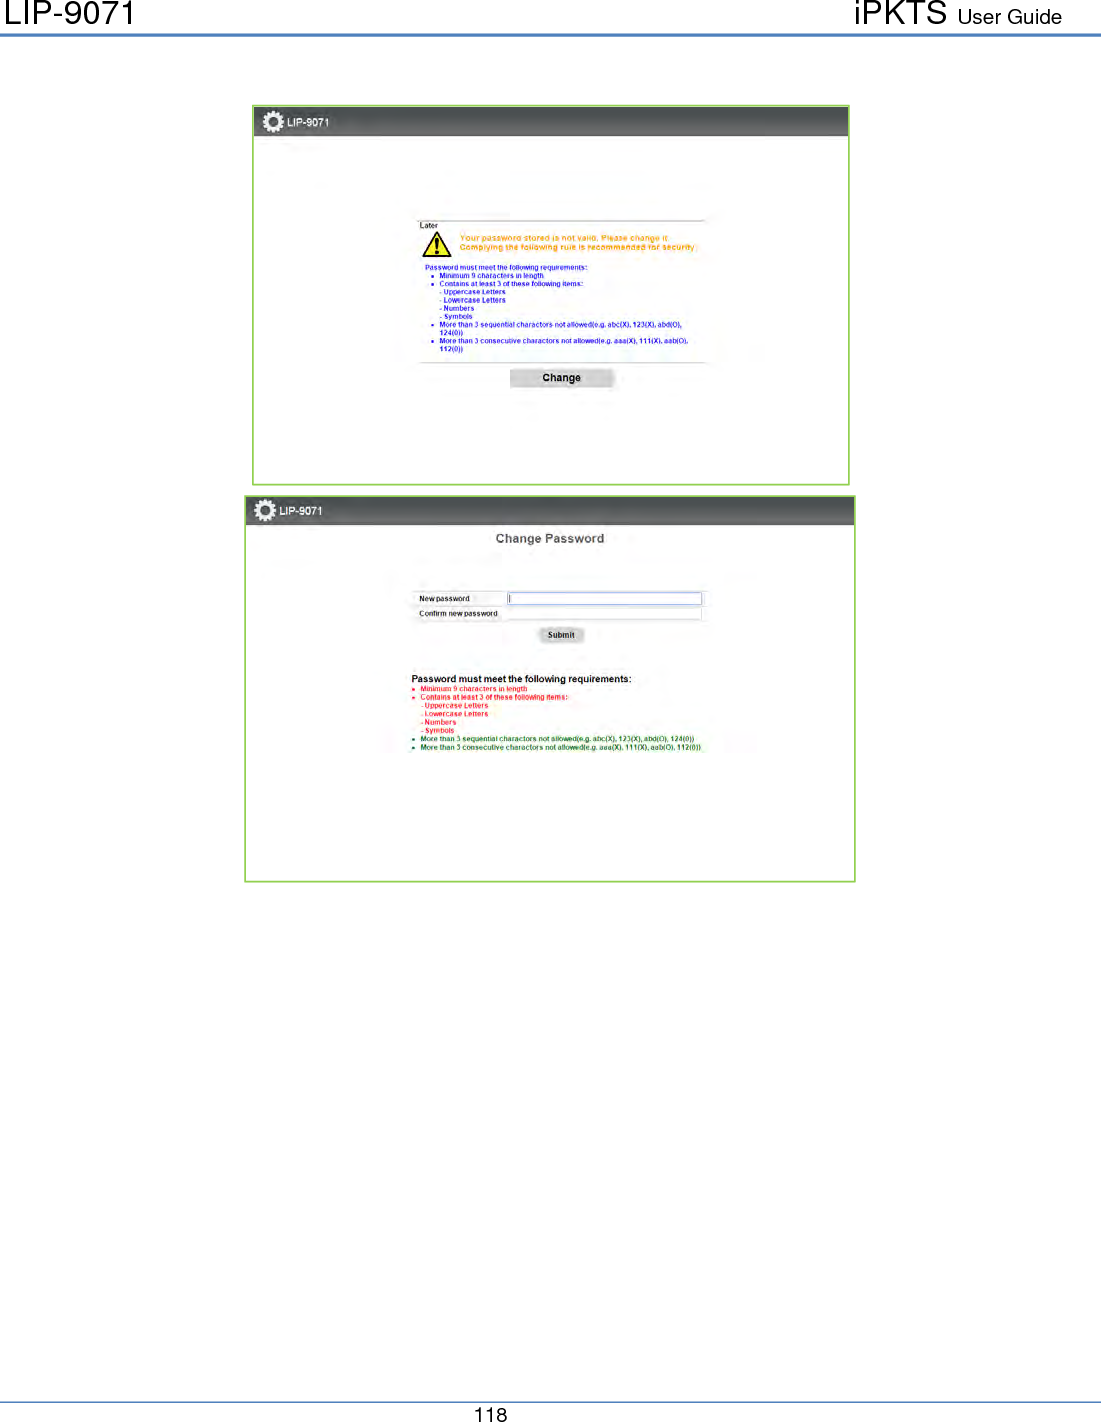
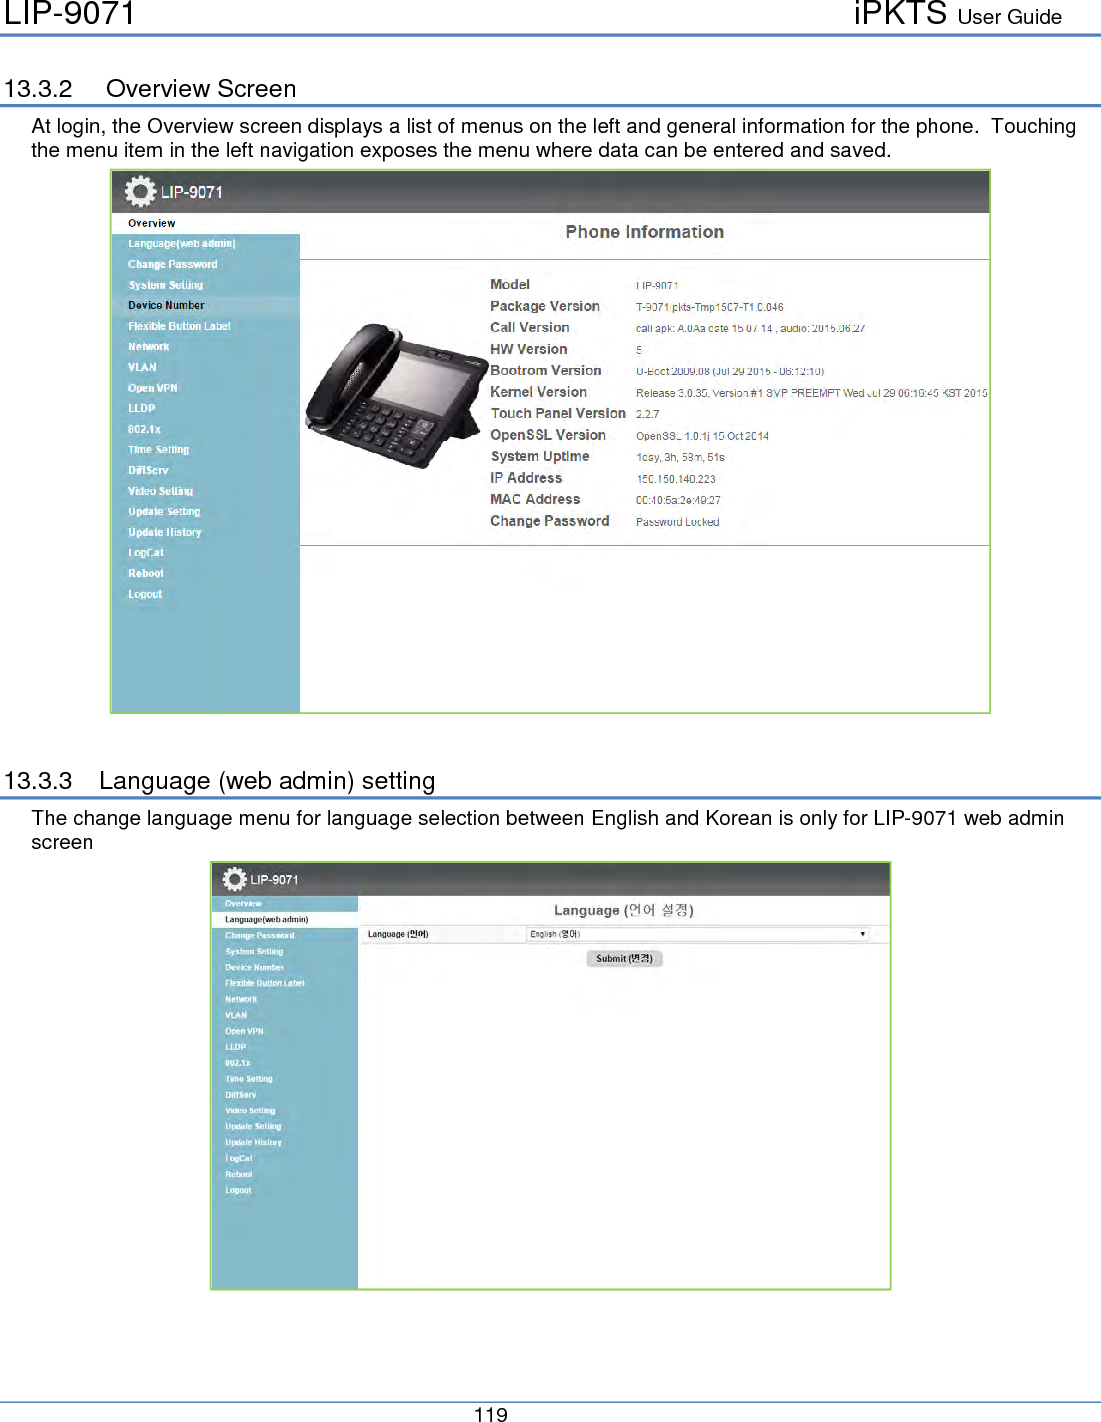
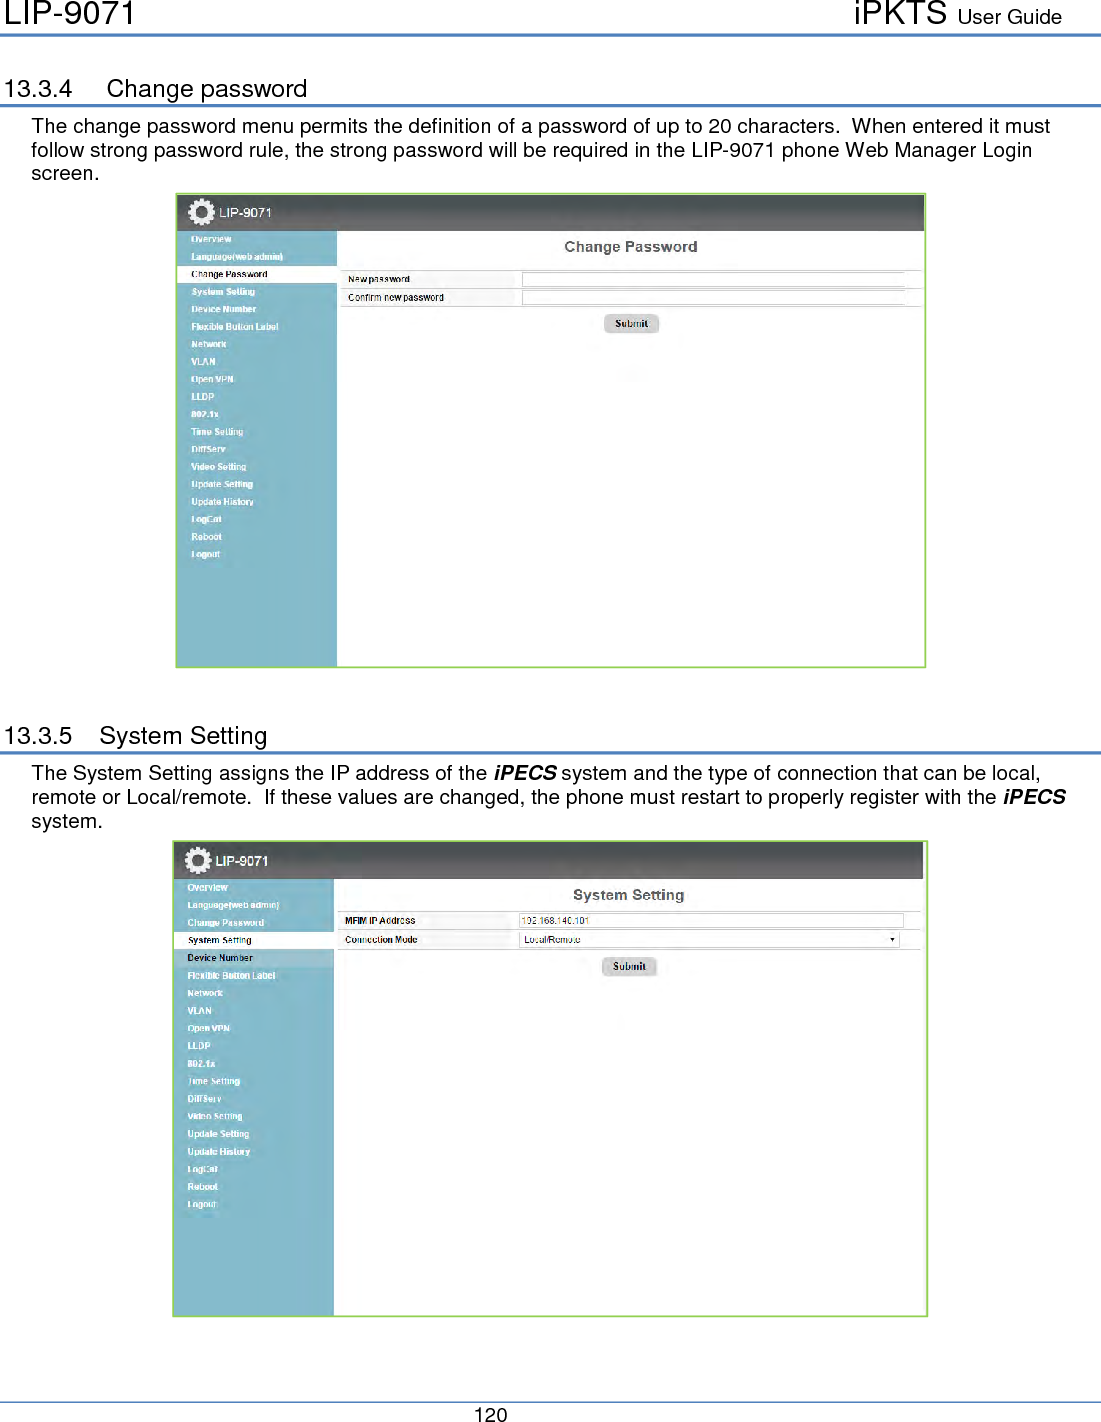
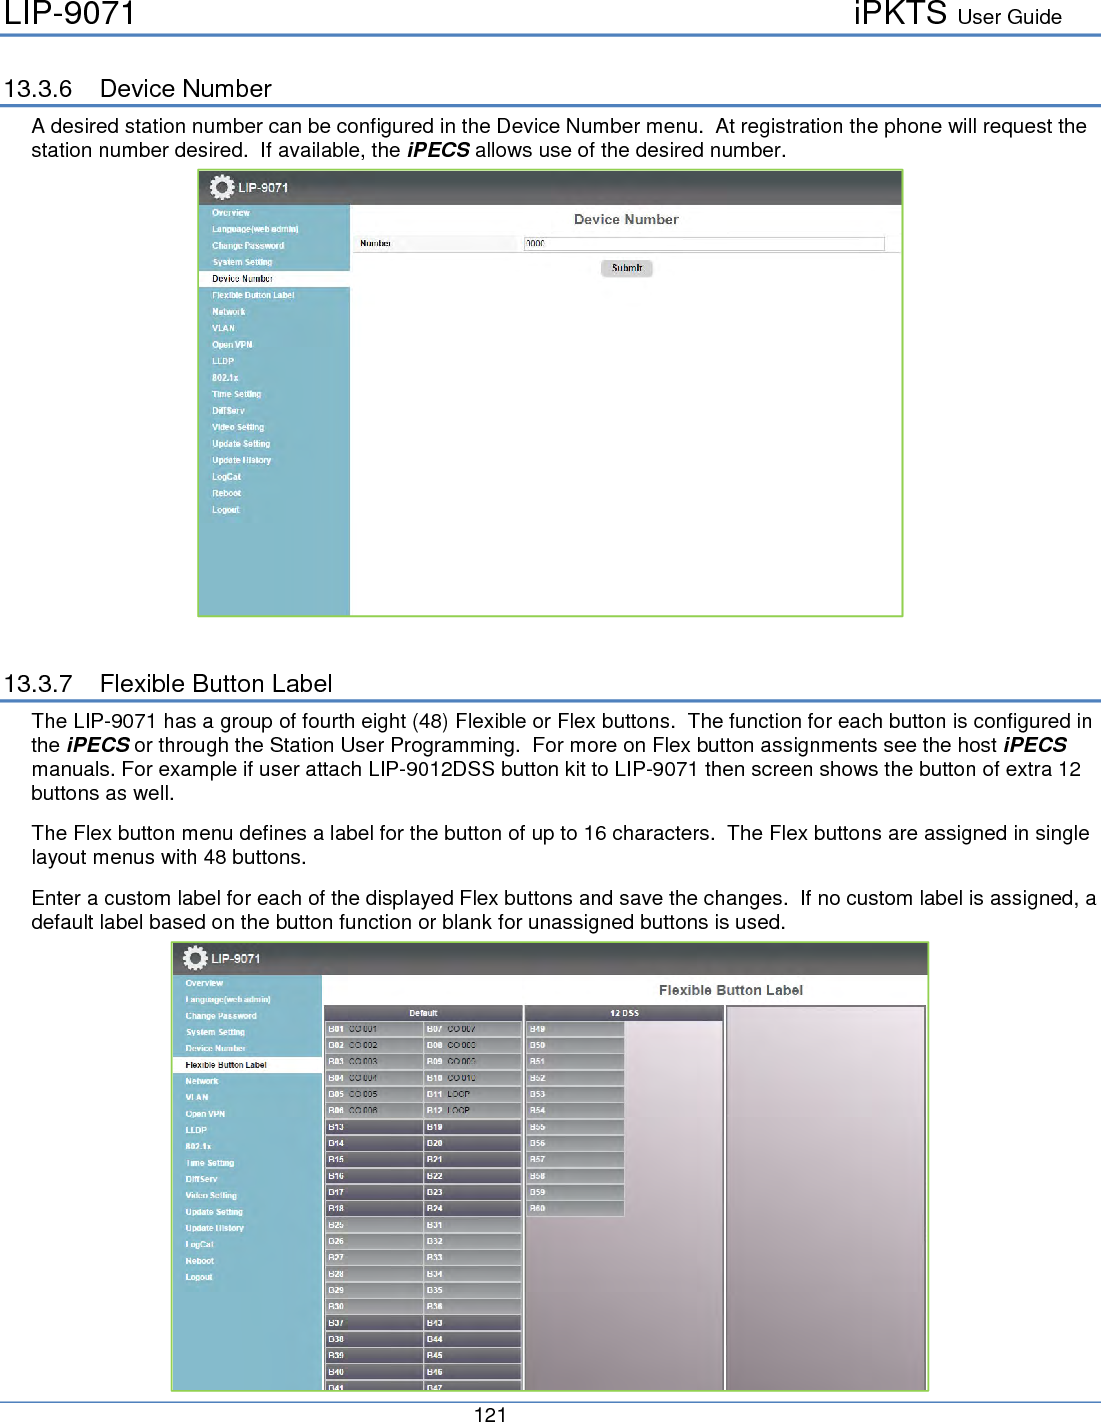
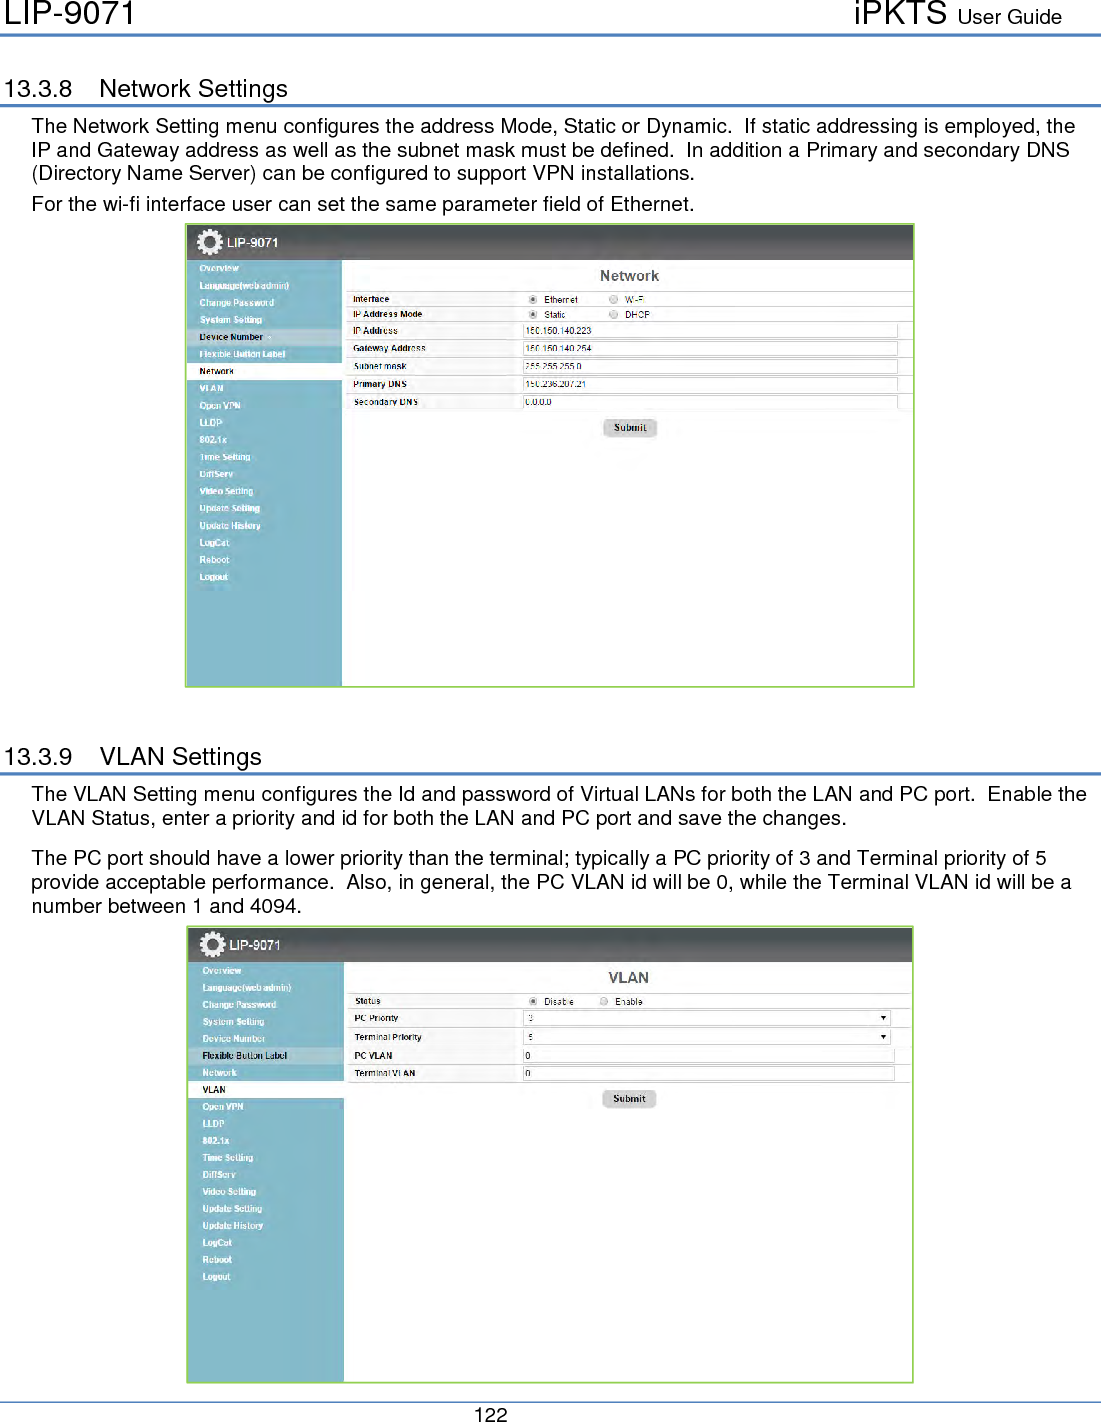
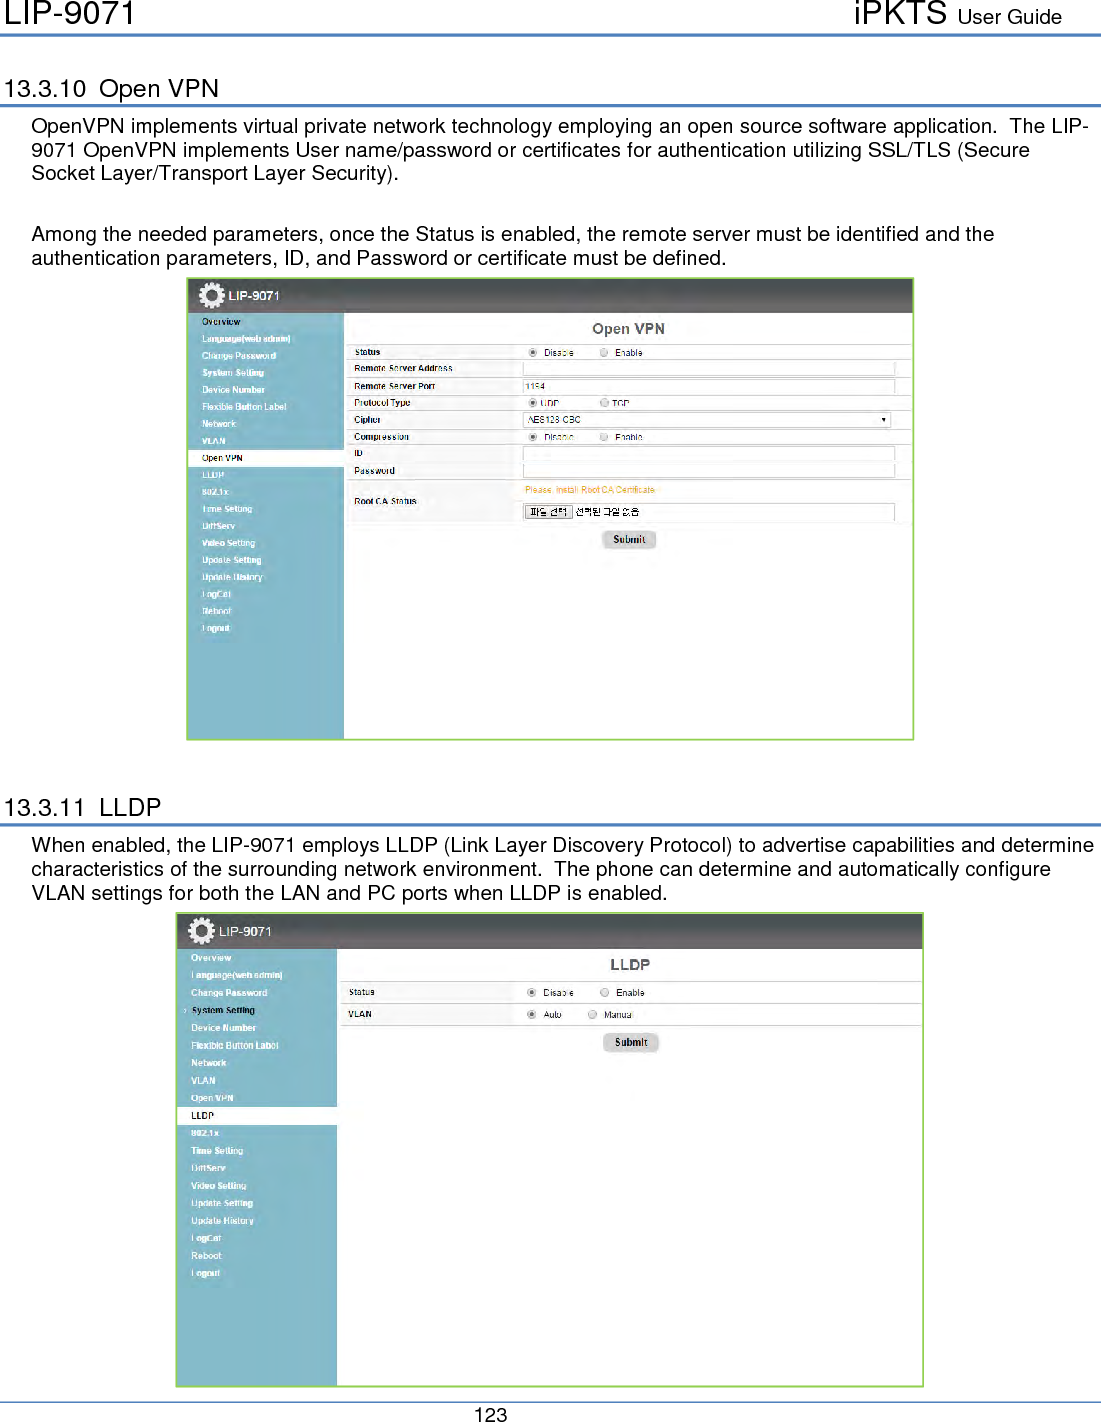
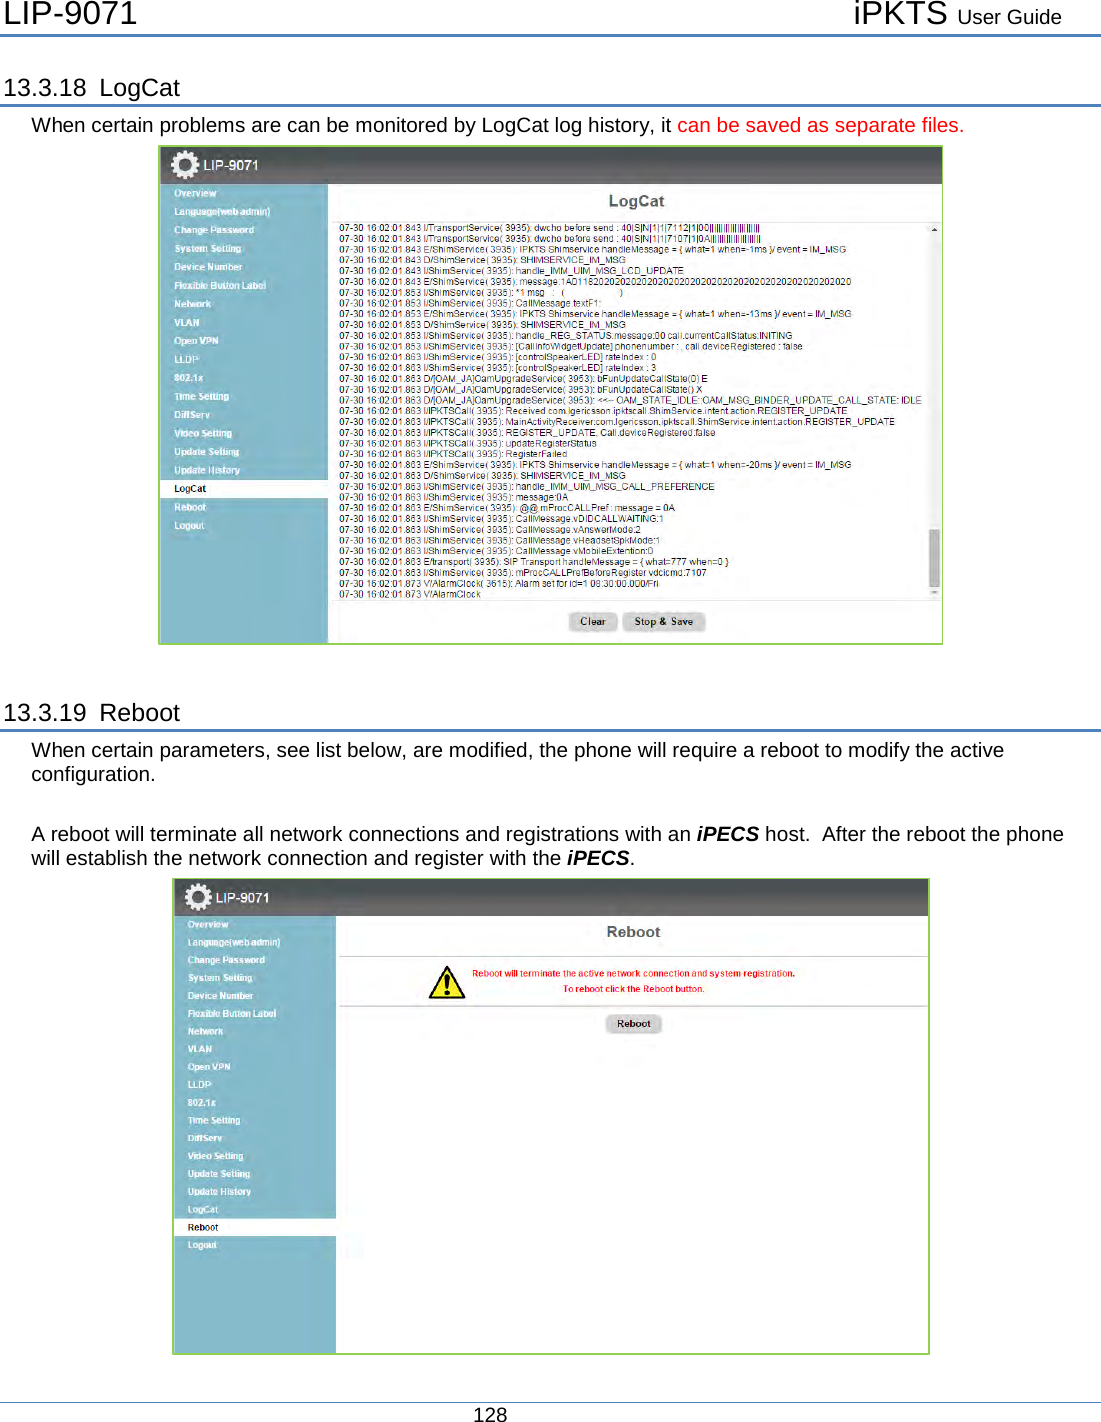
![LIP-9071 iPKTS User Guide Regulatory and Safety Notices European Union Declarations of Conformity Ericsson-LG Enterprise Co., Ltd. declare that the equipment specified in this document bearing the “CE” mark conforms to the European Union Radio and Telecommunications Terminal Equipment Directive(R&TTE 1999/5/EC), including the Electromagnetic Compatibility Directive(2004/108/EC) and Low Voltage Directive(2006/95/EC). Copies of these Declarations of Conformity (DoCs) can be obtained by contacting your local sales representative. [USA/CSA] FCC/IC Certificate Number FCC ID: 2ABGALIP9071 IC: 11597A-LIP9071 FCC/IC Interference Statement This equipment has been tested and found to comply with the limits for a Class B digital device, pursuant to part 15 of the FCC Rules. These limits are designed to provide reasonable protection against harmful interference in a residential installation. This equipment generates, uses and can radiate radio frequency energy and, if not installed and used in accordance with the instructions, may cause harmful interference to radio communications. However, there is no guarantee that interference will not occur in a particular installation. If this equipment does cause harmful interference to radio or television reception, which can be determined by turning the equipment off and on, the user is encouraged to try to correct the interference by one or more of the following measures: ㆍReorient or relocate the receiving antenna. ㆍIncrease the separation between the equipment and receiver. ㆍConnect the equipment into an outlet on a circuit different from that to which the receiver is connected. ㆍConsult the dealer or an experienced radio/TV technician for help. This device complies with part 15 /RSS-GEN of the FCC/IC rules. Operation is subject to the following two conditions: (1)This device may not cause harmful interference; and (2) This device must accept any interference received, including interference that may cause undesired operation. This Class B digital apparatus complies with Canadian ICES-003. Cet appareil numérique de la classe B est conforme à la norme NMB-003 du Canada.](https://usermanual.wiki/Ericsson-LG-Enterprise/LIP9071/User-Guide-2863848-Page-3.png)