LG Electronics USA 42LM3400UC LED LCD TV monitor User Manual
LG Electronics USA LED LCD TV monitor
UserManual.wiki
>
LG Electronics USA
>
42LM3400UC User Manual
User Manual
Navigation menu
Upload a User Manual
Namespaces
Wiki Guide
HTML
PDF
Info
Views
User Manual
Discussion / Help
Navigation

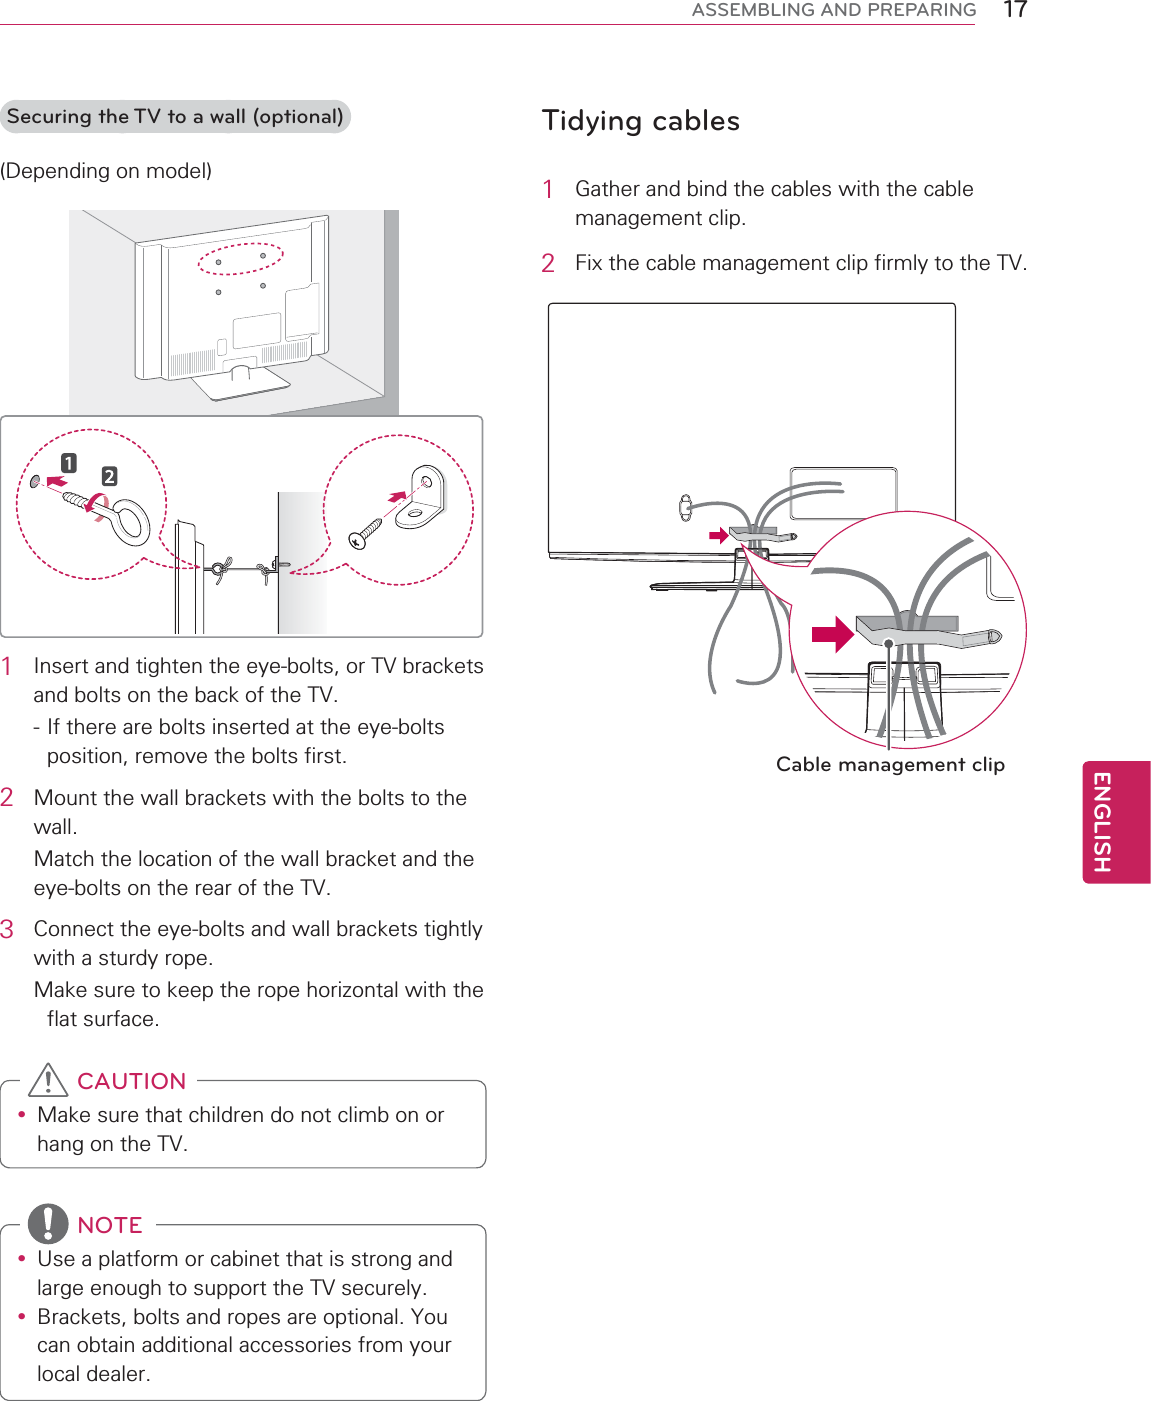
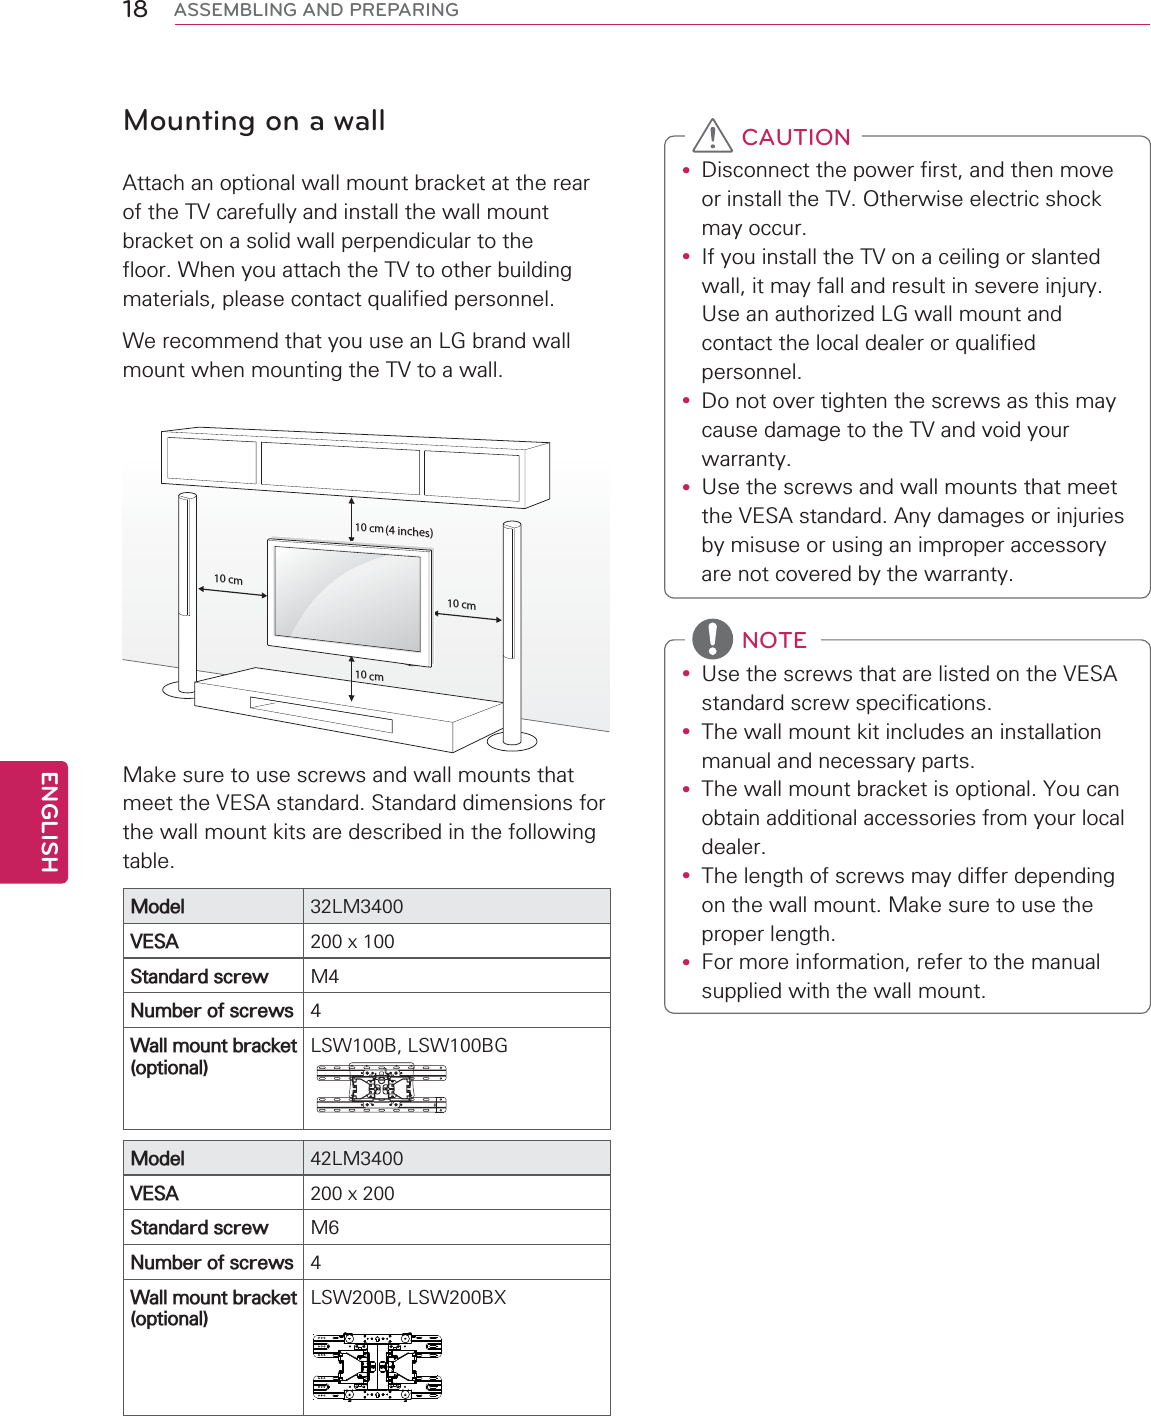
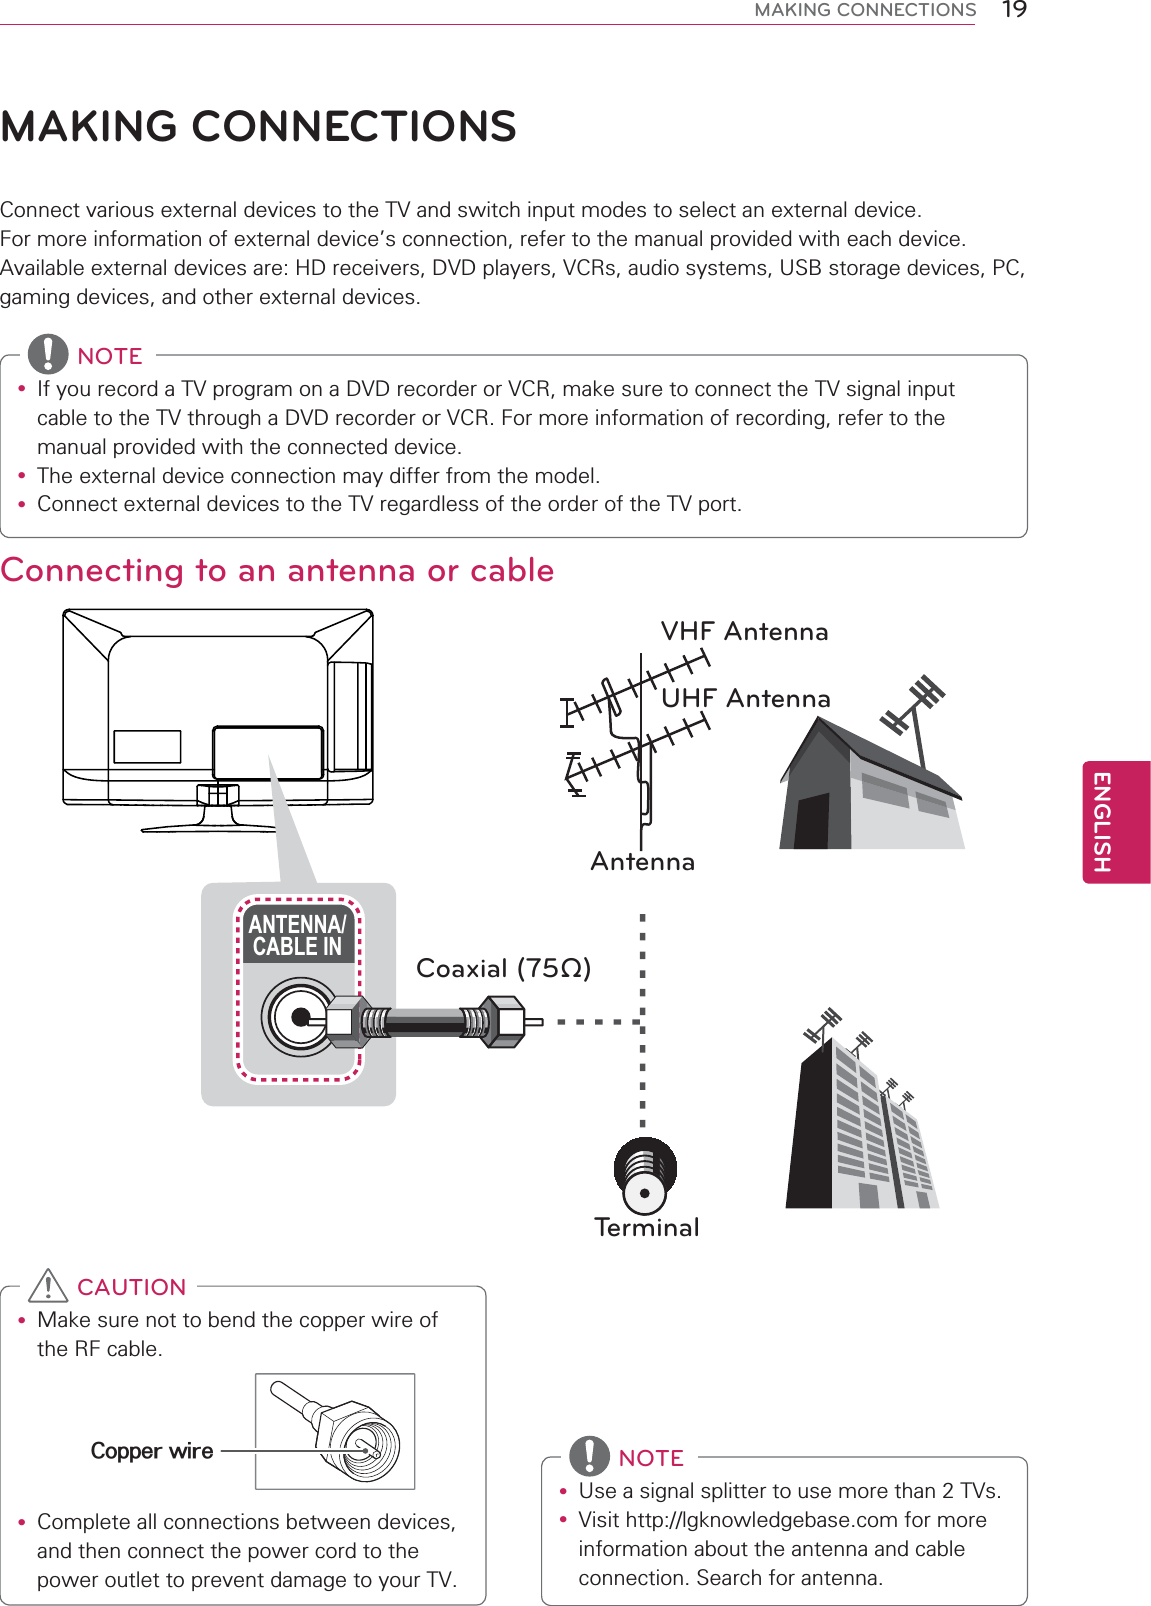
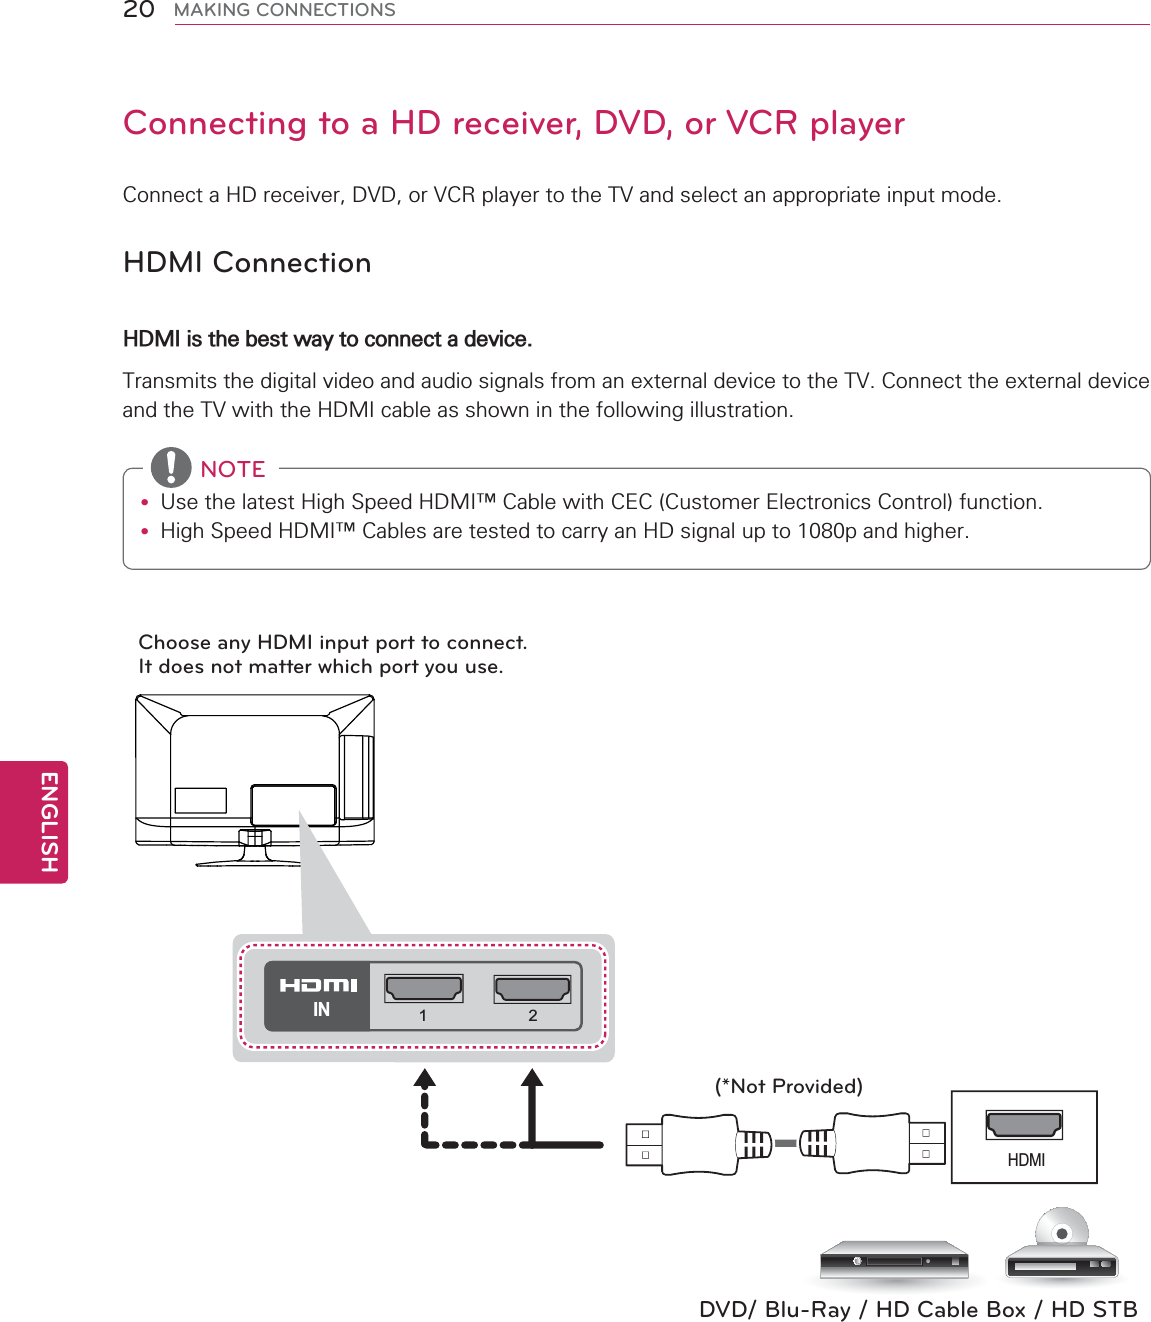
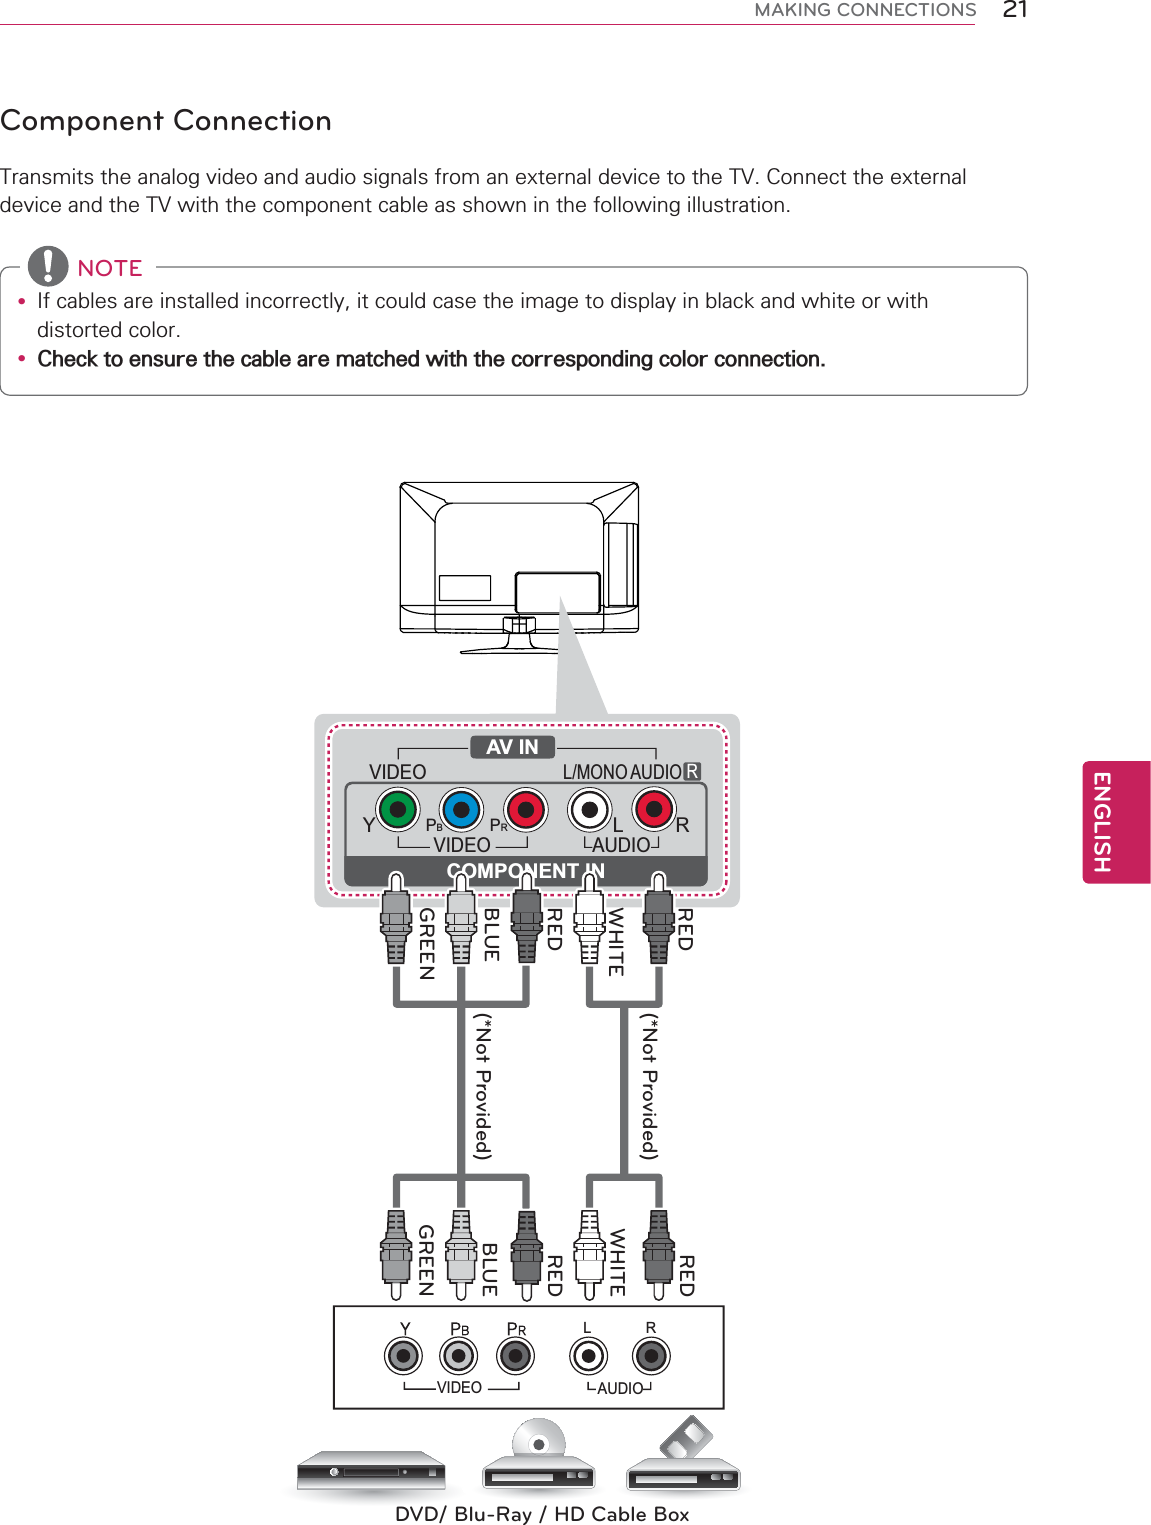
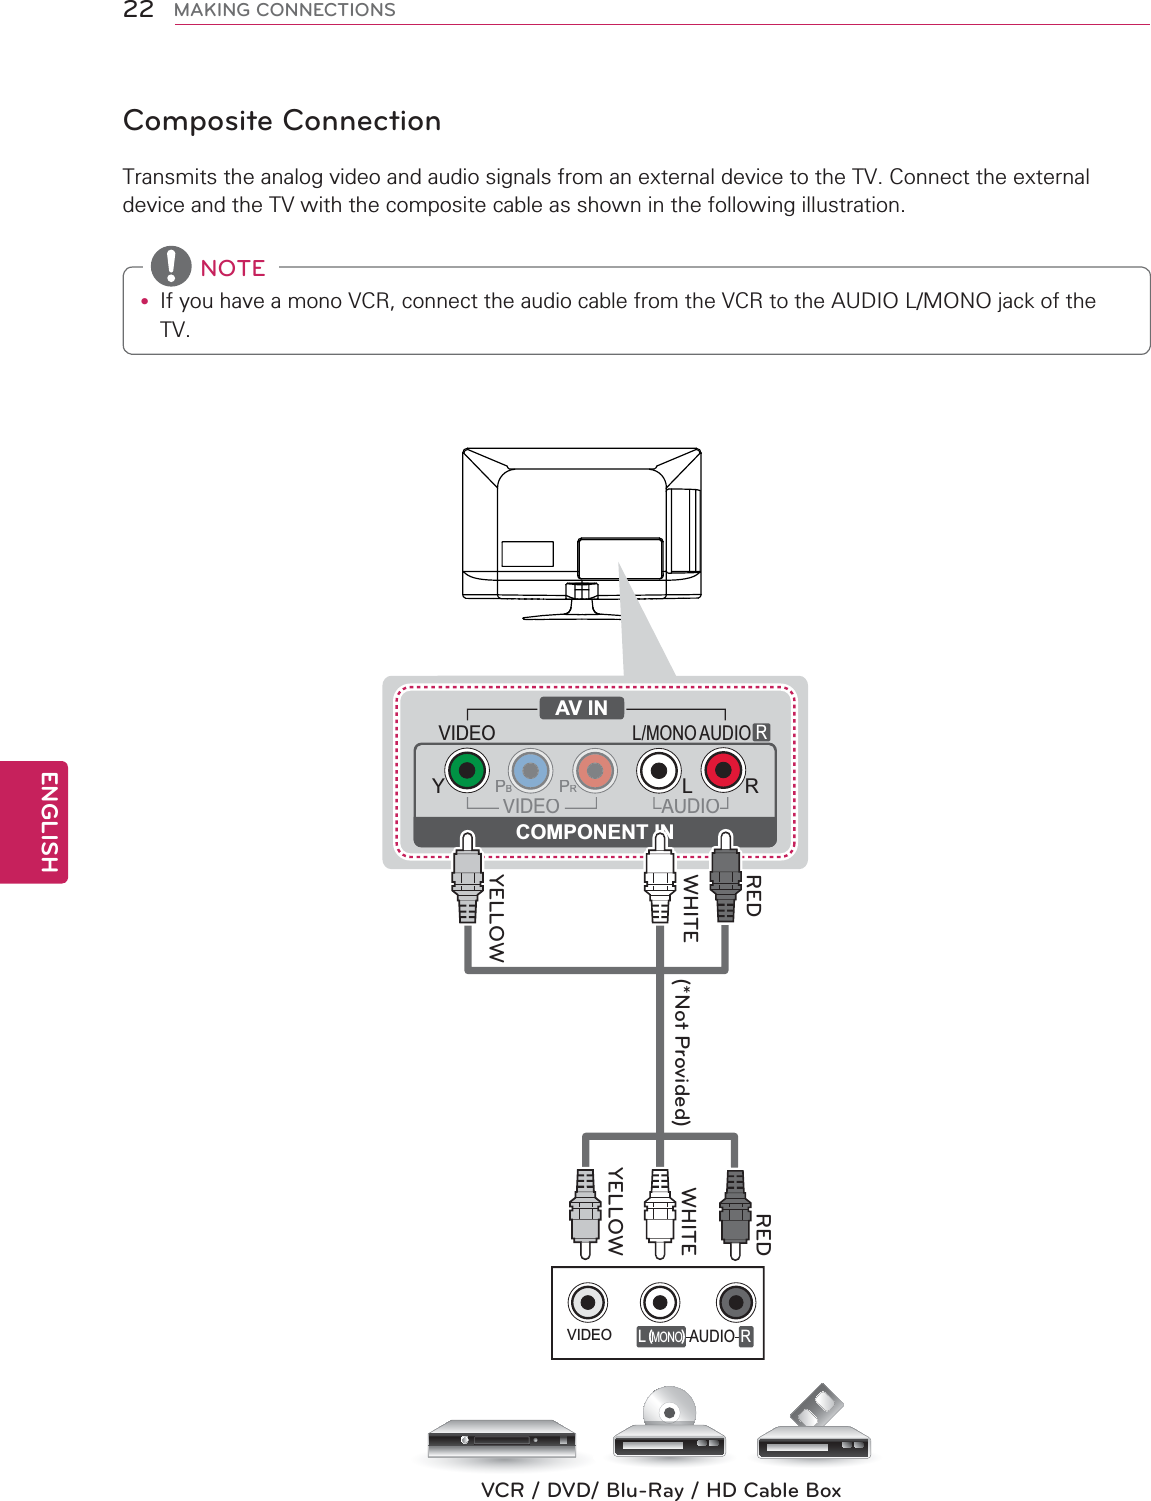
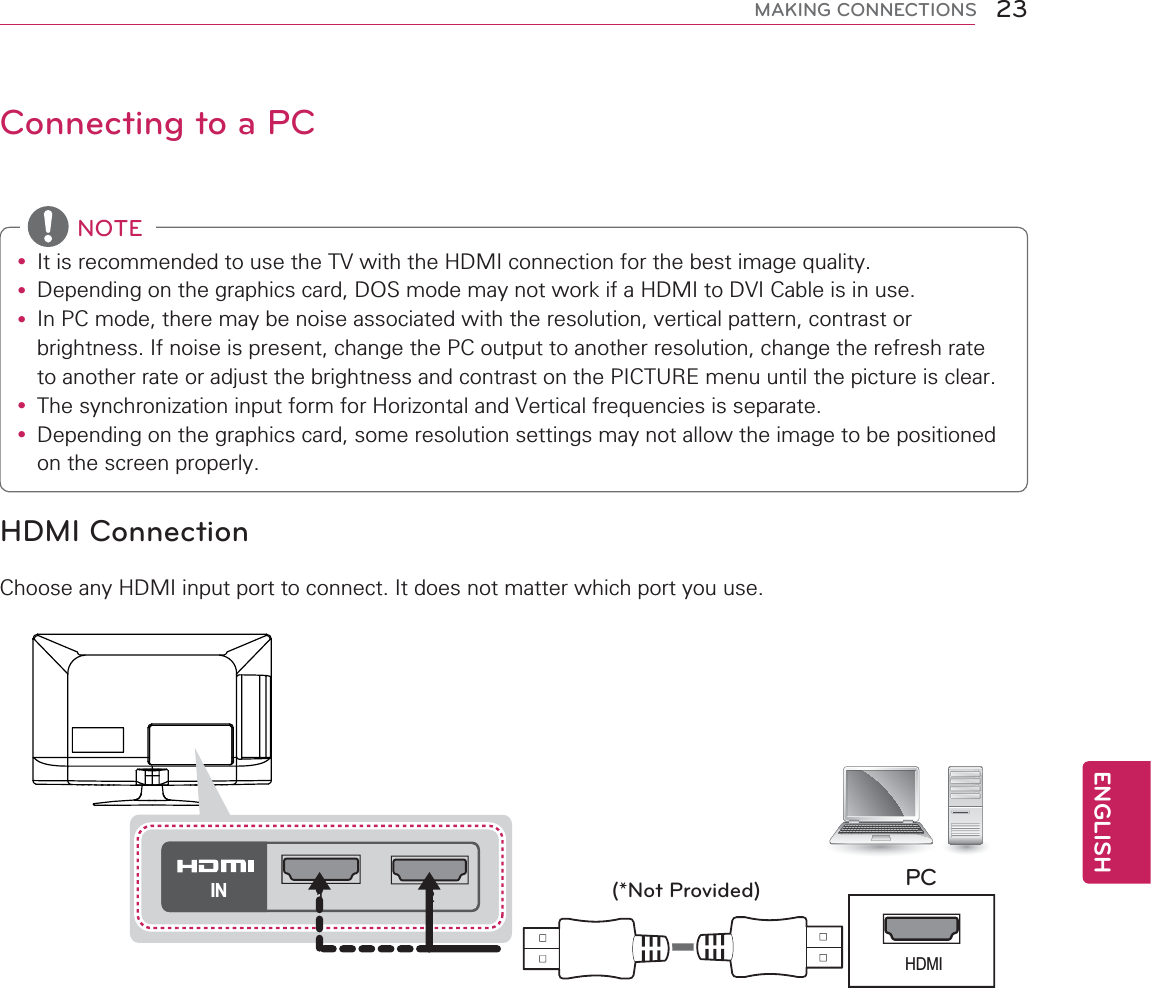
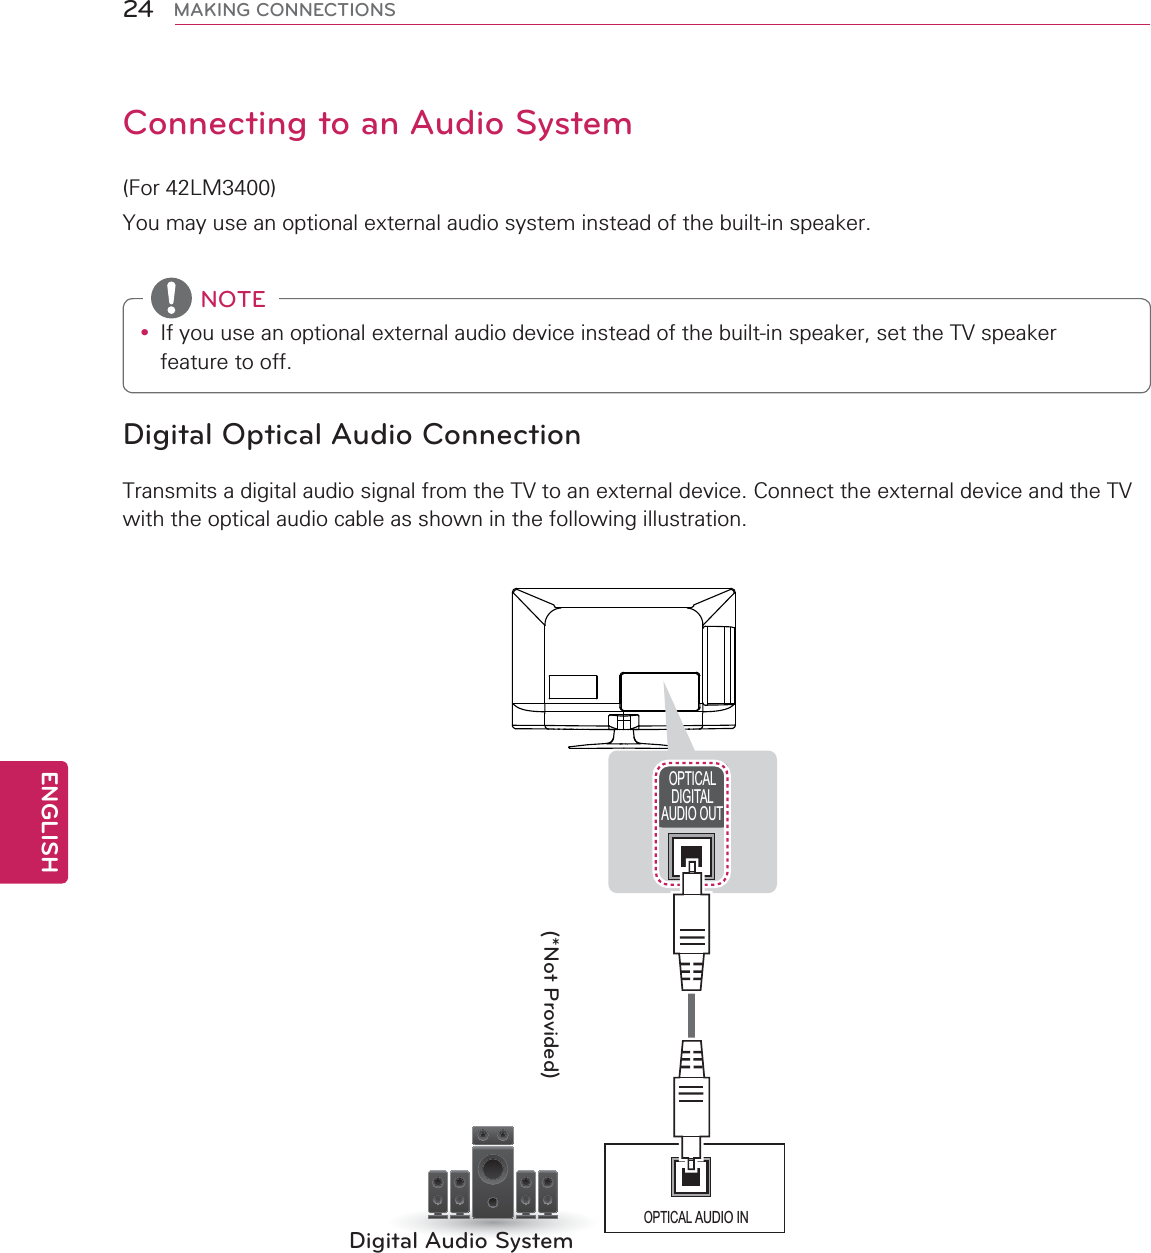
![ENGLISH29USING THE USER GUIDEUSING THE USER GUIDEUser Guide allows you to more easily access the detailed TV information.1 Press SETTINGS to access the main menus.2 Press the RED button to access the Customer Support menus.Ö3,&785( $8',2 &+$11(/ 7,0(0<0(',$1(7:25.237,21/2&.3UHVV2.ᯙWRVHW\RXURSWLRQVHWWLQJV&XVWRPHU6XSSRUWᰳ([LW۳6RIWZDUH8SGDWH۳3LFWXUH7HVW۳6RXQG7HVW۳3URGXFW6HUYLFH,QIR۳1HWZRUN7HVWᯡ8VHU*XLGH&ORVH3 Press the Navigation buttons to scroll to User Guide and press OK.28VHU*XLGH237,21&+$11(/6HWWLQJ3,&785(6281'6HWWLQJ$GYDQFHG)XQFWLRQ7RXVHLQSXWGHYLFH7RVHWWLPHRSWLRQV7RVHWODQJXDJH7RVHWFDSWLRQ7RVHWRWKHURSWLRQV7RVHW79ORFNRSWLRQV7RXVH(QHUJ\6DYLQJIHDWXUH3,QIRUPDWLRQ11Allows to select the category you want.2Allows to select the item you want.You can use ᰜᰝto move between pages.3Allows to browse the description of the function you want from the index.128VHU*XLGH OPTION > To set languageSETTINGS Ö OPTION ¨ LanguageYou can select the language of the menu displayed on the screen and digital sound broadcasting.yMenu Language : Selects a language for the display text.y Audio Language [In Digital Mode Only] : Select the desired language when watching digital broadcasting containg several voice languages.&ORVH=RRP,Q237,21&+$11(/6HWWLQJ3,&785(6281'6HWWLQJ$GYDQFHG)XQFWLRQ,QIRUPDWLRQ2&ORVH=RRP2XWSETTINGS Ö OPTION ¨ LanguageYou can select the language of the menu displayed on the screen and digital sound broadcasting.yMenu Language : Selects a language for the display text.y Audio Language [In Digital Mode Only] : Select the desired language when watching digital broadcasting containg several voice languages.1Shows the description of the selected menu. You can use ᰜᰝto move between pages.2Zooms in or out the screen.](https://usermanual.wiki/LG-Electronics-USA/42LM3400UC/User-Guide-1687974-Page-30.png)