LG Electronics USA KE520 PCS GSM/ EDGE Phone with Bluetooth User Manual KE520 1
LG Electronics USA PCS GSM/ EDGE Phone with Bluetooth KE520 1
UserManual.wiki
>
LG Electronics USA
>
KE520 User Manual
Users Manual
Navigation menu
Upload a User Manual
Namespaces
Wiki Guide
HTML
PDF
Info
Views
User Manual
Discussion / Help
Navigation
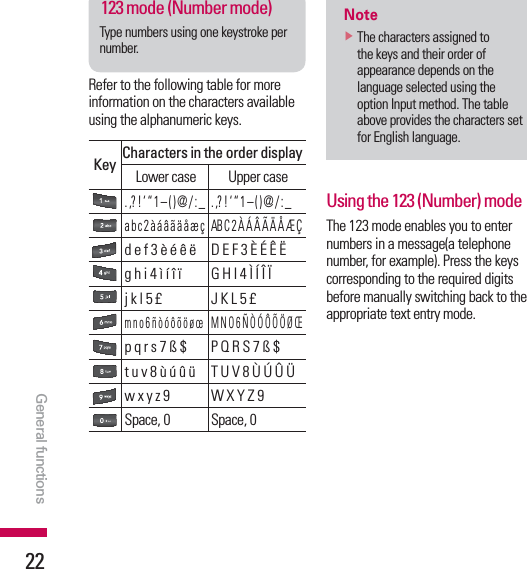
![8For Your SafetyImportant InformationThis user guide contains important information on the use andoperation of this phone. Please read all the informationcarefully for optimal performance and to prevent any damageto or misuse of the phone. Any changes or modifications notexpressly approved in this user guide could void your warrantyfor this equipment.Before You StartSafety InstructionsWARNING! To reduce the possibility of electric shock, do notexpose your phone to high humidity areas, such as thebathroom, swimming pool, etc.Always store your phone away from heat. Never store yourphone in settings that may expose it to temperatures less than32°F or greater than 104°F, such as outside during extremeweather conditions or in your car on a hot day. Exposure toexcessive cold or heat will result in malfunction, damageand/or catastrophic failure.Be careful when using your phone near other electronicdevices. RF emissions from your mobile phone may affectnearby in adequately shielded electronic equipment. Youshould consult with manufacturers of any personal medicaldevices such as pacemakers and hearing aides to determine ifthey are susceptible to interference from your mobile phone.Turn off your phone in a medical facility or at a gas station.Never place your phone in a microwave oven as this willcause the battery to explode.IMPORTANT! Please read the TIA SAFETY INFORMATION onpage 78 before using your phone.Safety InformationRead these simple guidelines. Breaking the rules may bedangerous or illegal. Further detailed information is given in thisuser guide.]Never use an unapproved battery since this could damagethe phone and/or battery and could cause the battery toexplode.]Never place your phone in a microwave oven as it willcause the battery to explode.]Do not dispose of your battery by fire or with hazardous orflammable materials.]Make sure that no sharp-edged items come into contactwith the battery. There is a risk of this causing a fire.]Store the battery in a place out of reach of children.]Be careful that children do not swallow any parts such asrubber plugs (earphone, connection parts of the phone,etc.). This could cause asphyxiation or suffocation.](https://usermanual.wiki/LG-Electronics-USA/KE520/User-Guide-843897-Page-4.png)
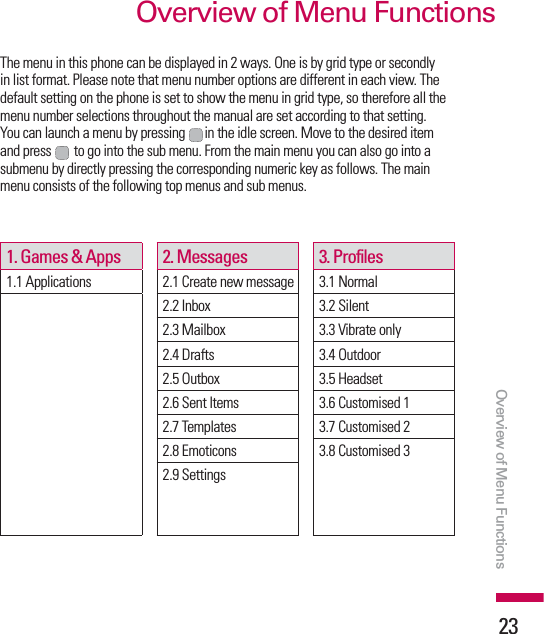
![9For Your Safety]Unplug the power cord and charger during lightning stormsto avoid electric shock or fire.]When riding in a car, do not leave your phone or set up thehands-free kit near to the air bag. If wireless equipment isimproperly installed and the air bag is activated, you may beseriously injured.]Do not use a hand-held phone while driving.]Do not use the phone in areas where its use is prohibited.(For example: aircraft).]Do not expose the battery charger or adapter to directsunlight or use it in places with high humidity, such as abathroom.]Never store your phone in temperatures less than- 4°F orgreater than 122°F.]Do not use harsh chemicals (such as alcohol, benzene,thinners, etc.) or detergents to clean your phone. There is arisk of this causing a fire.]Do not drop, strike, or shake your phone severely. Suchactions may harm the internal circuit boards of the phone.]Do not use your phone in high explosive areas as the phonemay generate sparks.]Do not damage the power cord by bending, twisting, pulling,or heating. Do not use the plug if it is loose as it may causea fire or electric shock.]Do not place any heavy items on the power cord. Do notallow the power cord to be crimped as it may cause fire orelectric shock.]Do not handle the phone with wet hands while it is beingcharged. It may cause an electric shock or seriouslydamage your phone.]Do not disassemble the phone.]Do not place or answer calls while charging the phone as itmay short-circuit the phone and/or cause electric shock orfire.]Only use the batteries, antennas, and chargers provided byLG. The warranty will not be applied to products provided byother suppliers.]Only authorized personnel should service the phone and itsaccessories. Faulty installation or service may result inaccidents and consequently invalidate the warranty.]Do not hold or let the antenna come in contact with yourbody during a call.]An emergency call can be made only within a service area.For an emergency call, make sure that you are within aservice area and that the phone is turned on.](https://usermanual.wiki/LG-Electronics-USA/KE520/User-Guide-843897-Page-5.png)
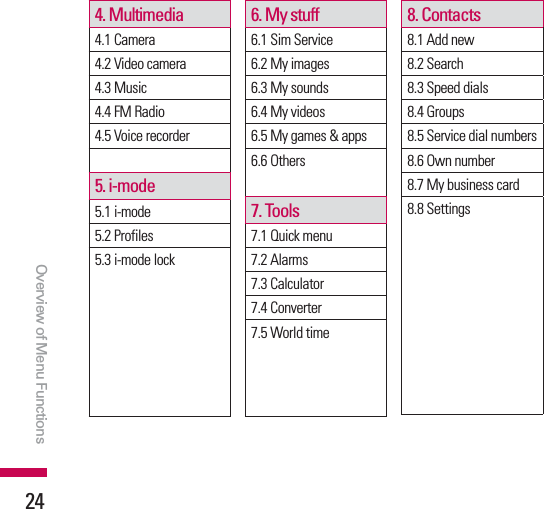
![11For Your SafetyVehicle Mounted External Antenna(optional, if available)A minimum separation distance of 8 inches (20cm) must bemaintained between the user/bystander and the vehiclemounted external antenna to satisfy FCC RF exposurerequirements. For more information about RF exposure, visitthe FCC website at www.fcc.govFCC Part 15 Class B ComplianceThis device and its accessories comply with part 15 of FCCrules. Operation is subject to the following two conditions: (1) This device and its accessories may not cause harmfulinterference, and (2) this device and its accessories mustaccept any interference received, including interference thatmay cause undesired operation.Cautions for Battery]Do not disassemble.]Do not short-circuit.]Do not expose to high temperature: 60°C (140°F).]]Do not incinerate.Battery Disposal]Please dispose of your battery properly or bring to yourlocal wireless carrier for recycling.]Do not dispose in fire or with hazardous or flammablematerials.Adapter (Charger) Cautions]Using the wrong battery charger could damage your phoneand void your warranty.]The adapter or battery charger is intended for indoor useonly.Do not expose the adapter or battery charger to direct sunlightor use it in places with high humidity, such as the bathroom.](https://usermanual.wiki/LG-Electronics-USA/KE520/User-Guide-843897-Page-7.png)
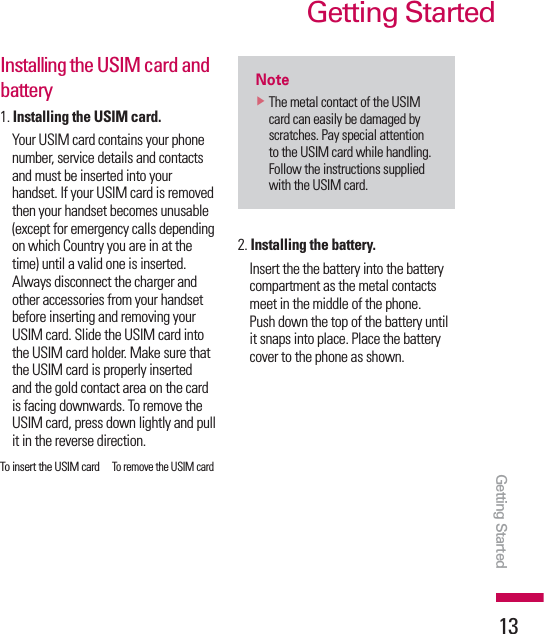
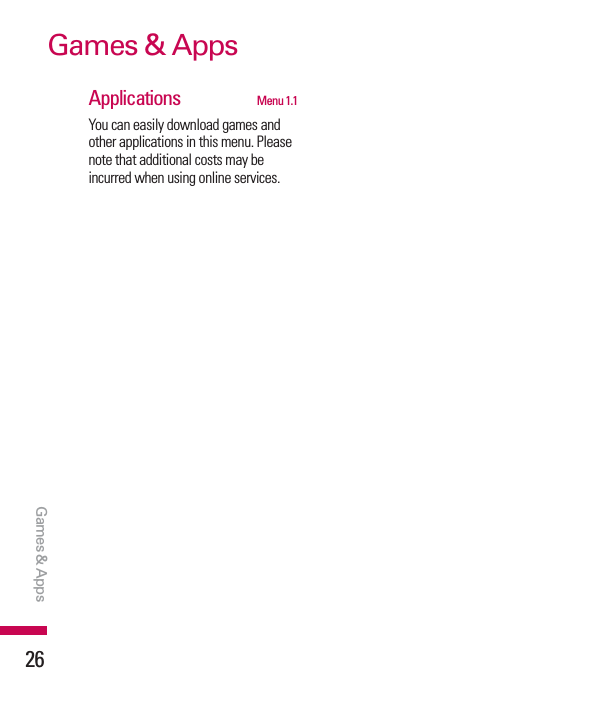
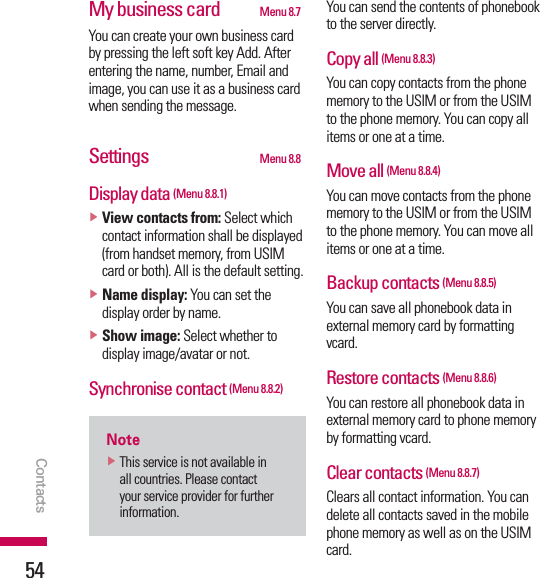
![17Getting Startedinstruction manual.Memory card formattingBefore you start to use the memory card you have to format it. After you insert the memory card, select Menu oSettings oMemory Manager oExternal memory, then press the left soft key.This operation should only be done when you insert the memory card for the first time. During formatting various folders will be created for different data types.Turning the handset on/offTurning your handset onEnsure that your USIM card is in your handset and the battery is charged. Press and hold until the power comes on. Enter the USIM PIN code that was supplied with your USIM card if the PIN code request is set to On.After a few seconds you will be registered on the network.Turning your handset off Press and hold until the power goes off. There may be a few seconds delay while the handset powers down.Do not turn the handset on again during this time.Access codesYou can use the access codes described in this section to avoid unauthorised use of your phone. The access codes (except the PUK and PUK2 codes) can be changed by using the Change codesfeature [Menu #.5.3].](https://usermanual.wiki/LG-Electronics-USA/KE520/User-Guide-843897-Page-15.png)
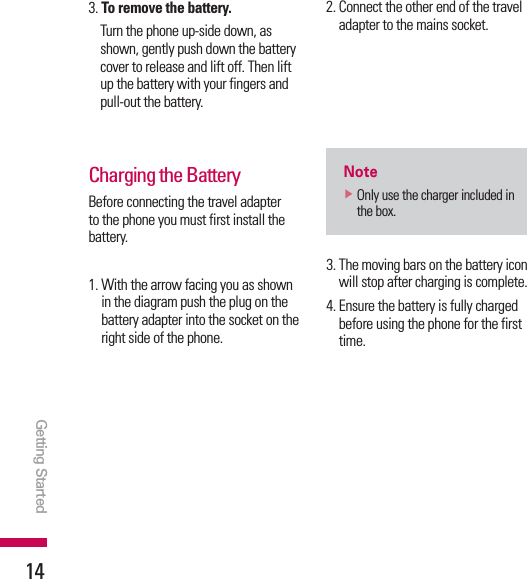
![19General functionsGeneral functionsMaking and answering callsMaking a voice call1. Enter the number including the full area code.vTo delete a digit press .To delete all digits press and hold .2. Press to make the call.3. Press to finish the call..OTEvTo activate the speakerphone during a call, activate the touch keys and press .Making a call from the call logs1. In standby mode, press and the latest incoming, outgoing and missed phone numbers will be displayed.2. Select the desired number by using / .3. Press to call the number.Making a video callYou can make a video call in a 3G covered service area. If the called user has a 3G video phone in a 3G covered service area, the call will be established. You can also answer a video call for video incoming call. To make/answer a video call, do the following.1. Input the phone number using the keypad, or select the phone number from the calls made/received lists. vTo correct mistakes, press briefly to delete the last number, or press and hold to delete all numbers.2. If you do not want to use the speakerphone, ensure you have the headset plugged in.3. To start the video function, press the left soft key [Options] and select Video call.vYou will be notified that you will need to close other applications to make the video call.](https://usermanual.wiki/LG-Electronics-USA/KE520/User-Guide-843897-Page-17.png)

![27MessagesMessagesCreate new message Menu 2.1Message (Menu 2.1.1)You can write and edit a message containing a combination of text, image, video and audio.1. Enter your message in the Message field. Option menus in Message fieldvInsert: You can perform the following actions:1. Image: You can insert an image. (Existing image/Take picture)2. Video: You can insert a video clip. (One video clip per slide)3. Sound: You can insert a sound file. (One sound per slide)4. Symbols: You can insert symbols. After entering the corresponding number keys, press .5. Template: You can insert a text template saved on the phone. After selecting a template, press . The selected template is inserted into the Message window.6. Emoticon: You can insert an emoticon on writing a message,7. Name & number: After searching the name and the number in phonebook, you can insert the entry.8. New slide: Select this to add a new slide.9. Subject: Select this to insert a subject.vSave to drafts: Select this to save the message to drafts.vInput method: Select the desired dictionary mode.vWriting language: You can select the language for writing a message.vAdd to dictionary: You can add a word to the dictionary.2. Press the right soft key [Back] to exit the menu or go to previous menu after setting submenus.3. Press the confirmation key [Send] to go to the recipients screen. From there you can enter phone numbers directly or from contacts stored in the phonebook. Use the following functions by using the left soft keys [Options].](https://usermanual.wiki/LG-Electronics-USA/KE520/User-Guide-843897-Page-25.png)
![28MessagesvRecently used: You can use the last few MMS addresses that you sent to previously. vSave to drafts: Select this menu to save the message in Drafts.vBack4. Press the confirmation key [Send] to send the message. The message will automatically be saved in the Sent Items folder. If the message has not been sent, it will remain in the Outbox with a failed status.Email (Menu 2.1.2)To send/receive an Email, you should set up the Email account. (Refer to page 67~70 for how to set up an E-Mail account.)1. Enter the Email addresses of the recipients in the To, Cc, Bcc fields. You can search the Contacts by pressing .2. Move the cursor to the Subject field and key in the subject.3. You can enter the message contents by moving the cursor to the Message field.4. Use the following functions by using the left soft key [Options].vInsert: Select this menu to insert special characters, templates, and contacts. It is also possible to attach multimedia files (pictures, videos and sounds).vSearch contacts: Select this menu to insert Email addresses saved in Contacts. (Only shown in Option menu when cursor is located in To/Cc/Bcc fields.)vRecently used: You can use the latest Email address you saved temporarily.vSave to drafts: Select this menu to save the message in Drafts.vView attachment: Shows the attached files. (This item is only available when some files have been attached.)vRemove: Deletes the attachment file. vInput method: Select the desired dictionary mode.vAdd to dictionary: You can add a new word to the dictionary.vWriting language: You can change the writing language.vSet mail priority: You can configure the priority of the Email you wish to send.Messages](https://usermanual.wiki/LG-Electronics-USA/KE520/User-Guide-843897-Page-26.png)
![29Messages5. When you have finished writing an Email, press to send the Email.Inbox Menu 2.21. You can view received messages. Select a message and then press to view the message.2. You can view the previous or next message by using / .3. To view a multimedia message (Notification), select Retrieve in the message notification view screen. The file is then transmitted, and you can view the file when the transmission is complete.You can use the following functions by using the left soft key [Options] in the Inbox.vReply to: Creates a reply to the sender or all recipients of the selected message.vForward: Forwards the selected message..OTEvNot supported for multimedia message (Notification) and WAP push messages.vMake video call: You can make a video call.vDelete: Deletes the current message.vCreate new message: You can write a new message or an E-mail.vCopy: In case of SMS, you can copy the message into handset or USIM.vMove: In case of SMS, you can move the message into handset or USIM.vFilter: Displays messages by desired message types.vMark/Unmark: You can select one or more messages for multiple deletion.vMessage information: You can check the message type, date and time and where it is saved.vSave address: Save originated number to phonebook.](https://usermanual.wiki/LG-Electronics-USA/KE520/User-Guide-843897-Page-27.png)
![30.OTEvYou can check the saved E-mails in E-mail [Menu 5.3].Mailbox Menu 2.3When you access this menu, you can either connect to your remote mailbox to retrieve your new email messages, or you can view the previously retrieved email messages without logging in to the email server.In the Mailbox, up to 300 emails can be stored.1. Select an email account and then press to view the received email list.2. In email list, you can use the following functions by using the left soft key [Options]. According to email mailbox type(POP3 or IMAP4), supported [Options] is different.vReply to: Creates a reply to the the sender or all recipients of the selected message.vForward: Forwards the selected email message to others.vCopy to: Copy the selected message to other folder.(Only IMAP4)vRetrieve: Retrieves new email messages.(Only POP3)vMessage synchronisation: Email message synchronizes with the server.(Only IMAP4)vDelete: In case of POP3, deletes the email. In case of IMAP4, changes the flag.vDelete from server: Deletes the email from server.(Only POP3)vCreate new message: You can write a new message or an Email.vSet as read/unread: You can set the selected email to read or unread.vMark/Unmark: Use mark/unmark option for multiple deletion.vExpunge: Expunges the selected message from the server.(Only IMAP4)vSort by: Sort the email message by selected type. vMessage info.: Brief information on the message including size, type, date and filenames.MessagesMessages](https://usermanual.wiki/LG-Electronics-USA/KE520/User-Guide-843897-Page-28.png)
![31MessagesDrafts Menu 2.4You can view saved messages. Select a message and then press to edit the message.You can use the following functions by using the left soft key [Options].vSend: Sends the selected message.v Delete: Deletes the selected message.vCreate new message: You can write a new message or an E-mail.vMark/ Unmark: You can select one or more messages for multiple deletion.vFilter: Displays messages by desired message types.vMessage information: You can check the message type, date, time, size and where it's saved.vEdit : You can edit the selected message. Outbox Menu 2.5The Outbox is a temporary storage place for messages waiting to be sent. Failed messages are also placed in Outbox. For example, E-mails will be placed in Outbox if the E-mail account is not correctly configured.1. Select a message.2. You can use the following functions by using the left soft key [Options].[For sending / waiting messages]vCreate new message: You can write a new message or an E-mail.vCancel sending: You can stop sending/waiting status.vMessage information: You can check the message type, date, time and where it's saved.[For a failed message]vResend: Resends the selected message.vDelete: Deletes the current message.vSave to drafts: You can send the message to drafts.vCreate new message: You can write a new message or an E-mail.](https://usermanual.wiki/LG-Electronics-USA/KE520/User-Guide-843897-Page-29.png)
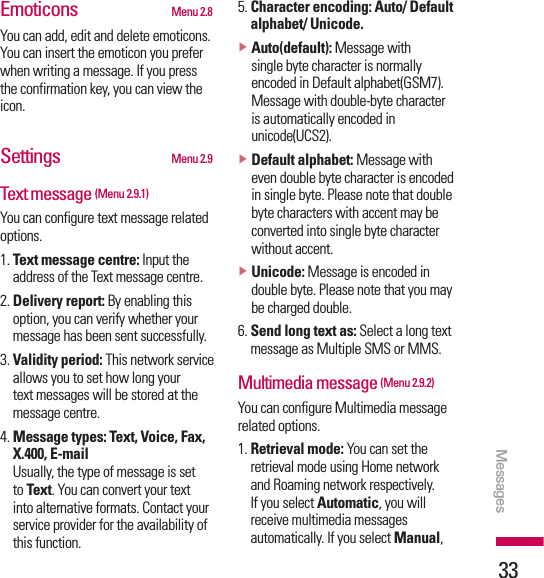
![32vMessasge information: You can check the message type, date, time, size and where it's saved.Sent Items Menu 2.6Show the messages you sent(Message/E-mail)[Options]vForward: Forwards the selected message.vEdit: You can edit the selected message.vDelete: Deletes the selected message.vCreate new message: You can write a new message.vMark/Unmark: You can select one or more messages for multiple deletion.vFilter: Displays messages by desired message types.vMessage information: You can check the message type, date, time, size and where it is saved.Templates Menu 2.7Text templates (Menu 2.7.1)You can add, edit, and delete frequently used useful phrases using the left soft key [Options]..OTEvDepending on your service provider, useful phrases are saved as a default.Multimedia templates (Menu 2.7.2)You can use the following funcations by using the left soft key.vAdd new: You can create a new multimedia template.vWrite multimedia message:Creates a multimedia message with the selected template.vEdit: Edits the selected template.vDelete: Deletes the selected template.vDelete all: Deletes all templates (except pre-installed ones)MessagesMessages](https://usermanual.wiki/LG-Electronics-USA/KE520/User-Guide-843897-Page-30.png)
![34you will only receive a notification message in the inbox and then you can decide whether to download multimedia messages or not.2. Delivery report: Allows you to determine whether to request a delivery confirmation mail to a recipient, and whether to allow sending a delivery confirmation mail to a sender.vRequest report: Determines whether to request a delivery confirmation mail for a Multimedia message.vAllow report: Determines whether to allow sending a delivery confirmation mail for a delivery confirmation mail request.3. Read reply: Allows you to determine whether to request a read confirmation mail to a recipient, and whether to allow sending a read confirmation mail to a sender.vRequest reply: Determines whether to request a read confirmation mail for a Multimedia message.vAllow reply: Determines whether to allow sending a read confirmation mail for a read confirmation mail request.4. Priority: You can select the priority level of the messages (Low, Normal and High).5. Validity period: Allows you to configure the term of validity for a message when transmitting a multimedia message. The message would be saved in the multimedia message server only for the configured term.6. Slide duration: Allows you to configure the duration of each page when writing a message.7. Delivery time: Configures the delivery time of message to the recipient. The Multimedia message centre will deliver the message after the delivery time.8. Multi. msg. centre: Allows you to configure network information such as the MMSC and the WAP gateway, to send a multimedia message. Using the left soft key [Options], you can activate, add or delete a profile. A profile name selected by a checkmark is the currently configured value. You can view and edit the contents of the profile in edit mode by pressing the right soft key [Edit]. The edit screen also appears when creating MessagesMessages](https://usermanual.wiki/LG-Electronics-USA/KE520/User-Guide-843897-Page-32.png)
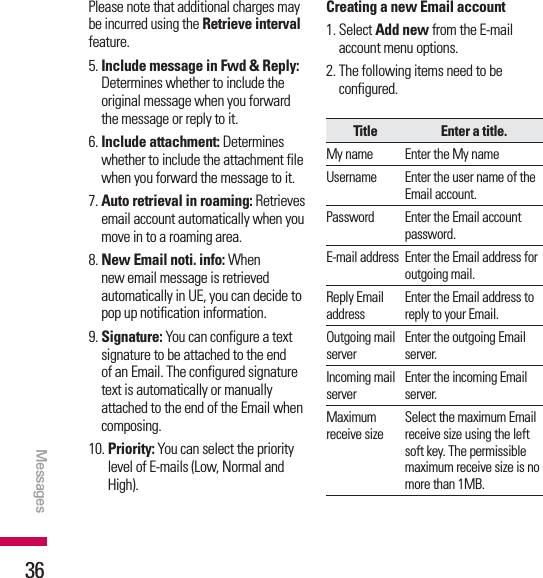
![35a new profile under Options. The meaning of each item is given below.vTitle: Profile name.vMMSC URL: Enter the multimedia message centre URL.vMMS Proxy: Enter the WAP gateway address and port number.vConnection mode: Select one of the connection mode. (TCP with Proxy, TCP without Proxy, UDP)vAccess points: Specify the access point name. (see WAP connection settings.)Press the right soft key [Done] to save the changes and complete Multimedia msg. centre setting.E-mail (Menu 2.9.3)You can configure settings for receiving and transmitting Emails.1. E-mail accounts: You can create or configure an Email account including the Email server and user ID. You can edit a selected Email account by pressing the left soft key[option]- 2.Edit. You can select an Email account to be used to send an Email using . You can select the following functions using the left soft key [Options].vAdd new: Create a new Email account.vEdit: To edit the selected Email account.vView: Views a selected e-mail account.vMark/Unmark: Use mark/unmark option for multiple deletion.vDelete: Deletes a selected Email account. All the Emails included in the account will be deleted.2. Allow reply email: Determines whether to allow sending a read confirmation mail for a read confirmation mail request.3. Request reply email: Determines whether to request a read confirmation mail. 4. Retrieve interval: You can configure Retrieve interval to retrieve Emails automatically from the incoming mail server. When a new Email arrives, an icon appears at the top of the screen. You can select the auto receiving time slot to Off, 15 minutes, 30 minutes,1 hour, 2 hours, 4 hours or 8 hours.Messages](https://usermanual.wiki/LG-Electronics-USA/KE520/User-Guide-843897-Page-33.png)
![38Title Enter a title.APOP secure login Decide whether to activate APOP secure login or not using the left soft key. When the mailbox type is IMAP4, APOP secure login is always set to OFF.3. Press the centre soft key [Save] to complete the Email account configuration.Editing an Email account1. Select a desired Email account from the Email account list and press the left soft [Options] then select Edit.2. You can edit desired fields by moving the cursor up and down.3. When configuration is complete, press the centre soft key [Save] to complete the Email account configuration..OTEvWhen you try to change the mailbox type, all Emails downloaded before will be deleted.Videomail (Menu 2.9.4)This menu allows you to get the video mail if this feature is supported by the network service provider. Please check with your network service provider for details of their service in order to configure the handset accordingly.Voicemail (Menu 2.9.5)You can add or modify voice mail centre.Service message (Menu 2.9.6)You can configure the service message receipt option.Info. service (Menu 2.9.7)vCell broadcast: You can set the reception status.vChannels: You can add or modify the channels.vLanguages: You can select the language you desire. Then, the info service message will be shown in the language that you have selected.MessagesMessages](https://usermanual.wiki/LG-Electronics-USA/KE520/User-Guide-843897-Page-36.png)
![39ProfilesProfilesYou can select ringtone or vibration for an incoming call and configure the sound and volume of the ringtone, key tone, and sound effect, according to a profile. A different list of options is available for each profile that has been selected for editing.vAlert byThis option determines the incoming call notification mode. You can select from [Ring], [Vibration], [Silent], [Ring & vibration], [Ring after vibration], [Max Ring & Vibration].vVoice ringtoneYou can select the ringtone for incoming voice calls.vVideo ringtoneYou can select the ringtone for incoming video calls.vVolumeSet the ringtone volume.vMessage alertYou can set how often the phone is to inform you of a received message until it is read.vMessage toneYou can select a file from among your own personal files or from the default files, to be played by the phone upon receiving a message.vKey toneYou can set the key tone to be played when pressing the keys.vKey tone volumeYou can set the volume of the chosen key tone, choosing from 7 available levels.vConfirmation toneYou can set the confirmation tone to be played by the phone to confirm actions.vStart-up soundYou can set the effect to be played when the phone is switched on.vStart-up fileYou can select which file will be played when the phone is switched on.vShut down soundYou can set the effect to be played when the phone is switched off.vShut down fileYou can select which file will be played when the phone is switched off.](https://usermanual.wiki/LG-Electronics-USA/KE520/User-Guide-843897-Page-37.png)
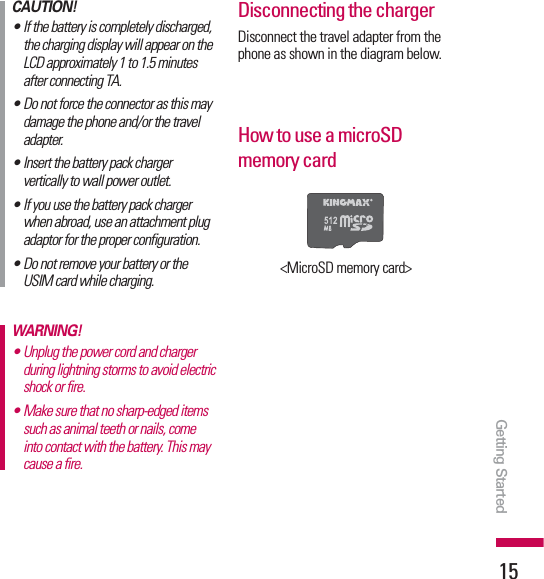
![40MultimediaMultimedia Camera Menu 4.1This application enables you to take a still picture. You can take a picture in the size you want, and use it for the address book photo, home screen and other more general purposes.Once taken, the picture can be sent via Multimedia message, Email or Bluetooth.Options Take Back1. Press the left soft key to access Options and set the desired environment as follows.vMove between the options menu with / .vSelect the desired value with / and confirm the selection with .2. After finishing all the settings, press the right soft key [Close].3. Focus the camera on what you want to take and press .4. Press to save the picture. It is saved in the Pictures folder of My Files..OTEvPress the right soft key [Back] to go back to the preview mode.Video camera Menu 4.2This application enables you to record a video clip. You can play and watch a saved video file in this menu. Once recorded, a video clip can be sent via Message, Email or Bluetooth.Brightness: From -2.0 to +2.0 at 0.5 interbvals. The higher the level, the brighter the screen.Pause Stop](https://usermanual.wiki/LG-Electronics-USA/KE520/User-Guide-843897-Page-38.png)
![41Multimedia 1. Press the left soft key to access Options and set the desired environment as follows.vMove between the options menus with / .vSelect the desired value with / and confirm the selection with .2. After finishing all the settings, press the right soft key [Close].3. Focus the camera on what you want to record and press to start recording. And press to stop recording.vYou can pause the recording by pressing the left soft key [Pause].4. Press to save the video clip. It is saved in the Videos folder of My Files..OTEvPress the right soft key [Back] to go back to the preview mode.Music Menu 4.3Recently played (Menu 4.3.1)This menu will be activated when there are some tracks currently played.All tracks (Menu 4.3.2)You can view all the music files stored in the phone/external memory. Playlists (Menu 4.3.3)You can create your own playlists by choosing tracks from the All tracks menu list.Artists (Menu 4.3.4)You can view and play music sorted by Artists.Albums (Menu 4.3.5)You can view and play music sorted by Albums.Genres (Menu 4.3.6)You can view and play music sorted by Genres.](https://usermanual.wiki/LG-Electronics-USA/KE520/User-Guide-843897-Page-39.png)
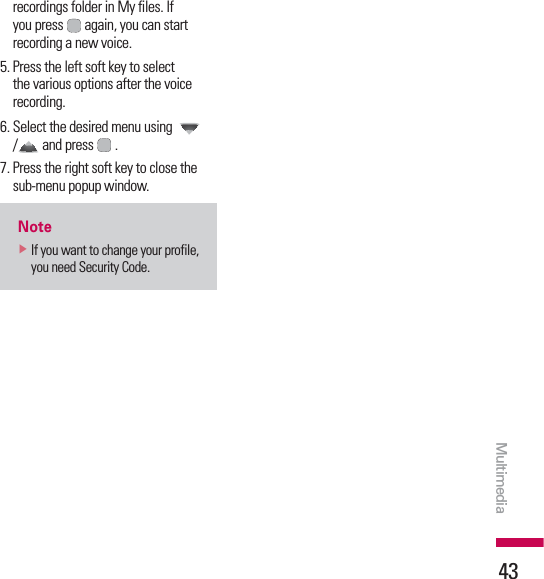
![42Shuffle tracks (Menu 4.3.7)If you want to play the music continuously and randomly, select this option. FM Radio Menu 4.41. Connect the headset with your phone.2. After presetting radio channels, you can listen to other channel by pressing the corresponding number key (short press).3. You can access the following option menus by pressing the left soft key [Options].vEdit channel: You can adjust frequency and change the radio station in the selected channel. You can change the frequency with Left/Right navigation keys and number keys.vAuto scan: If you select “Auto scan Now?” On, automatically set the radio channel. And When “Save this station” message will be popped up, if you select Yes, the selected frequency will be stored.vReset all channels: You can delete all channels you saved.vListen via speaker: Select this to listen to the radio through the builtin speaker. To turn off the speaker, select “Listen via wired Headset” in the [Options].Voice recorder Menu 4.51. Press the left soft key [Option] to display the option pop up menu before recording.2. Move to the desired menu item using / and press . vDuration: You can set the recording duration to MMS msg. size, 30 secs, or 1 min.vQuality: You can select a recording quality from High,Medium and Low.vGo to my sounds: Opens the Voice recordings folder in My Files.3. Pressing starts recording. When recording is started, the recording time appears on the LCD. To cancel recording, press Back.4. When you finish the recording, press to stop. The recorded file is automatically saved in the Voice Multimedia Multimedia](https://usermanual.wiki/LG-Electronics-USA/KE520/User-Guide-843897-Page-40.png)
![45My stuffMy stuffMy images Menu 6.1The Pictures folder consists of embedded links for downloading pictures through the Internet and Default images. To view the picture in details, press the confirmation key.When a file is selected, the following options will be displayed by pressing the left soft key [Options].vSend: You can send the selected image via Message, E-mail or Bluetooth as long as the image is not protected by Digital Rights Management (DRM).vUse as - Home screen: You can set an image as the home screen theme.- Outgoing call- Contact image: You can set the image of selected entry in contacts. When you receive an incoming call, the image saved in contact is displayed.- Start up: You can set an image as start up screen theme.- Shut down: You can set an image as shut down image.v Move: Enables the file to be moved to an other folder.vCopy: Enables the file to be copied to an other folder.vDelete: Deletes the selected image.vMark/Unmark: Using the Mark function, you can send, delete, move and copy multiple files.vFile- Rename: You can rename the image.- Edit: Enables the image to be edited.- File info.: Shows information on the selected image file.vCreate new folder: You can create a new folder within the folder currently selected.vSlide show: You can view the images as a slide show.vSort by: You can sort the files by date, file type or name.vGrid view: You can view the images as a Grid view.vMemory status: You can view the memory status (handset or external memory card).](https://usermanual.wiki/LG-Electronics-USA/KE520/User-Guide-843897-Page-43.png)
![46My stuffMy sounds Menu 6.2The Sounds folder consists of embedded links for downloading ringtones and music as well as folders containing the Default sounds and Voice recordings. When a file is selected, the following options will be displayed by pressing the left soft key [Options].vSend: You can send the selected image via Message, E-mail or Bluetooth as long as the file is not protected by Digital Rights Management (DRM).vUse as- Voice ringtone: You can set the sound file as a ringtone for when you receive an incoming voice call.- Video ringtone: You can set the sound file as a ringtone for when you receive an incoming video call.- Message tone: You can set the sound file as a ringtone when receiving a message.- Start up: You can set the sound file as a ringtone when handset starts up.- Shut down: You can set the sound file as a ringtone when the handset shuts down.vMove: Enables the file to be moved to an other folder.vCopy: Enables the file to be copied to an other folder.vDelete: Deletes the selected image.vMark/Unmark: Using the Mark function, you can send, delete, move and copy multiple files.vFile- Rename: You can rename the image.- File info.: Shows information on the selected image file.vSort by: You can sort the files by date, file type or name.vMemory status: You can view the memory status (handset or external memory card).My videos Menu 6.3Here you can manage or send downloaded or captured videos clips. If you press [Connect], you can activate the video file.The following are available using the left soft key [Options] in the Video list.My stuff](https://usermanual.wiki/LG-Electronics-USA/KE520/User-Guide-843897-Page-44.png)
![49ToolsToolsQuick menu Menu 7.1You can specify functions to save in the Quick menu. You can save the functions frequently used in the Quick menu.Alarms Menu 7.2If you set the alarm, the appears on the indicator bar. The specified alarm sounds at the scheduled time. Press to stop the alarm, and the alarm is released. Press the left soft key [Snooze] and choose the snooze interval. The alarm sound stops and resumes after the selected Snooze duration. You can configure up to 5 alarms.1. Select your desired alarm to configure in the alarm list. If there is no alarm, press the left soft key [Add] to add a new alarm.2. Set/Cancel alarm: Set or cancel the alarm using the options for specifying whether the alarm is on or by choosing the alarm time.3. Input alarm time: Input your desired alarm time by specifying Hour and Minute. Choose either ‘AM’ or ‘PM’ which is visible if 12 hour format is specified for the phone.4. Select repeat mode: Select the desired repeat mode using / or select the desired one from the list by pressing left soft key [List].5. Select bell: Select the bell to ring at the alarm time opening the list by pressing left soft key [Edit].6. Input memo: Input alarm name.7. Snooze: You can set the snooze duration for the alarm.8. When you have finished setting the alarm, press the centre key [Save]..OTEvThe alarm will go off even when the phone is switched off.Calculator Menu 7.3The calculator module allows you to perform basic arithmetic functions such as addition, subtraction, multiplication, and division as well as some scientific functions. (sin, cos, tan, log, ln, exp, sqrt, deg, rad)1. Press the left soft key [Options].2. Select the appropriate function.](https://usermanual.wiki/LG-Electronics-USA/KE520/User-Guide-843897-Page-47.png)
![50ToolsYou can enter numbers by using the number keys, and the operators by using / / / .You can enter a decimal point by pressing . Whenever you press , characters are sequentially deleted in reverse order. Whenever you hold down , all the characters are deleted in reverse order in one go. When calculation is complete and the result is displayed on the screen, pressing a symbol saves the result into the symbol, and continues calculation.Converter Menu 7.4Using this menu, users can convert Currency, Surface, Length, Weight,Temperature, Volume and Velocity.Currency (Menu 7.4.1)1. Select the Currency menu.2. Users can set a currency exchange rate using option menu "Change currency".3. Enter currency rates for up to 6 currencies equivalent to GBP and then press [Save].Then you can convert from one currency to another.4. You can view the value of up to 6 currency units.5. Press [Reset] to clear the current input Field.6. To exit the currency conversion function, press the [Back] key.Surface (Menu 7.4.2)1. Select Surface menu.2. Select the desired unit to convert using [List].3. Enter the standard unit and view the converted value.4. Press [Reset] to clear the current input Field, and locate the cursor in the input field.5. To exit the Surface conversion function, press [Back] key.Length (Menu 7.4.3)1. Select the length menu.2. Select the desired unit to convert using [List].3. Enter the standard unit and view your converted value.4. Press [Reset] to clear the current input field and locate the cursor in the input field.Tools](https://usermanual.wiki/LG-Electronics-USA/KE520/User-Guide-843897-Page-48.png)
![51Tools5. To exit the length conversion function, press the [Back] key.Weight (Menu 7.4.4)1. Select the Weight menu.2. Select the desired unit to convert using [List].3. Enter the standard unit and view the converted value.4. Press [Reset] to clear the current input Field, and locate the cursor in the input field. 5. To exit the Weight conversion function, press the [Back] key.Temperature (Menu 7.4.5)1. Select the Temperature menu.2. Position the cursor on the desired unit by using the up or down arrow keys.3. Enter the standard unit and view the converted value.4. Press [Reset] to clear the current input field and locate the cursor in the input field.5. To exit the Temperature conversion function, press the [Back] key.6. You can insert negative values by selecting [-].Volume (Menu 7.4.6)1. Select the Volume menu.2. Select the desired unit to convert using [List].3. Enter the standard unit and view the converted value.4. Press [Reset] to clear the current input field and locate the cursor in the input field.5. To exit the volume conversion function, press the [Back] key.Velocity (Menu 7.4.7)1. Select the Velocity menu.2. Select the desired unit to convert using [List].3. Enter the standard unit and view the converted value.4. Press [Reset] to clear the current input field and locate the cursor in the input field.5. To exit the Velocity conversion function, press the [Back] key.](https://usermanual.wiki/LG-Electronics-USA/KE520/User-Guide-843897-Page-49.png)

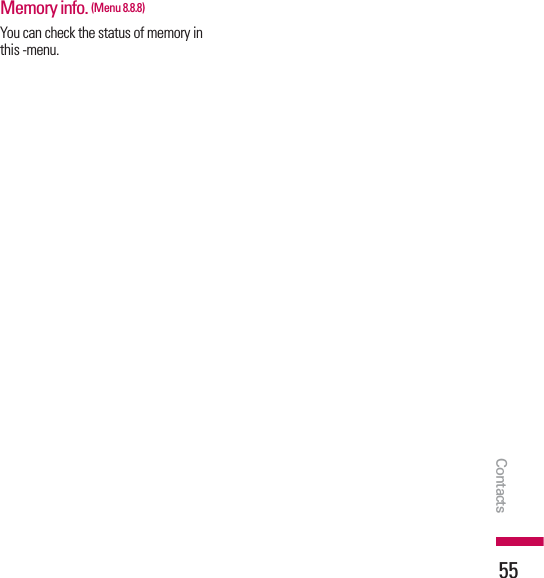
![56CallingCallingCall logs Menu 9.1All calls (Menu 9.1.1)Allows you to view the missed, received, and dialled call records. You can make a call, or send a message to the number you have selected from the records. You can also save the number in Contacts.Dialled calls (Menu 9.1.2)Allows you to view dialled call records, make a call, send a message, and save the number in Contacts.Received calls (Menu 9.1.3)Allows you to view received call records, make a call, send a message, and save the number in Contacts.Missed calls (Menu 9.1.4)Allows you to view missed call records, make a call, send a message, and save the number in Contacts.Call duration Menu 9.2You can view call time by types. Press the left soft key [Options] to choose either partial initialisation or entire initialisation. Also press right soft key [Clear] to initialise a selected duration type. Initialization will require your Security code.The following timers are available:vAll calls: Shows total call time.vDialled calls: Shows outgoing call time.vReceived calls: Shows incoming call time.vLast call: Shows the latest call time in units of hours/minutes/seconds.Data volume Menu 9.3Allows you to check the sent, received and all data volume transferred.Press the left soft key [Otions ] to choose entire initialization. or the selected volume type initialization. Initialization will require your Security code.](https://usermanual.wiki/LG-Electronics-USA/KE520/User-Guide-843897-Page-54.png)
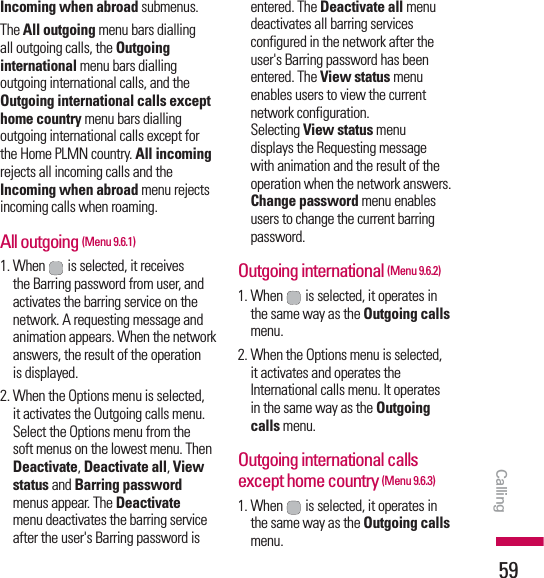
![57CallingCall costs Menu 9.41. This function displays the call costs of the Last call and All calls.2. To initialise, press the centre key [Clear] and enter the PIN2 code.3. You can select either Units or Currency in Set call cost.According to your setting, the call cost is displayed during a call (If USIM and Network support Advice Of Charge(AOC)).4. In the Set limit configuration, select On to configure the cost limit. When a cost limit is configured, and the call costs reach the limit, making a call will not be allowed.Call divert Menu 9.5Call divert menus for voice and video calls are provided.If you press , you can activate call divert menu.Voice calls (Menu 9.5.1)vAll voice callsvWhen busyvNo answervNot reachable1. When the number list is not exsisted Converts to an editor for entering a divert number. You can input the number to divert a call directly or search it in phonebook. If you press [Divert], the phone will send the request to service provider after entering the number. While waiting for the result from the network, a Requesting message and animation appears.2. When the number list is exsisted Displays To other number menu including of the number list. While waiting for the result from the network, a Requesting message and animation appears.3. Option menu After activating All voice calls menu, selecting the Options menu at the bottom of the menus displays the Deactivate, Deactivate all, View status and clear list menus. The View status menu shows the settings on the network. If you select this menu, Requesting. message and animation appear. Then the network settings are displayed when](https://usermanual.wiki/LG-Electronics-USA/KE520/User-Guide-843897-Page-55.png)
![58the information is received from the network. If you select the Deactivate menu, the call divert numbers registered in the network are deleted after user confirmation. Clear list menu will delete all divert number list.Video calls (Menu 9.5.2)vAll video callsvWhen busyvNo answervNot reachable1. When the number list is not exsisted Converts to an editor for entering a divert number. You can input the number to divert a call directly or search it in phonebook. If you press [Divert], the phone will send the request to service provider after entering the number. While waiting for the result from the network, a Requesting message and animation appears.2. When the number list is exsistedDisplays To other number menu including of the number list. While waiting for the result from the network, a Requesting message and animation appears.3. Option menuAfter activating the All video calls menu, selecting the Options menu at the bottom of the menus displays the Deactivate, Deactivate all, View status and clear list menus.If you select the Deactivate menu, the call divert numbers registered in the network are deleted after user confirmation. Selecting the Cancel all menu will display the operation result after showing the Requesting message and animation. Clear list menu will delete all divert number list.Deactivate all (Menu 9.5.3)You can select to deactivate all or not.Call barring Menu 9.6Call barring menus for Voice and Video calls are provided.The menu consists of Voice calls,Video calls and Deactivate all. The Voice calls and Video calls menus have the following submenus.The Call barring menu consists of All outgoing, Outgoing international,Outgoing international calls except home country, All incoming and CallingCalling](https://usermanual.wiki/LG-Electronics-USA/KE520/User-Guide-843897-Page-56.png)
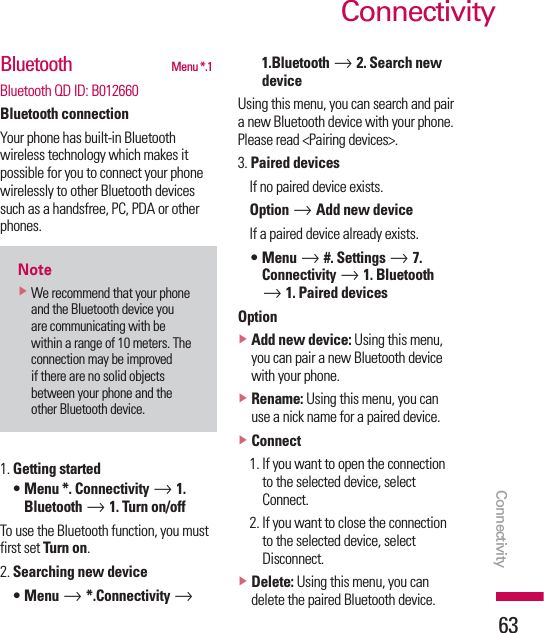
![64ConnectivityConnectivity vDelete all: Using this menu, you can delete all of the paired Bluetooth devices.4. Configuring Bluetooth settings• Menu *.Connectivity o 1. Bluetooth o 4. Settings- My device visibility: Set [My device visibility] to [Visible] so that other devices can detect your phone when they are searching for a Bluetooth device. If you select [Hidden], other devices will not be able to detect your phone when they are searching for a Bluetooth device.- My device name: You can name or rename your phone as it will appear on other devices. Your phone's name will be shown on other devices only when [My device visibility] is set to [Visible].- Supported services: This menu shows the list of available Bluetooth services in your phone.- My address: This menu shows yours Bluetooth device address..OTEvWhen user use Bluetooth Devices with the handset, the security of the handset is at risk. Therefore, we recommend that Bluetooth visibility be set to Hidden after configuration or device pairing. For incoming files via Bluetooth regardless of paired devices, you can choose to accept or reject the connection, after checking the sender details.<Pairing devices>1. To search for a Bluetooth device to pair, press Option > Add new device.2. Screen shows Searching for devices. Bluetooth devices within a range of 10m will be found.3. If Bluetooth devices are found, these devices are listed on the screen. If no Bluetooth device is found, you will be asked if you want to search again.4. Pairing procedure- Press [Add]. A window will appear on the screen asking you to enter your password.](https://usermanual.wiki/LG-Electronics-USA/KE520/User-Guide-843897-Page-62.png)
![65Connectivity - After creating a password (of 1 to 16 digits), the user of the other device must enter the password for pairing. The user of the other device must know the password in advance for authentication.<Connecting a headset or a handsfree>1. Pair the headset according to the procedures described in the Pairing Devices section.2. To use the headset, select the headset from the paired devices, select Options>Connect.3. To disconnect the headset, select the headset from the paired devices, select Options>Disconnect.<Deleting devices>1. Select a device to delete from the Paired devices.2. You can delete a device by selecting Options > Delete. To delete all paired devices, select Options > Delete All.<Transmitting data using Bluetooth>1. To transmit data from your phone to another Bluetooth device, first select the application where the target data is saved. For example, to send a file in the My Files to another device, select Menu > 6. My Files > 1. My images / 2. My sounds / 3. My videos / 5. Others / 6. My memory card > Select data to transmit > Options > Send > 3. Bluetooth2. Transmitting data1) The paired devices are displayed. If the desired device does not exist in the list, select [Refresh].2) Select the device to which you want to transmit data from the listed devices on the screen and press it.3) If the other party allows your transmission, the data is transmitted.<Receiving data using Bluetooth>If another party attempts to transmit data, question for accepting the connection will appear on the screen. If you allow the connection, the data will be transmitted to your phone.During data transmission, the Bluetooth icon is changed to File Transfer icon.And the received files are saved to appropriate folders according to file types. For example, image files are saved to My image folder automatically.](https://usermanual.wiki/LG-Electronics-USA/KE520/User-Guide-843897-Page-63.png)
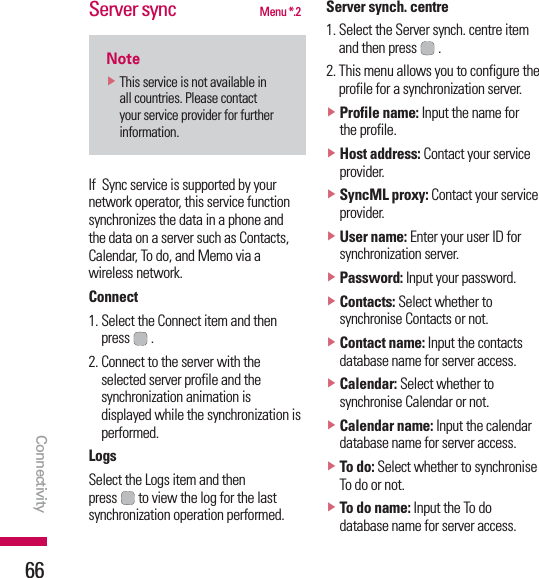
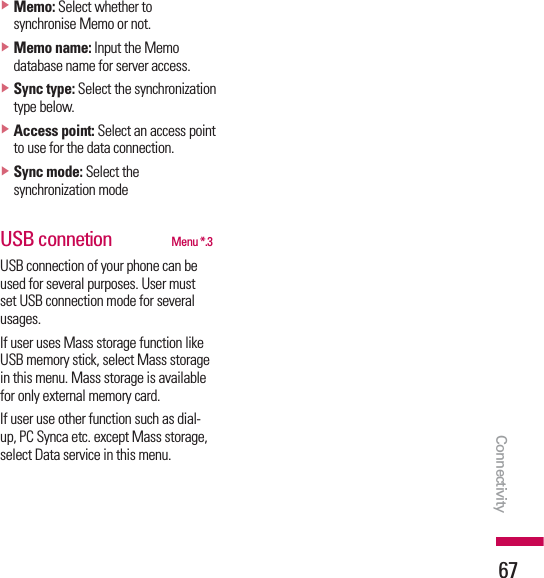
![68Organiser OrganiserCalendar Menu 0.1Schedule inquiry and search1. Reference by MonthsYou can refer to your schedule by months. The cursor is on the current date, and the registered date is marked. The schedule saved for the date where the cursor is located is represented by a grey box. Pressing the shortcut key moves to the previous year and pressing move to the next year and pressing moves to today. Pressing moves to the previous month, and moves to the next month. Pressing moves to the weekly calendar. You can move the date using / / / .2. Detailed referenceYou can refer to a detailed schedule, that is the whole contents of the schedule configured by the user. You can send the schedule to another phone or an Internet site through SMS (Text message) or MMS (Multimidia message) or E-mail or Bluetooth using the left soft key [Options].Add new eventYou can add an event. You can configure the start date, end date, start time, end time, contents, type of event, repetition, alarm of the schedule.vSet type: Appointment, Birthday, AnniversaryvSet repeat: Once, Daily, Weekly, Monthly, Annually, User settingvSet alarm: No alarm, On time, 15 mins before, 30 mins before, 1 hour before, 1 day before, 3 days before, 1 week beforeDelete schedule1. Delete previous schedulesYou can delete all previous schedules using this function.2. Delete all schedulesYou can delete all saved schedule contents using this function.Set up and release holidayYou can set up or release user holidays. Press the left soft key [Options] and select Set holiday.The selected date will be displayed in red.](https://usermanual.wiki/LG-Electronics-USA/KE520/User-Guide-843897-Page-66.png)
![69Organiser To release the holiday, press the left soft key [Options] and select Clear holiday.Schedule notificationIf the user has configured the alarm setting, the specified alarm sound will ring. If the notification time is before the schedule start time, you can set up the alarm again.To do Menu 0.2You can view, edit and add tasks to do. Tasks are displayed in time order. Tasks that have been completed or not completed are displayed in different ways.AddTo add a task, press the left soft key [Options] in the Tasks list management screen and select Add new eventoption. Then input the date, description and priority for the task.When you have finished entering the data, press the centre key [Save] to save the new task.Detailed view and EditTo view detailed task contents, locate the cursor on the desired item in the Tasks list, and then press the centre key. You can send, edit and delete a task using the left soft key [Options].Set job statusTasks set as finished are displayed as crossed out below the unfinished tasks in the Tasks list. You can set Finished tasks to Not finished by selecting Options.Memo Menu 0.3Using the memo management function, you can view and manage saved memo contents, and add new memos.Add memoTo add a new memo, press the left soft key [Add] or [Add new memo] in Options. Enter the contents of the memo. You can save the memo to the list by pressing the centre key [Save].Edit and delete memoHighlight the desired memo and press to view its contents. You can edit or delete the contents of a memo using the left soft key [Options]. You can return to the memo management screen by pressing right soft key [Back]. You can select Multiple or All memos using the Mark/Unmark option and then delete a memo using the Delete option.](https://usermanual.wiki/LG-Electronics-USA/KE520/User-Guide-843897-Page-67.png)
![70OrganiserOrganiserSecret memo Menu 0.4You can write a secret memo to protect your privacy. You enter the security code to use this menu.Add private memoTo add a new memo, press the left soft key [Add] or [Options]. Enter the contents of the memo. You can save the memo to the list by pressing the centre key [Save].Edit and delete a private memoHighlight the desired memo and press to view its contents. You can edit or delete the contents of a memo using the left soft key [Options]. You can return to the memo management screen by pressing right soft key [Back]. You can select Multiple or All memos using the Mark/Unmark option and then delete a memo using the Delete option.Date finder Menu 0.5You can find the date you want with this function.Settings Menu 0.6Calendar (Menu 0.6.1)You can set the configurations to view the calendar.vDefault view: You can set the default value to view a calendar; Month view, Week viewvWeek start time: 1AM, 2AM, 3AM, 4AM, 5AM, 6AM, 7AM, 8AM, 9AM, 10AM, 11AM, 12PMvWeek starts on: You can set the default day to start a week; Sunday, MondayBackup calendar & to do (Menu 0.6.2)You can create the backup files of the calendar or tasks entries saved in the phone when you insert an external memory.Restore calendar & to do (Menu 0.6.3)You can restore the backup files of calendar or tasks when you insert an external memory.](https://usermanual.wiki/LG-Electronics-USA/KE520/User-Guide-843897-Page-68.png)
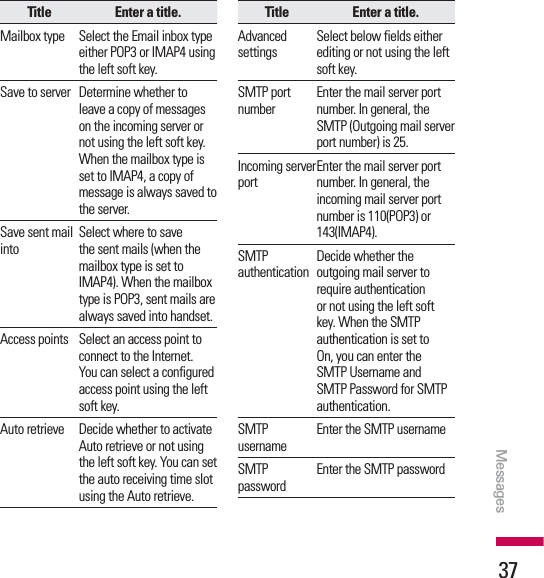
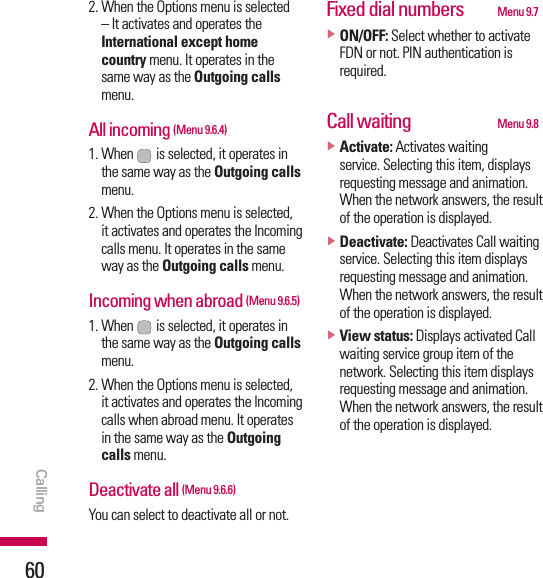
![73Settingsthe user is valid only while the phone is turned on.Time (Menu #.3.1)1. Select the Time item from the Date & time list, and then press .2. Move to your desired field, Hour,Minute, Second or am/pm field using the navigation keys. (When you have selected 12 hour as Time format)3. Enter Hour, Minute and Secondusing the number keys.4. Select the time format using / .5. Select the hour indicator format i.e. Off, Cuckoo clock or Chime bell.6. Press the centre soft key [Save] to set the time with the specified value.Date (Menu #.3.2)1. Select the Date item from the Date & time list, and then press .2. Select the date format using / .3. Enter Day, Month and Year using the number keys.4. Press the centre soft key [Save] to set the date with the specified value.Auto update date/time (Menu #.3.3)When Auto Update is configured to On,the time and date are automatically updated according to the current time zone. If Confirm first is selected, the time and date update is confirmed before it is updated automatically.Daylight saving (Menu #.3.4)Select whether to activate the daylight saving function or not. You can set the Summer time difference of selected home city for 1 hour or 2 hours.Network Menu #.4Select Network (Menu #.4.1)Select between Automatic and Manual.vAutomatic: Automatically searches for the network and registers the handset to the network. This is recommended for best service and quality.vManual: All the currently 2G(GSM) and 3G(UMTS) available networks are shown and you can select one of them for registration. If the registration of the network has failed, the network](https://usermanual.wiki/LG-Electronics-USA/KE520/User-Guide-843897-Page-71.png)
![74SettingsSettingslists are listed again and you can select any other one for registration.Network mode (Menu #.4.2)You can set a type of network to search for when networks are searched in the Select network menu.vAutomatic: Searches all the networks connectable.vUMTS: Searches only networks supporting 3G.vGSM 900/1800: Searches only networks supporting GSM 900/1800 band.vGSM 1900: Searches only networks supporting GSM 1900 band.Preferred lists (Menu #.4.3)If the network is searching automatically, you can add a preferable network to be connected to. And the following options are available.vAdd new: You can add a new network using the followings.- Search: You can select one from the network list stored in the phone.- Enter new network: You can enter the country code (MCC), the network code (MNC) and RAT to add.vDelete: Deletes the selected network.vEdit: You can modify the information of the selected network.vMove up: Moves the selected network upward.vMove down: Moves the selected network downward.Access points (Menu #.4.4)This menu shows the access point list. You can create new profiles, delete or edit them by using the Option Menu. However, you cannot delete or edit default configurations depending on country variant. You can edit the following configuration items by pressing the left soft key [Option] and Edit.Connection title Access Point profile name.Bearer Choose the bearer from the list. (Default is UMTS.)AuthenticationChoose the authentication from the list.(Default is No auth)User name Information provided by service provider.](https://usermanual.wiki/LG-Electronics-USA/KE520/User-Guide-843897-Page-72.png)