Leica Biosystems Nussloch SPECTRAST Multistainer User Manual
Leica Biosystems Nussloch GmbH Multistainer
UserManual.wiki
>
Leica Biosystems Nussloch
>
SPECTRAST User Manual
>
User Manual
Contents
1.
User Manual
2.
14051280101J_SPECTRA_ST_IFU_1v3J_en.pdf
3.
HistoCore_SPECTRA_ST_RFID-Registration_1v1B_Multi.pdf
User Manual
Navigation menu
Upload a User Manual
Namespaces
Wiki Guide
HTML
PDF
Info
Views
User Manual
Discussion / Help
Navigation


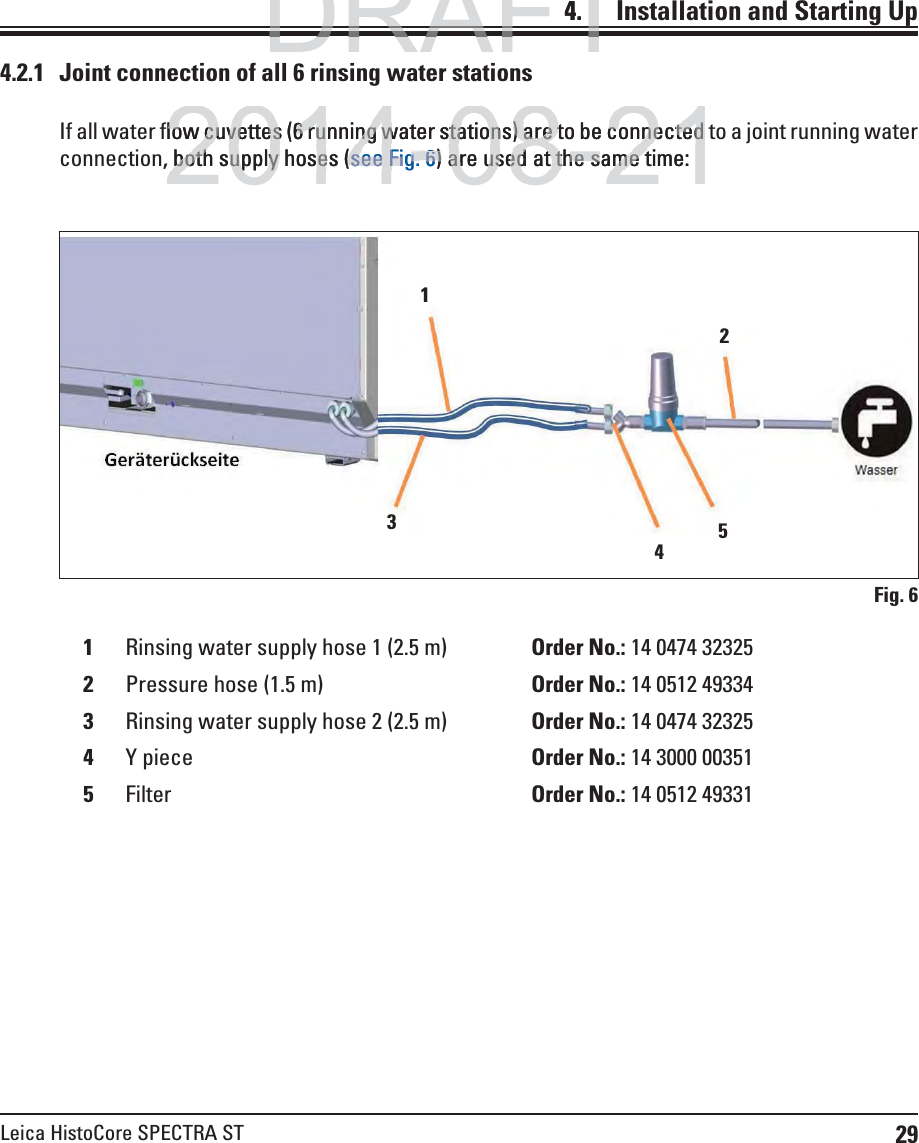
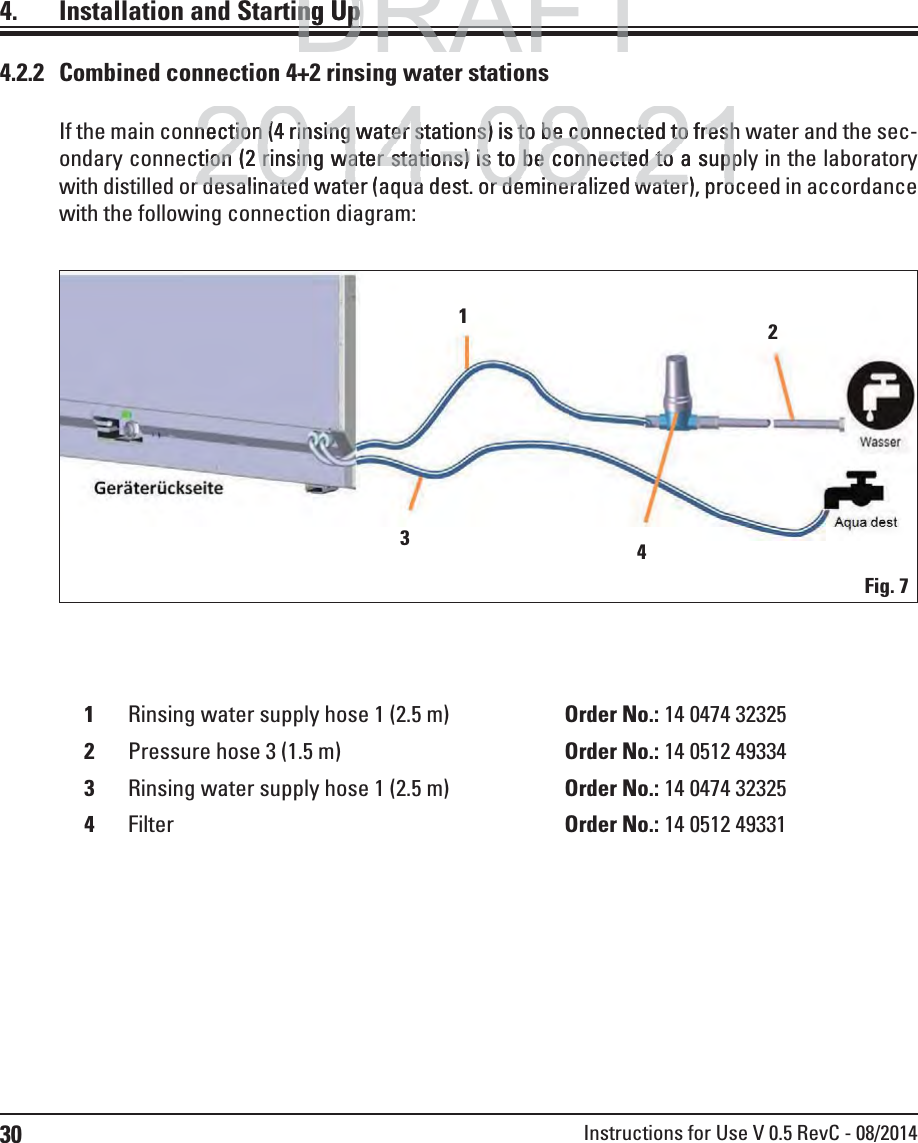
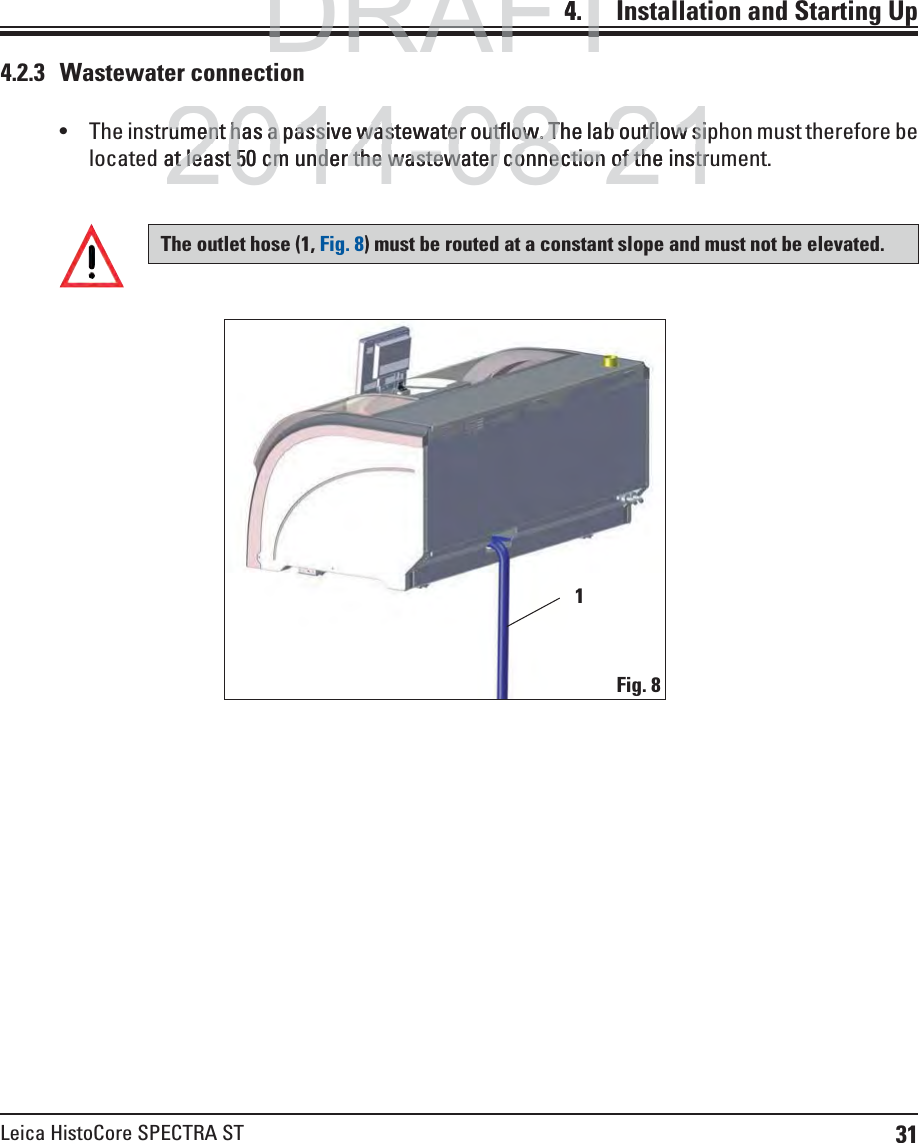
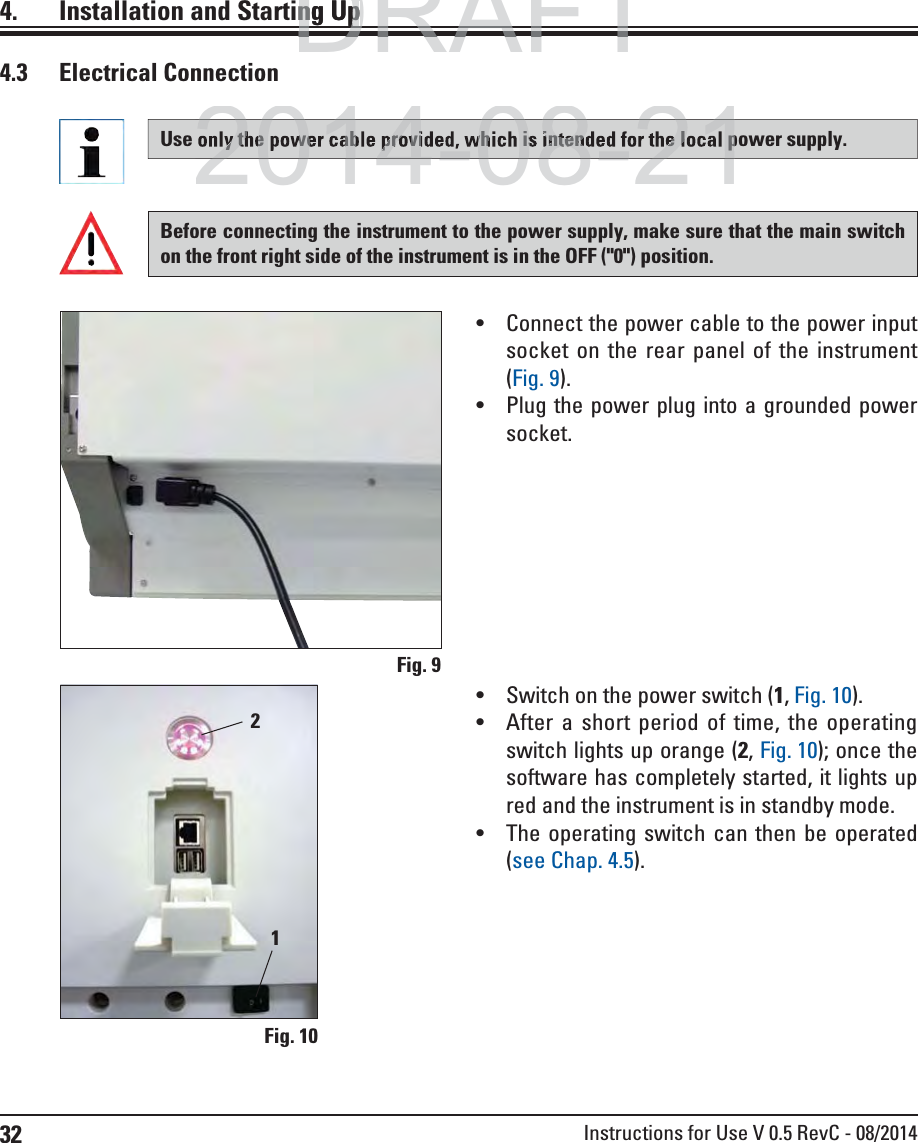
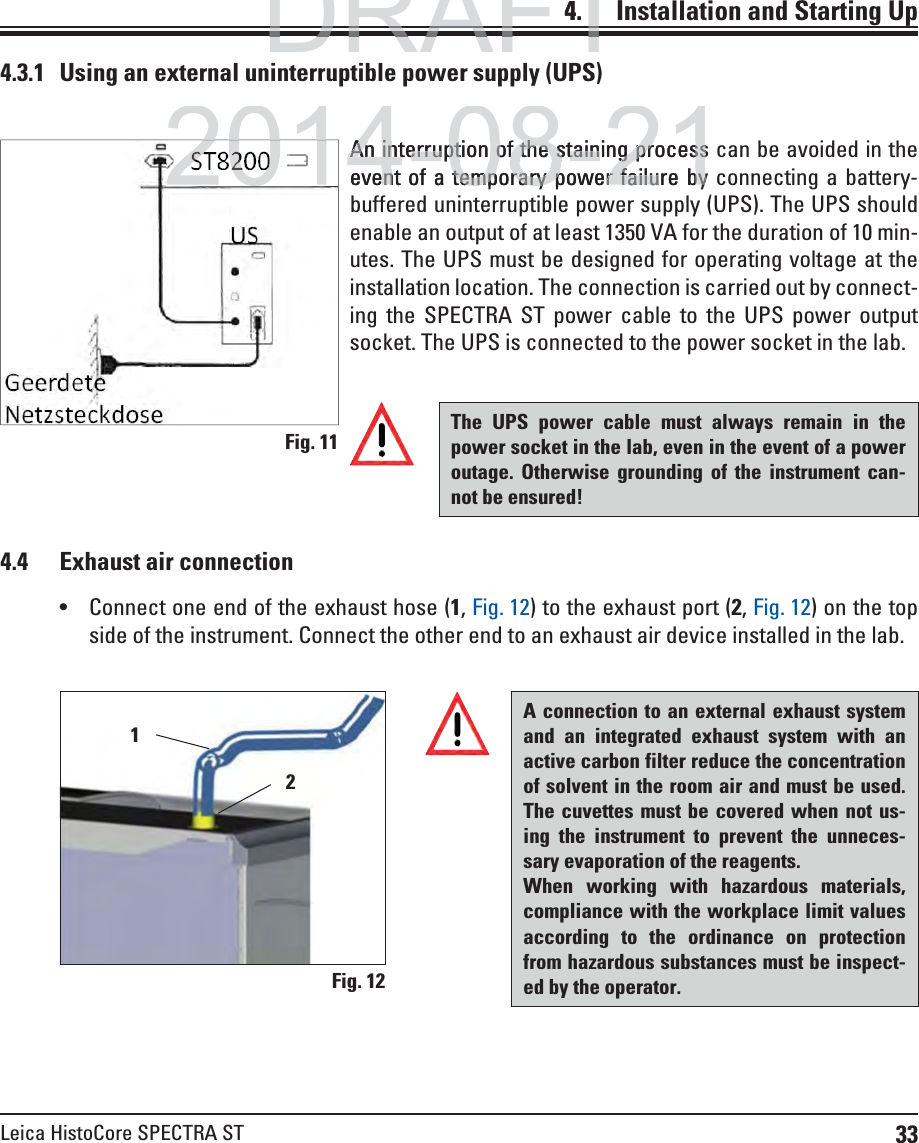
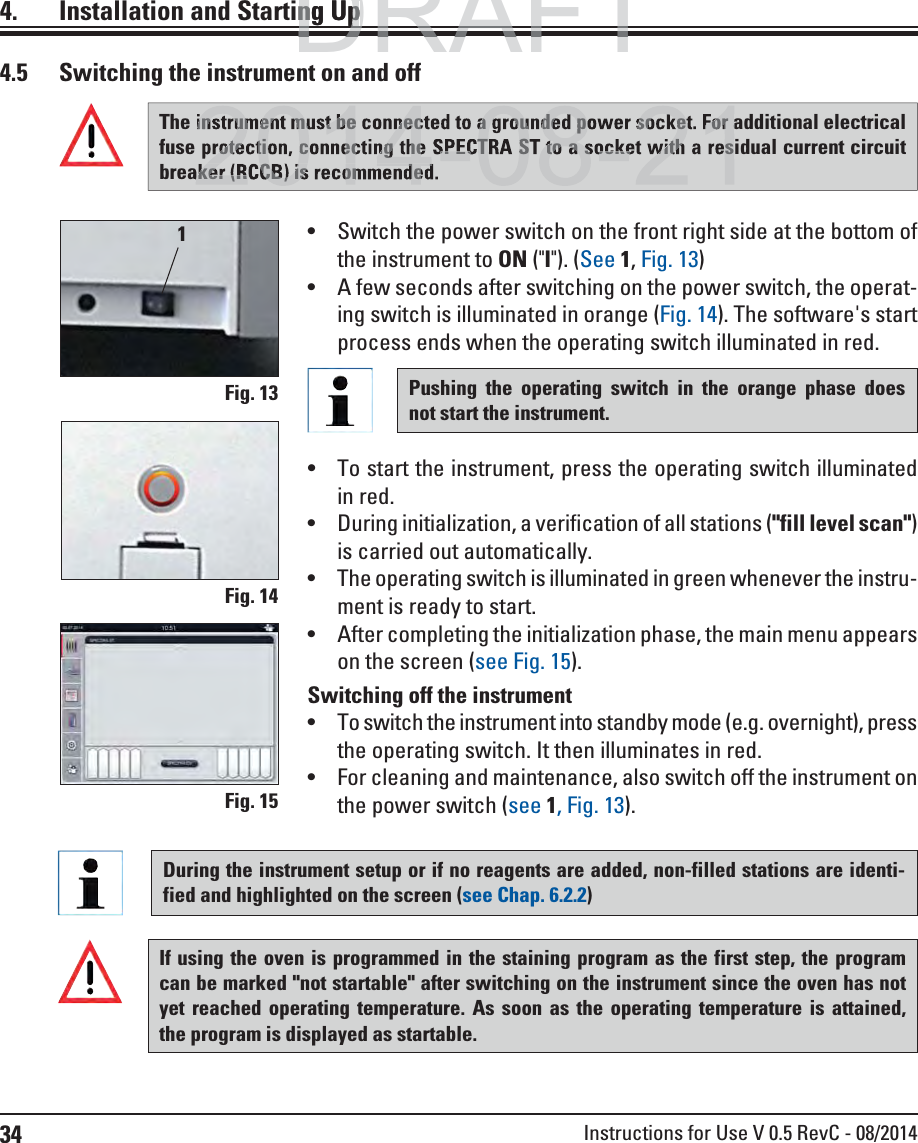
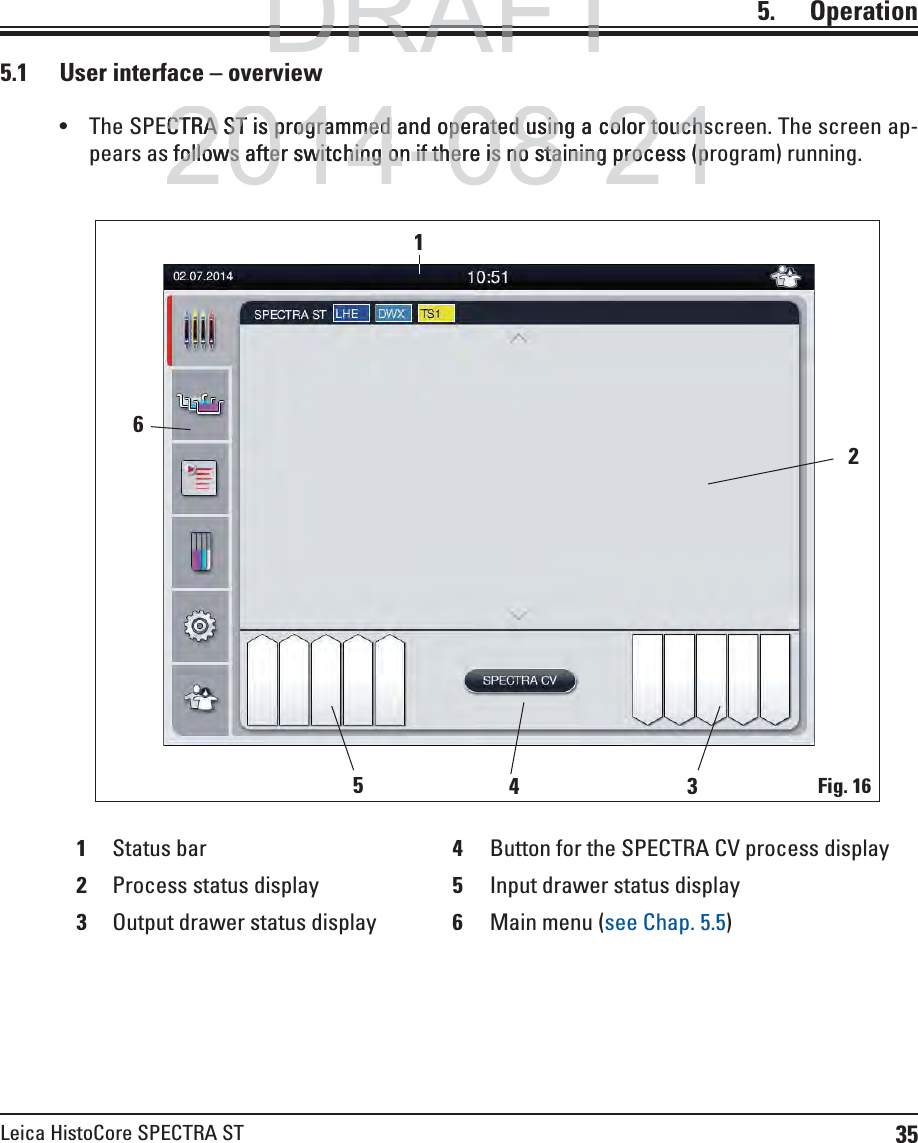
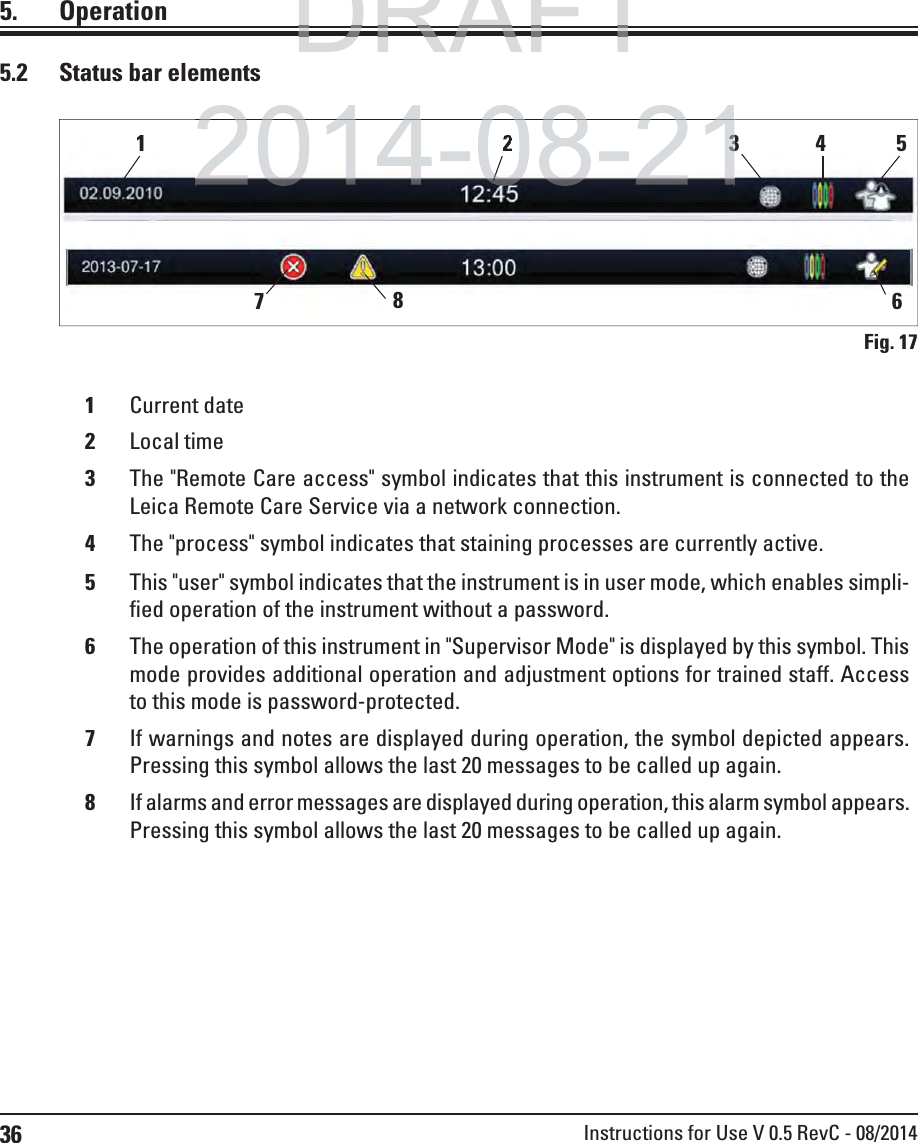
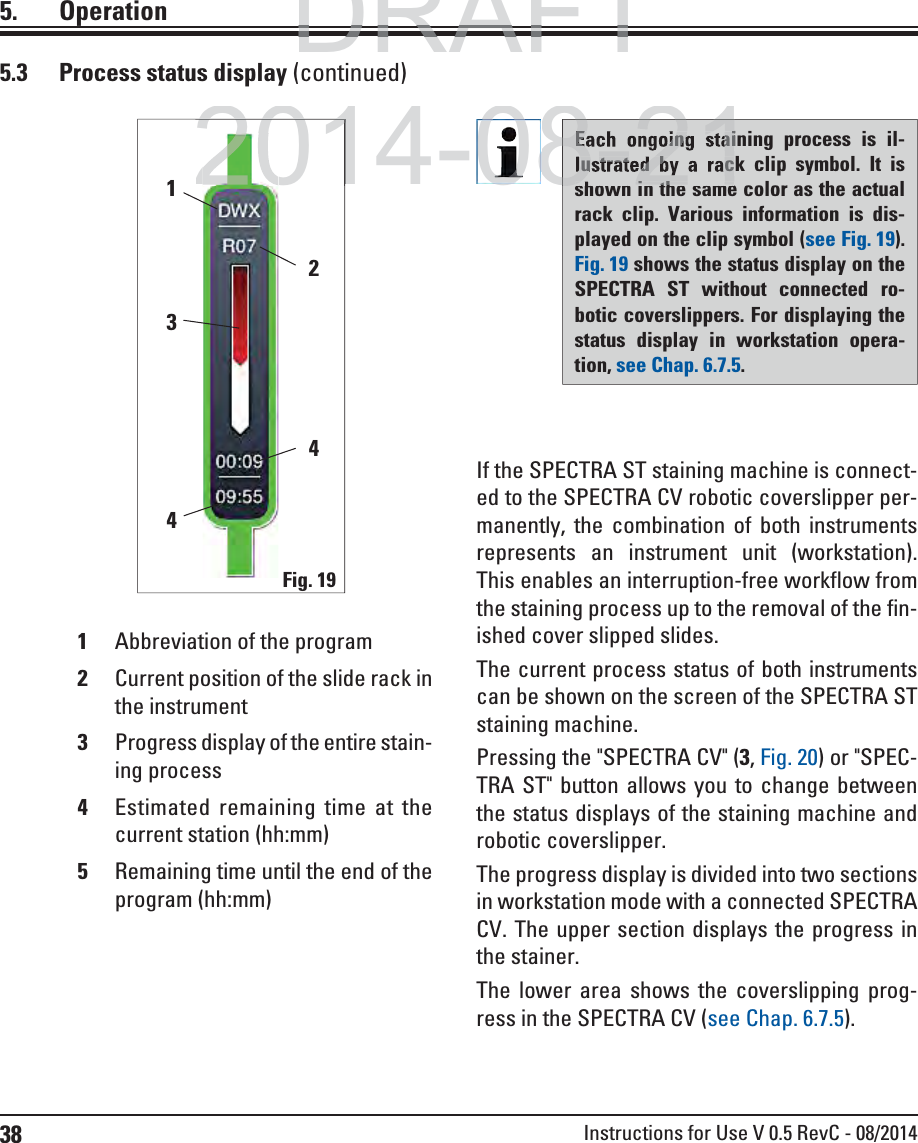
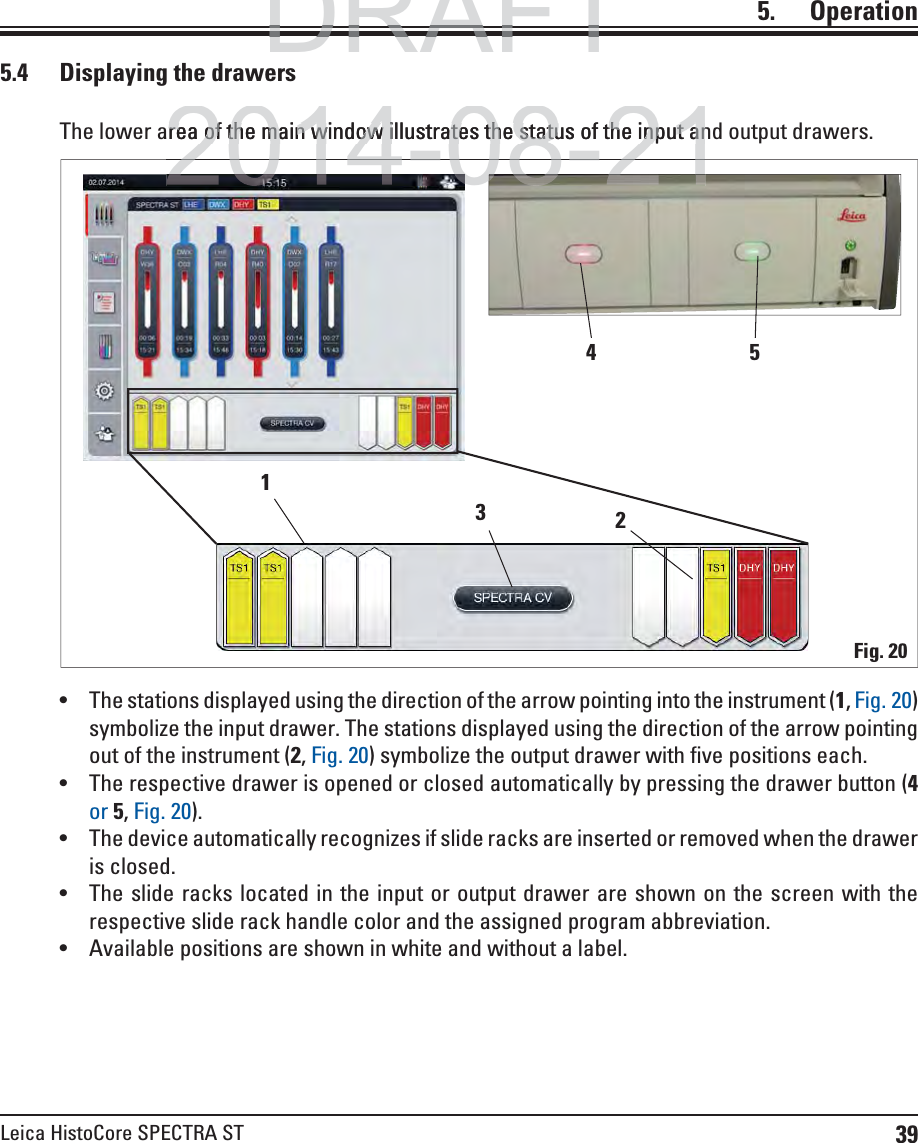
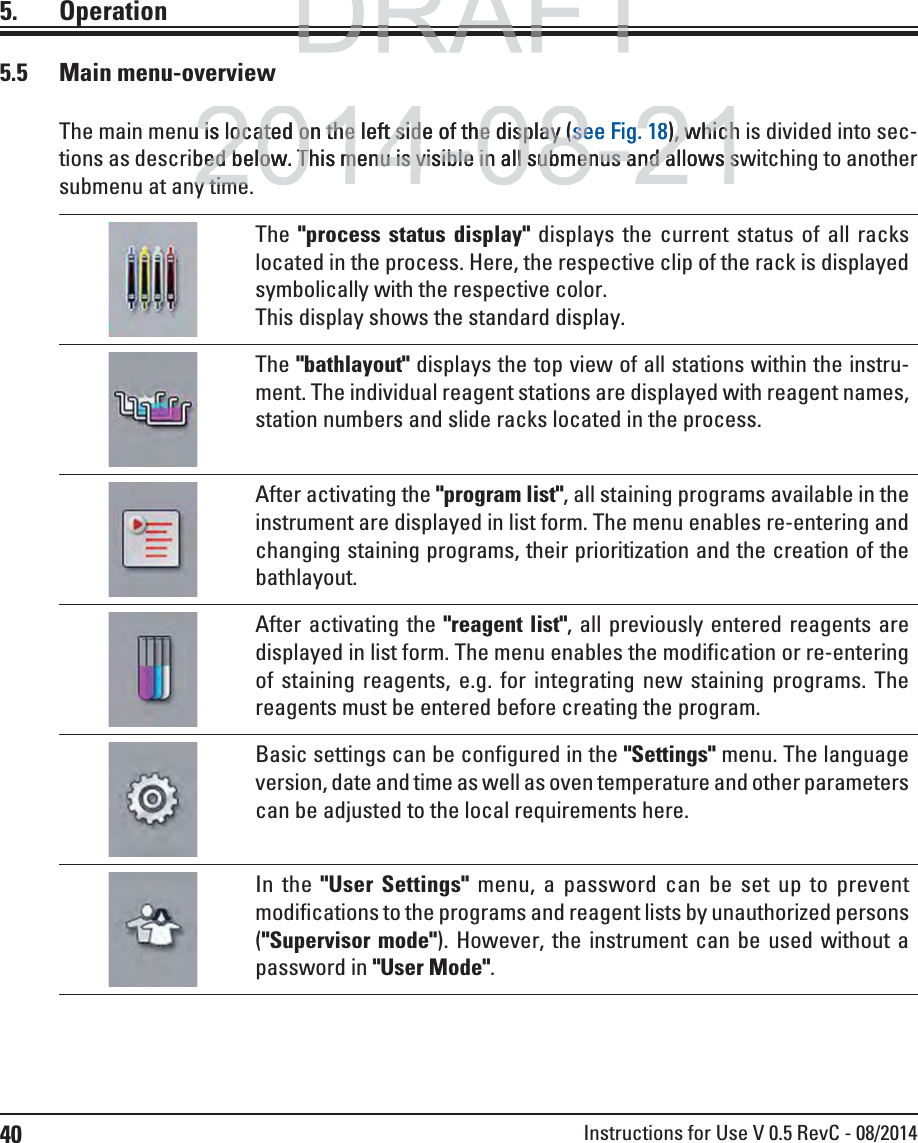
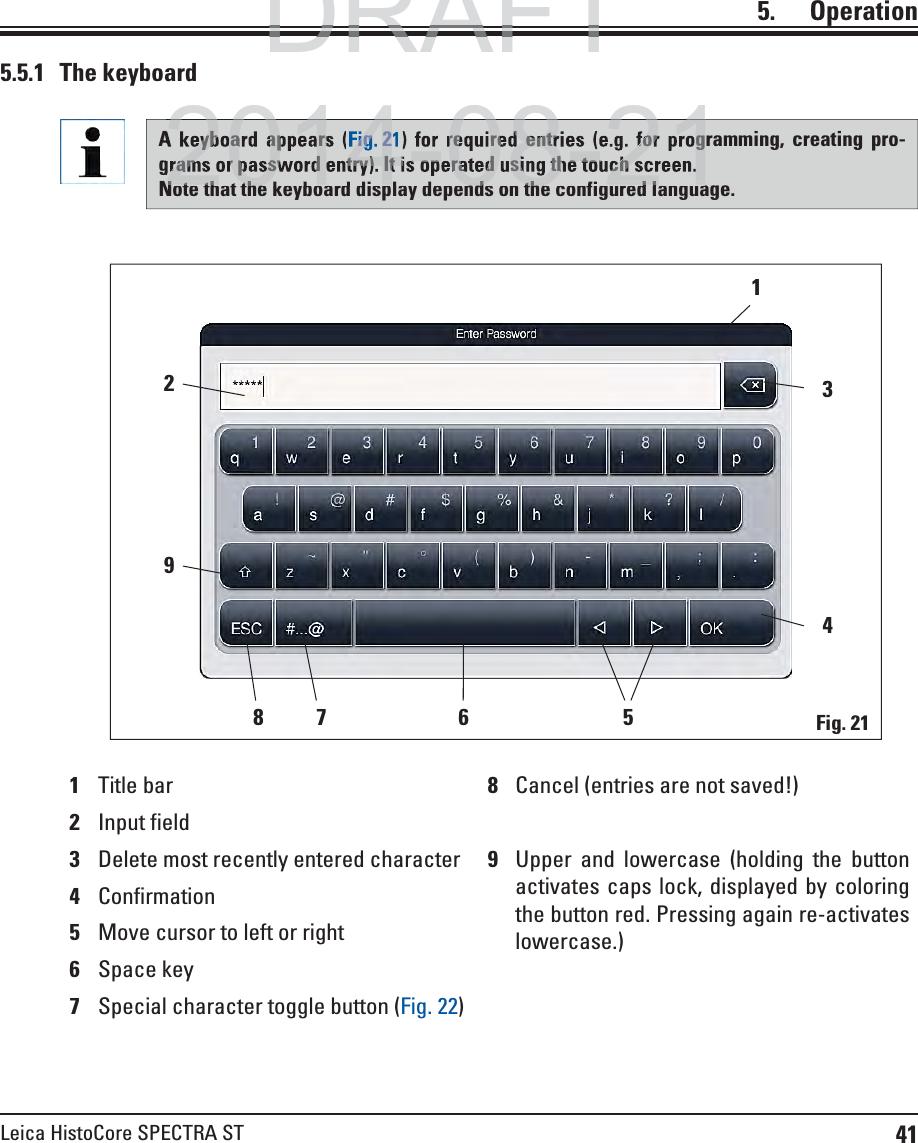
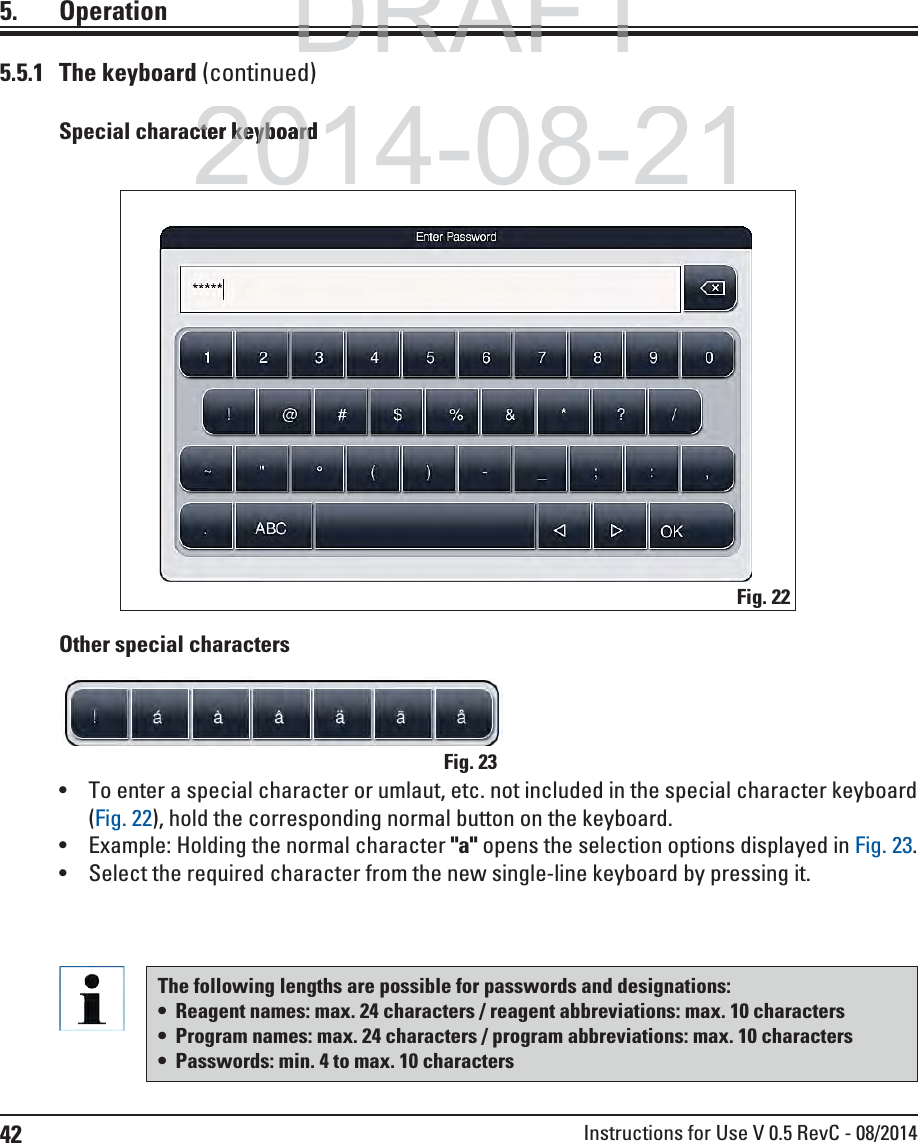
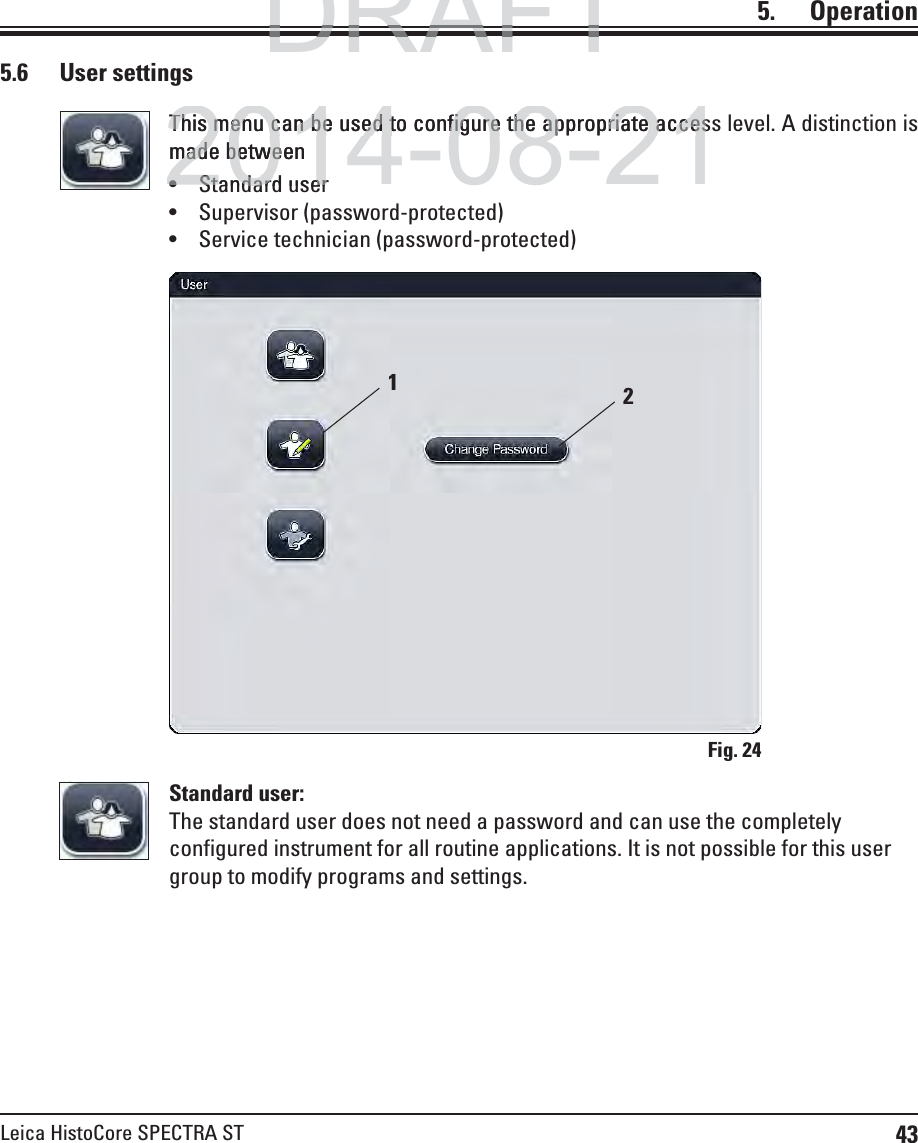
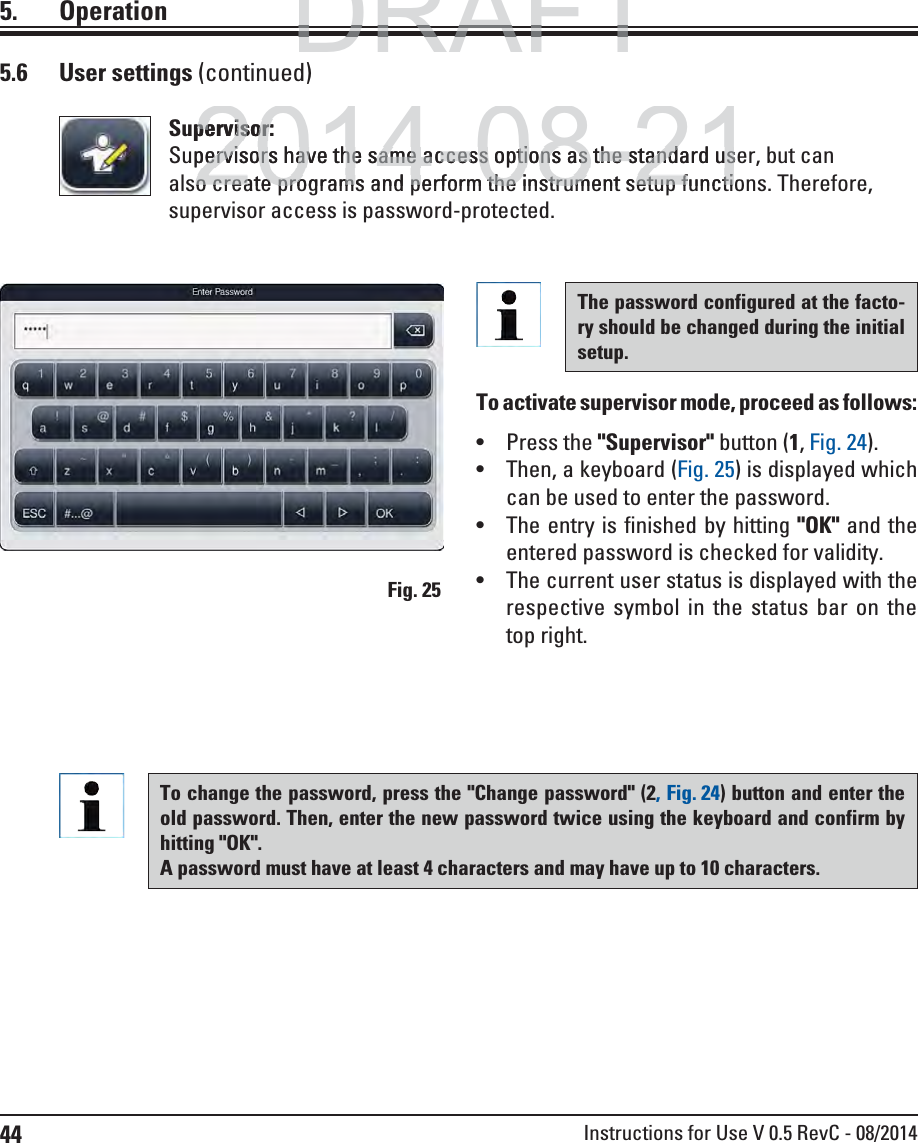
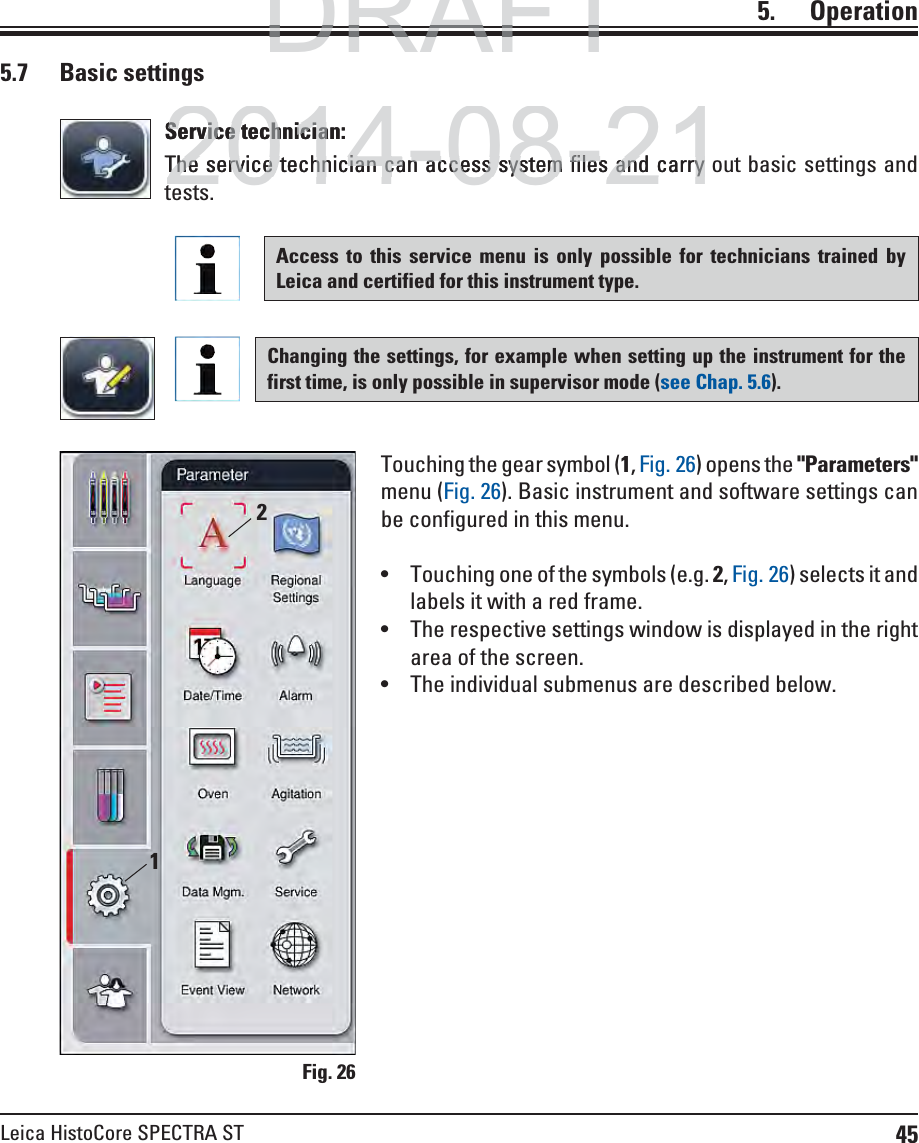
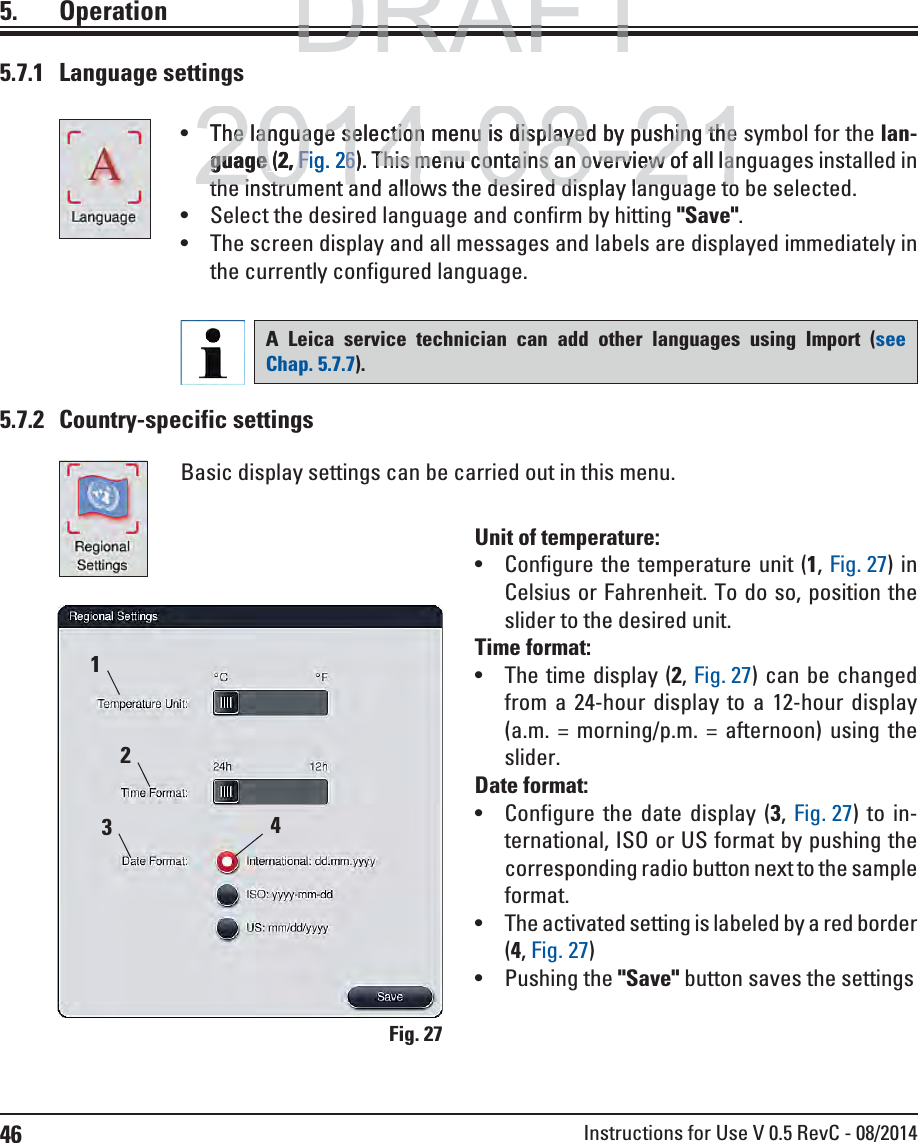
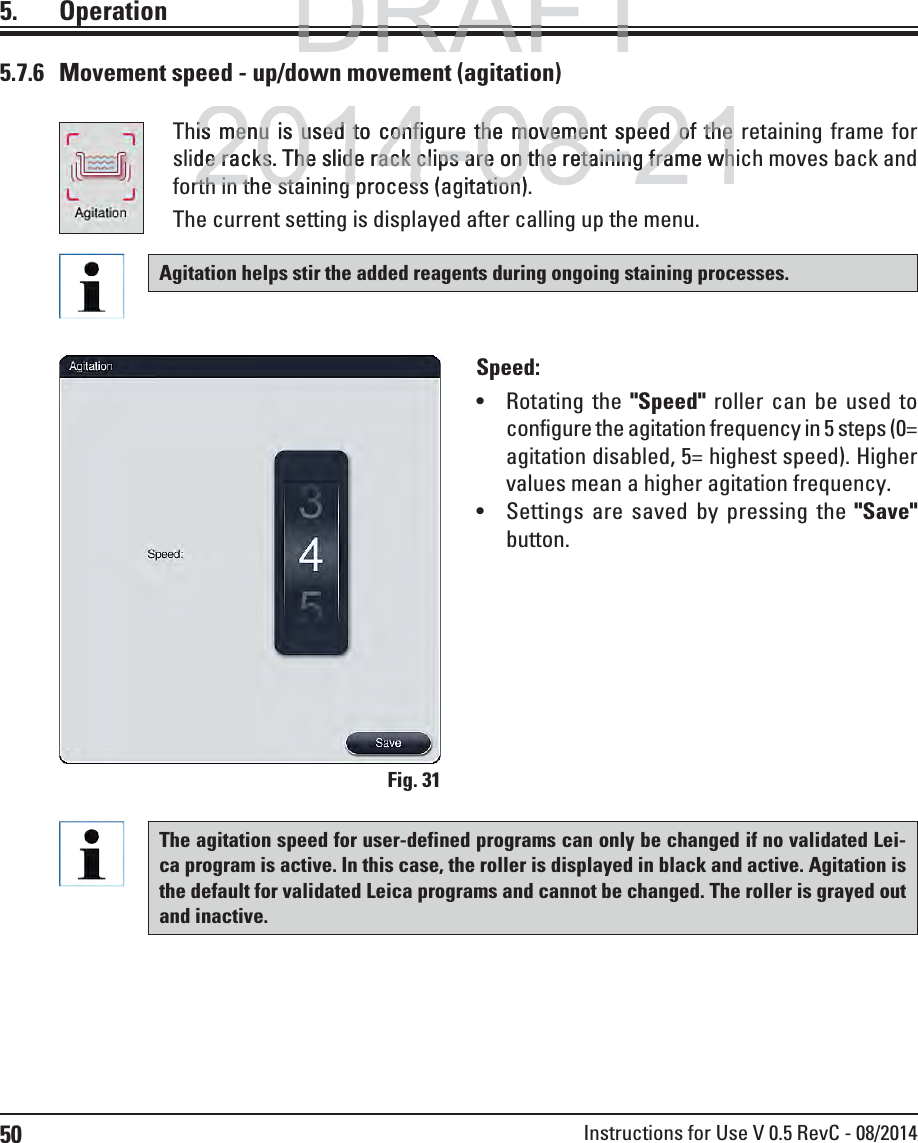
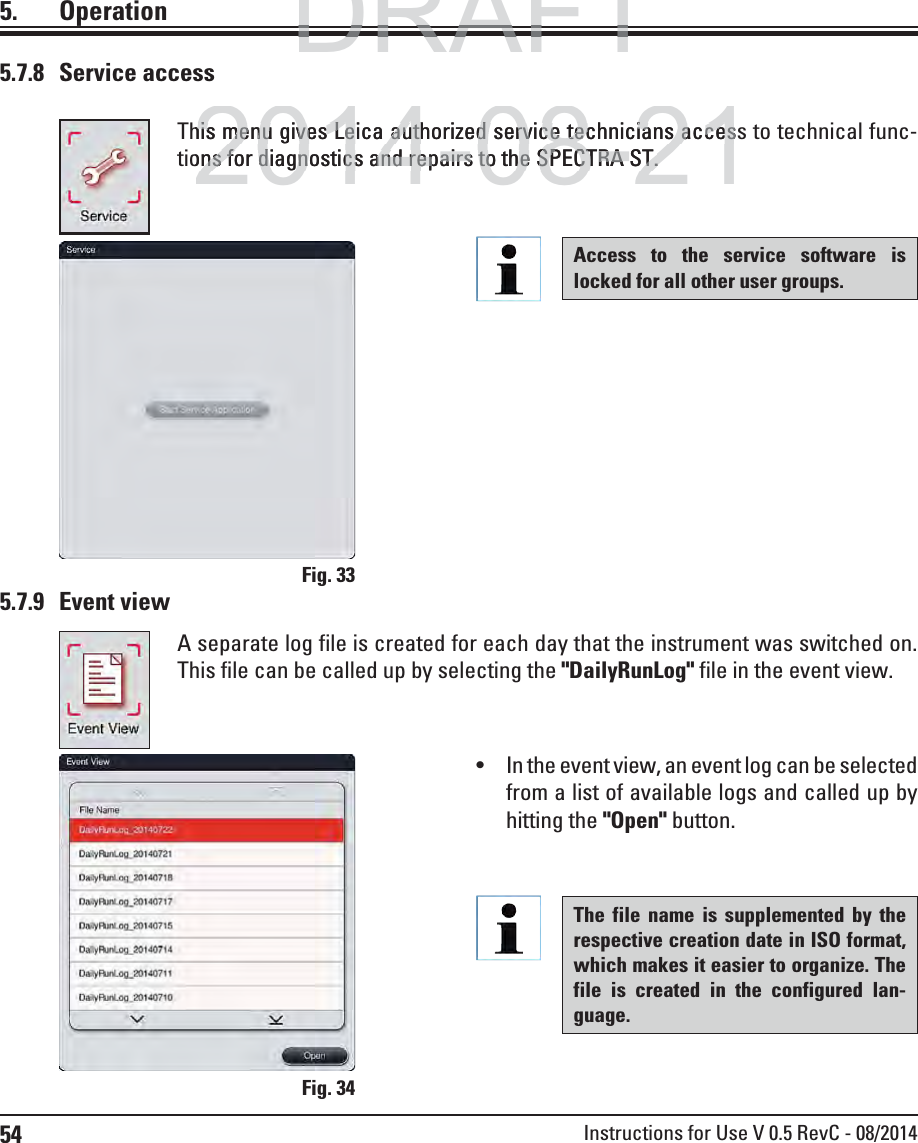
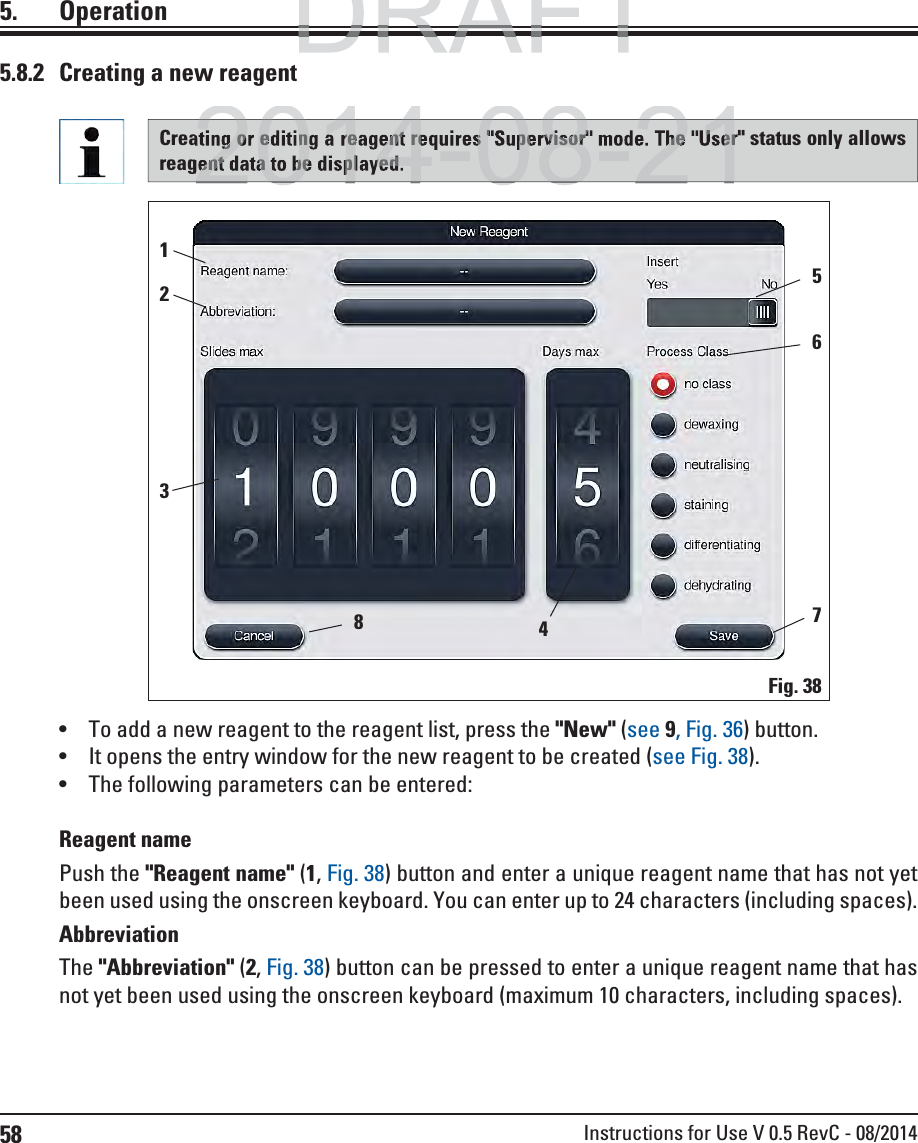
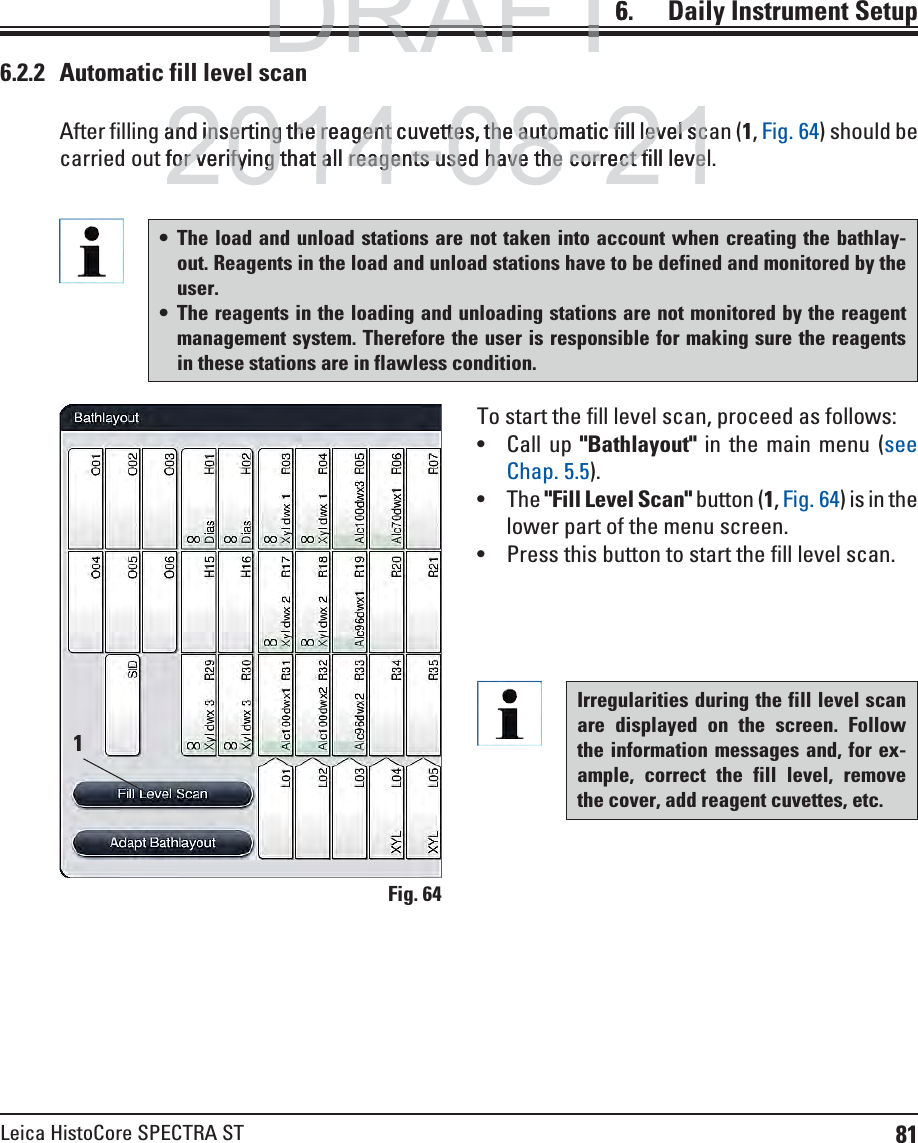
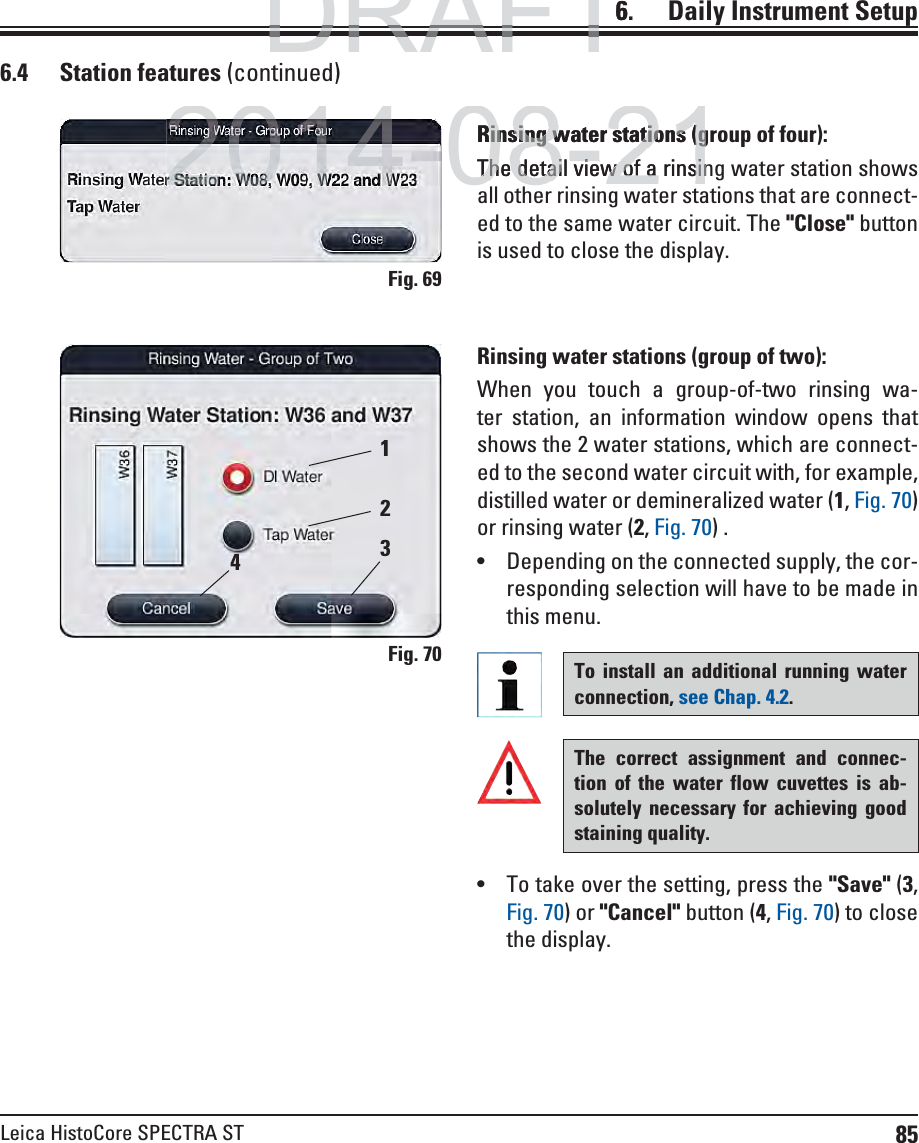
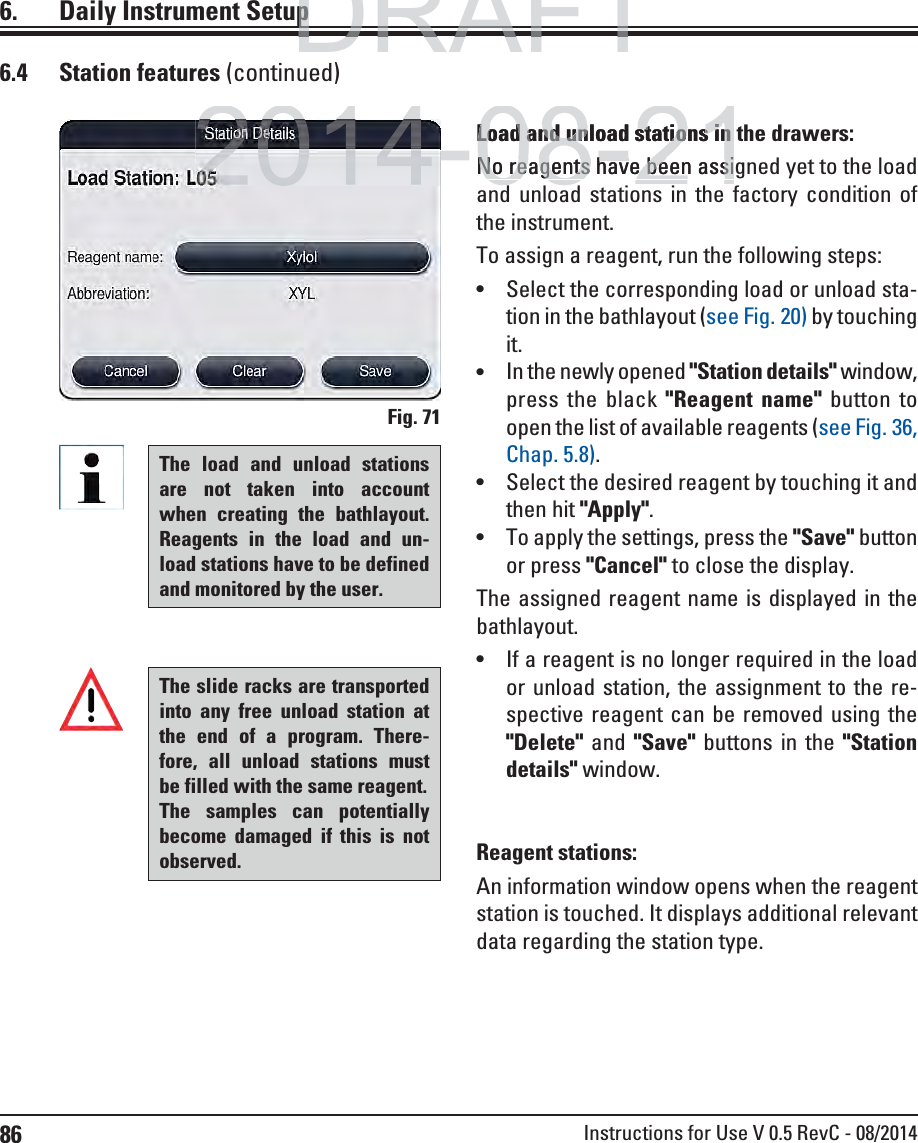
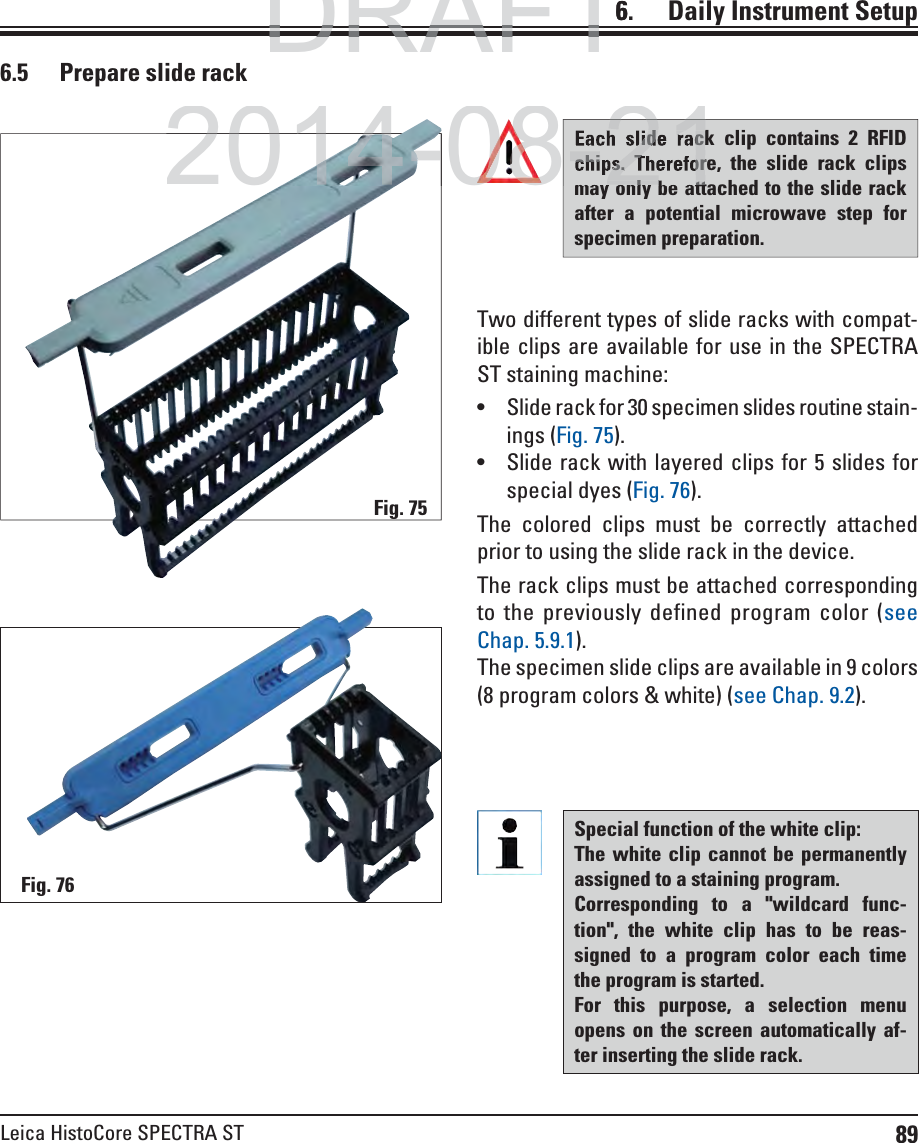
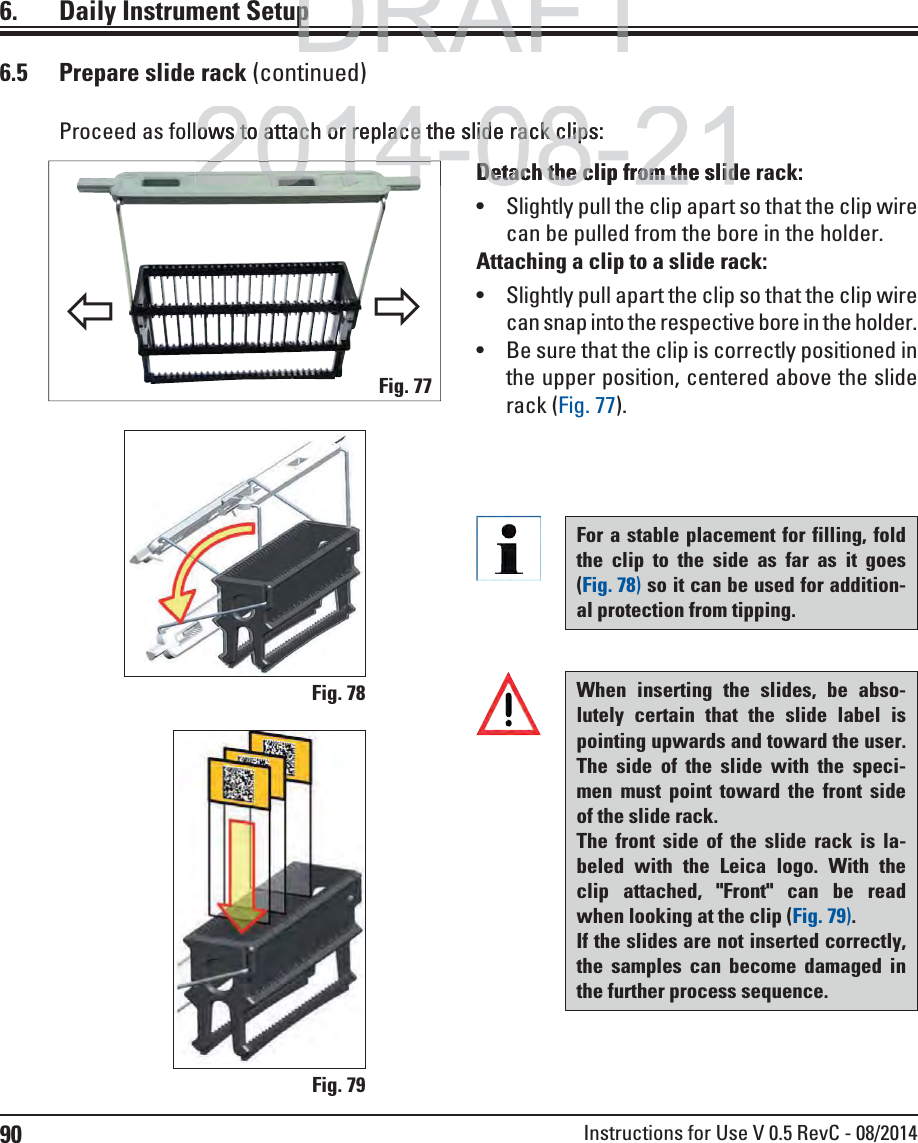
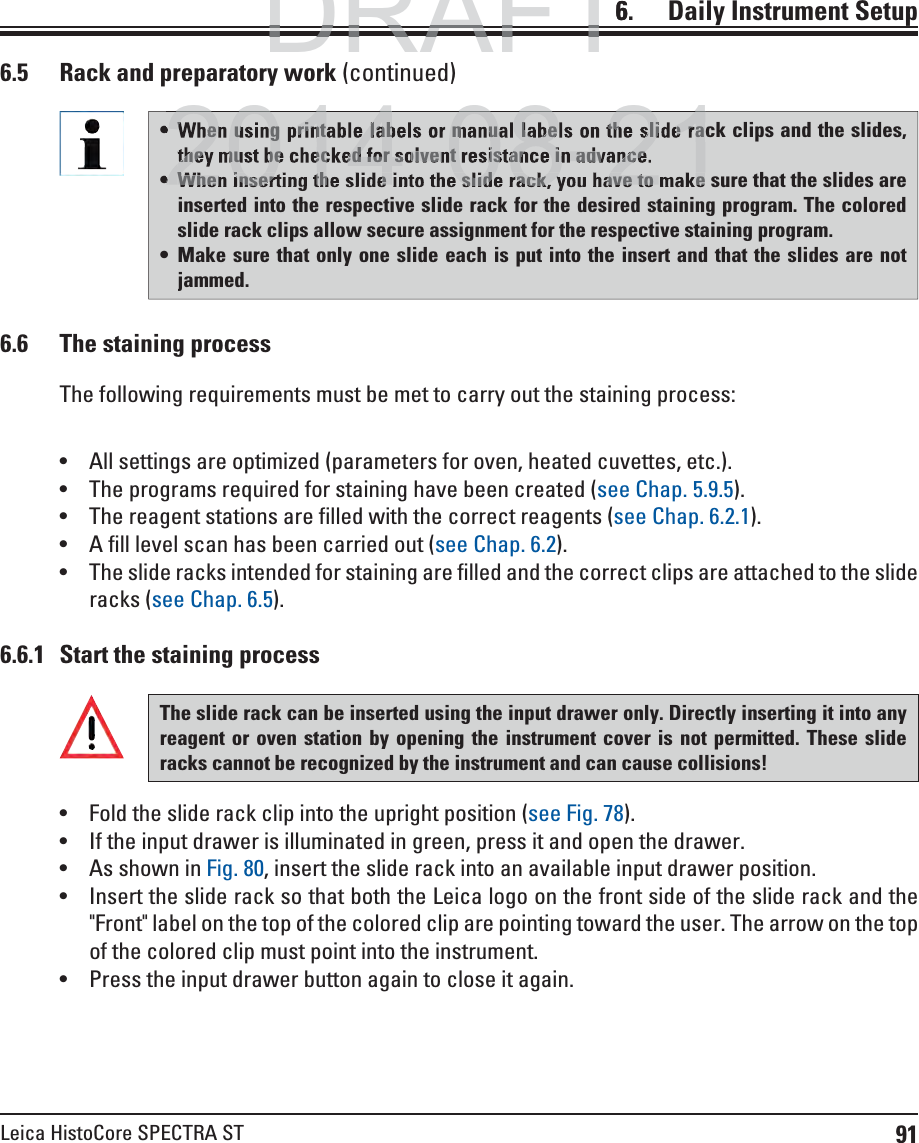
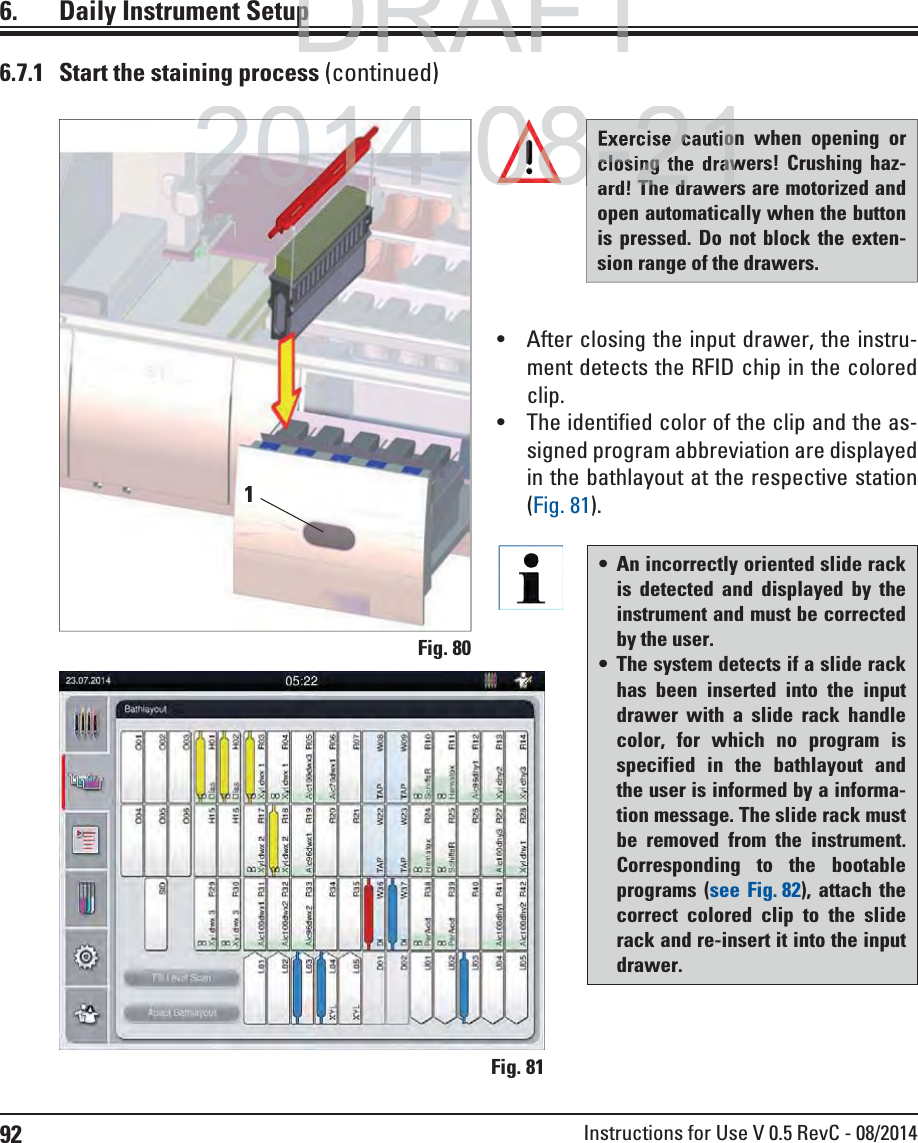
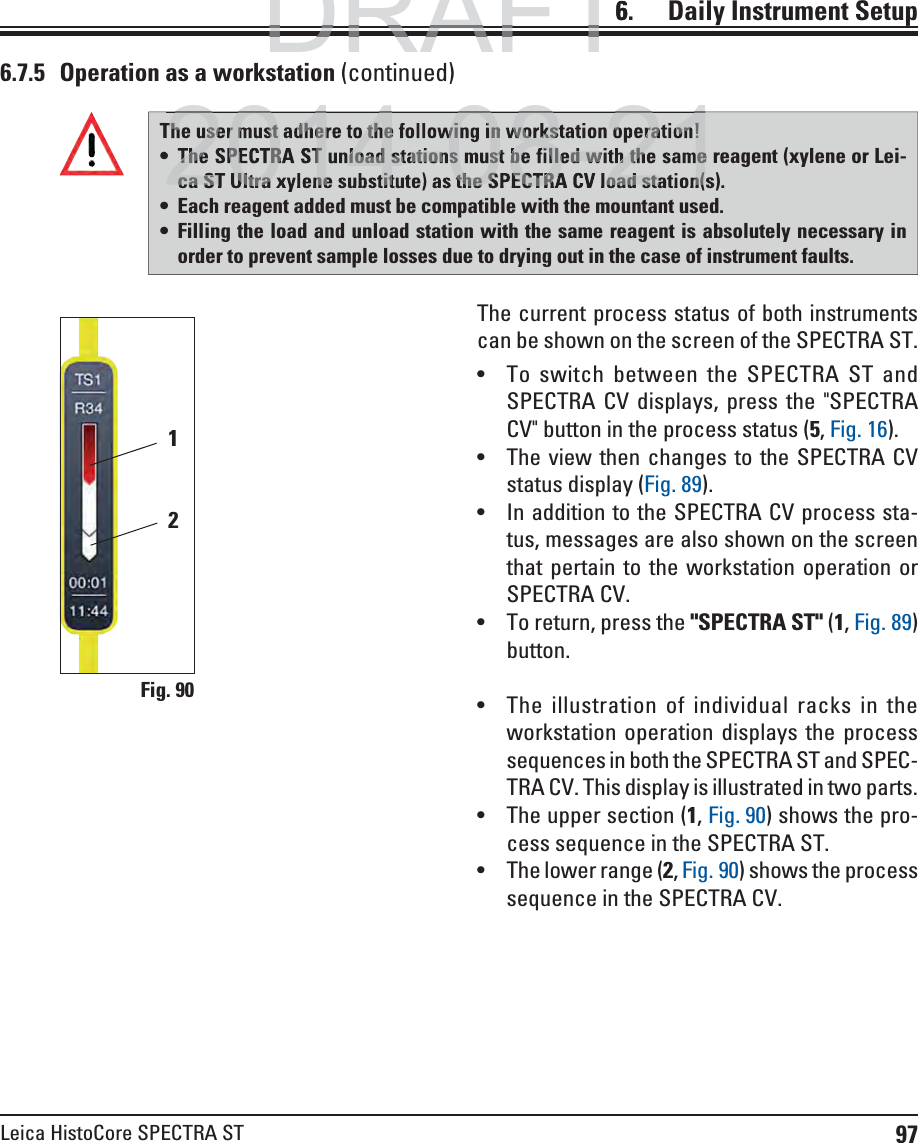
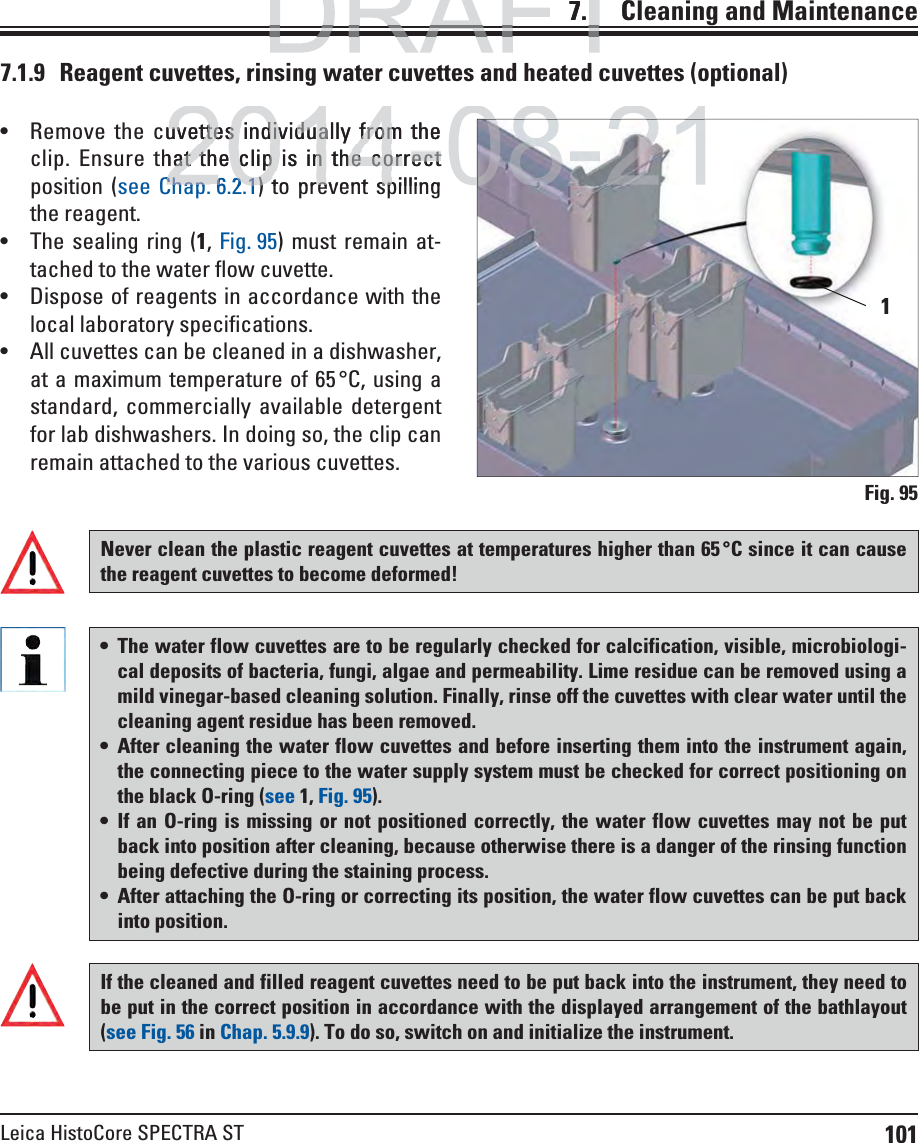
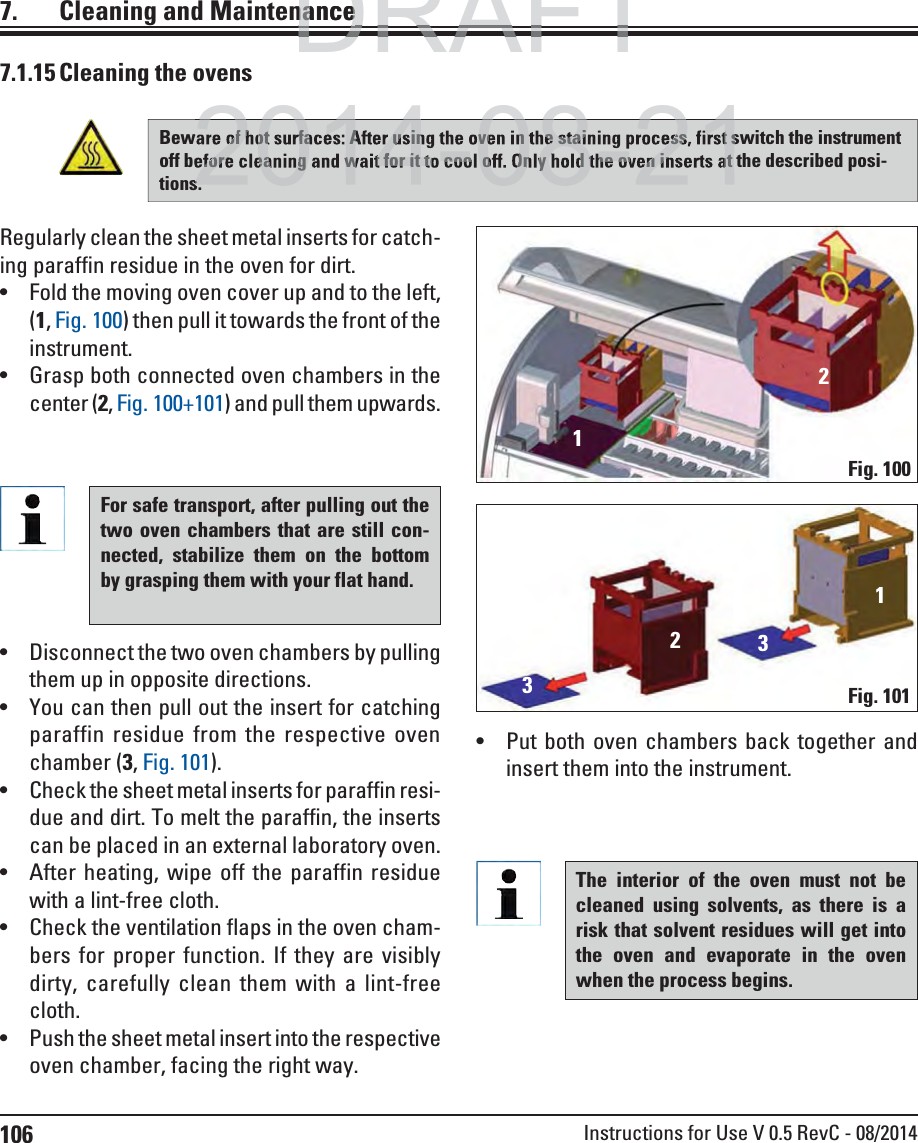
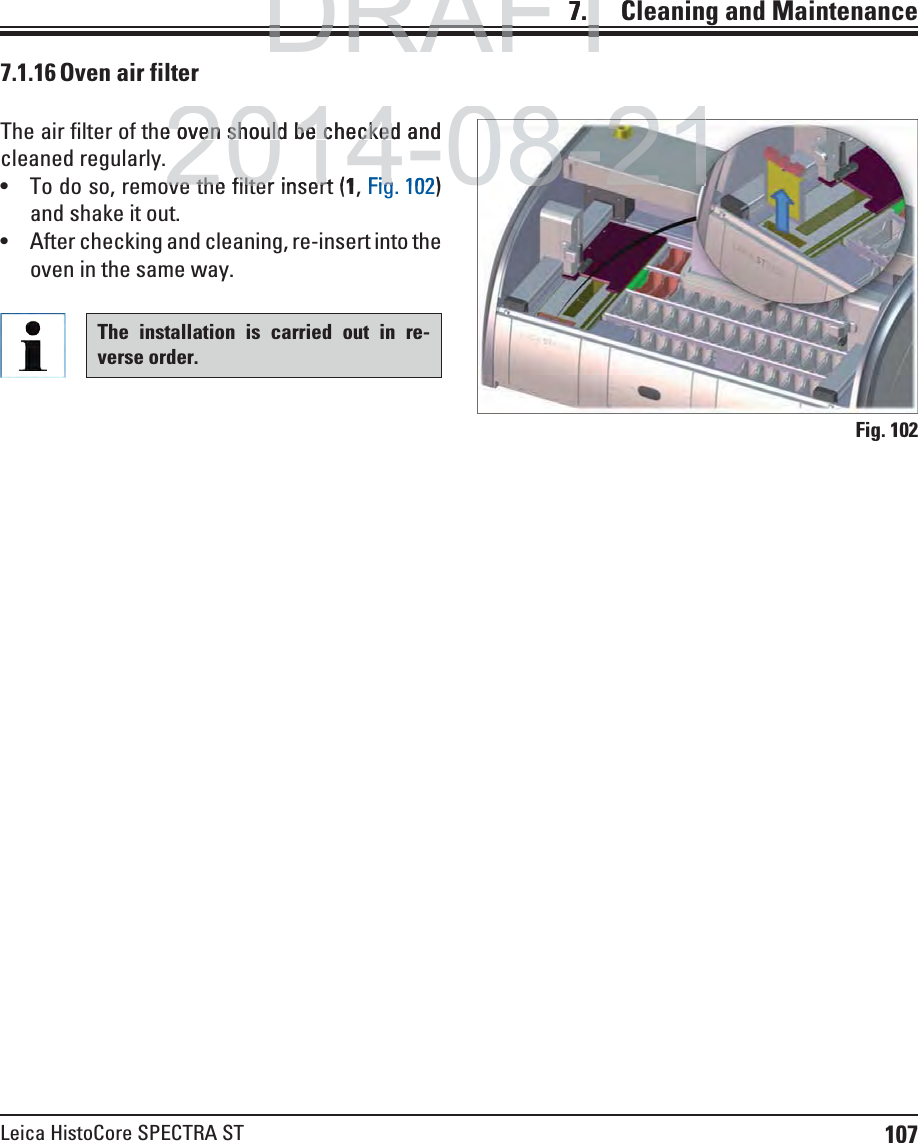
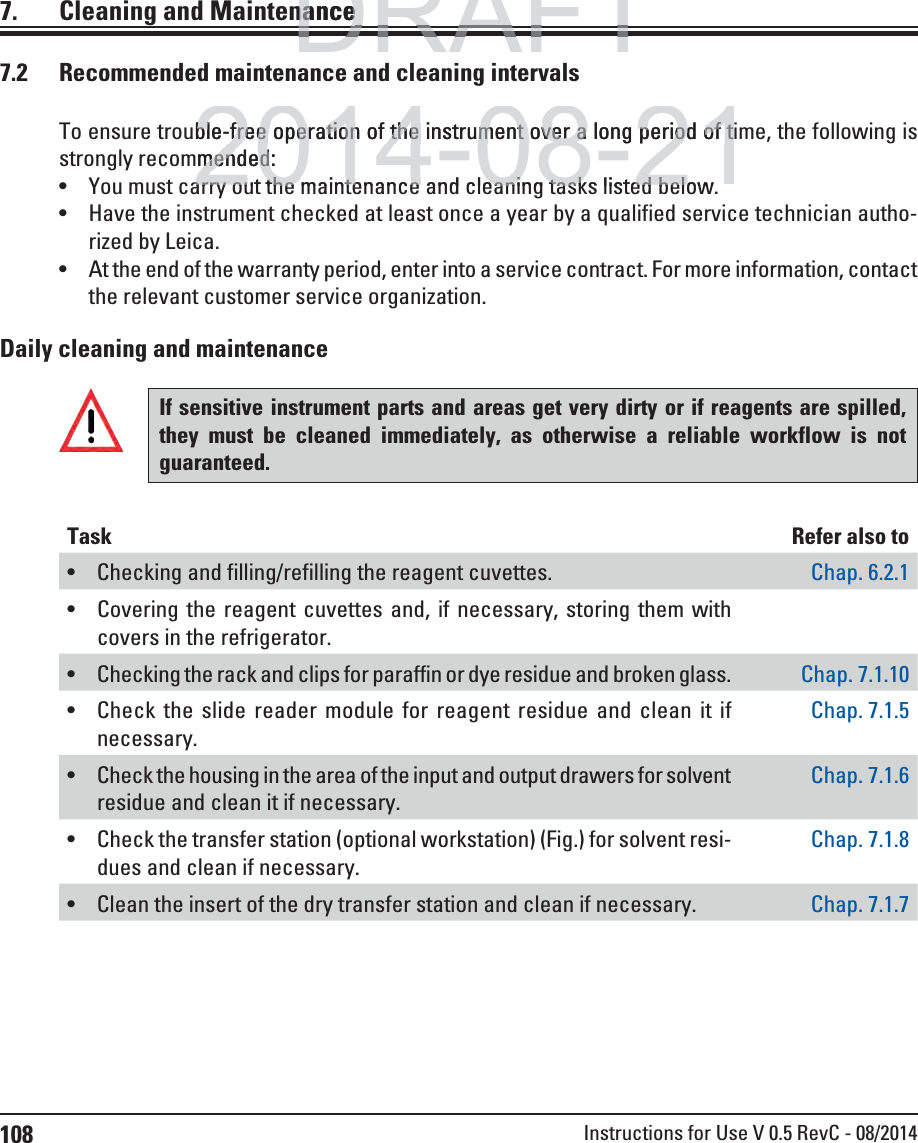
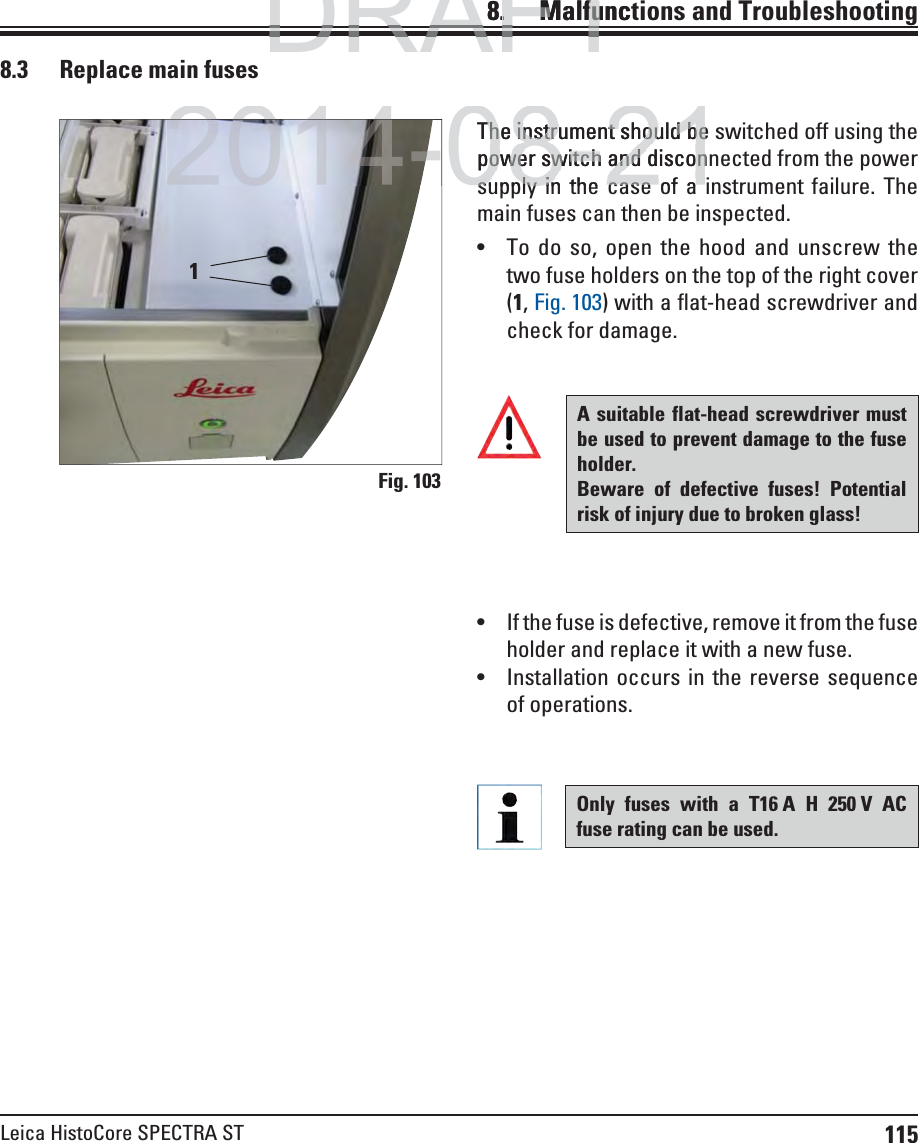
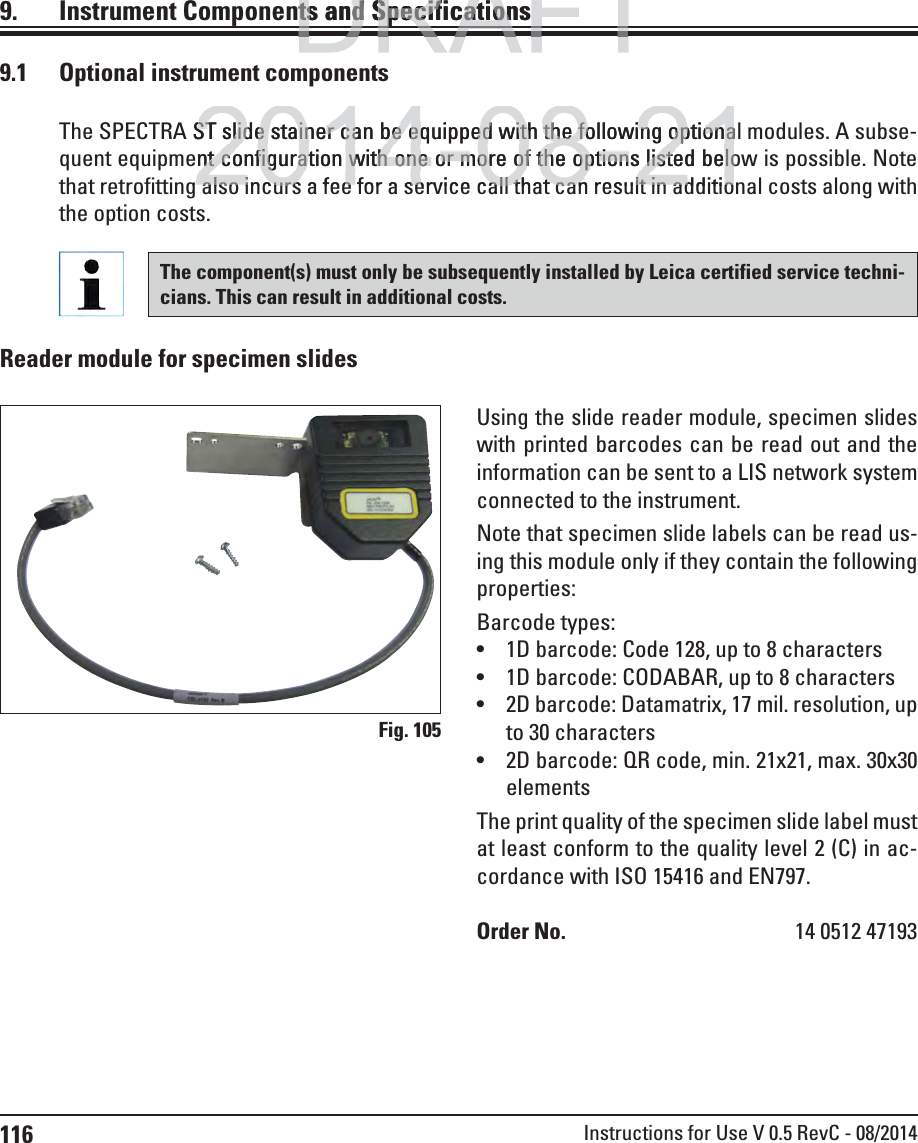
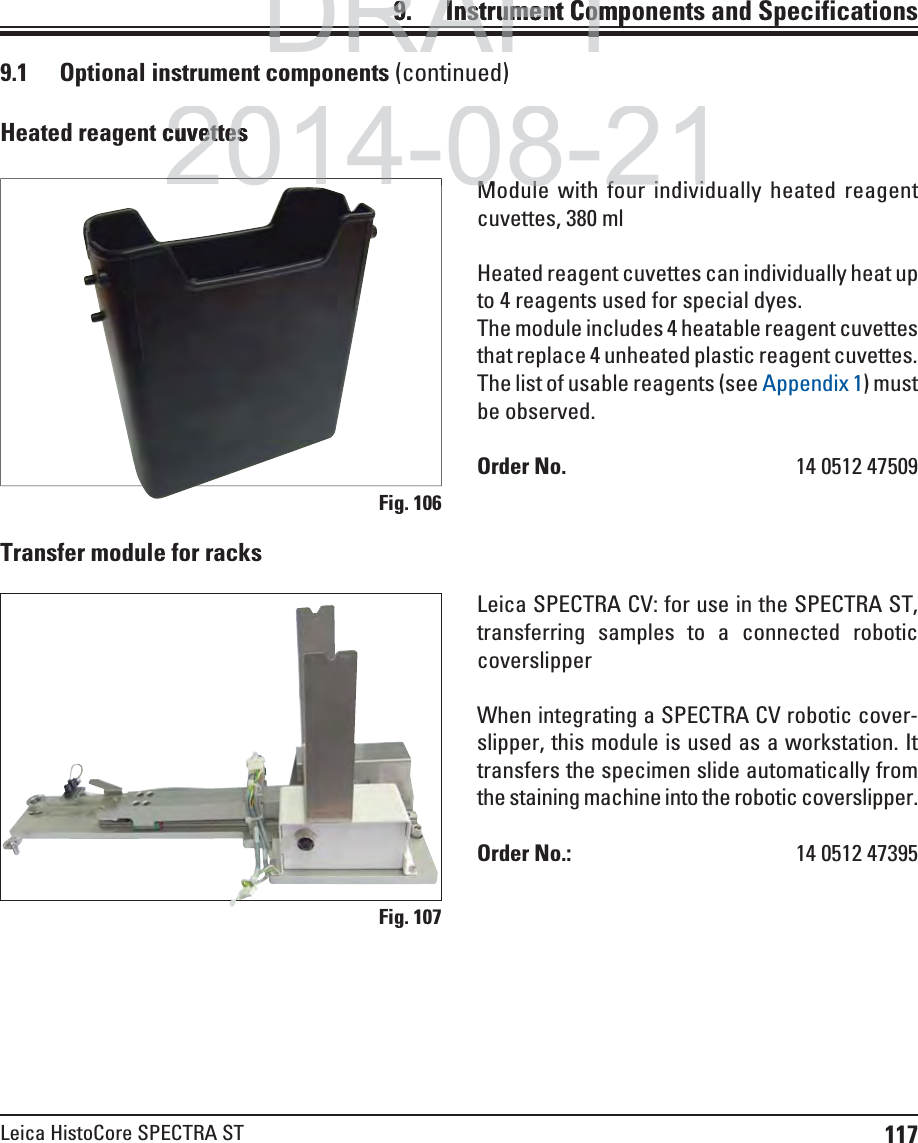
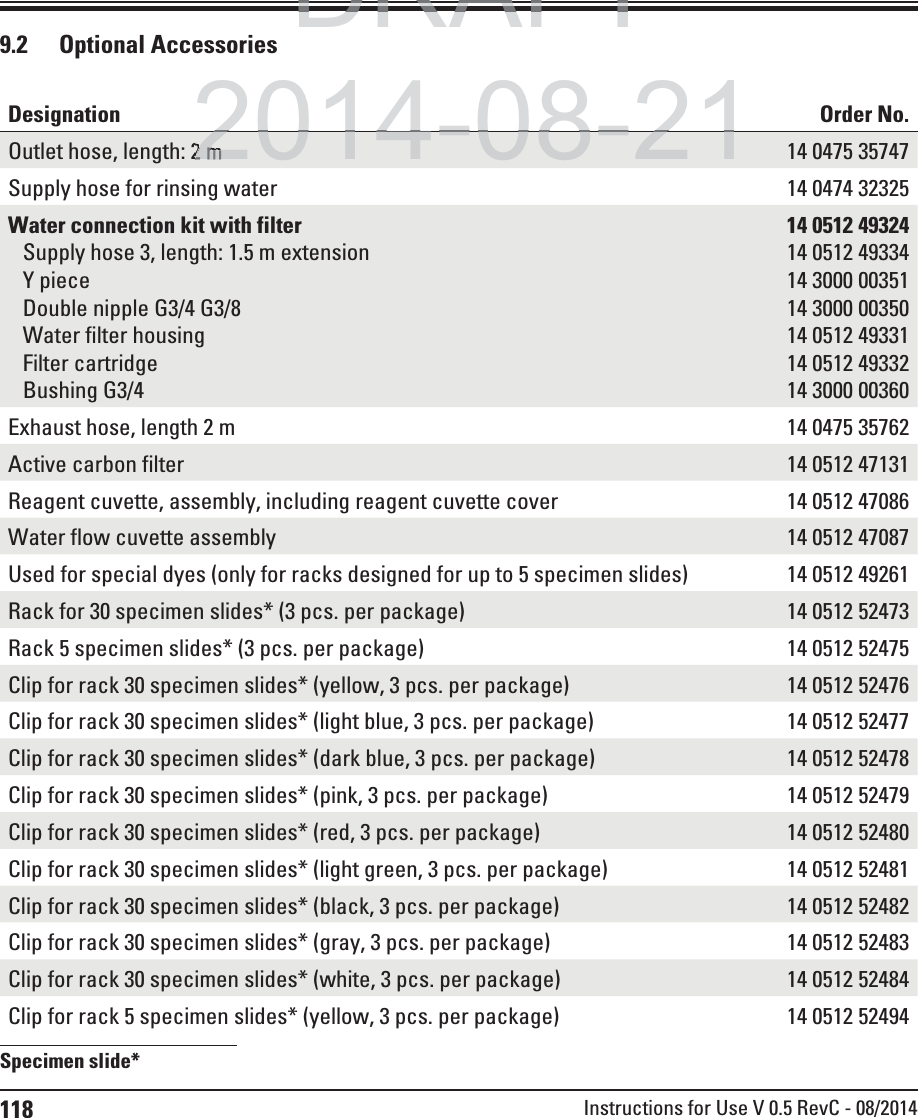
![37Leica HistoCore SPECTRA ST5.3 Process status display All slide racks located in the process (3) are displayed in the main window (Fig. 18). The title bar of the main window (2, Fig. 18) indicates the instrument type [SPECTRA ST] and lists the currently bootable staining programs with the defined abbreviations and the color assigned to the slide racks.Fig. 185. Operation123To display an active staining process, the upper part of the clip is displayed symboli-cally in the respective color (3, Fig. 18). If the number of racks in the process exceeds the maximum that can be displayed in the main window (max. 9), you can scroll through the display area vertically using the keys (1, Fig. 18). If one of the buttons is grayed out, it is disabled and there are no other elements in an area that is not shown.DRAFTDRAFTDRAFT2014 08 21](https://usermanual.wiki/Leica-Biosystems-Nussloch/SPECTRAST.User-Manual/User-Guide-2393112-Page-39.png)