Mandolyn Electronic Technology TRC650 Wireless Thermostat User Manual 03 THM405R 52 0546 6 MANUAL ENG
Mandolyn Electronic Technology Inc. Wireless Thermostat 03 THM405R 52 0546 6 MANUAL ENG
UserManual.wiki
>
Mandolyn Electronic Technology
>
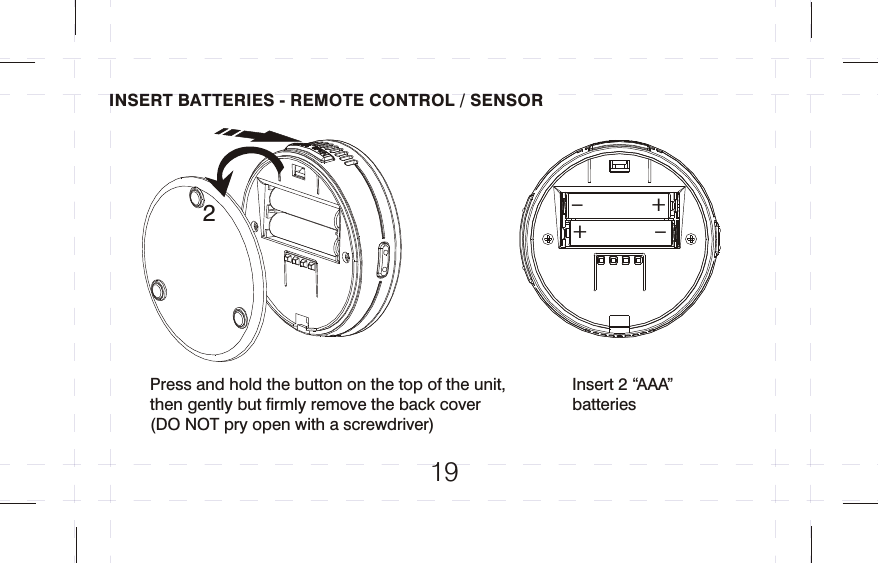
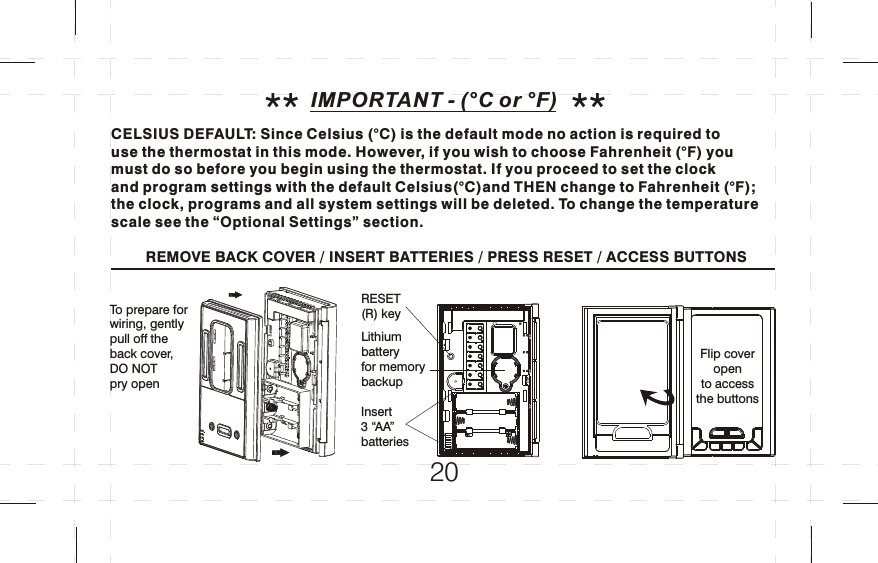
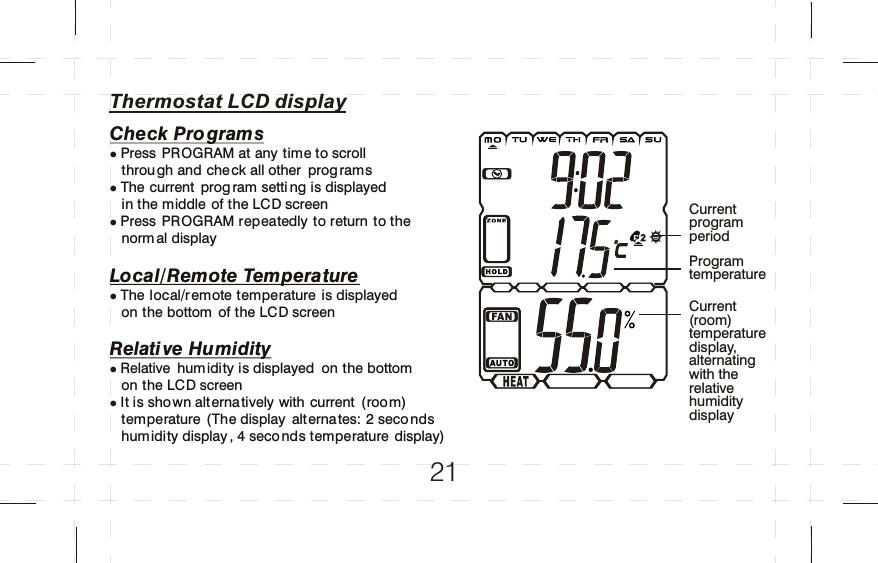
TRC650 User Manual
User Manual
Navigation menu
Upload a User Manual
Namespaces
Wiki Guide
HTML
PDF
Info
Views
User Manual
Discussion / Help
Navigation