Masimo RAD87B Rad-87 User Manual LAB5727K indd
Masimo Corporation Rad-87 LAB5727K indd
UserManual.wiki
>
Masimo
>
RAD87B User Manual
User Manual
Navigation menu
Upload a User Manual
Namespaces
Wiki Guide
HTML
PDF
Info
Views
User Manual
Discussion / Help
Navigation


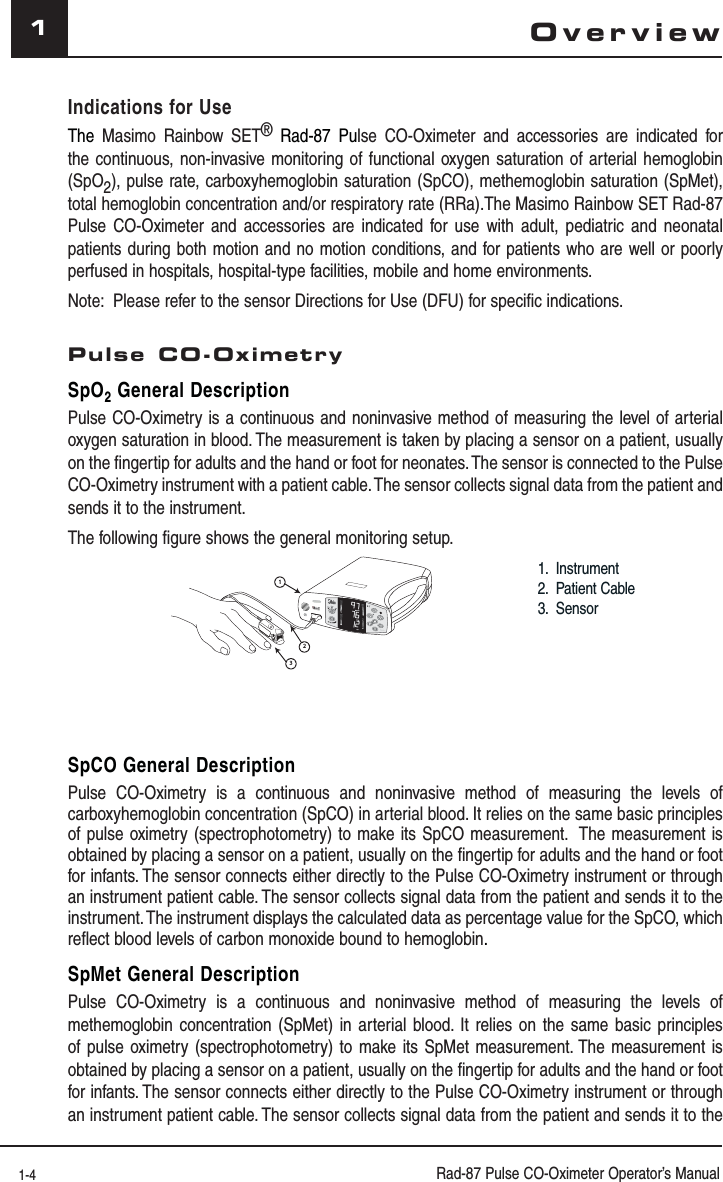
![Rad-87 Pulse CO-Oximeter Operator’s Manual 1-51Overviewinstrument. The instrument displays the calculated data as percentage value for the SpMet.SpHb (Total Hemoglobin) General DescriptionPulse CO-Oximetry is a continuous and noninvasive method of measuring the levels of total hemoglobin (SpHb) in arterial blood. It relies on the same principles of pulse oximetry to make the SpHb measurement. The measurement is taken by a sensor capable of measuring SpHb, usually on the fingertip for adults and pediatric patients. The sensor connects directly to the Pulse CO-Oximeter or with a patient cable. The sensor collects signal data from the patient and sends it to the instrument. The instrument displays the calculated data as measurement of total hemoglobin concentration. The Rad-87 can be configured to be a combined SpO2 monitor with other available parameters/measurements.CaO2 (Total Arterial Oxygen Content) General Description*Oxygen (O2) is carried in the blood in two forms, either dissolved in plasma or combined with hemoglobin. The amount of oxygen in the arterial blood is termed the oxygen content (CaO2) and is measured in units of ml O2/dl blood. One gram of hemoglobin (Hb) can carry 1.34 ml of oxygen, whereas 100 ml of blood plasma may carry approximately 0.3 ml of oxygen. The oxygen content is determined mathematically as:CaO2 = 1.34 (ml O2/g Hb) x Hb (g/dL) x HbO2 + PaO2 (mm Hg) x (0.3 ml O2/ 100 mm Hg/dL)Where HbO2 is the fractional arterial oxygen saturation and PaO2 is the partial pressure of arterial oxygen. For typical PaO2 values, the second part of the above equation [PaO2 (mm Hg) x (0.3 ml O2/ 100 mm Hg/dL] is approximately 0.3 ml/dl. Furthermore, for typical carboxyhemoglobin and methemoglobin levels, the functional saturation (SpO2) as measured by a pulse oximeter is given by:SpO2 = 1.02 x HbO2 * Martin, Laurence. All You Really Need to Know to Interpret Arterial Blood Gases, Second Edition. New York: Lippincott Williams & Wilkins, 1999. SpOC (Pulse CO-Oximetry) General Description The above approximations result in the following reduced equation for oxygen content via the Pulse CO-Oximeter: SpOC (ml/dl†) = 1.31 (ml O2/g Hb) x SpHb (g/dL) x SpO2 + 0.3 ml/dl† When ml O2/g Hb is multiplied by g/dL of Hb, the gram unit in the denominator of ml/g cancels the gram unit in the numerator of g/dL resulting in ml/dl (ml of oxygen in one dl of blood) as the unit of measure for SpOC.Rainbow Acoustic Monitoring General DescriptionRainbow Acoustic Monitoring continuously measures a patient's respiration rate based on airflow sounds generated in the upper airway. The Acoustic Respiration Sensor translates airflow sounds generated in the upper airway to an electrical signal that can be processed to produce a respiration rate, measured as breaths per minute.](https://usermanual.wiki/Masimo/RAD87B/User-Guide-1394405-Page-16.png)
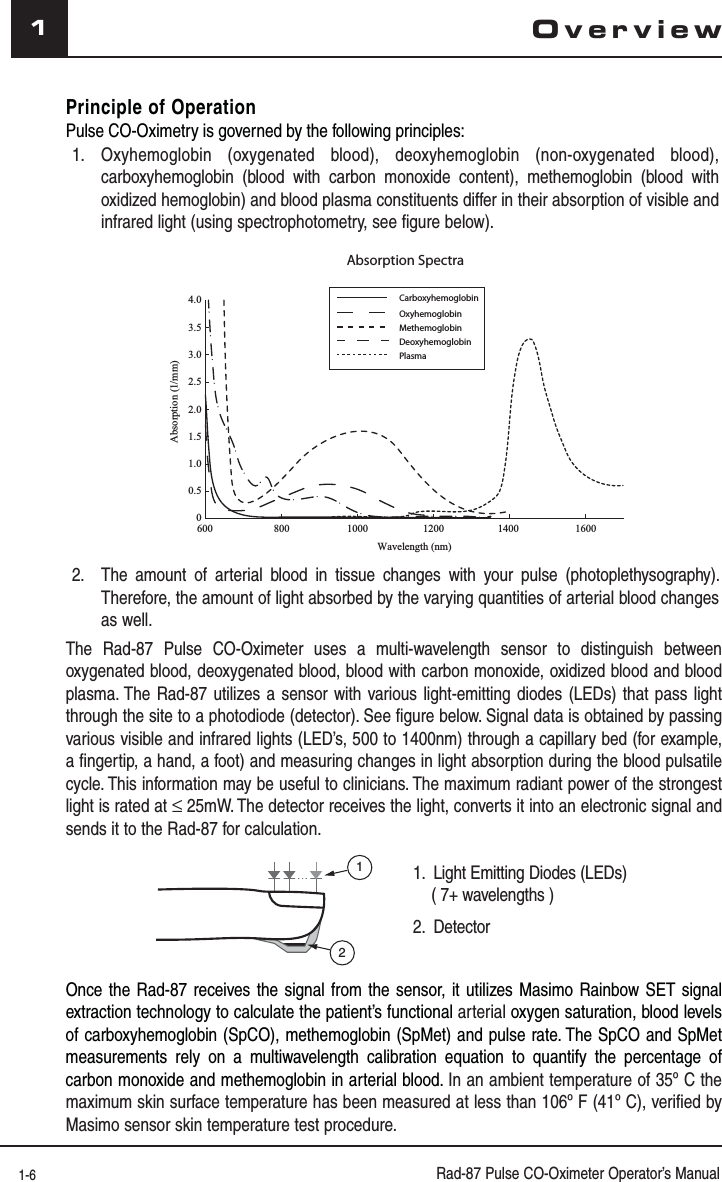
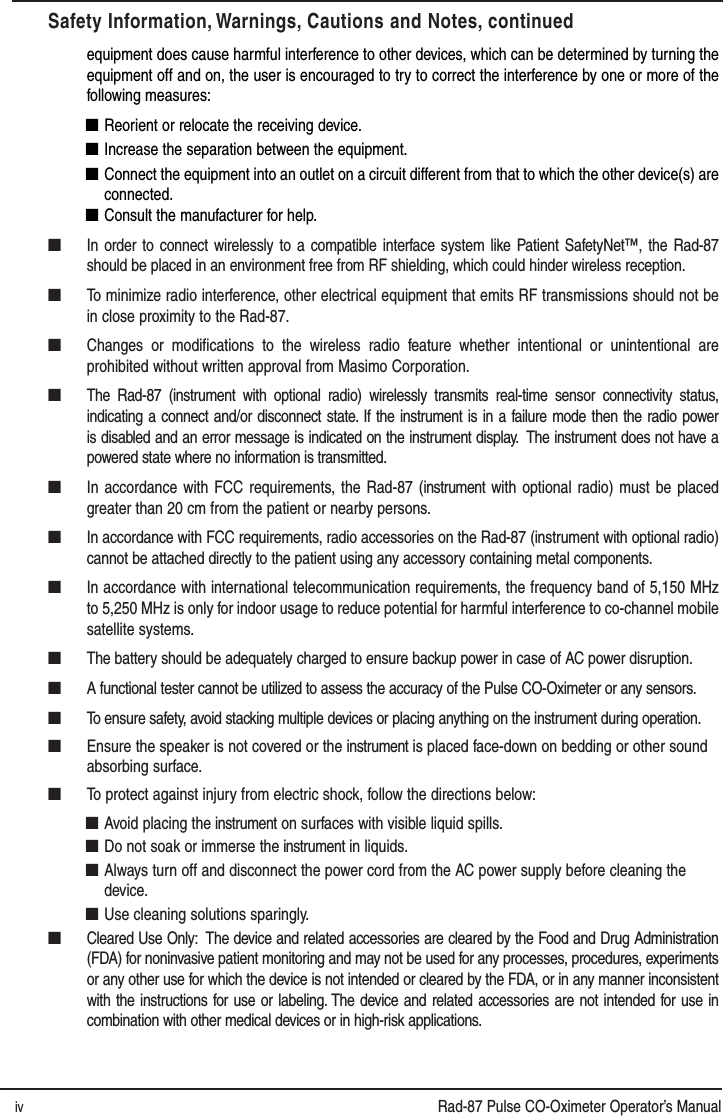
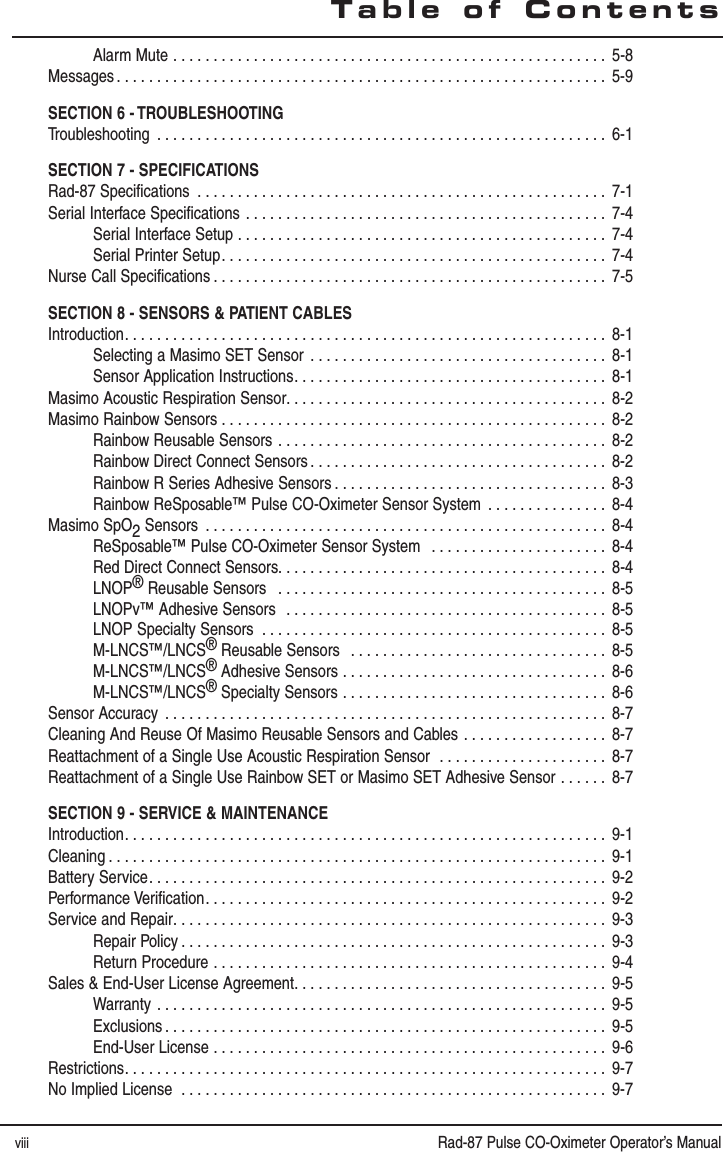
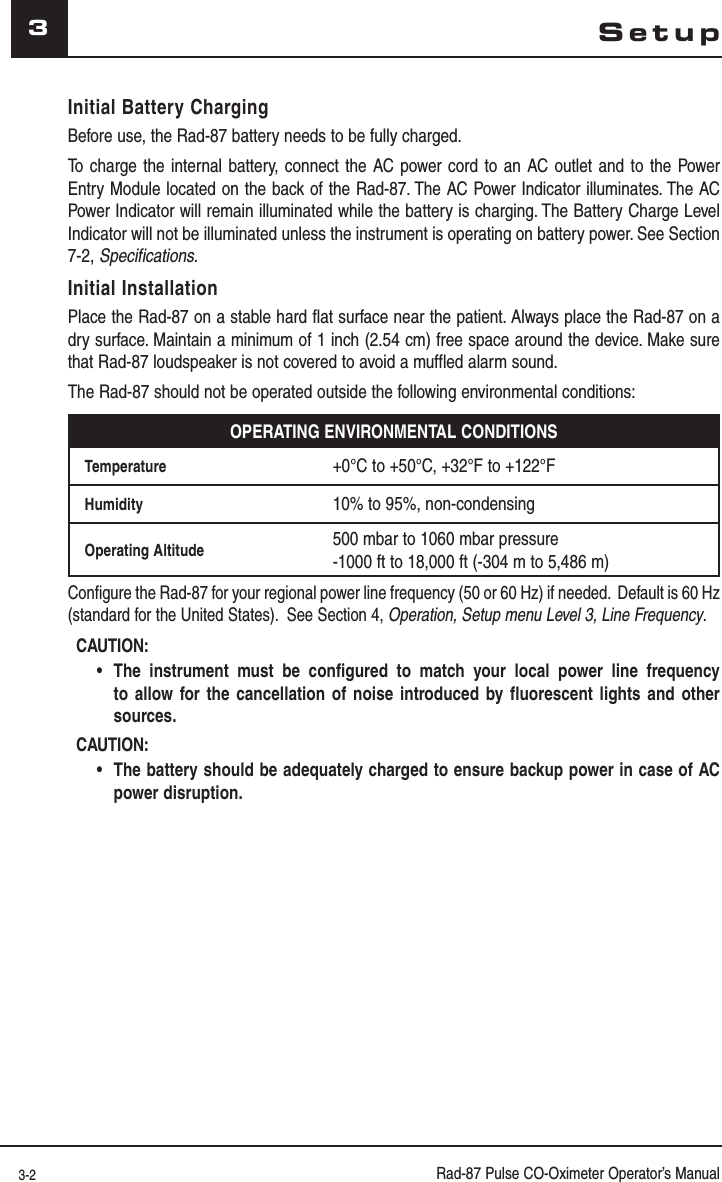
![1-8 Rad-87 Pulse CO-Oximeter Operator’s Manual1Rainbow Acoustic MonitoringRainbow Acoustic Monitoring is a real time, continuous, non-invasive method for measuring respiration rate based on respiratory sounds. Respiratory sounds include sounds related to respiration such as breath sounds (during inspiration and expiration), adventitious sounds, cough sounds, snoring sounds, sneezing sounds, and sounds from the respiratory muscles [1]. These respiratory sounds often have different characteristics depending on the location of recording [2] and they originate in the large airways where air velocity and air turbulence induce vibration in the airway wall. These vibrations are transmitted, for example, through the lung tissue, thoracic wall and trachea to the surface where they may be heard with the aid of a stethoscope, a microphone or more sophisticated devices.Rainbow Acoustic Monitoring ArchitectureThe following figure illustrates how a respiratory sound produced by a patient can be turned into a numerical measurement that corresponds to a respiratory parameter. Patient Sensor AcquisitonSystemSignal ProcessingRespiratory Airflow to SoundSound to Electrical SignalElectrical Signal to Digital SignalDigital Signal to Respiratory MeasurementEnvelope DetectionRRa Estimation PatientThe generation of respiratory sounds is primarily related to turbulent respiratory airflow in upper airways. Sound pressure waves within the airway gas and airway wall motion contribute to the vibrations that reach the body surface and are recorded as respiratory sounds. Although the spectral shape of respiratory sounds varies widely from person to person, it is often reproducible within the same person, likely reflecting the strong influence of individual airway anatomy [2-6].SensorThe sensor captures and transmits respiratory sounds (and other biological sounds) much like a microphone does. When subjected to a mechanical strain, (e.g., surface vibrations generated during breathing), the sensor becomes electrically polarized. The degree of polarization is proportional to the applied strain. This is known as the ‘Piezoelectric effect’ in this manual. The output of the sensor is an electric signal that includes a sound signal that is modulated by inspiratory and expiratory phases of the respiratory cycle.Acquisition SystemThe acquisition system converts the electrical signal provided by the sensor into a digital signal. This format allows the signal to be processed by a computing device.Overview](https://usermanual.wiki/Masimo/RAD87B/User-Guide-1394405-Page-19.png)
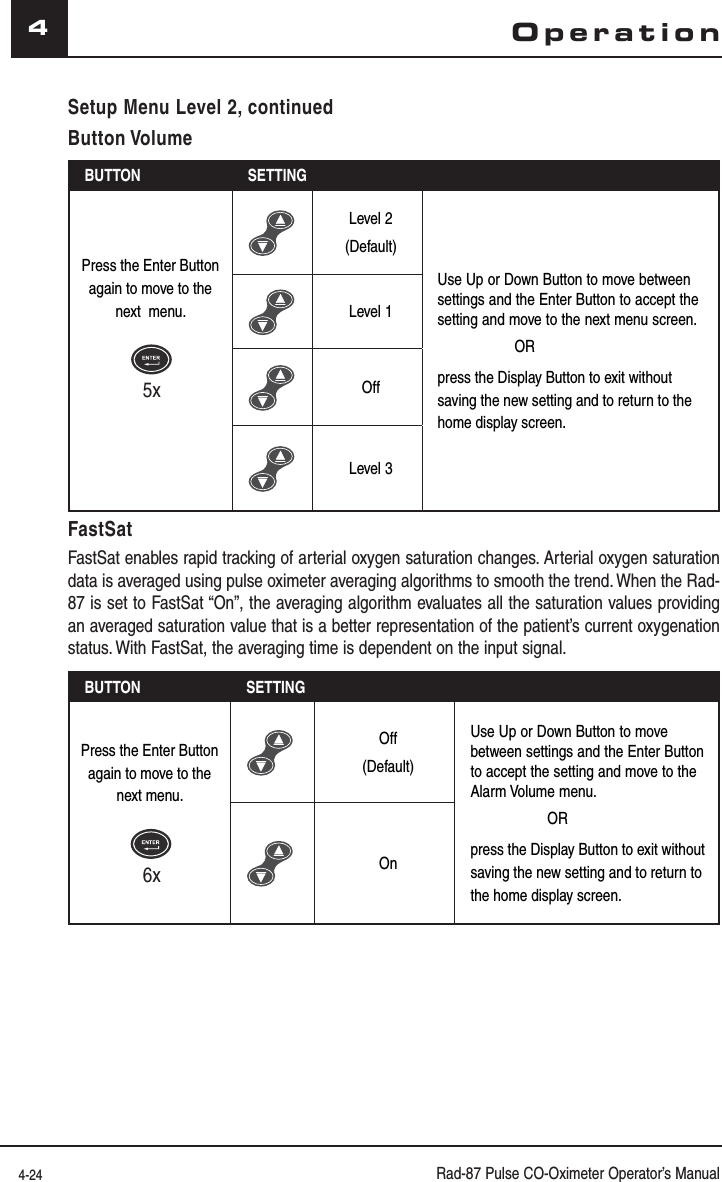
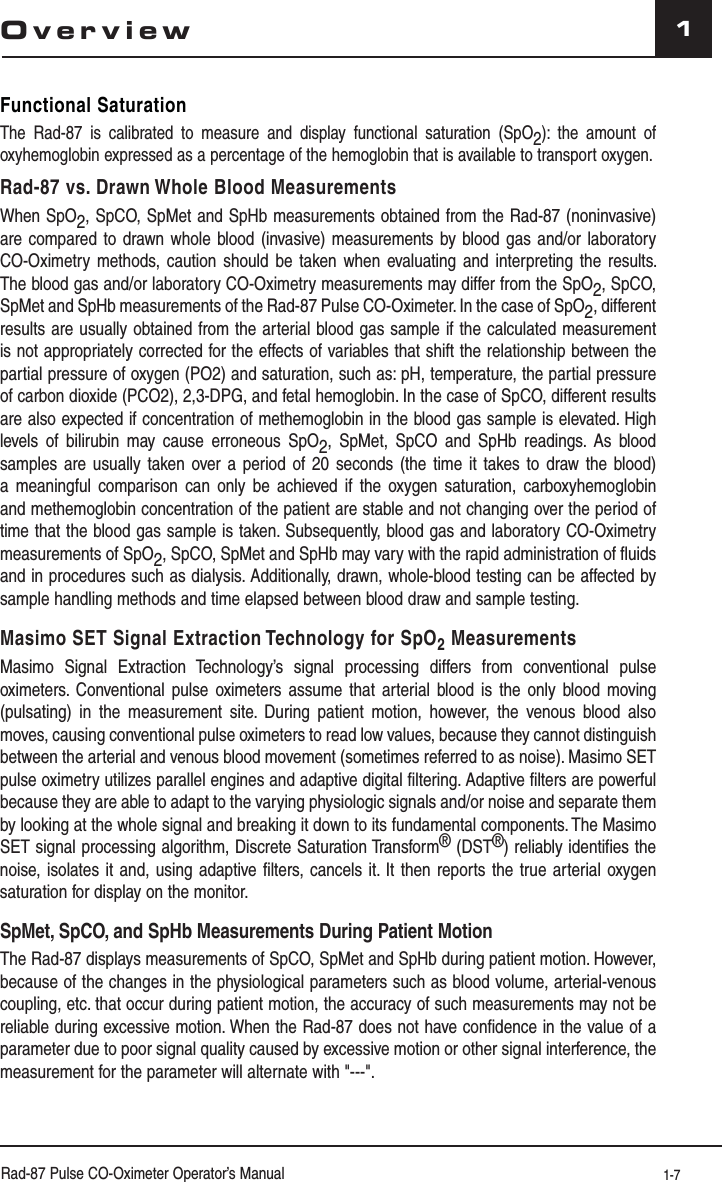
![Rad-87 Pulse CO-Oximeter Operator’s Manual 1-91OverviewSignal ProcessingThe digital signal produced by the acquisition system is converted into a measurement that corresponds to the respiratory parameter of interest. As shown in the figure on the previous page, this can be performed by, for example, determining the digital signal envelope or outline which in turn may be utilized to determine the respiratory rate. In this way, a real-time, continuous breath rate parameter can be obtained and displayed on a monitor which, in many cases, may be real-time and continuous.The respiratory cycle envelope signal processing principle is similar to methods that sample airway gases and subsequently determine a respiratory rate.[1] A.R.A. Sovijärvi, F. Dalmasso, J. Vanderschool, L.P. Malmberg, G. Righini, S.A.T. Stoneman. Definition of terms for applications of respiratory sounds. Eur Respir Rev 2000; 10:77, 597-610.[2] Z. Moussavi. Fundamentals of respiratory sounds analysis. Synthesis lectures on biomedical engineering #8. Morgan & Claypool Publishers, 2006.[3] Olsen, et al. Mechanisms of lung sound generation. Semin Respir Med 1985; 6: 171-179.[4] Pastercamp H, Kraman SS, Wodicka GR. Respiratory sounds – Advances beyond the stethoscope. Am J Respir Crit Care Med 1977; 156: 974-987.[5] Gavriely N, Cugell DW. Airflow effects on amplitude and spectral content of normal breath sounds. J Appl Physiol 1996; 80: 5-13.[6] Gavrieli N, Palti Y, Alroy G. Spectral characteristics of normal breath sounds. J Appl Physiol 1981; 50: 307-314.FastSatFastSat enables rapid tracking of arterial oxygen saturation changes. Arterial oxygen saturation data is averaged using pulse oximeter averaging algorithms to smooth the trend. When the Rad-87 is set to FastSat “On”, the averaging algorithm evaluates all the saturation values providing an averaged saturation value that is a better representation of the patient’s current oxygenation status. With FastSat, the averaging time is dependent on the input signal.](https://usermanual.wiki/Masimo/RAD87B/User-Guide-1394405-Page-20.png)
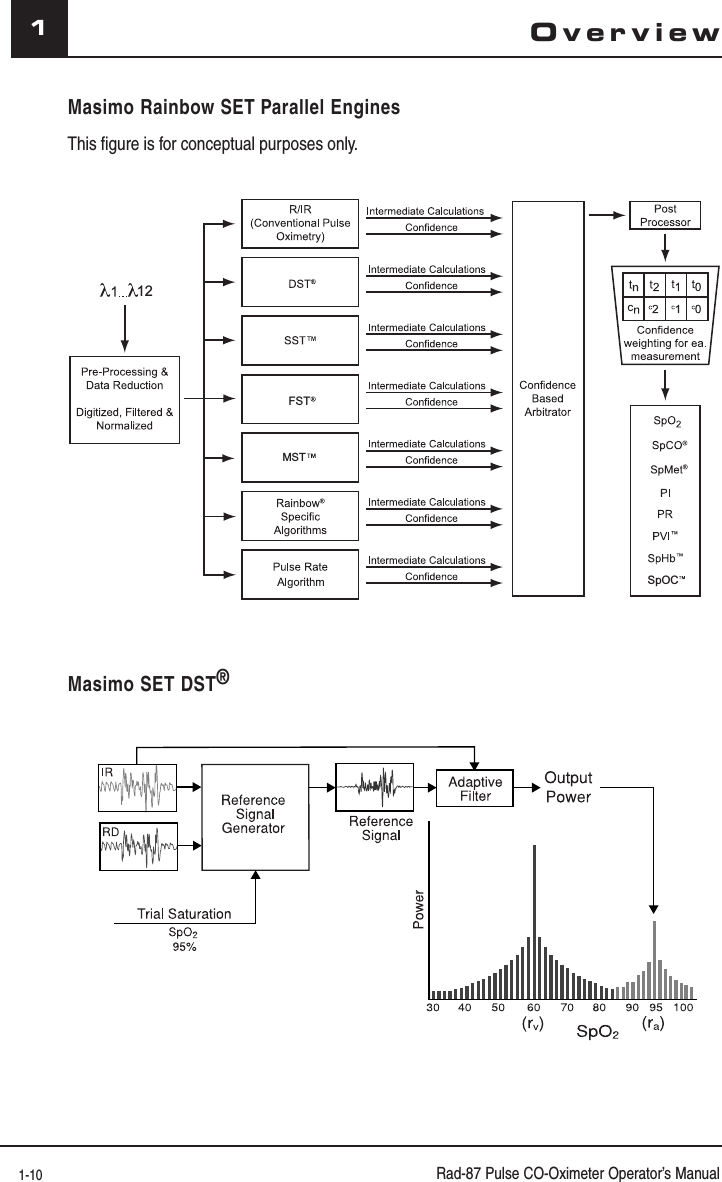
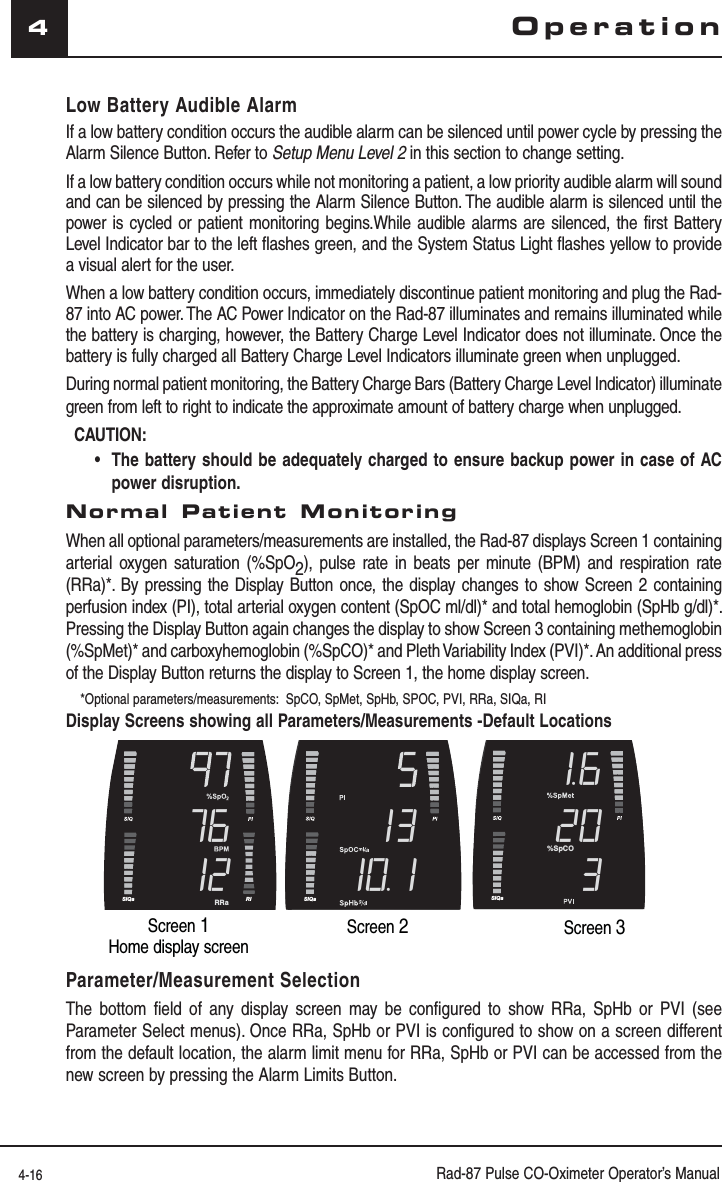
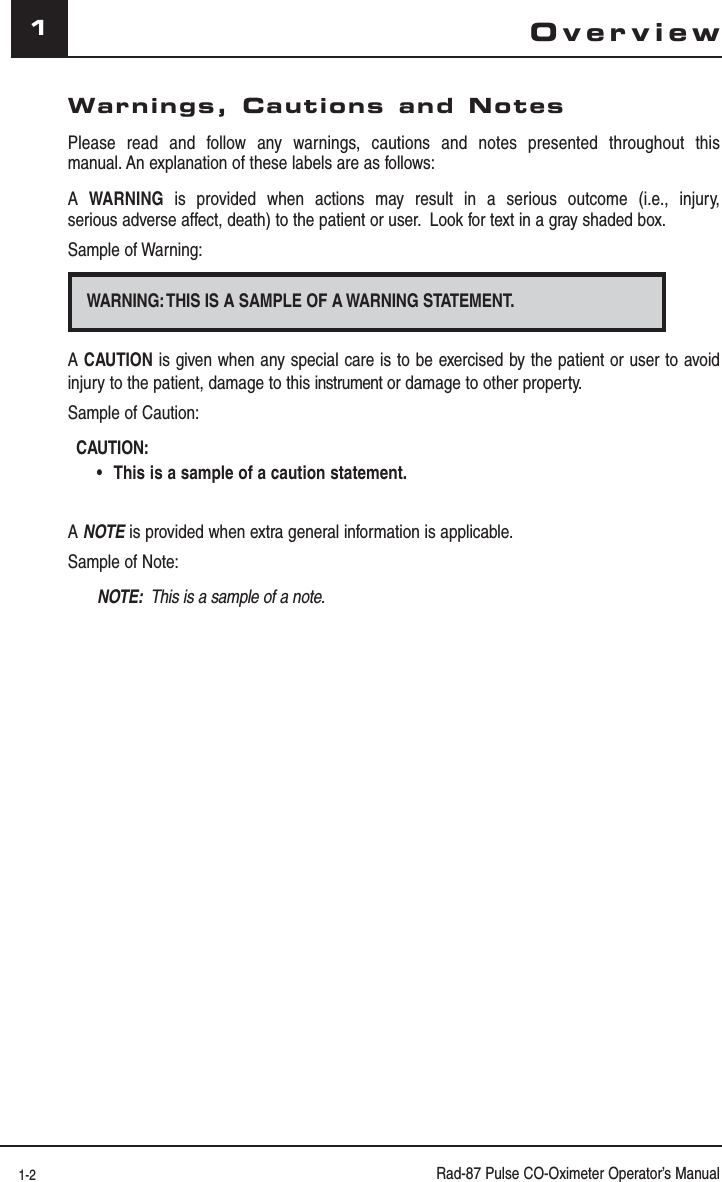
![Rad-87 Pulse CO-Oximeter Operator’s Manual 4-34Operation Basic Operation, continued ■ The System Status Light flashes red. ■ The display shows "SEN OFF" message.Disconnect the sensor from the patient cable or Rad-87. ■ The alarm tone sounds. ■ The Alarm Bell flashes red. ■ The System Status Light flashes red. ■ The display shows "NO SEN" message.NOTE: "NO SEN" or "SEN OFF" conditions will only generate a high priority alarm if the Rad-87 is actively monitoring a patient when the sensor is disconnected.12. Verify that the audible alarm can be silenced when a parameter/measurement alarm is exceeded.■ Create an alarm condition by lowering the high alarm limit for the pulse rate so that it is lower than the patient value. ■ Press the Alarm Silence button. ■ The alarm tone ceases for 120 seconds (default). ■ The Alarm Bell flashes red for a high pulse rate (high priority alarm). ■ The System Status Light flashes red.13. To begin patient monitoring: ■ Adjust the alarm limits. ■ Adjust the alarm volume. ■ Adjust the pulse beep volume.14. Verify the sensor is applied correctly and that the measured data is appropriate, see Section 4, Successful Monitoring.15. Monitor the patient.16. After monitoring is complete, remove the sensor from the patient and store or dispose of the sensor according to local laws. See the sensor's Directions for Use.17. Press and hold the Power Button for 2 seconds to turn the Rad-87 off [3 seconds in the Home Mode].](https://usermanual.wiki/Masimo/RAD87B/User-Guide-1394405-Page-36.png)