Medic4all VMG03 VMG03 User Manual 486174
Medic4all VMG03 486174
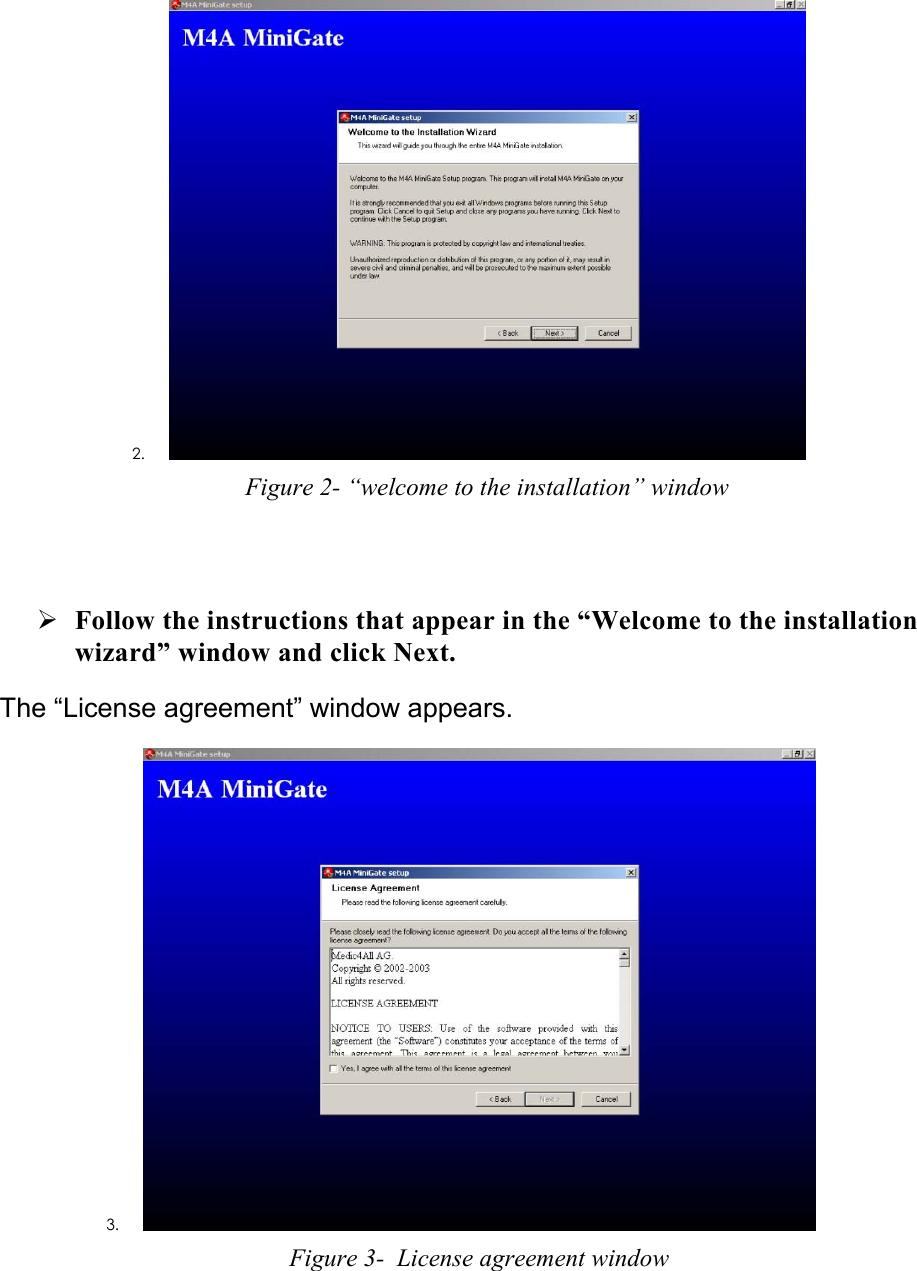
UserManual.wiki
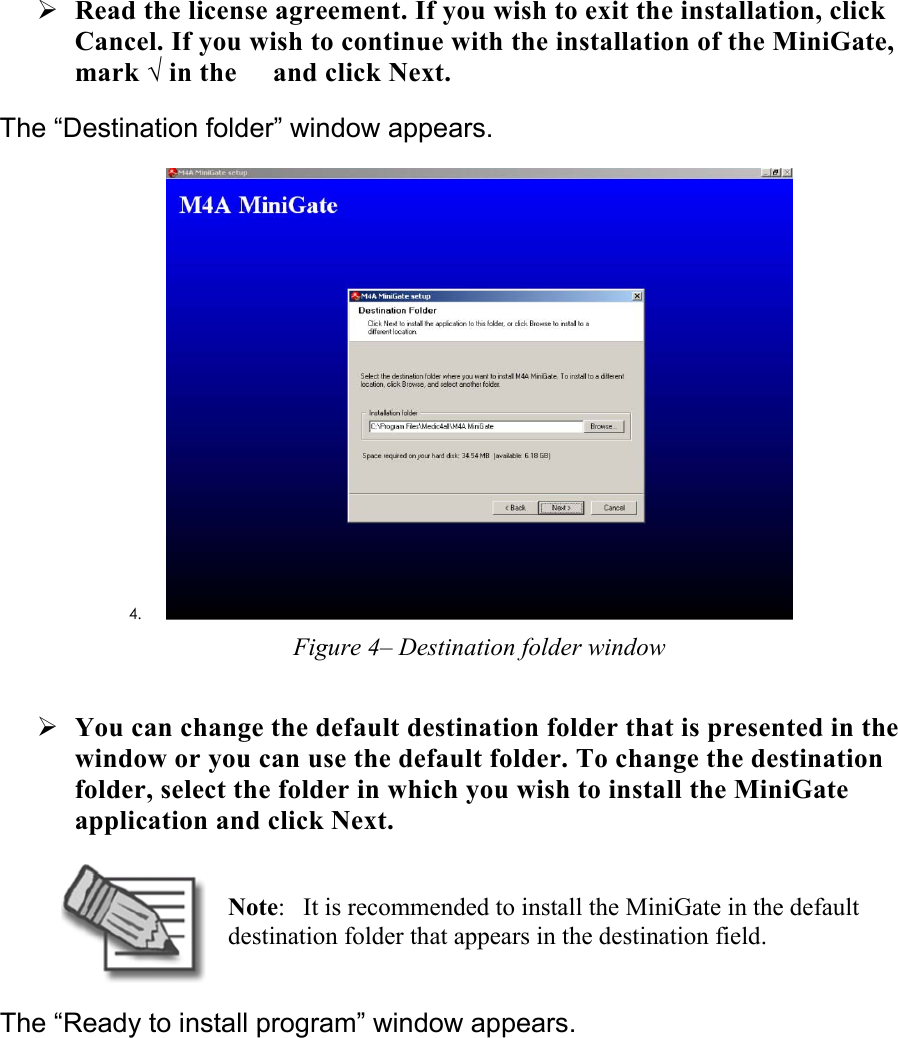
>
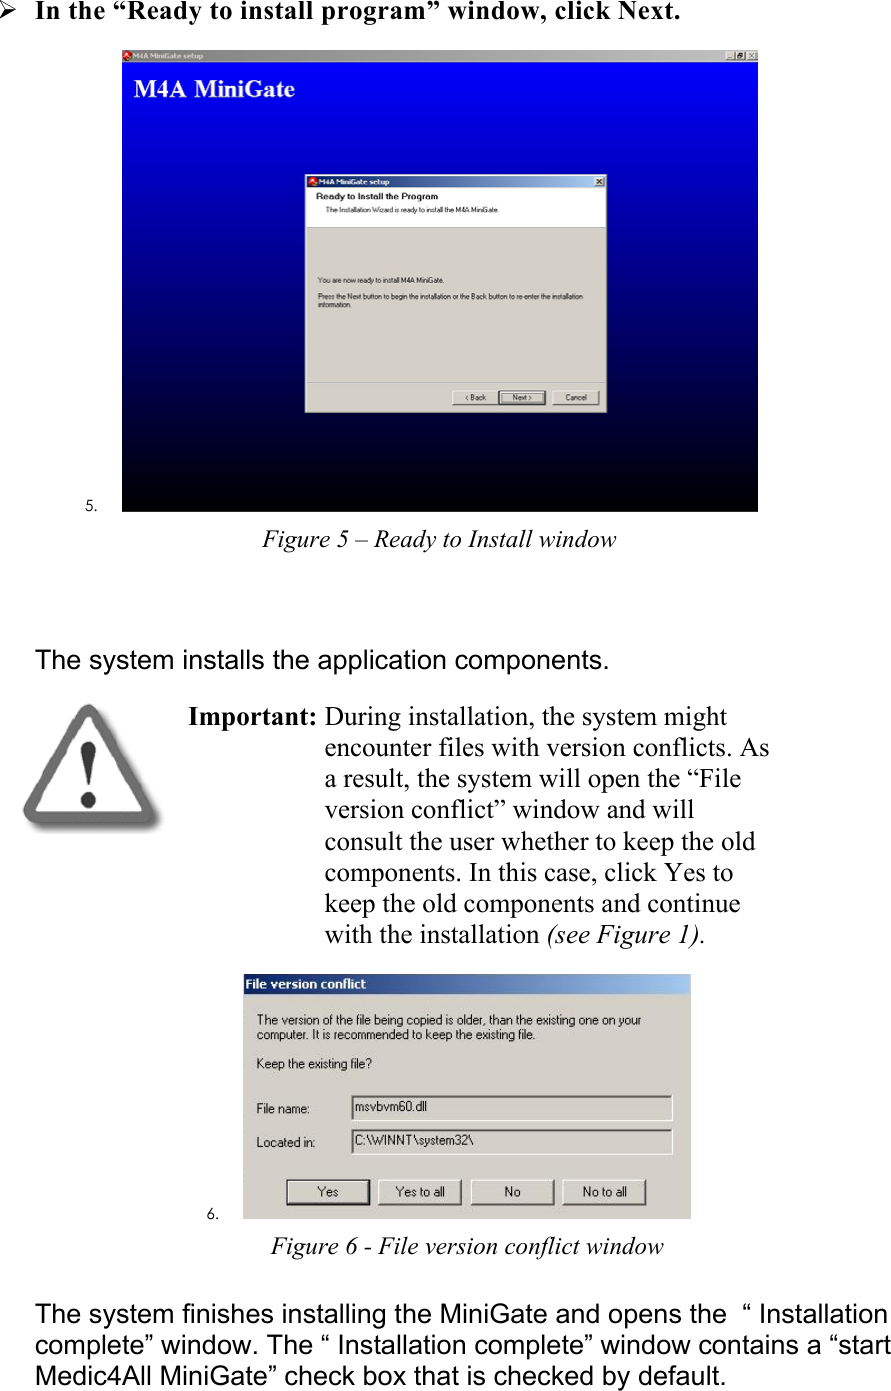
Medic4all
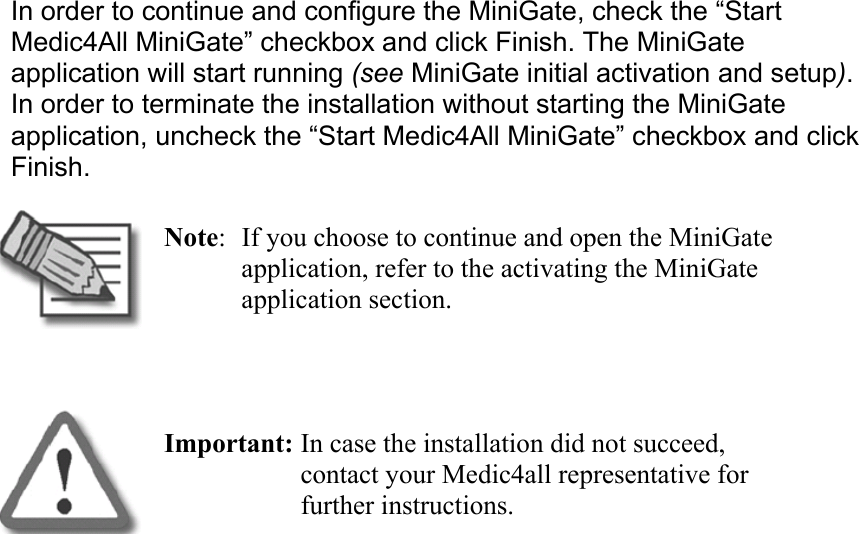
>
VMG03 User Manual
Product manual
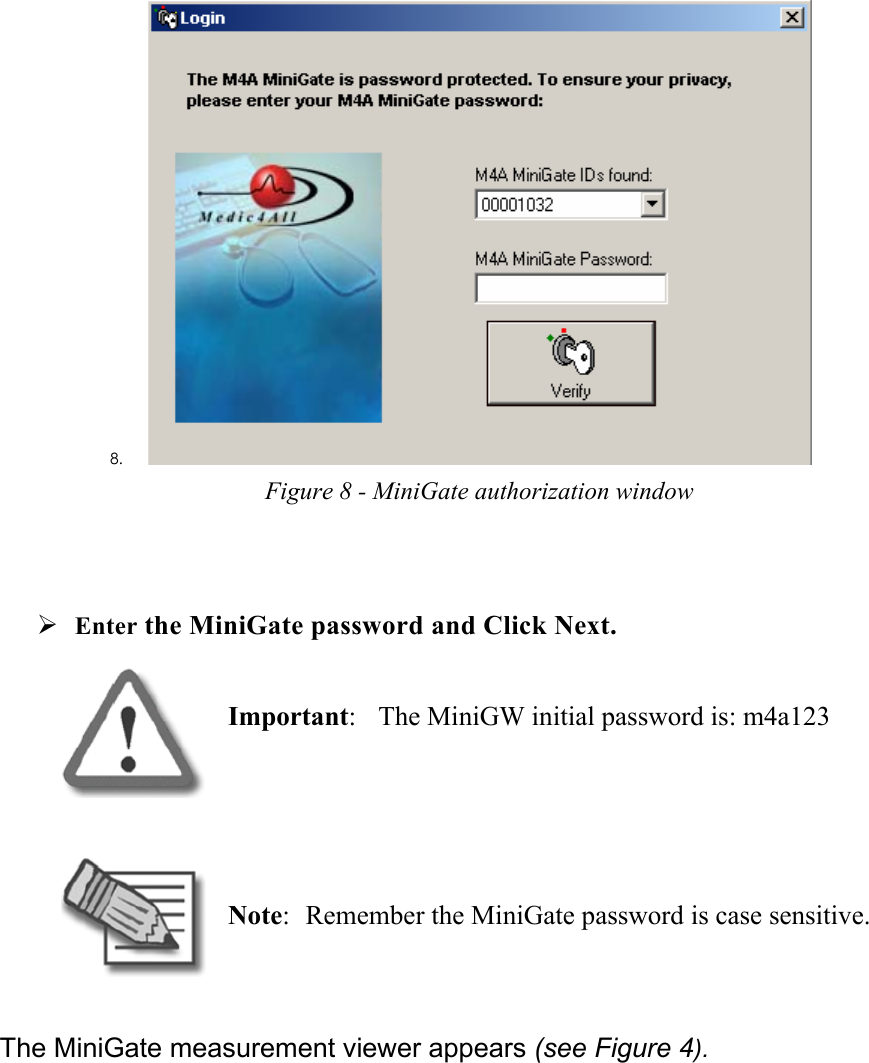
Navigation menu
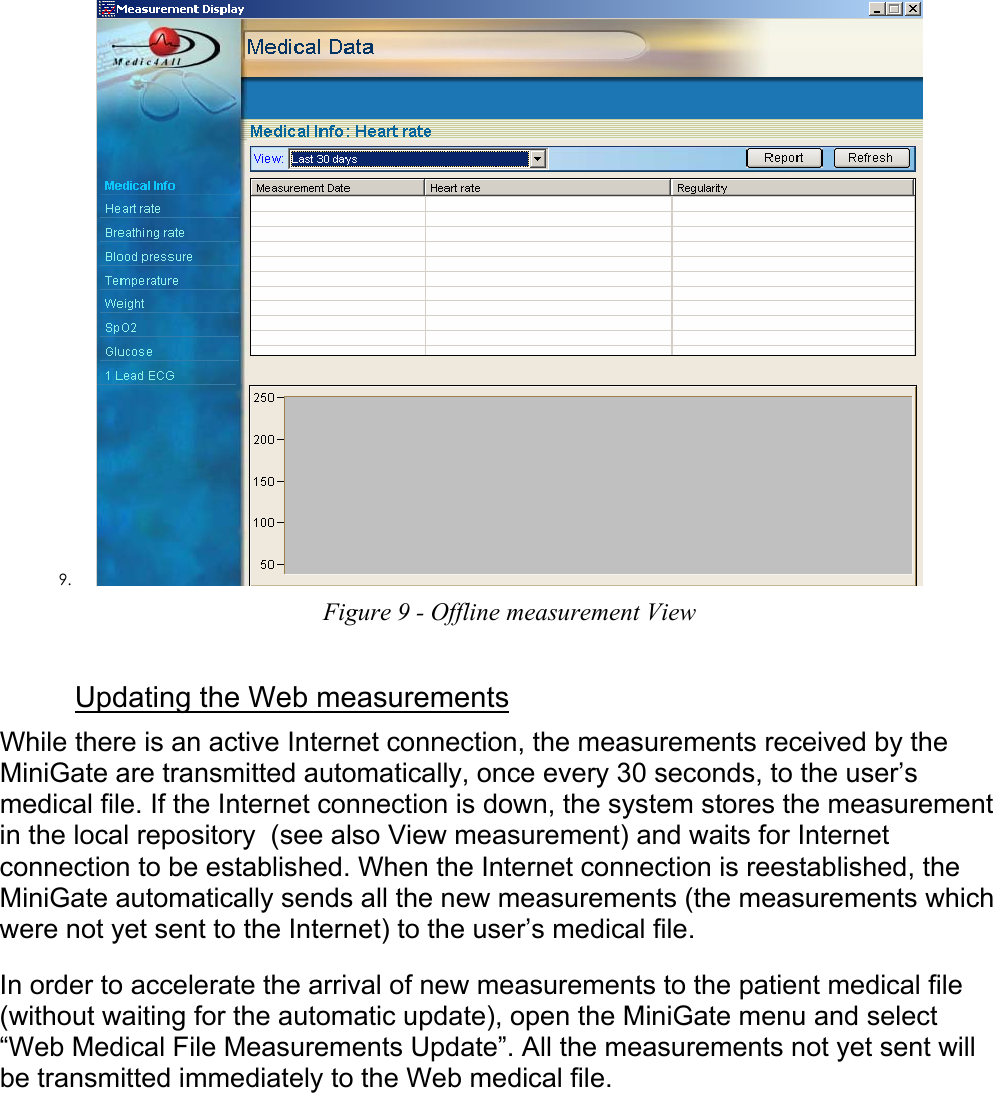
Upload a User Manual
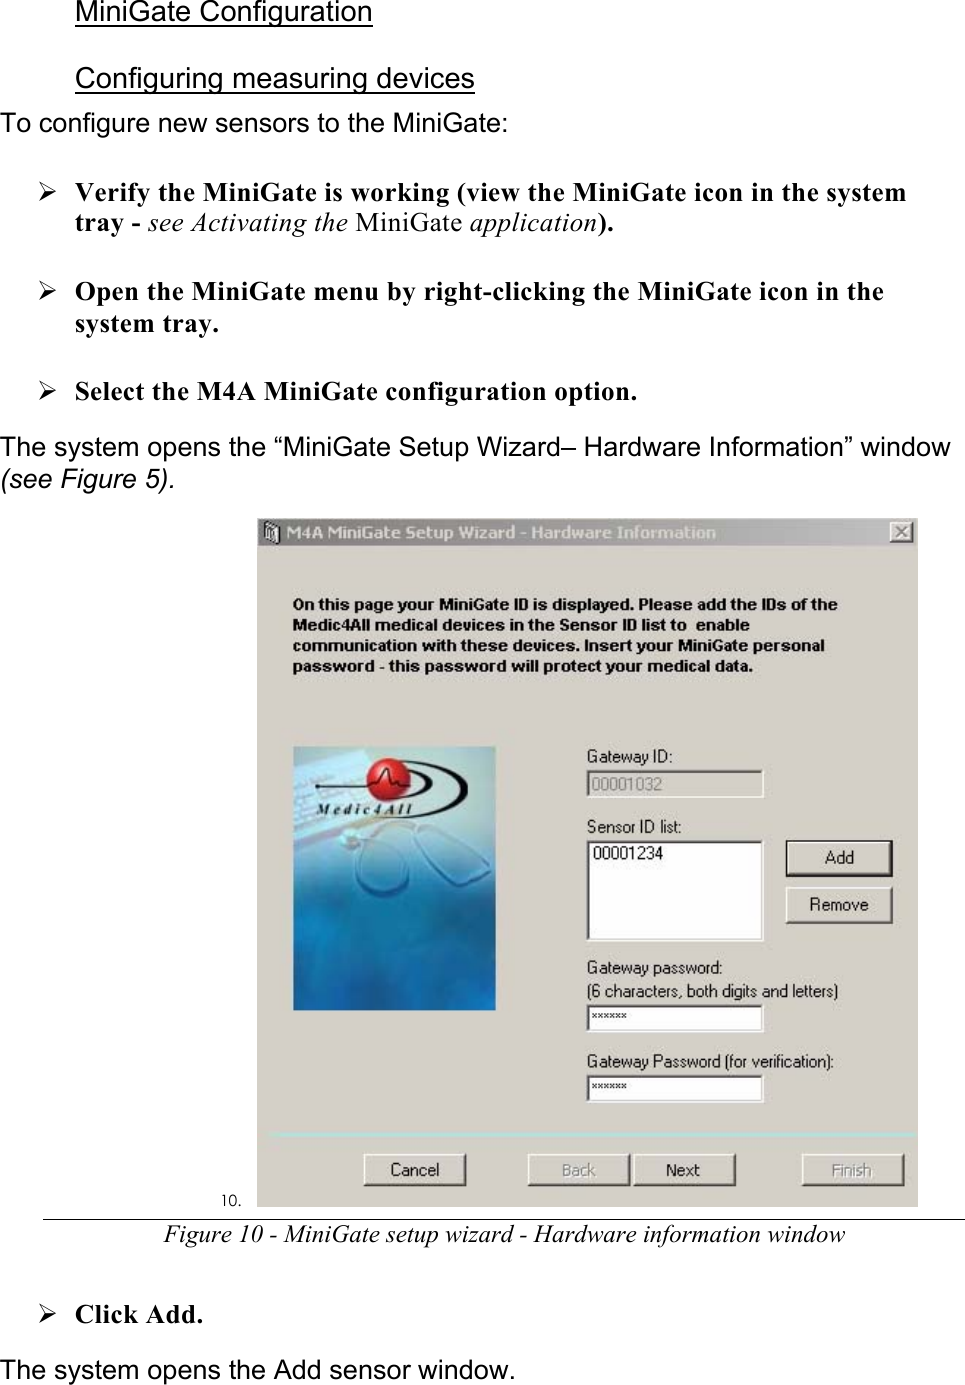
Namespaces
Wiki Guide
HTML
PDF
Info
Views
User Manual
Discussion / Help
Navigation

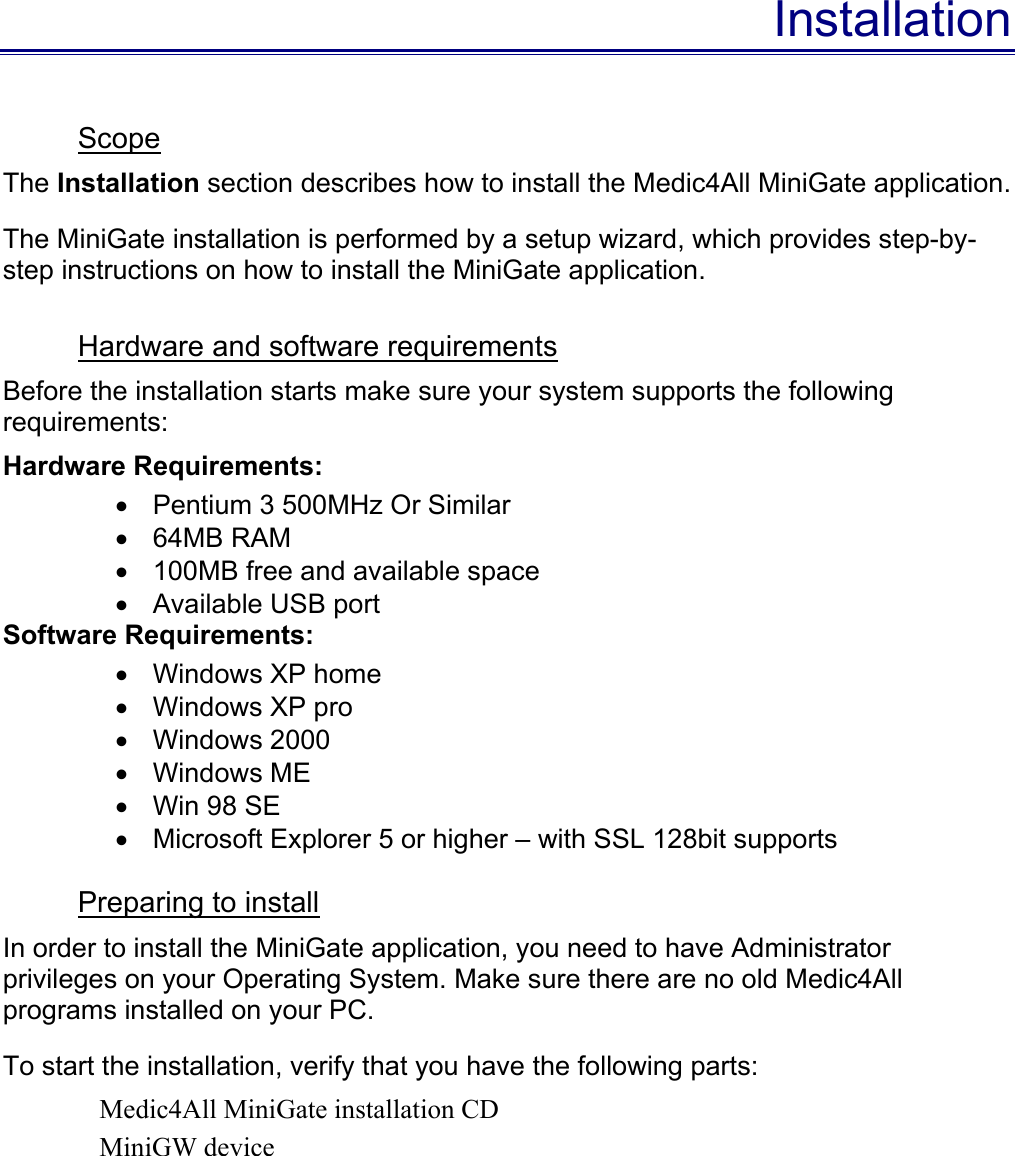


![Specifications Environment Operating condition +10˚C to +40˚C / 30% RH to 85% RH Storage condition -10˚C to +55˚C / 30% RH to 85% RH Dimensions Approx. 95[W] x 15[H] x 25 [D] mm Weight Approx. 7g Power Supply/bat Power 5V up to 100mA powered from the USB interface Radio Frequency communication Frequency 433.92 MHz (EU) 866.3 MHz (EU) 915 MHz (USA) Max transmission power 10 dbm (EIRP) at 433.92 MHz and 866.3 MHz. -1 dbm (EIRP) at 915 MHz Bandwidth 60 kHz max. Transmission range 200 m (free space) Data transfer rate 12Mbps Protocol USB 2.0 / HID](https://usermanual.wiki/Medic4all/VMG03/User-Guide-486174-Page-24.png)