Neptune Technology Group BELTCLIPT Belt Clip Transmitter User Manual 14 0066 Exhibit Cover
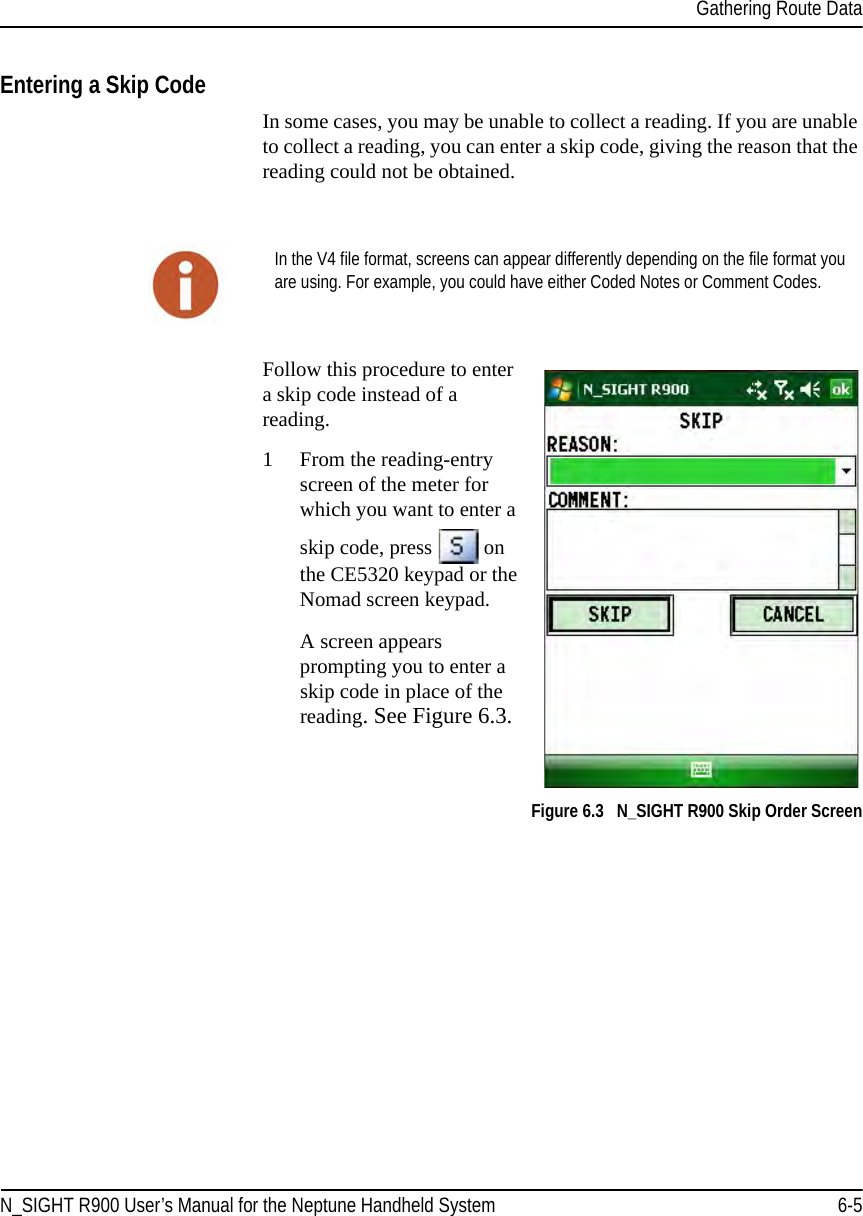
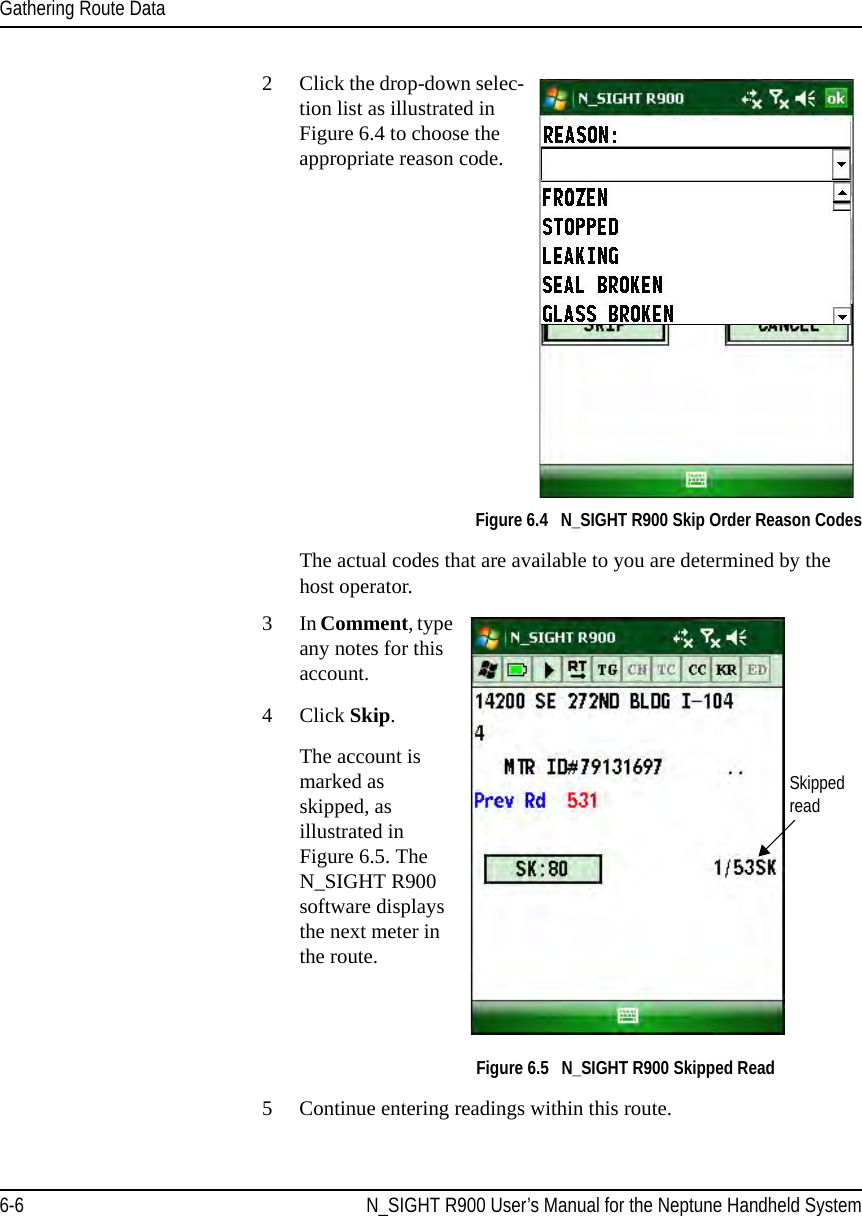
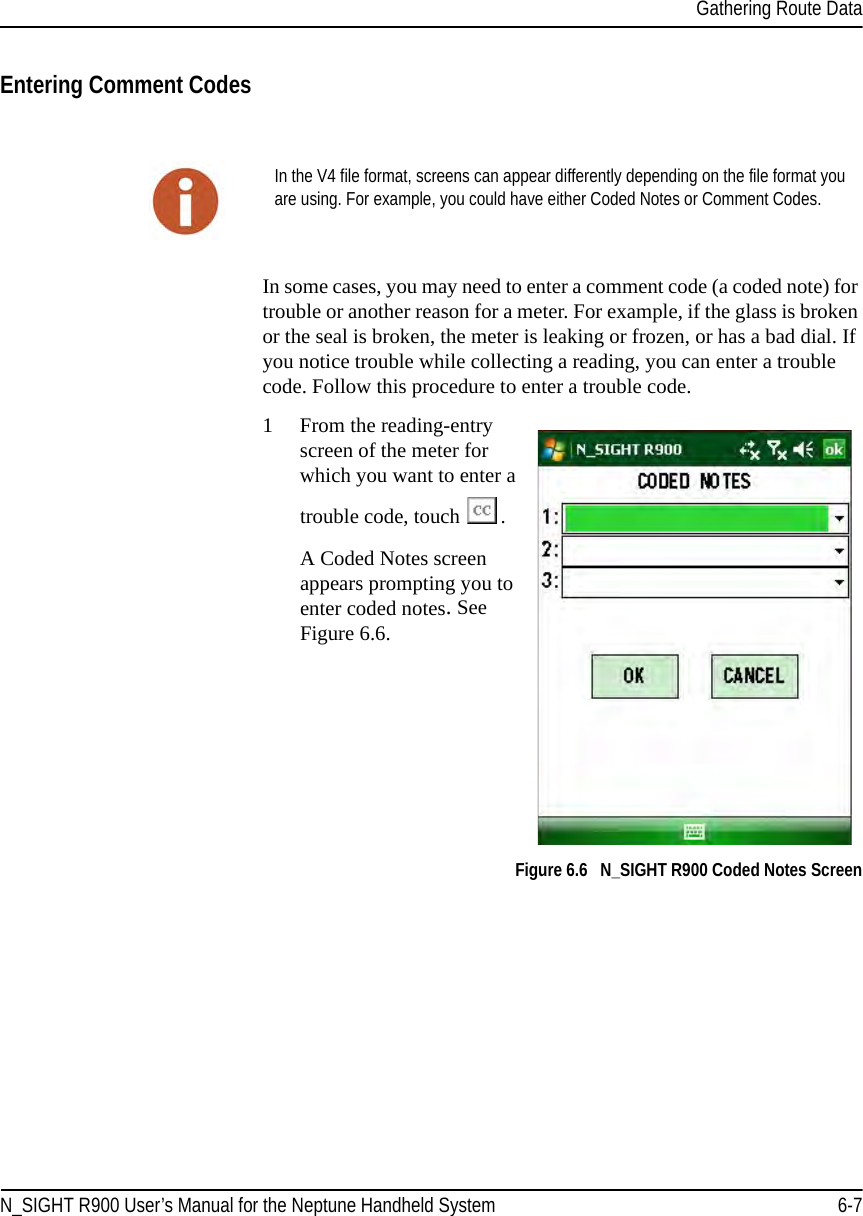
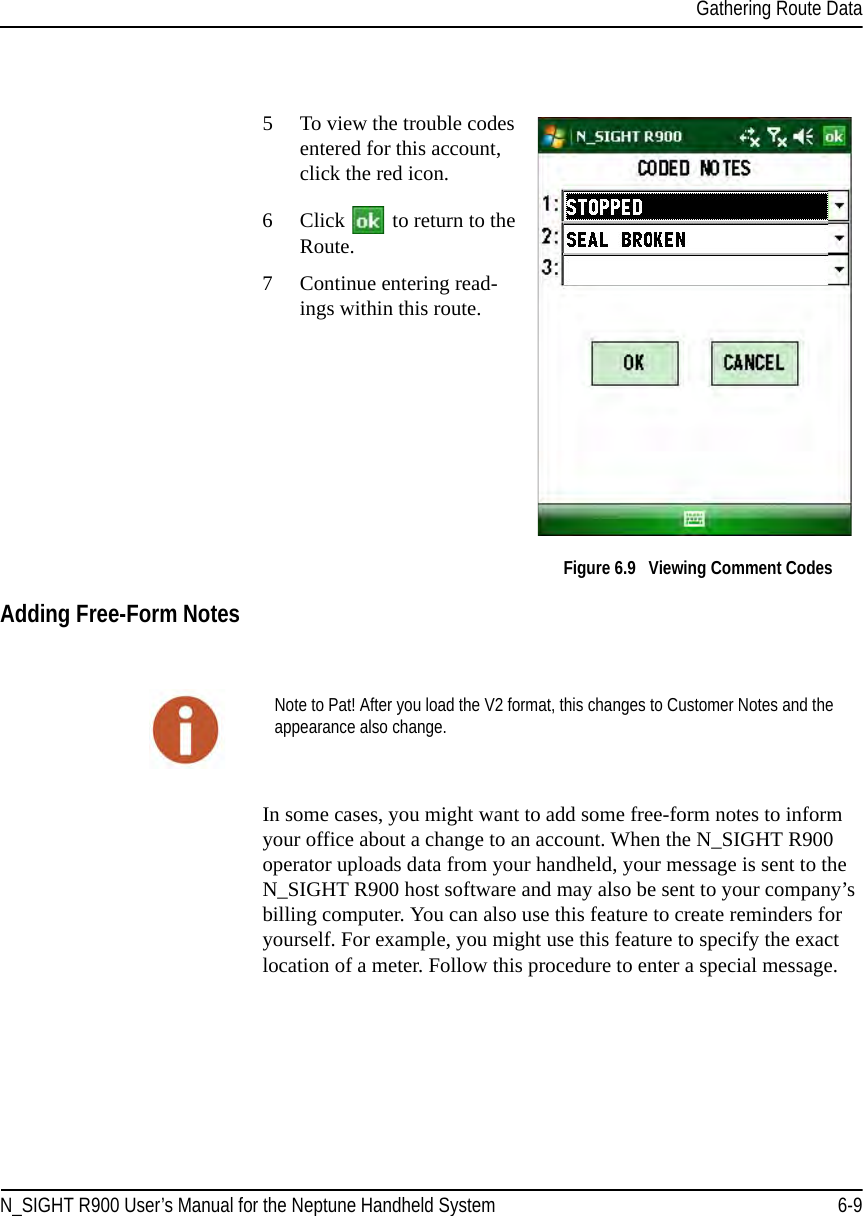
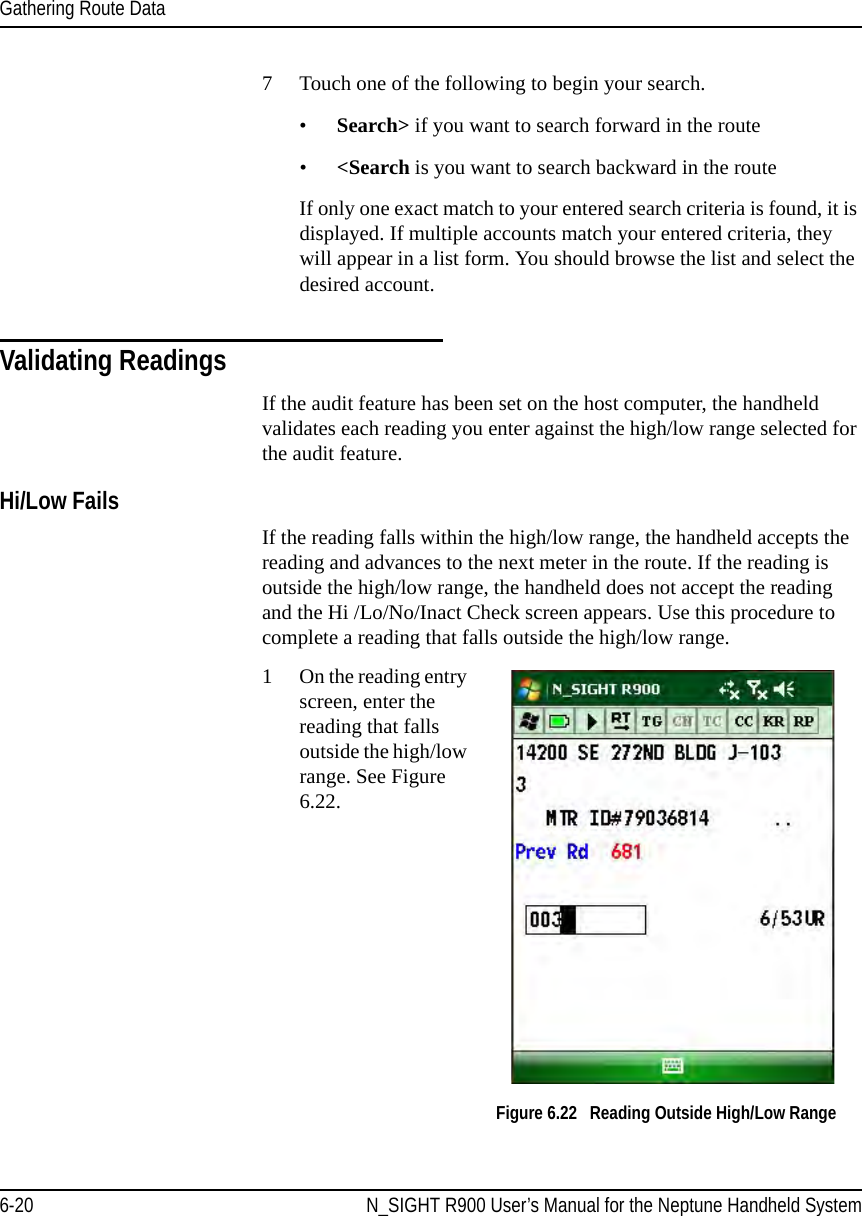
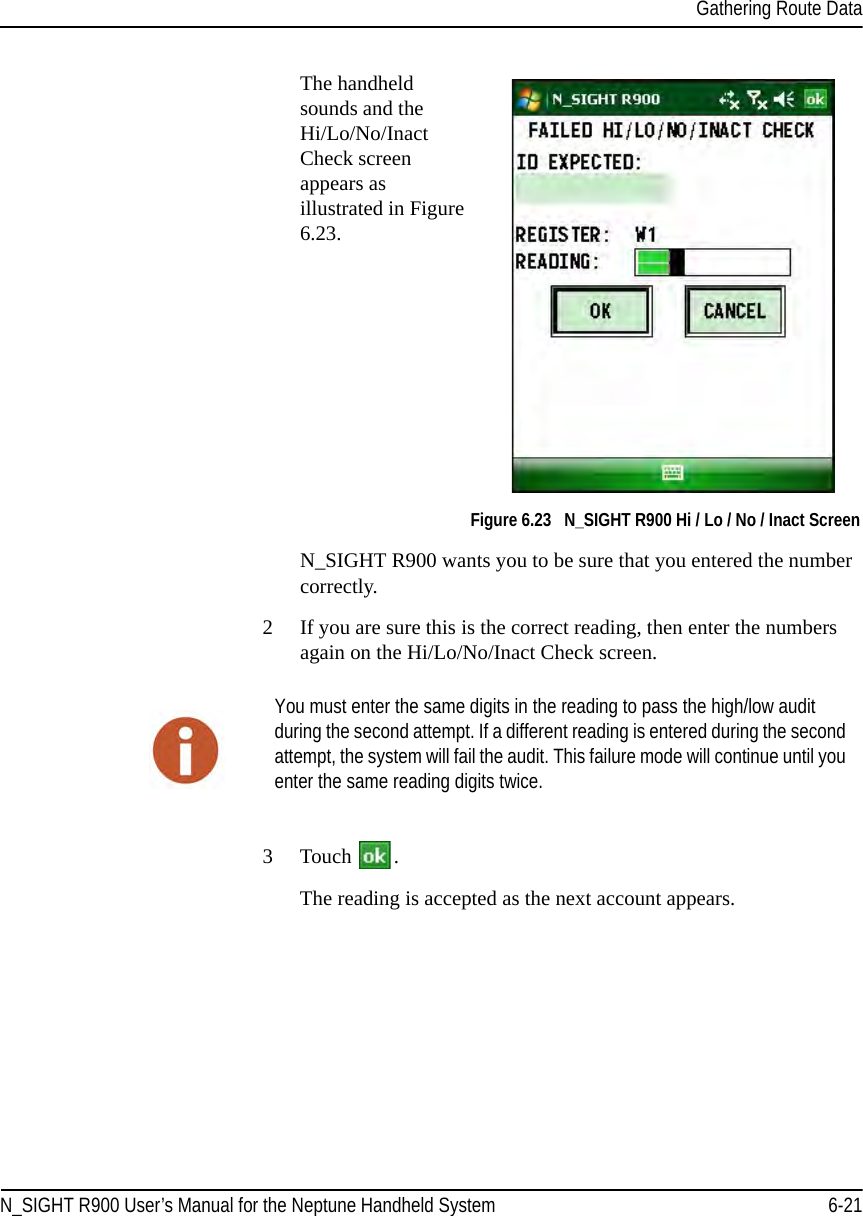
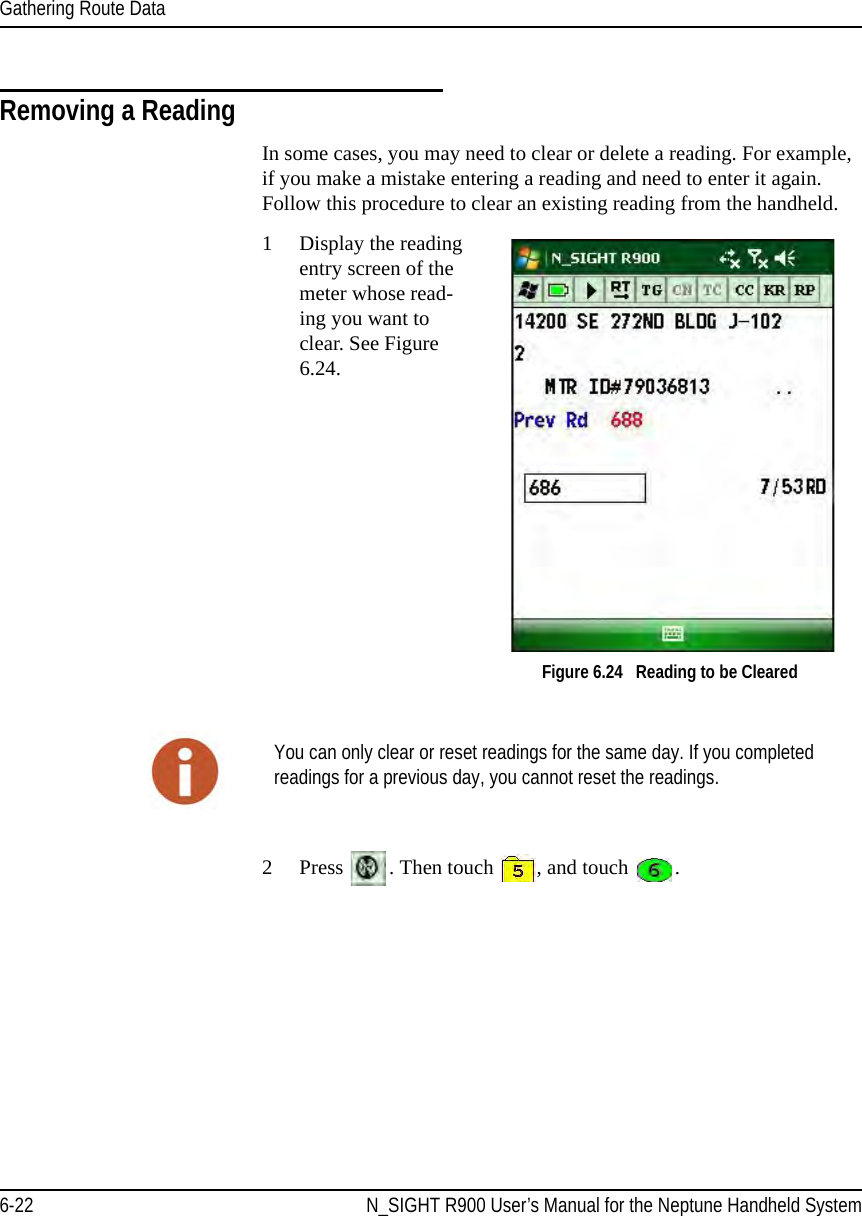
Neptune Technology Group Inc. Belt Clip Transmitter 14 0066 Exhibit Cover
UserManual.wiki
>
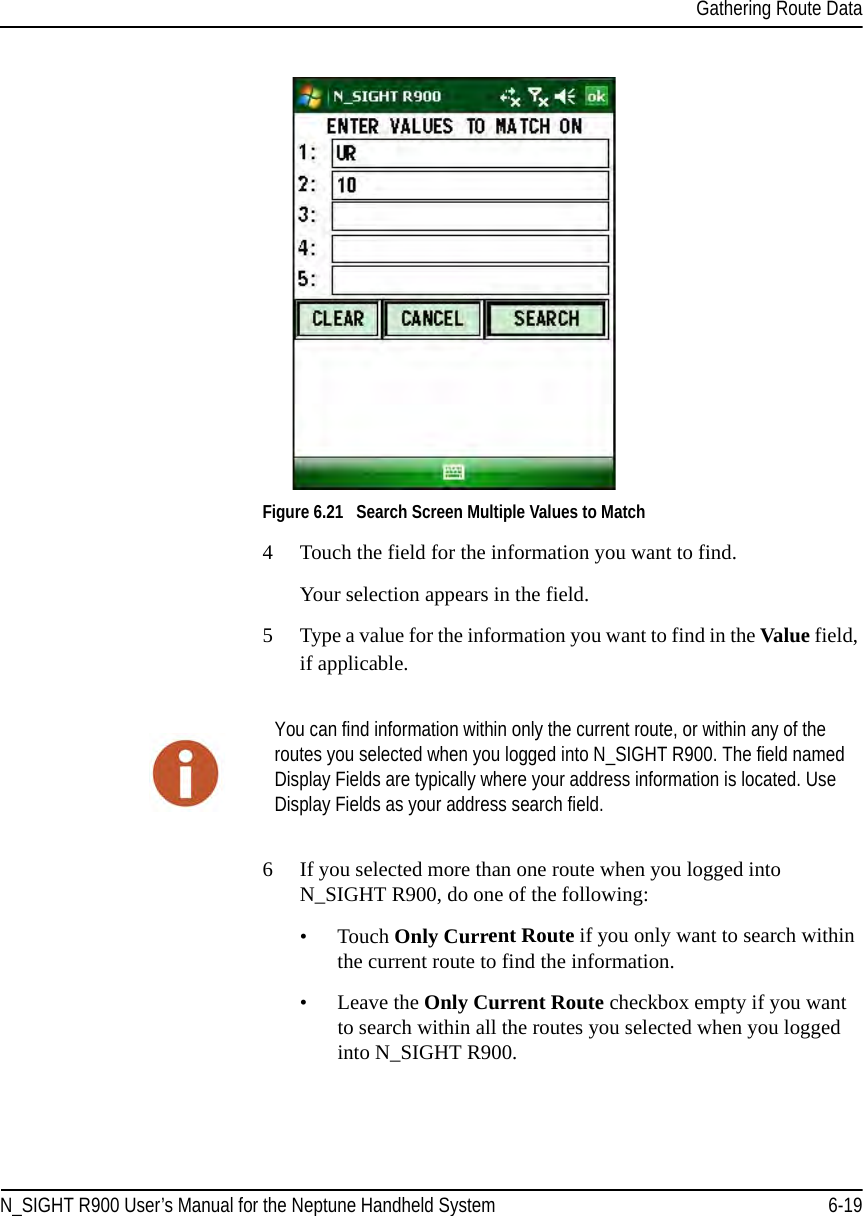
Neptune Technology Group
>
BELTCLIPT User Manual
Manual
Navigation menu
Upload a User Manual
Namespaces
Wiki Guide
HTML
PDF
Info
Views
User Manual
Discussion / Help
Navigation
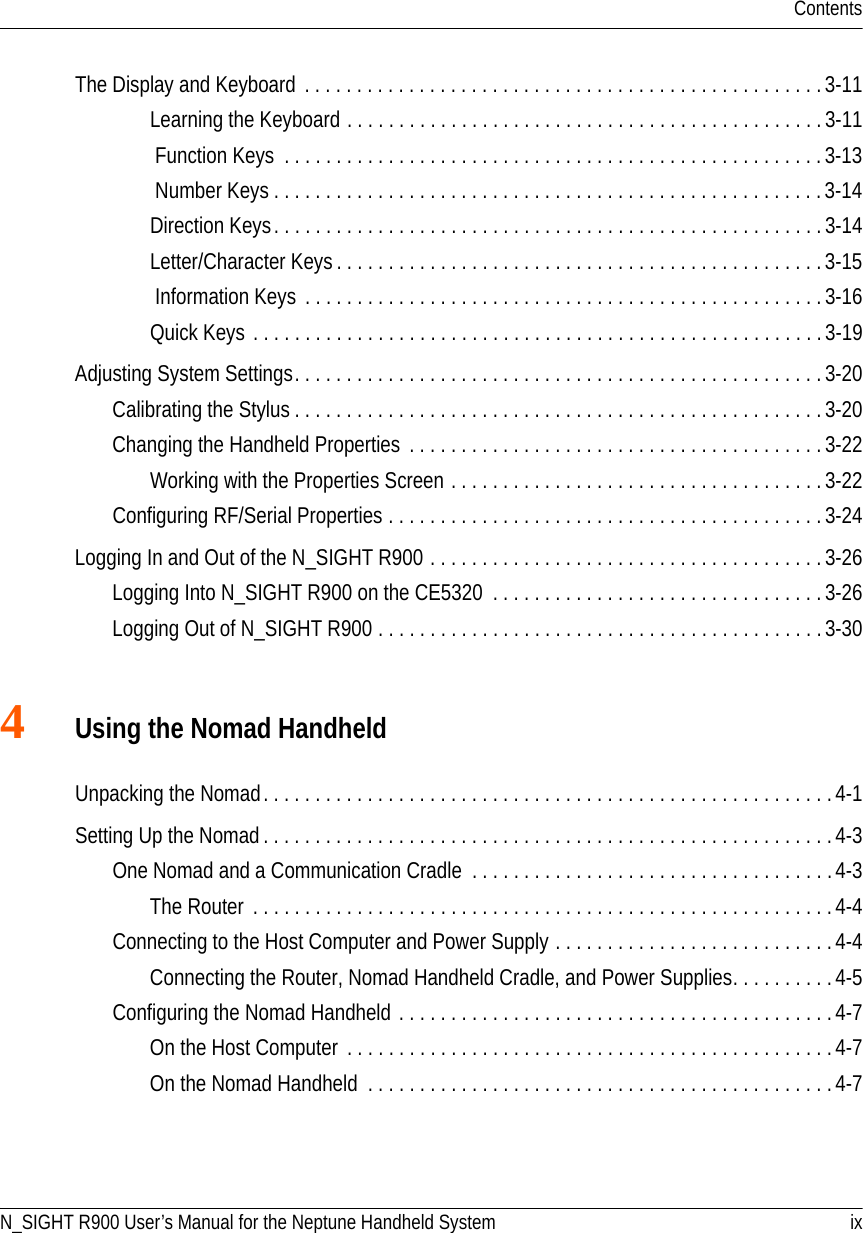

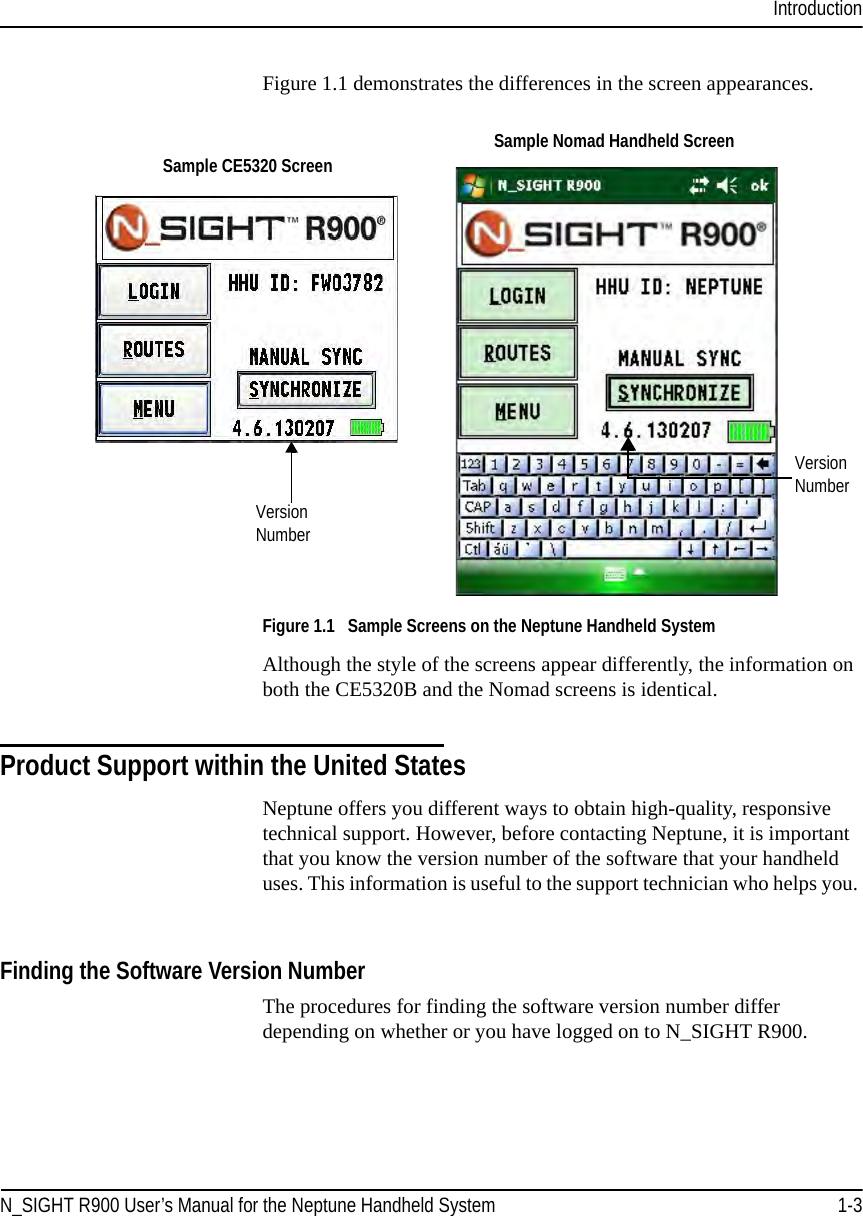


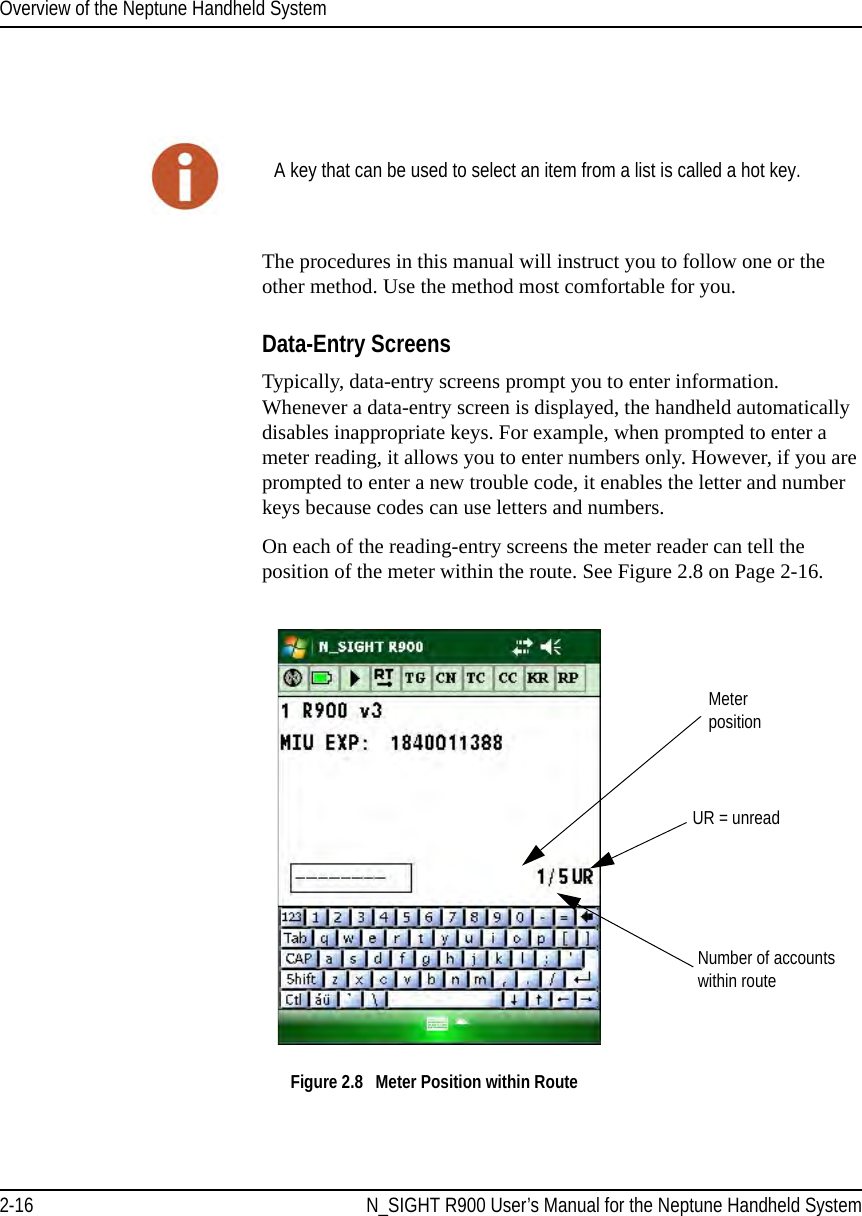
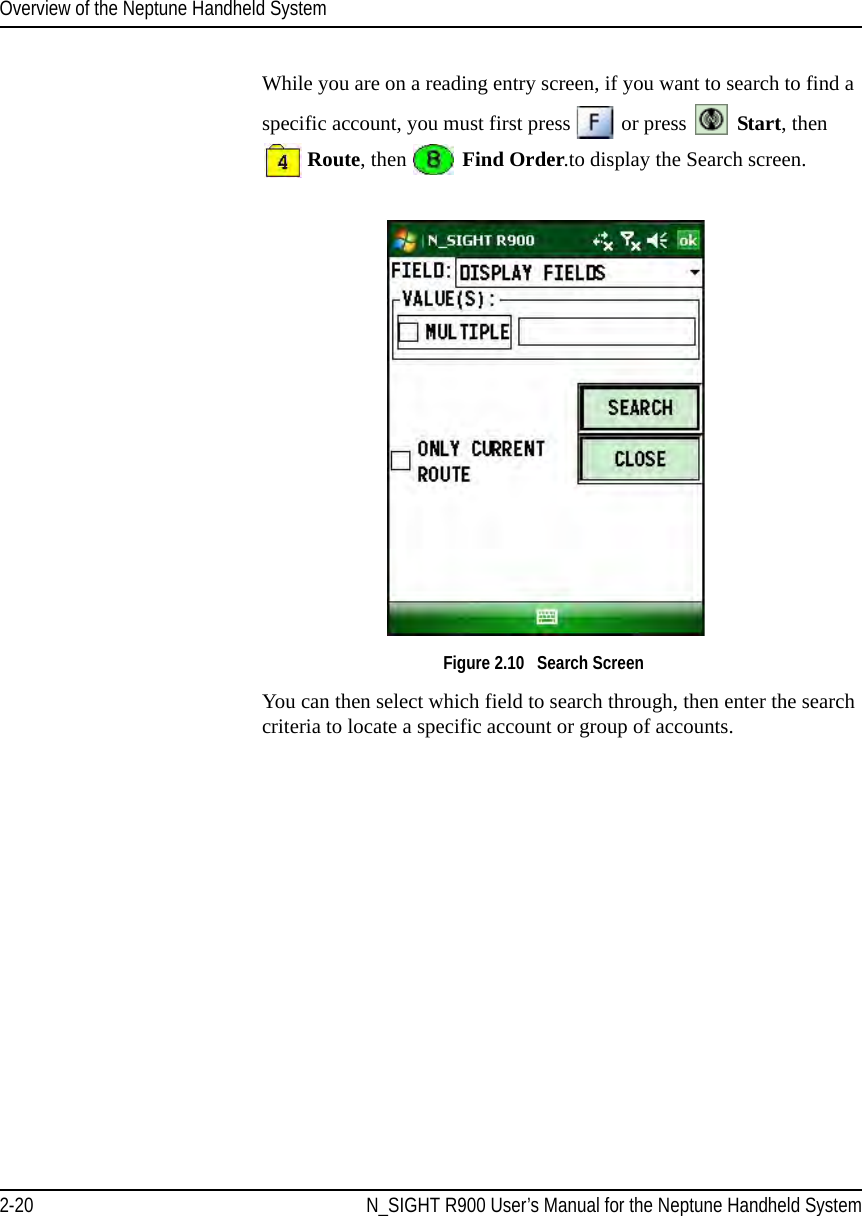
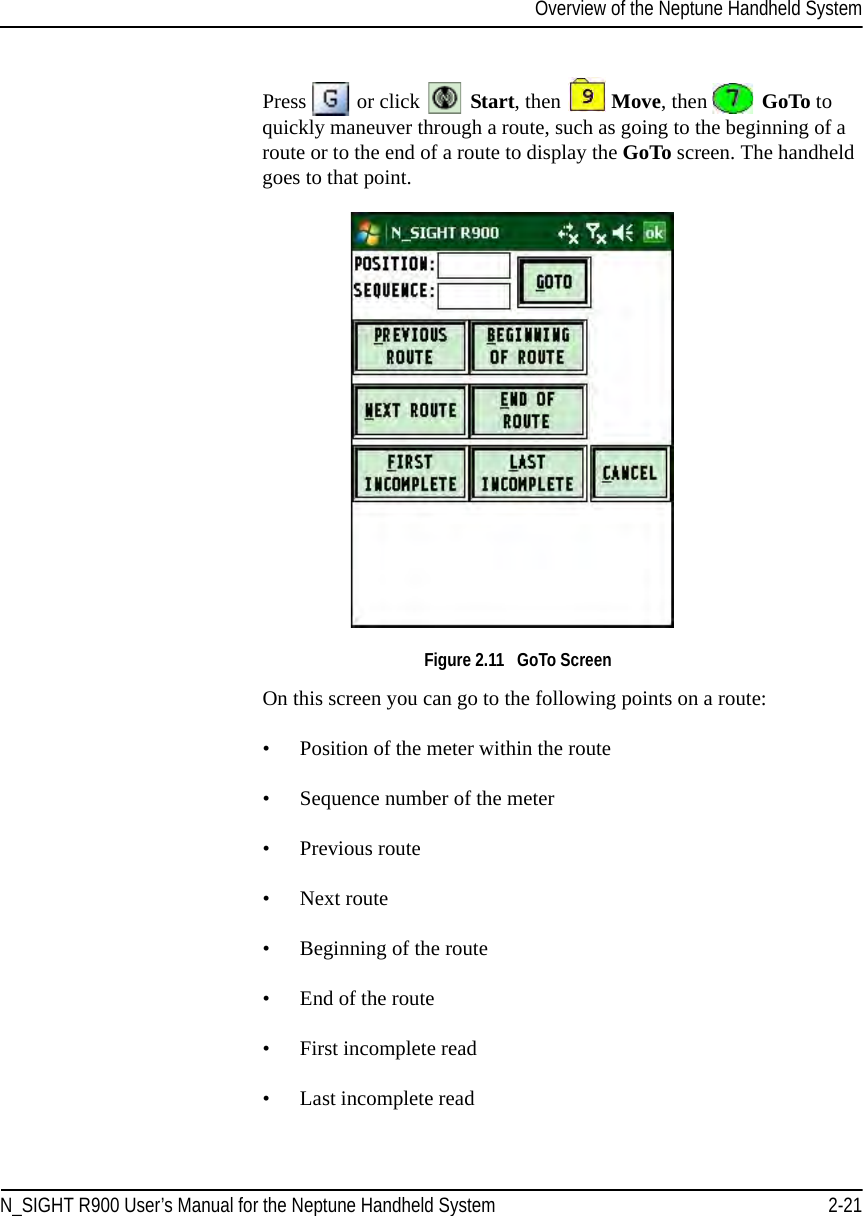
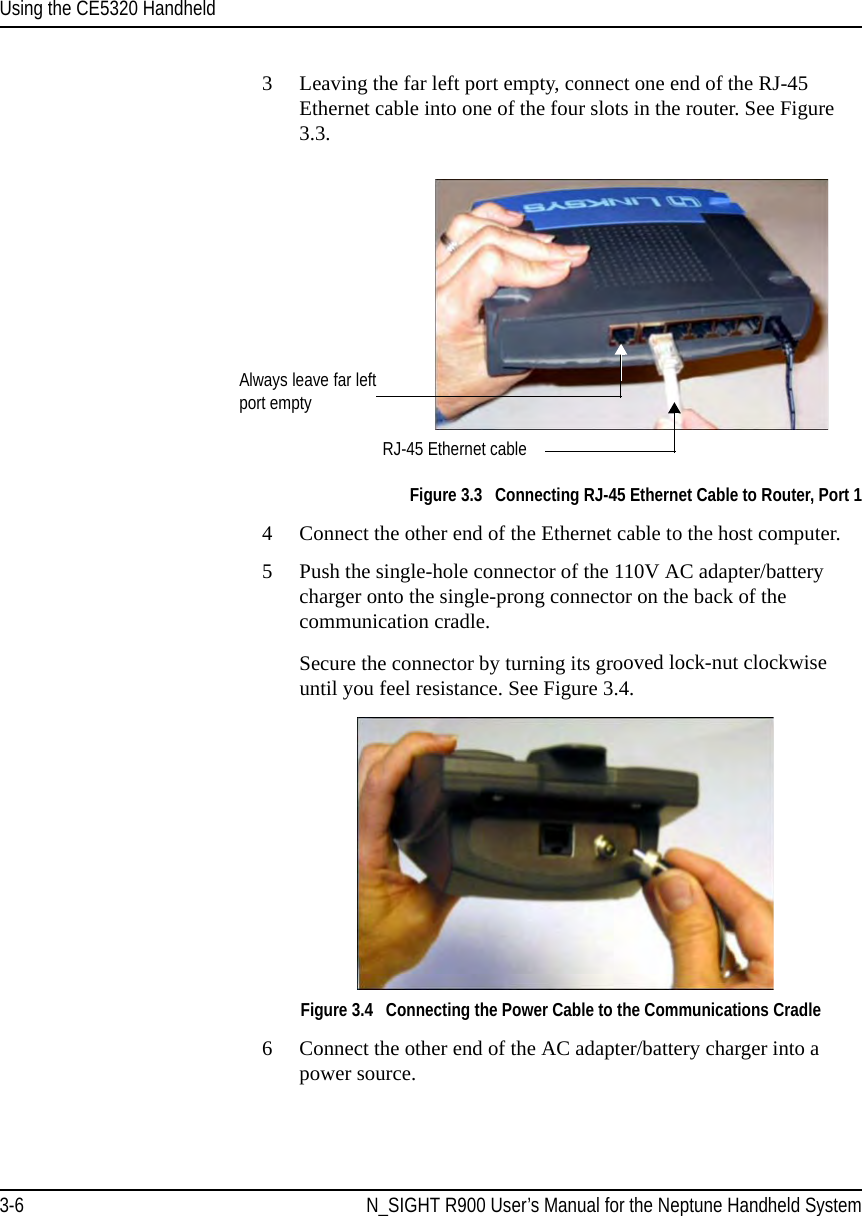
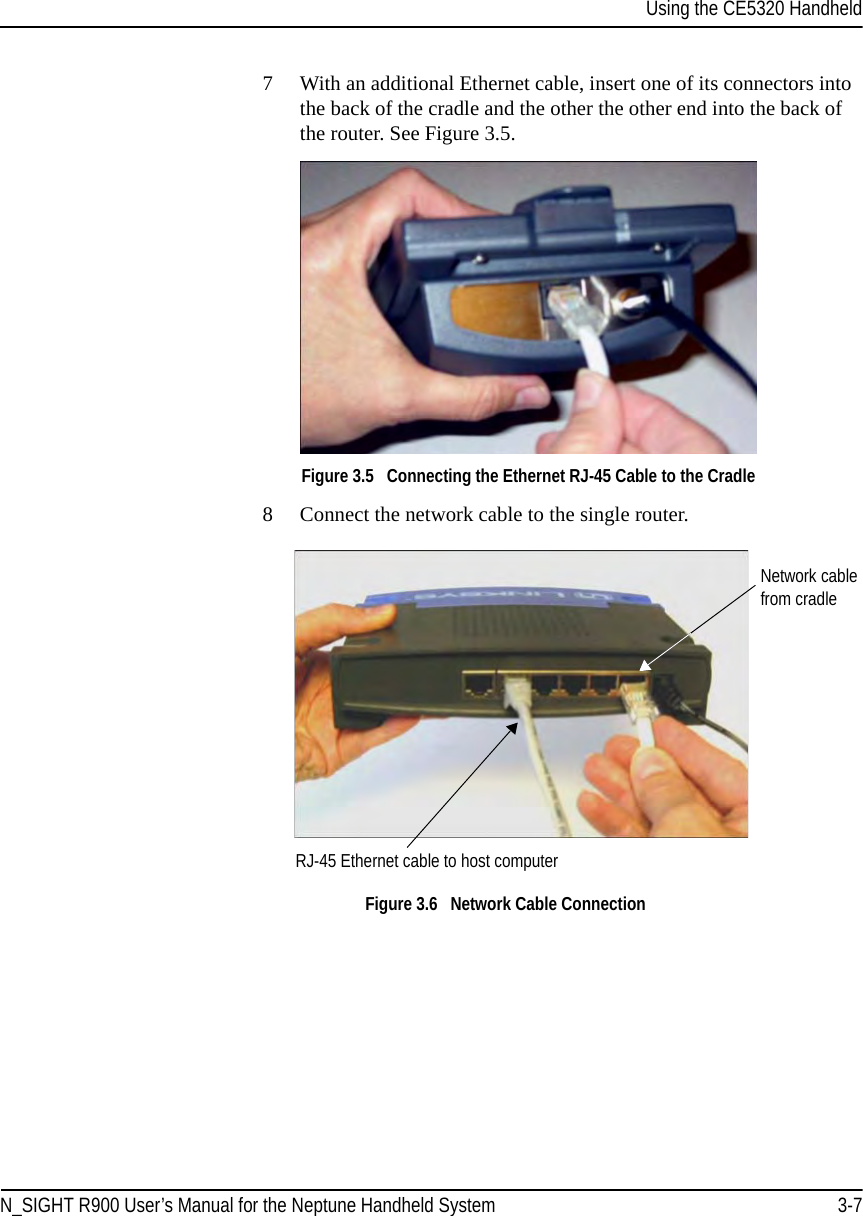
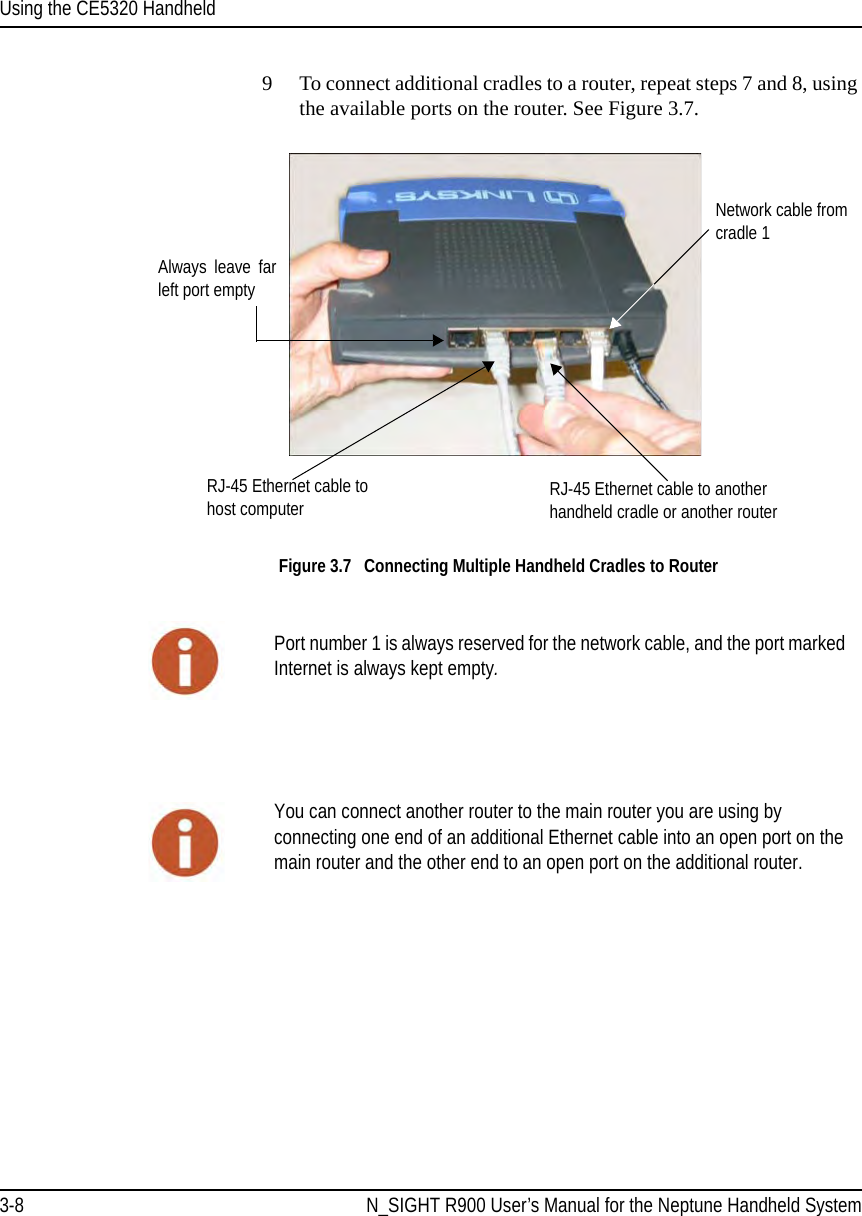
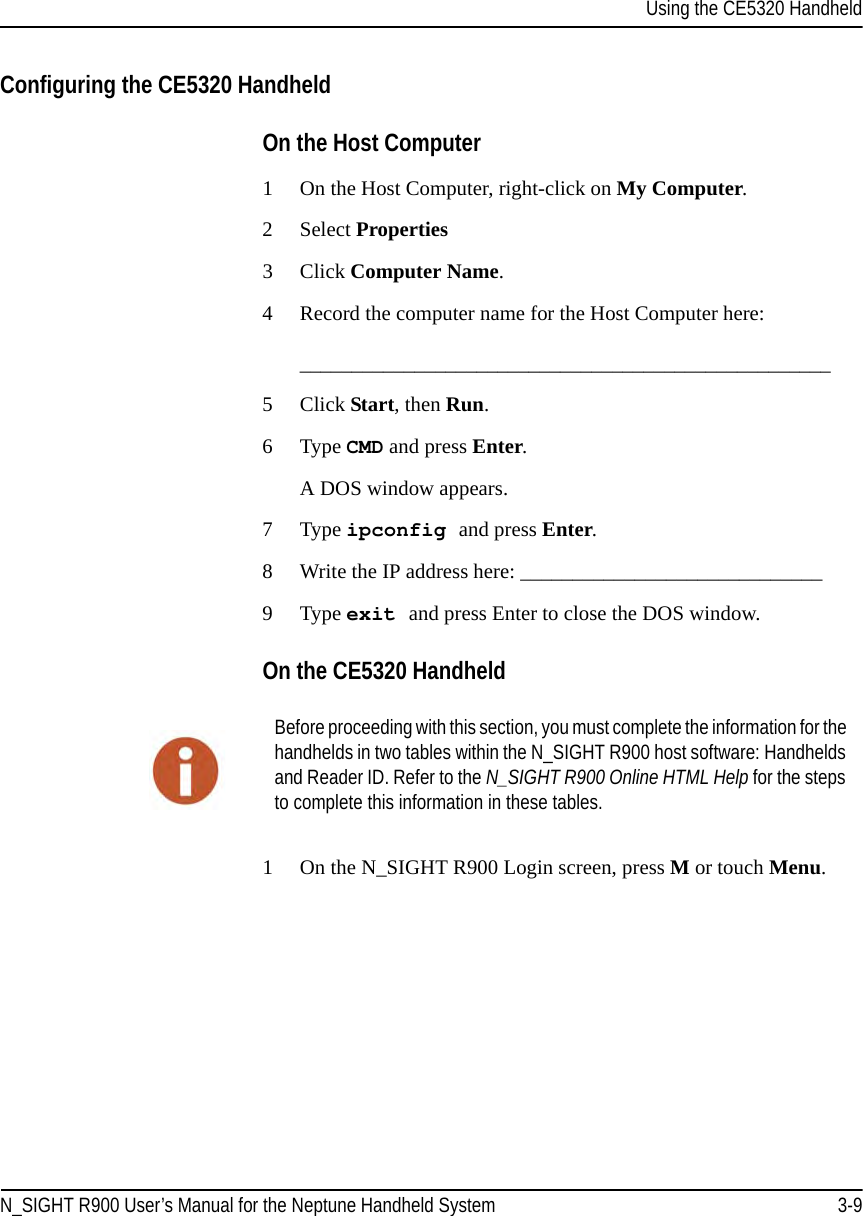

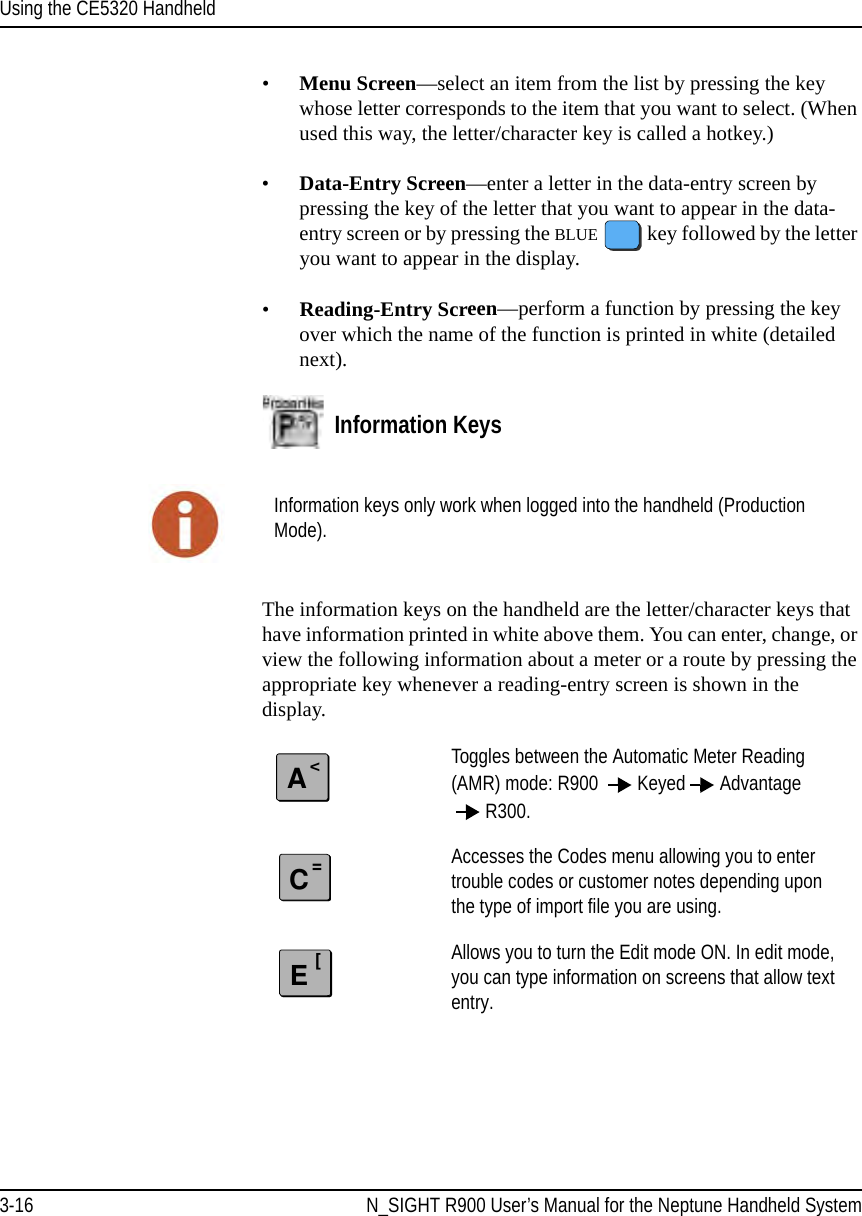
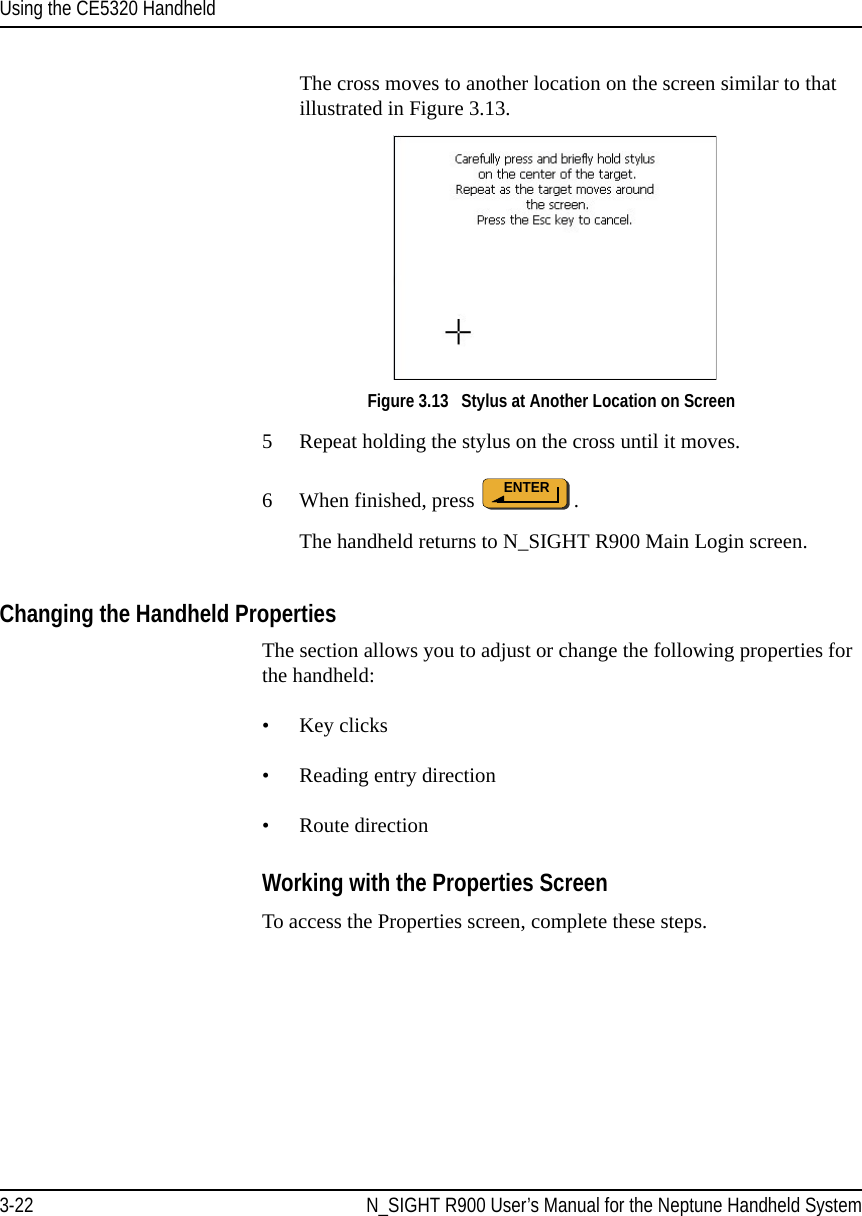
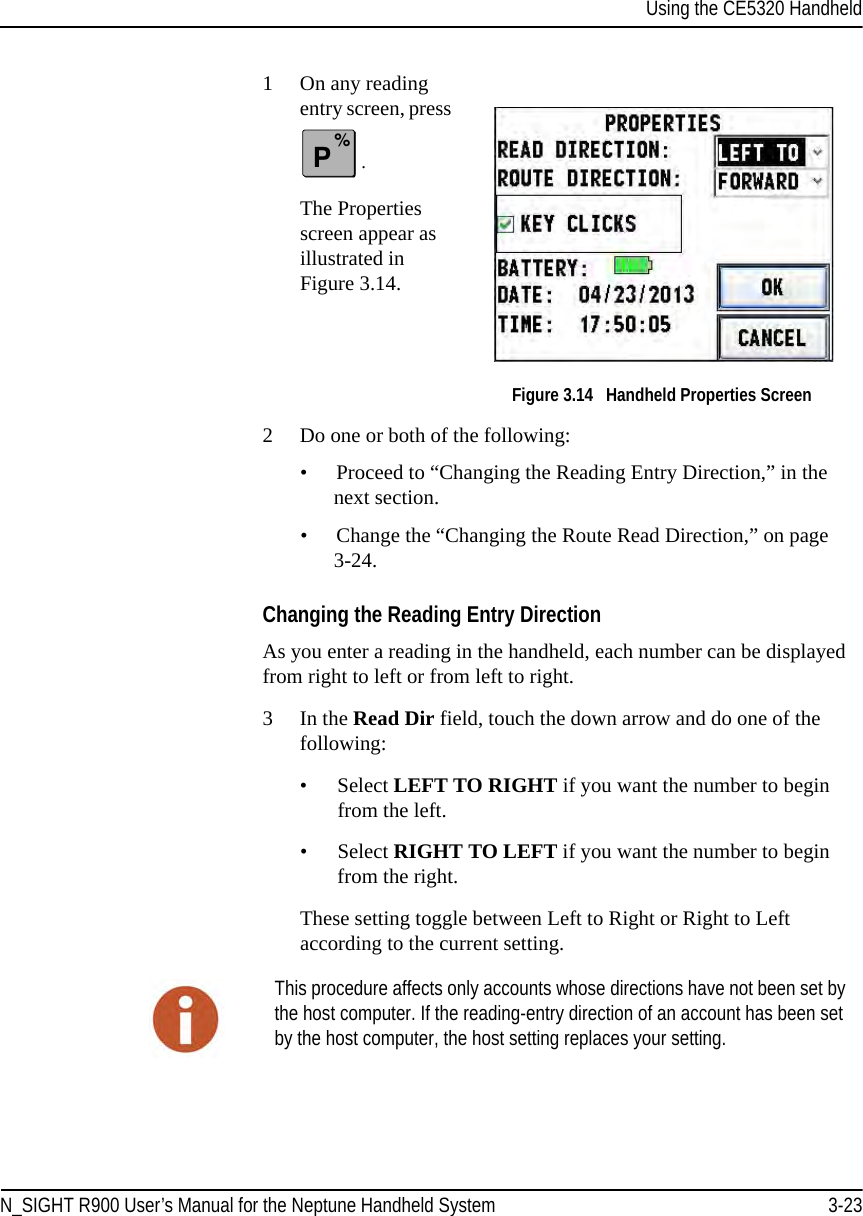
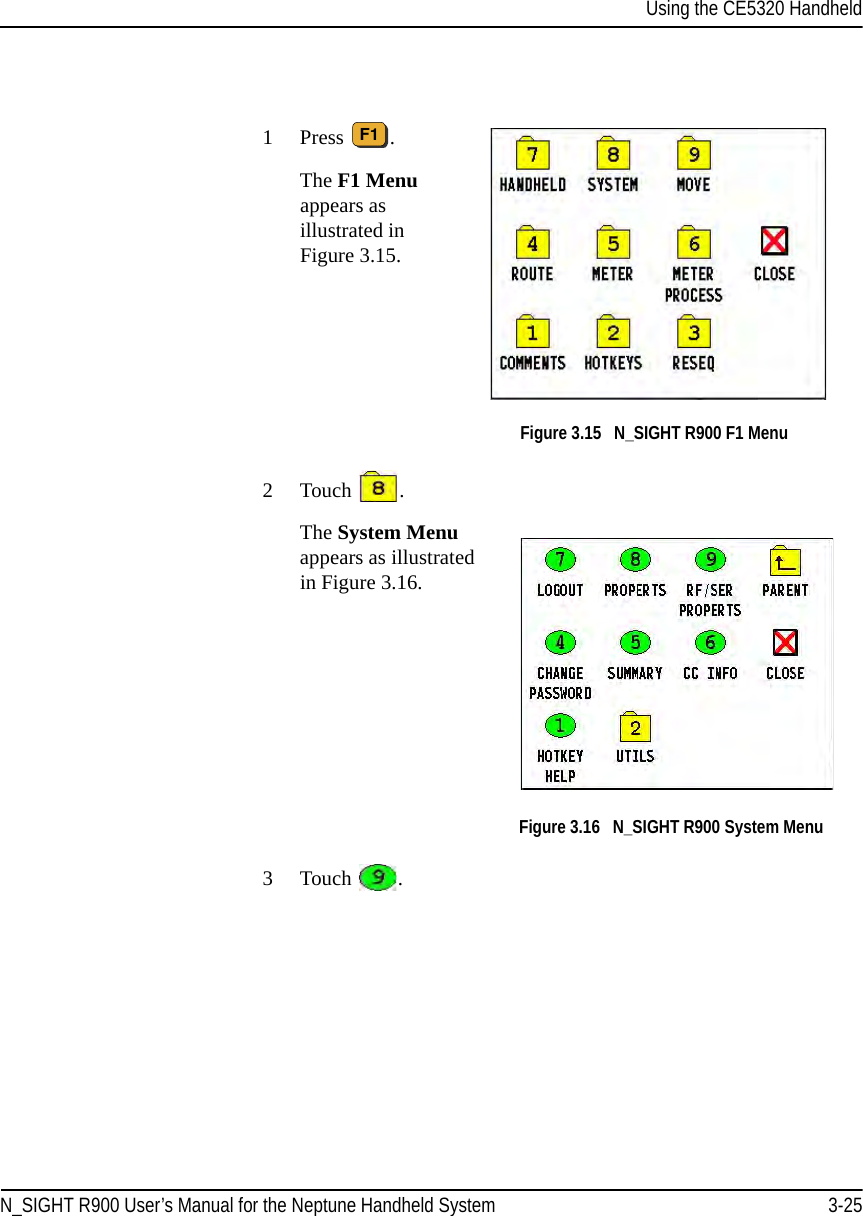
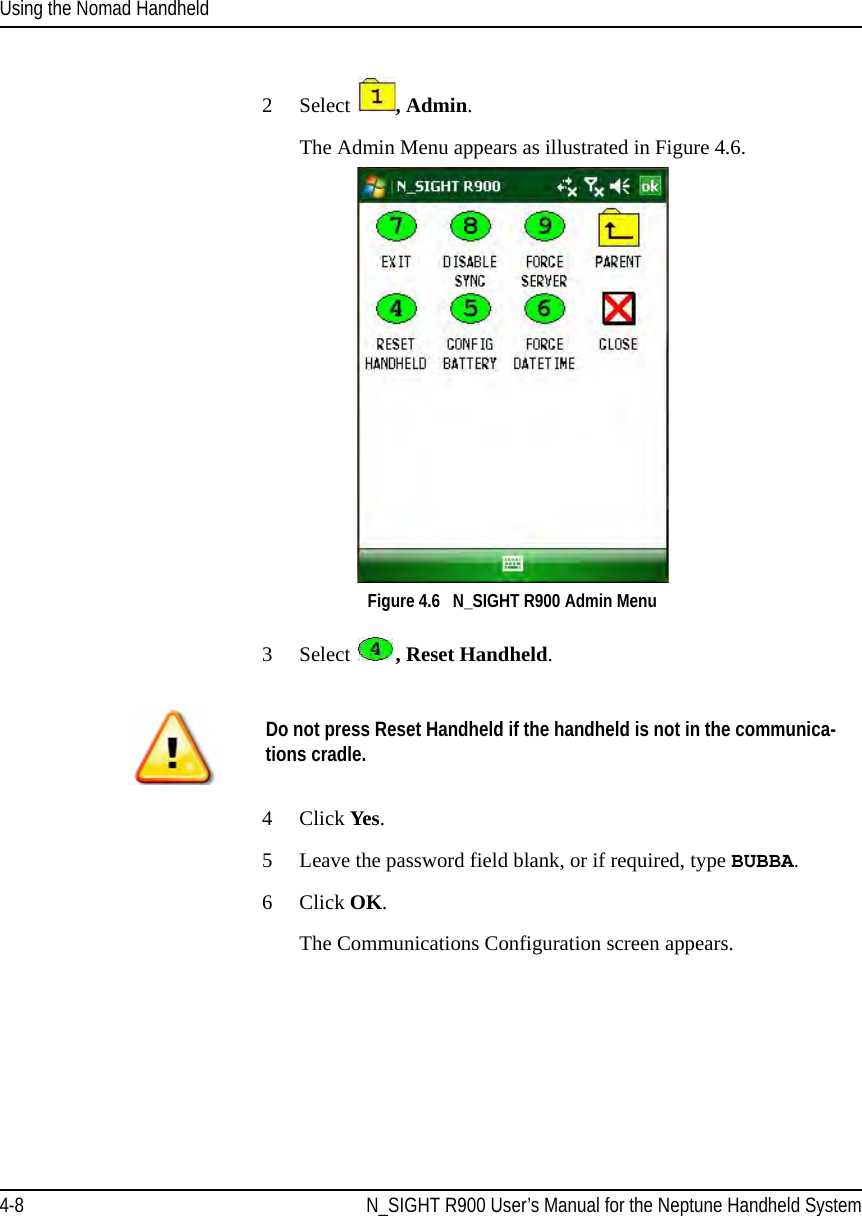
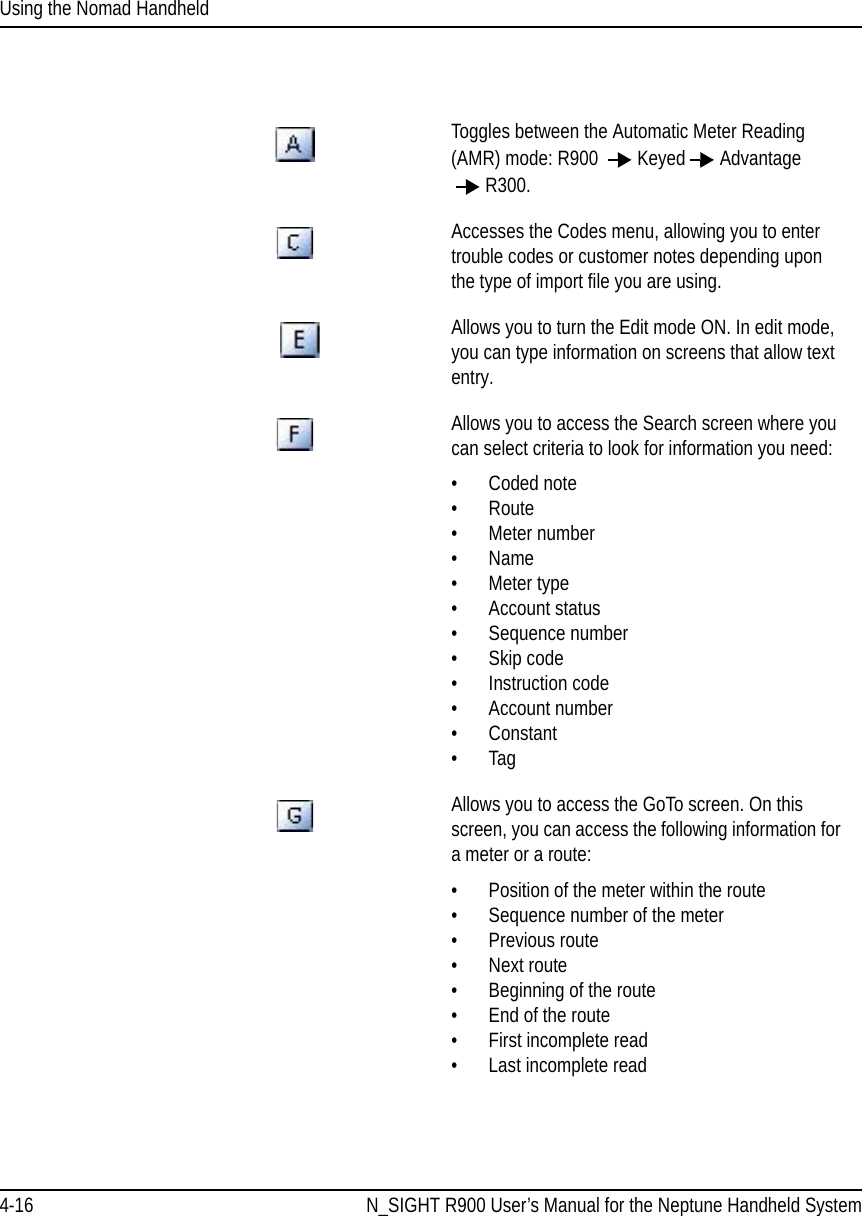
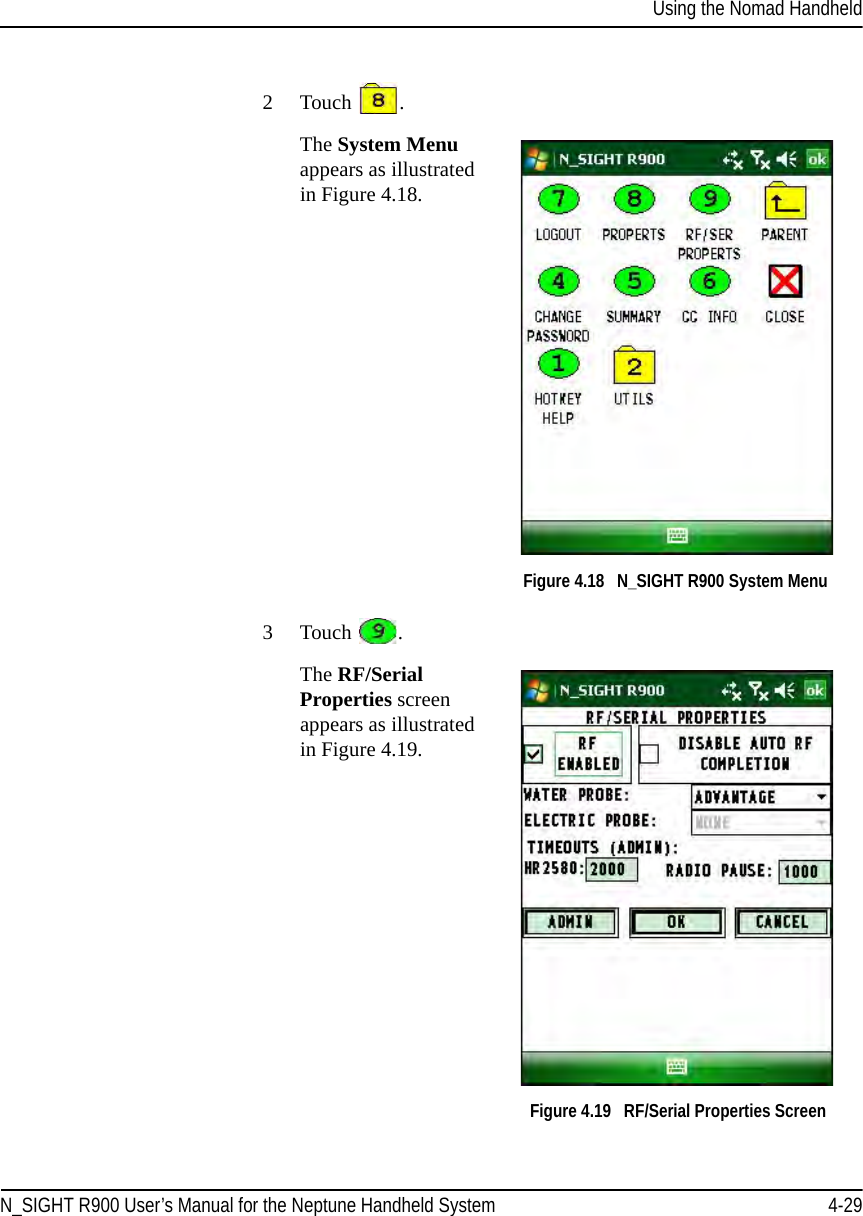
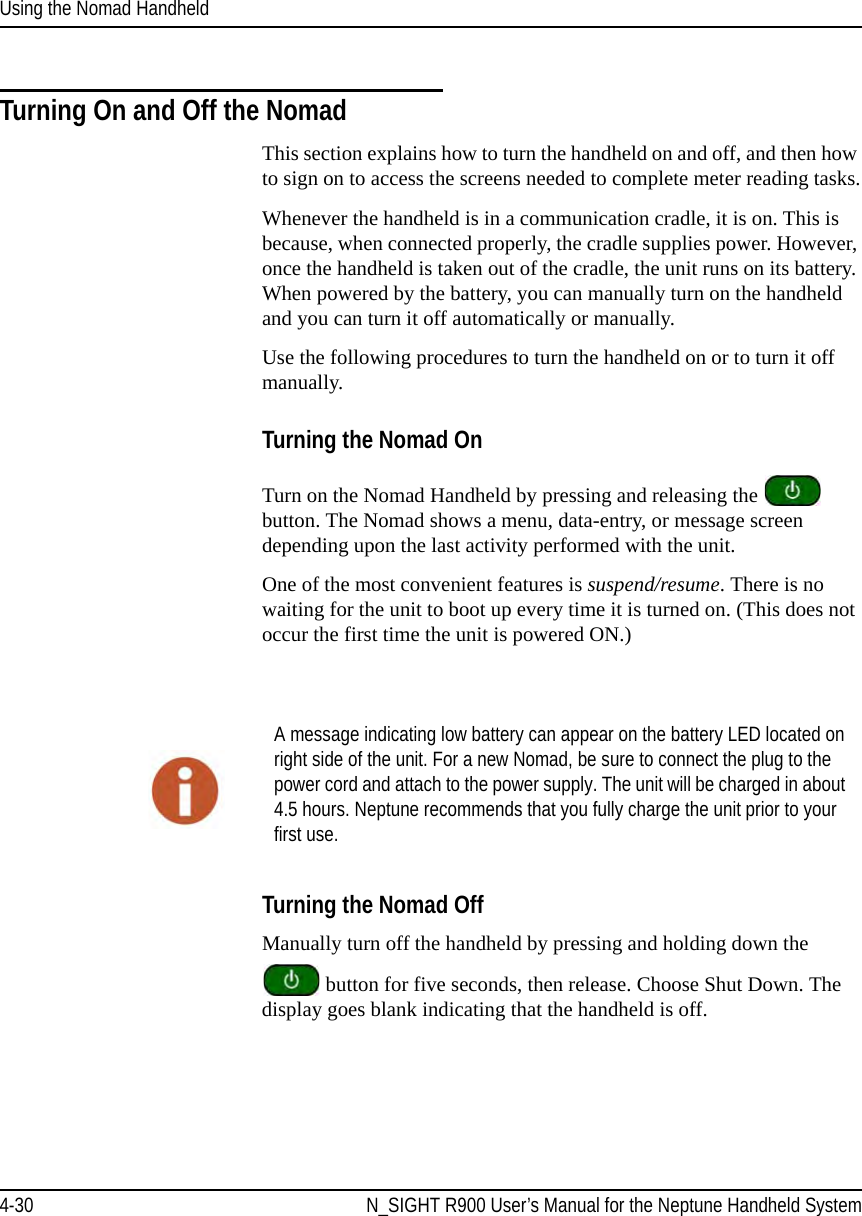
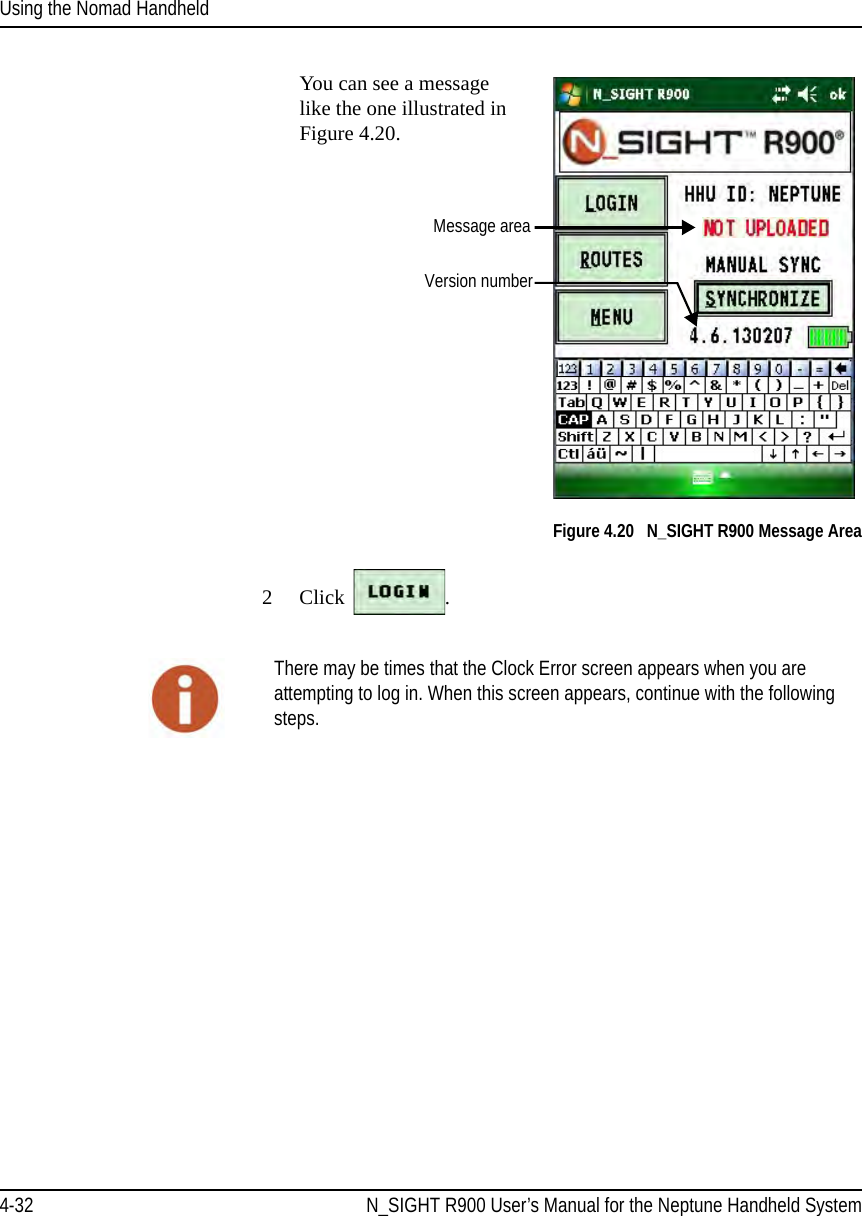
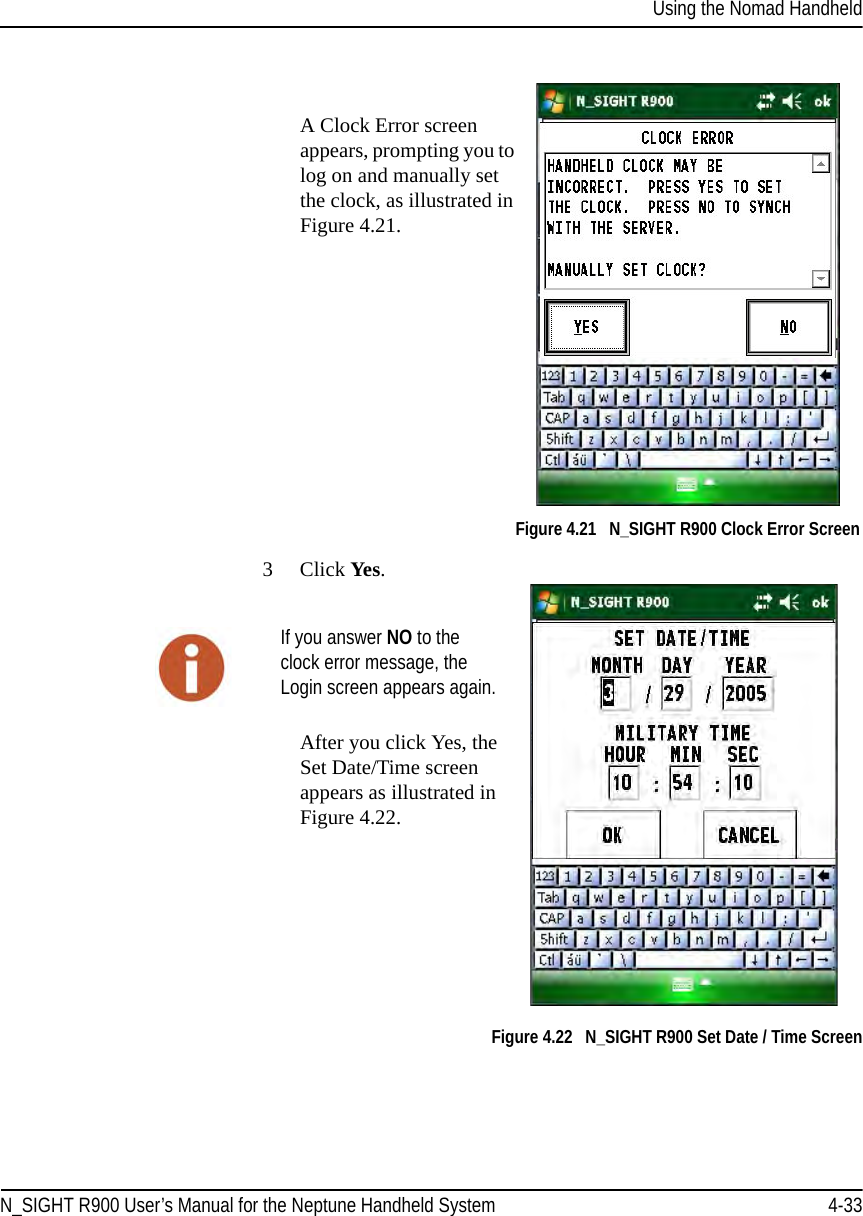
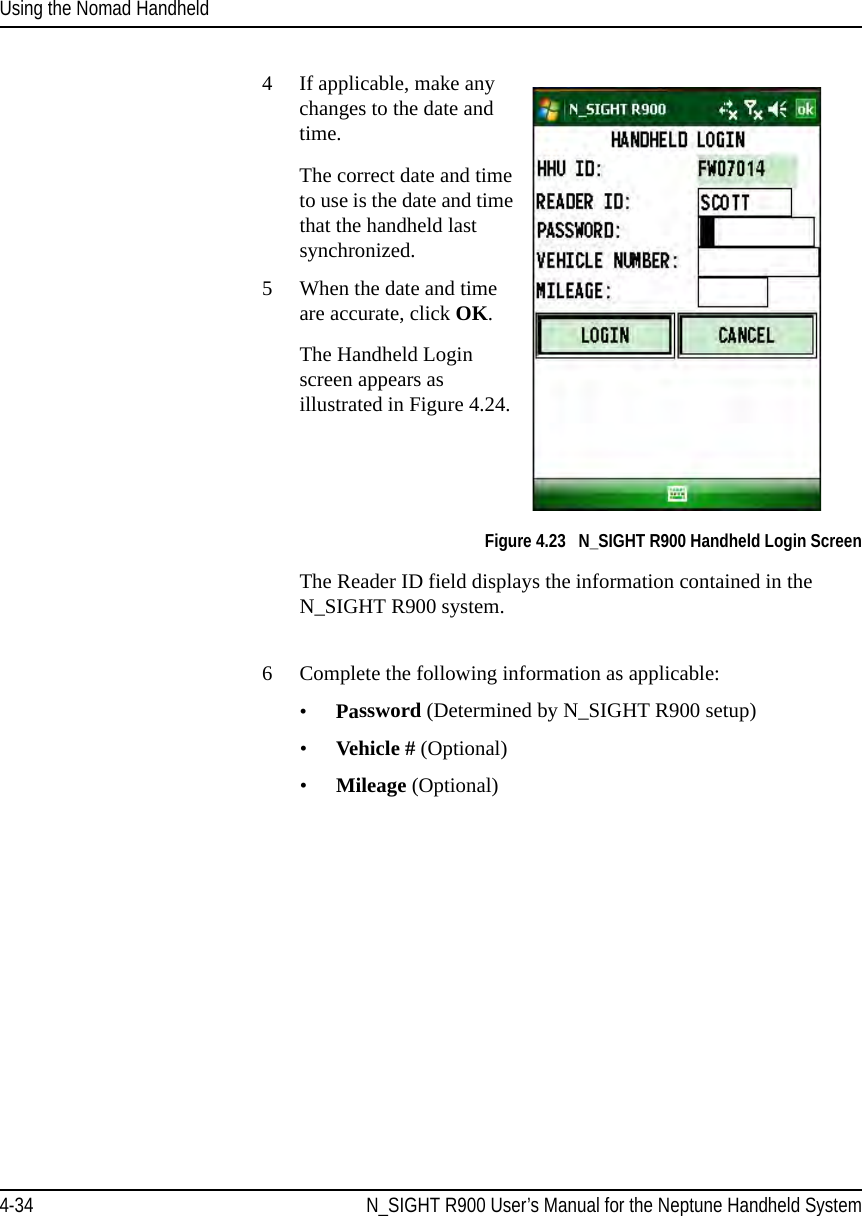
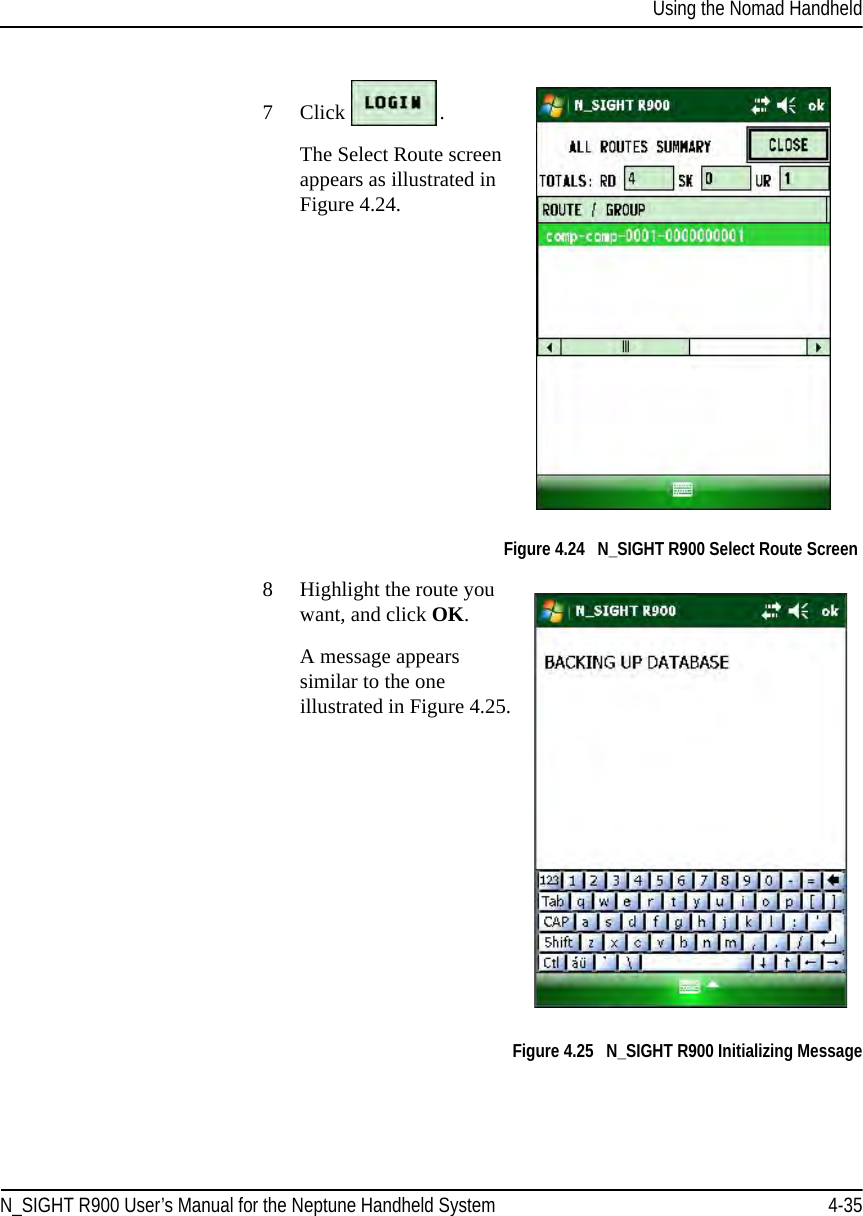
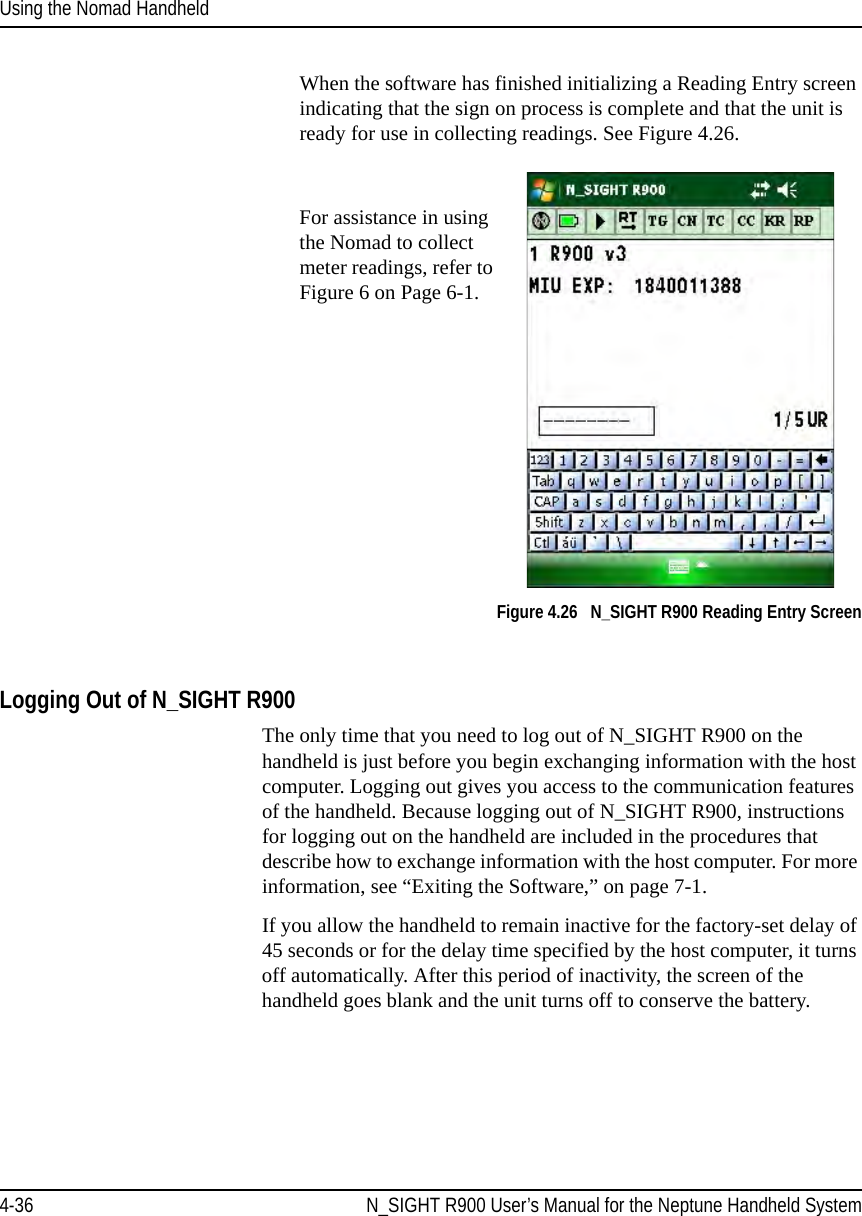
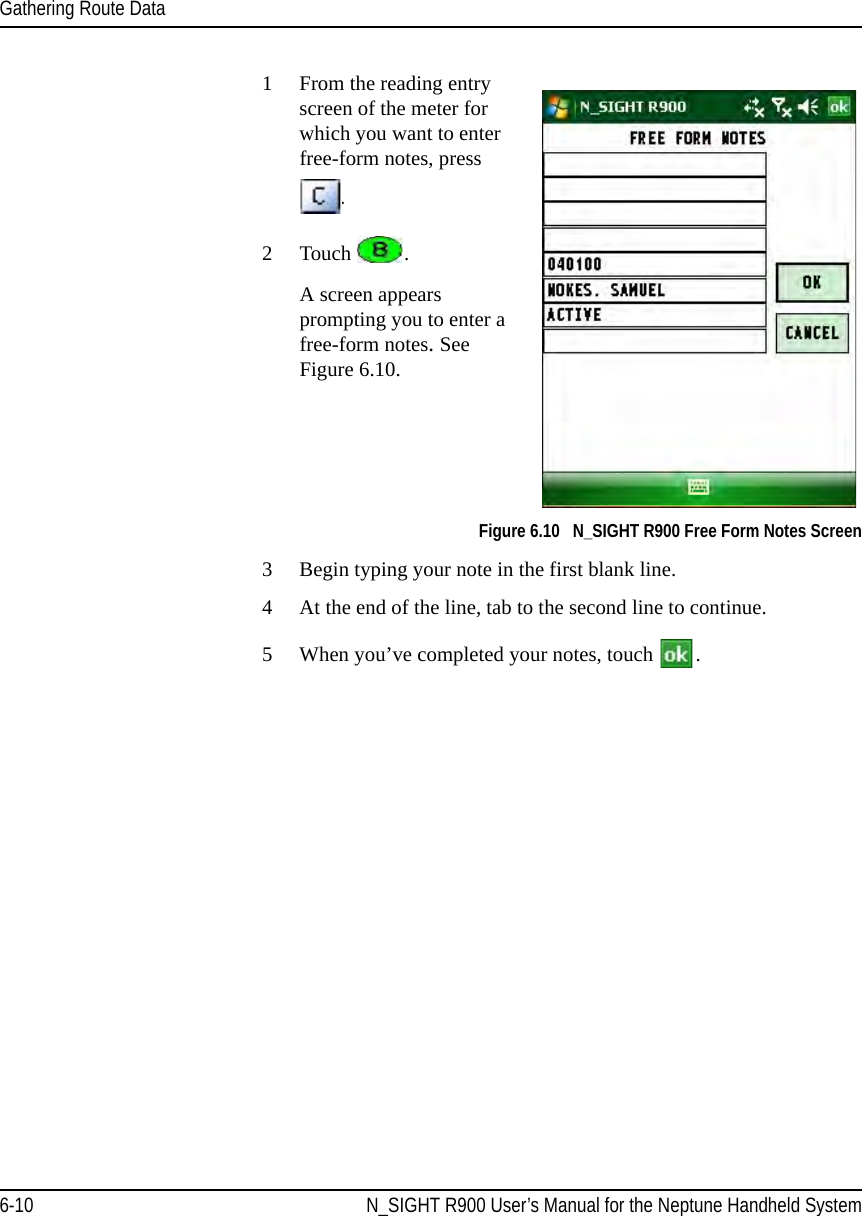
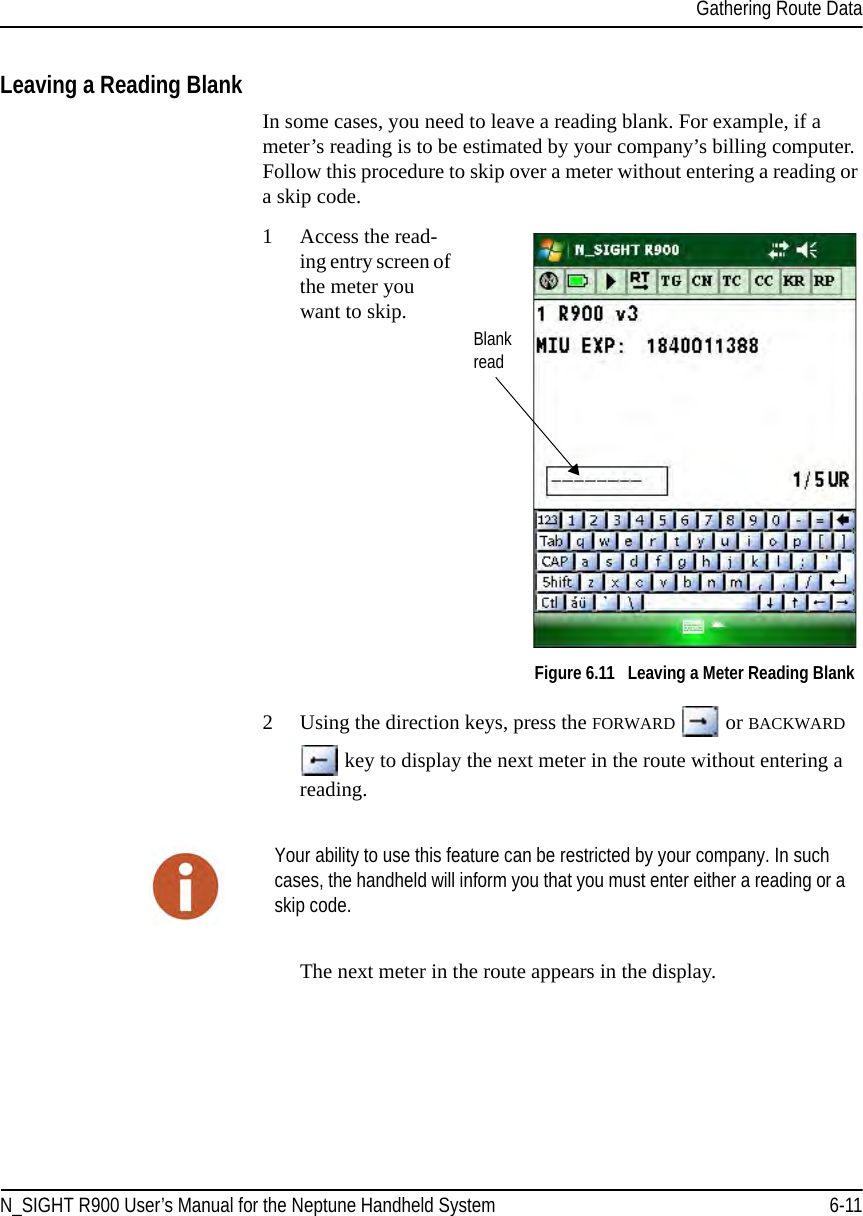
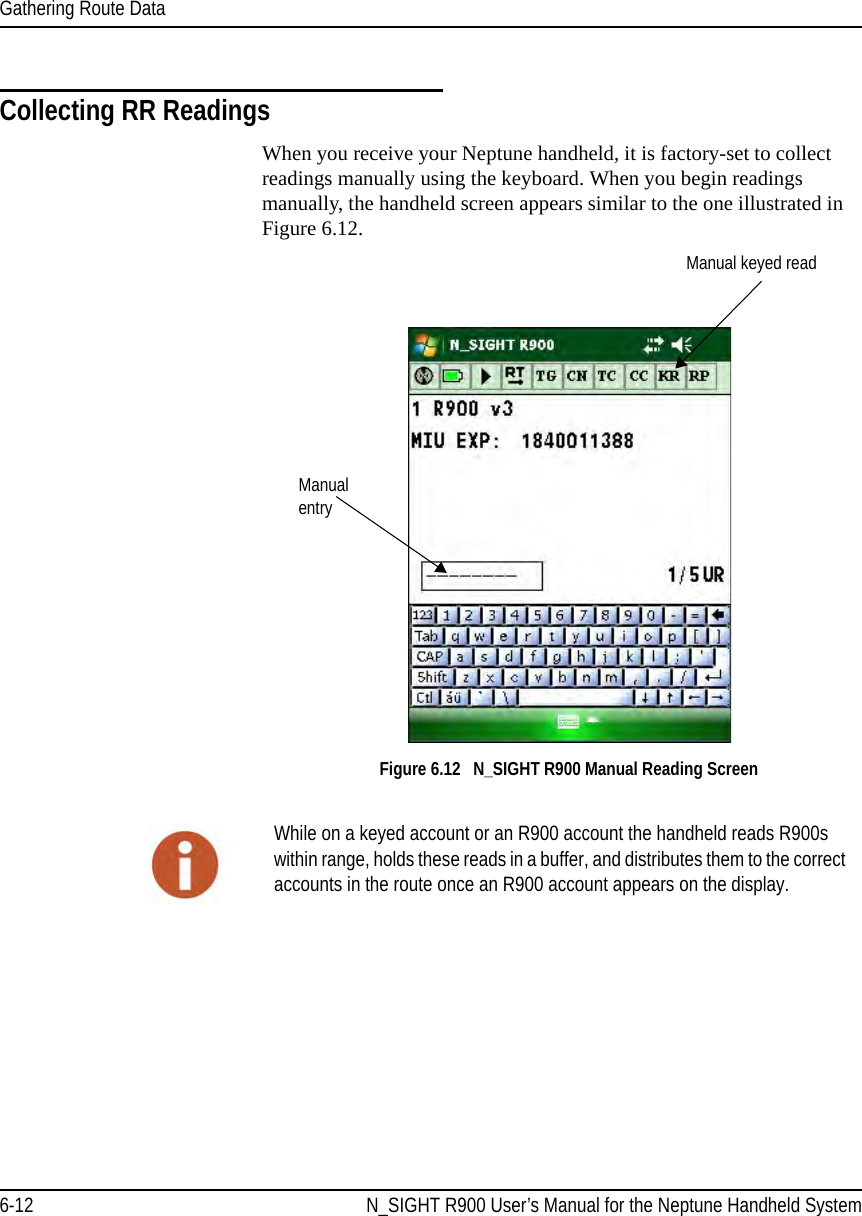
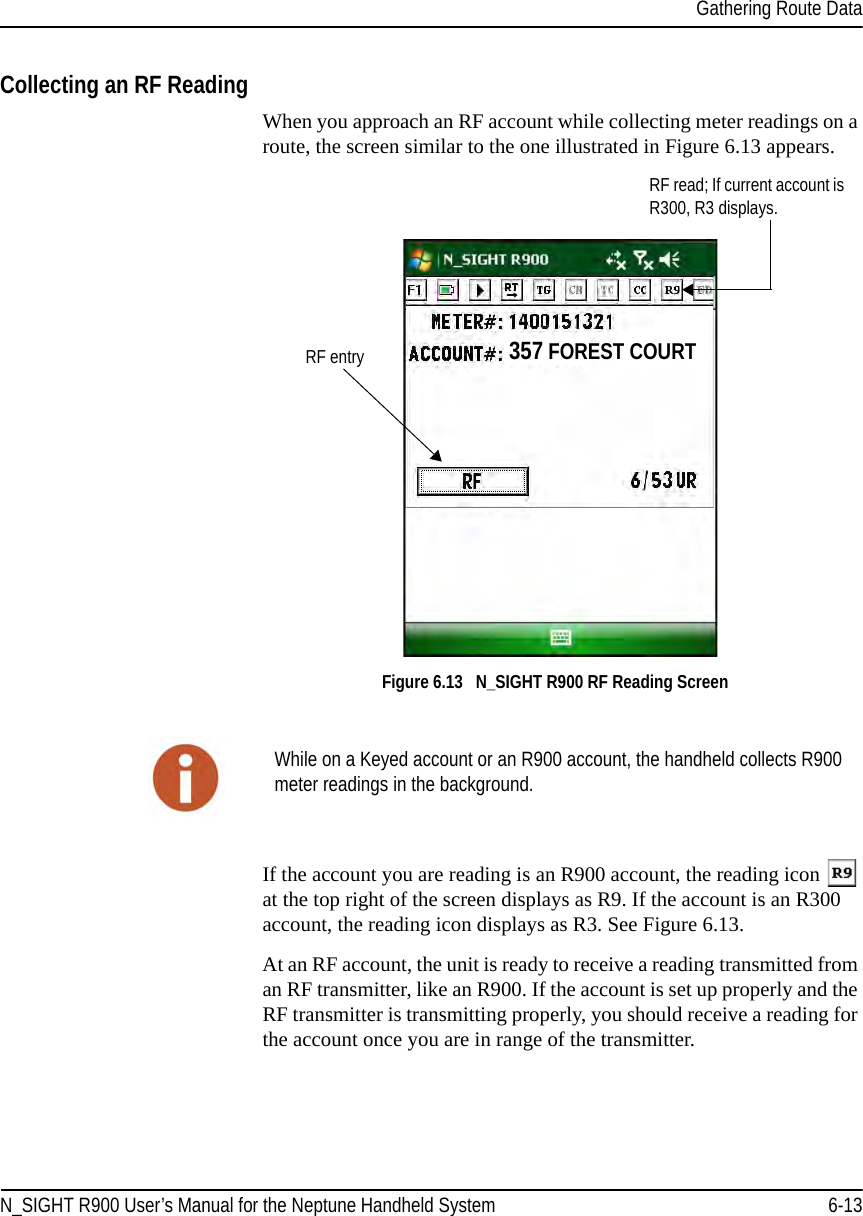
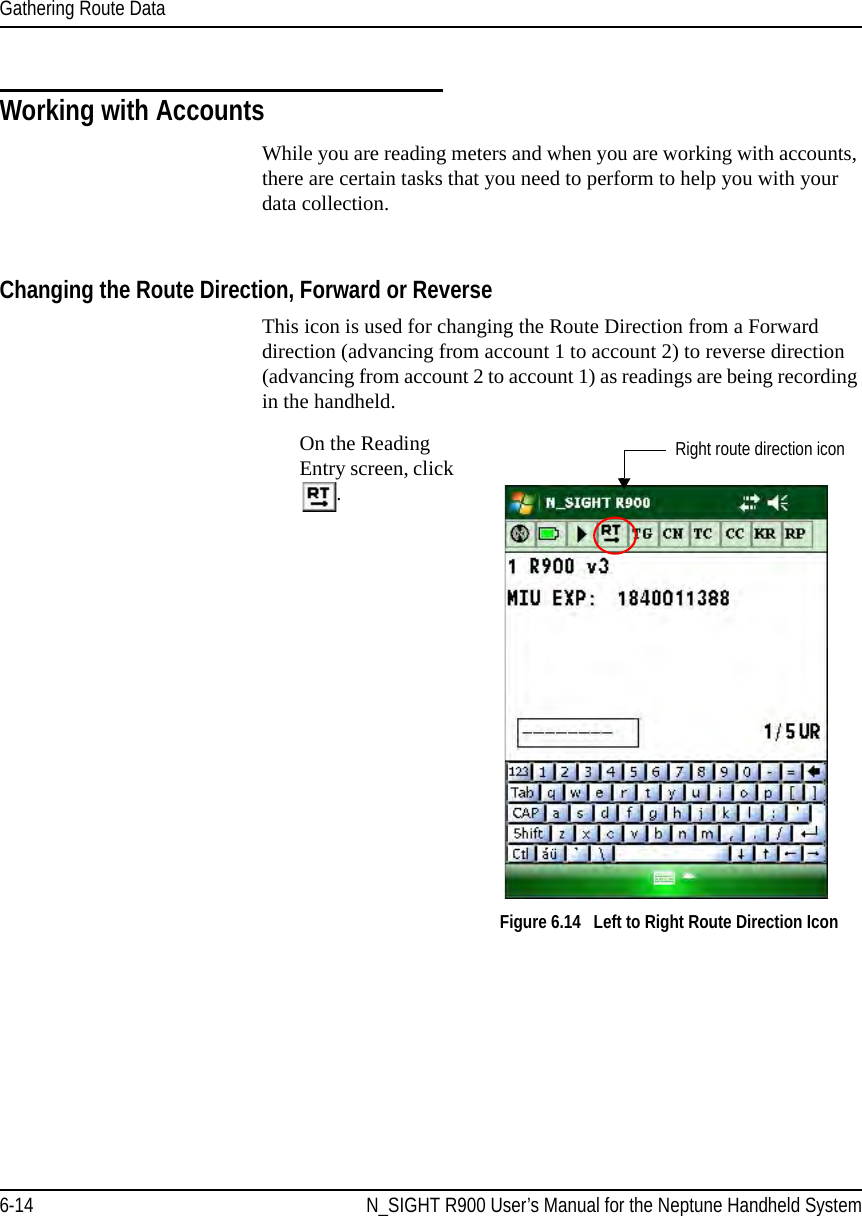
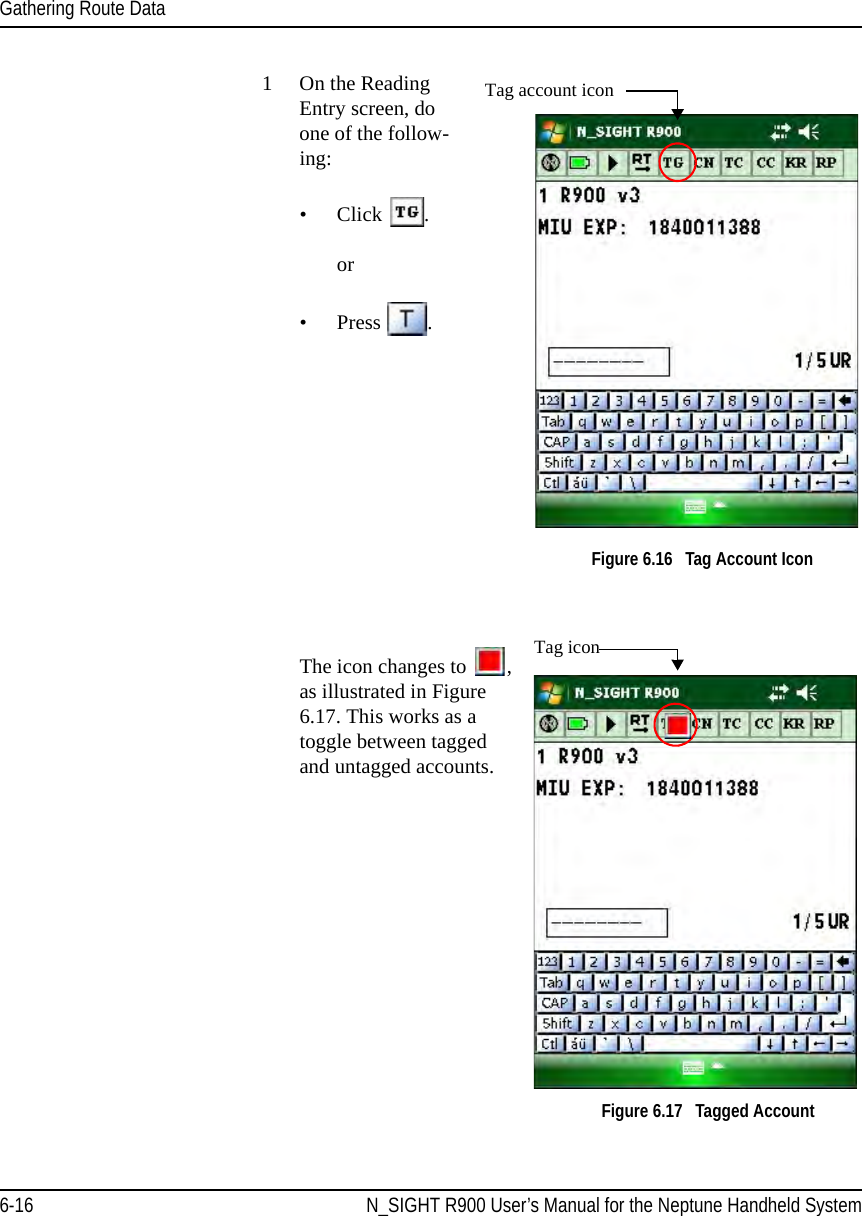
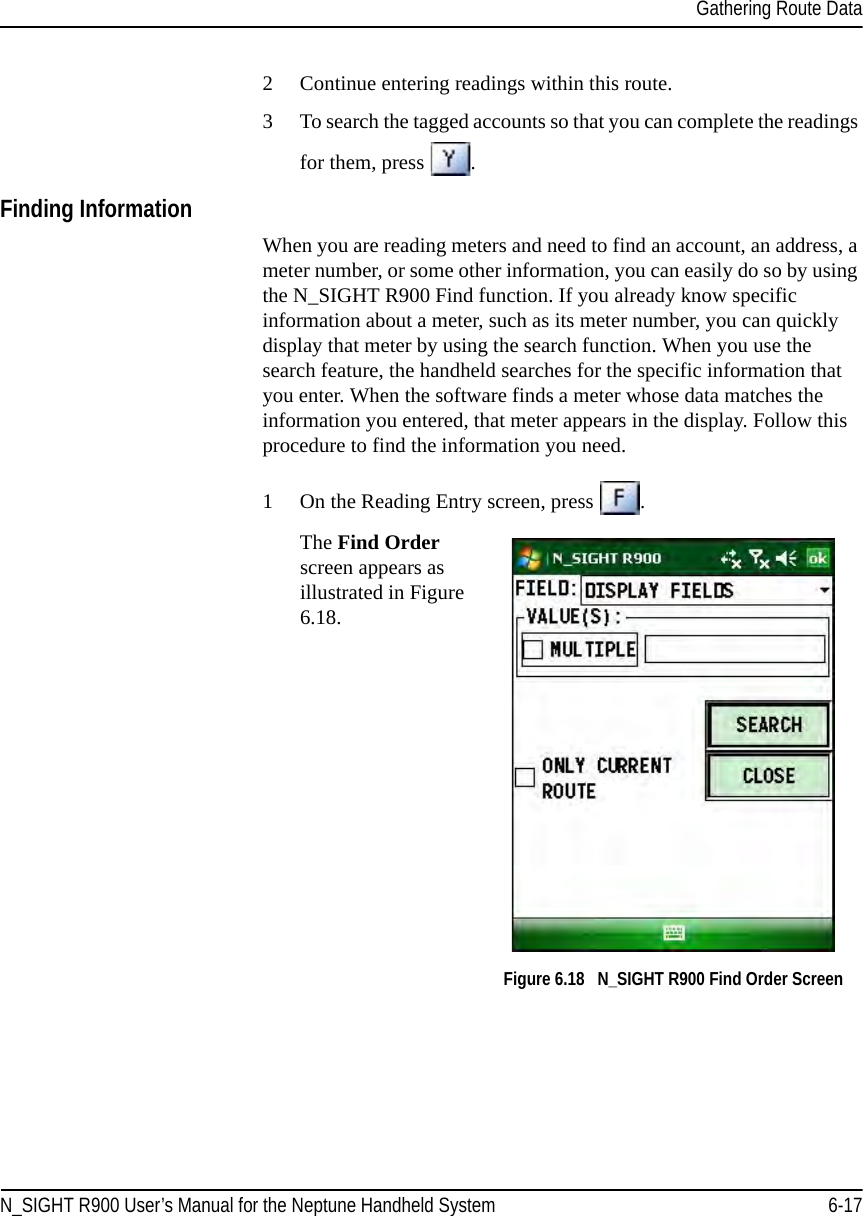
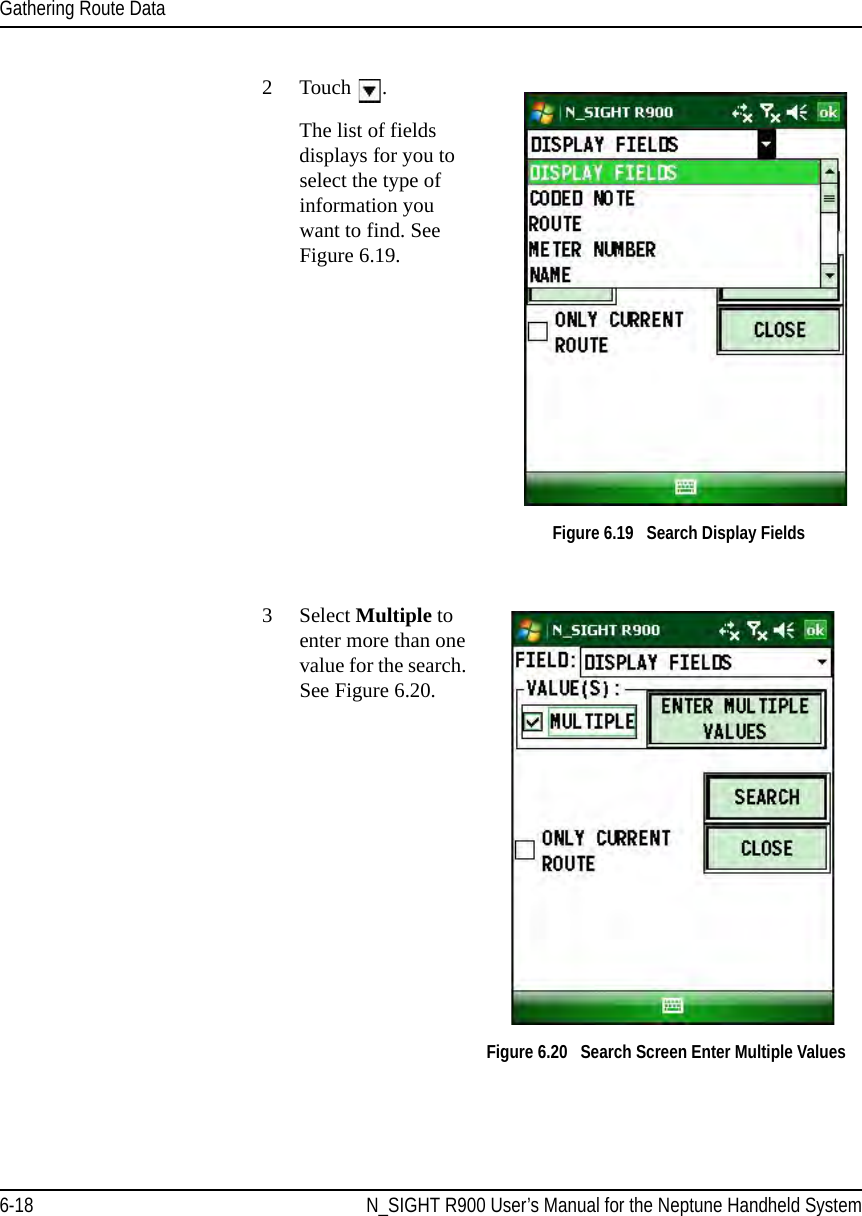
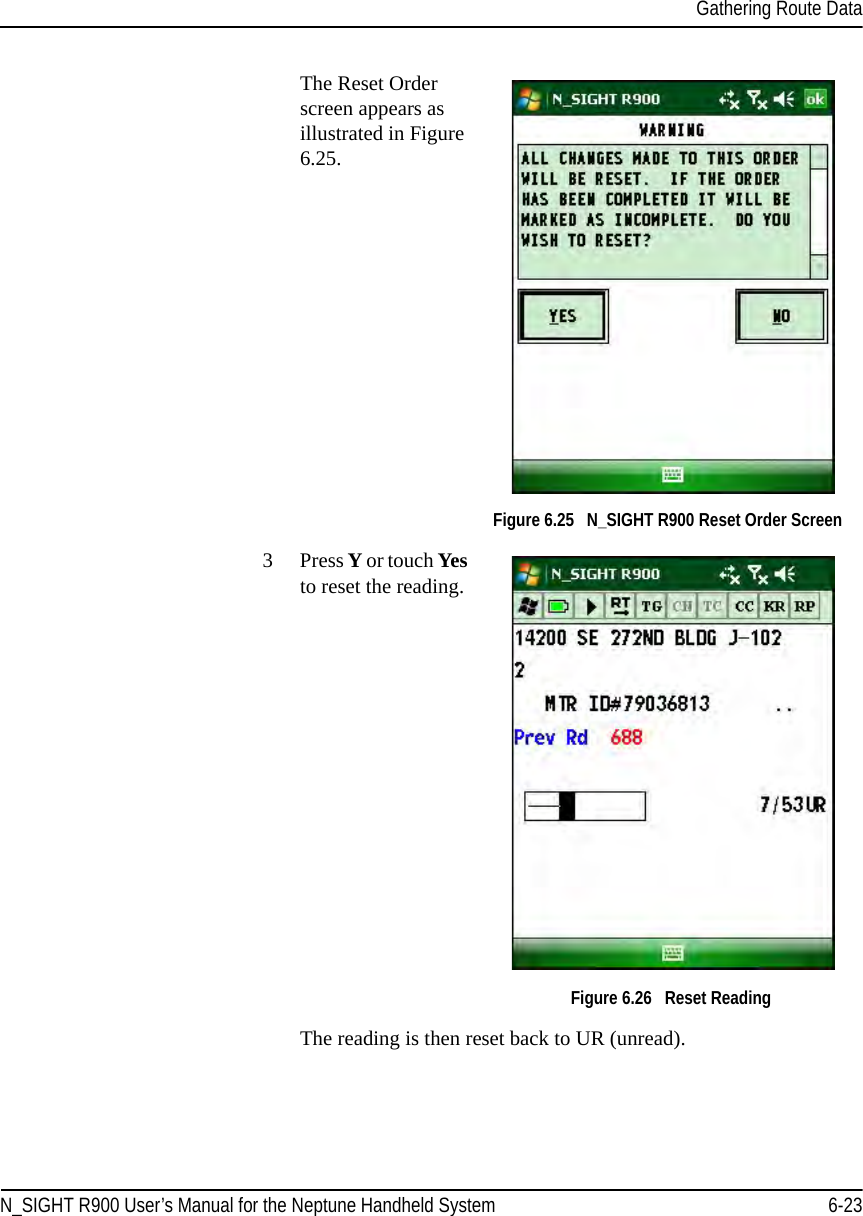
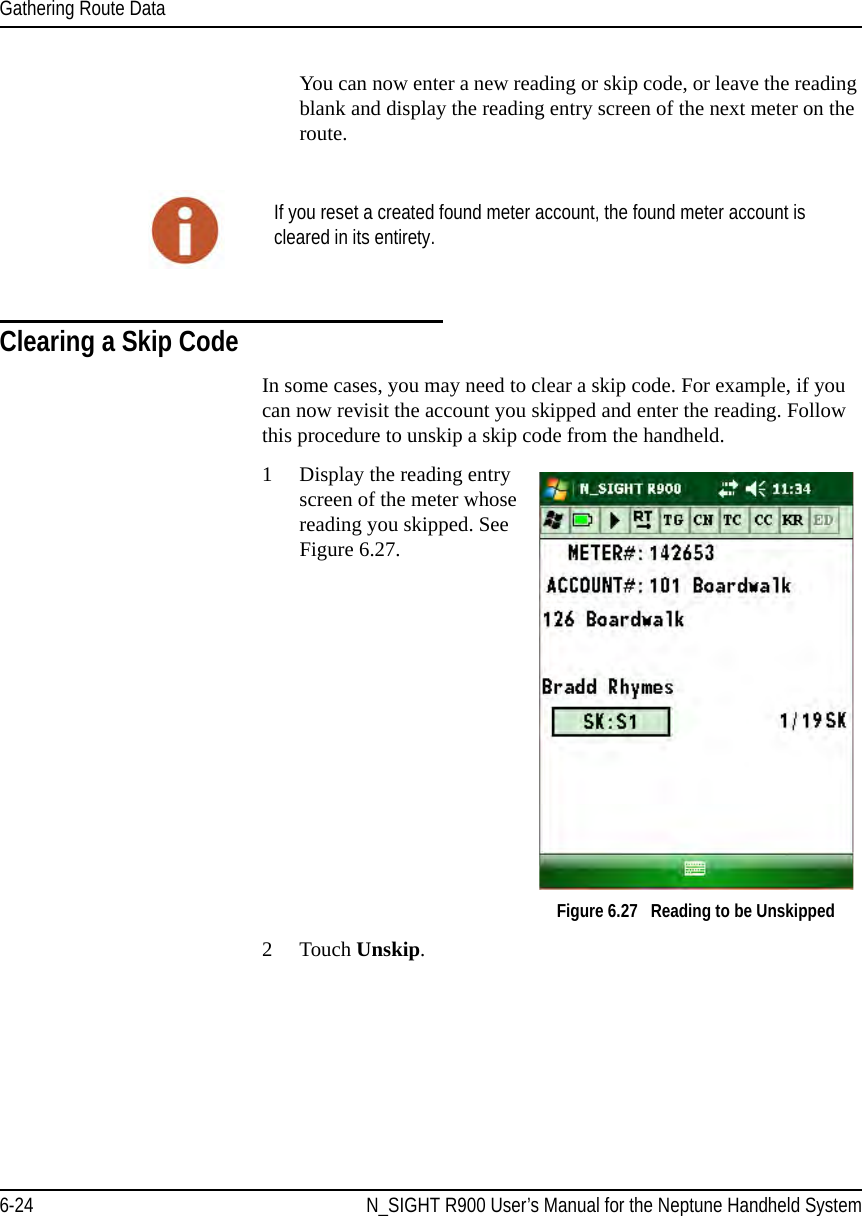
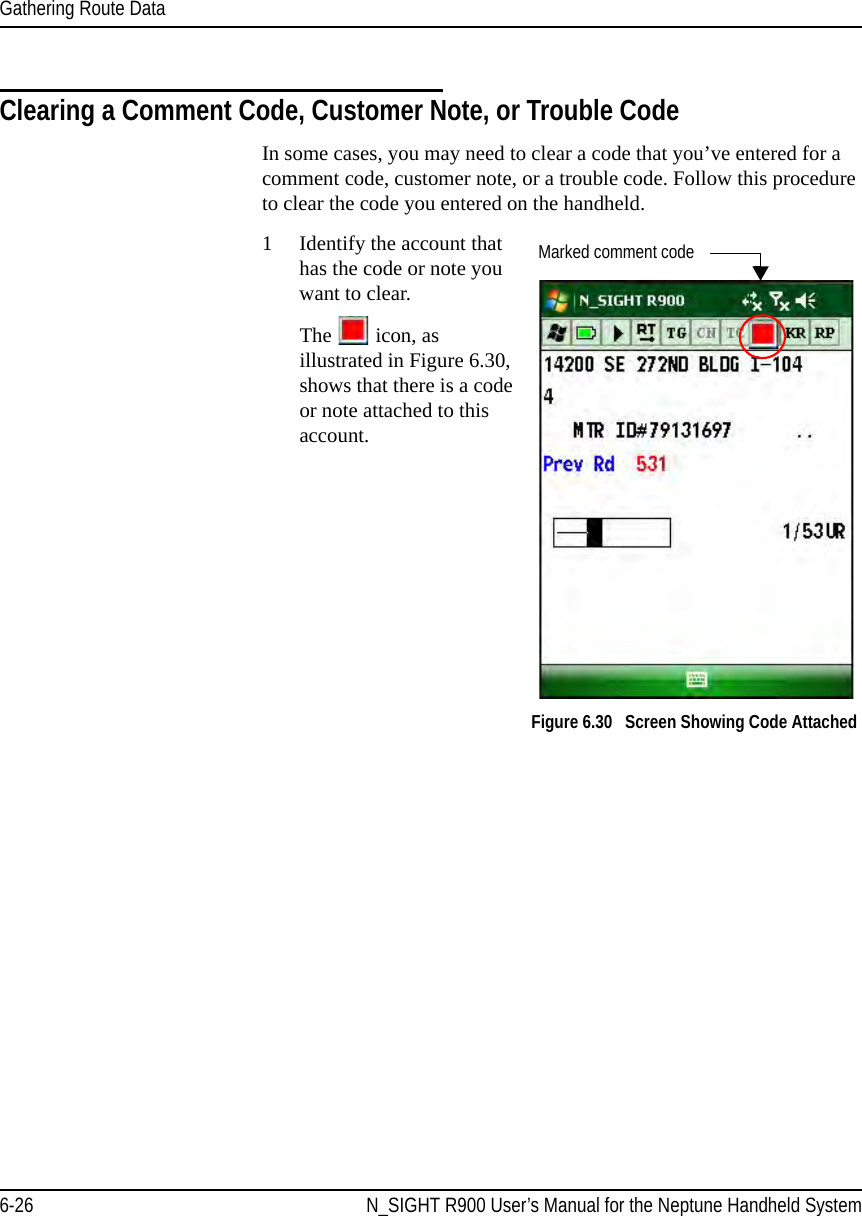
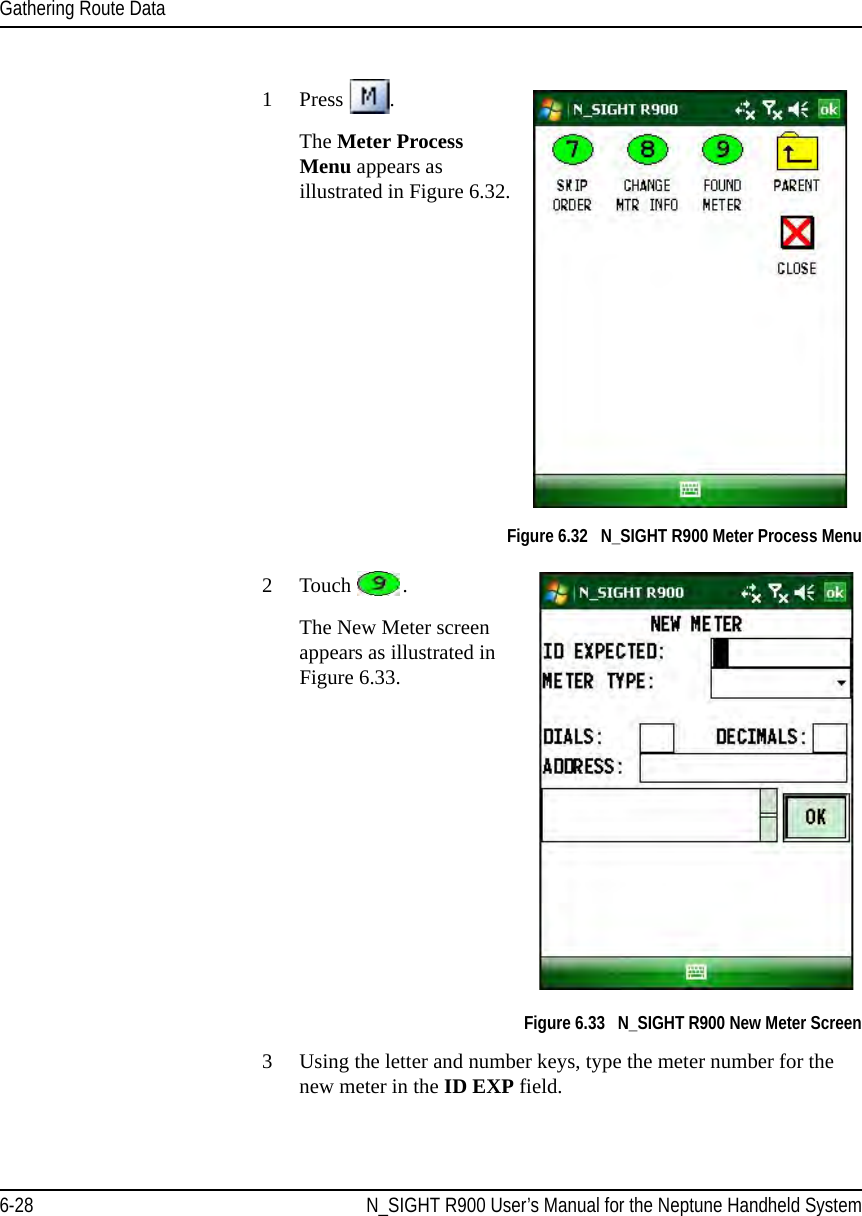
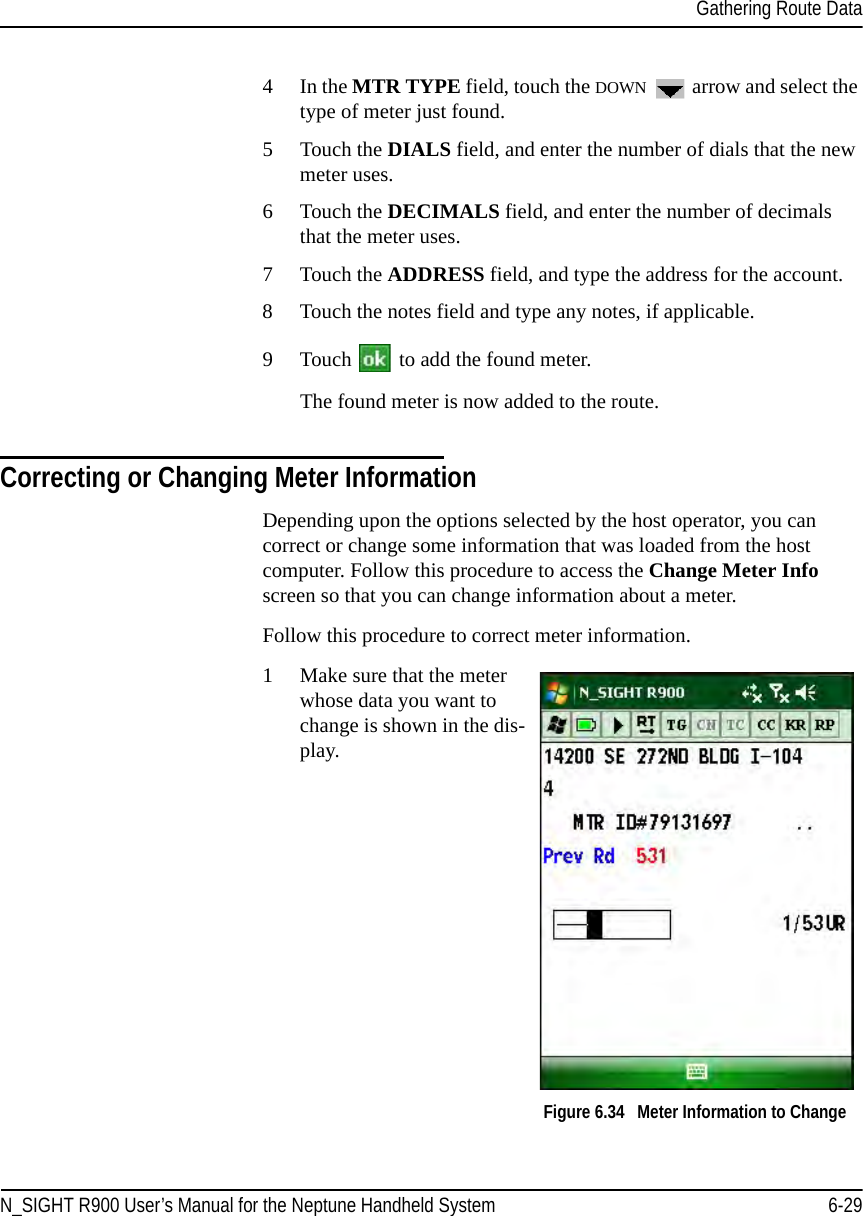
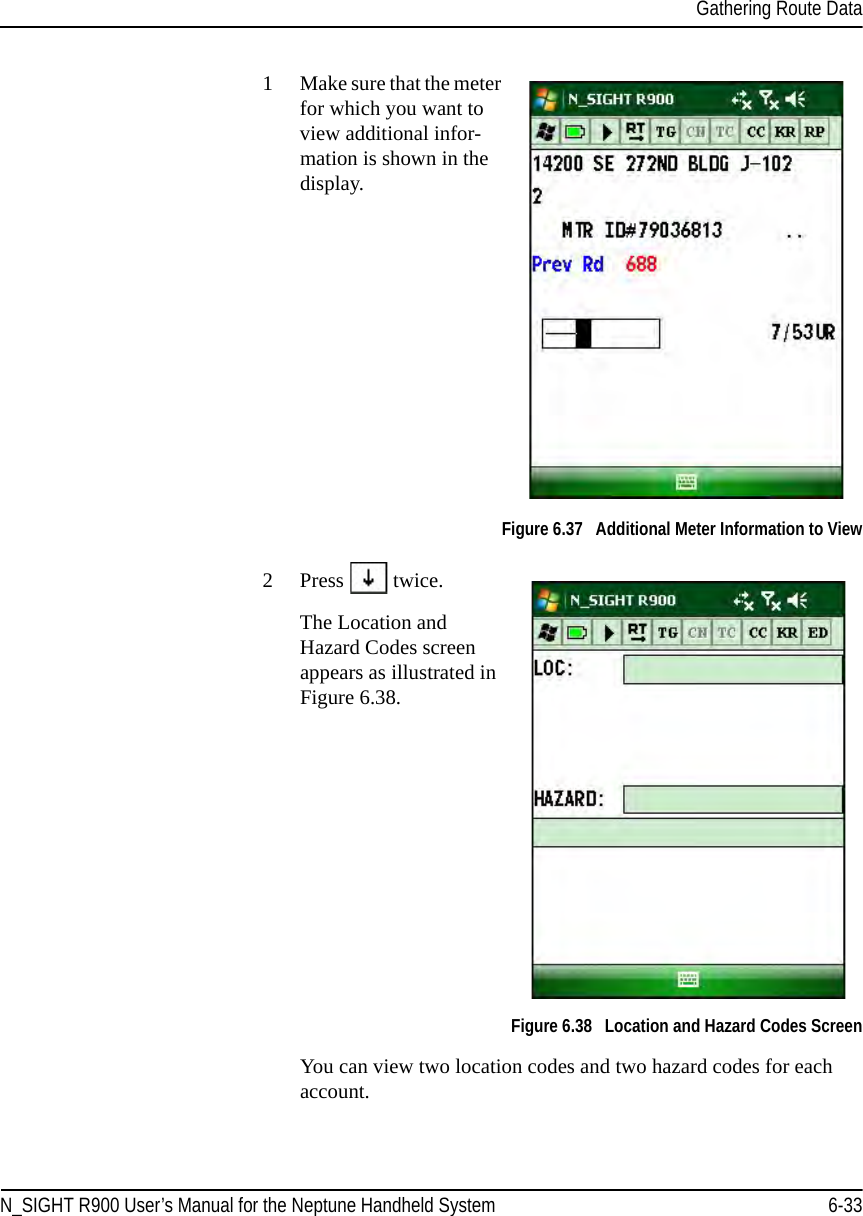
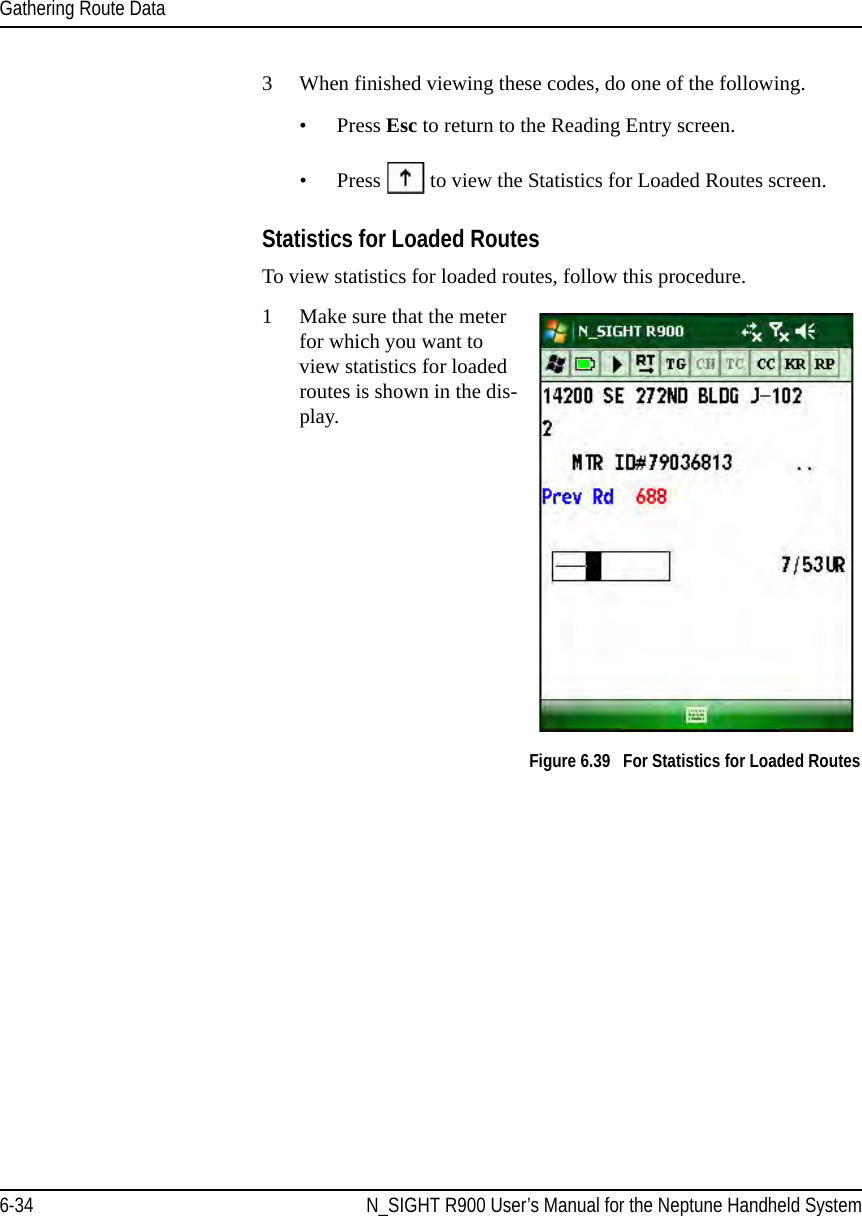
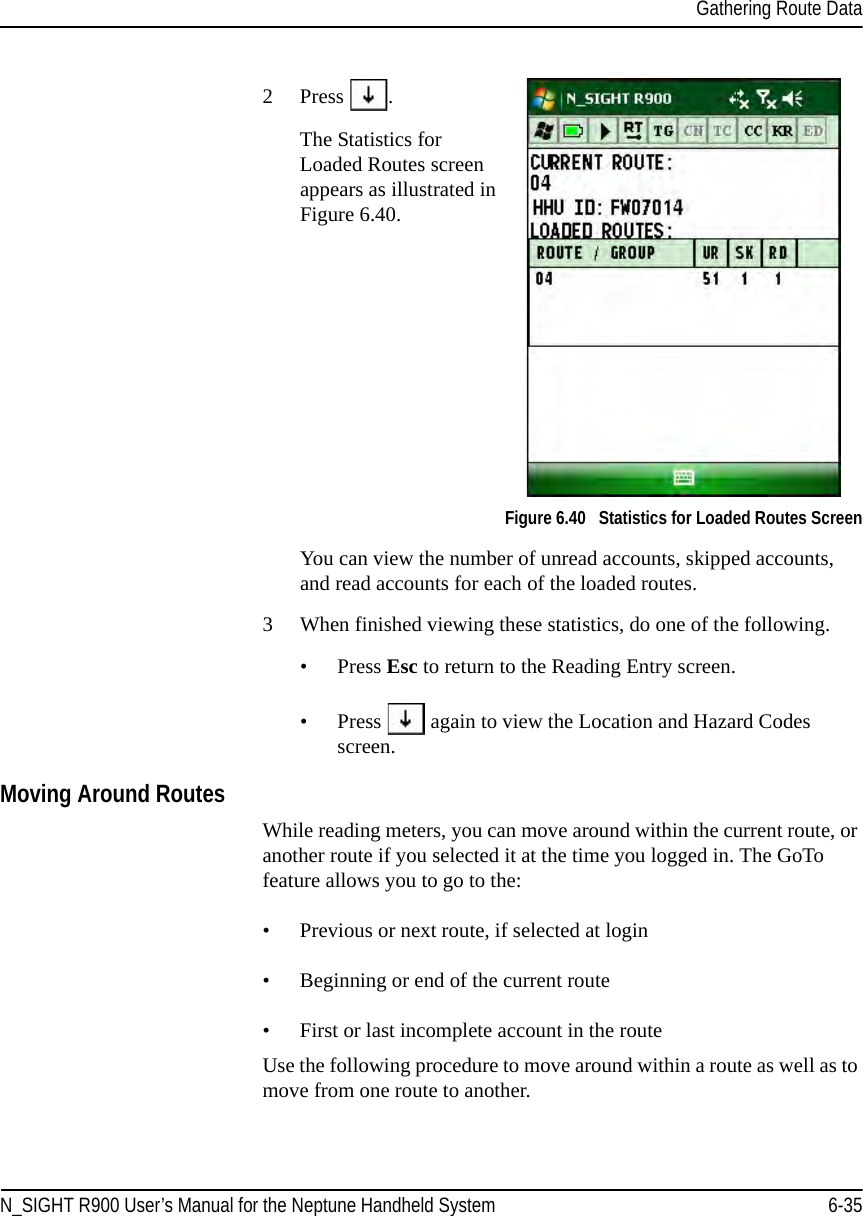
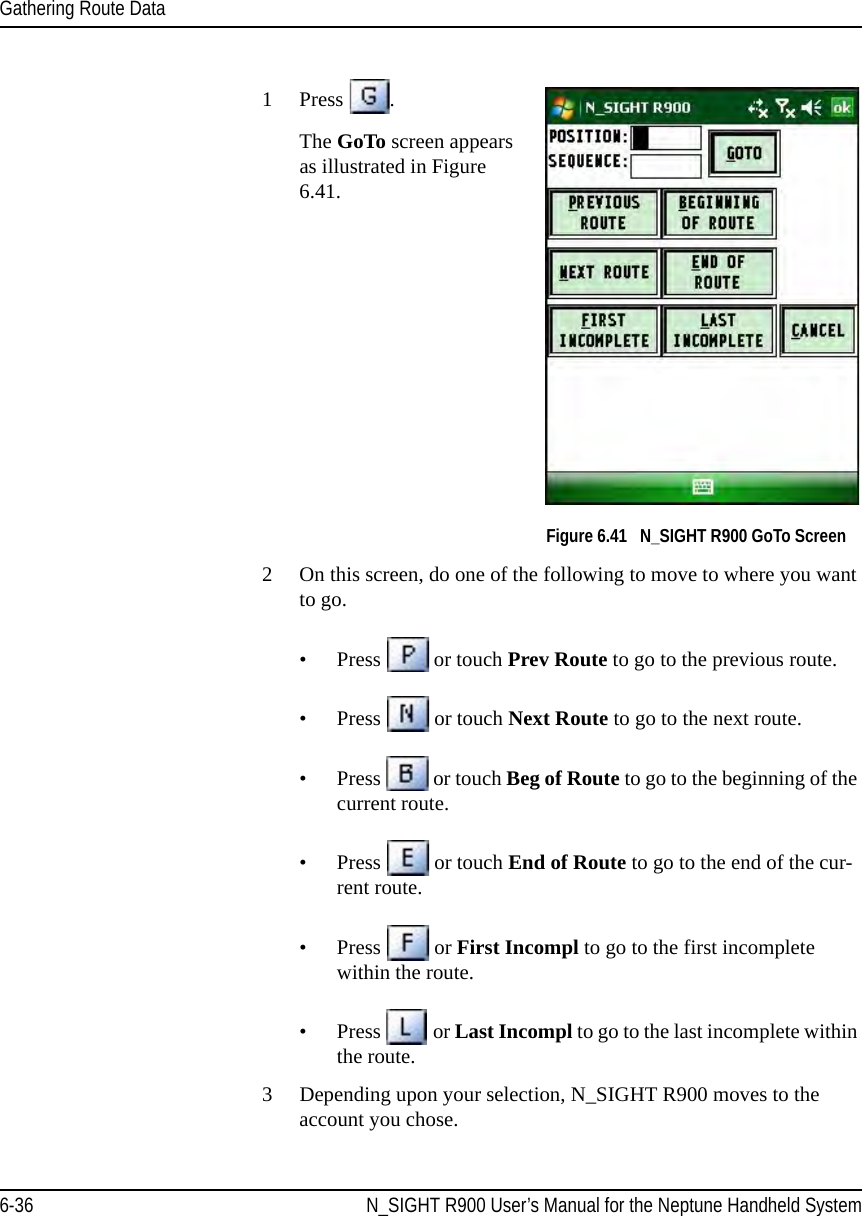
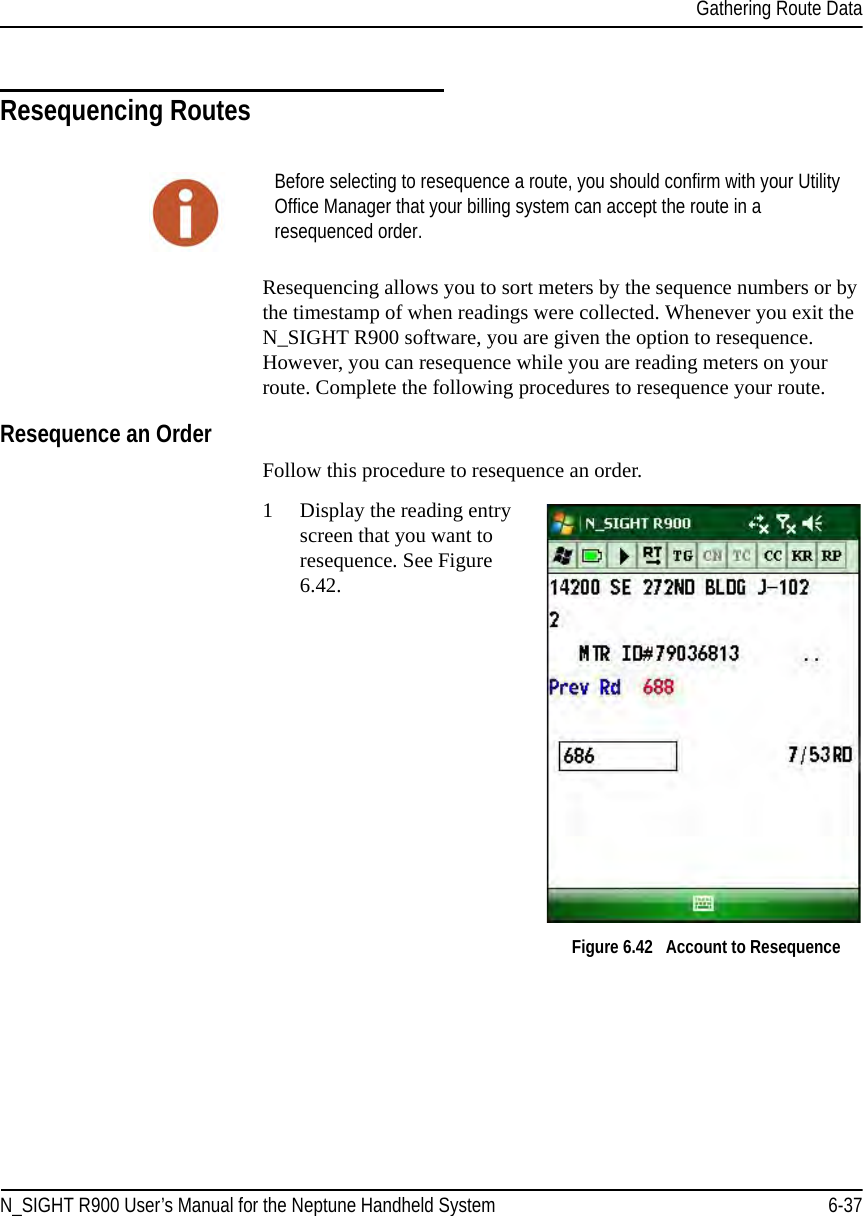
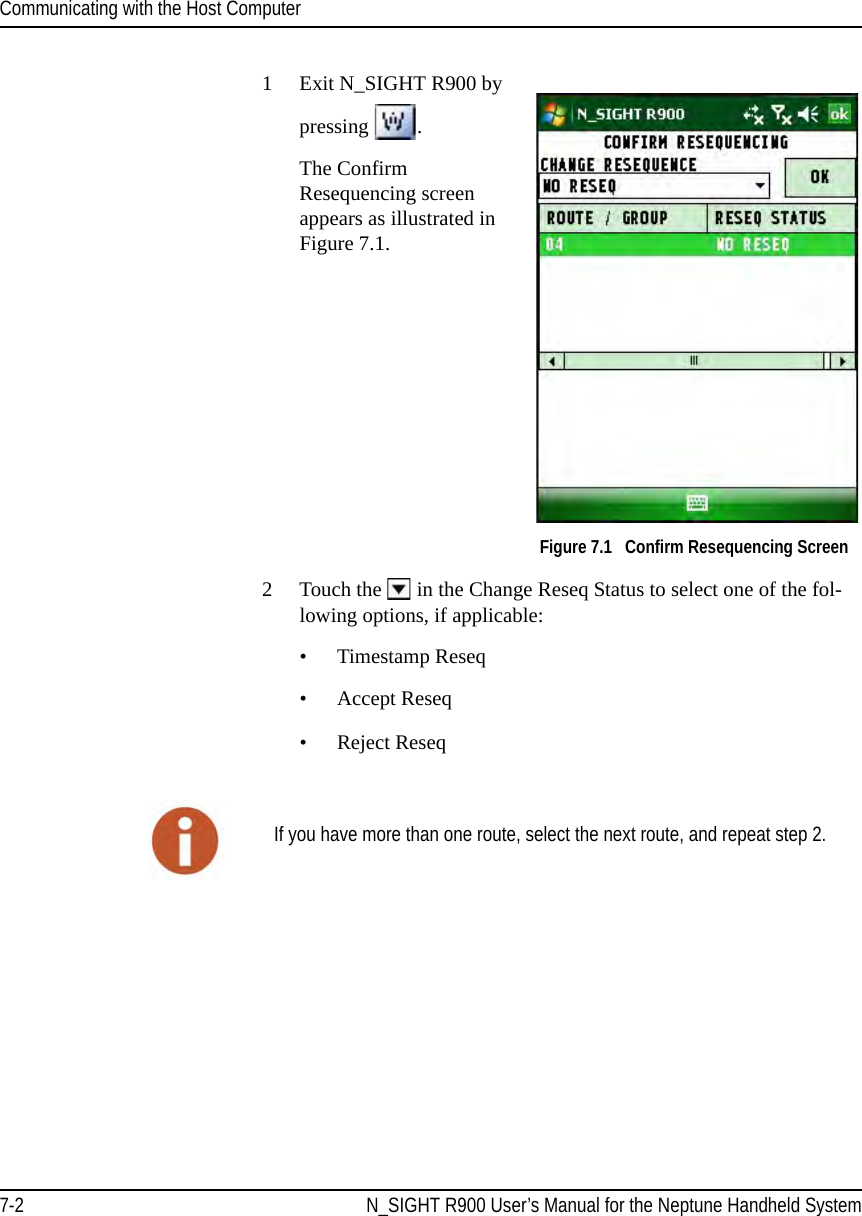
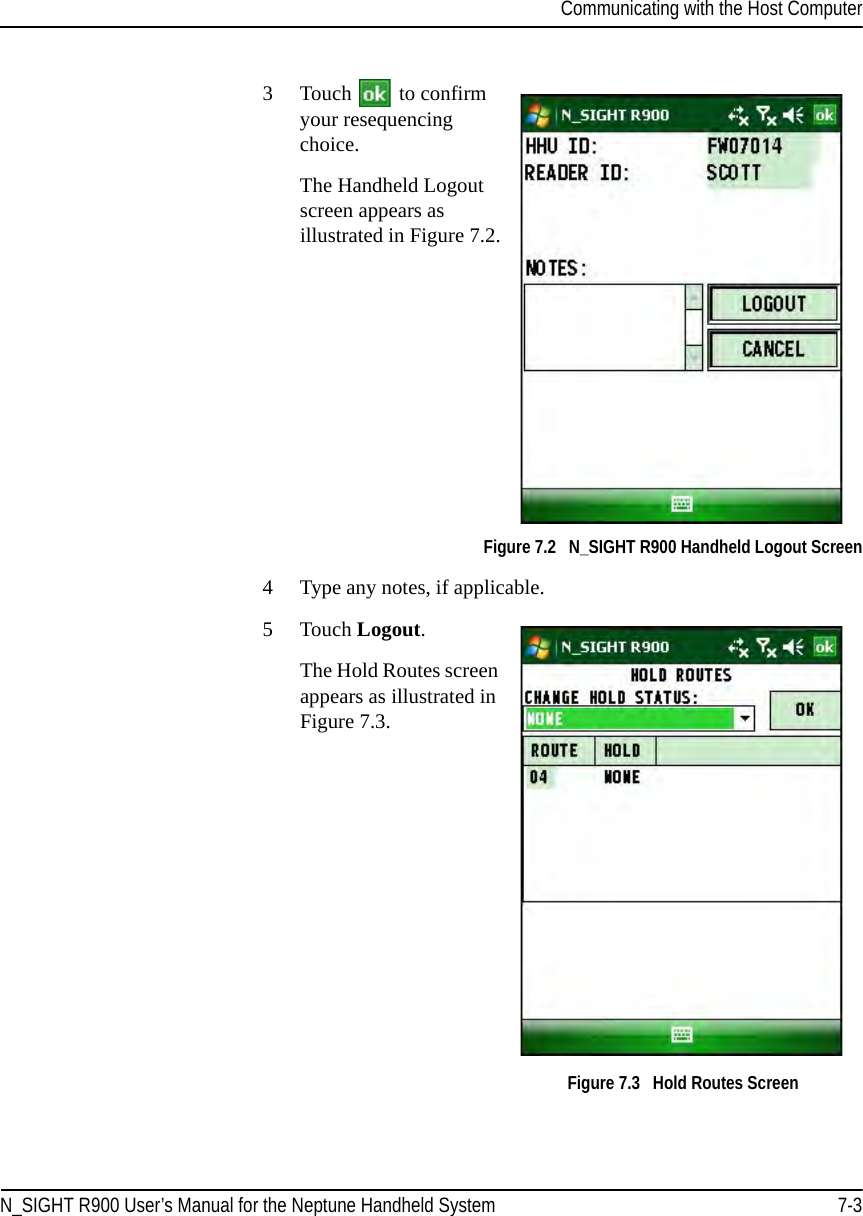
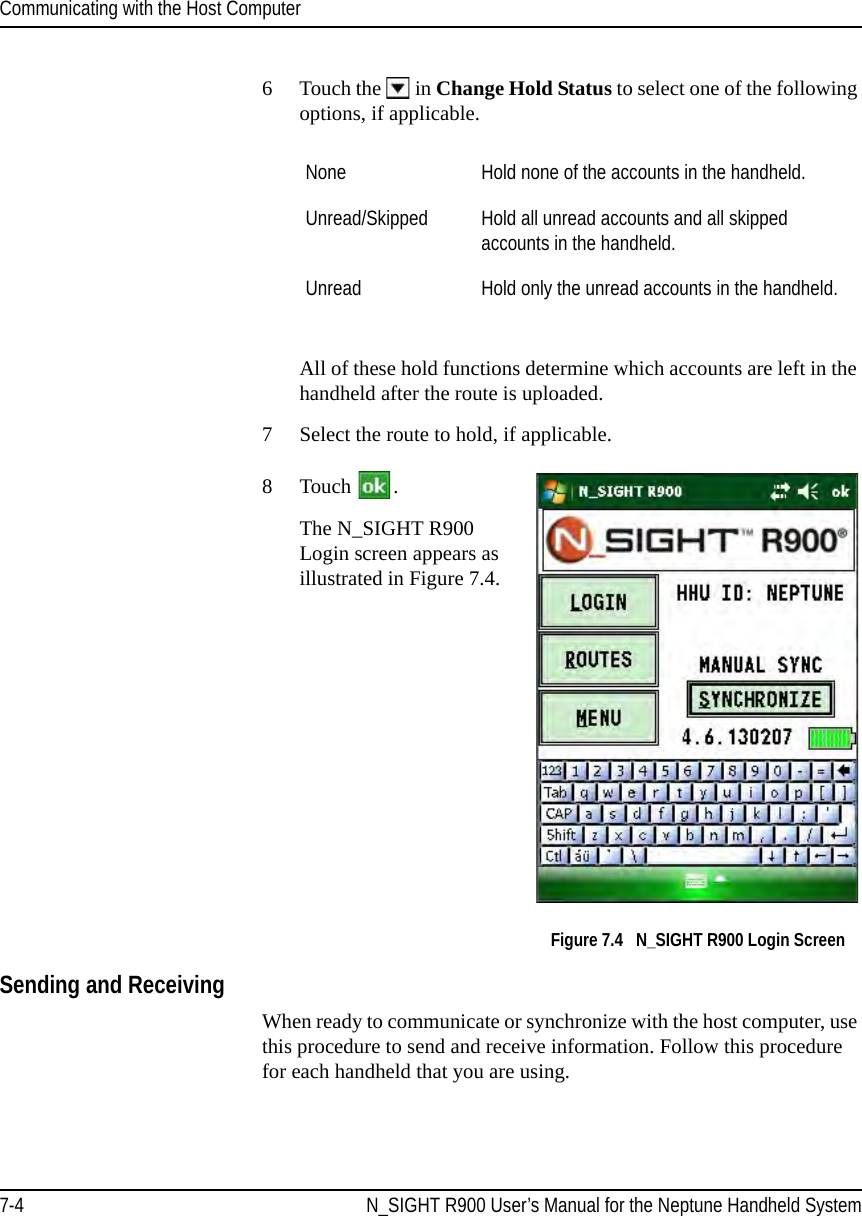
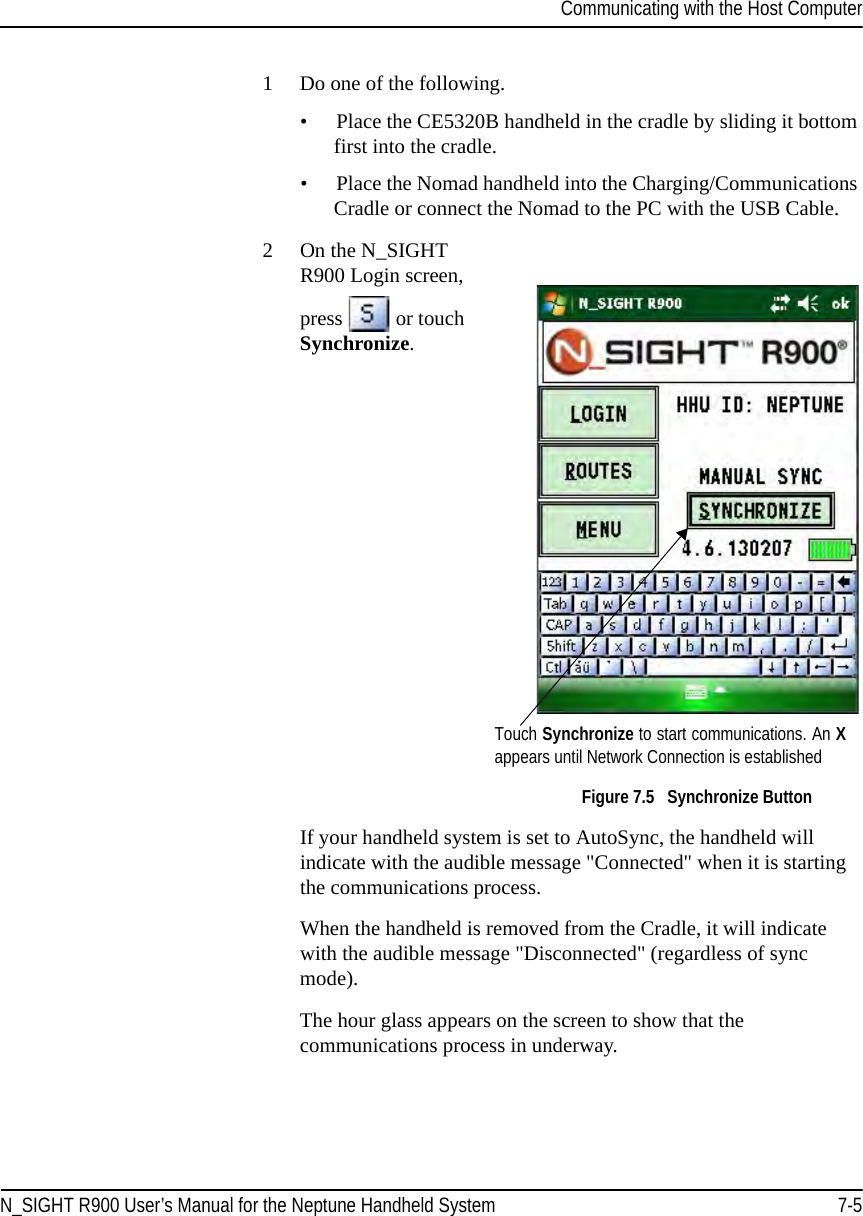
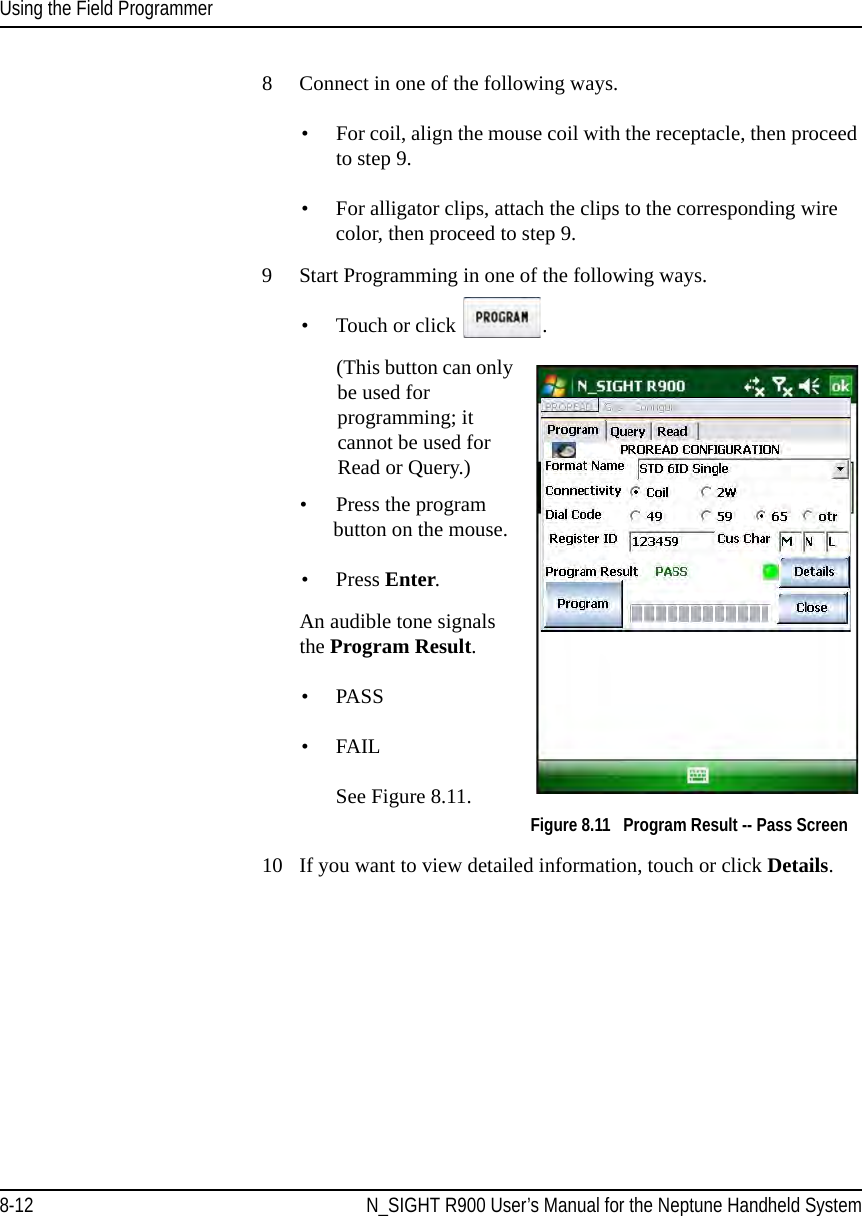
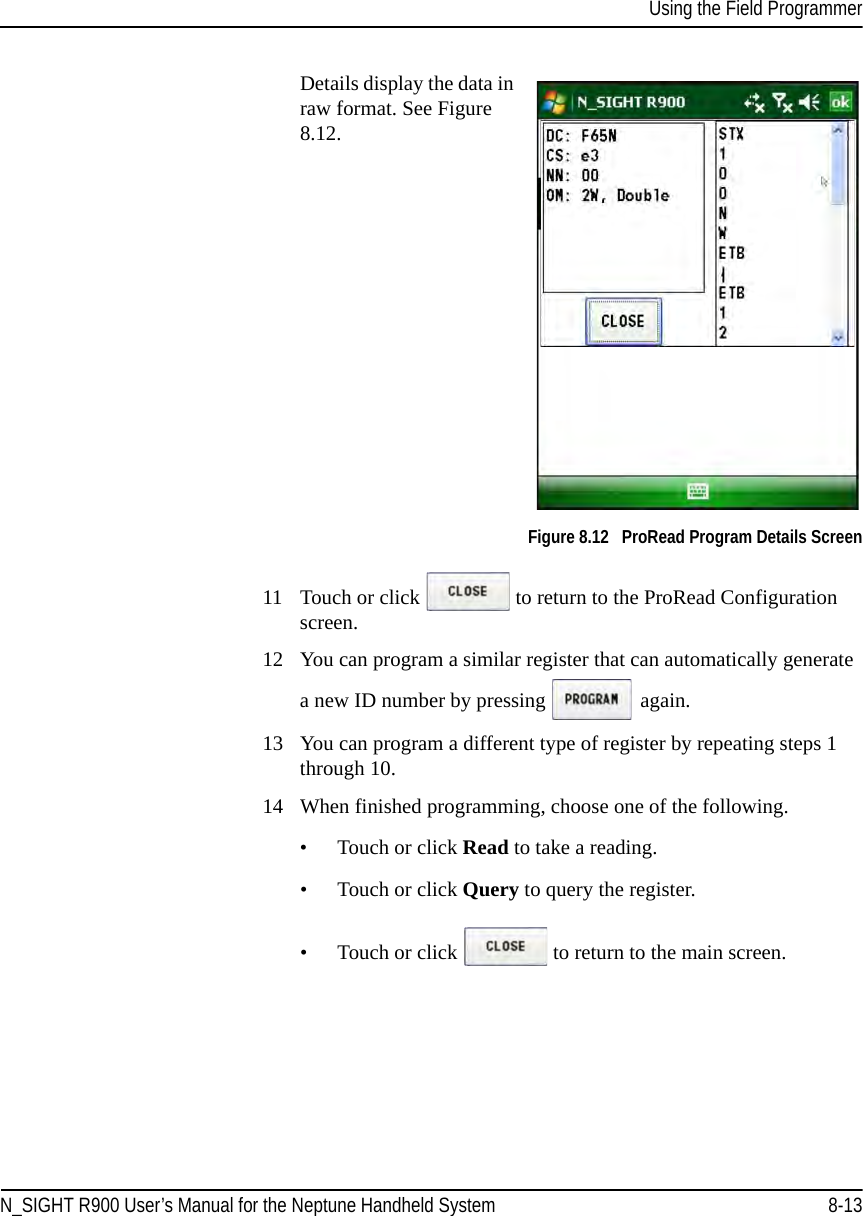
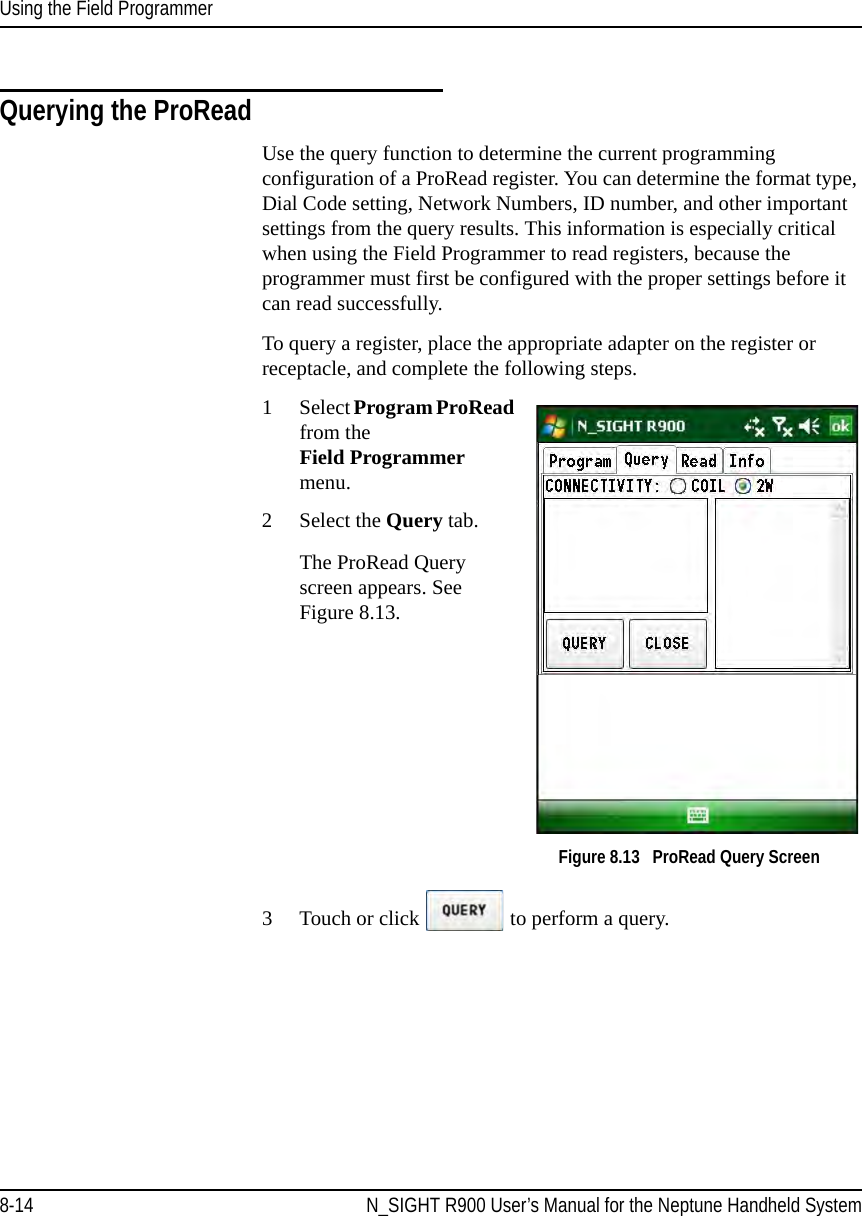
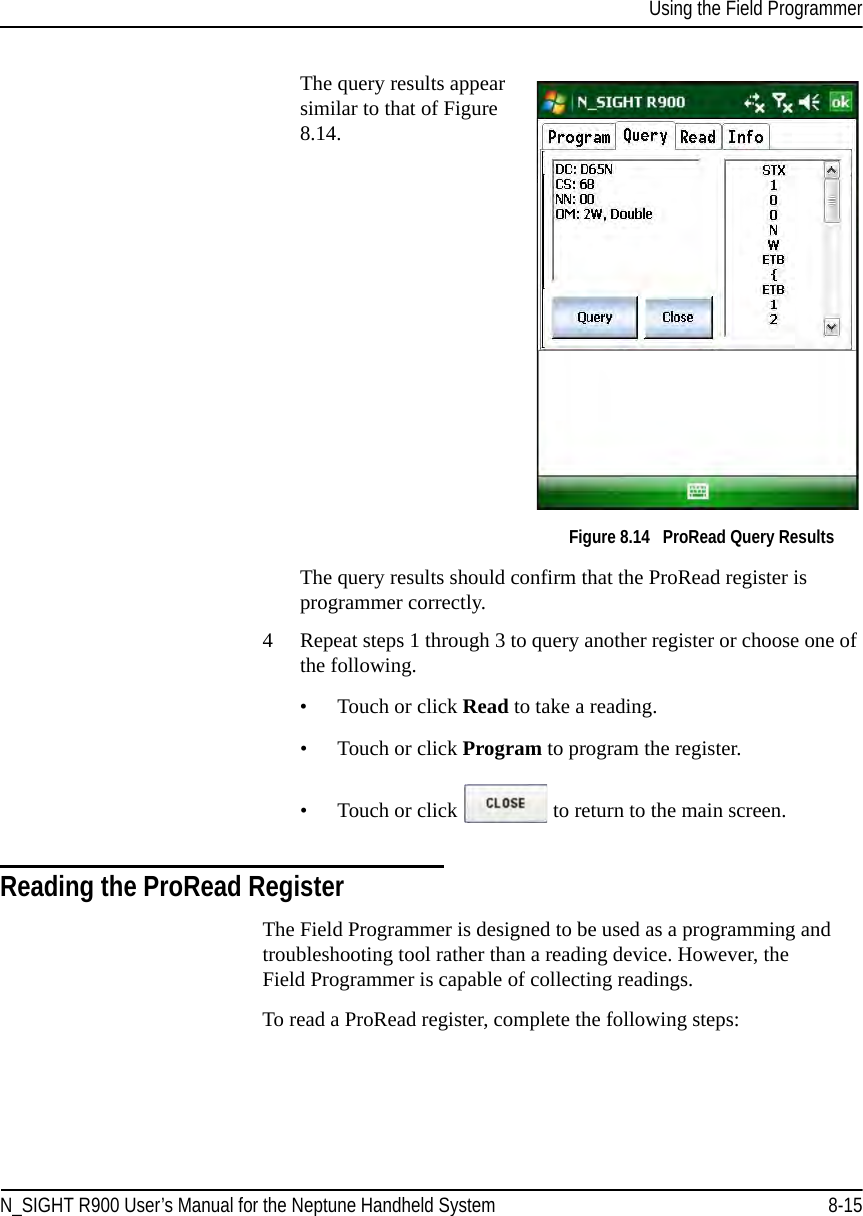
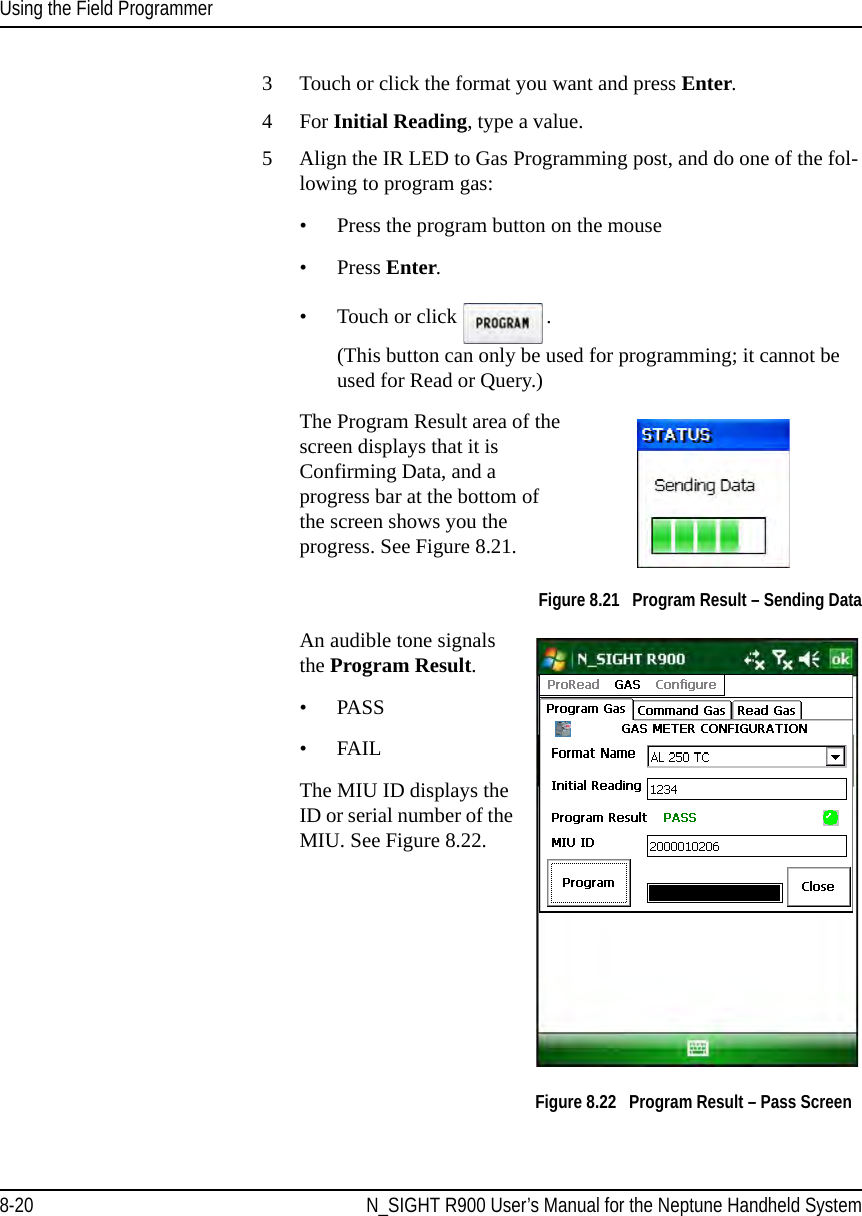
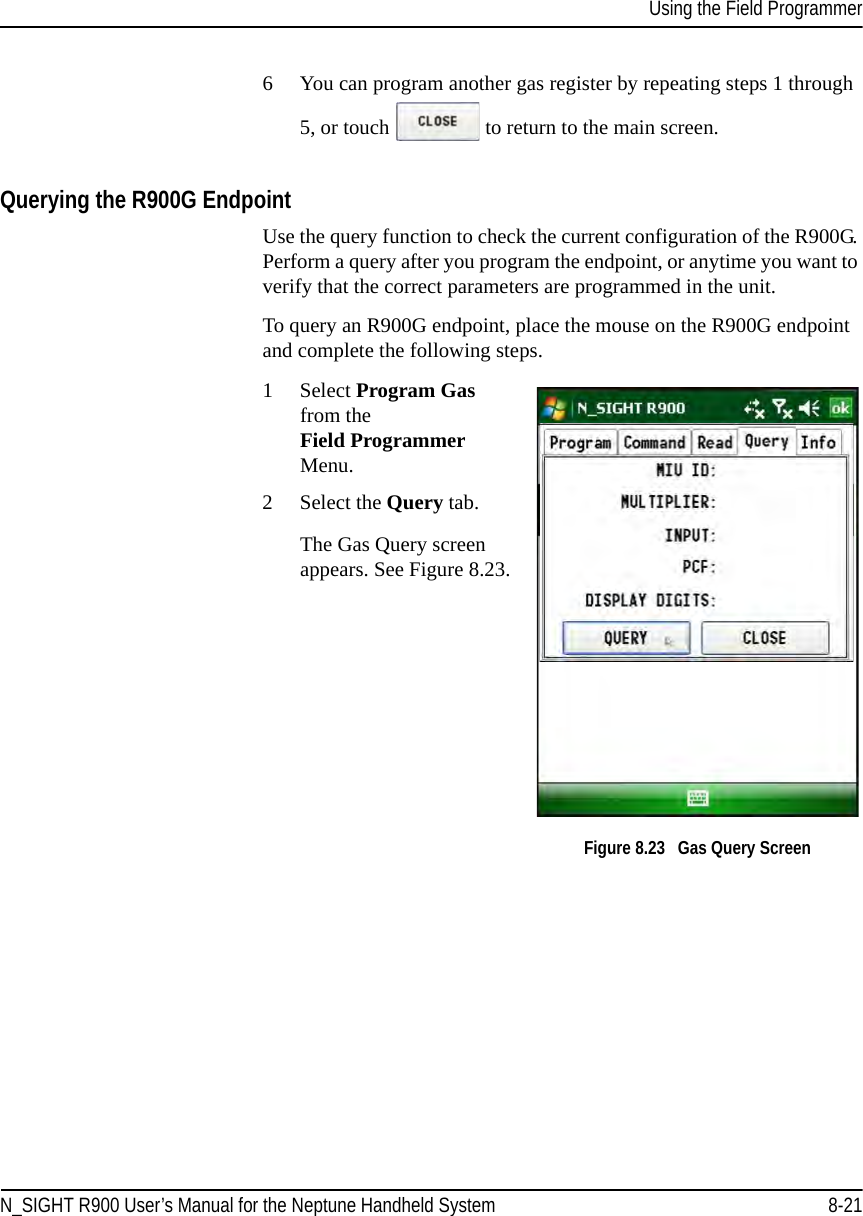
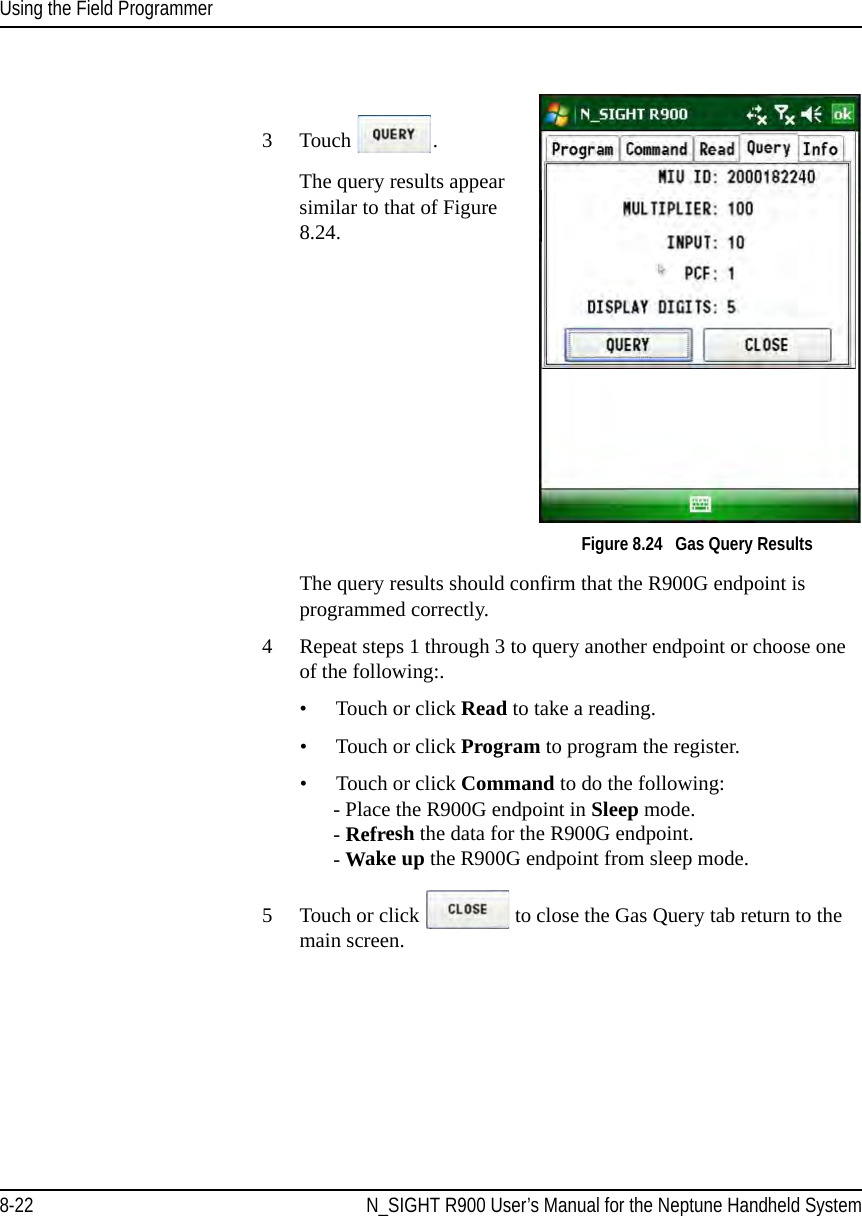
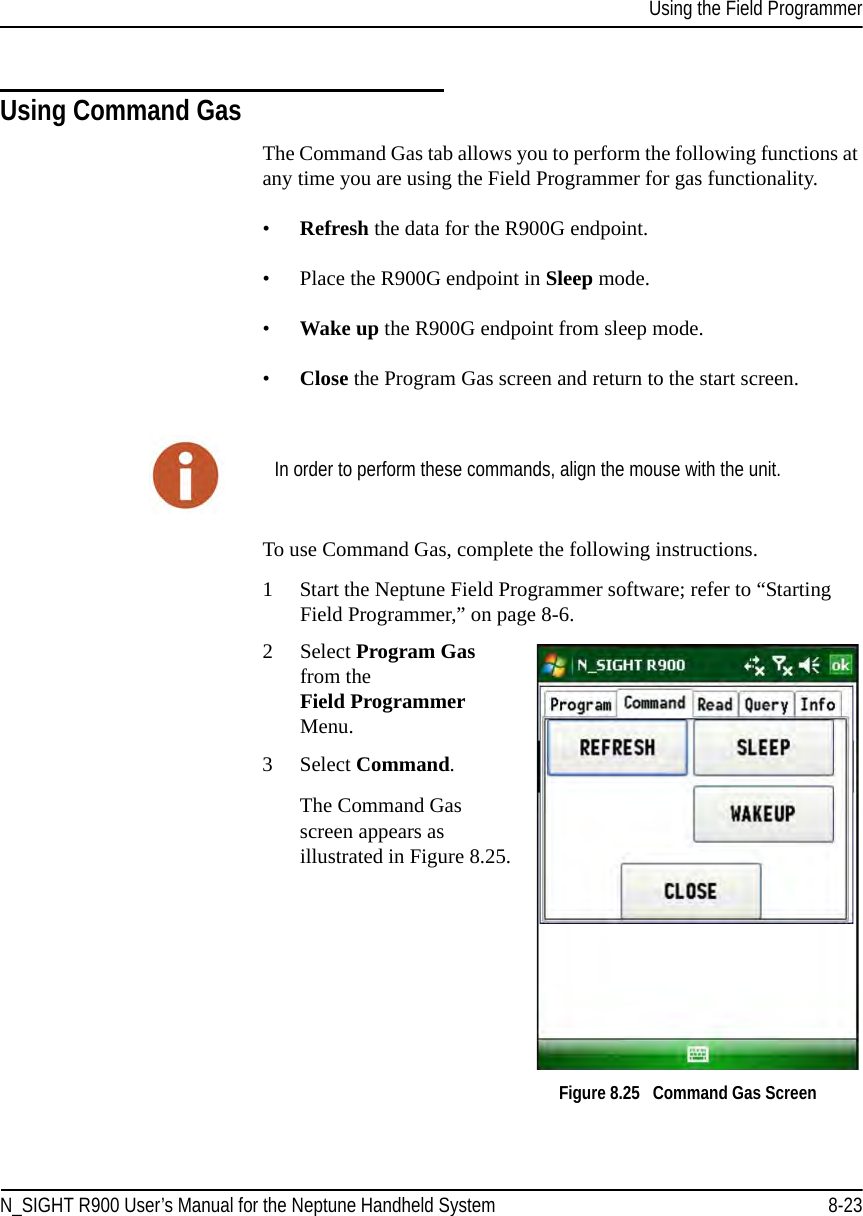
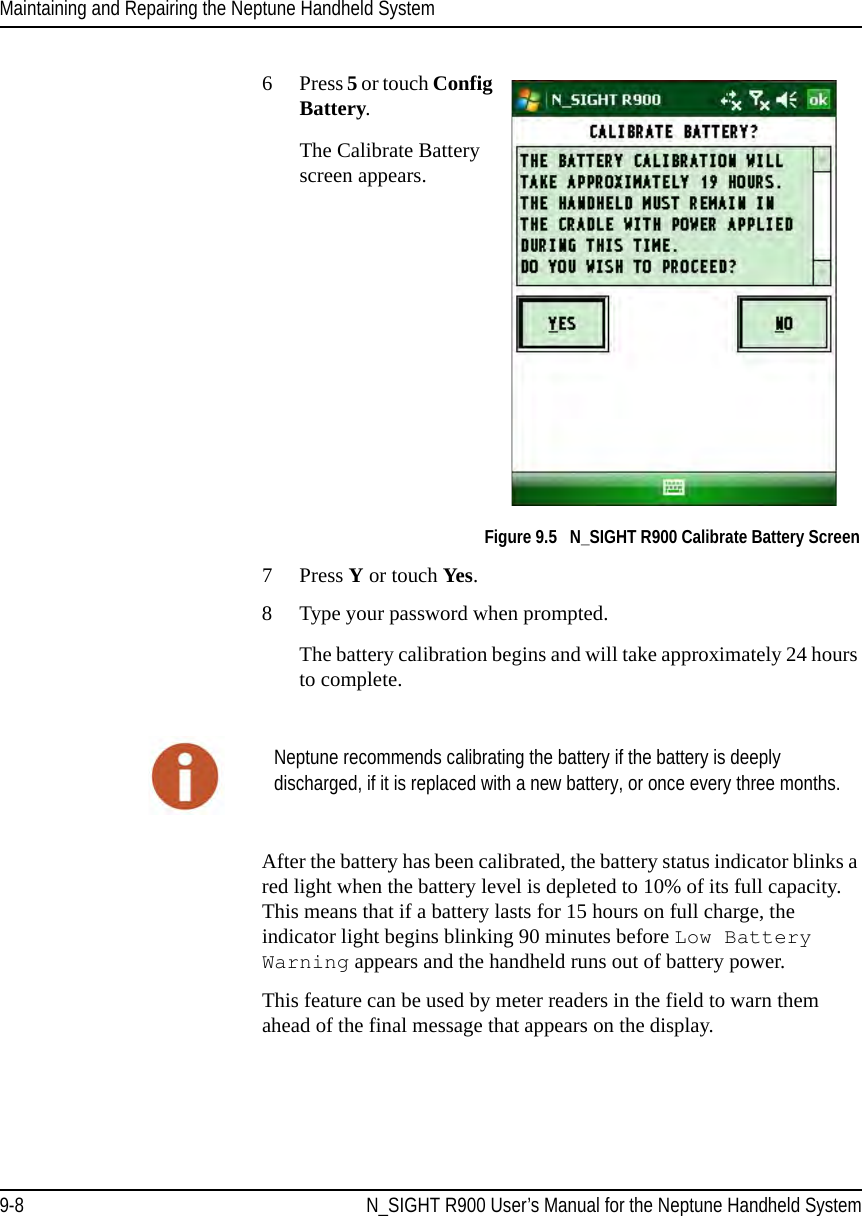
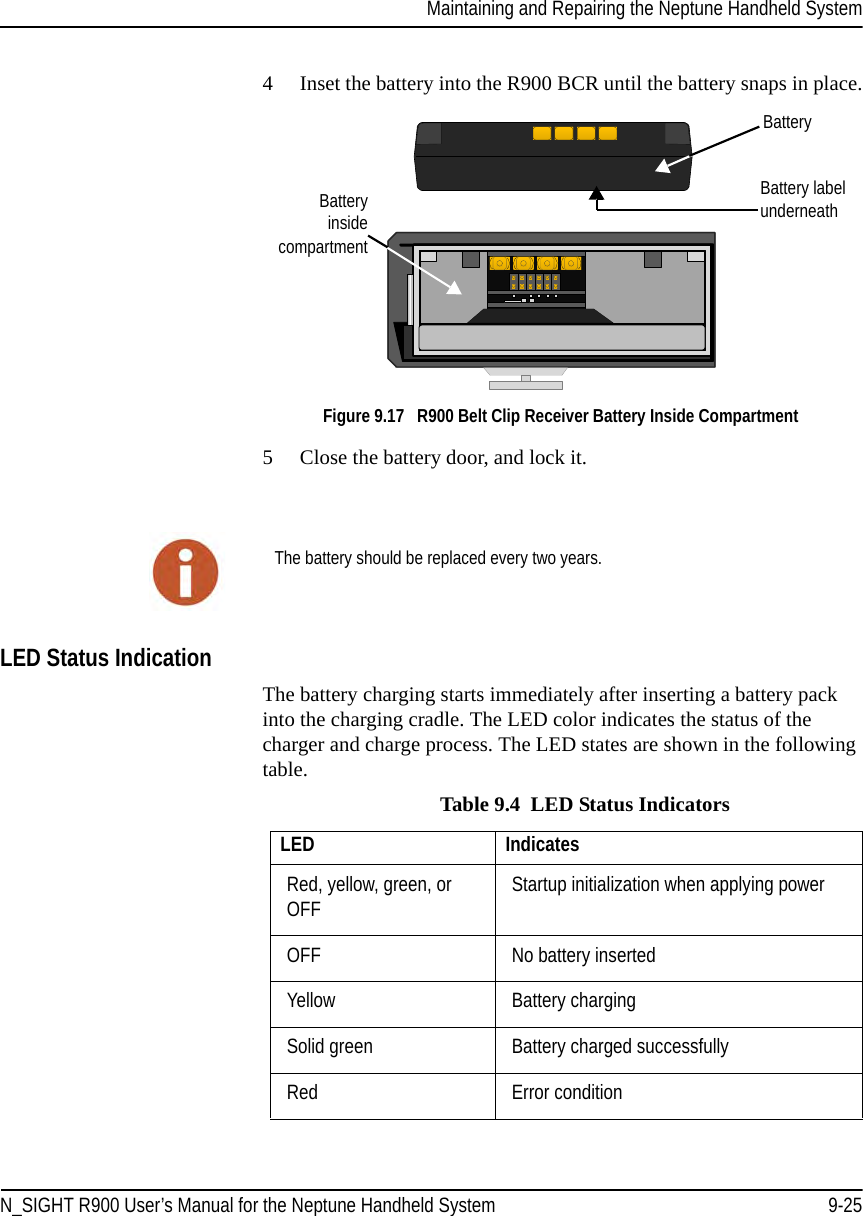
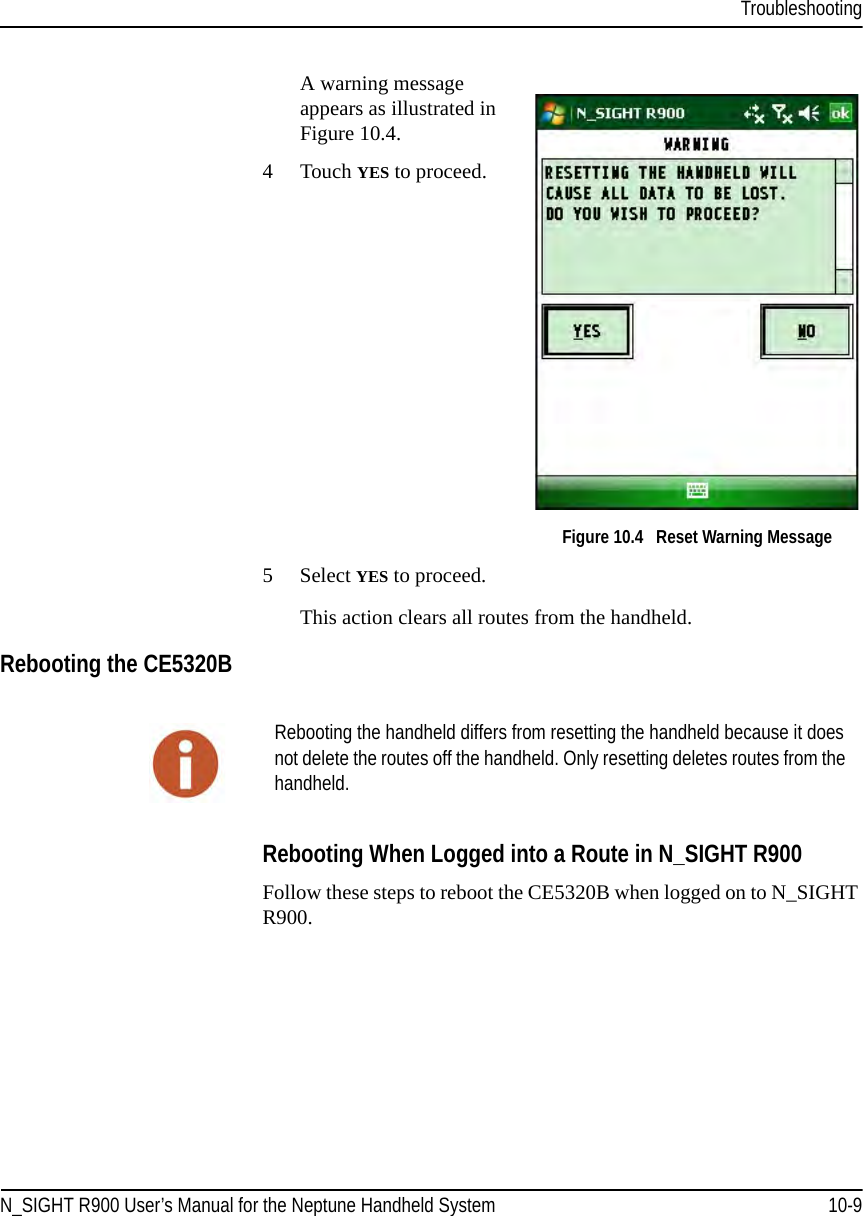
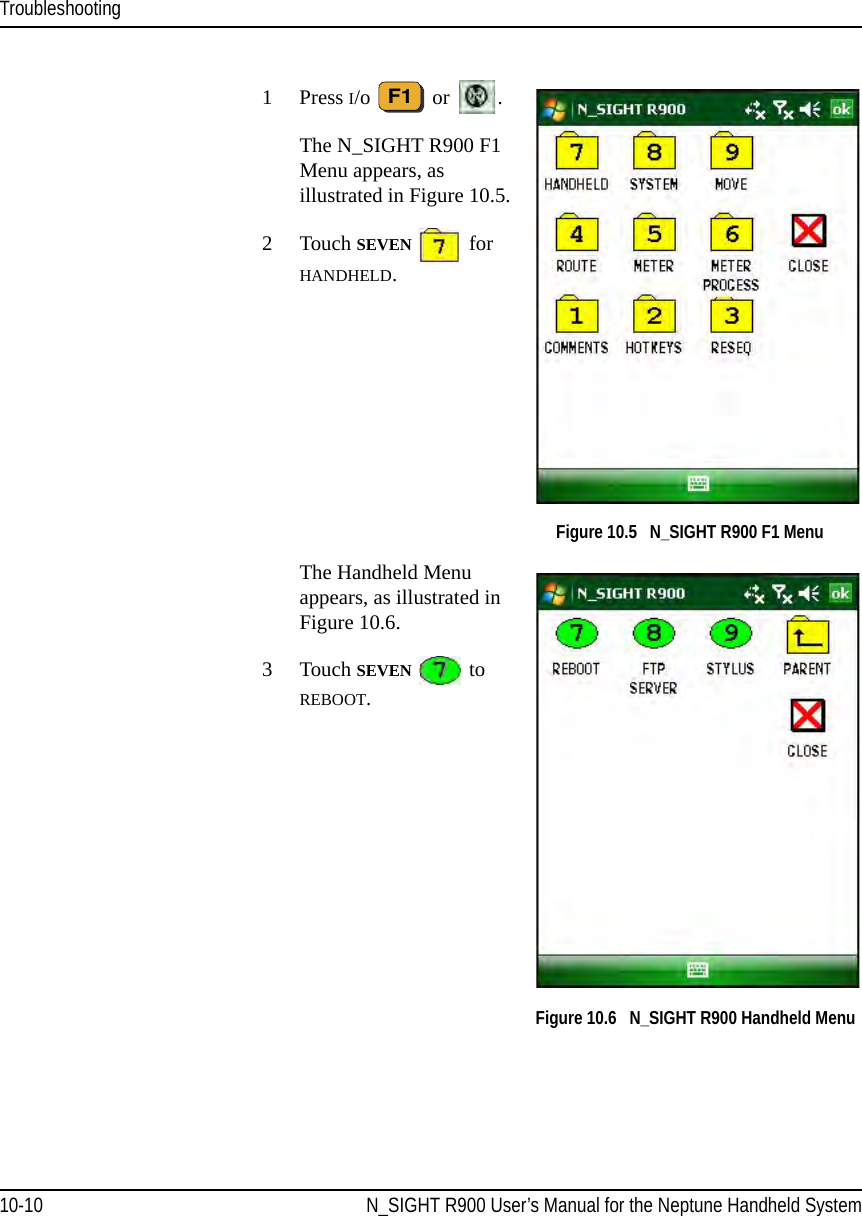
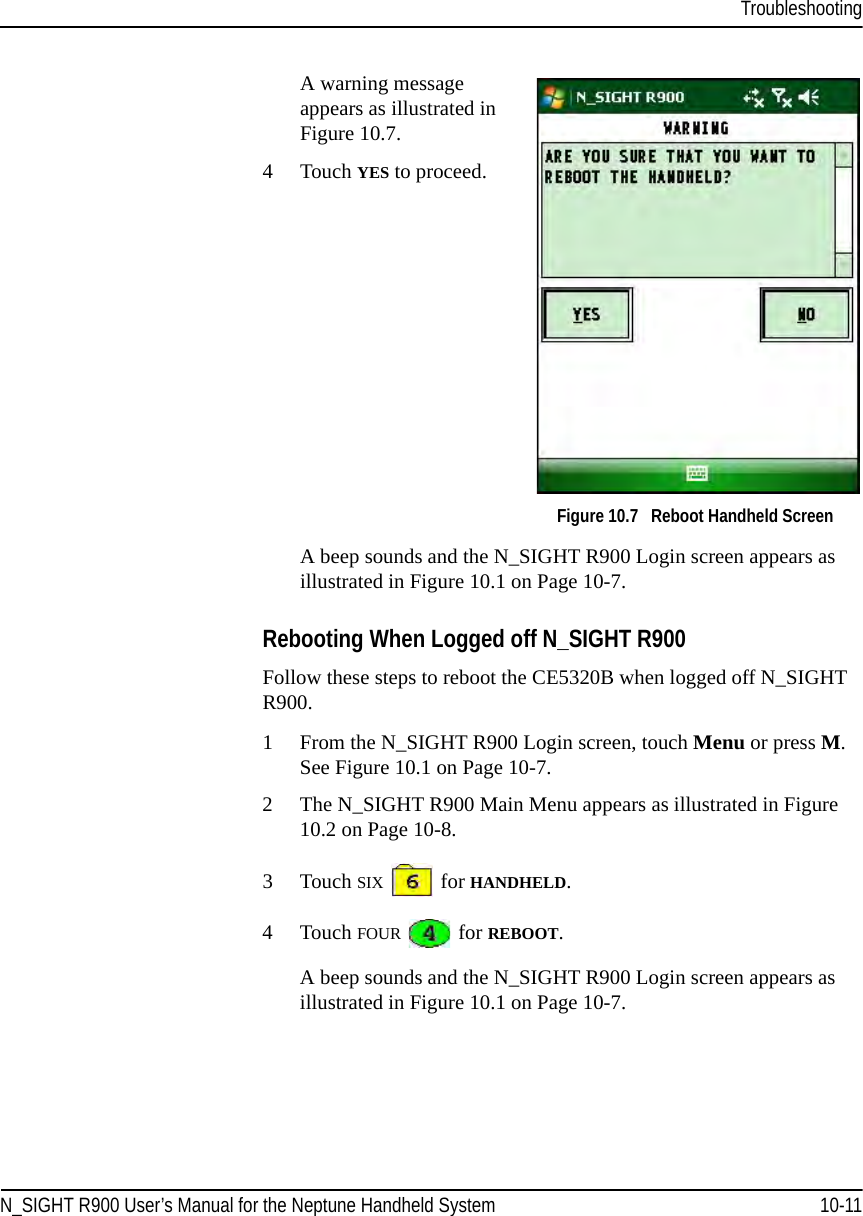
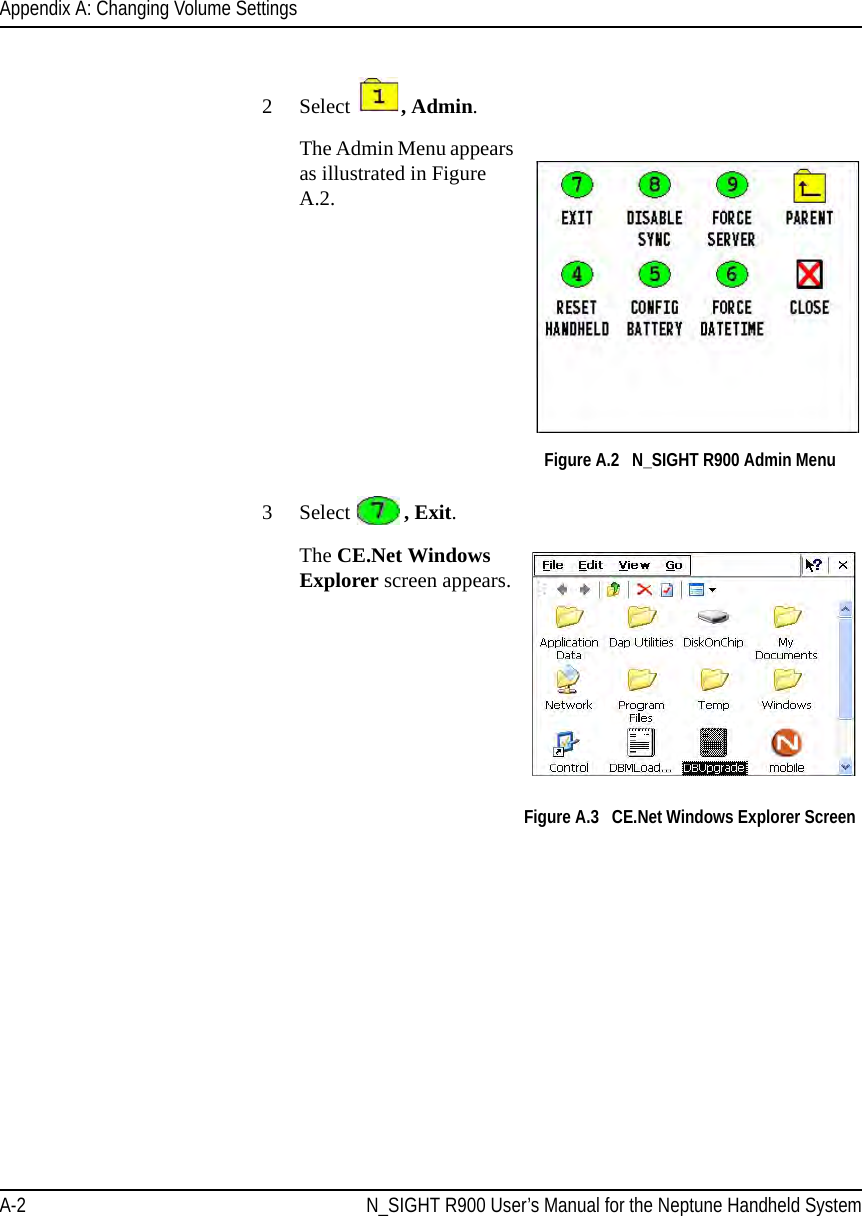
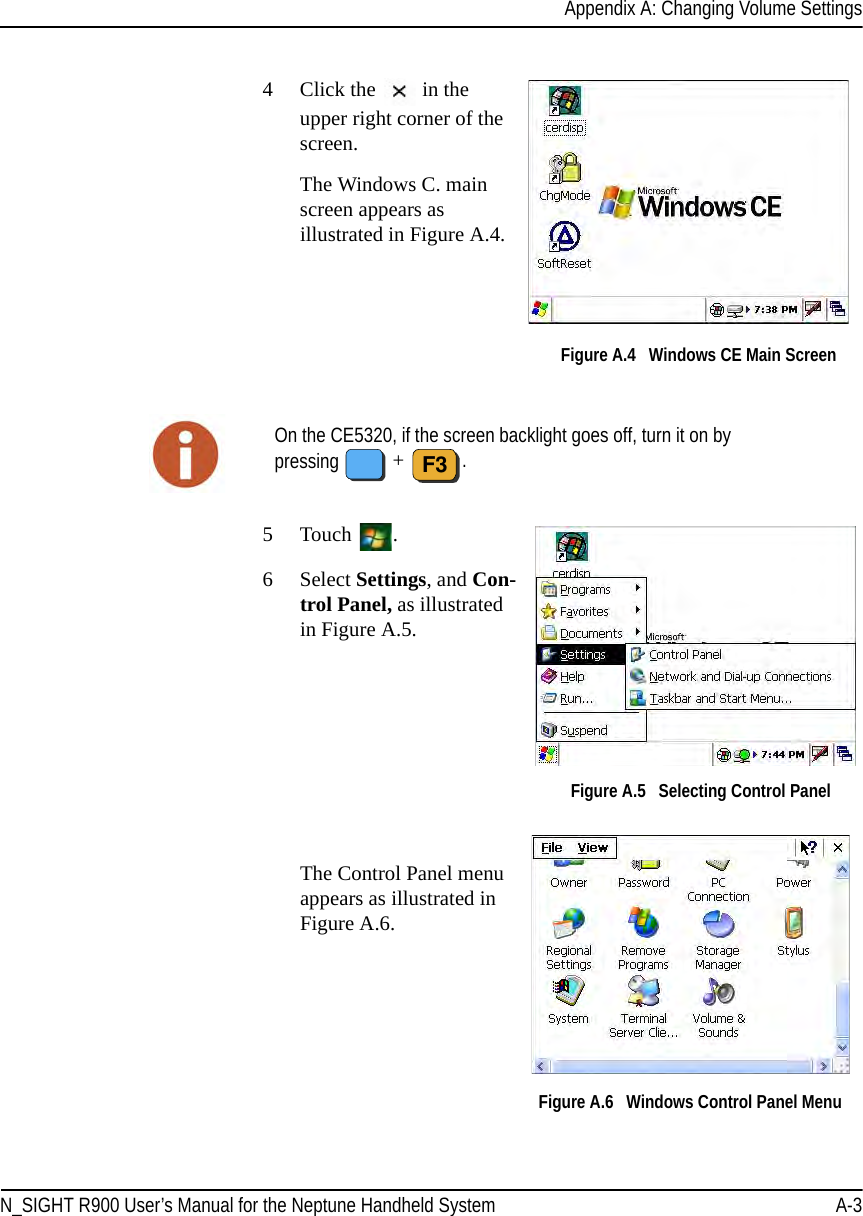
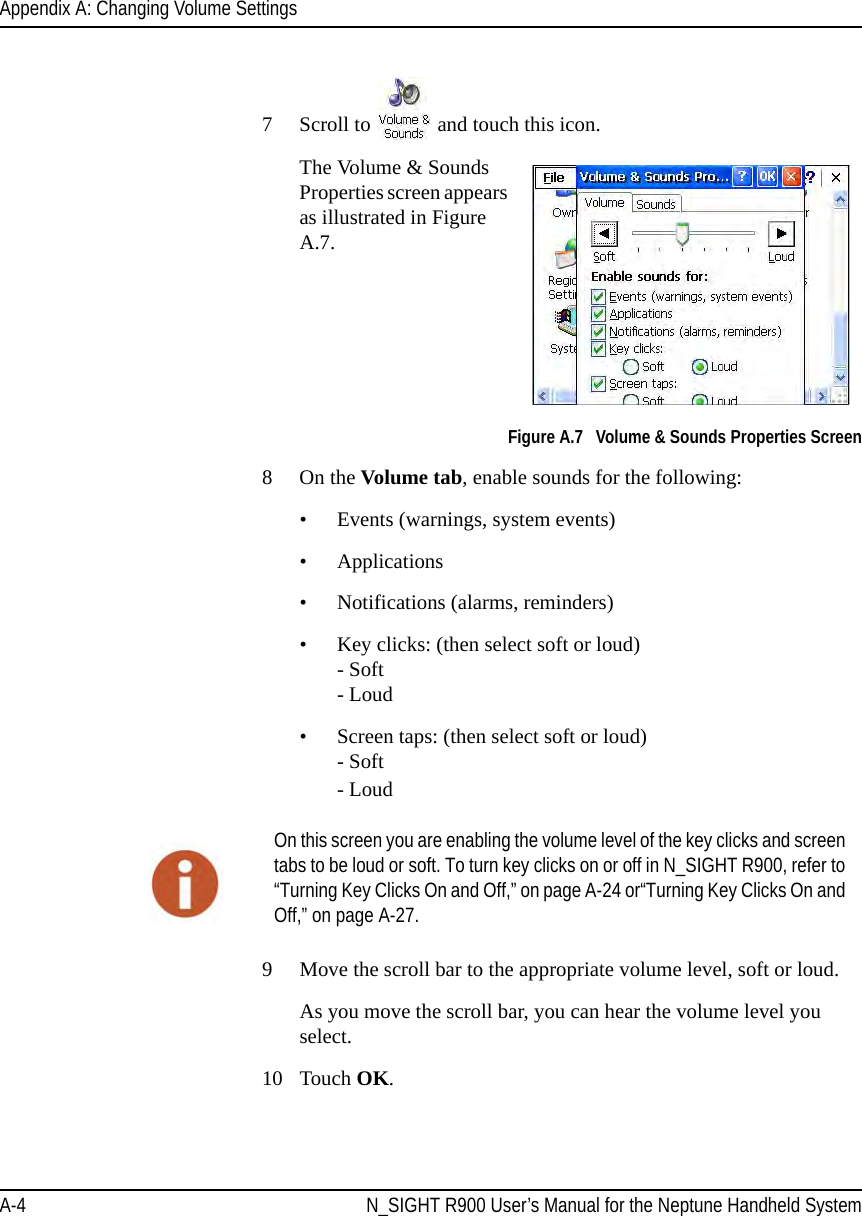
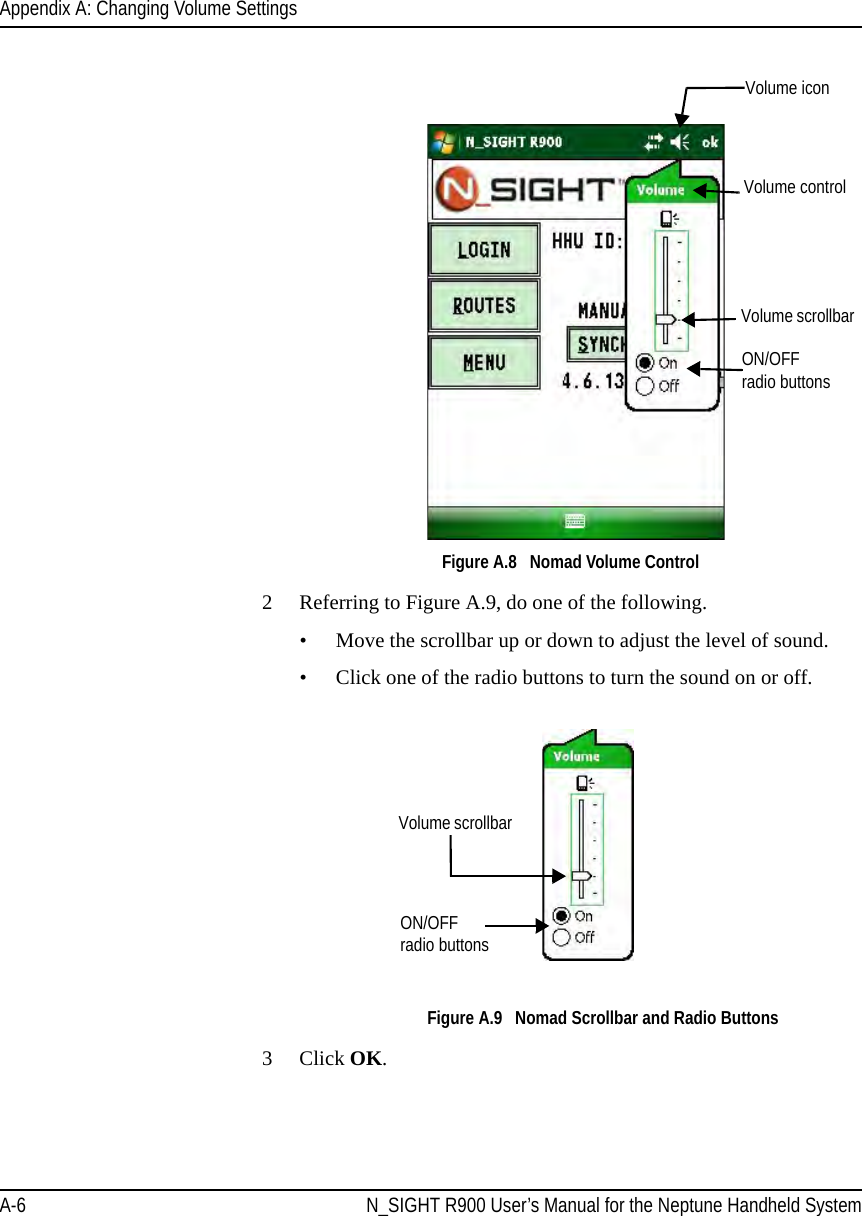
![Using the CE5320 HandheldN_SIGHT R900 User’s Manual for the Neptune Handheld System 3-17Allows you to access the Search screen where you can select criteria to look for information you need:• Coded note•Route• Meter number•Name• Meter type• Account status• Sequence number• Skip code• Instruction code• Account number• Constant•TagAllows you to access the GoTo screen. On this screen, you can access the following information for a meter or a route:• Position of the meter within the route• Sequence number of the meter• Previous route• Next route• Beginning of the route• End of the route• First incomplete read• Last incomplete readAllows you to view summary information about the route. When pressed with the CTL key, this key allows you to view screen information for the handheld, such as the version number, Internet Protocol (IP) Address, Random Access Memory (RAM), and storage.Allows you to enter a reading manually.Allow you enter List mode where the account addresses are presented in list form, a convenient way to browse through the accounts.F]G"I@K{L}](https://usermanual.wiki/Neptune-Technology-Group/BELTCLIPT/User-Guide-2311061-Page-80.png)