PENPOWER TECHNOLOGY INK01A MyInk User Manual XN205BT manual
PENPOWER TECHNOLOGY LTD. MyInk XN205BT manual
UserManual.wiki
>
PENPOWER TECHNOLOGY
>
INK01A User Manual
User Manual
Navigation menu
Upload a User Manual
Namespaces
Wiki Guide
HTML
PDF
Info
Views
User Manual
Discussion / Help
Navigation

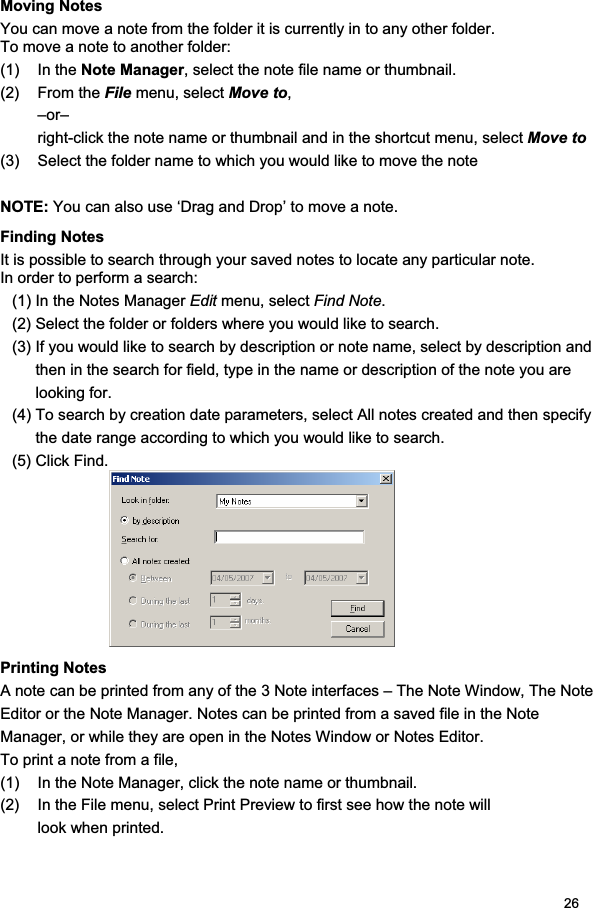
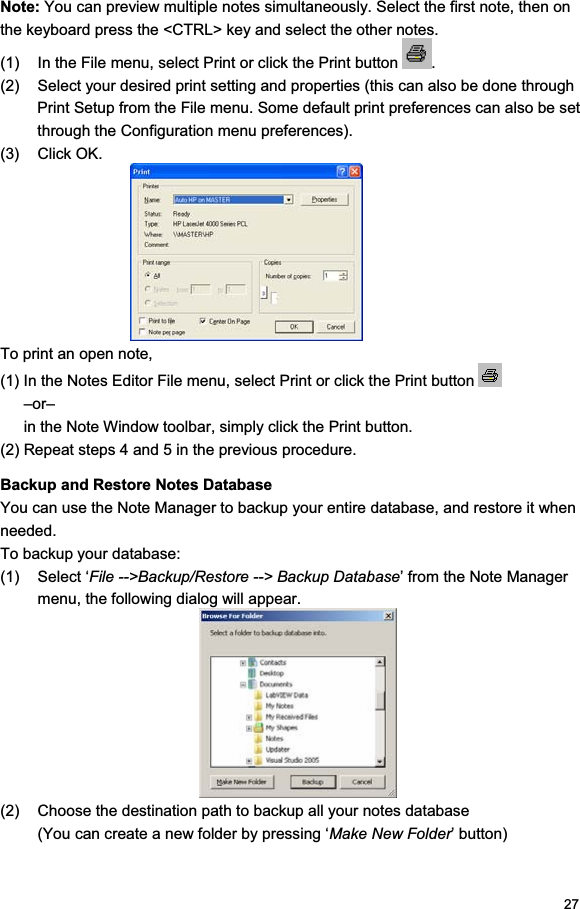
![28(3) Click the ‘Backup’ button, Upon a successful backup, the following message appears: To restore your database: (1) Select ‘File -->Backup/Restore --> Restore Database’ from the Note Manager menu, the following dialog will appear. (2) Choose the location of your database backup] (3) Click the ‘Restore’ button. (4) Upon a successful restore, your database will be restores to a new folder in the Note Manager. This new folder will be named ‘Restored database’ and will also be according to the restoring date and time. Setting Your Preferences Set your default preferences such as note color, auto-save options, print preferences, etc. in the Preferences dialog box. The dialog box is divided into three tabs, each controlling a different aspect of the system: General, Printing, and Ink. To access Preferences:](https://usermanual.wiki/PENPOWER-TECHNOLOGY/INK01A/User-Guide-1925321-Page-28.png)