Palm 710000 1900MHz GSM/GPRS PDA Communicator User Manual 2 of 2
Palm Inc 1900MHz GSM/GPRS PDA Communicator 2 of 2
UserManual.wiki
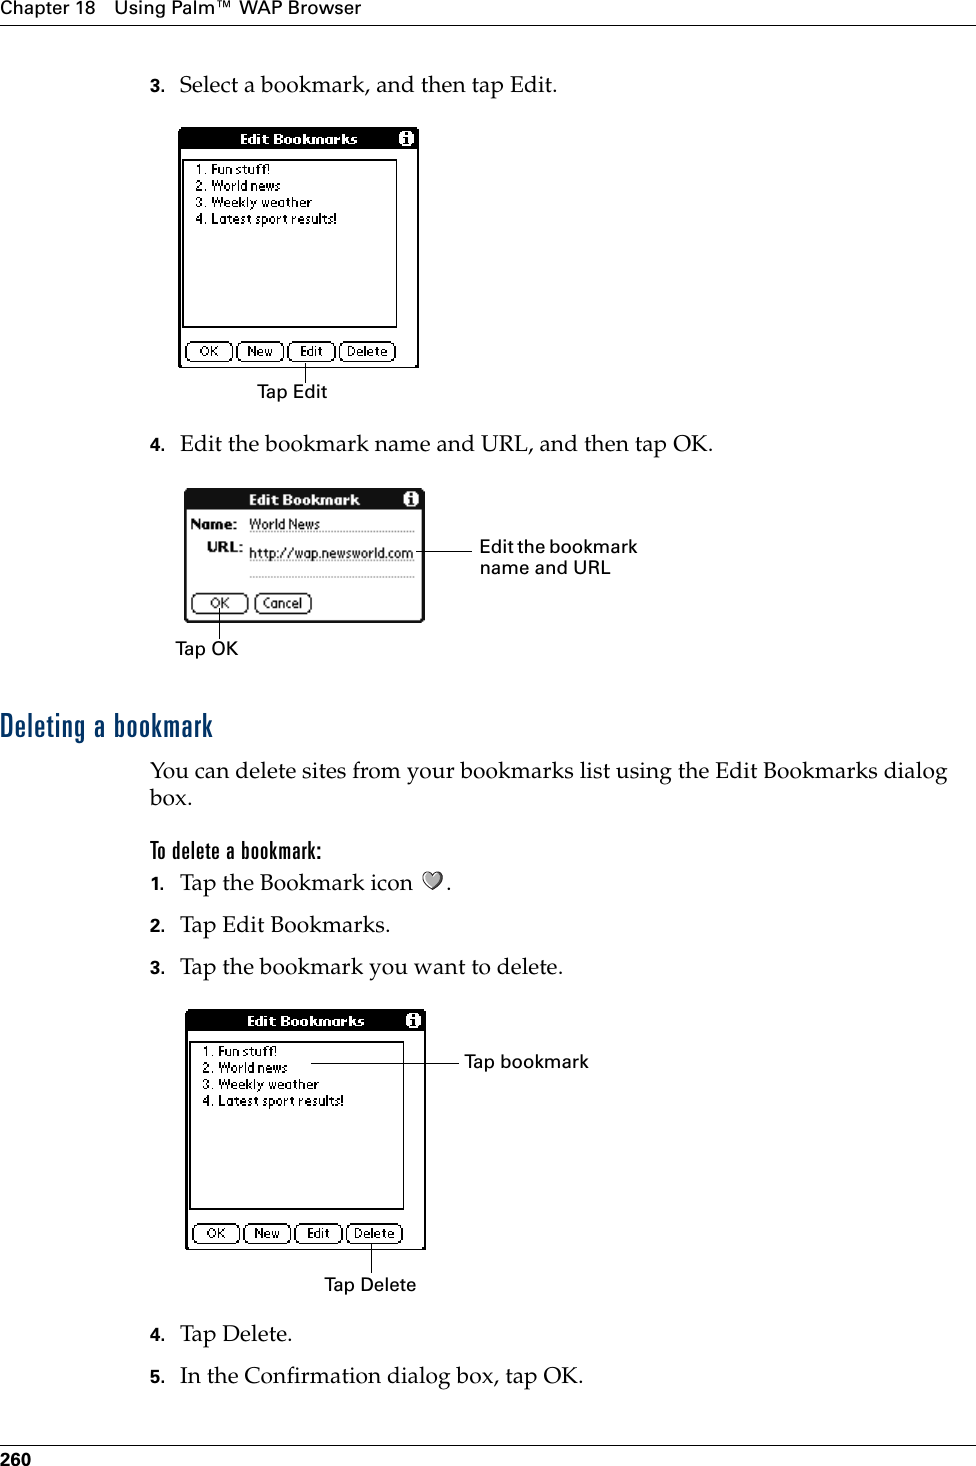
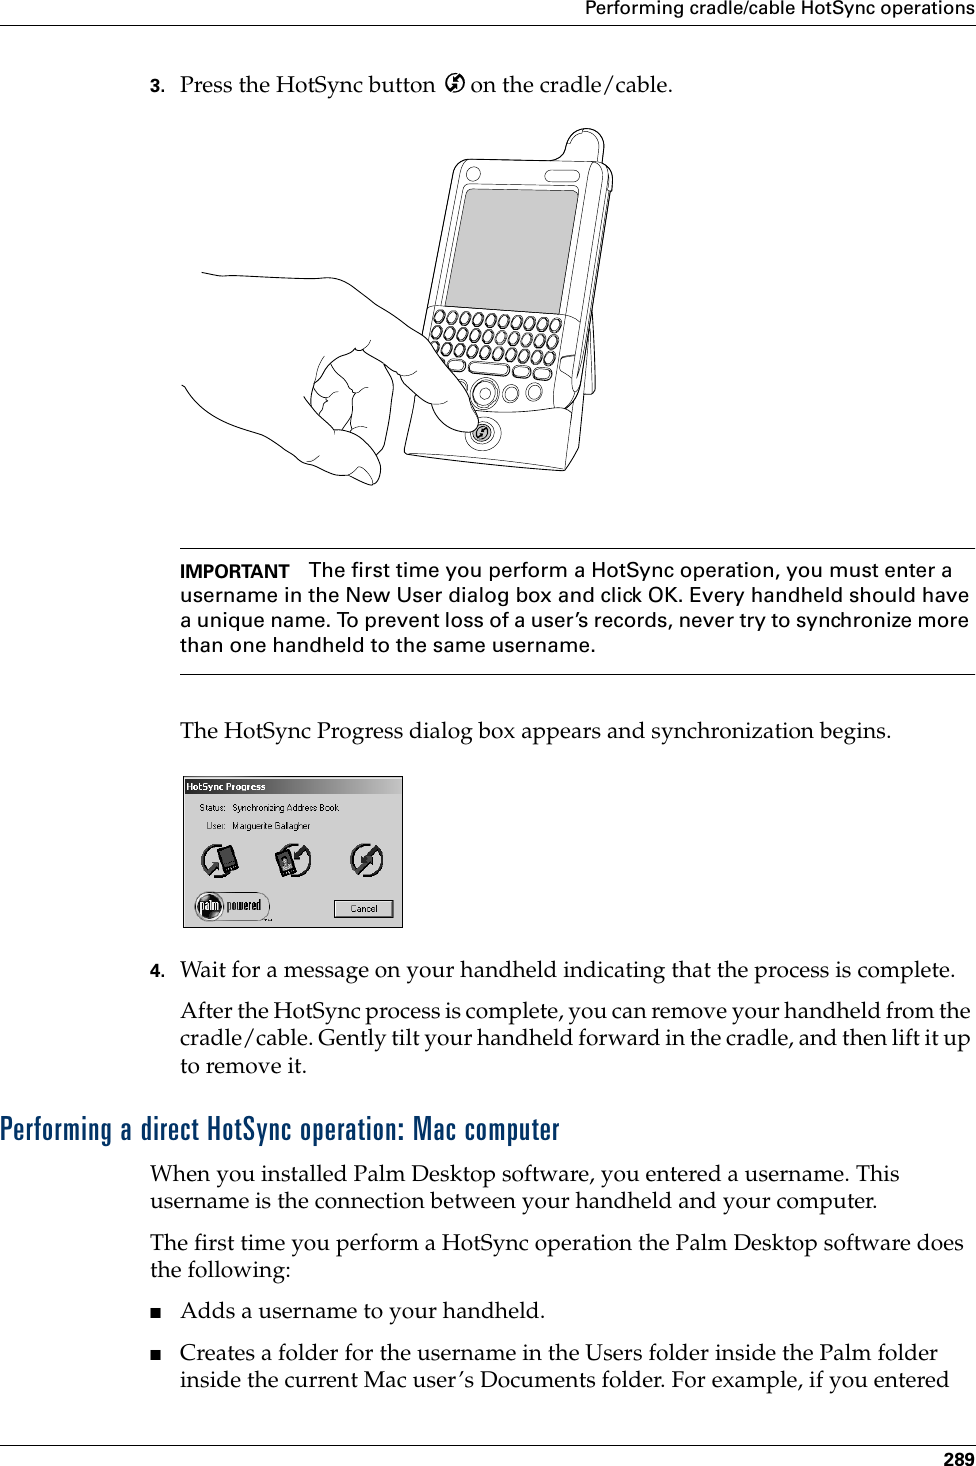
>
Palm
>
710000 User Manual
>
User Manual 2 of 2
Contents
1.
User Manual 1 of 2
2.
User Manual 2 of 2
3.
CRN 5889 question 1
User Manual 2 of 2
Navigation menu
Upload a User Manual
Namespaces
Wiki Guide
HTML
PDF
Info
Views
User Manual
Discussion / Help
Navigation

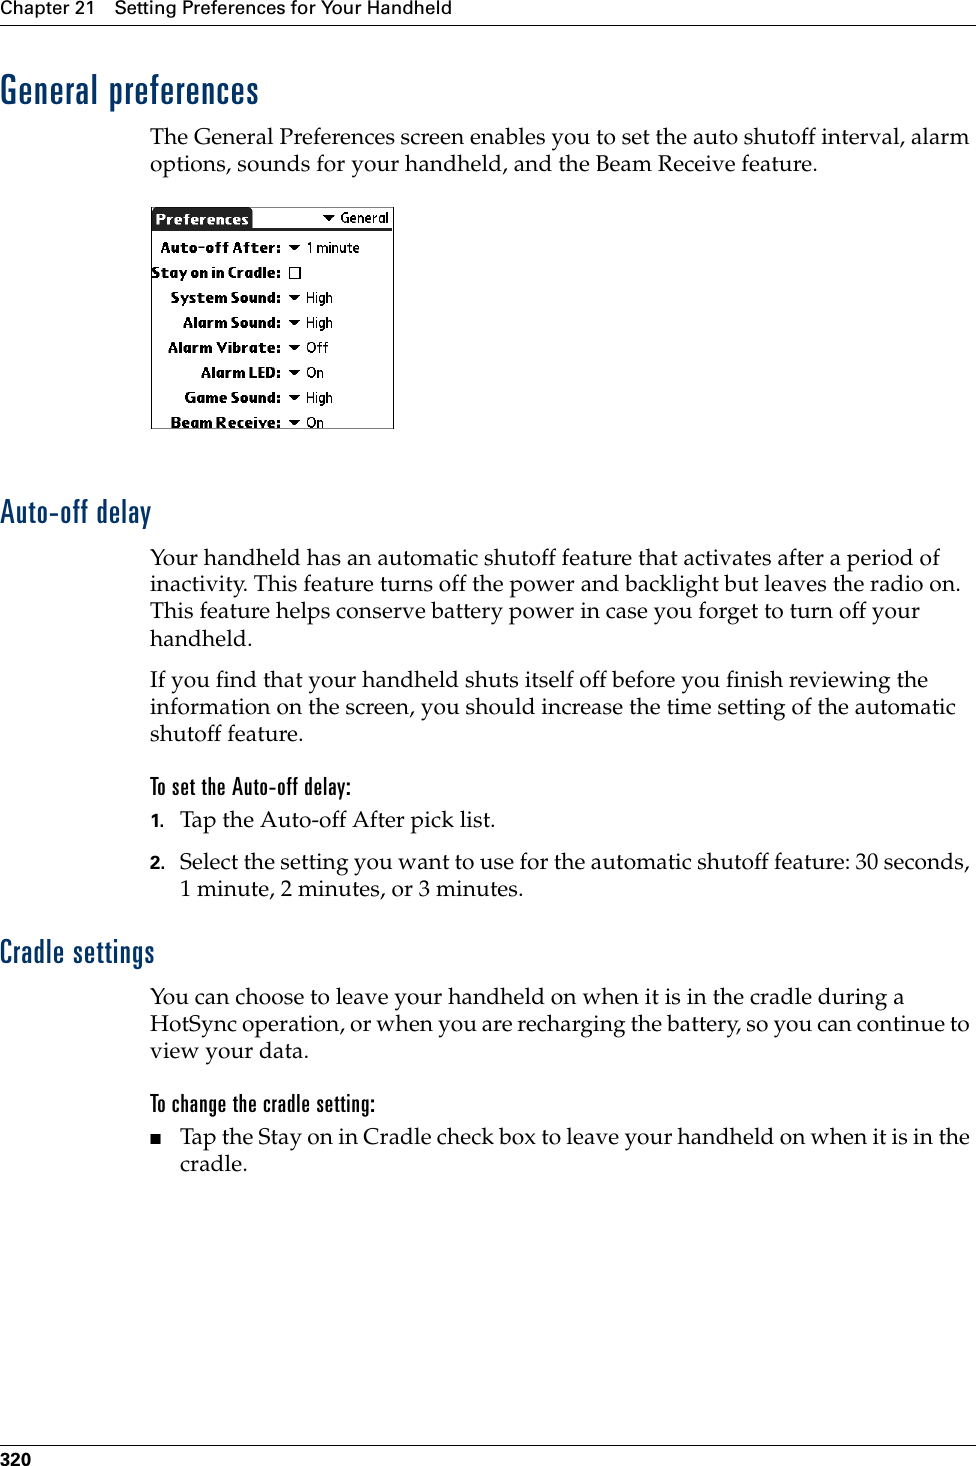
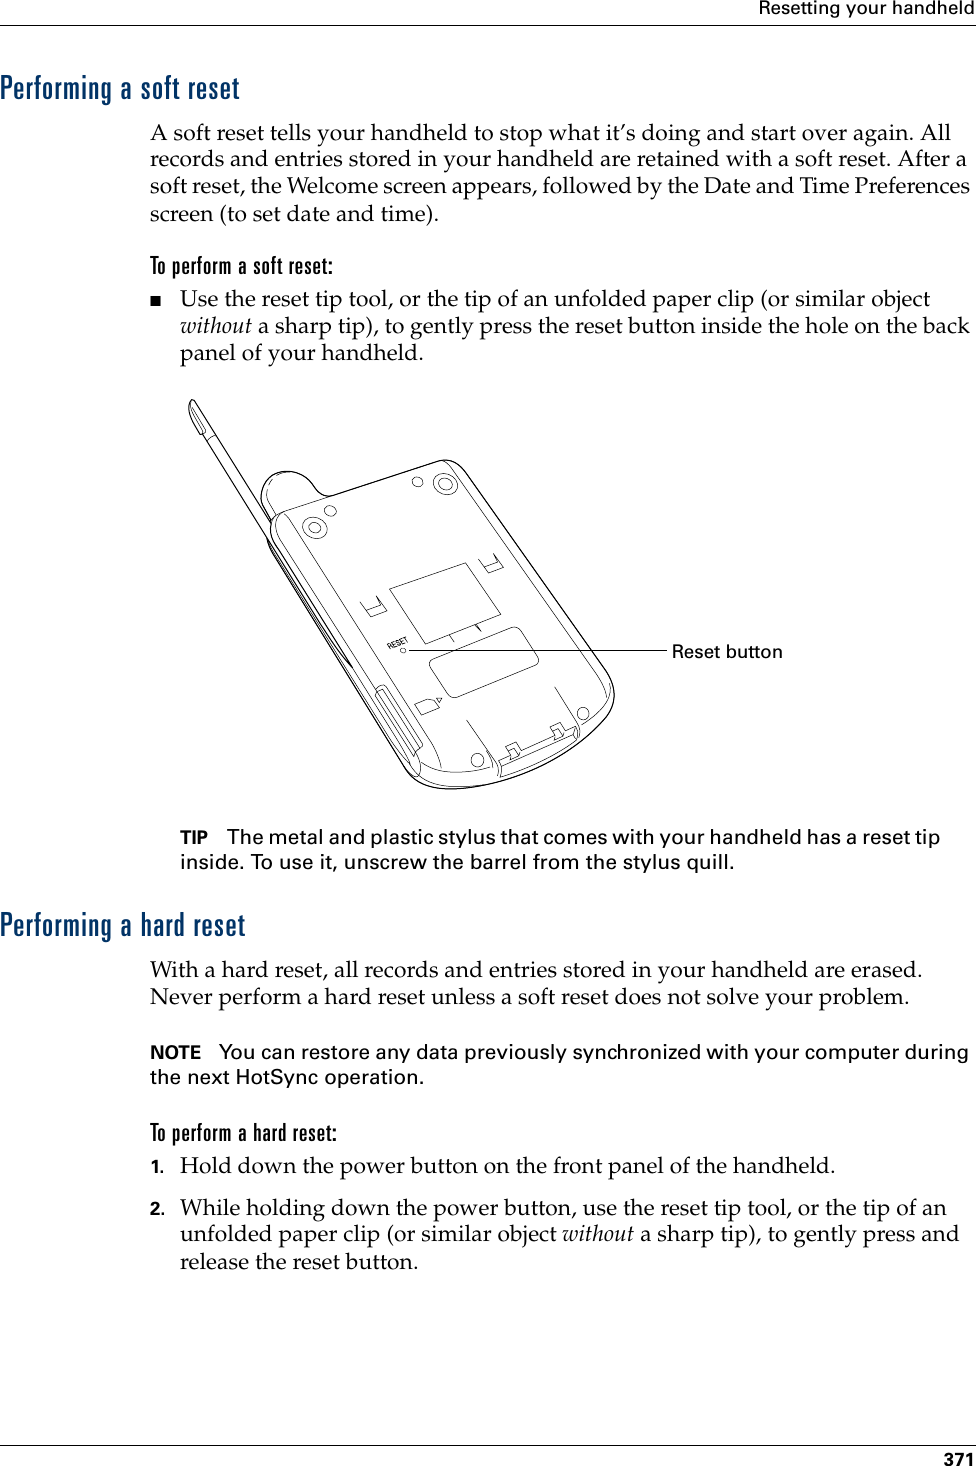
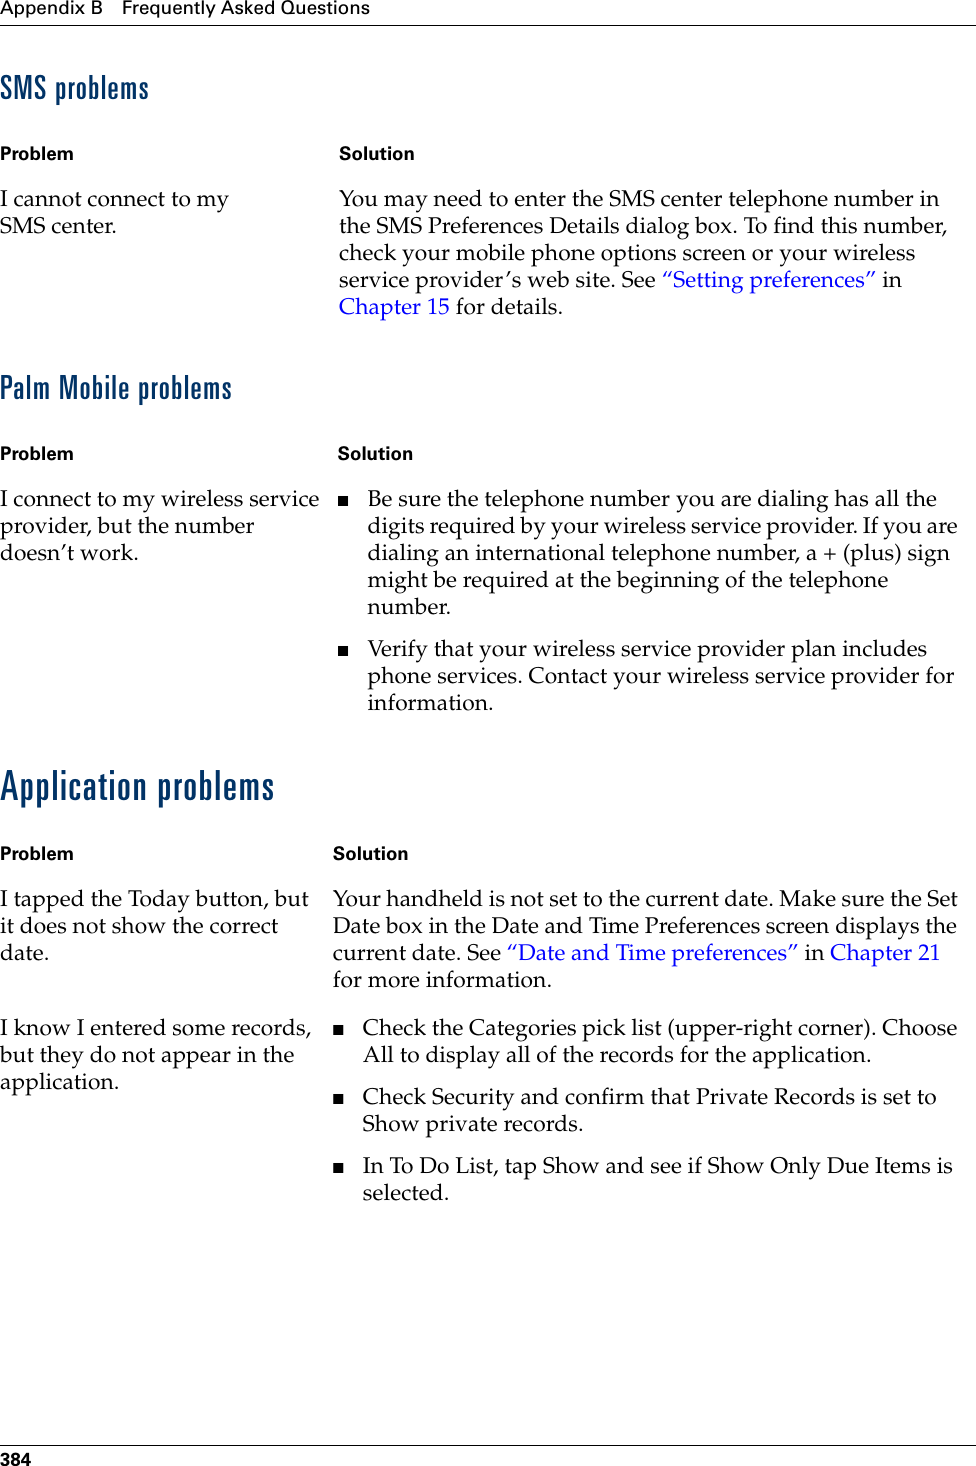
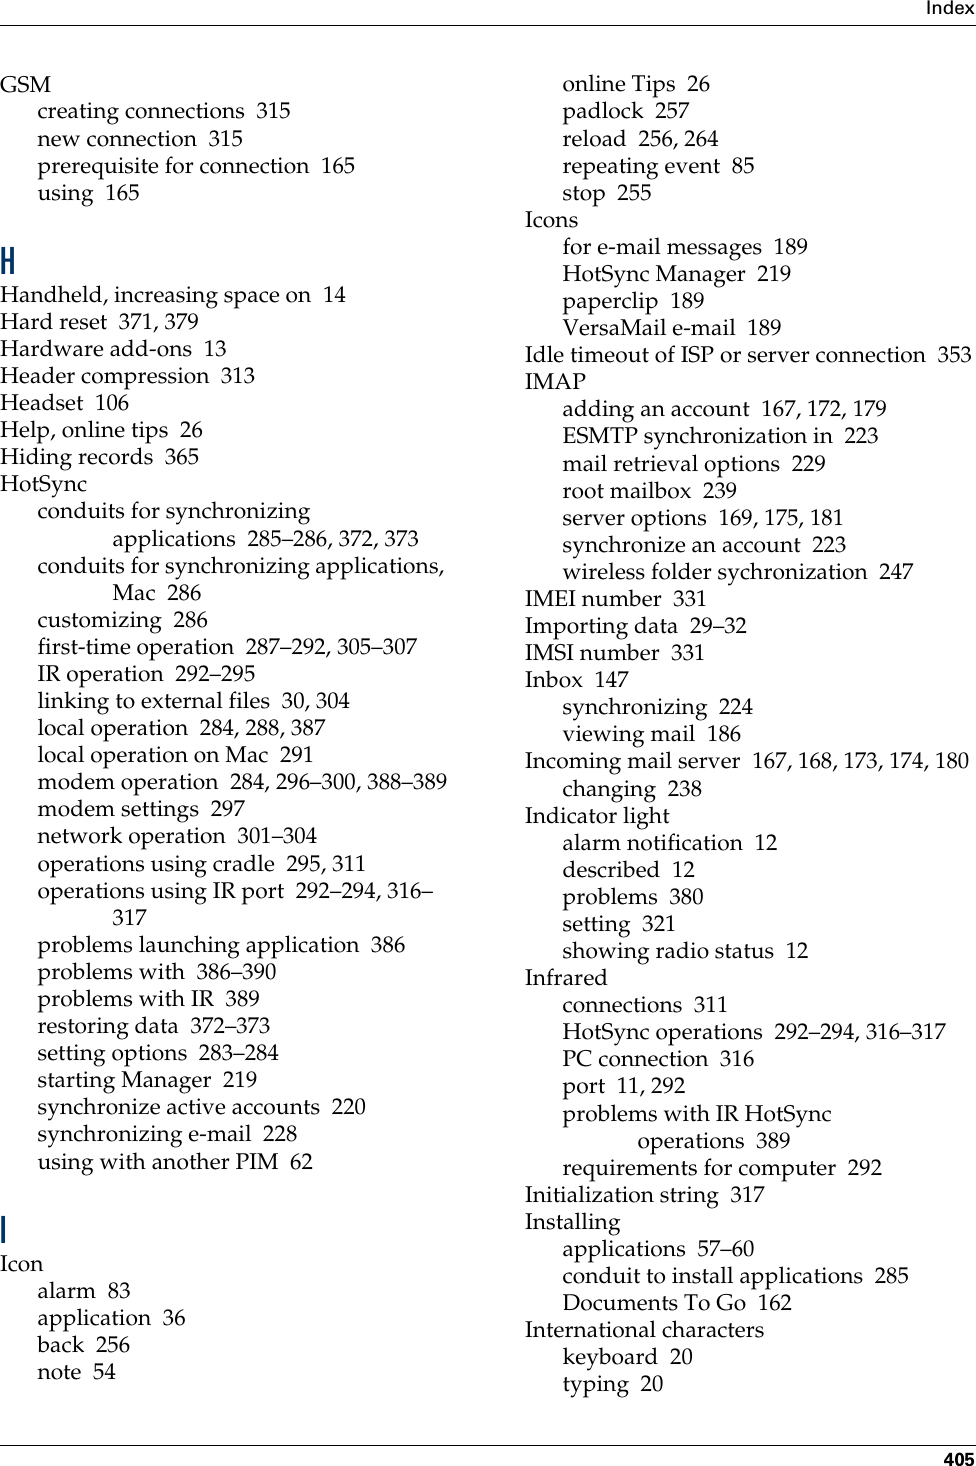
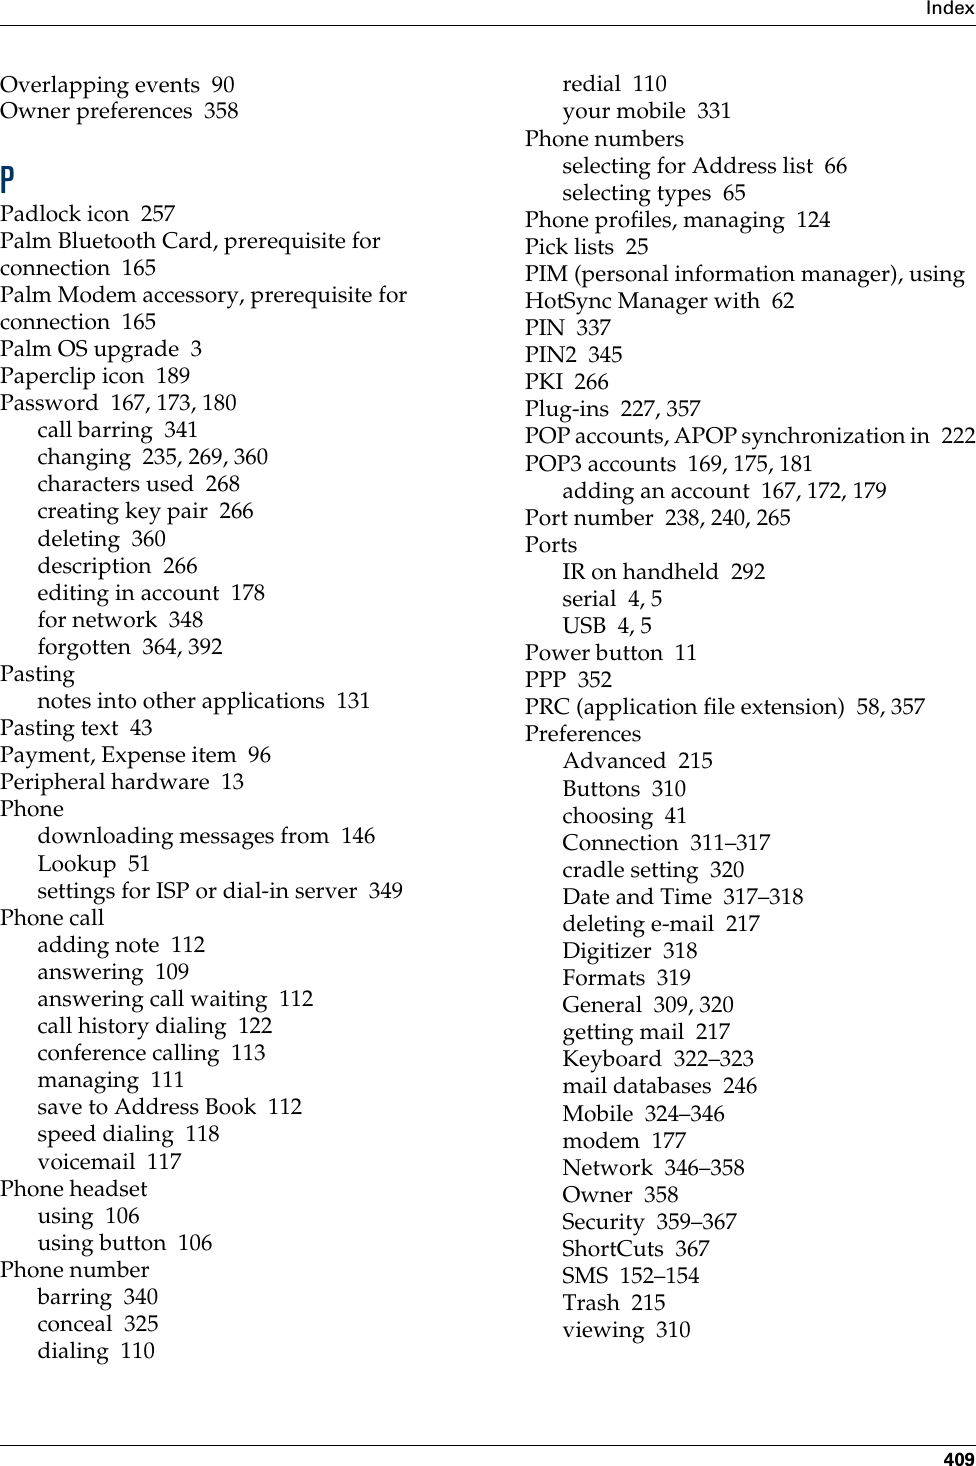
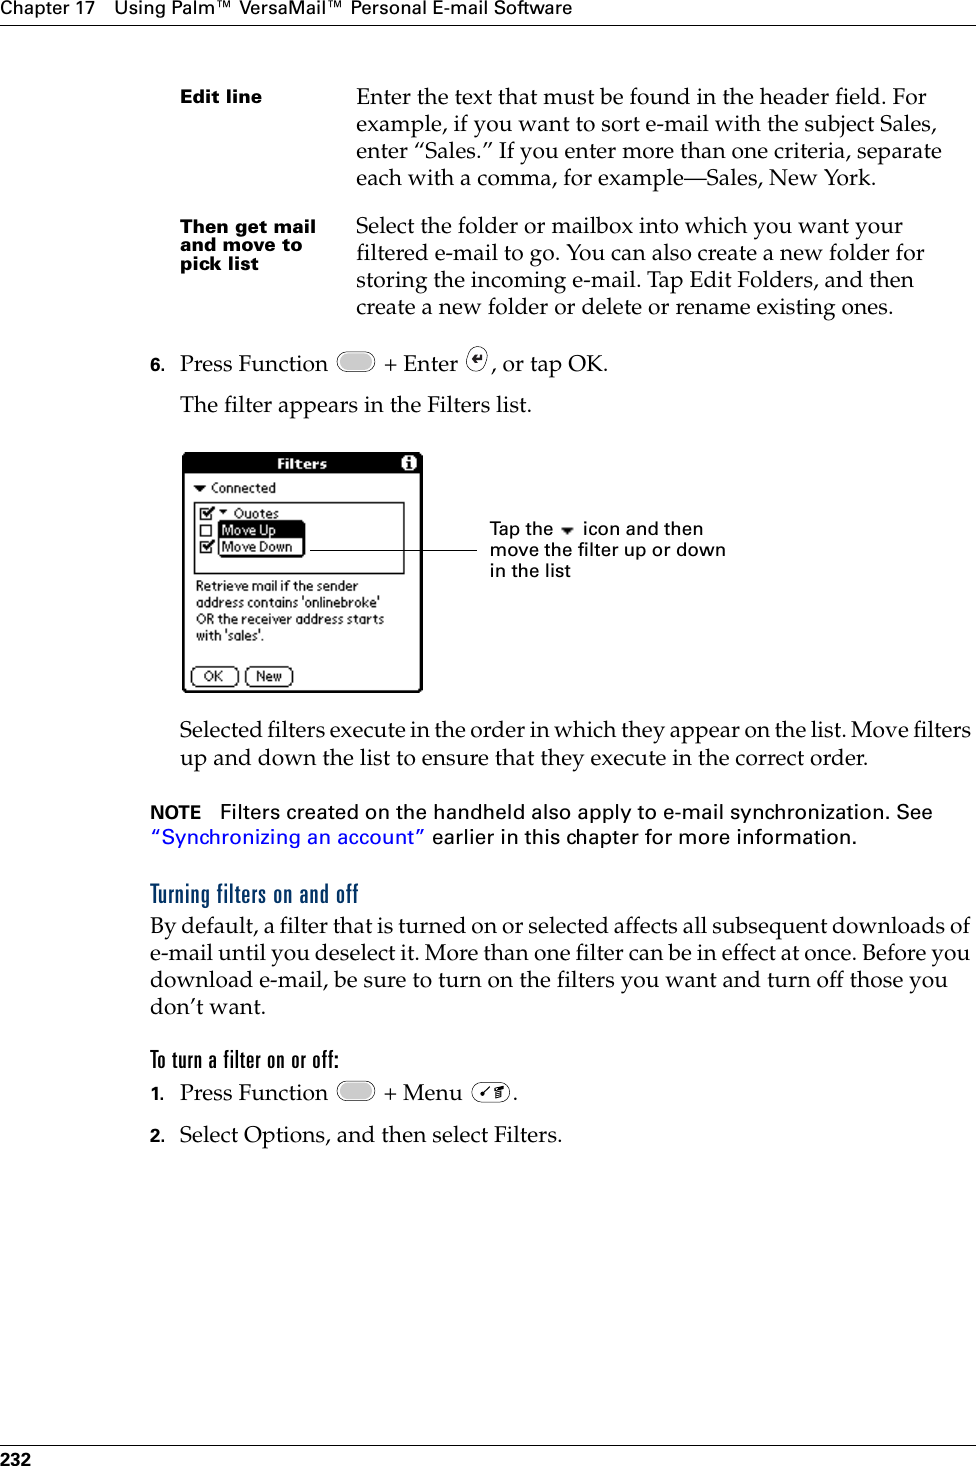
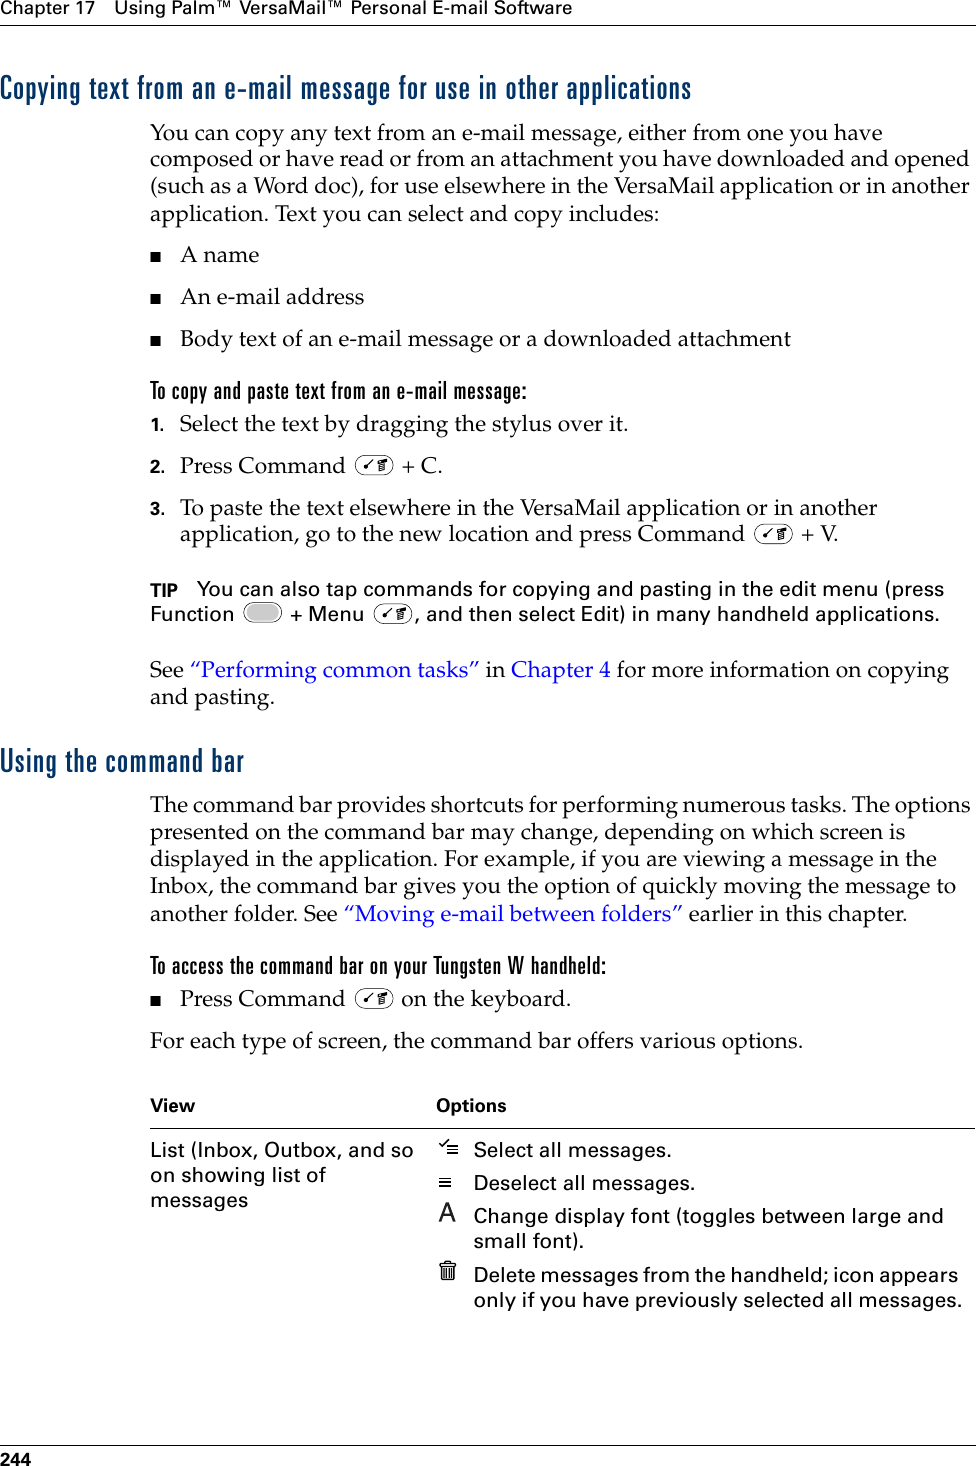
![Going beyond the basics231folder. The filter statement, which is displayed in the Filter Editor, is shown in the following figure.To create a filter:1. Press Function + Menu .2. Select Options, and then select Filters.3. Tap New.4. Enter a short description of the filter in the Name field.5. Use the If the pick lists to create criteria for the filter.The three pick lists and the edit line combine to create a statement that identifies the type of e-mail and where you want the e-mail stored. For example, a filter might read, “If the [Subject] [Contains] sales meeting, Then get mail and move to [Sales].” When you use this filter to sort incoming e-mail, any e-mail containing sales meetings in the subject line is filed in the Sales folder.To pick list Select the message header field with the information contained in the edit line: To, From, Subject, cc, Date, Size. For example, you might select Date to download only messages that are less than a certain number of days old. Contains pick list Select a filter action: Contains, Starts with, Does NOT Contain. Palm, Inc. Confidential](https://usermanual.wiki/Palm/710000.User-Manual-2-of-2/User-Guide-279433-Page-45.png)
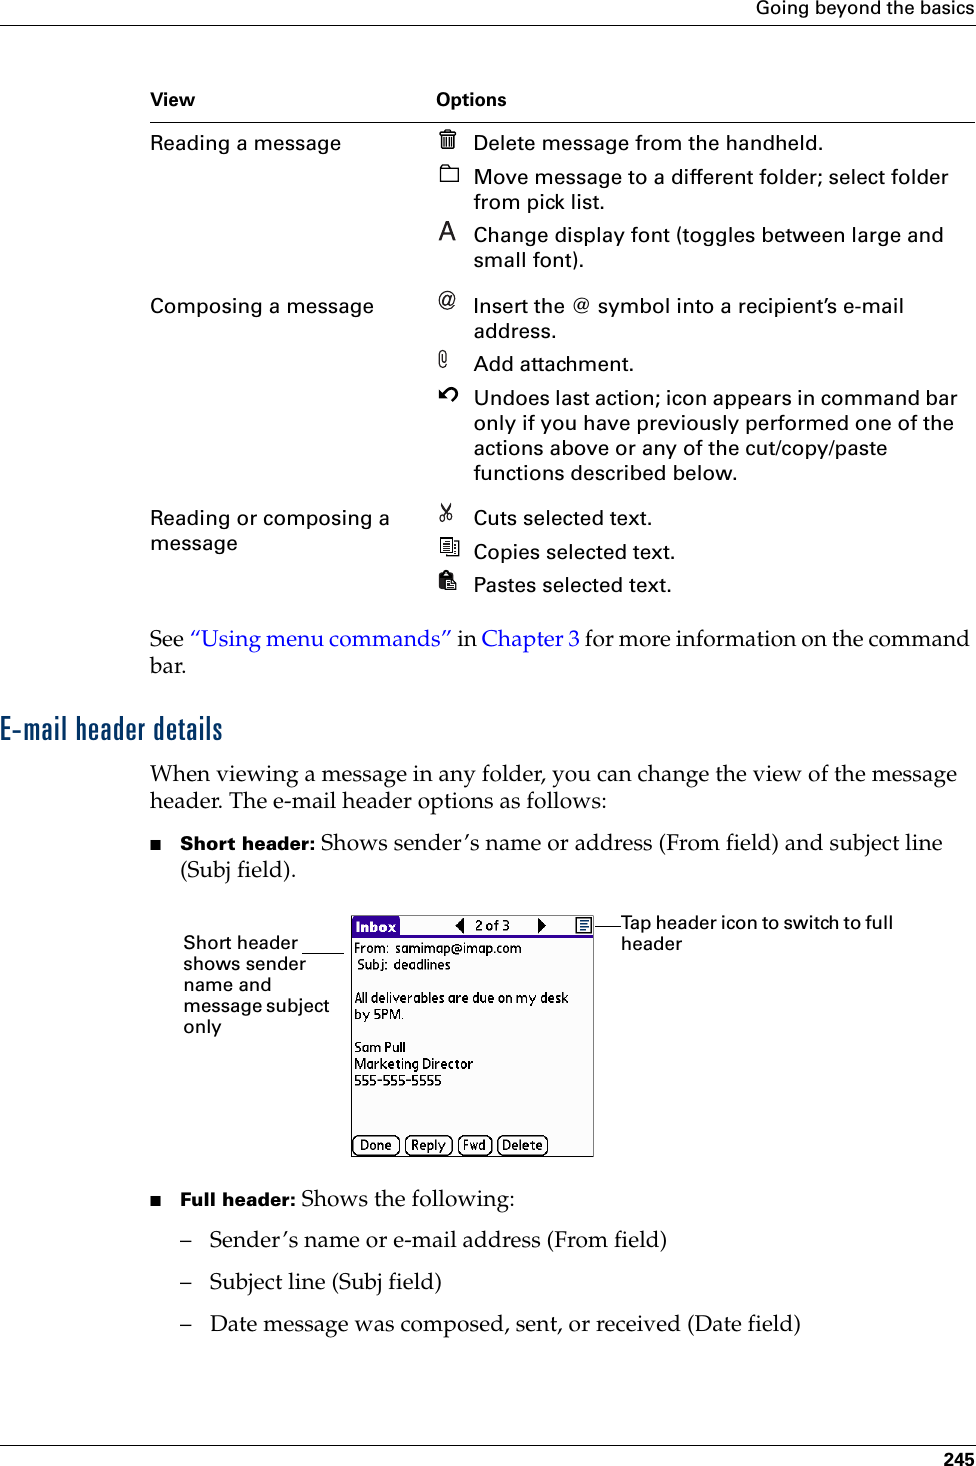


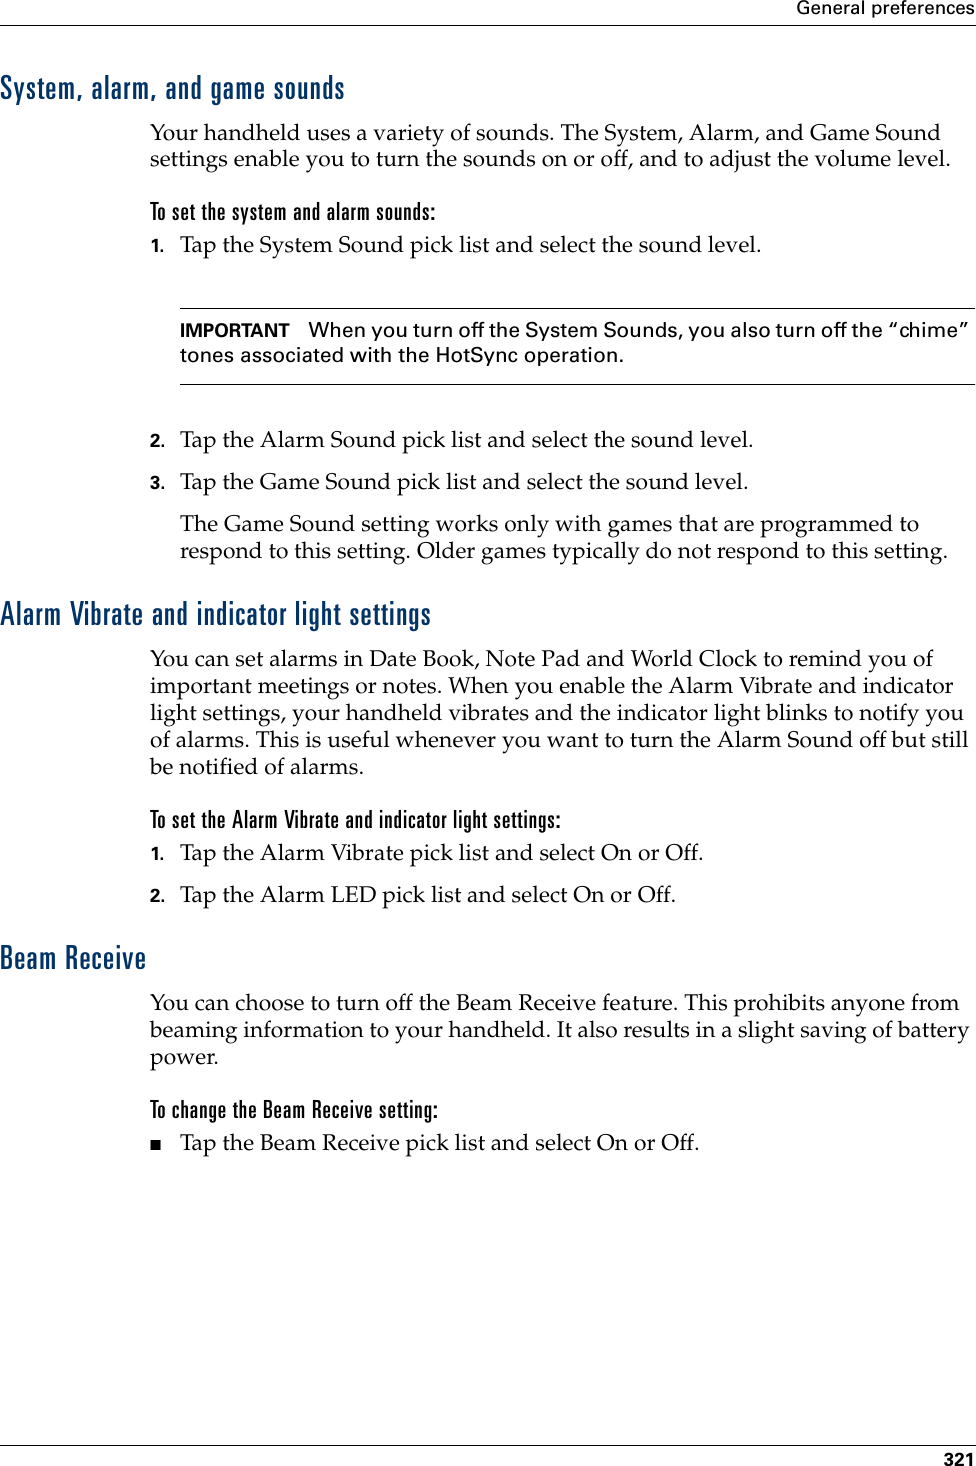
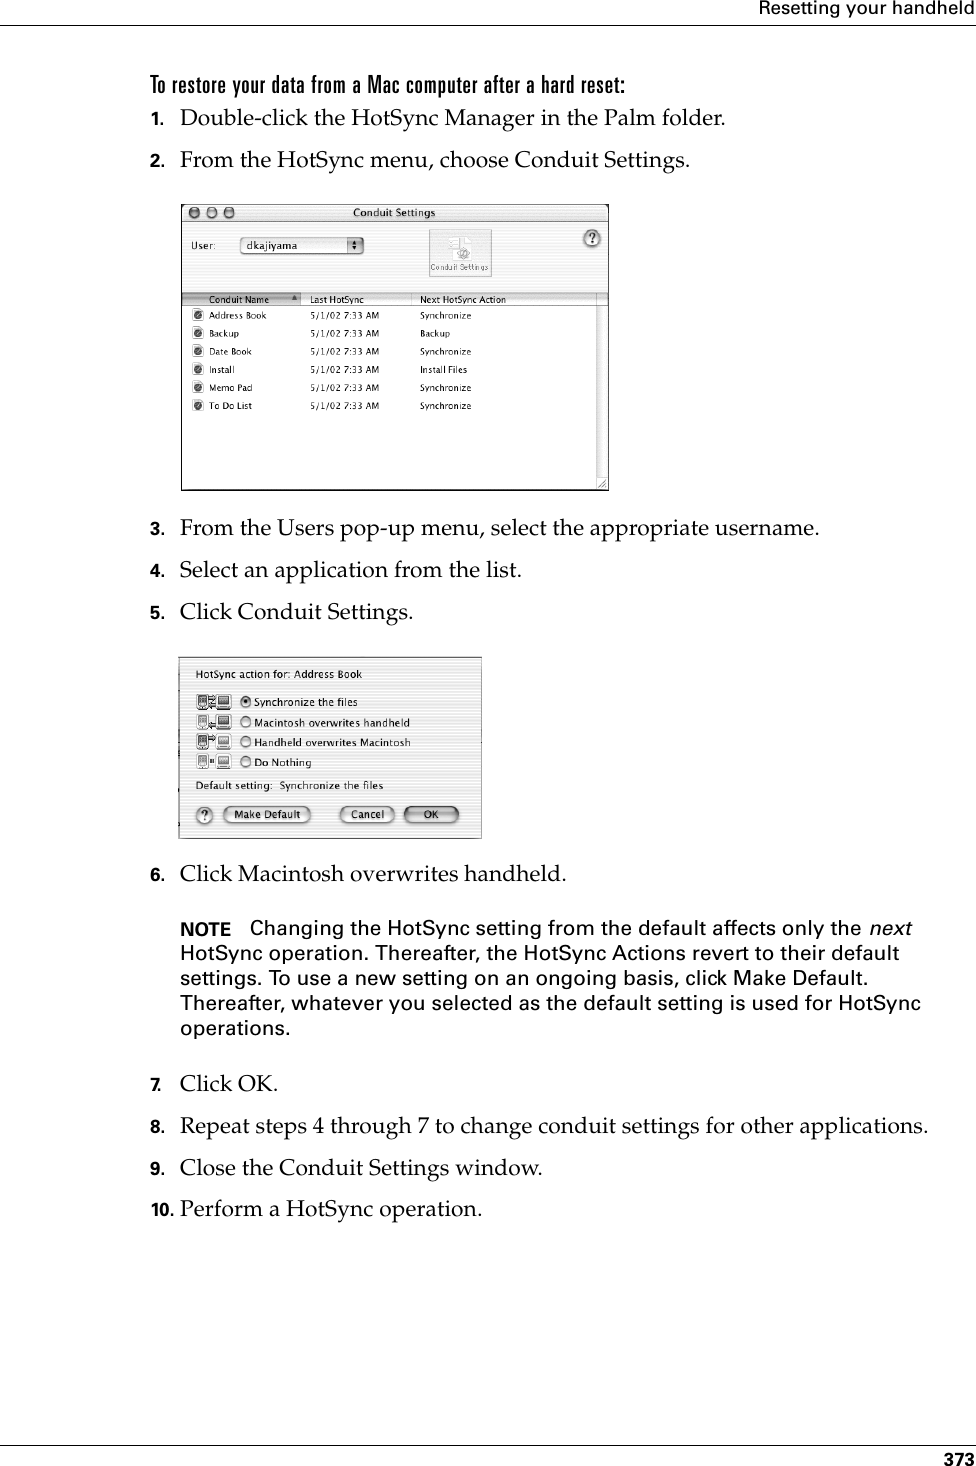
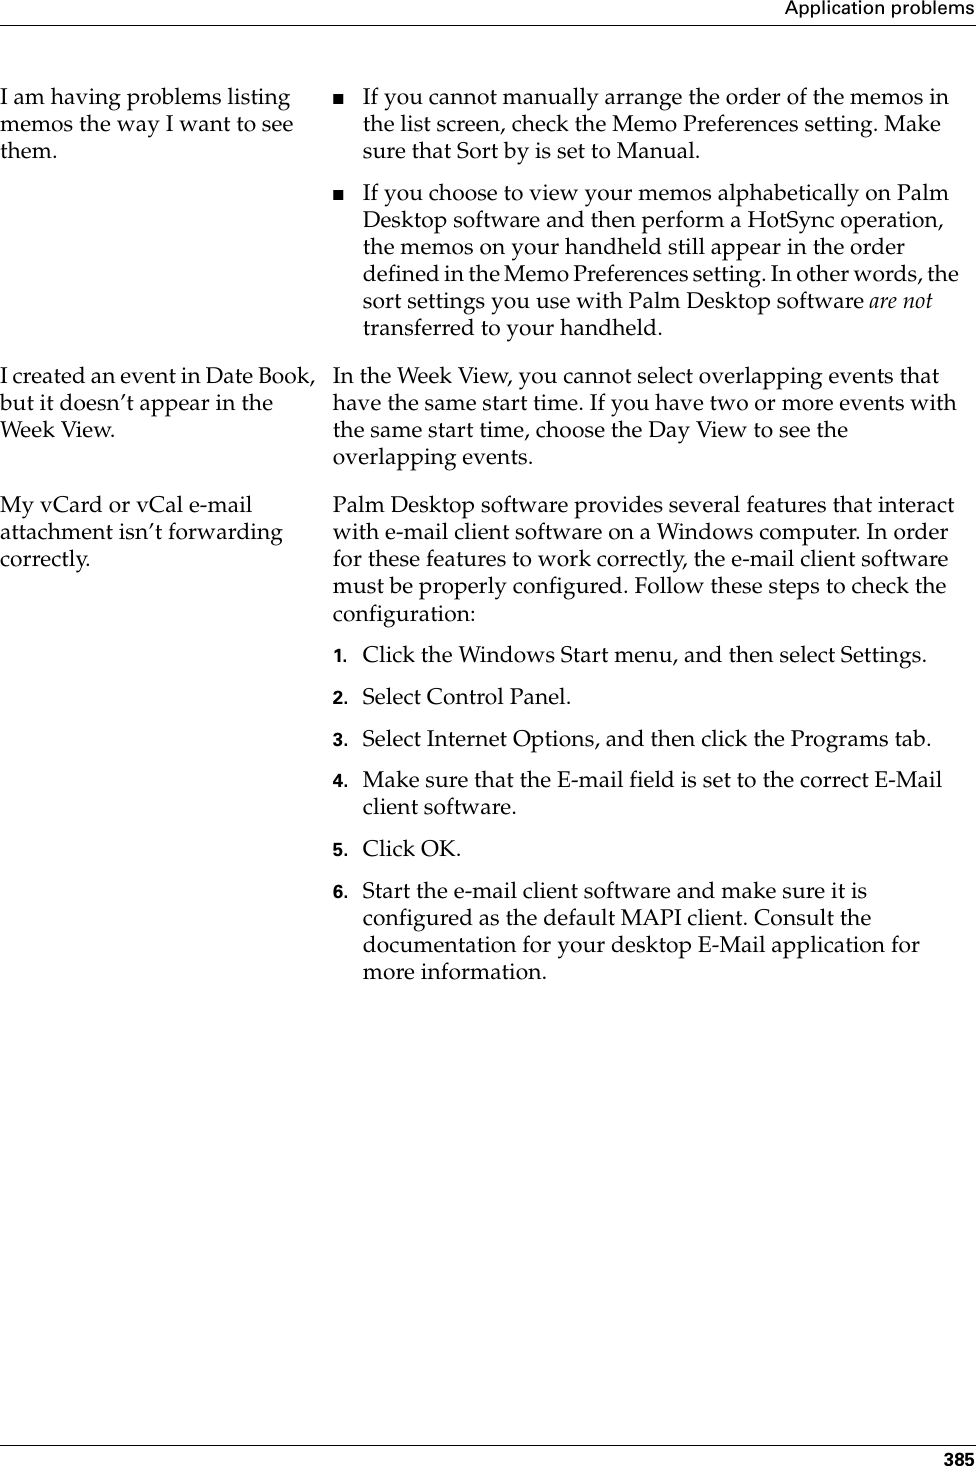
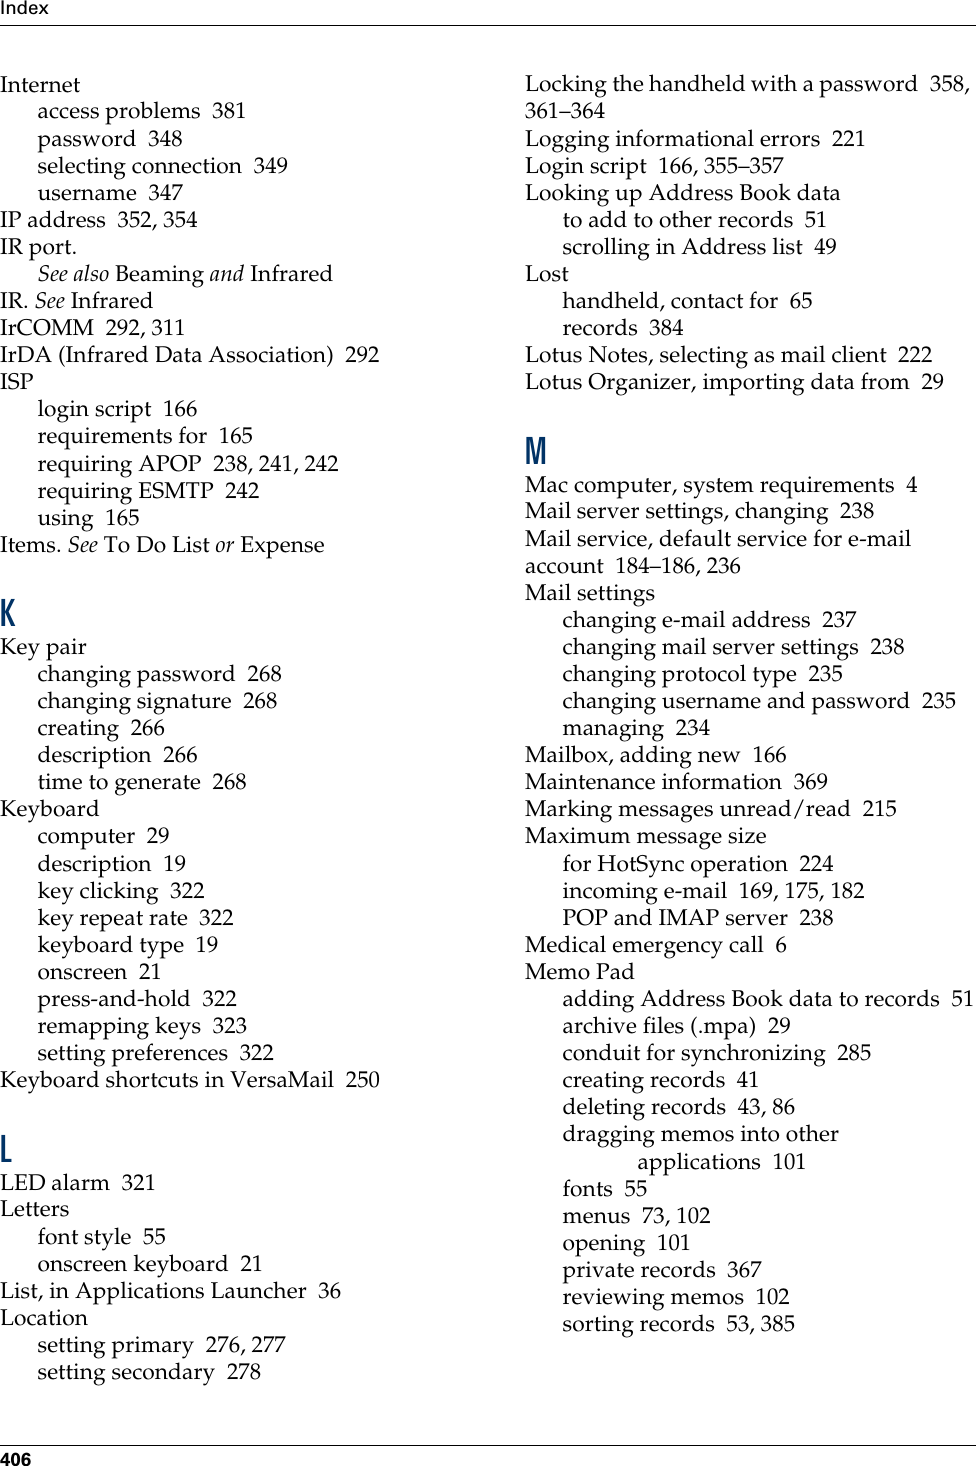
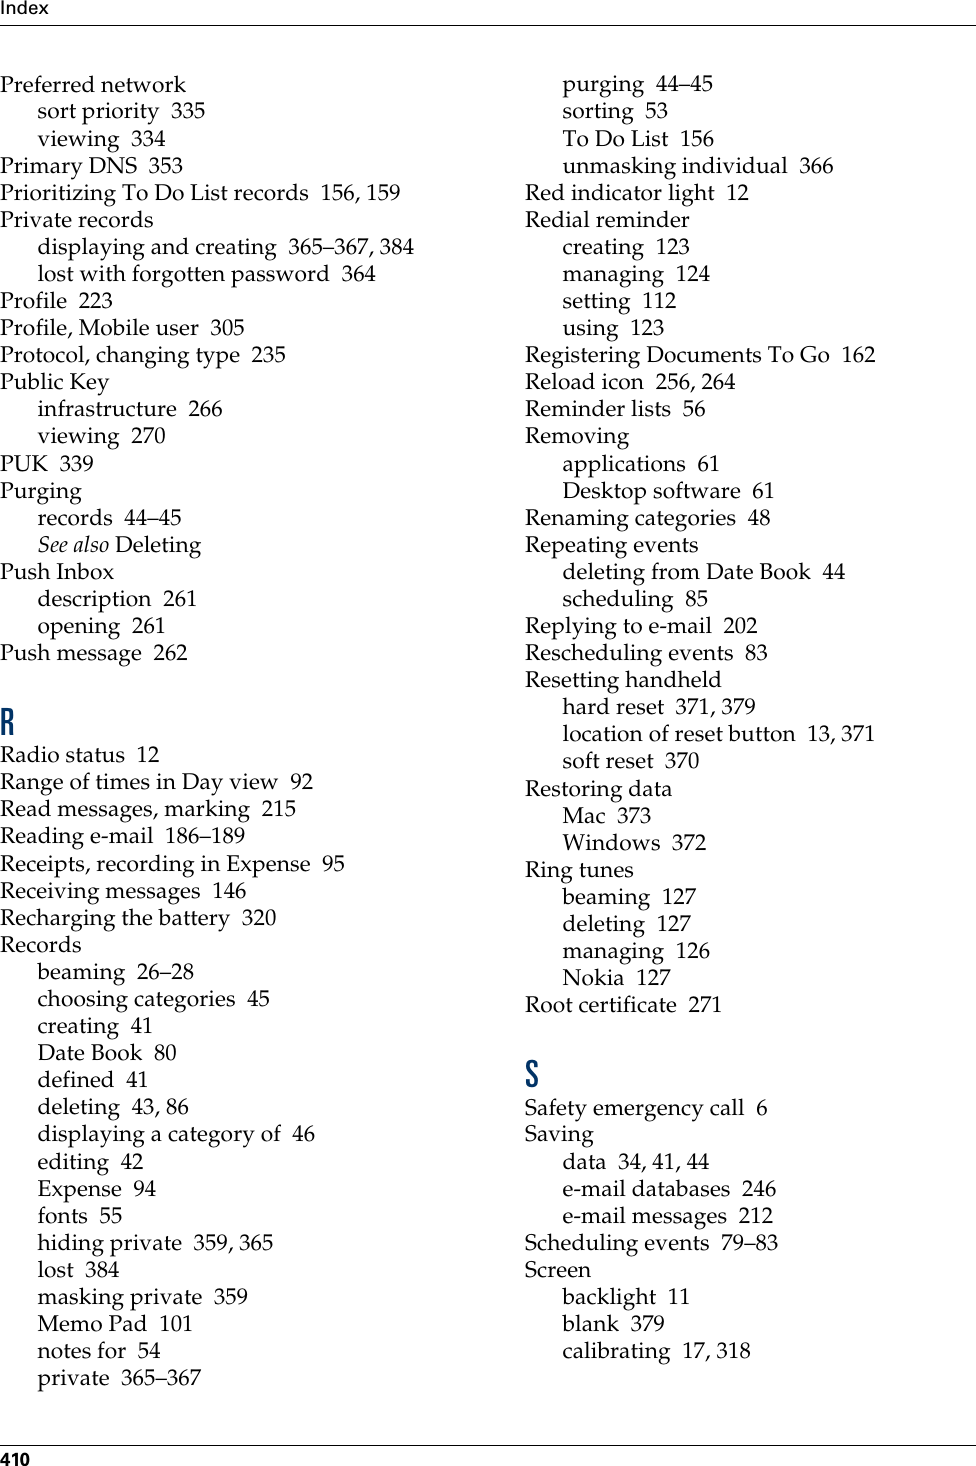
![Connection preferences311Connection preferencesIMPORTANT The connections preferences may have been set by your wireless service provider. Check with your provider before changing the preset settings.The Connection Preferences screen enables you to define the settings used to connect your handheld to other devices. The screen displays a list of available configurations that are ready to be further defined; the list varies depending on the kind of software you’ve added to your handheld.You can also create custom configurations, which include the following:PC via Cradle/Cable: A local HotSync connection; the direct connection between your handheld and your desktop computer. Your handheld is connected by its universal connector to the cradle, and the cradle is attached by its cable to a USB port of your desktop computer. (If you are using the optional serial cradle, the cradle attaches by its cable to a serial [COM] port of your computer.)Modem via Universal Connector: A cable connection between your handheld’s universal connector and a modem for dialing in to a modem that is part of your computer or laptop. PC via Infrared: A connection between the IR port of your handheld and the infrared device of your computer or laptop.Modem via Infrared: A connection between the IR port of your handheld and a modem. The modem can be attached to or within a mobile phone or some other device containing an IR port. (Some IR phones contain modems.)Palm, Inc. Confidential](https://usermanual.wiki/Palm/710000.User-Manual-2-of-2/User-Guide-279433-Page-125.png)