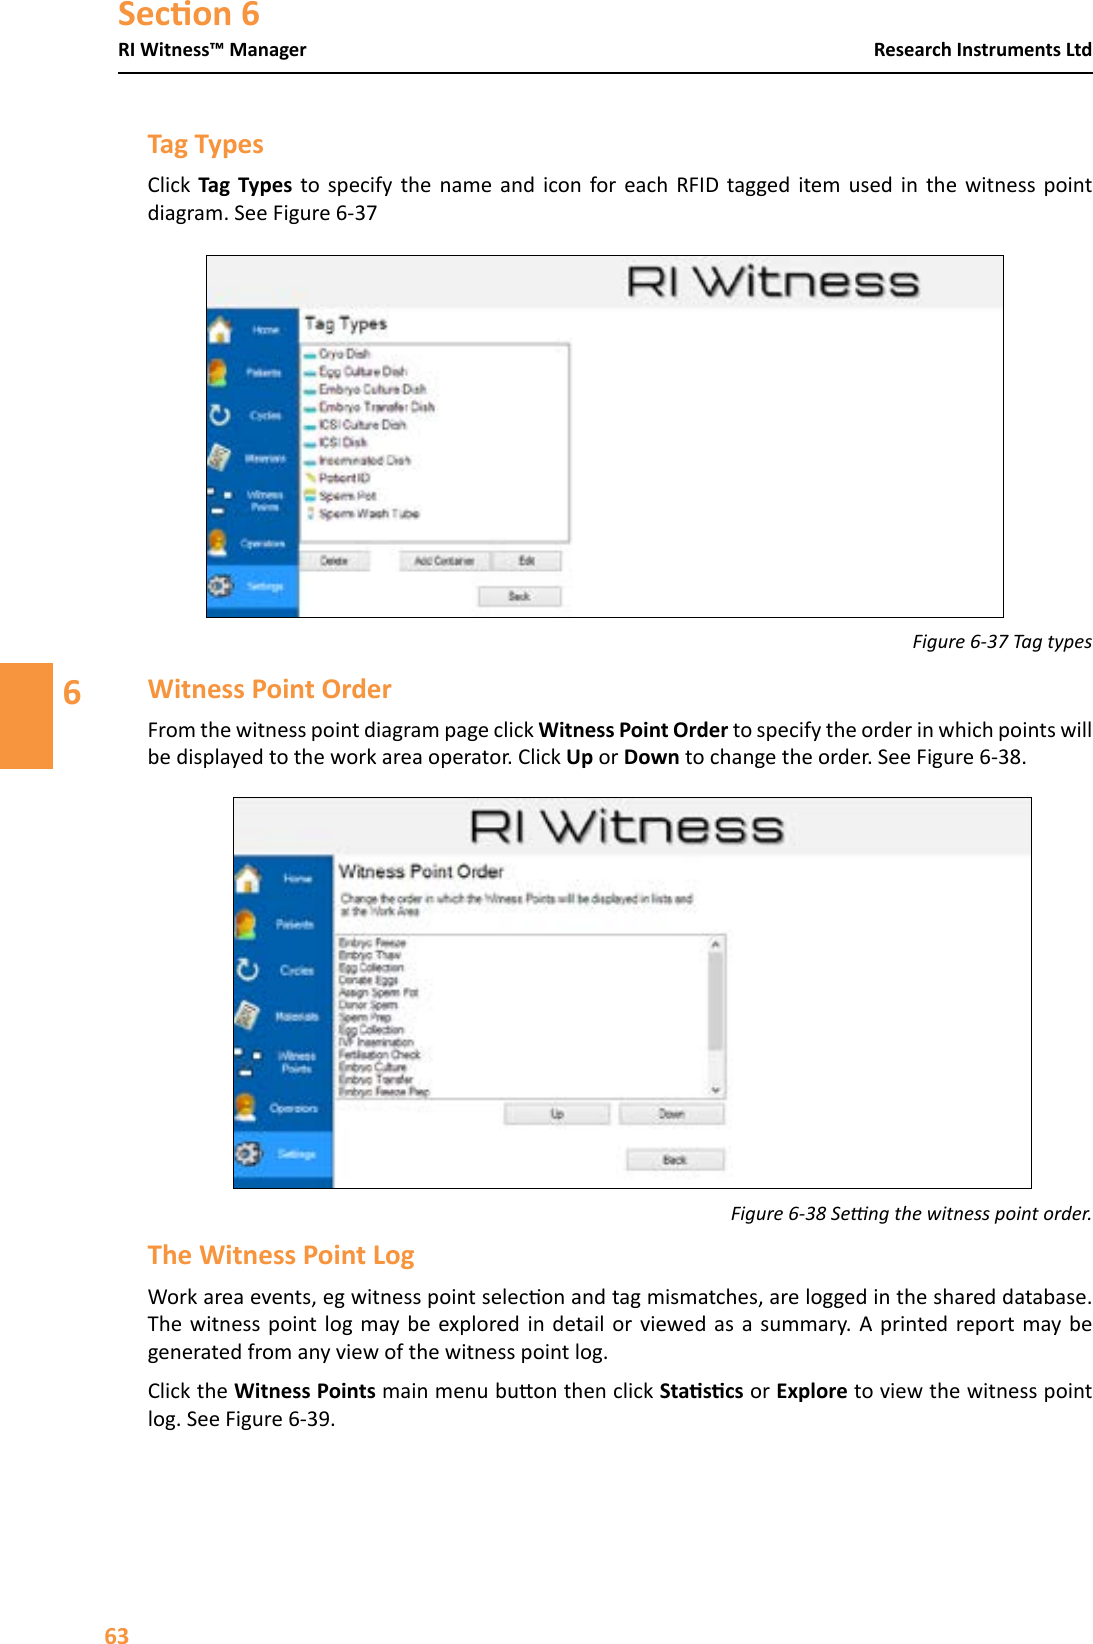
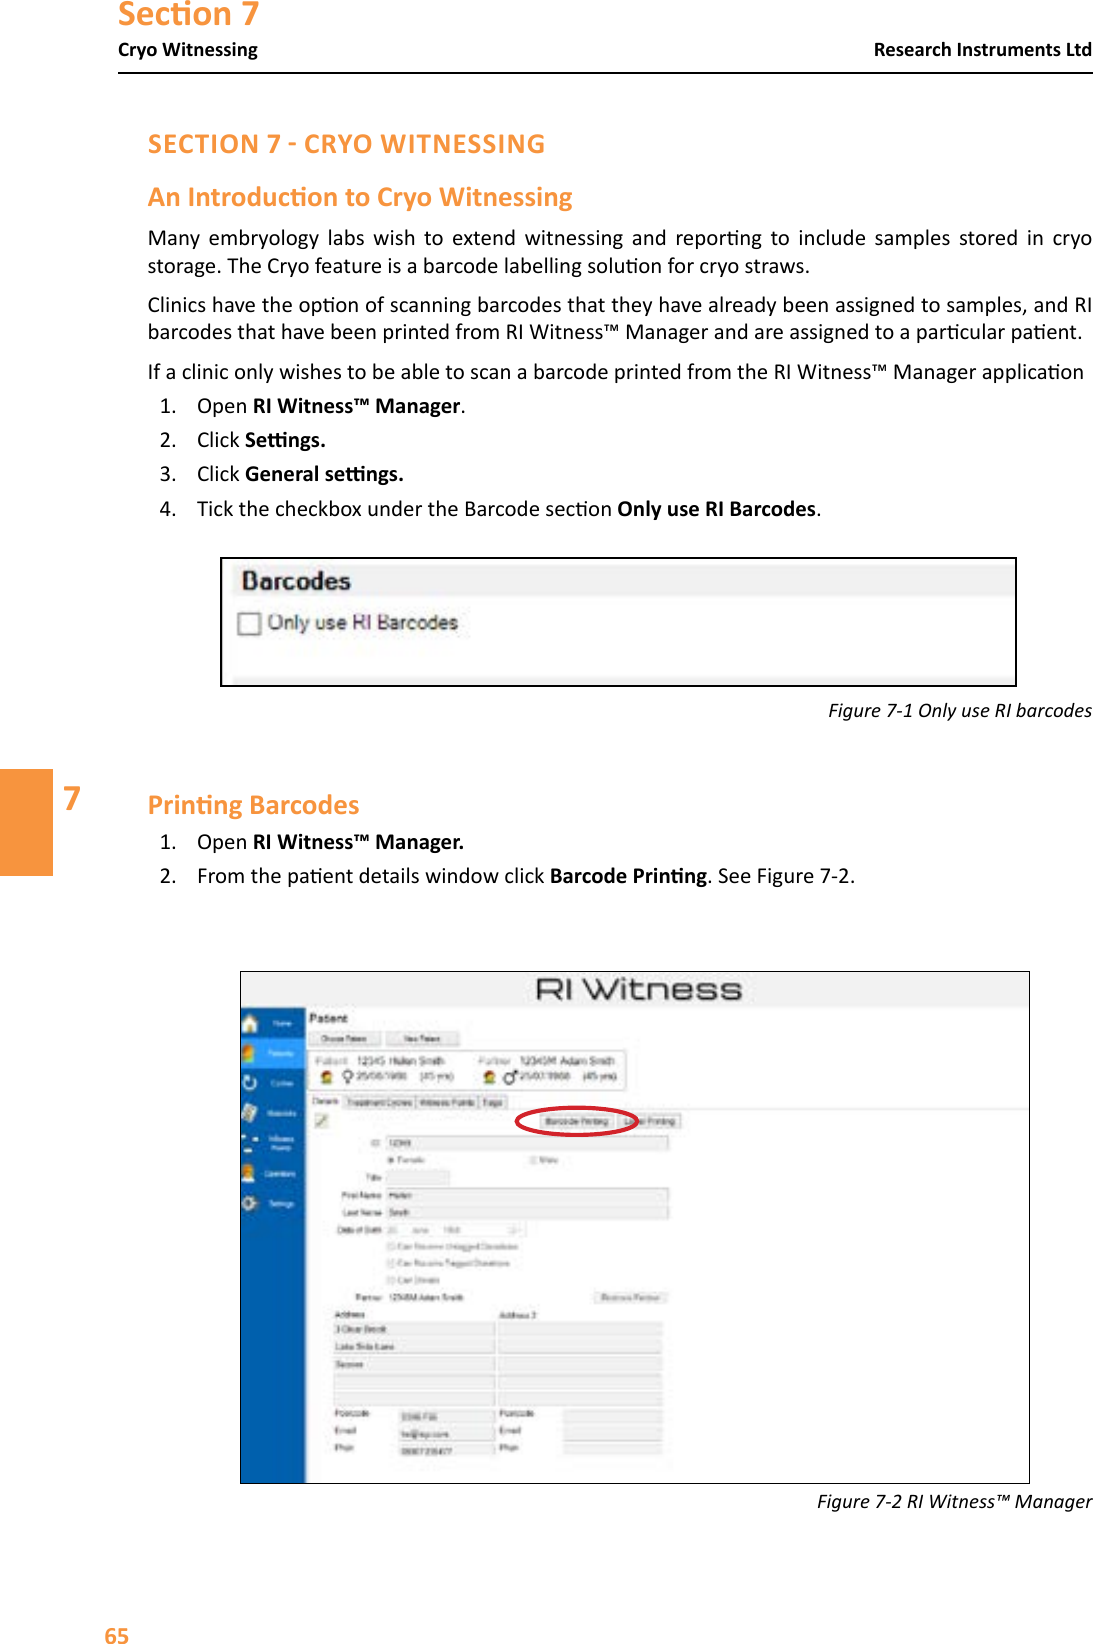
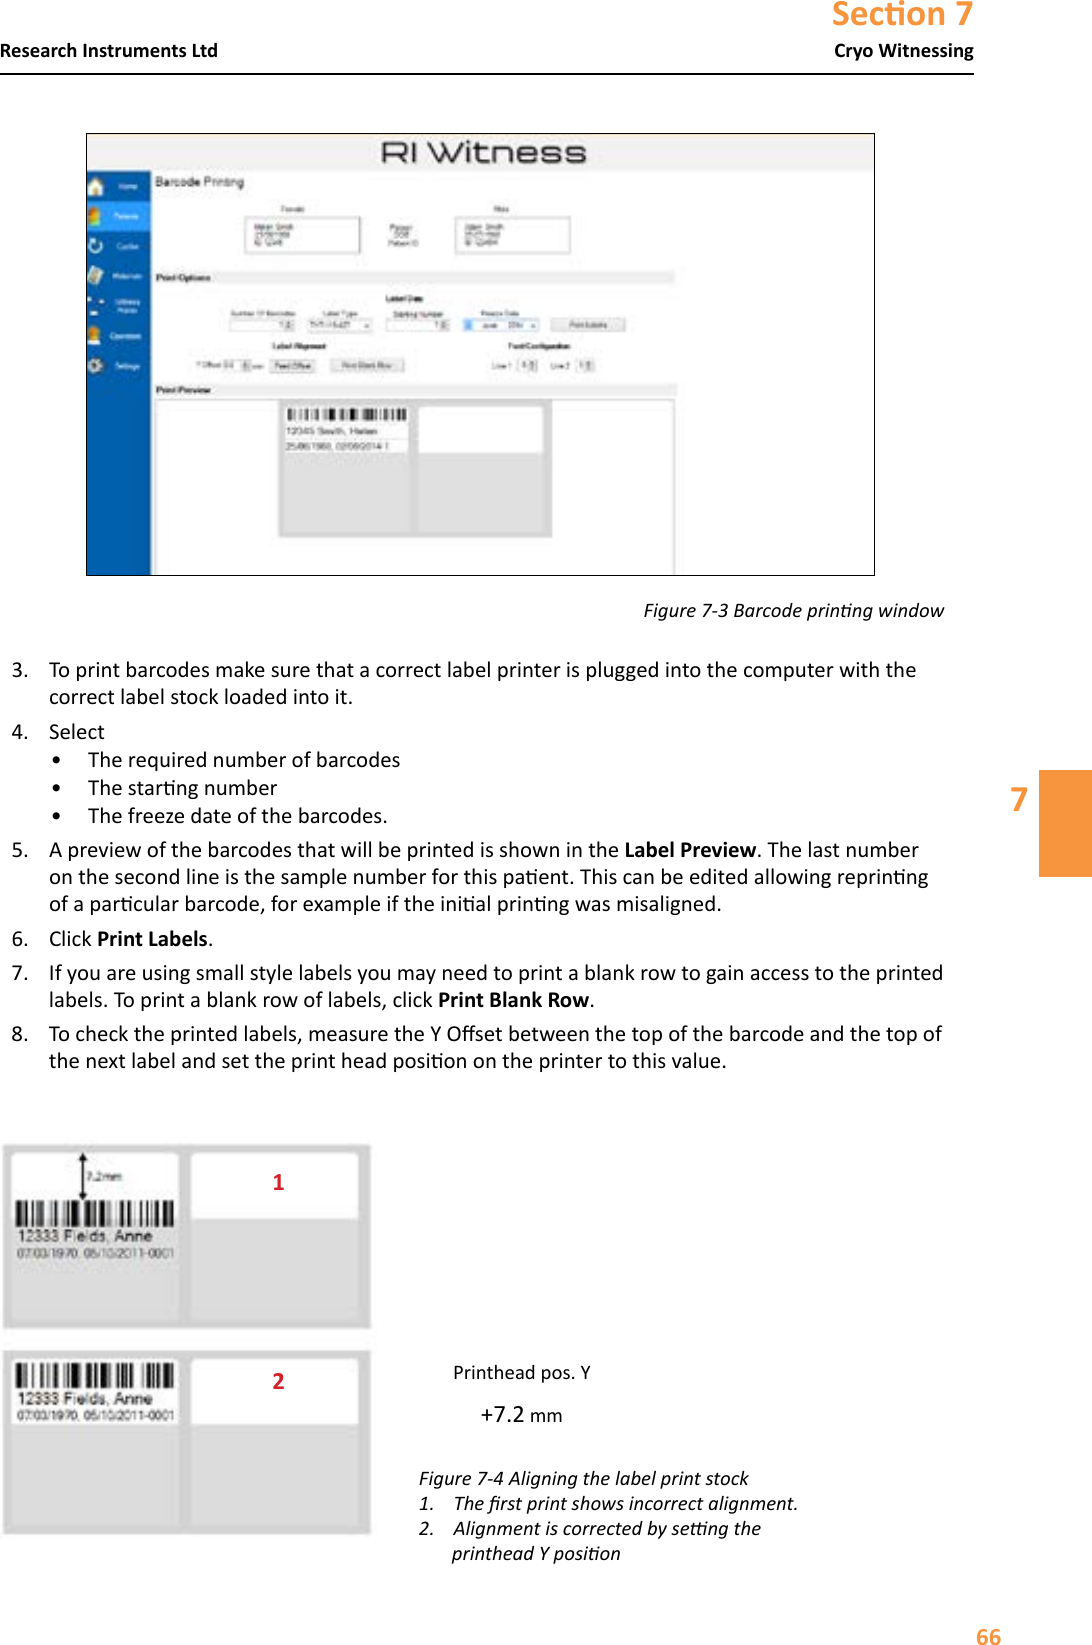
RESEARCH INSTRUMENTS 670854 RI Witness Sperm Prep Reader User Manual
RESEARCH INSTRUMENTS LTD RI Witness Sperm Prep Reader
UserManual.wiki
>
RESEARCH INSTRUMENTS
>
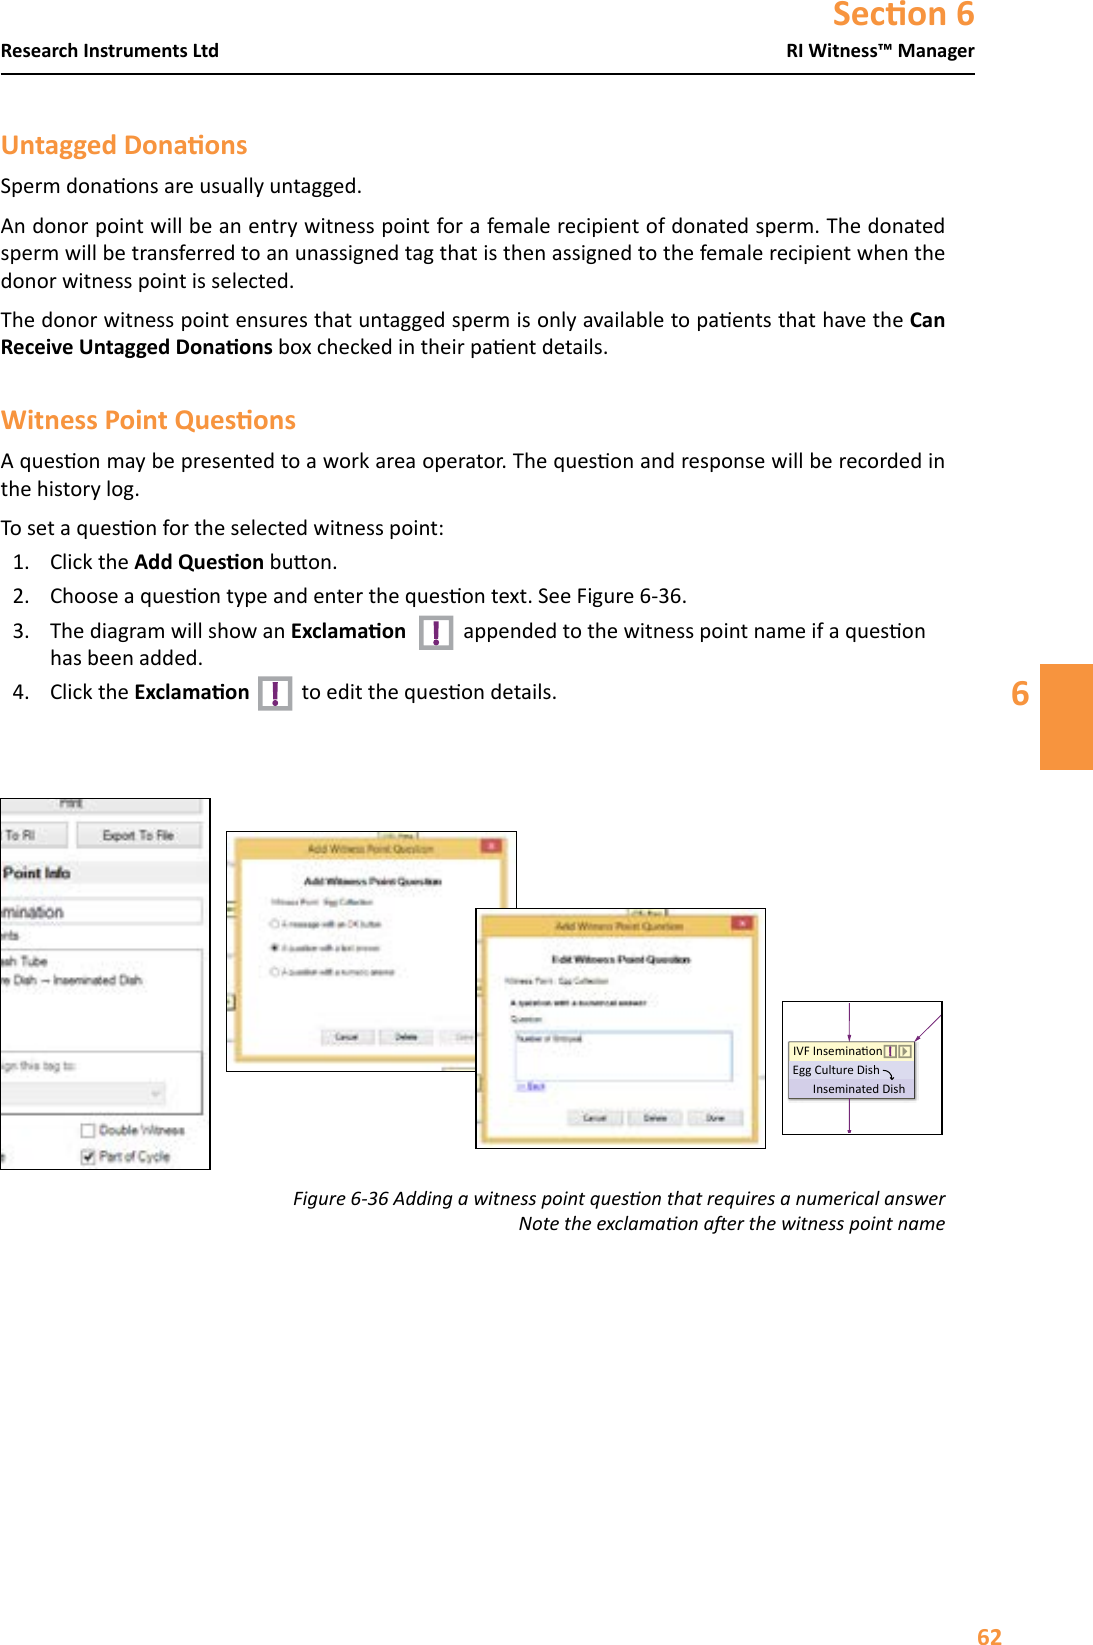
670854 User Manual
User Manual
Navigation menu
Upload a User Manual
Namespaces
Wiki Guide
HTML
PDF
Info
Views
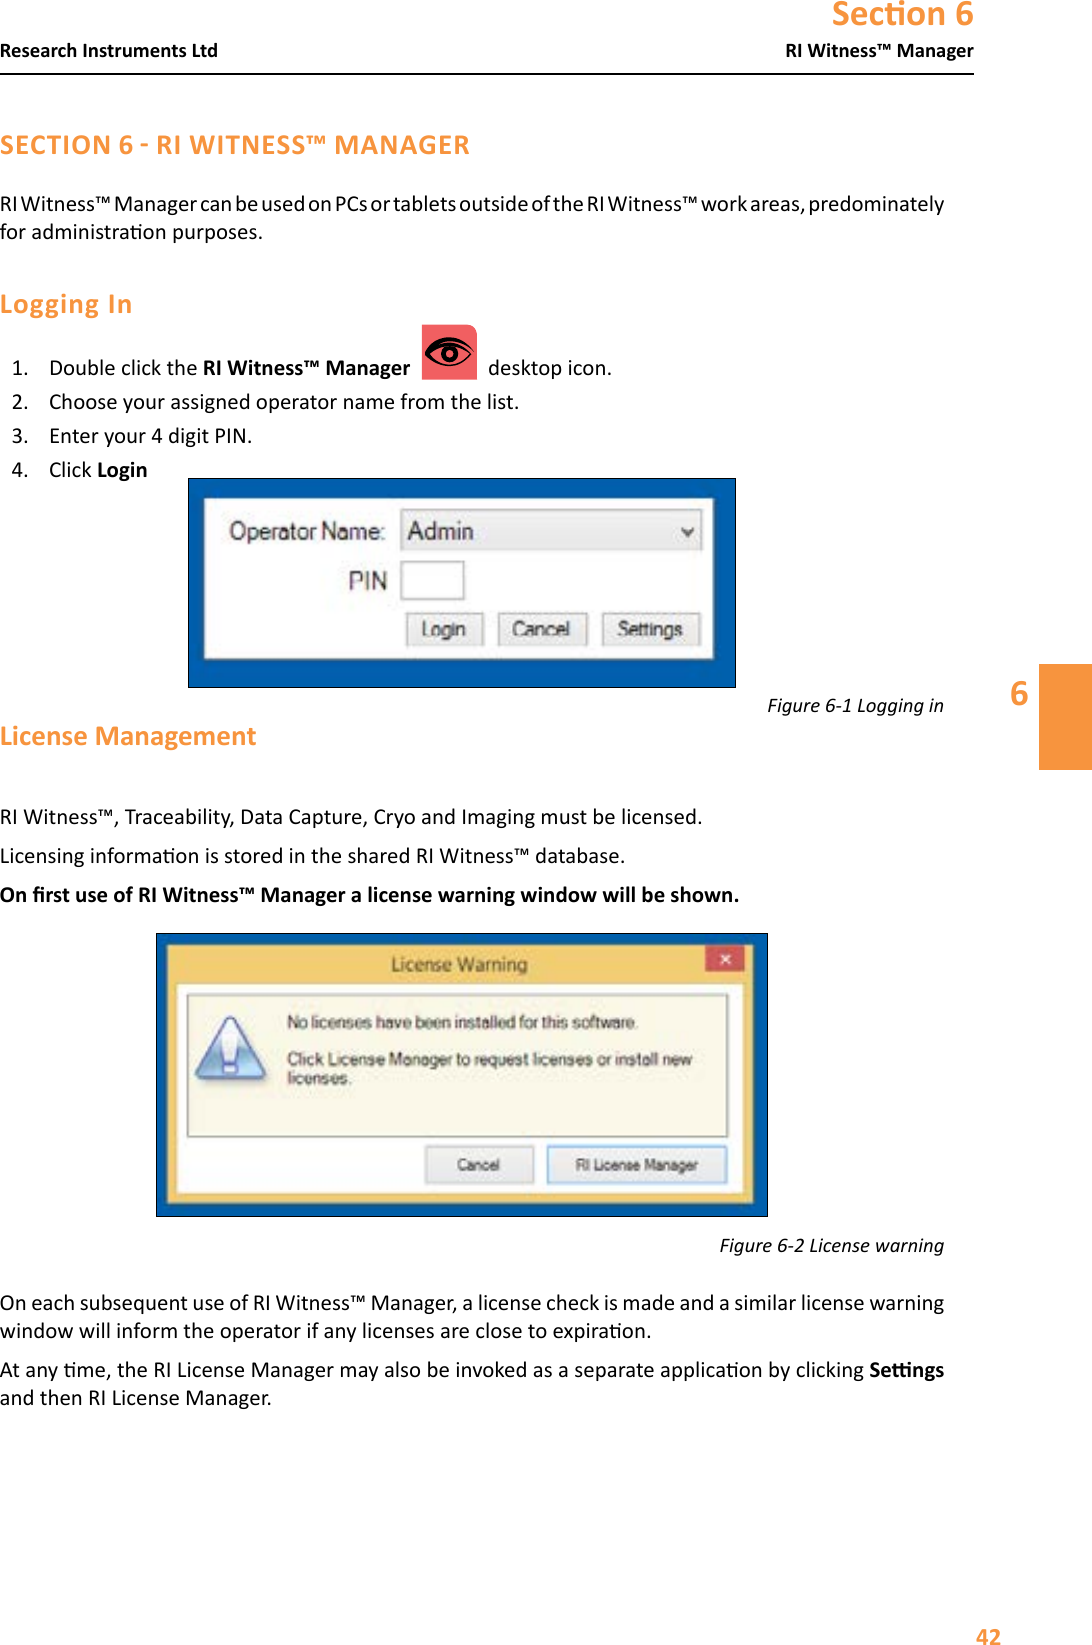
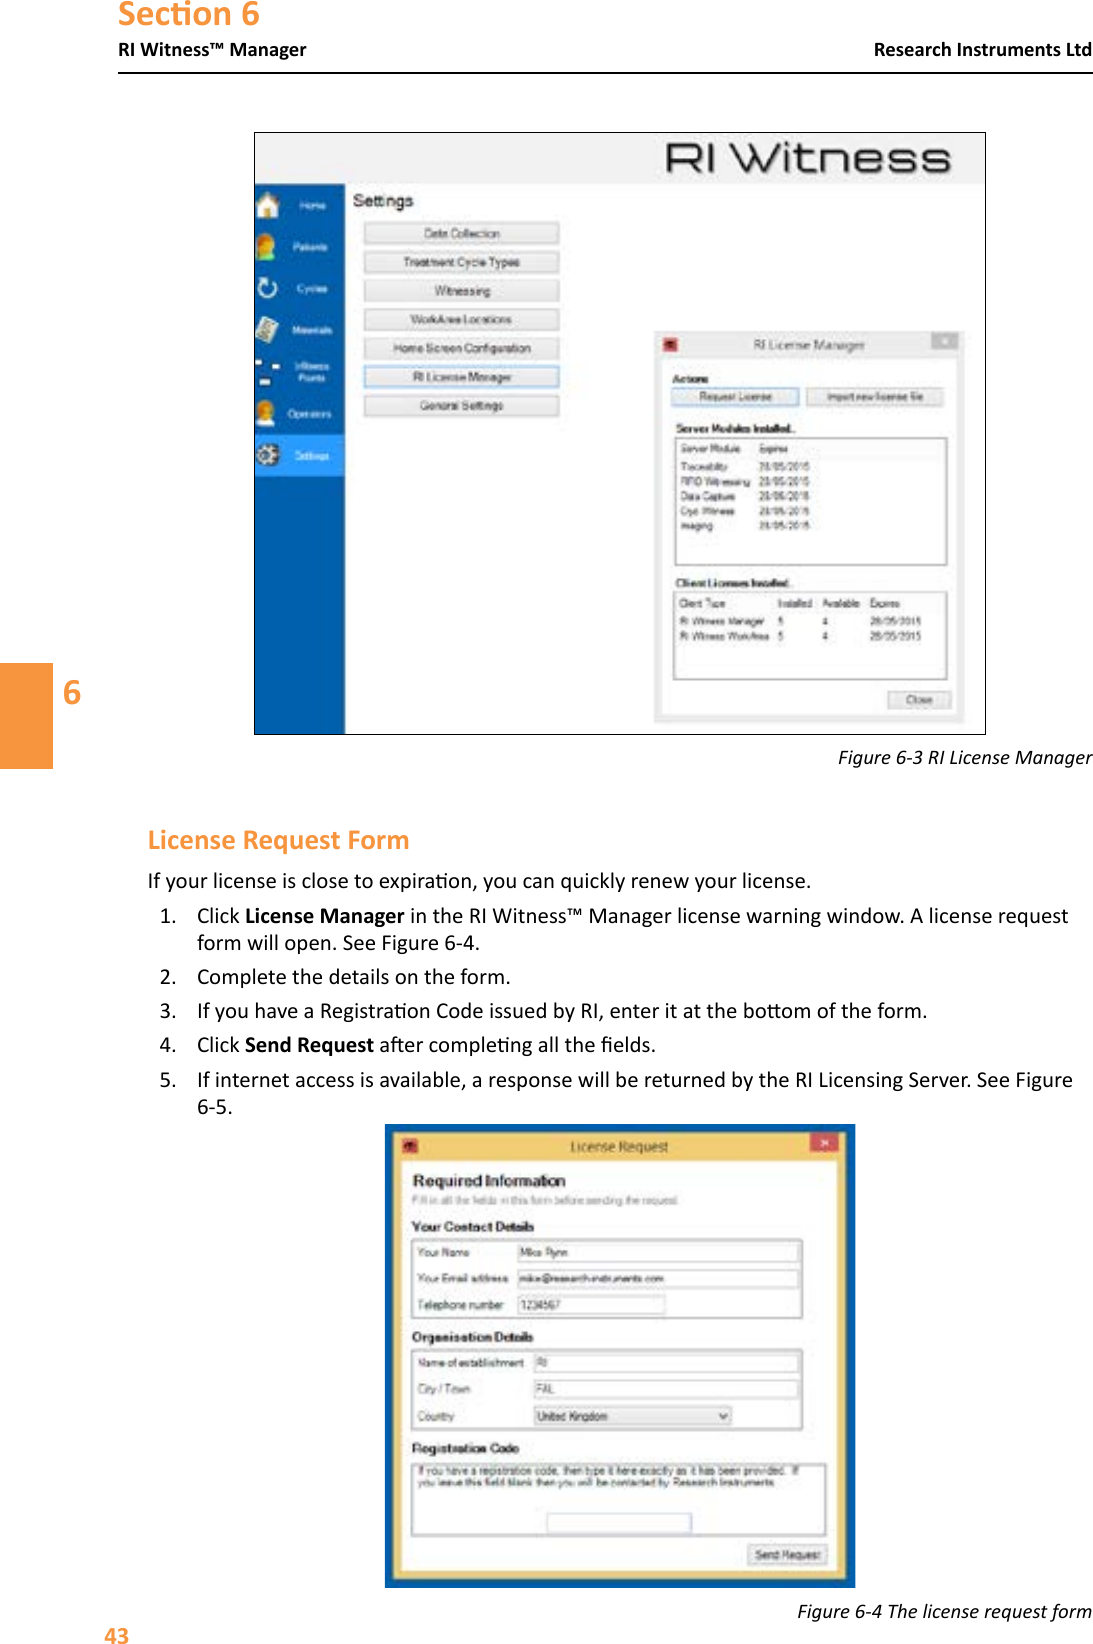
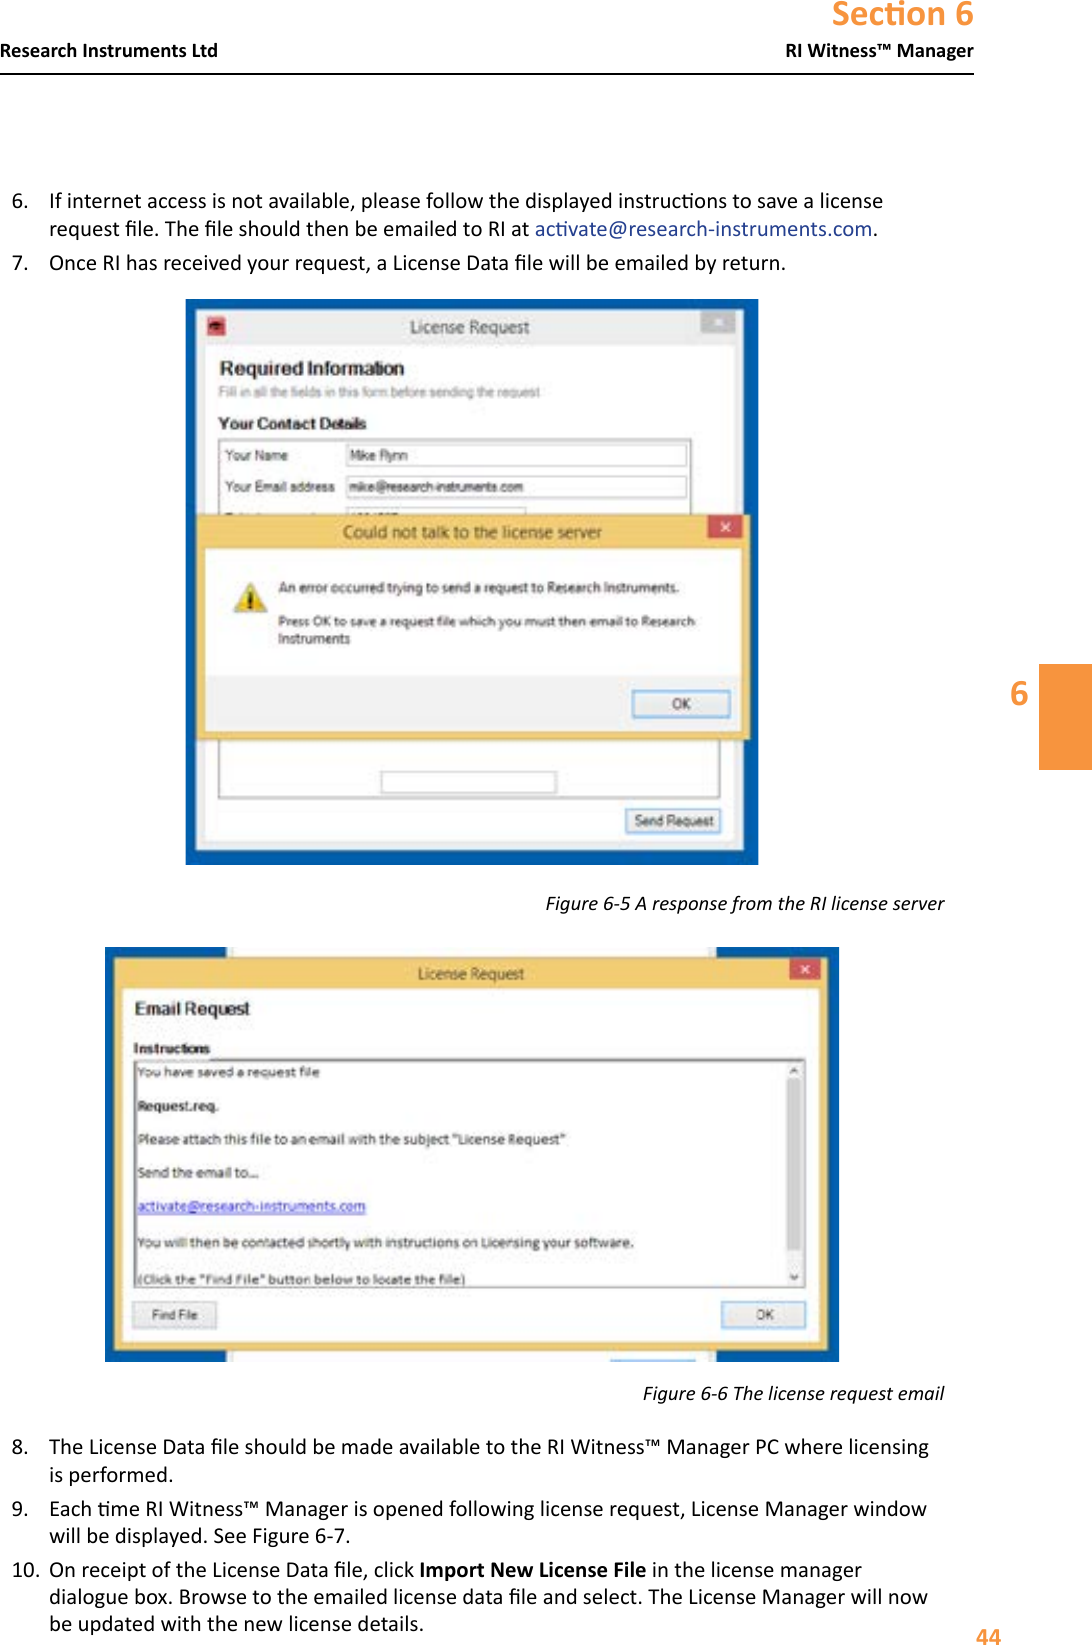
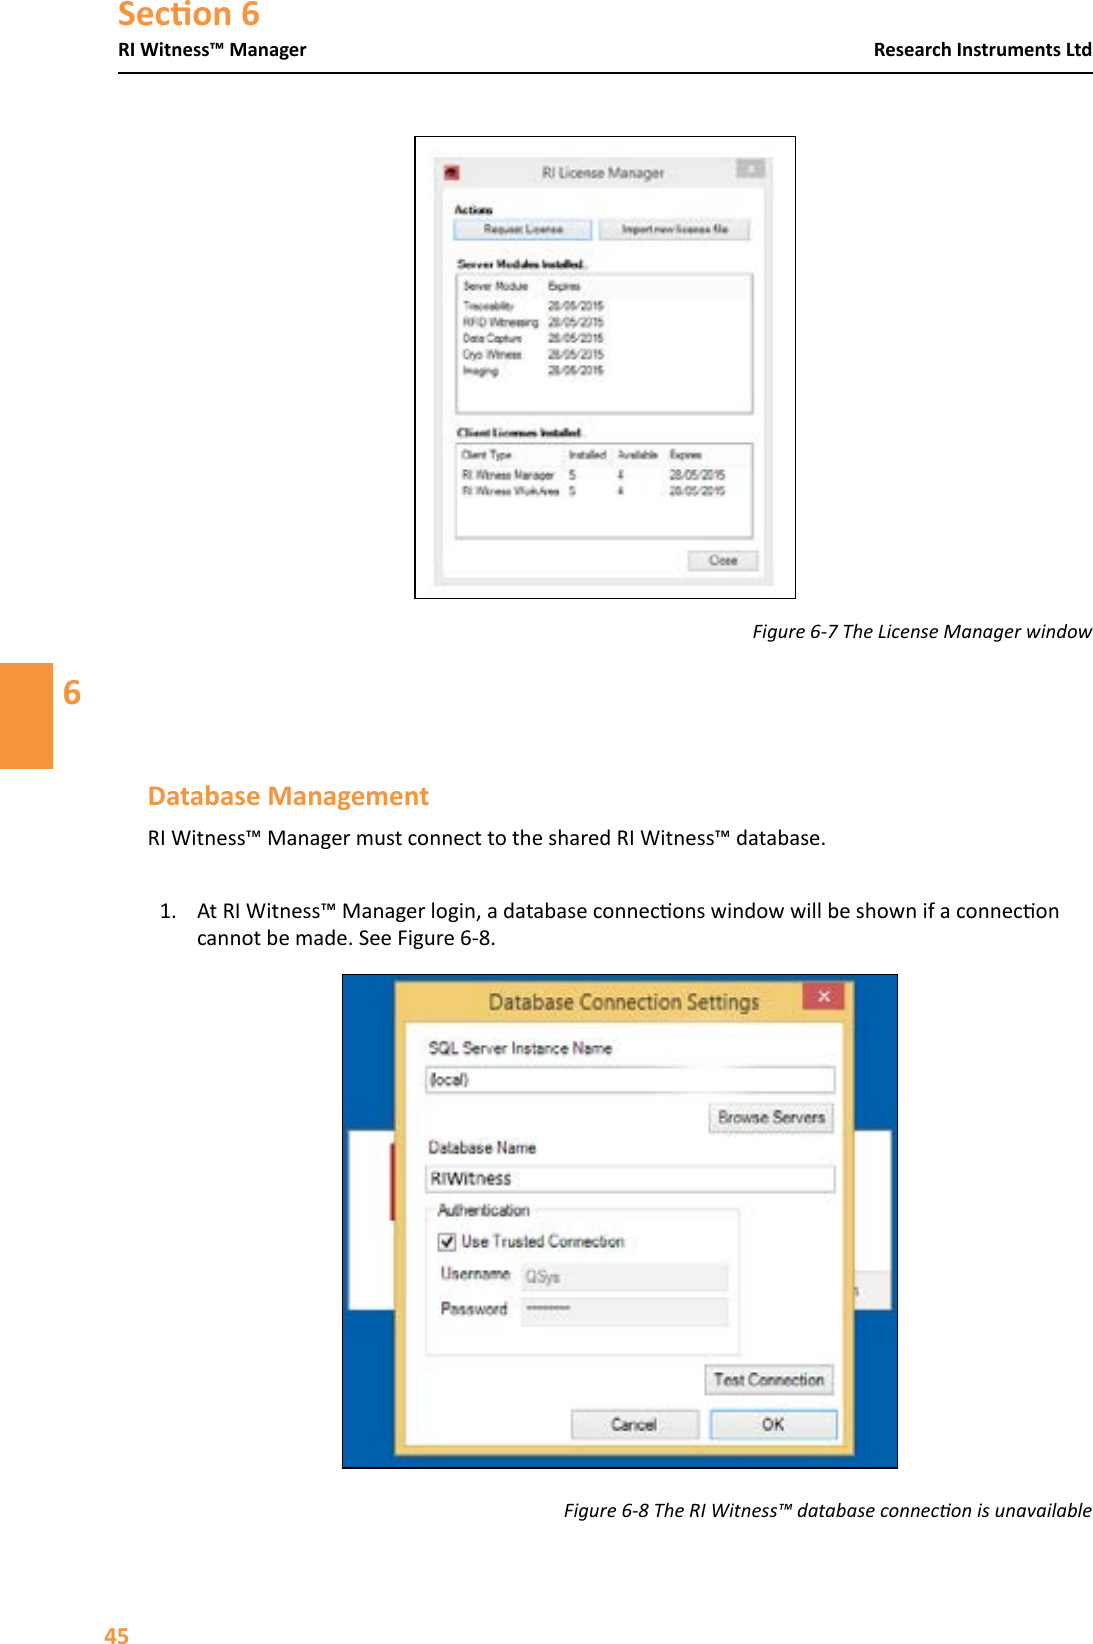
User Manual
Discussion / Help
Navigation

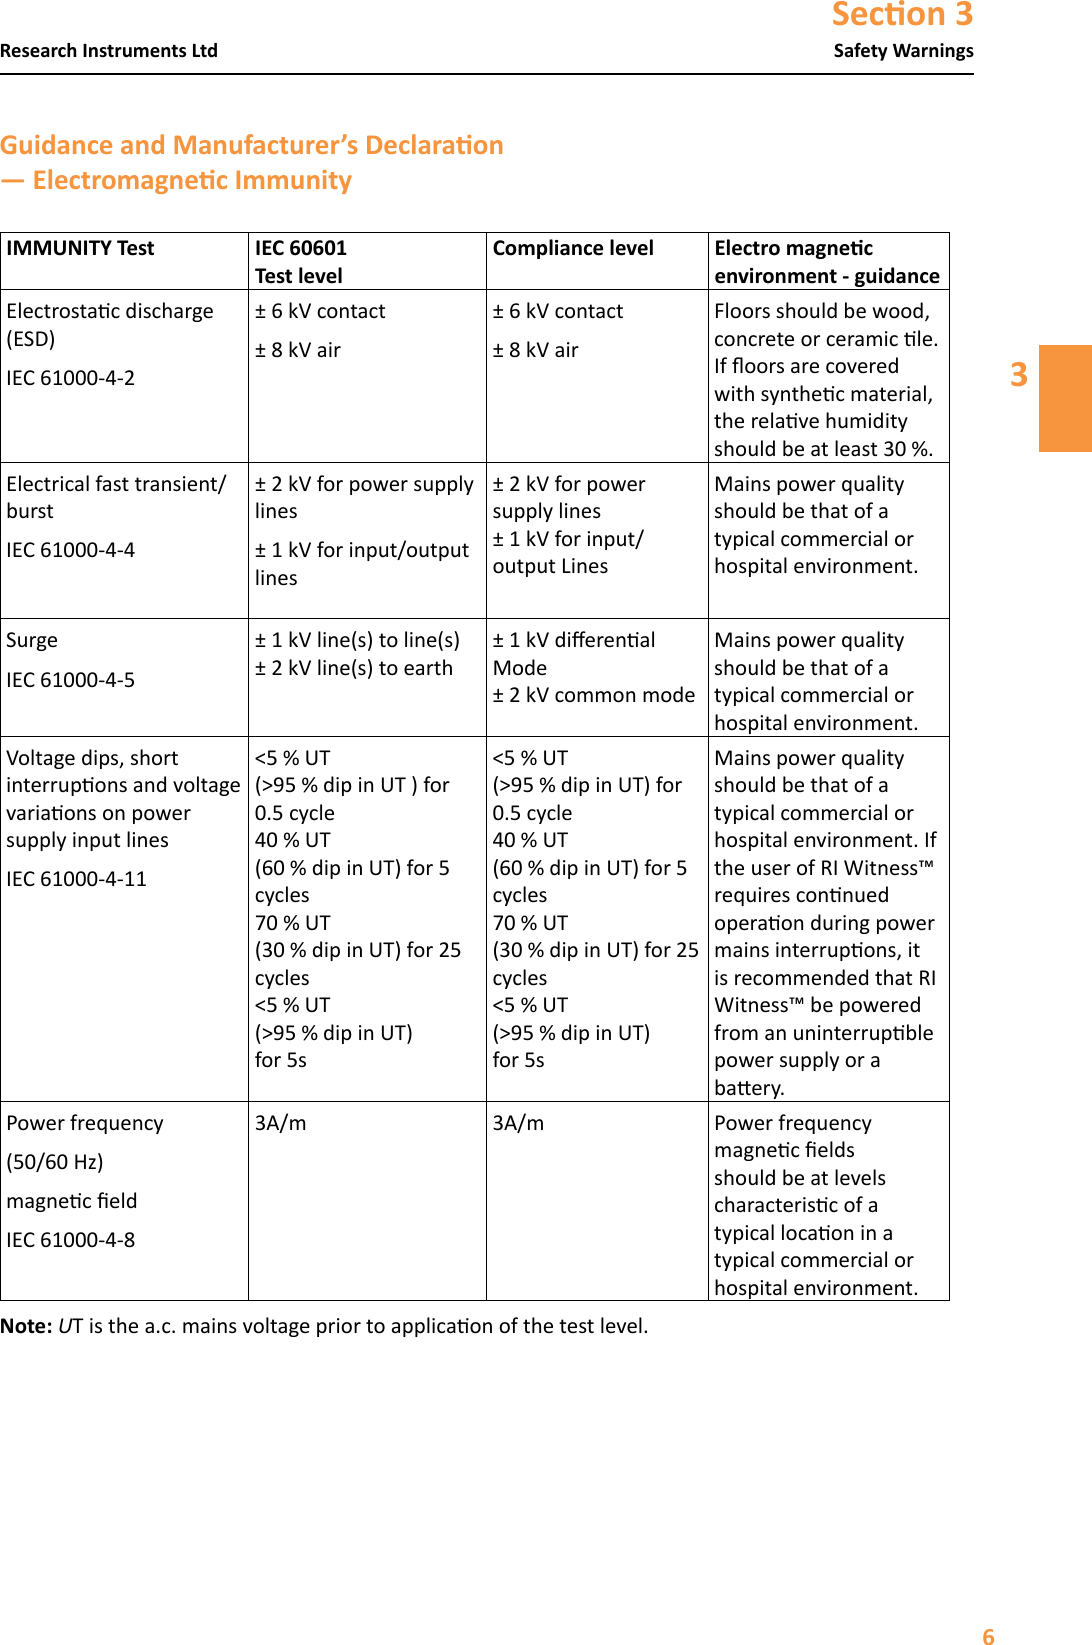
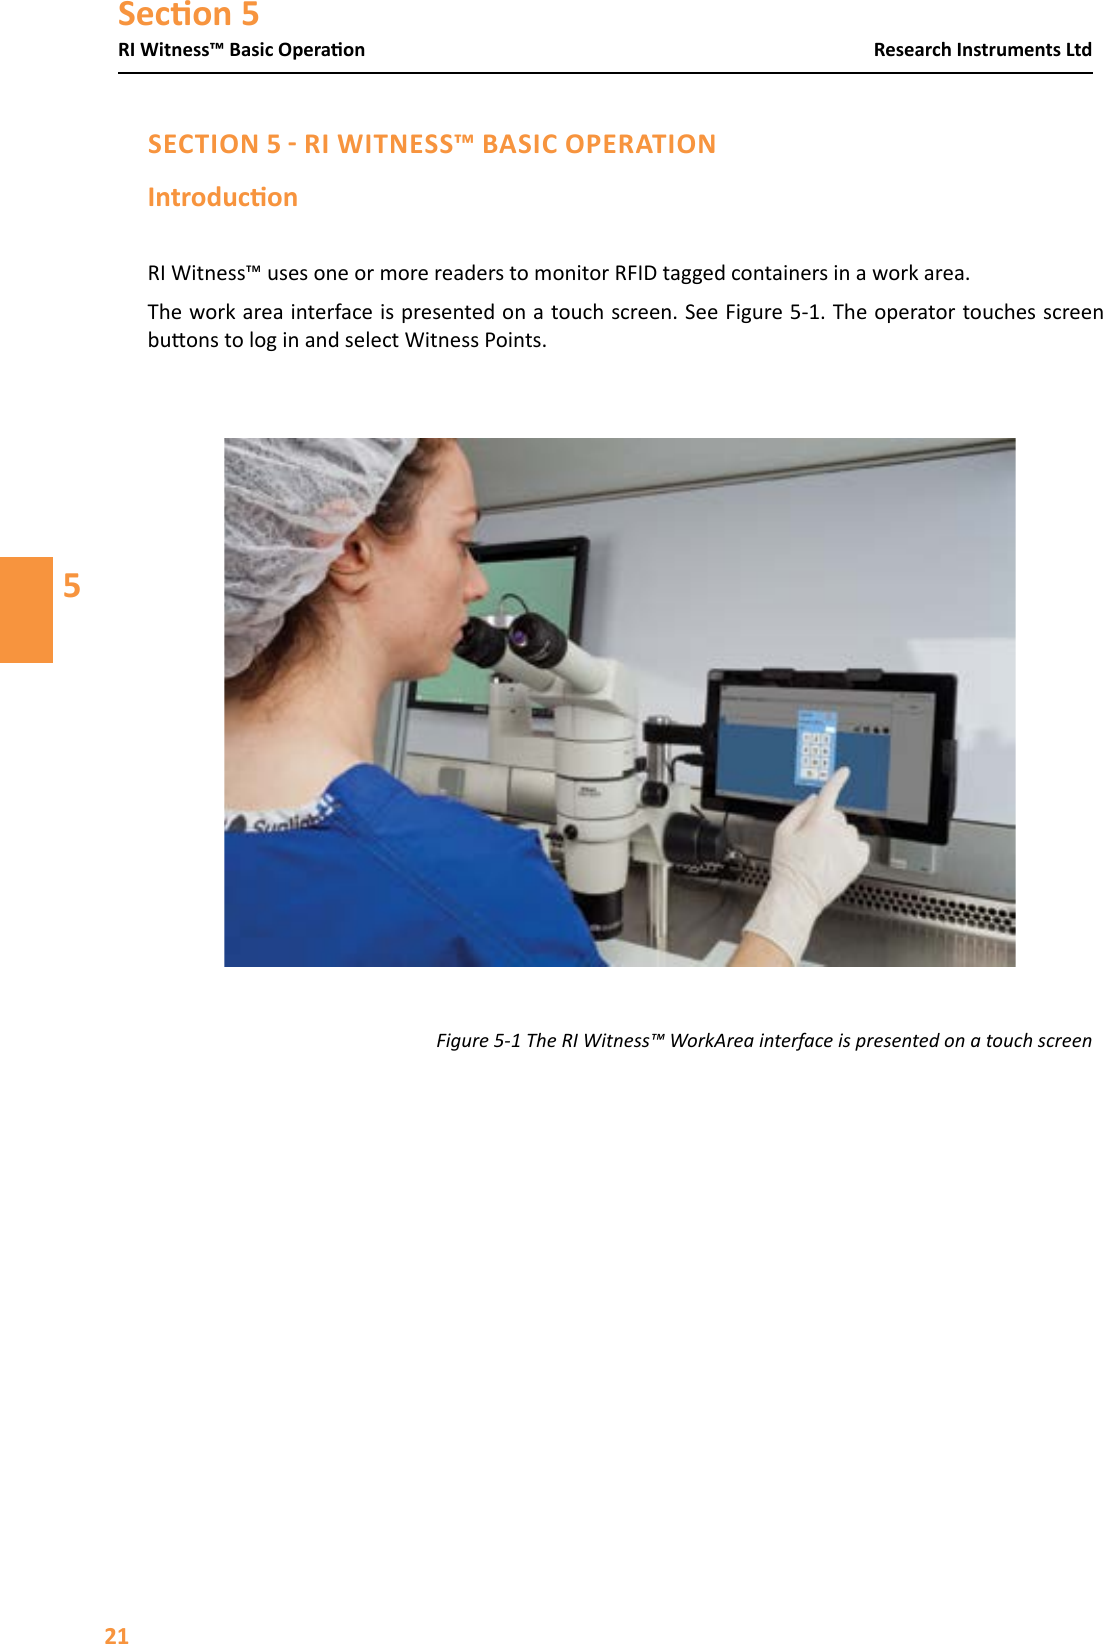
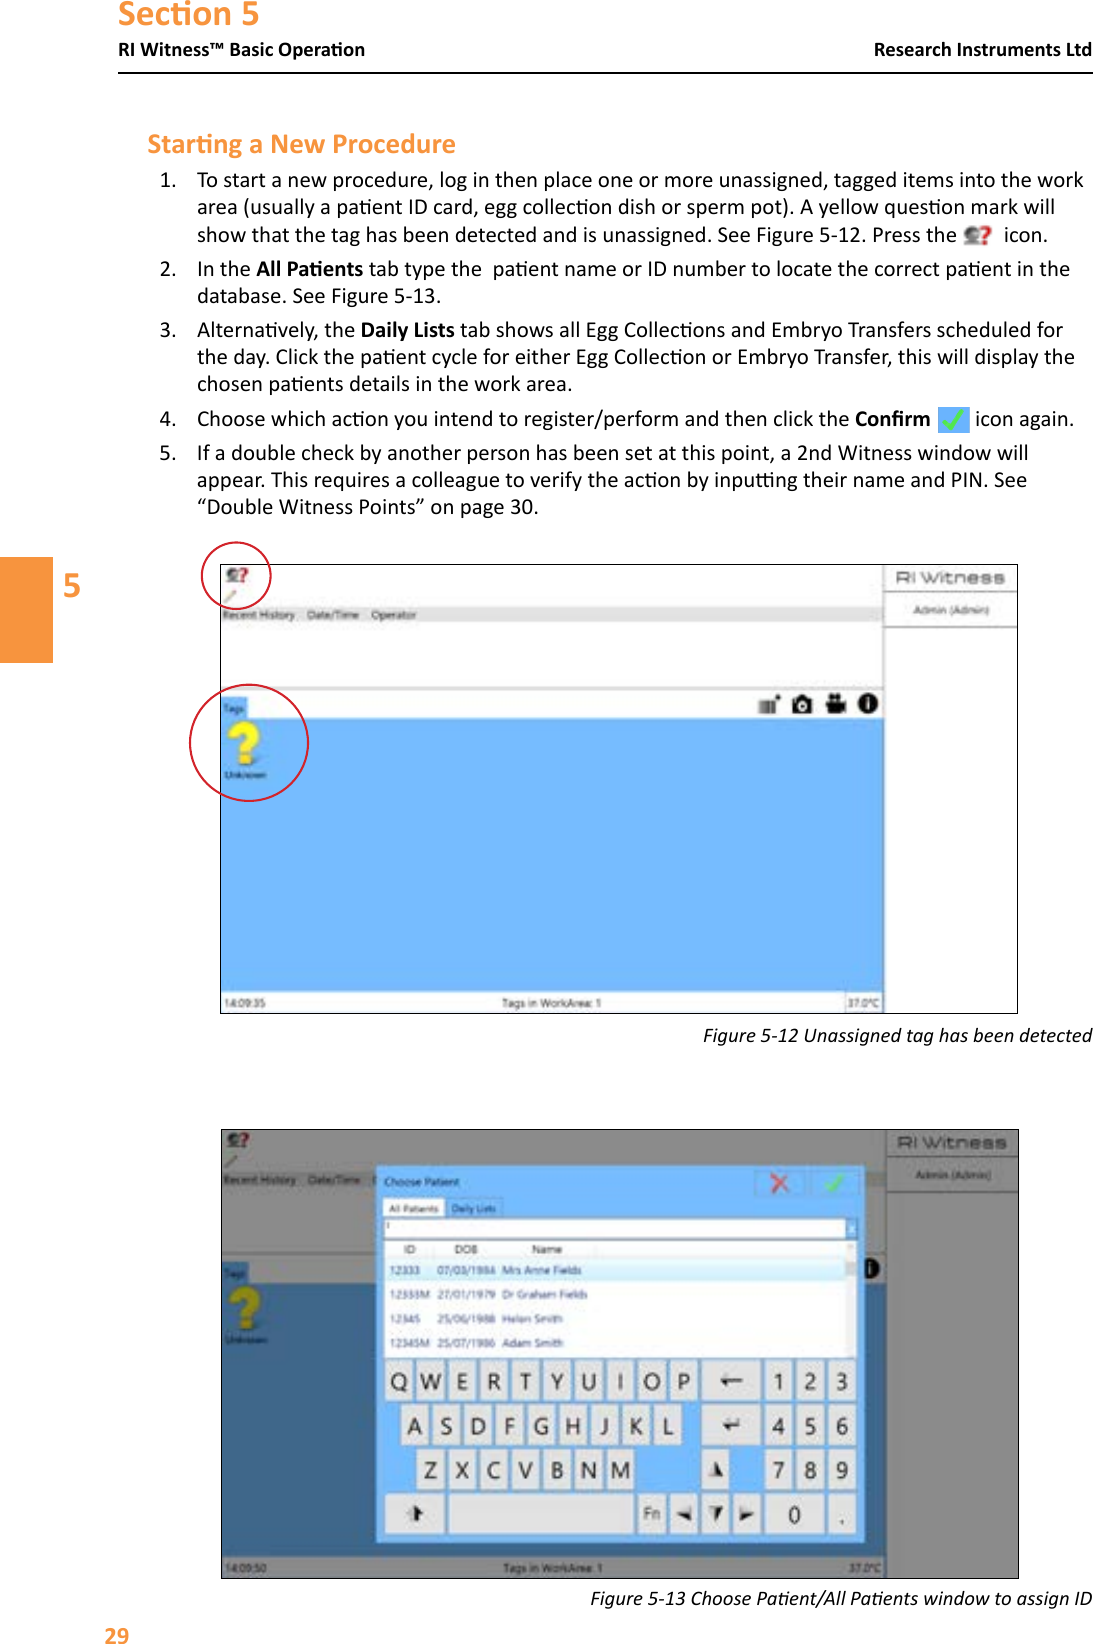
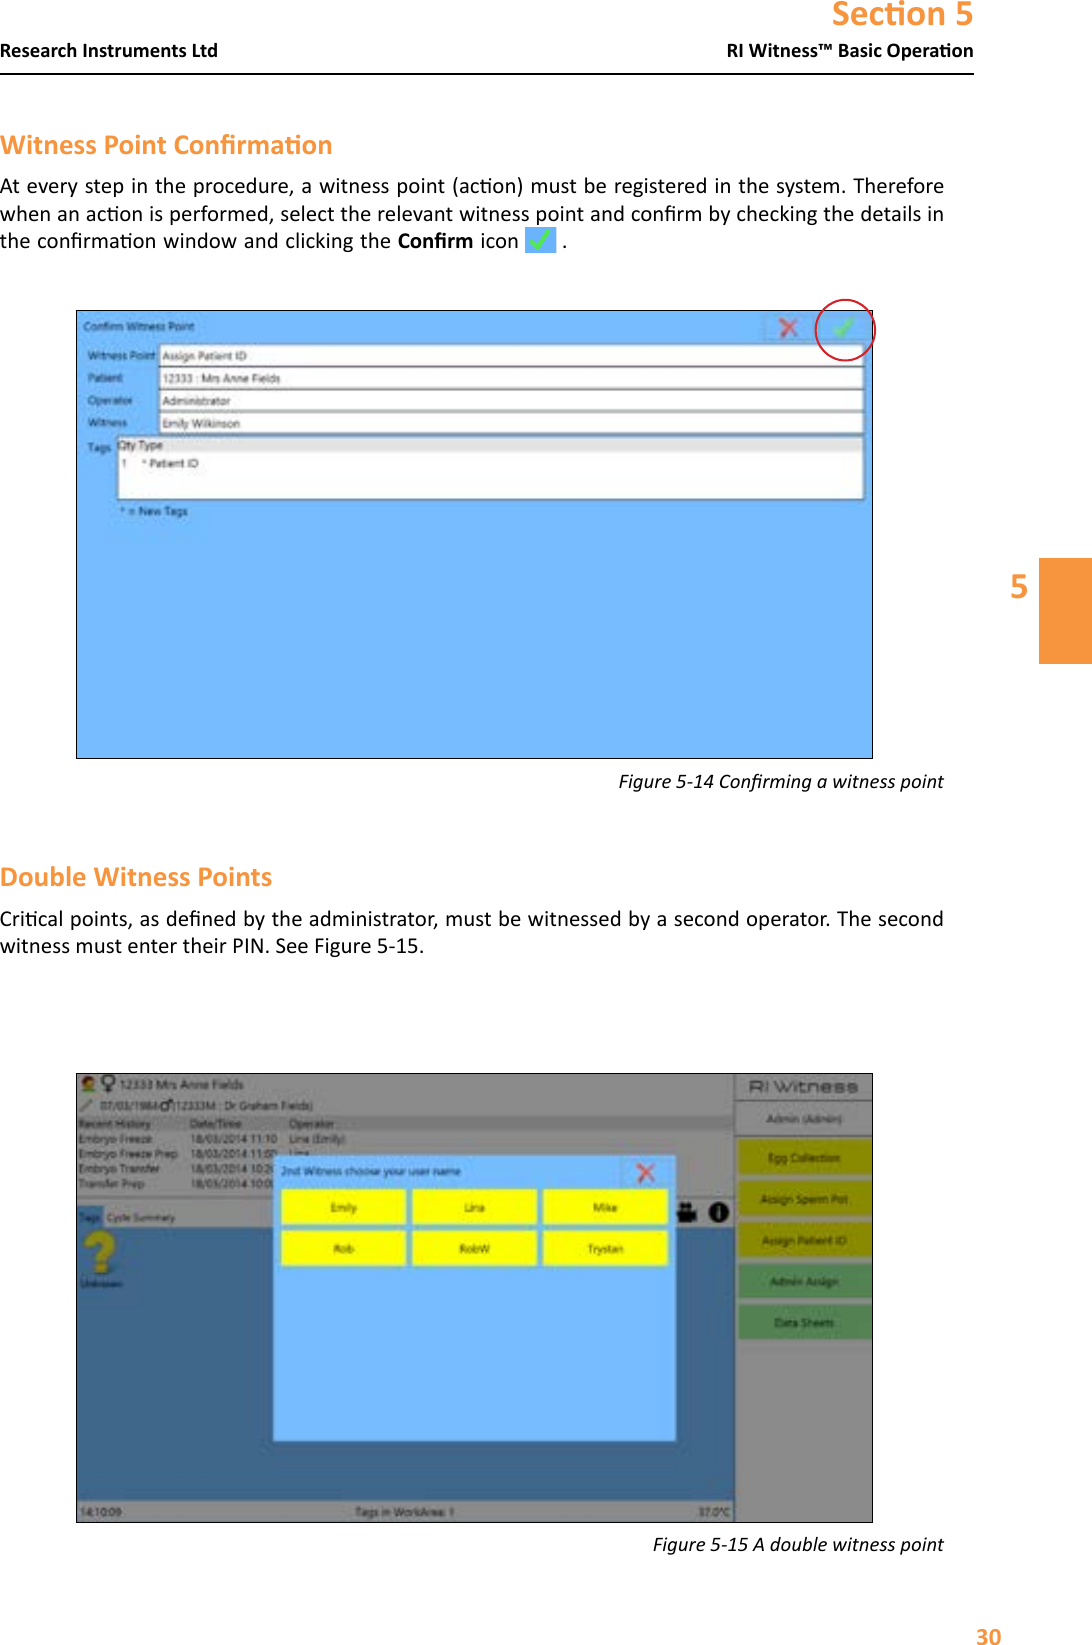
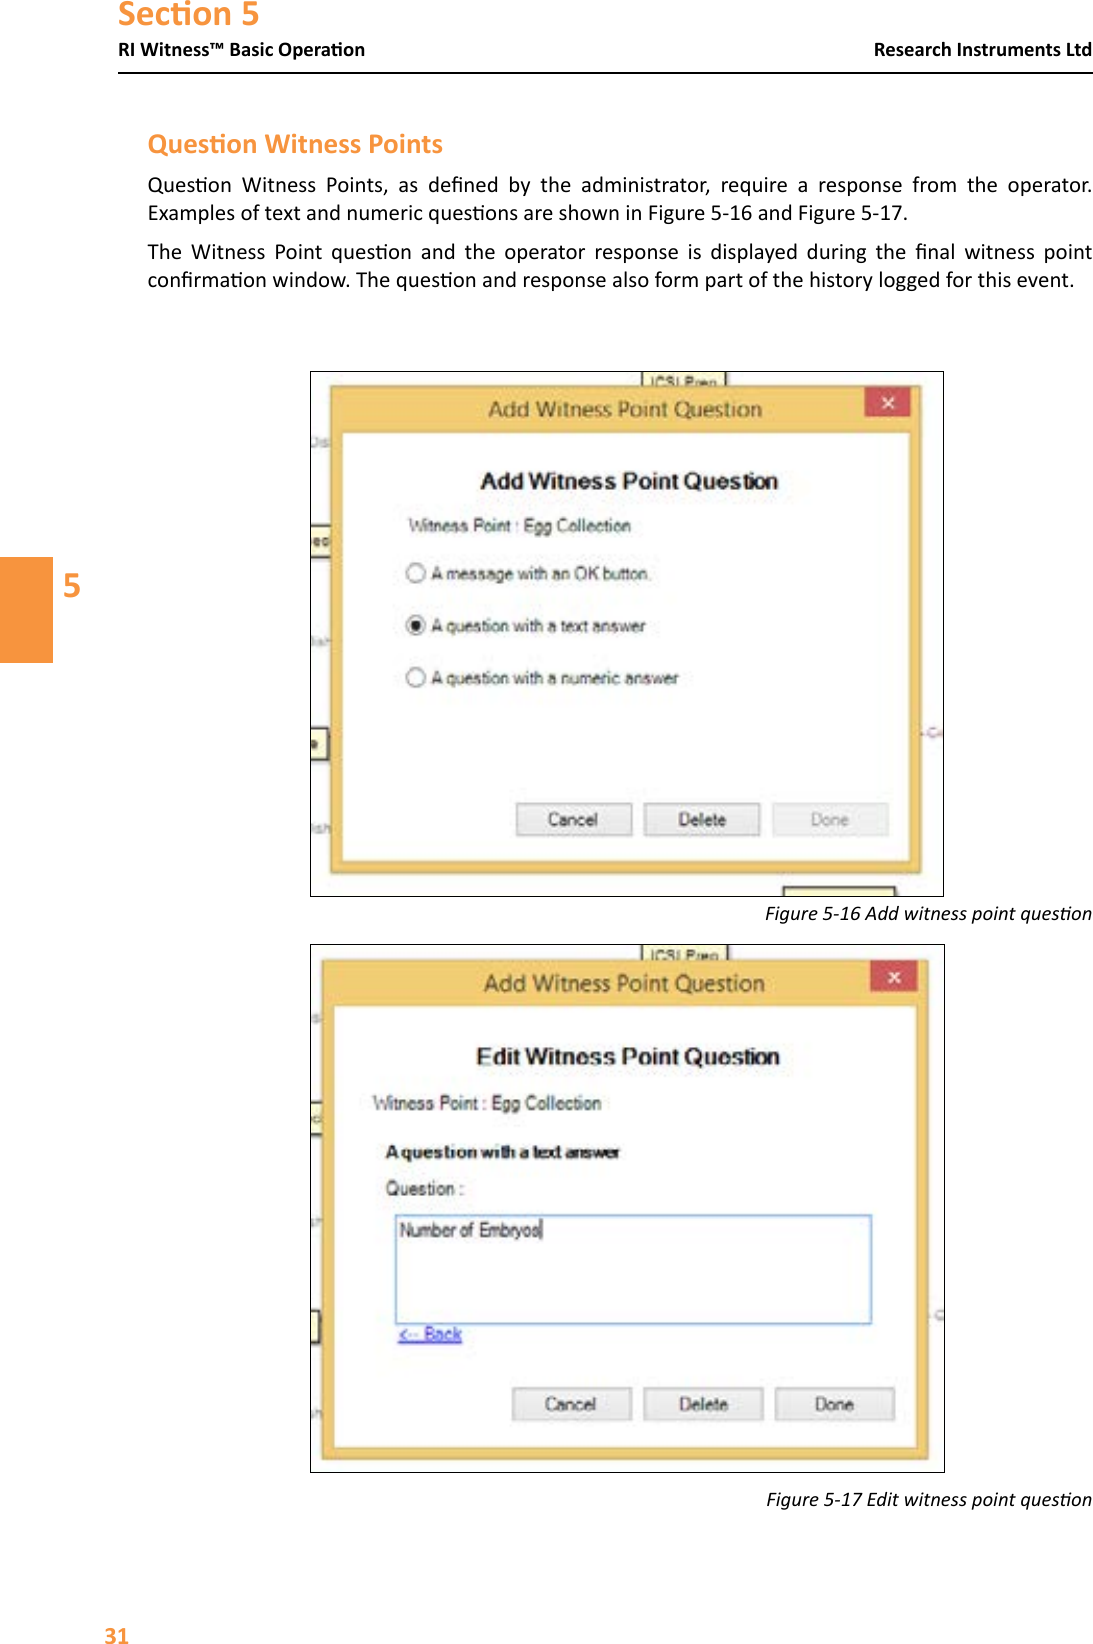
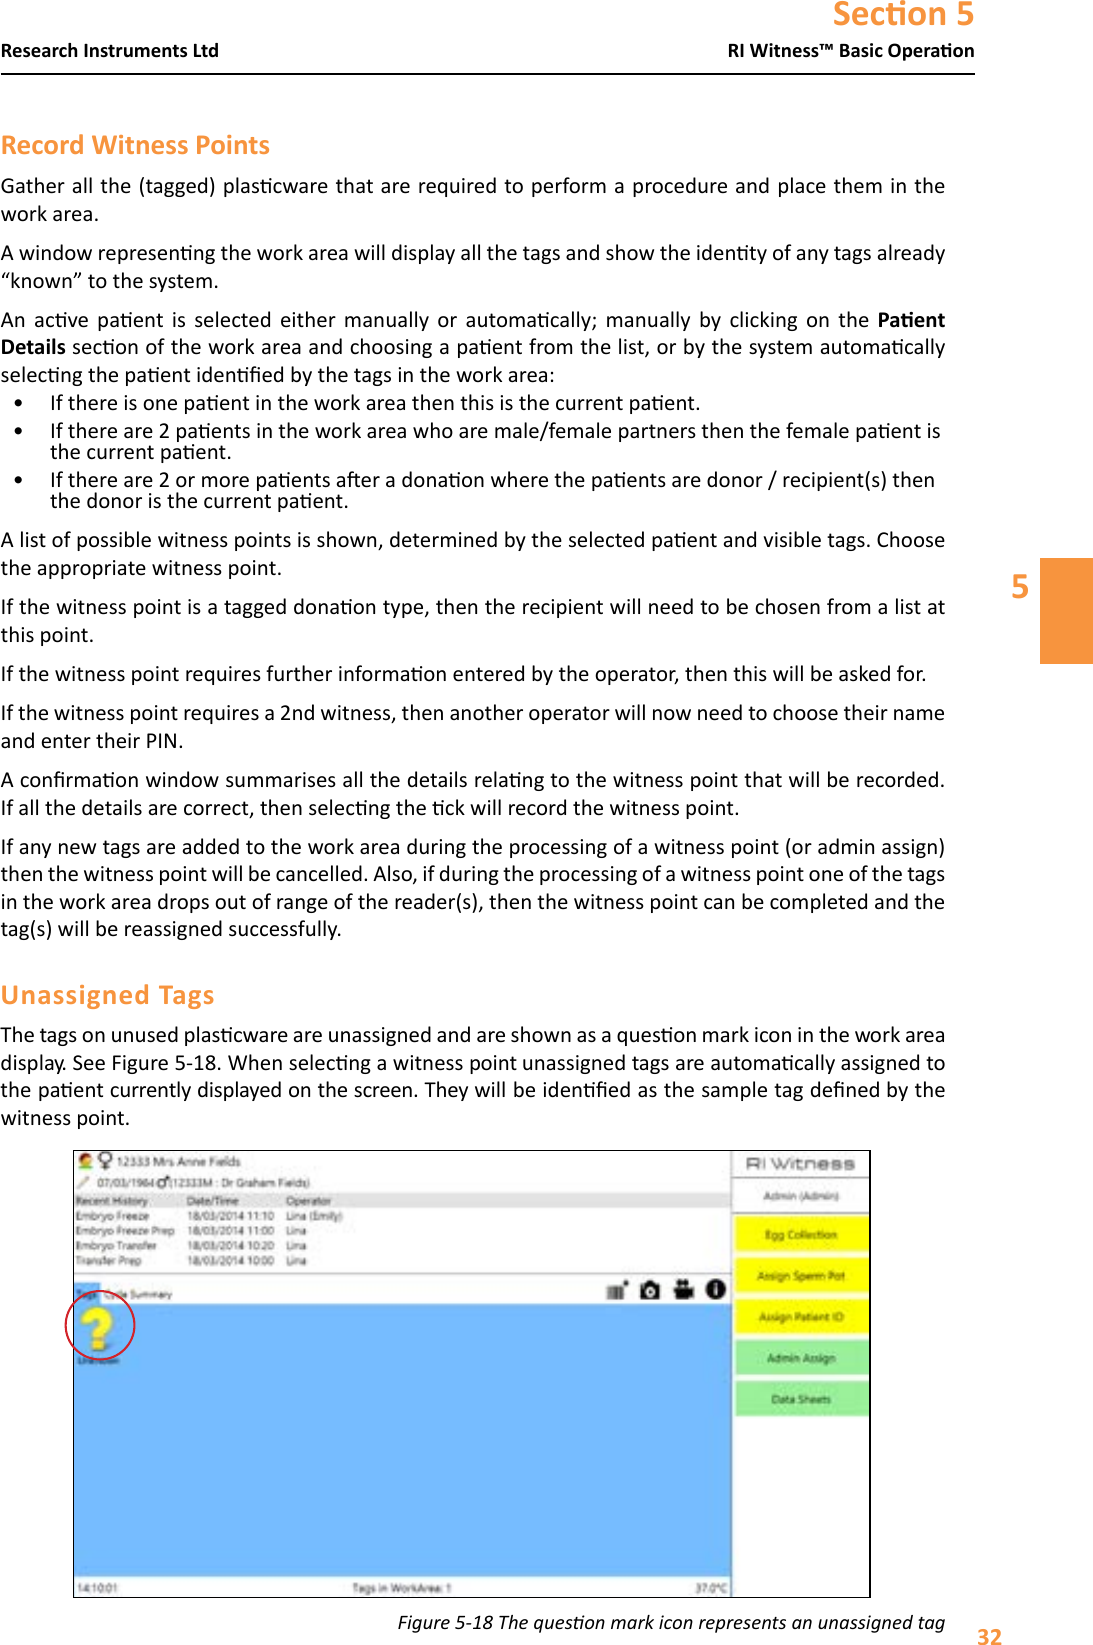
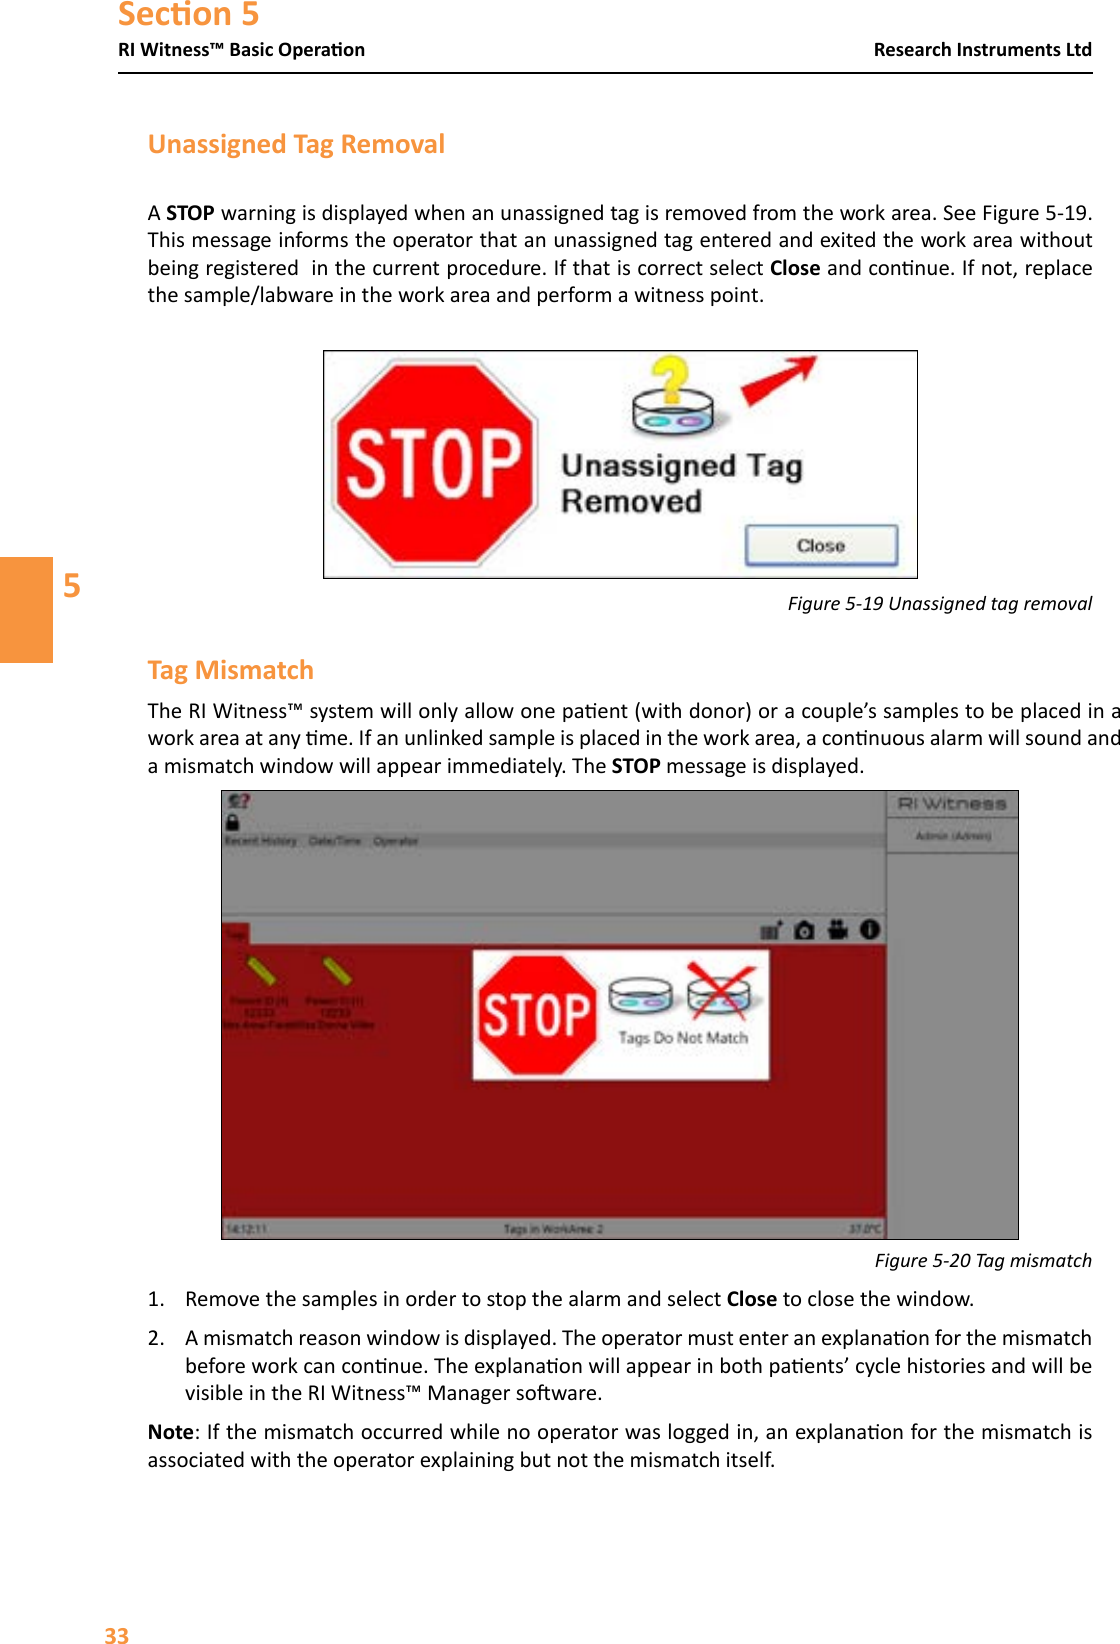
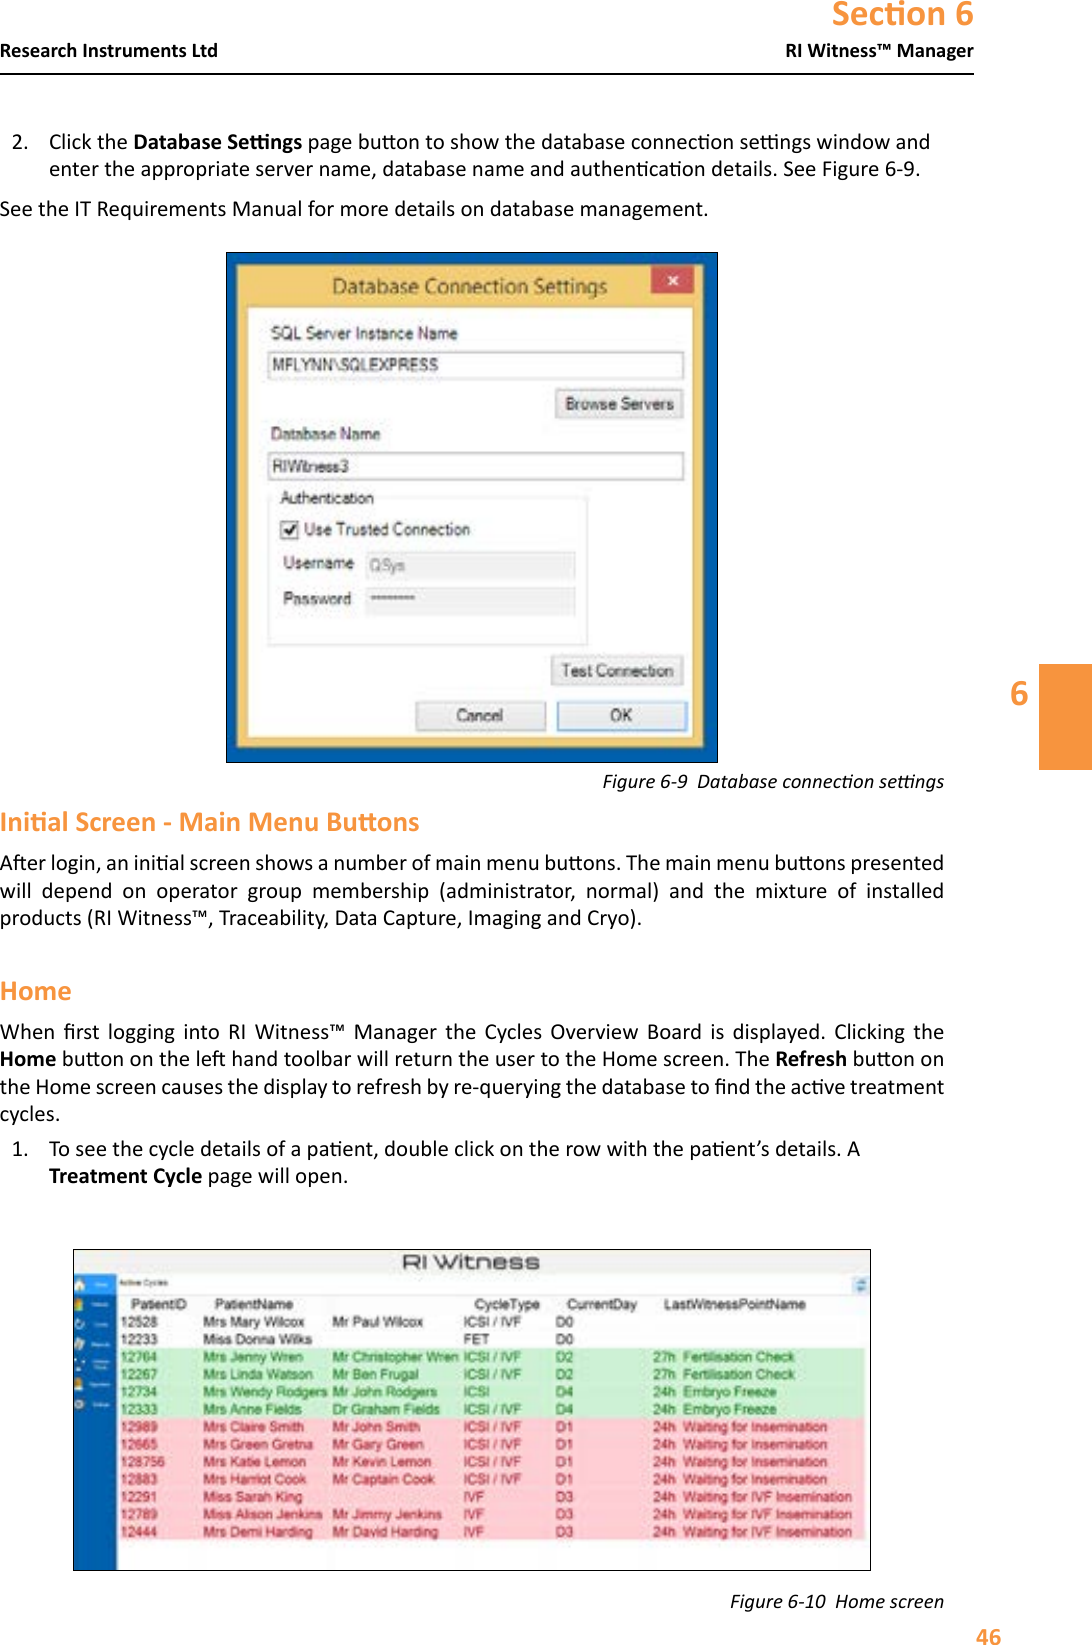
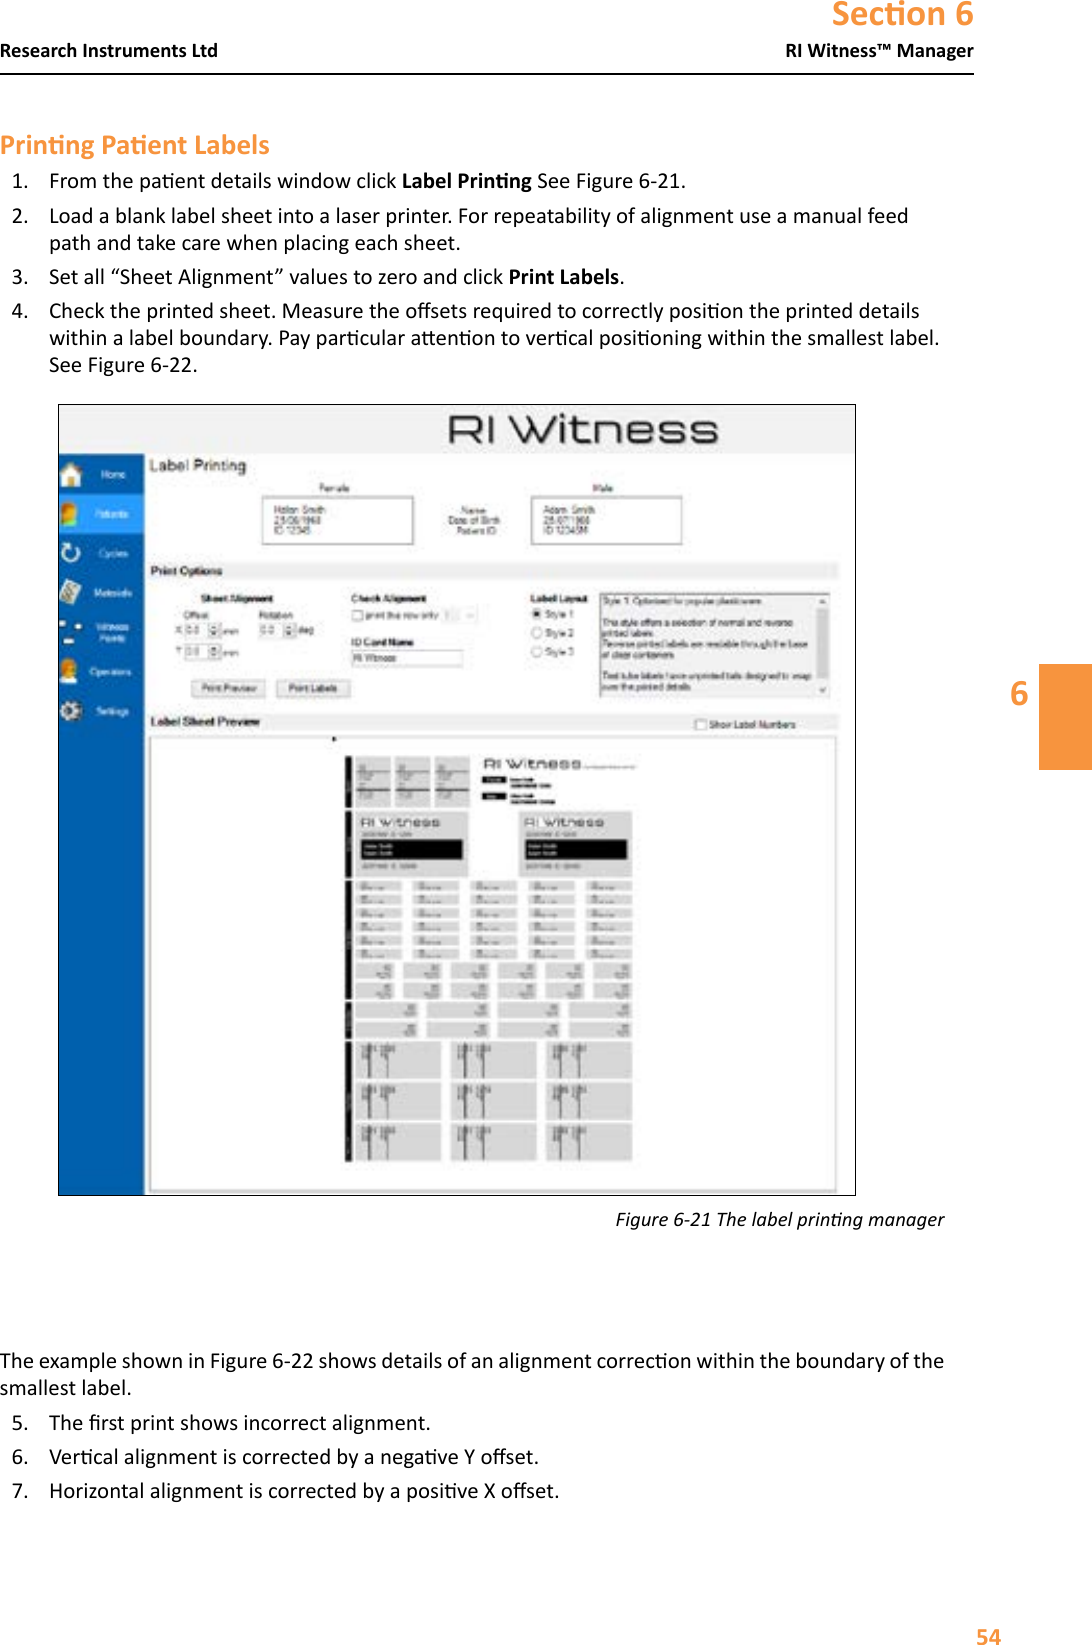
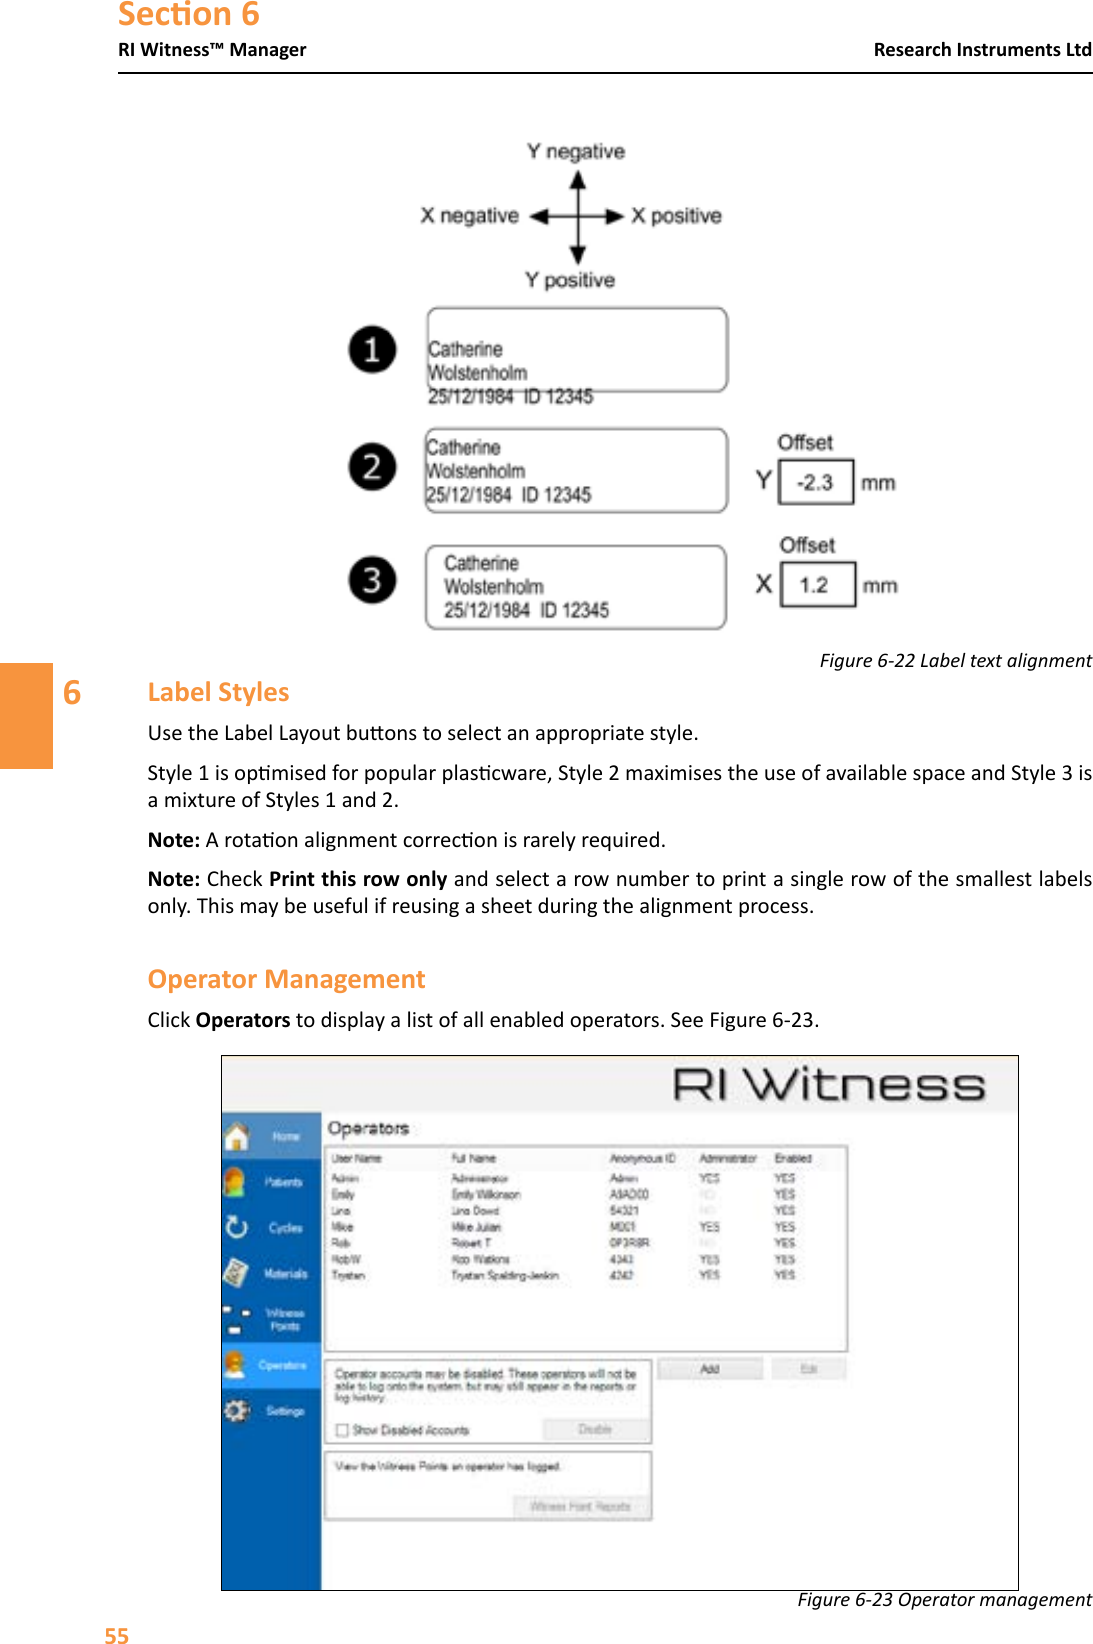
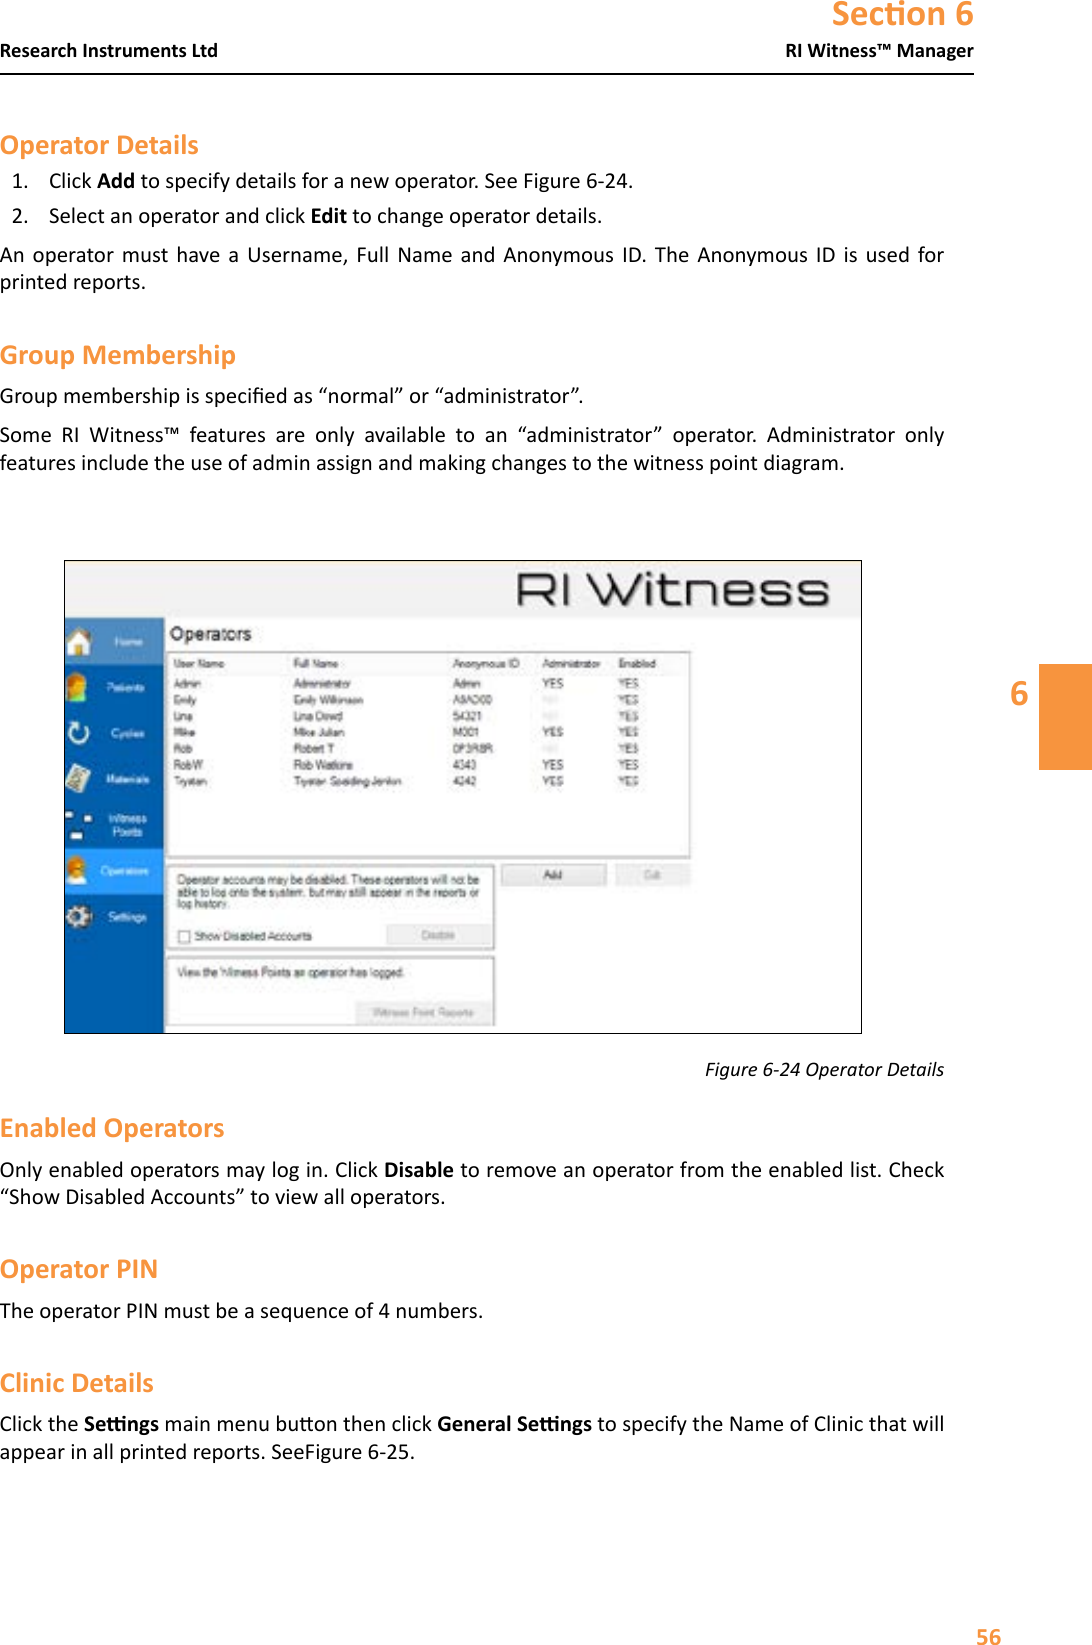
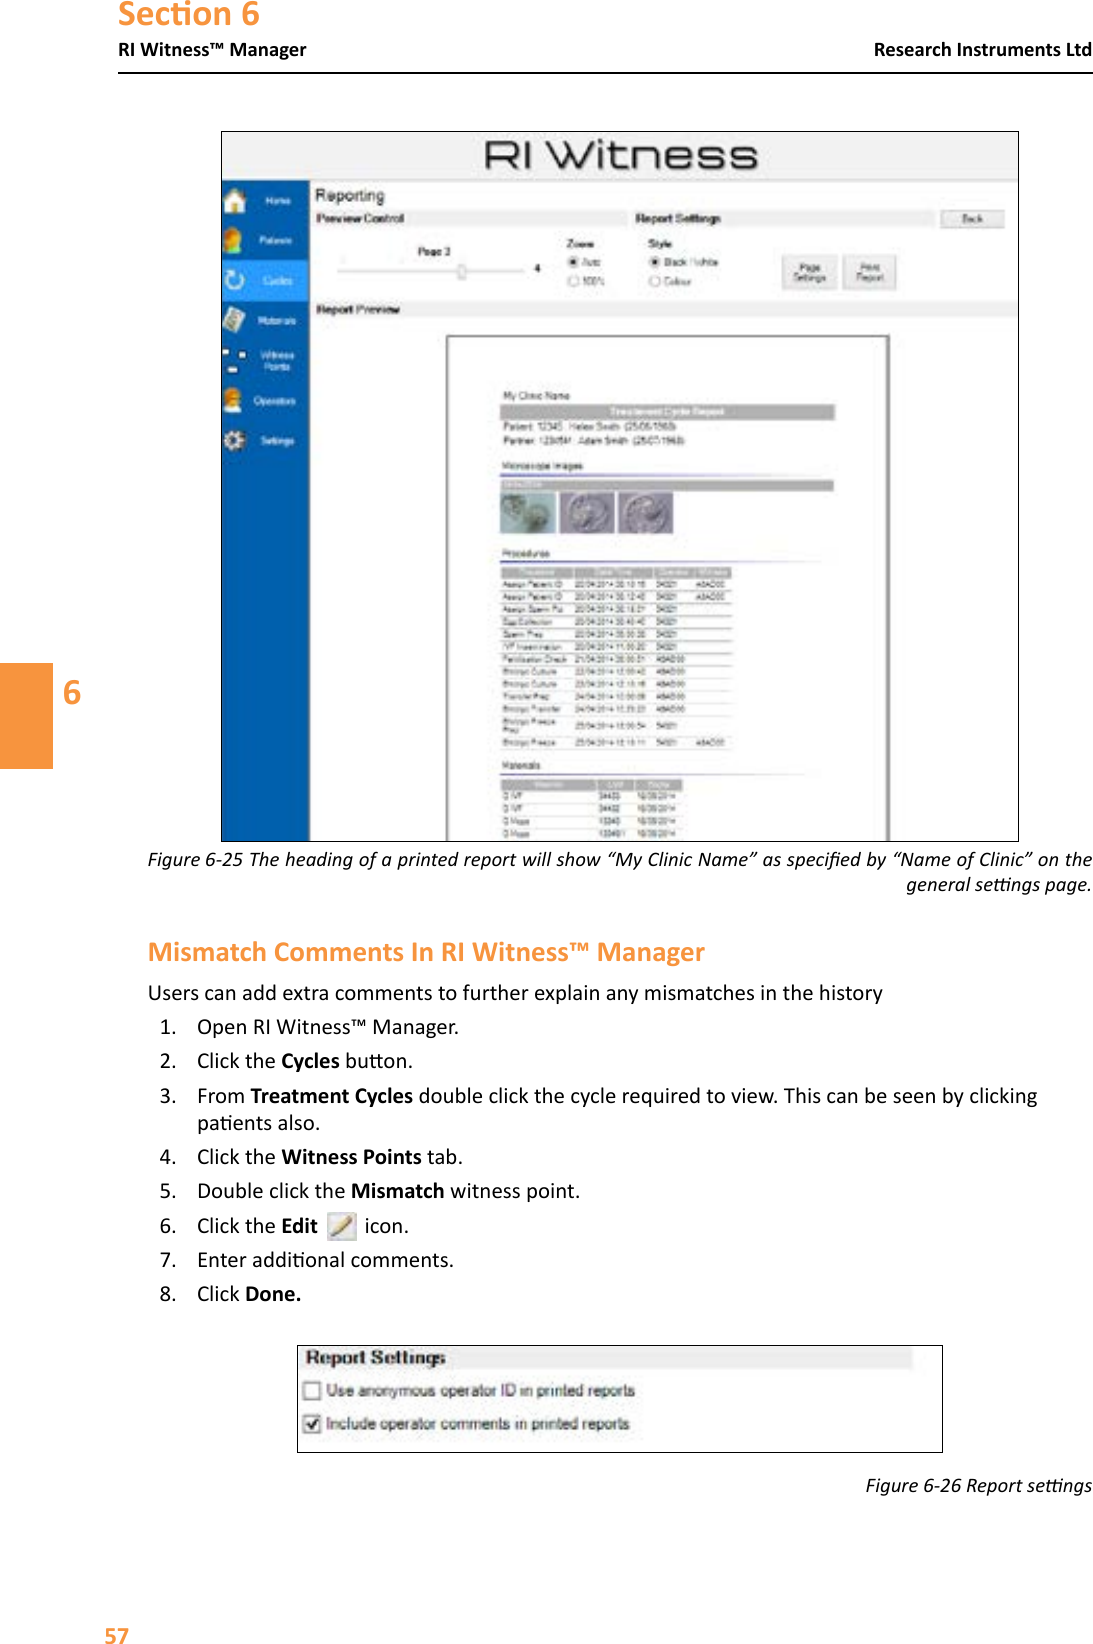
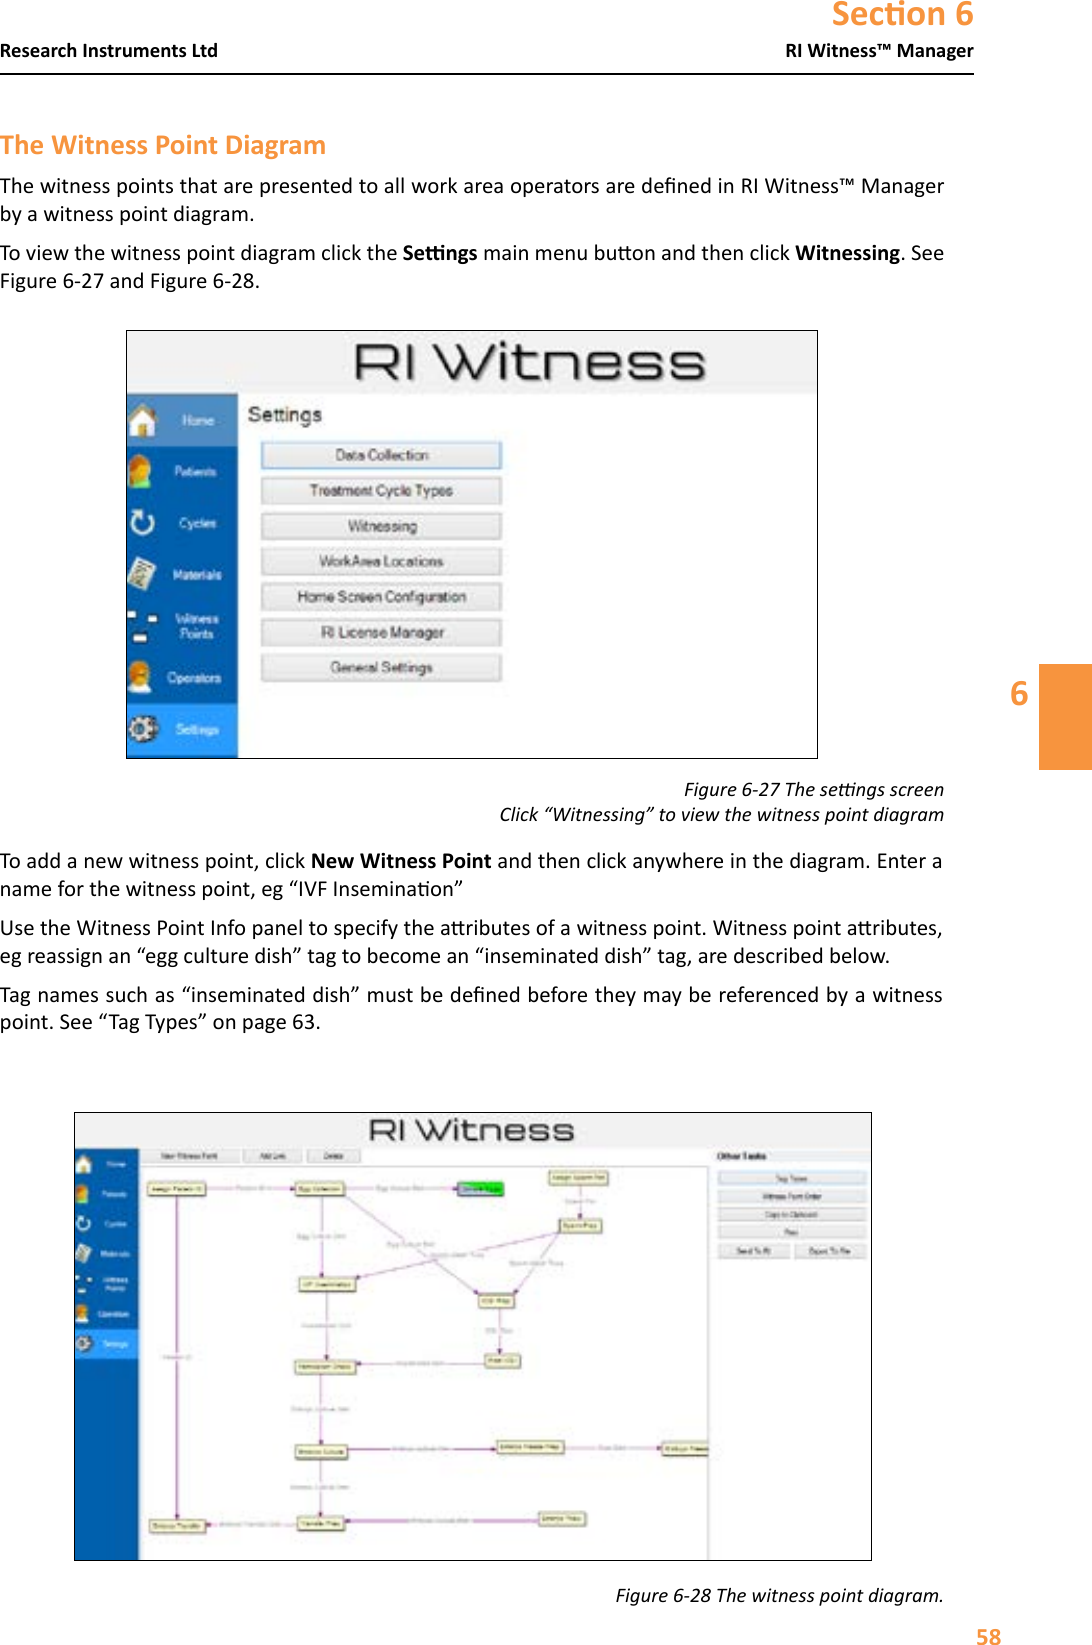
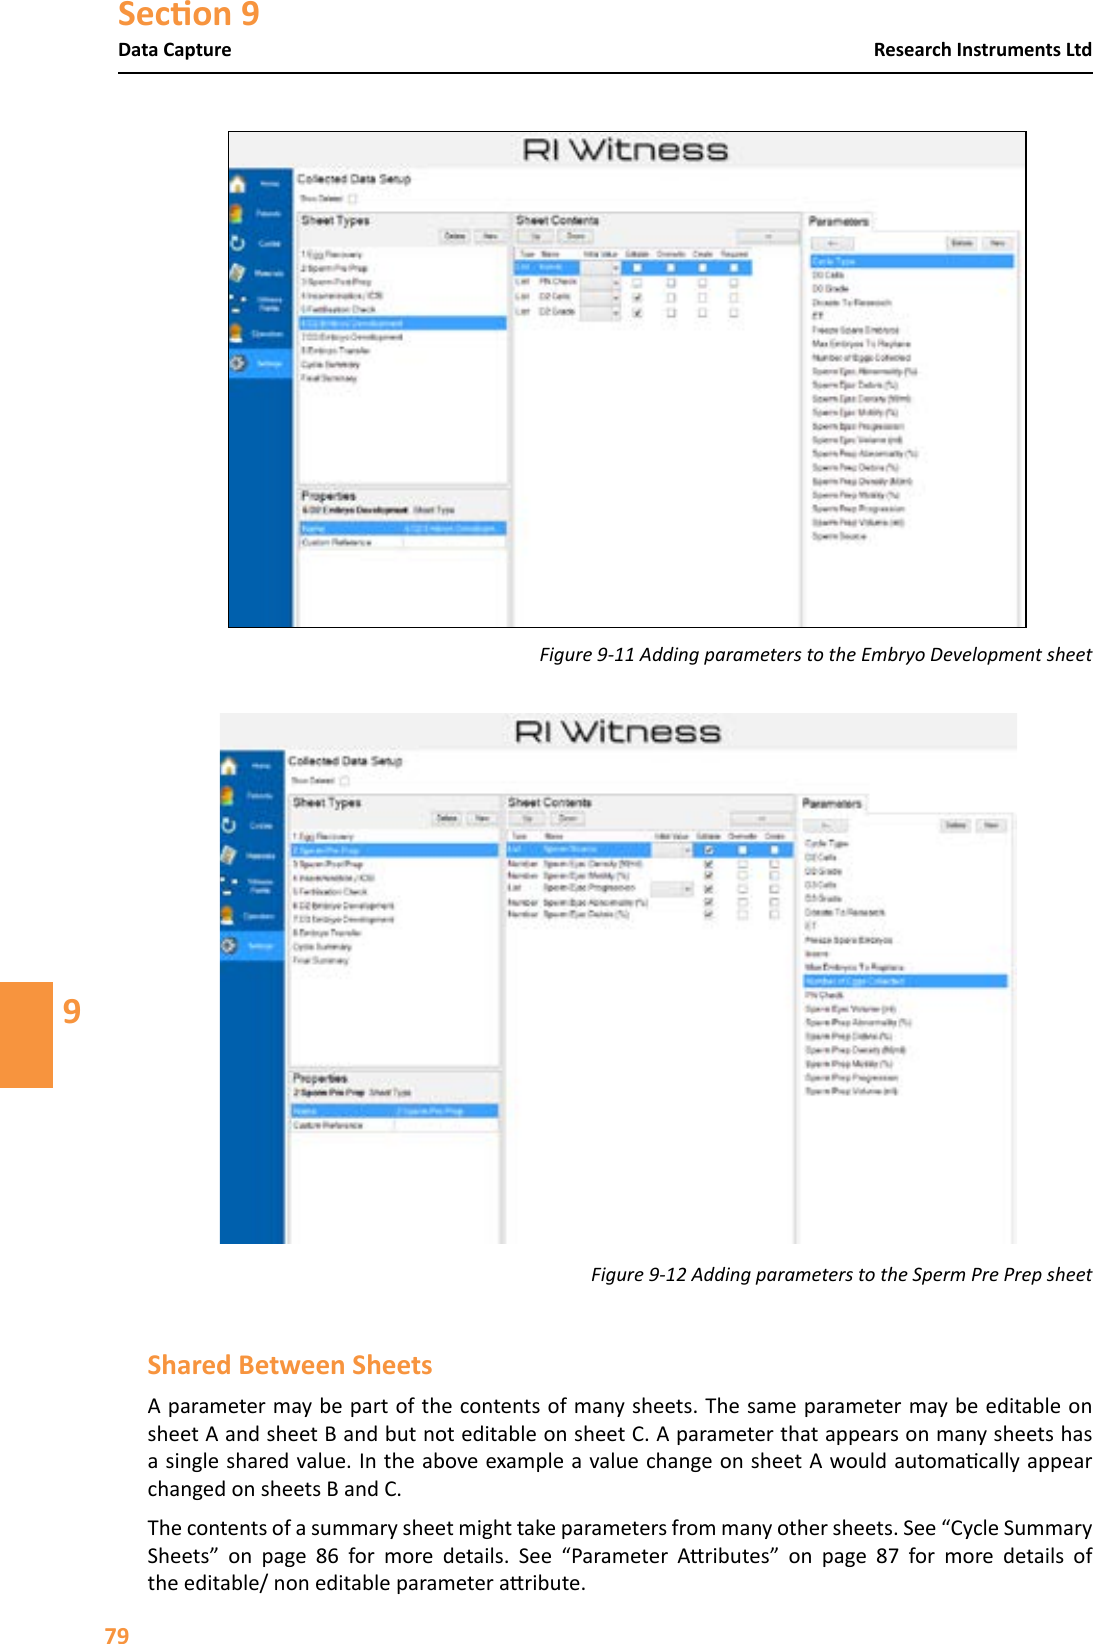
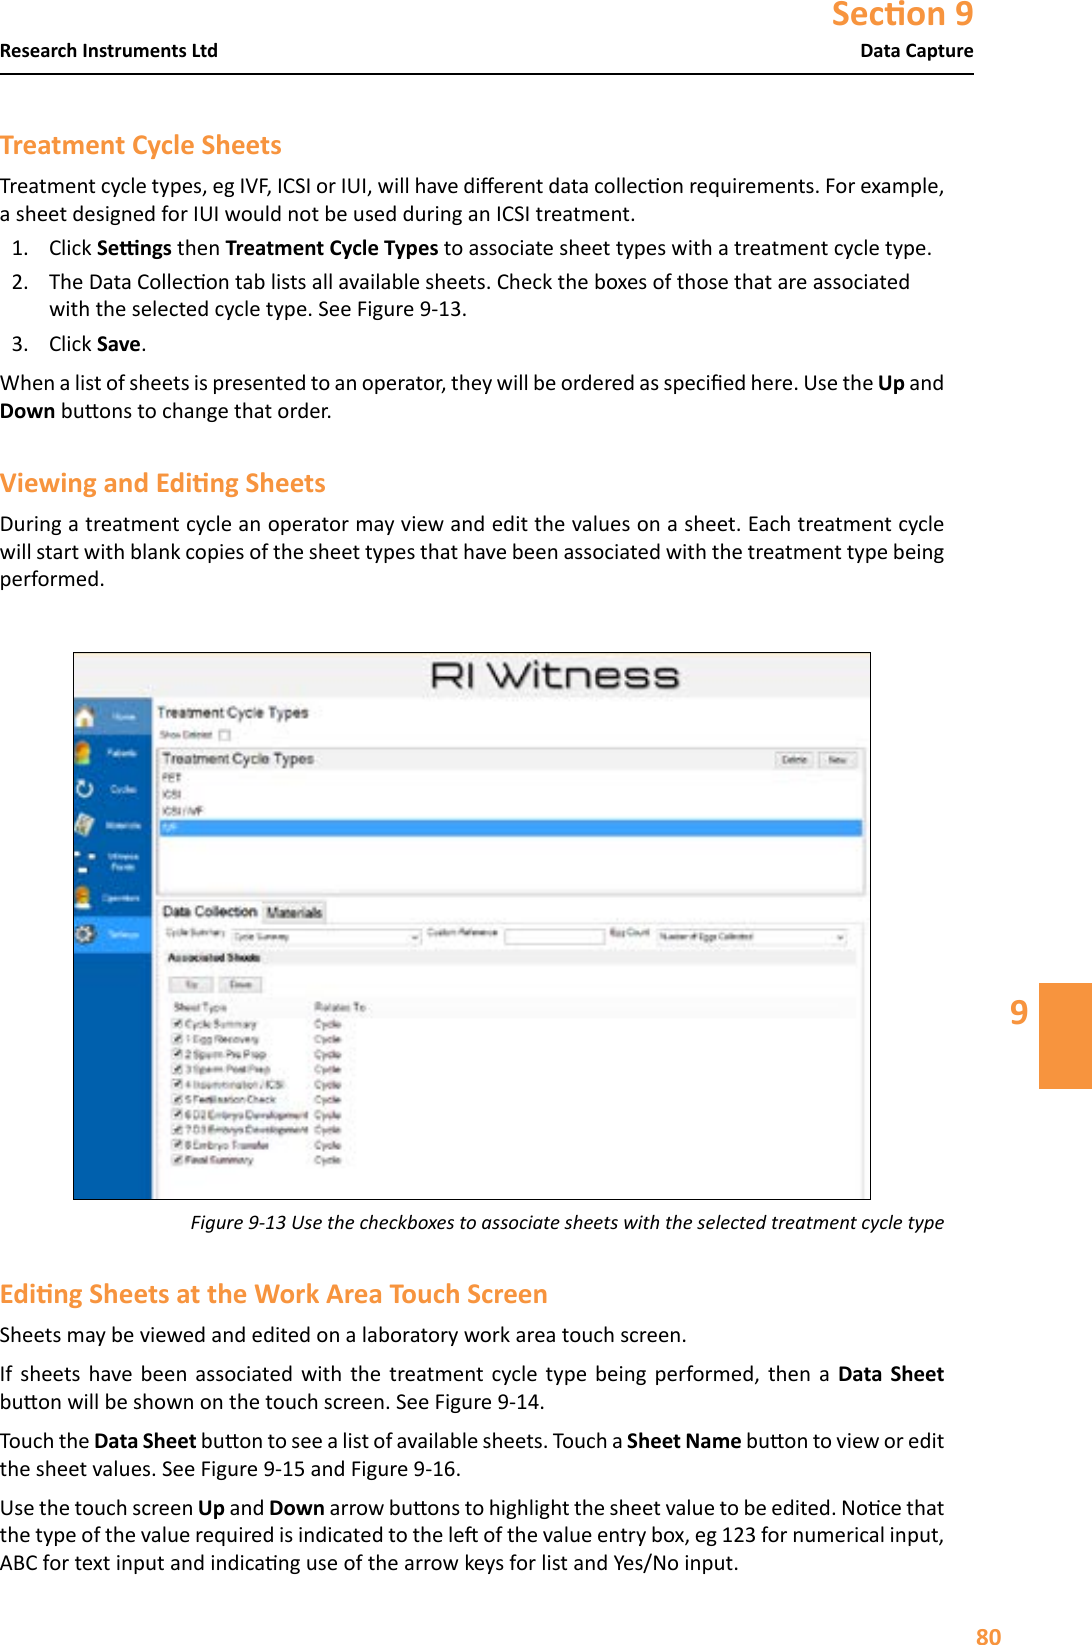
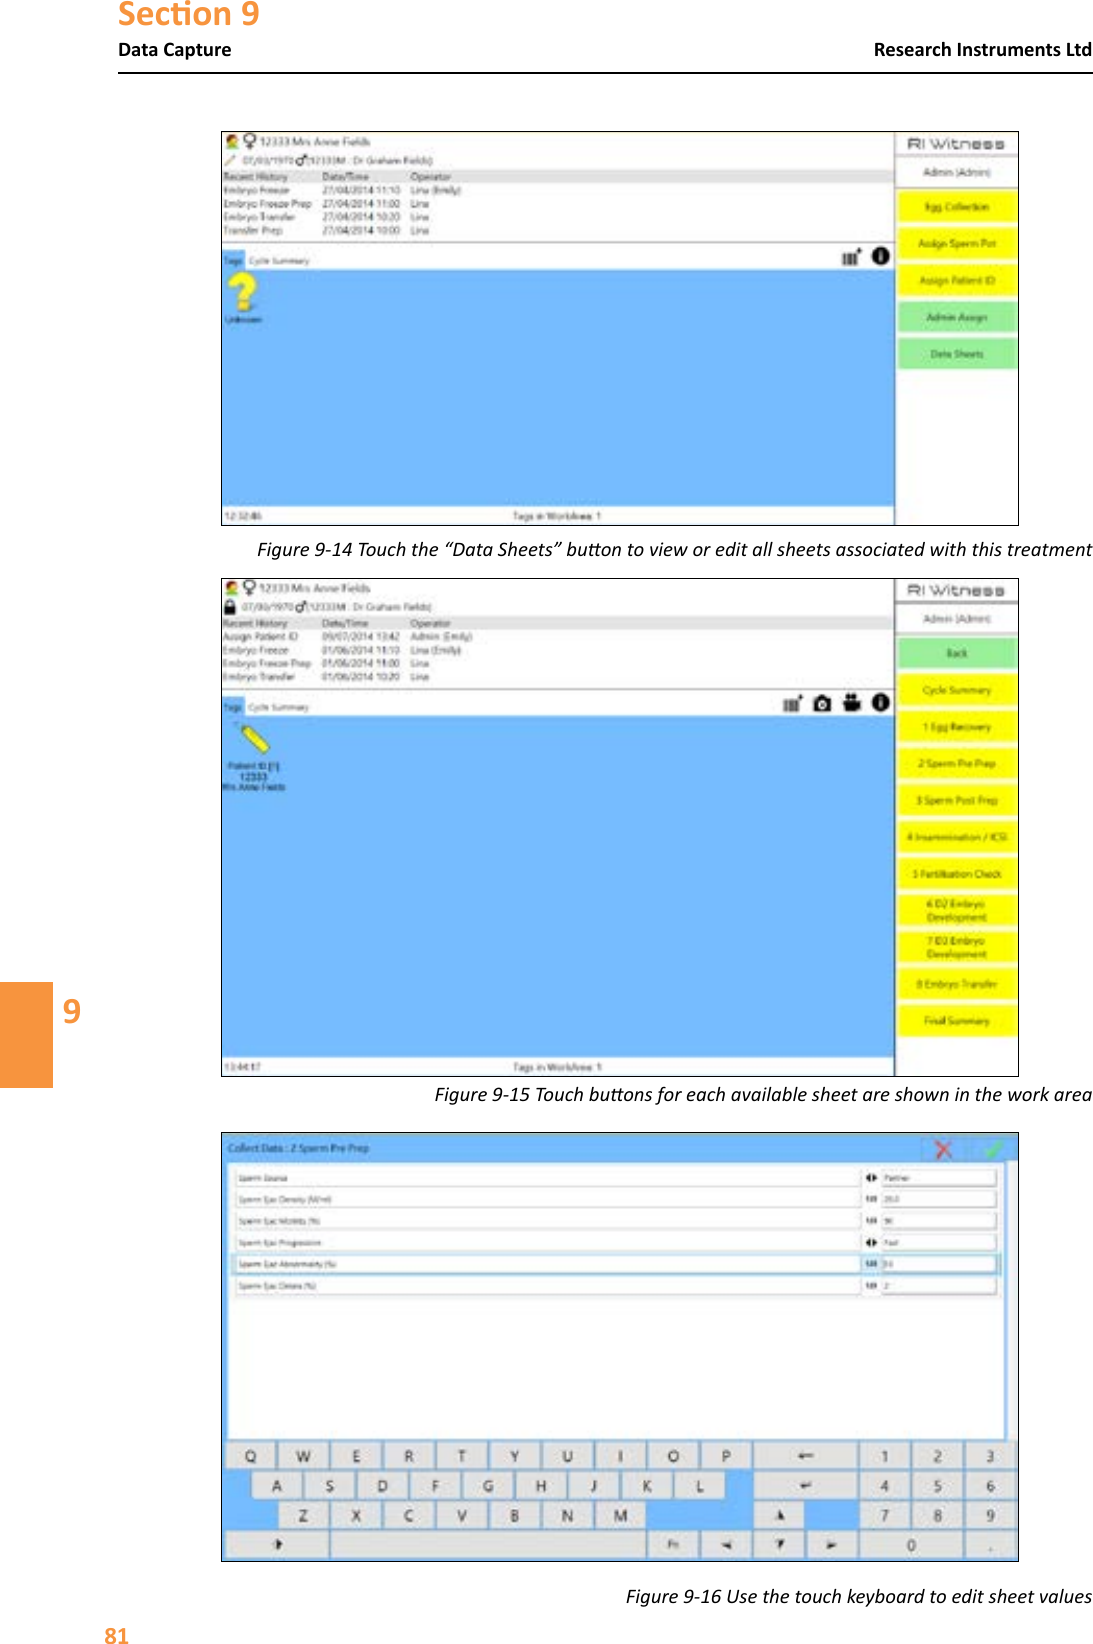
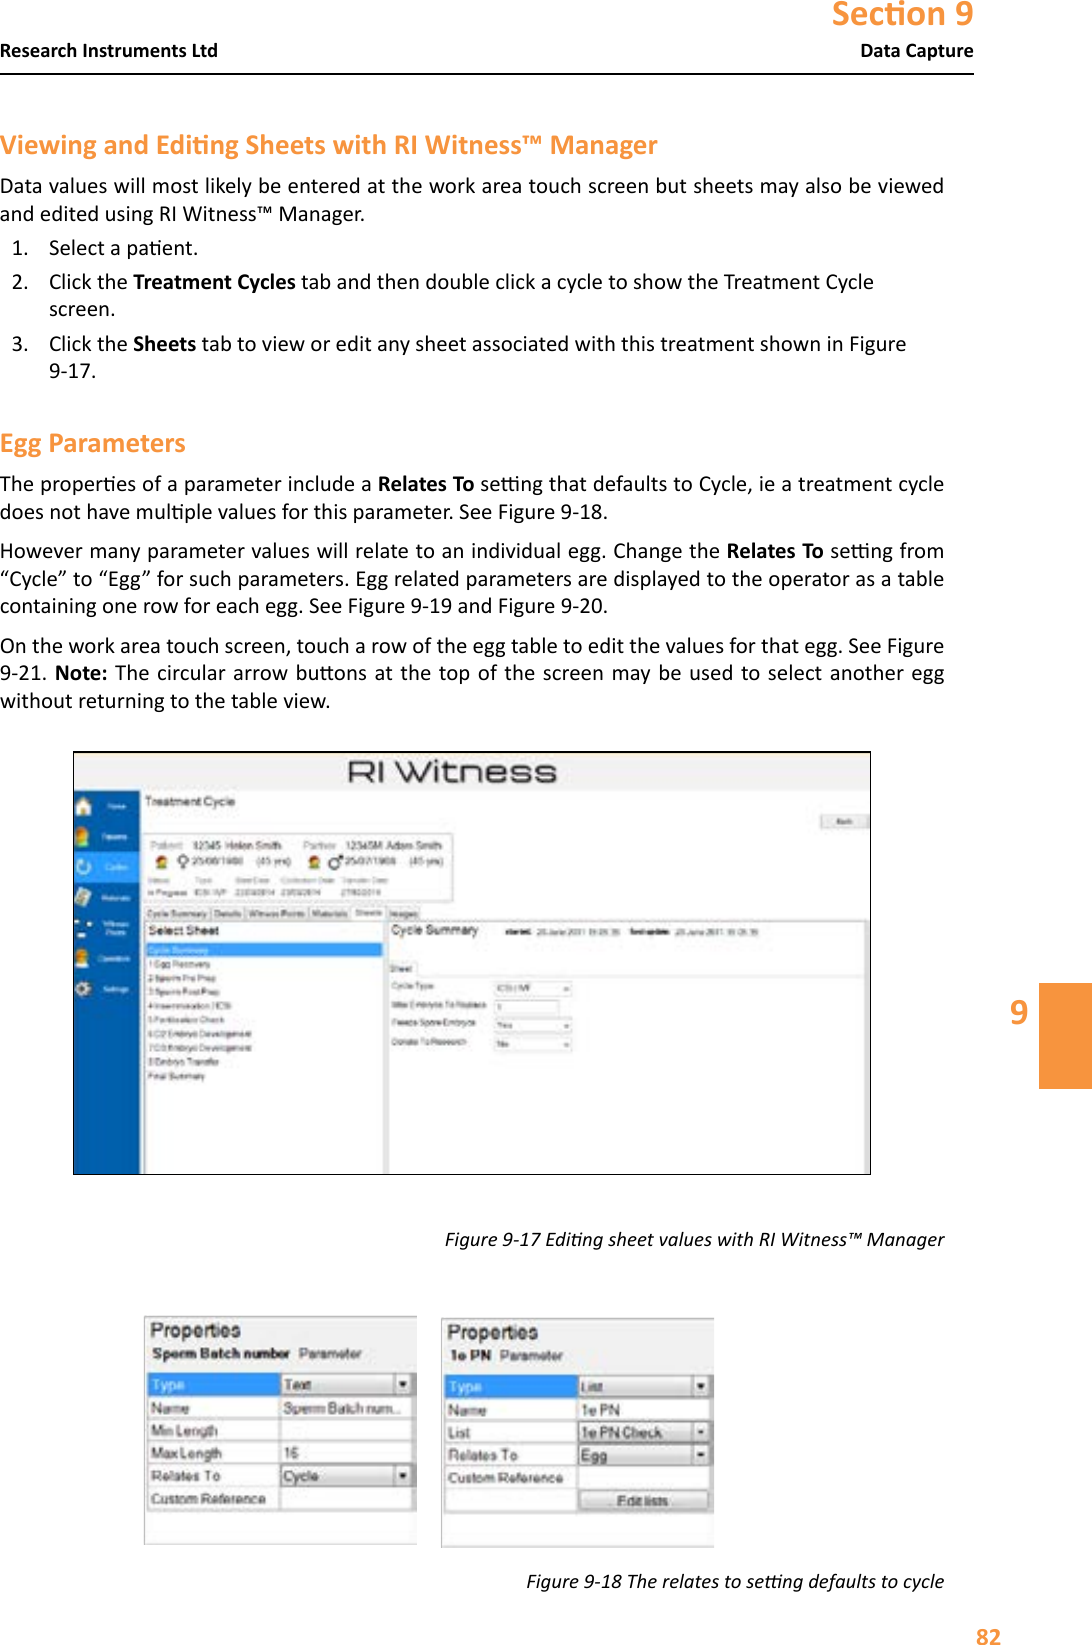
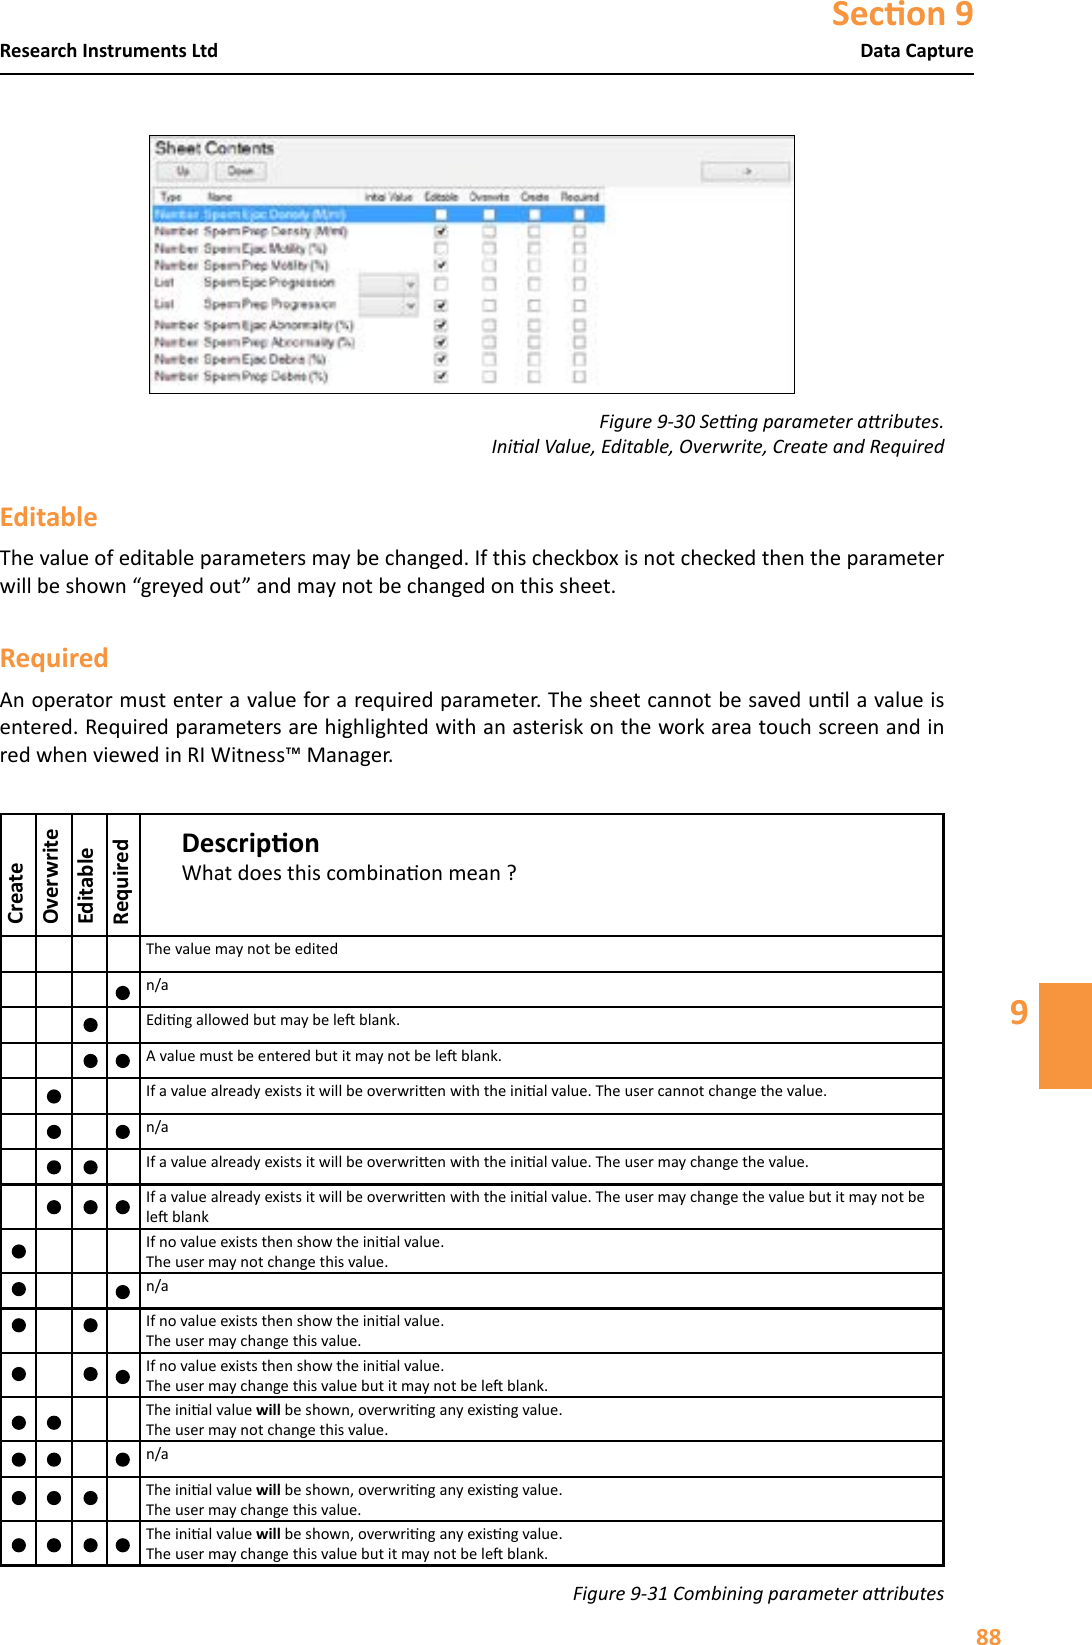
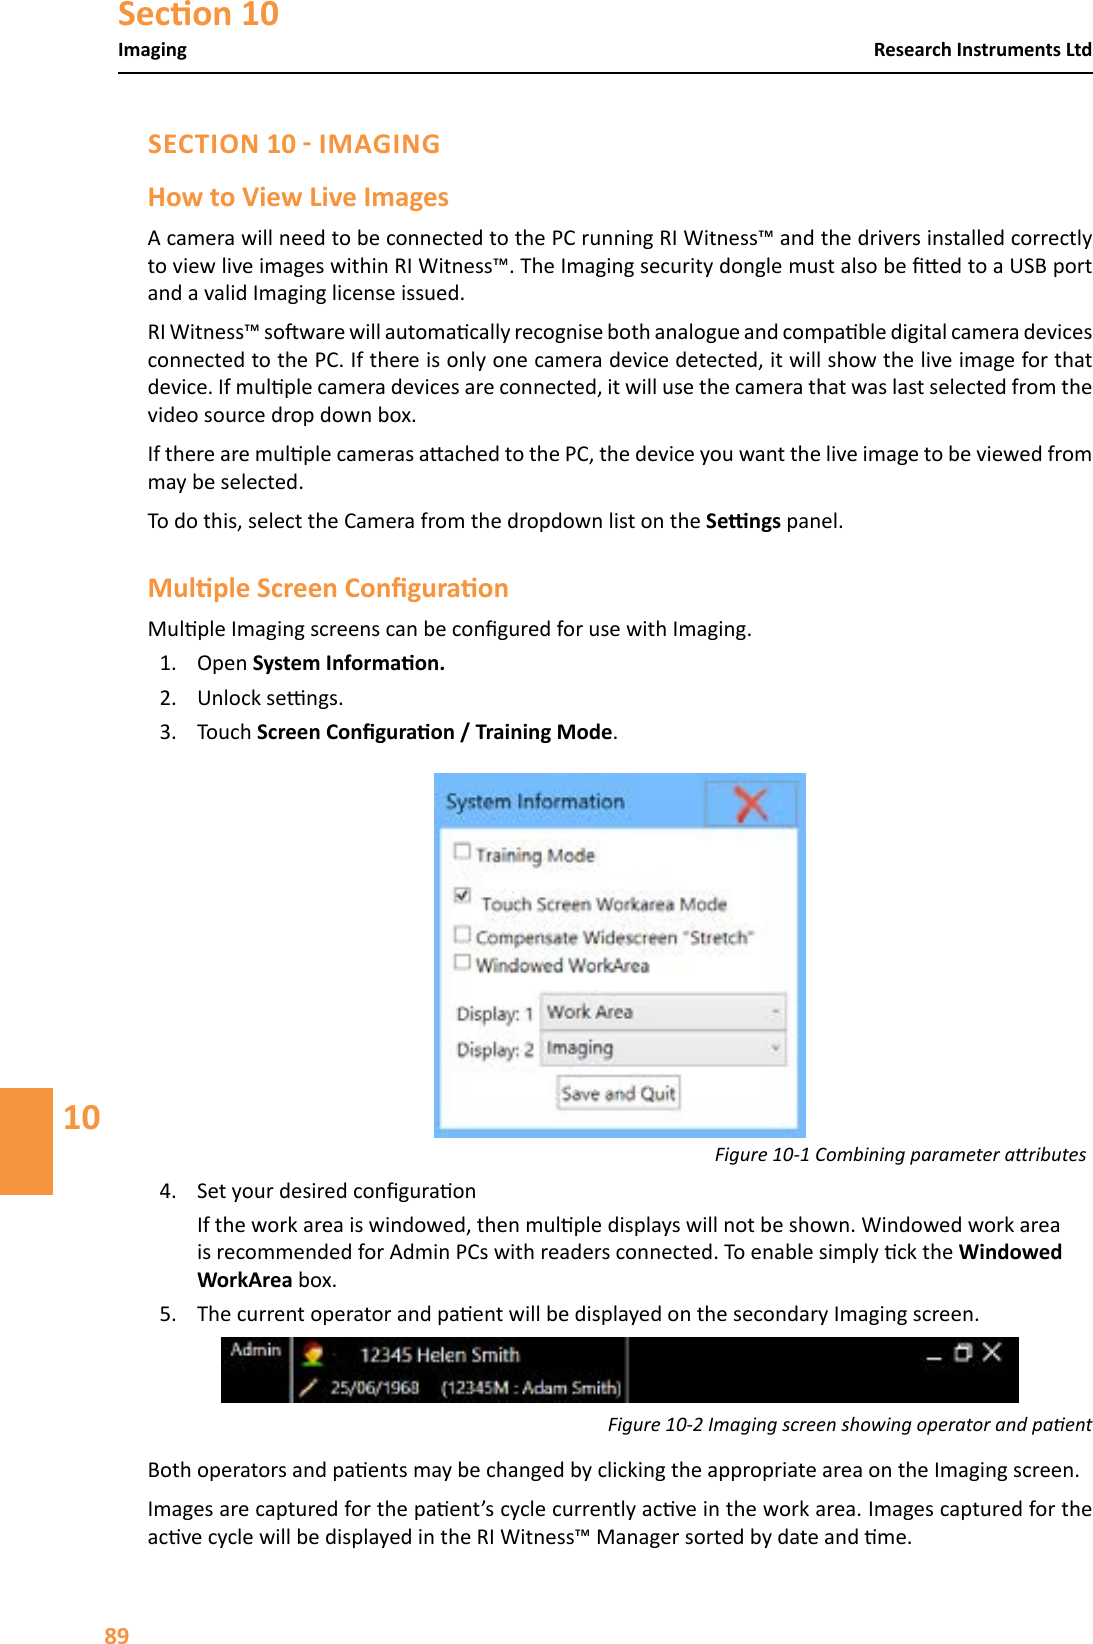
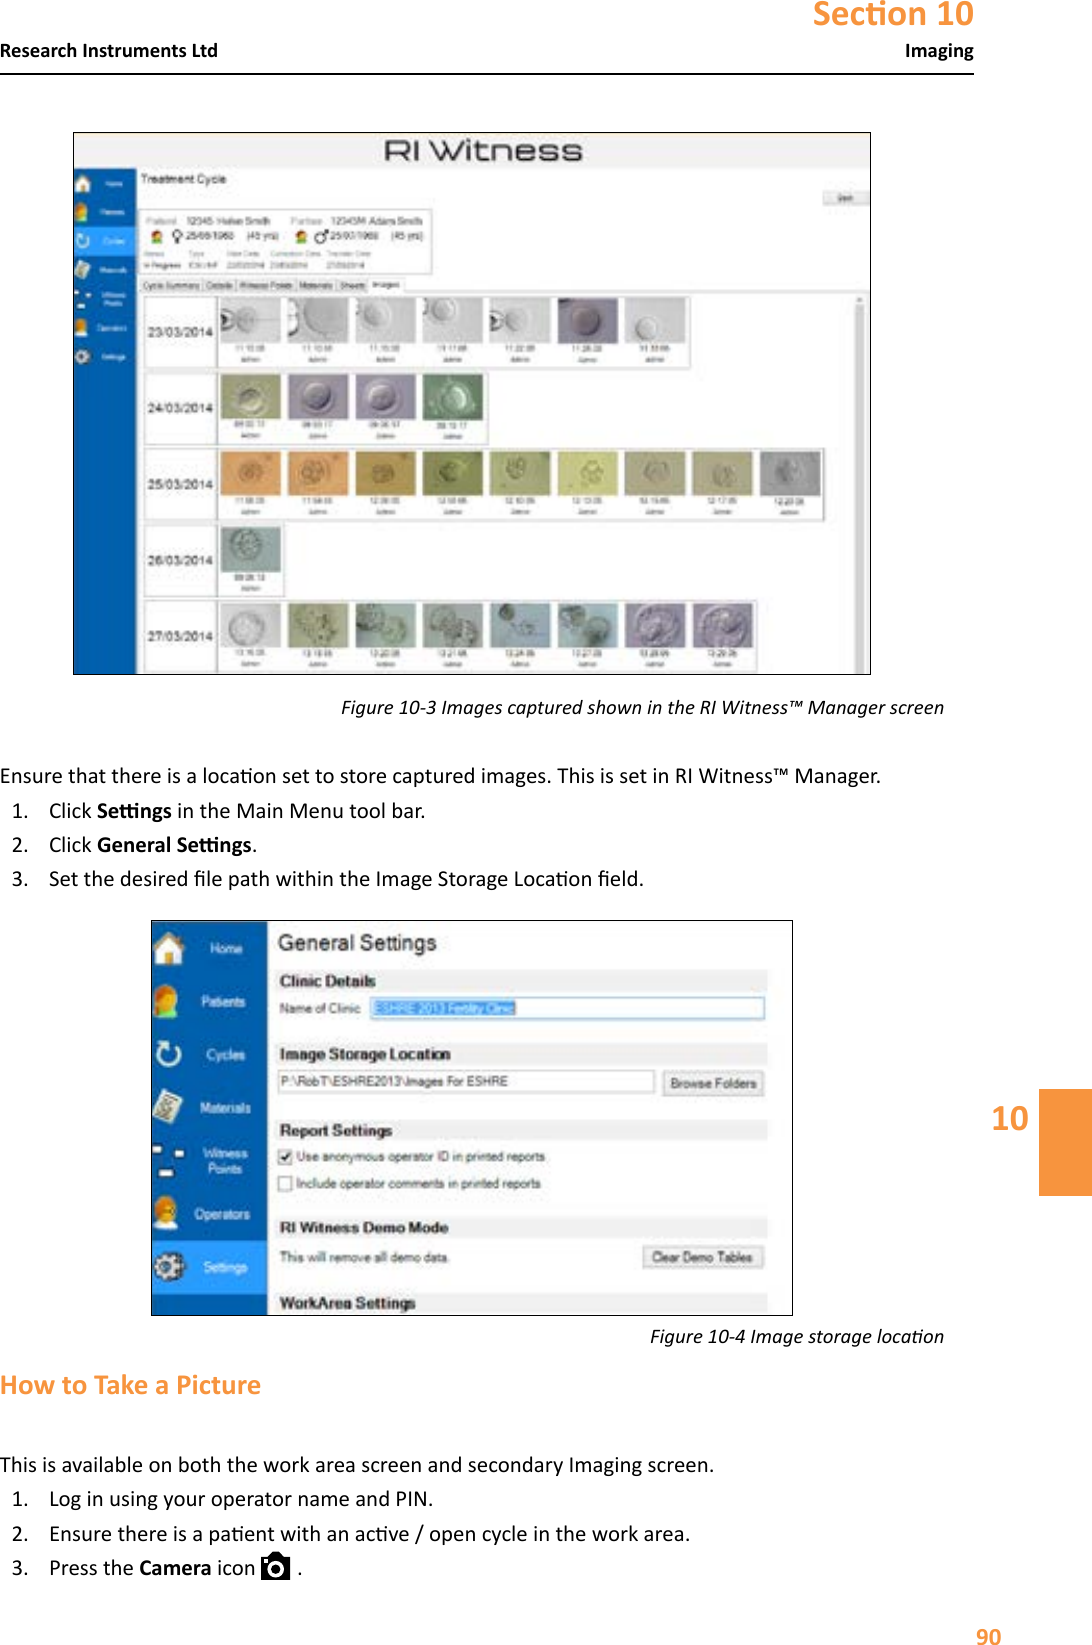
![Secon 3Safety Warnings73 IEC 60601 Conducted RF IEC 61000-4-6Radiated RF IEC 61000-4-33 Vrms150 kHz to 80 MHz3 V/m80 MHz to 2.5 GHz3 Vrms3 V/mPortableandmobileRFcommunicaonsequipment should be used no closer to any part of RI Witness™, including cables, than the recommended separaondistance calculated from the equaonapplicable to the frequency of the transmier.Recommendedseparaondistanced = [3.5/V 1]√pd = [3.5/V1]√p80MHz to 800MHzd = [3.5/V1√p800MHz to 2.5GHzwhere p is the maximum outputpower rang of the transmier inwas (W) according to the transmiermanufacturer and d is the recommended separaon distancein metres(m). Fieldstrengths from xed RF transmiers,as determined by an electromagnecsite survey, a should be less than the compliance level in each frequency range.b Interference may occur in the vicinity of equipment marked with the following symbol: At 80 MHz and 800 MHz, the higher frequency range applies.Theseguidelinesmaynotapplyinallsituaons.Electromagnecpropagaonisaectedbyabsorponandreeconfromstructures,objectsandpeople.Theseguidelinesmaynotapplyinallsituaons.Electromagnecpropagaonisaectedbyabsorponandreeconfromstructures,objectsandpeople.aFieldstrengthsfromxedtransmiers,suchasbasestaonsforradio(cellular/cordless)telephonesand land mobile radios, amateur radio, AM and FM radio broadcast and TV broadcast cannot be predicted theorecallywithaccuracy.ToassesstheelectromagnecenvironmentduetoxedRFtransmiers,anelectromagnecsitesurveyshouldbeconsidered.IfthemeasuredeldstrengthinthelocaoninwhichRIWitness™isusedexceedstheapplicableRFcompliancelevelabove,RIWitness™shouldbeobservedtoverifynormaloperaon.Ifabnormalperformanceisobserved,addionalmeasuresmaybenecessary,suchasre-orienngorrelocangRIWitness™.bOverthefrequencyrange150kHzto80MHz,eldstrengthsshouldbelessthan[V]V/m.](https://usermanual.wiki/RESEARCH-INSTRUMENTS/670854/User-Guide-2538035-Page-14.png)