Renaissance Learning NEO2 Portable Computing Device User Manual SmartApplet
Renaissance Learning, Inc Portable Computing Device SmartApplet
UserManual.wiki
>
Renaissance Learning
>
NEO2 User Manual
Users Manual
Navigation menu
Upload a User Manual
Namespaces
Wiki Guide
HTML
PDF
Info
Views
User Manual
Discussion / Help
Navigation

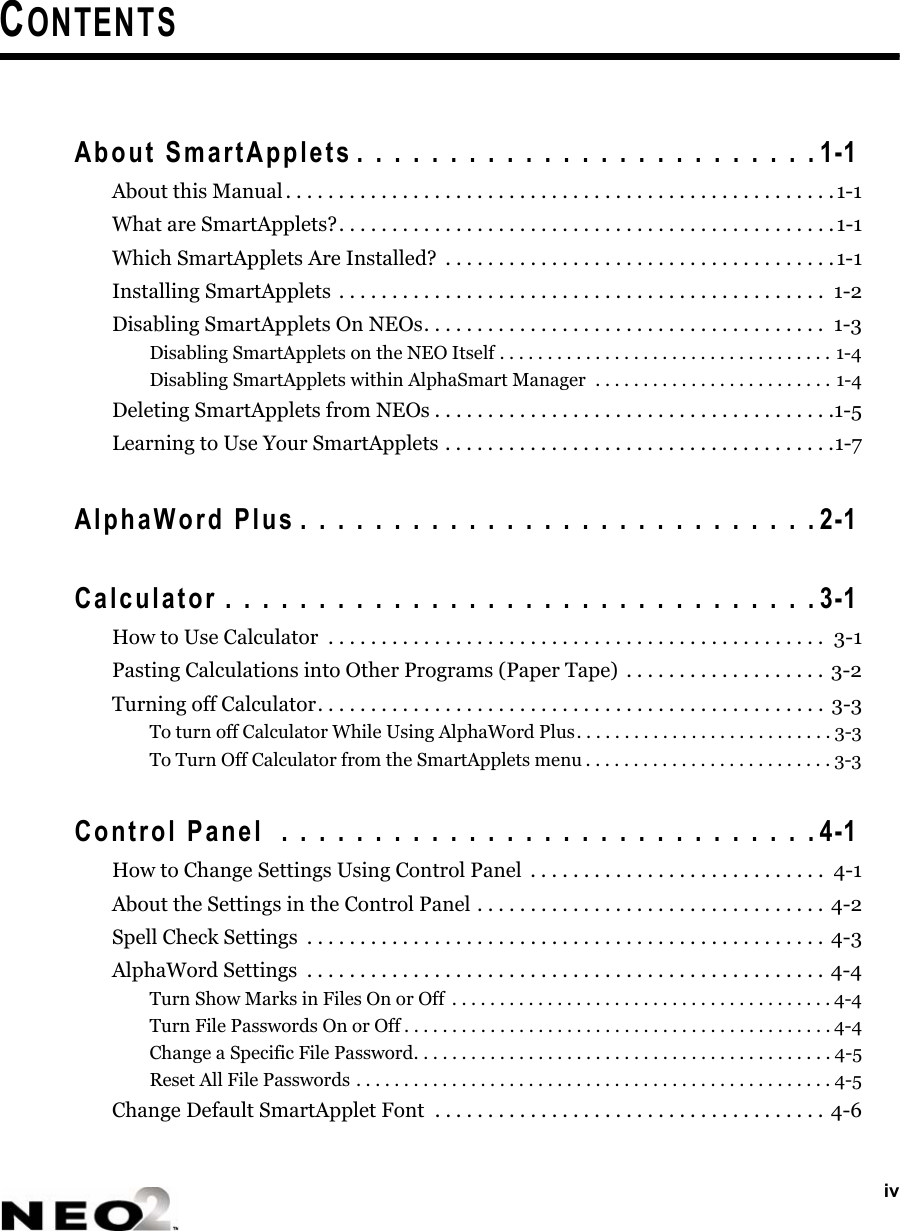
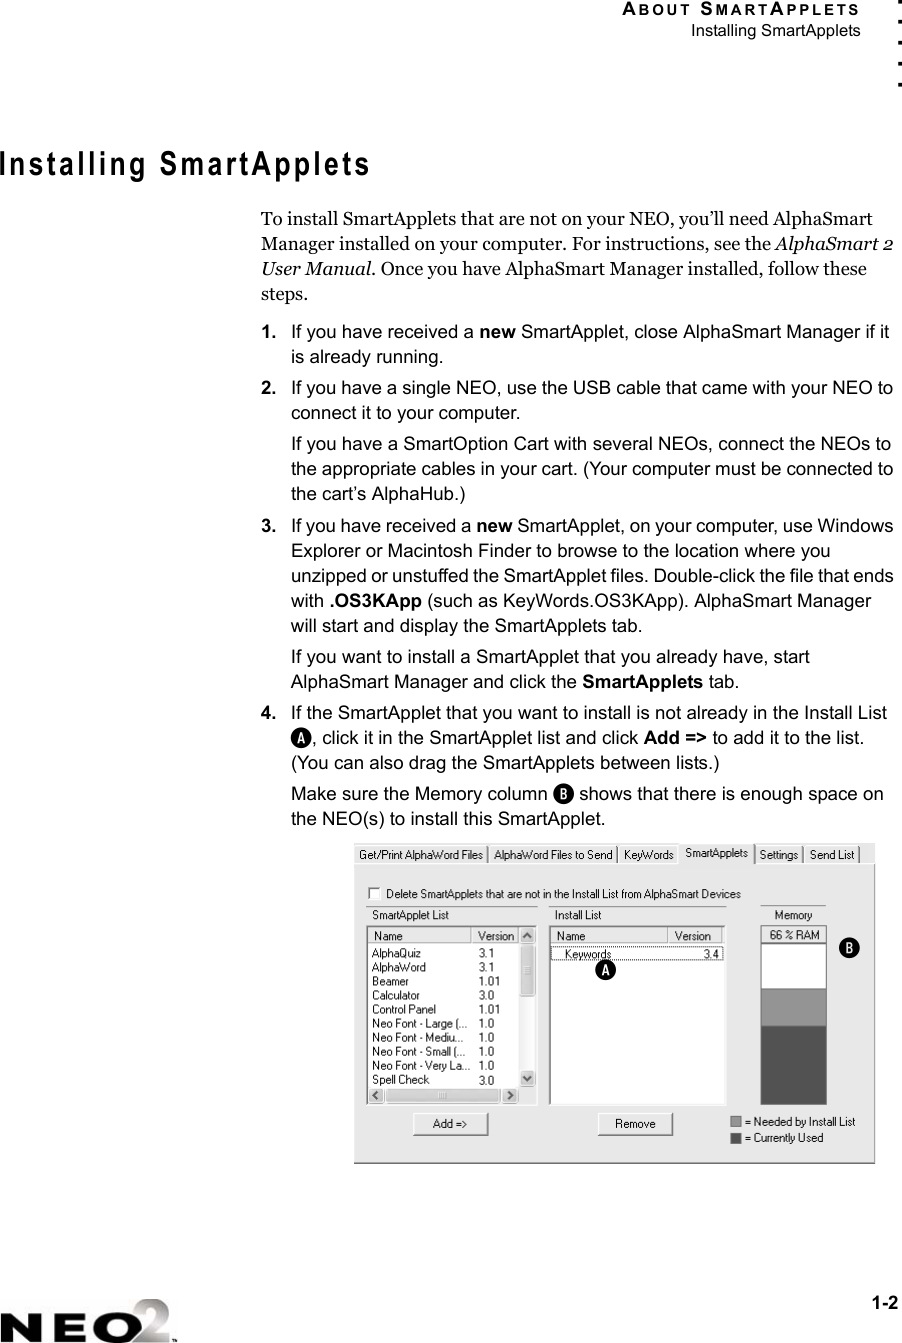
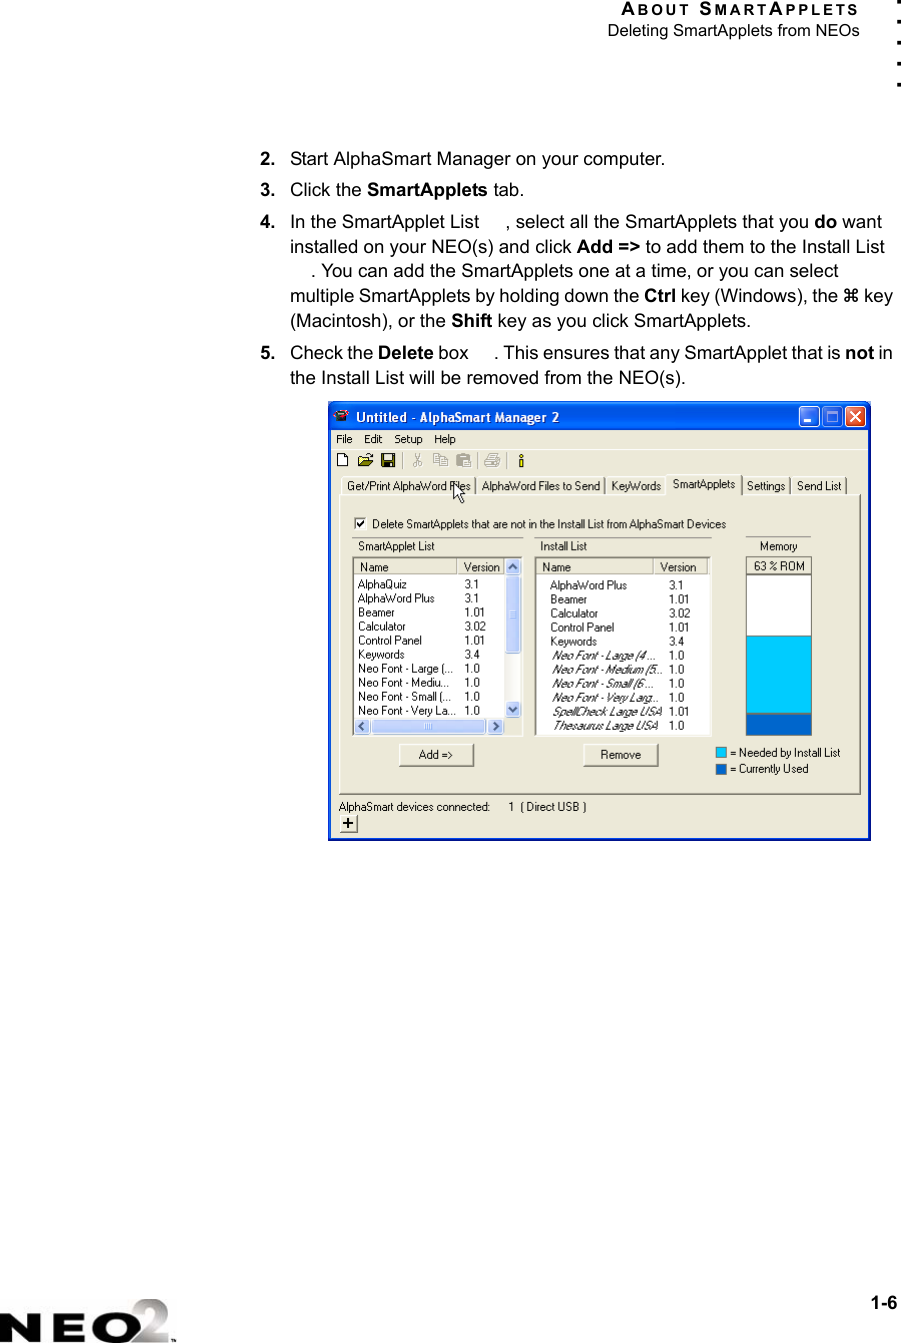


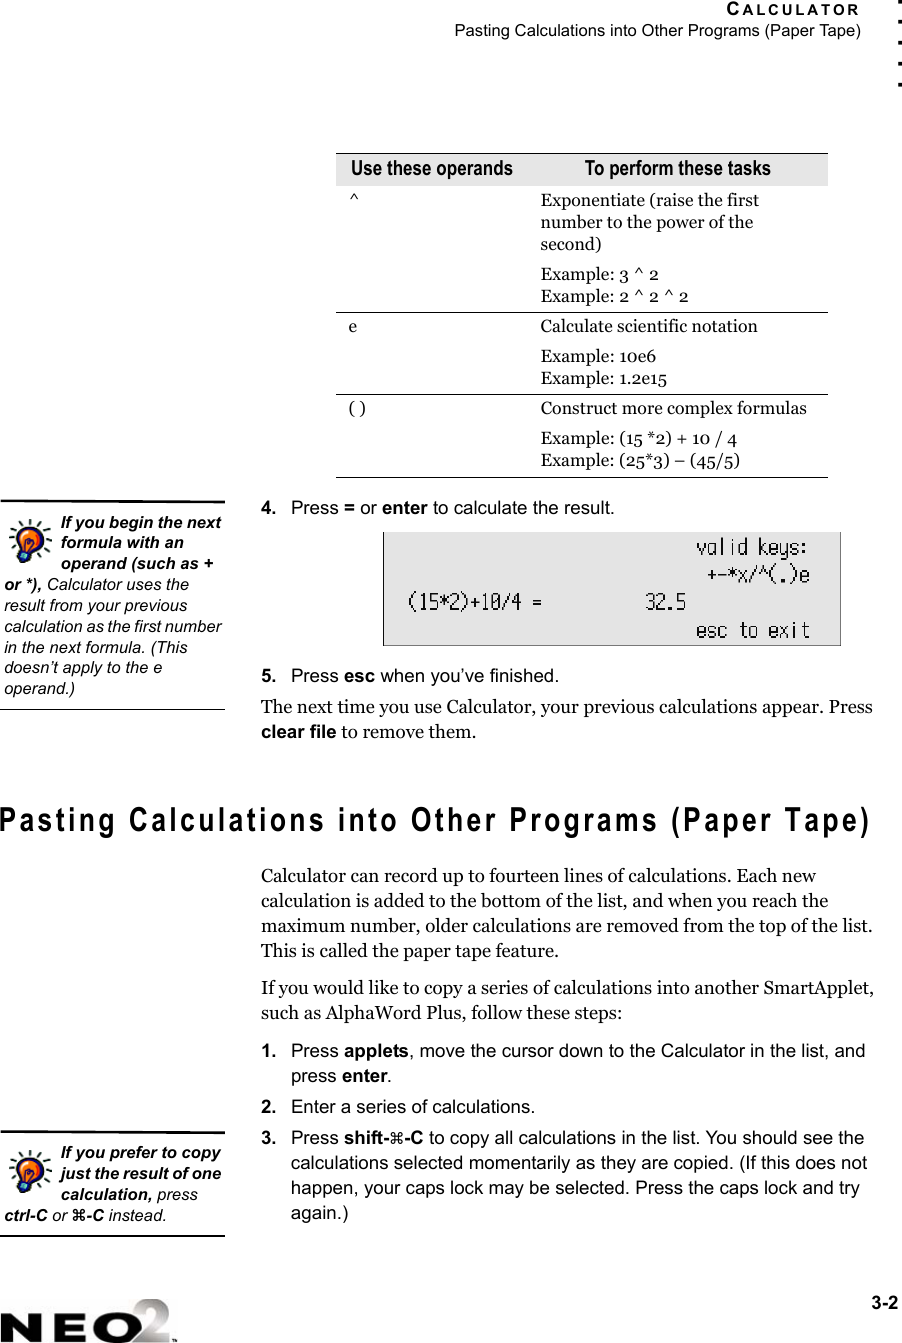

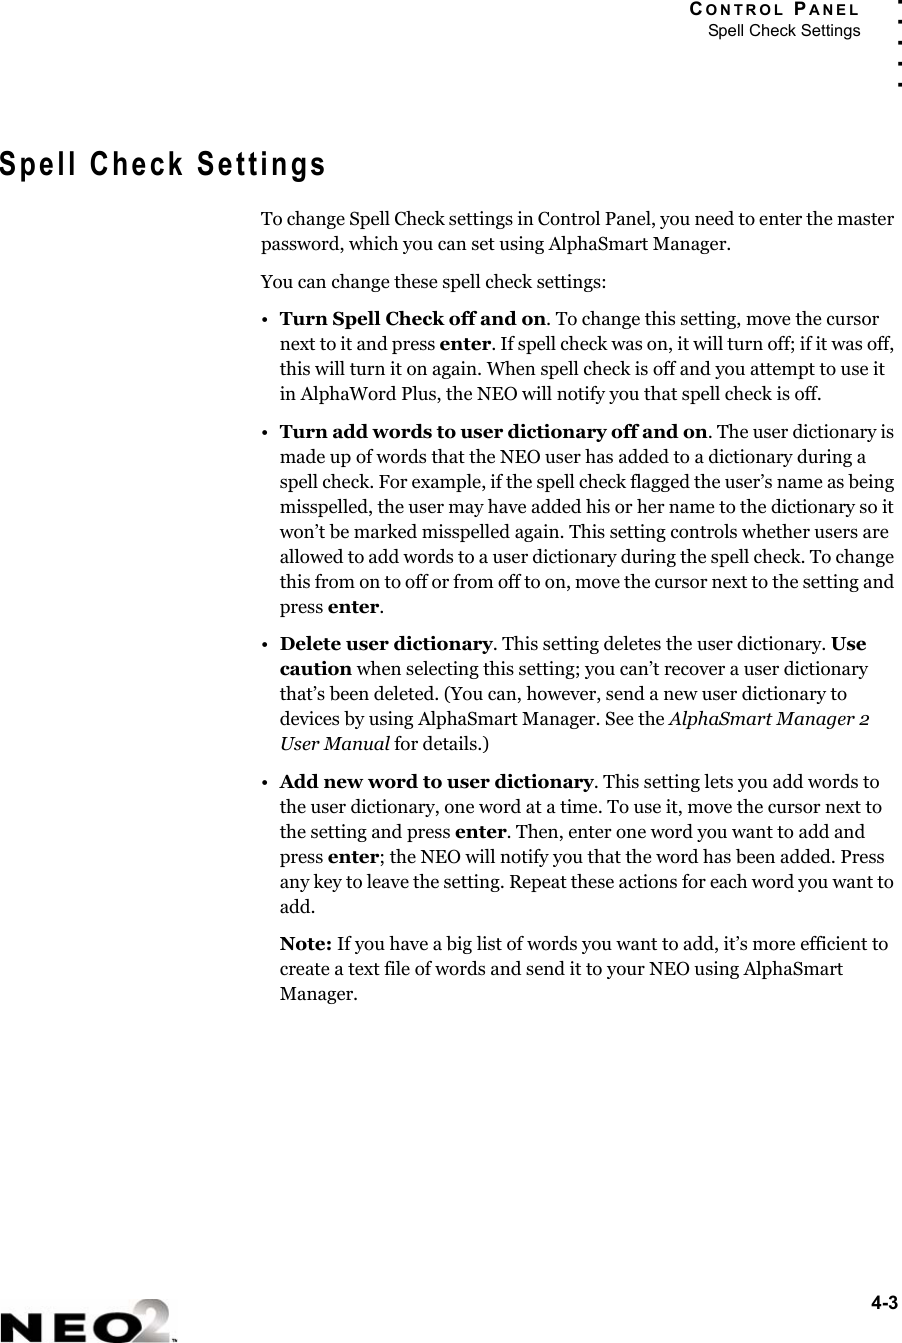
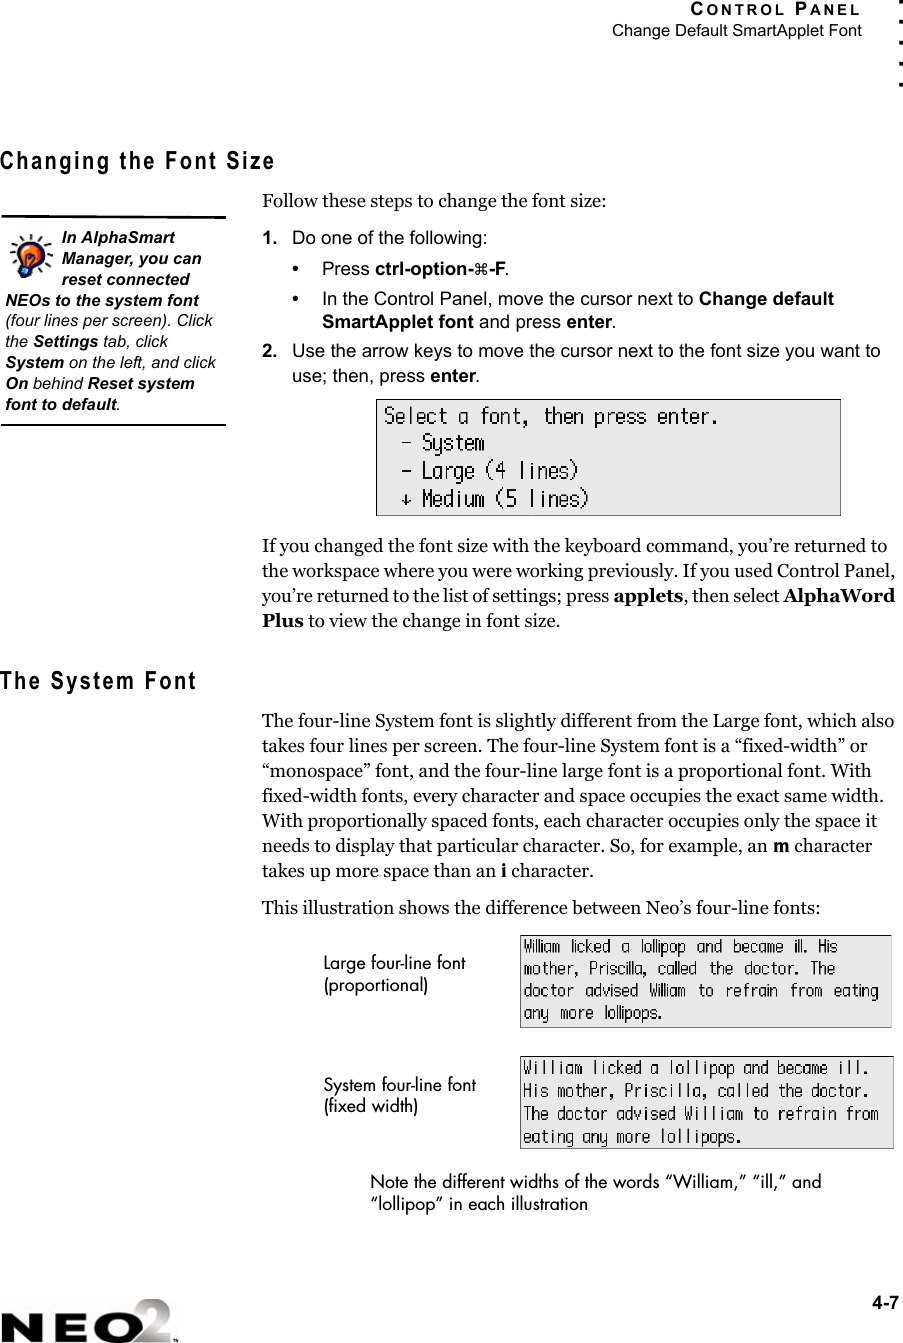
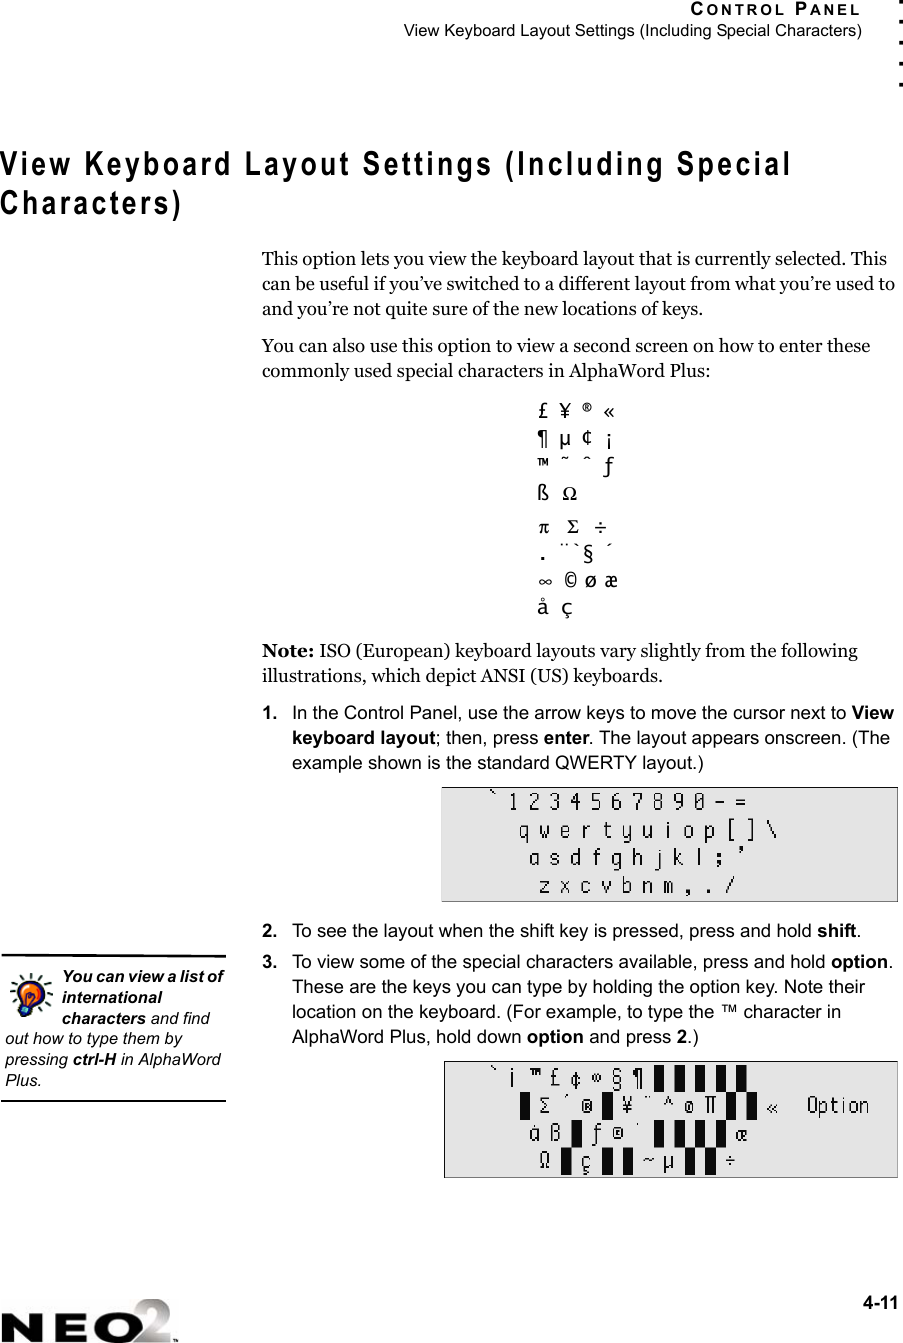
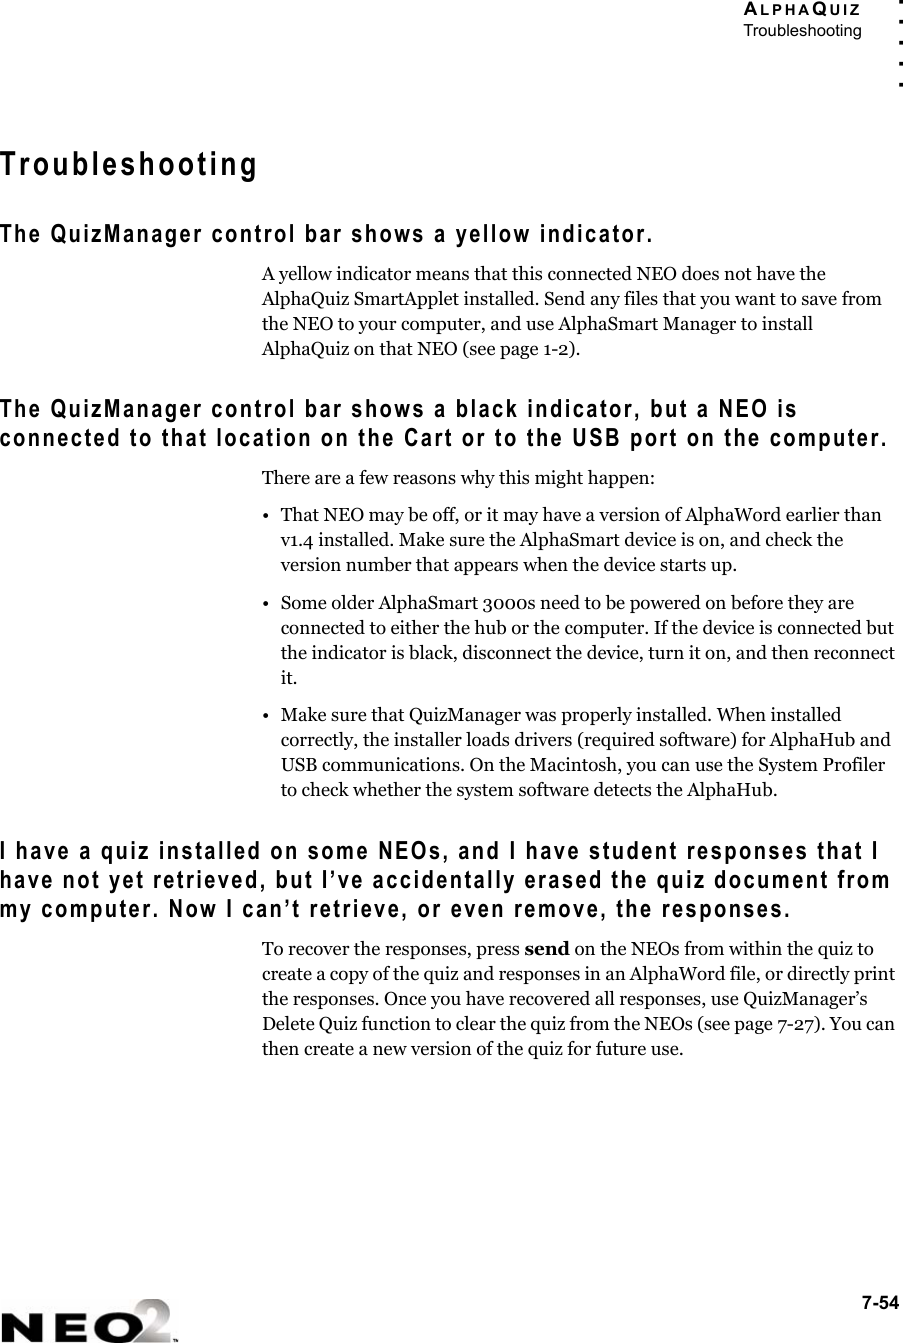
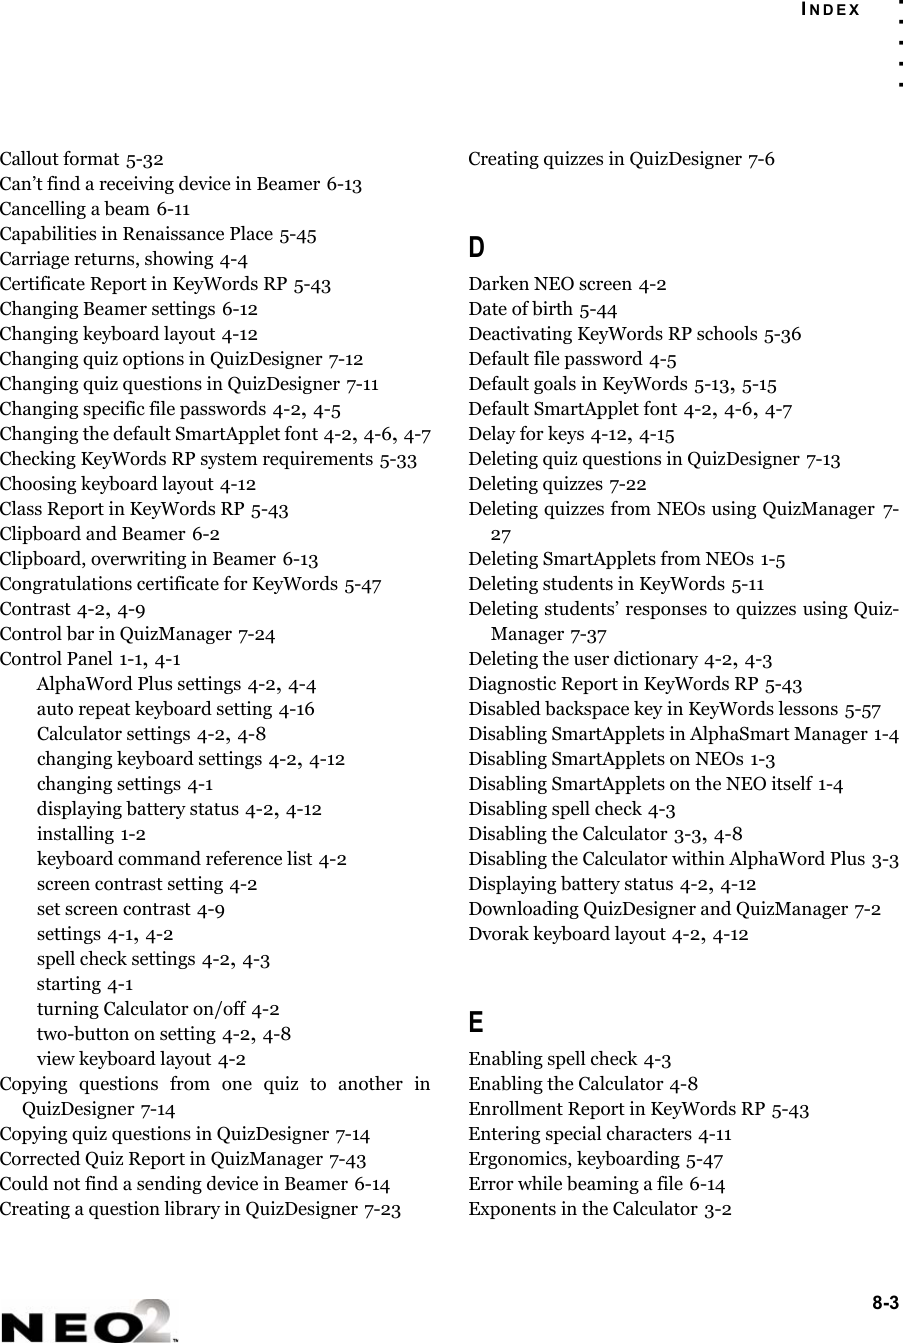
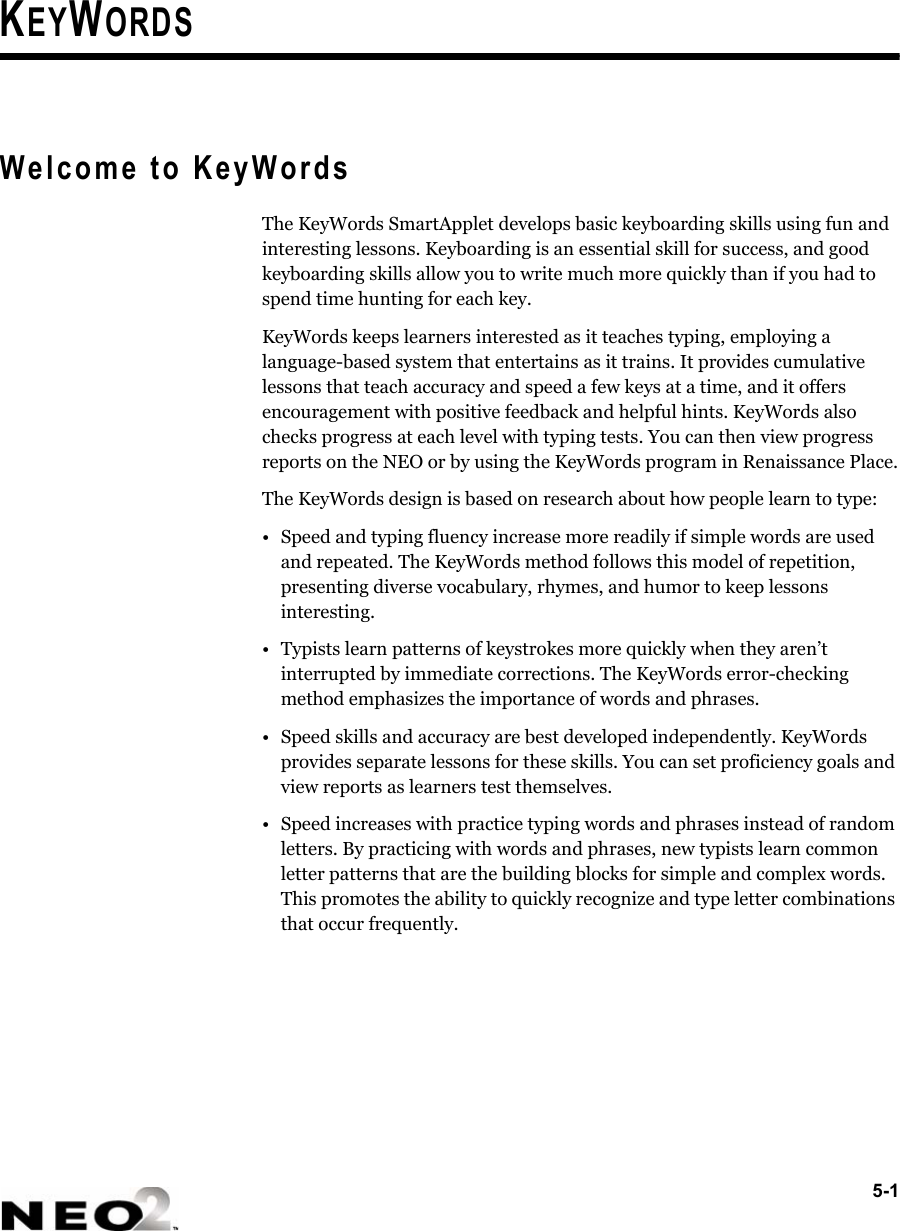
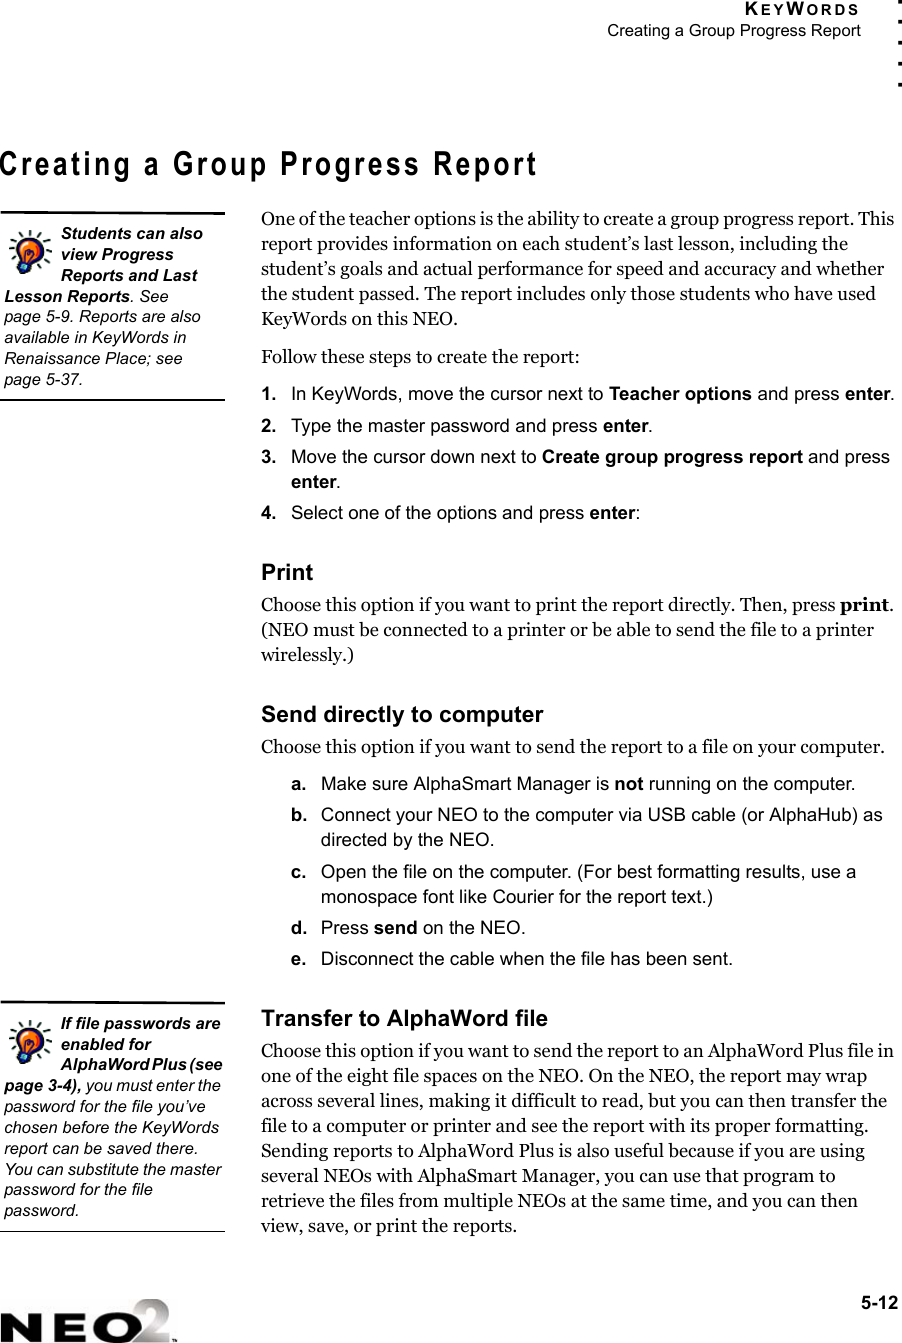
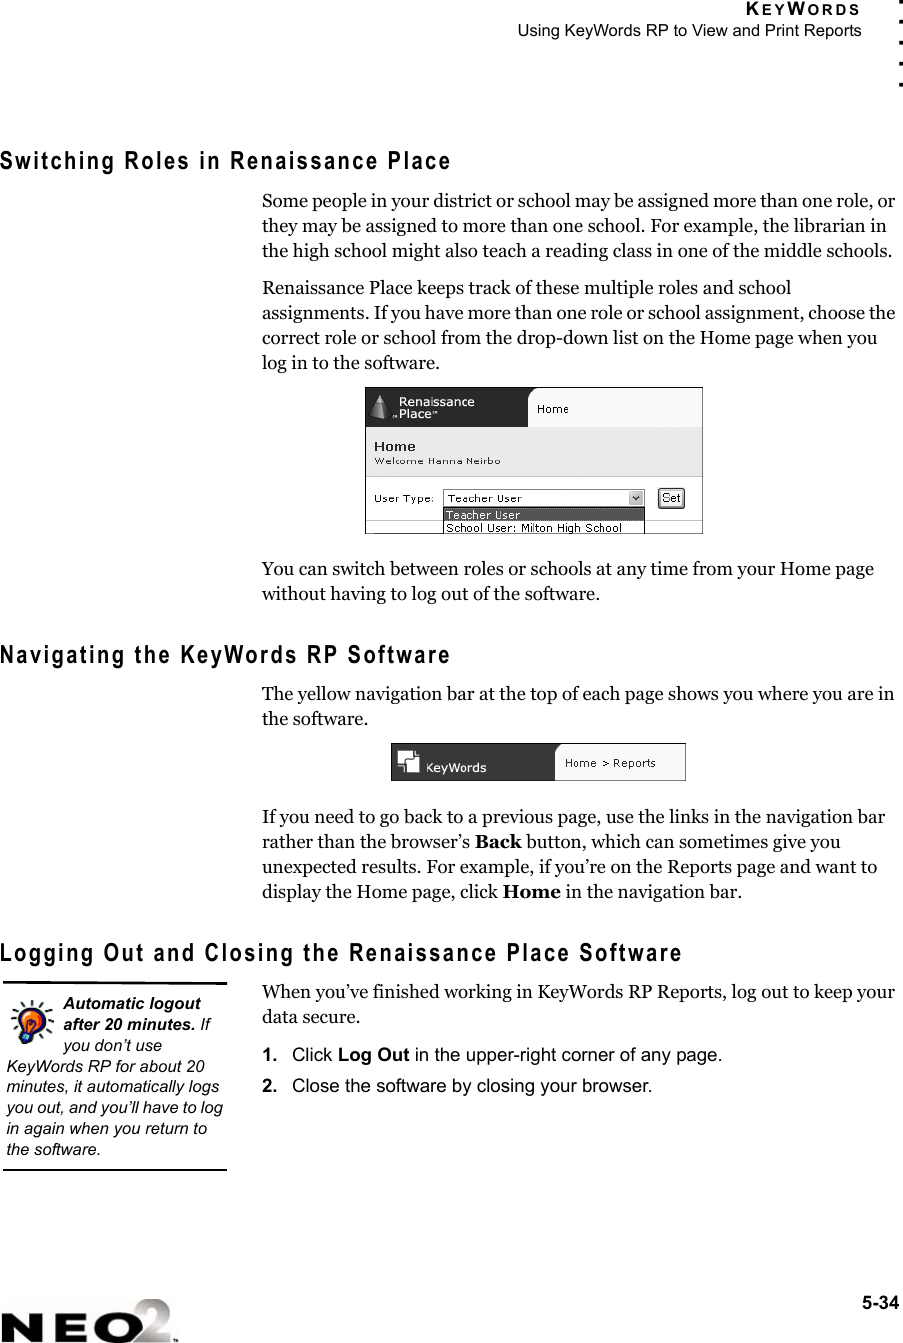
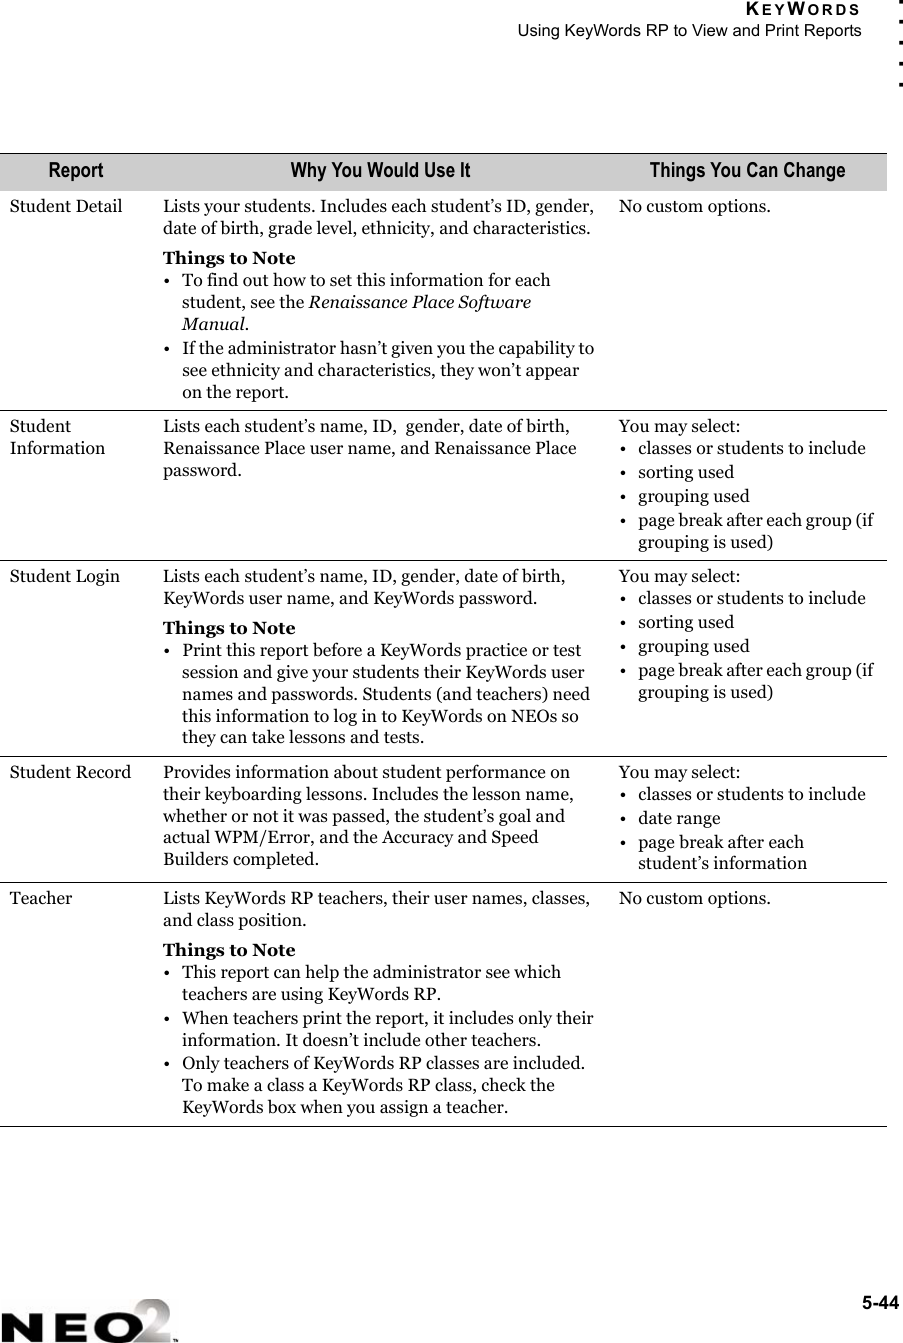
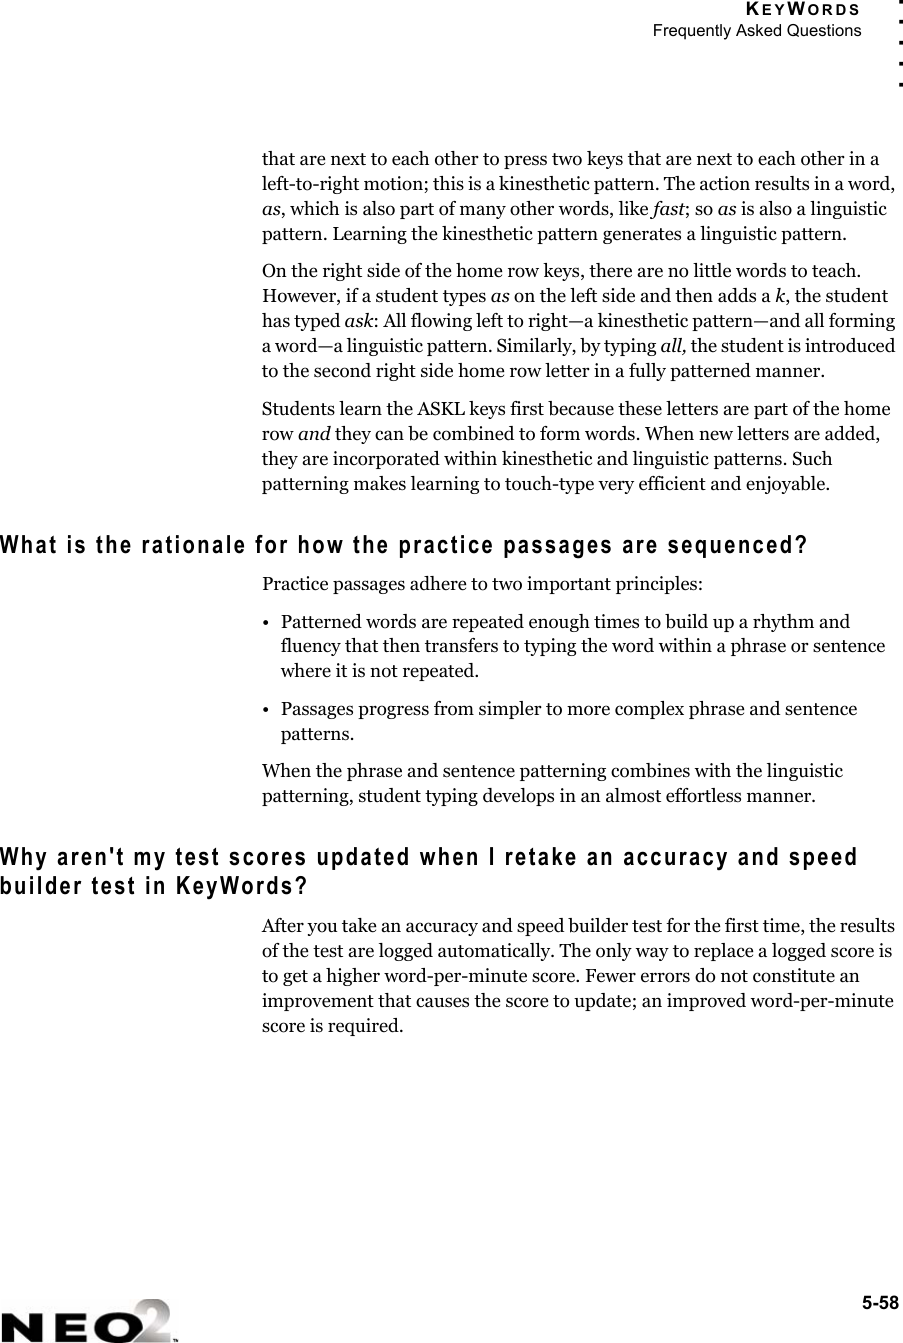
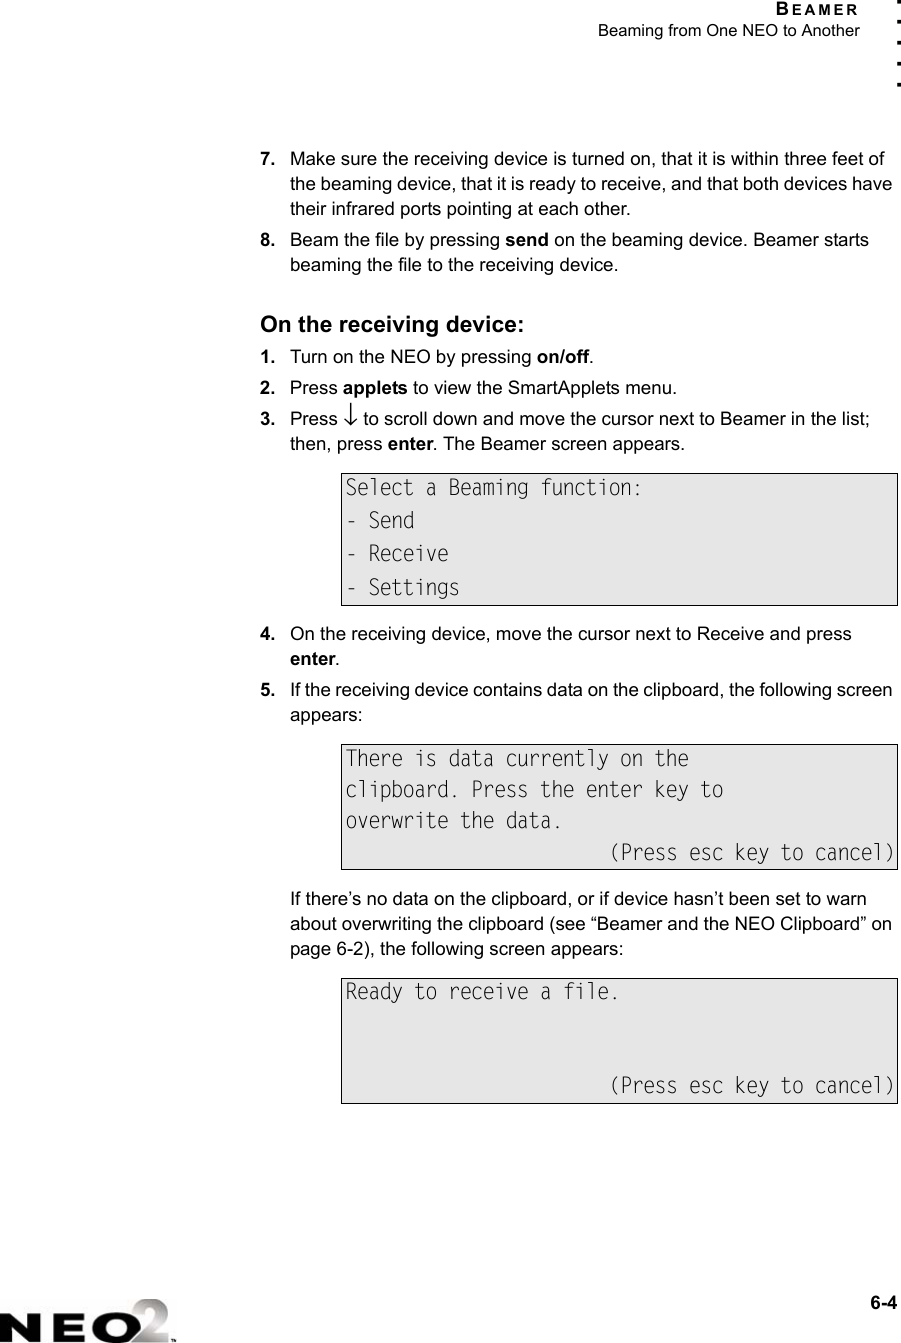
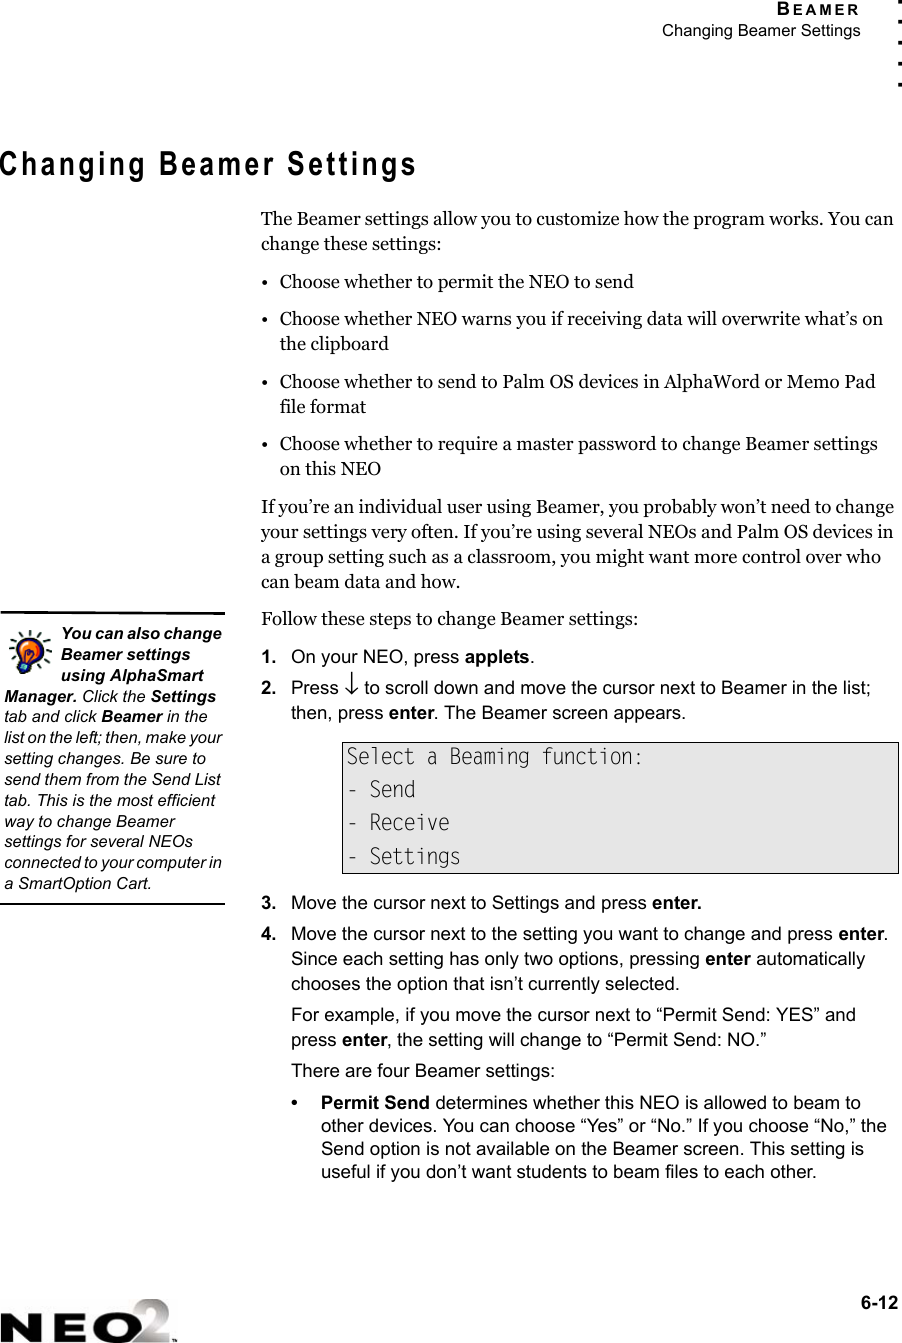
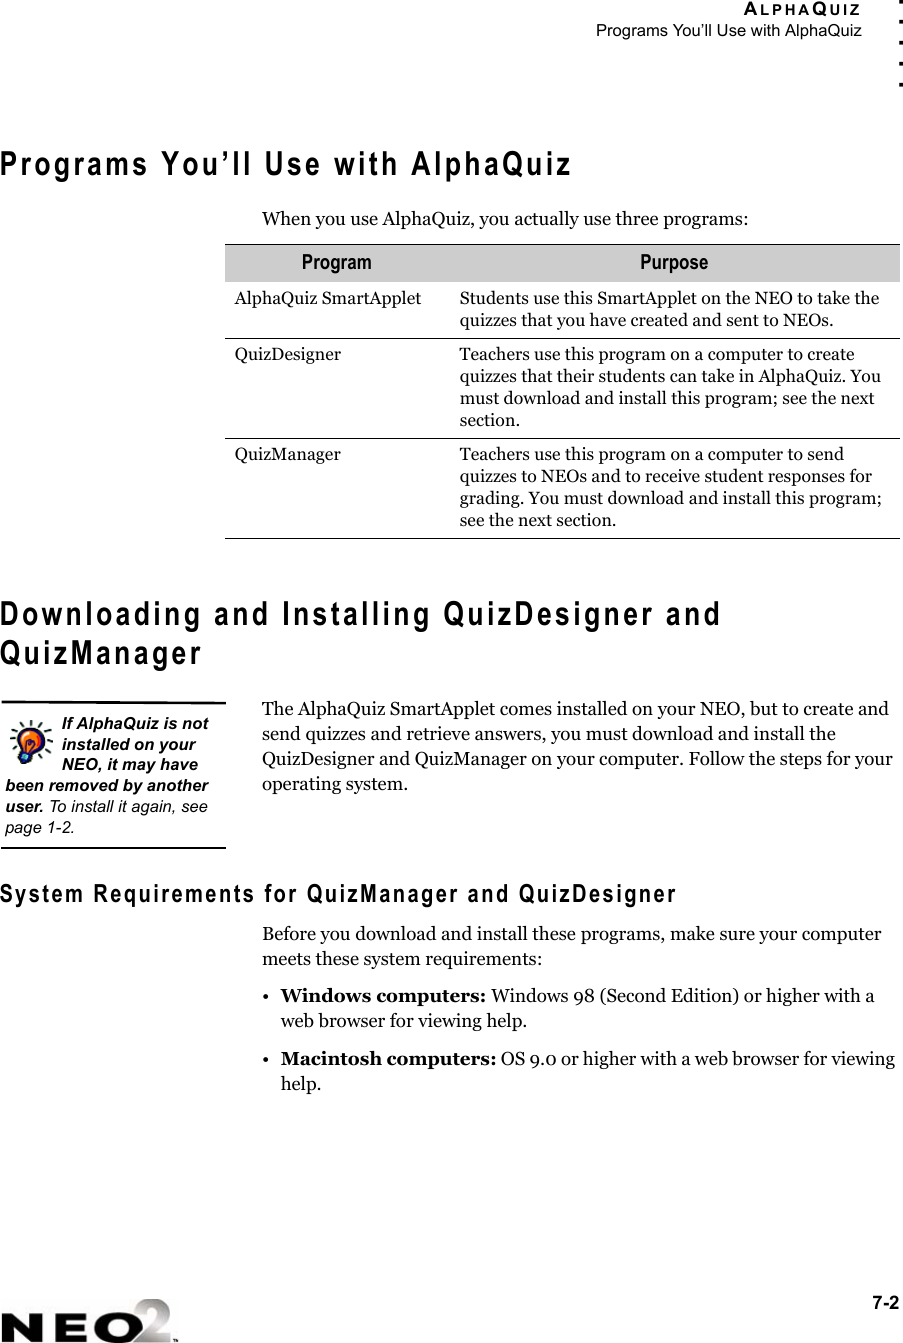
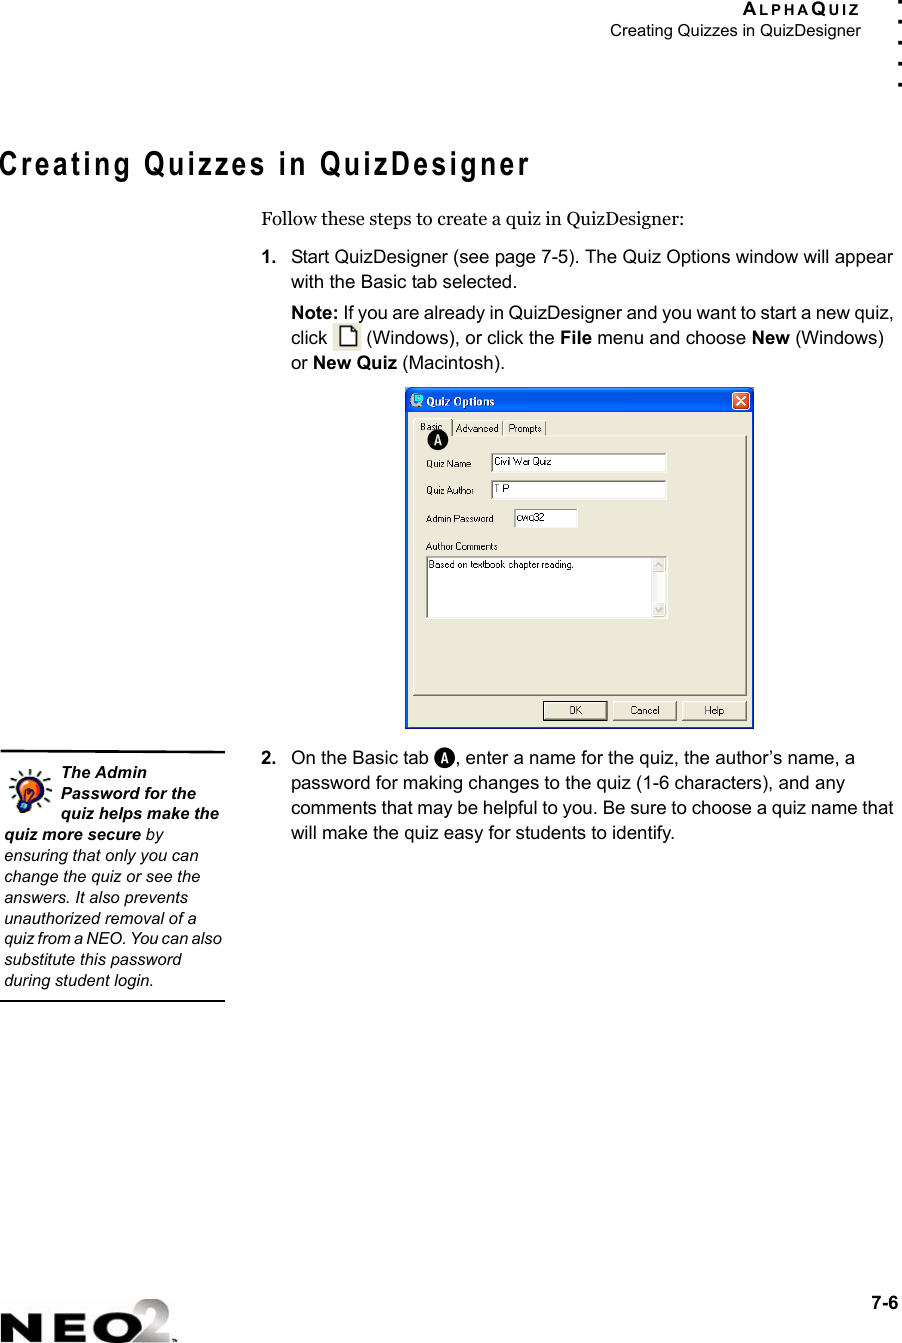
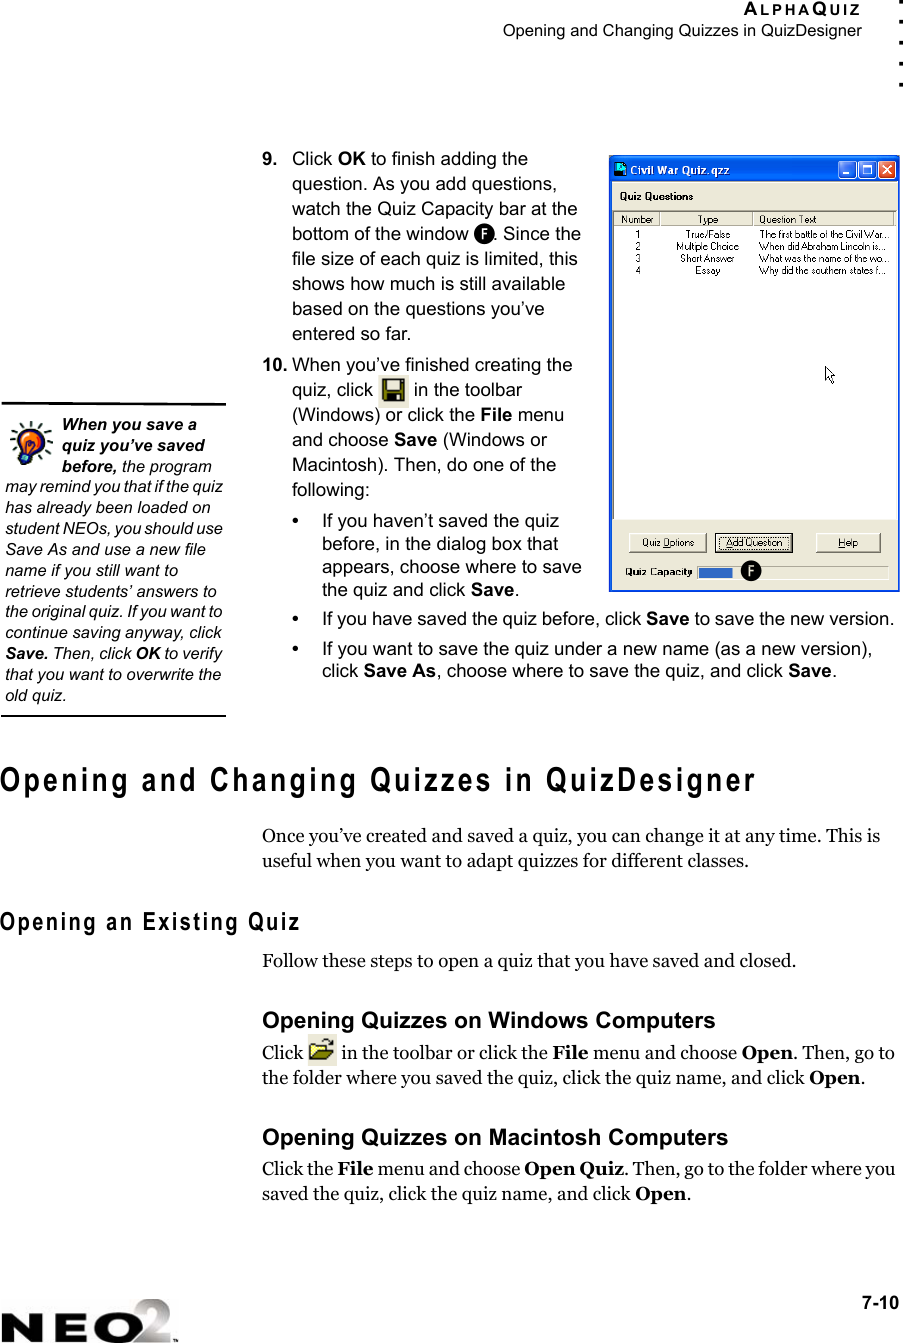
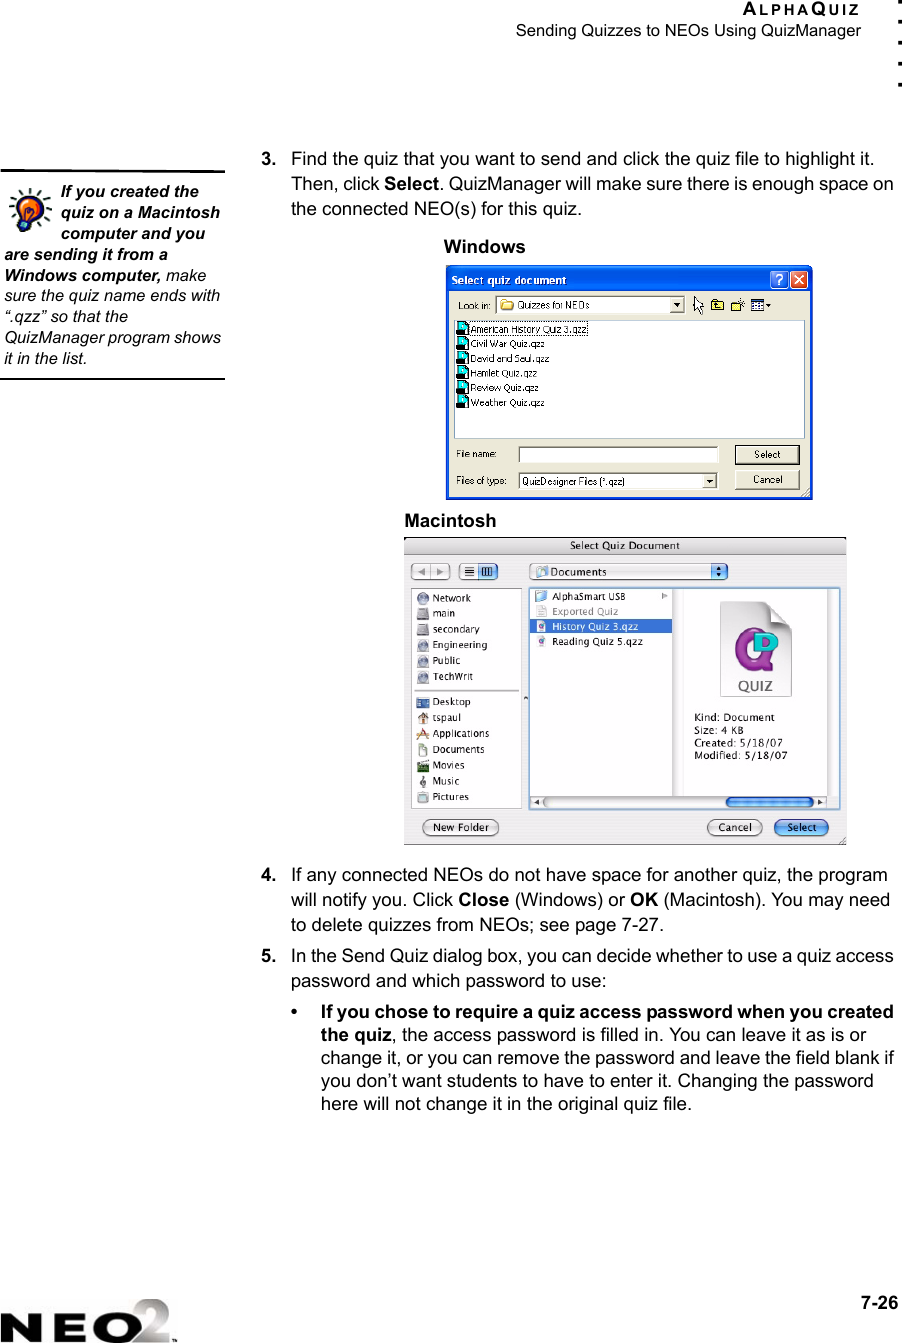
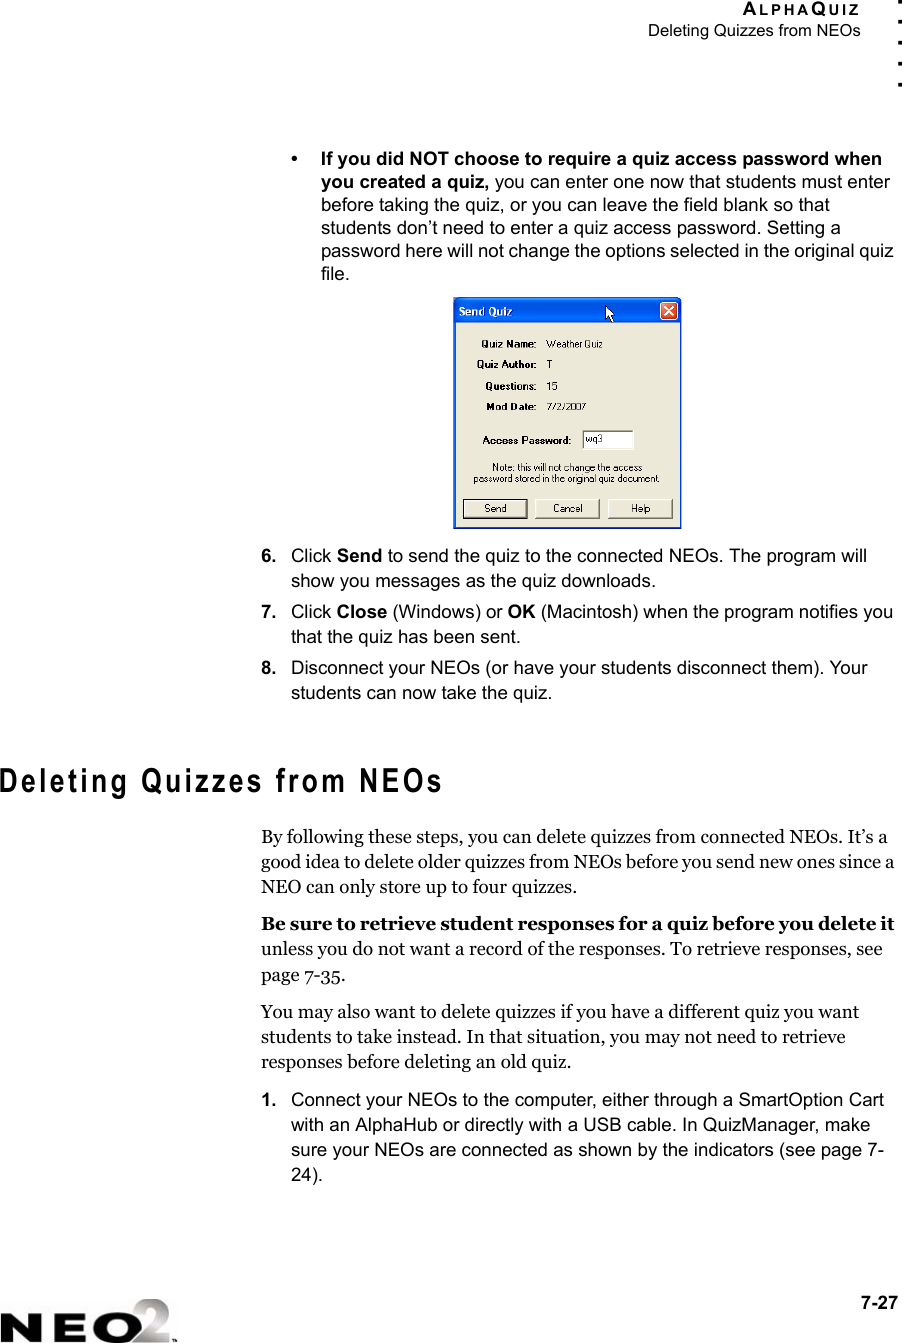
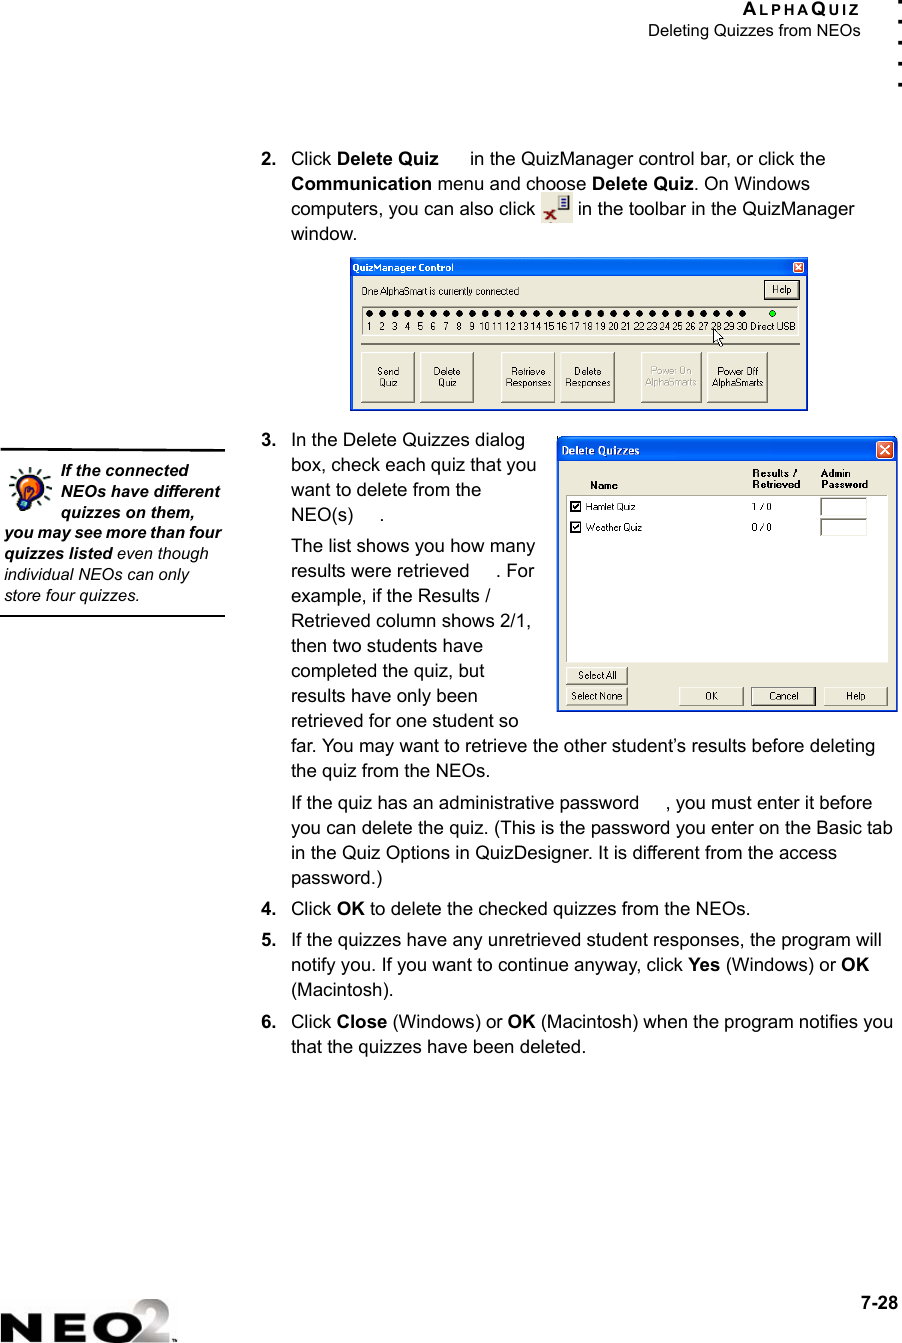
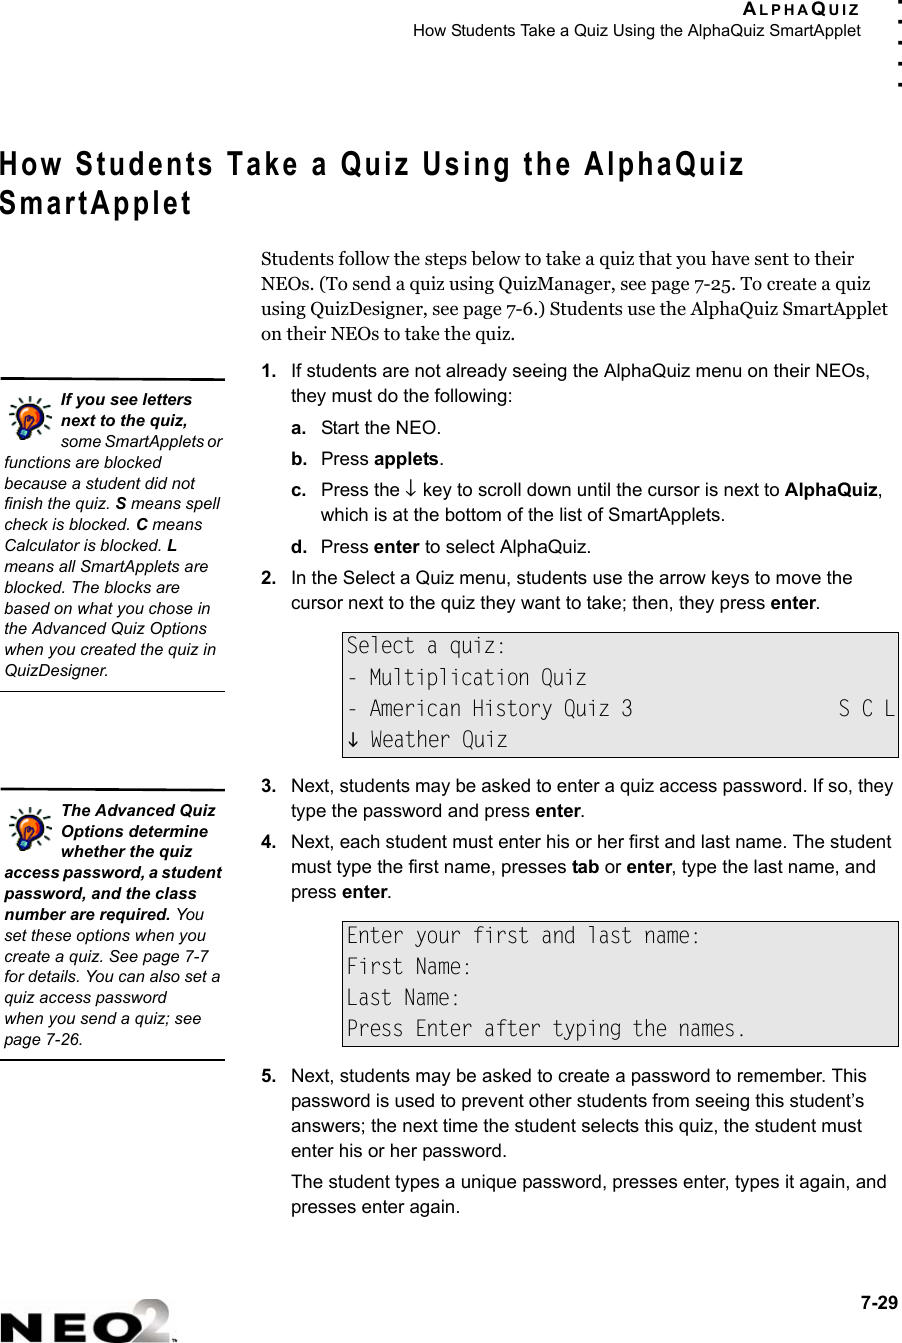
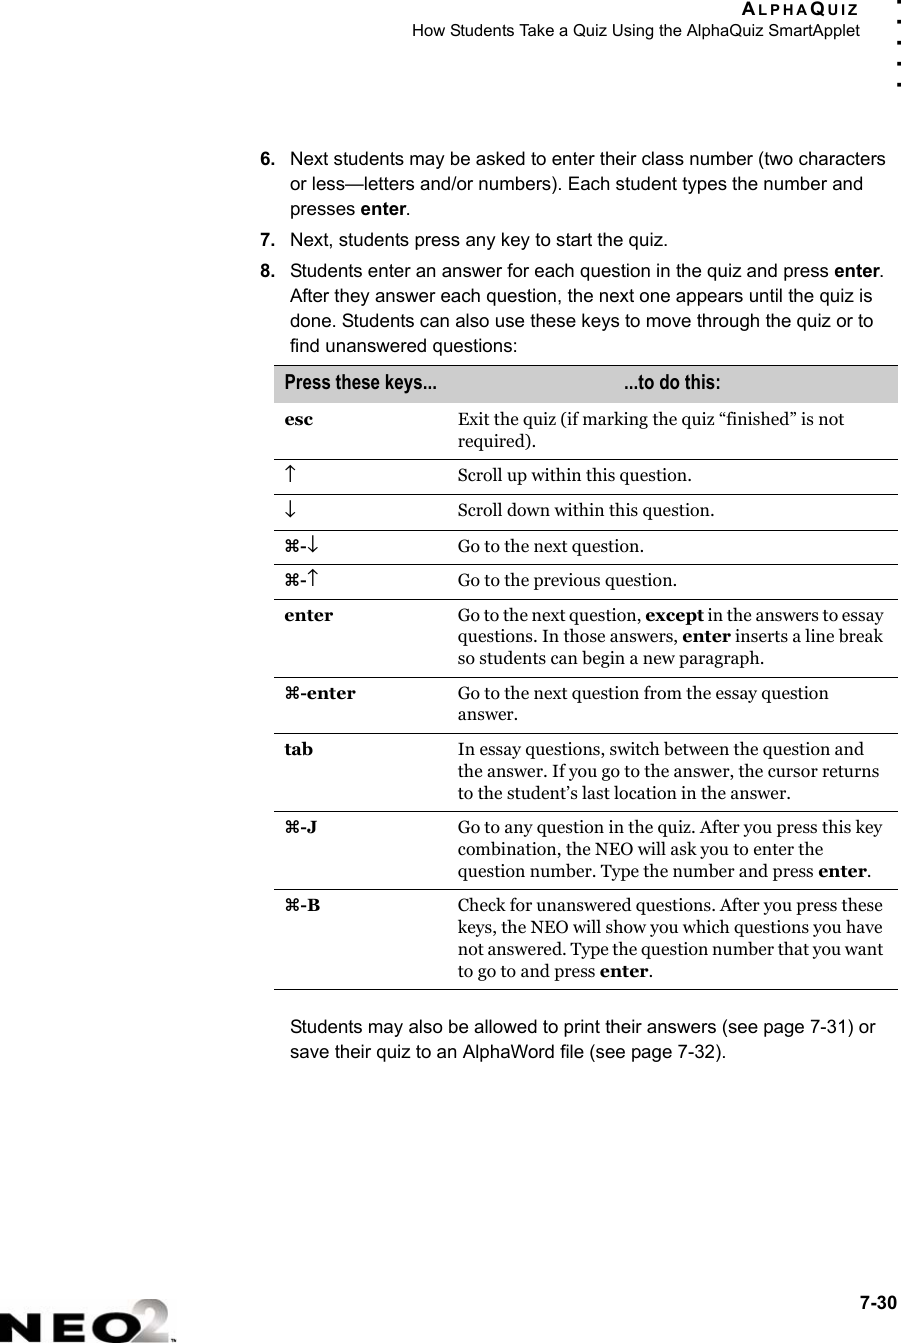
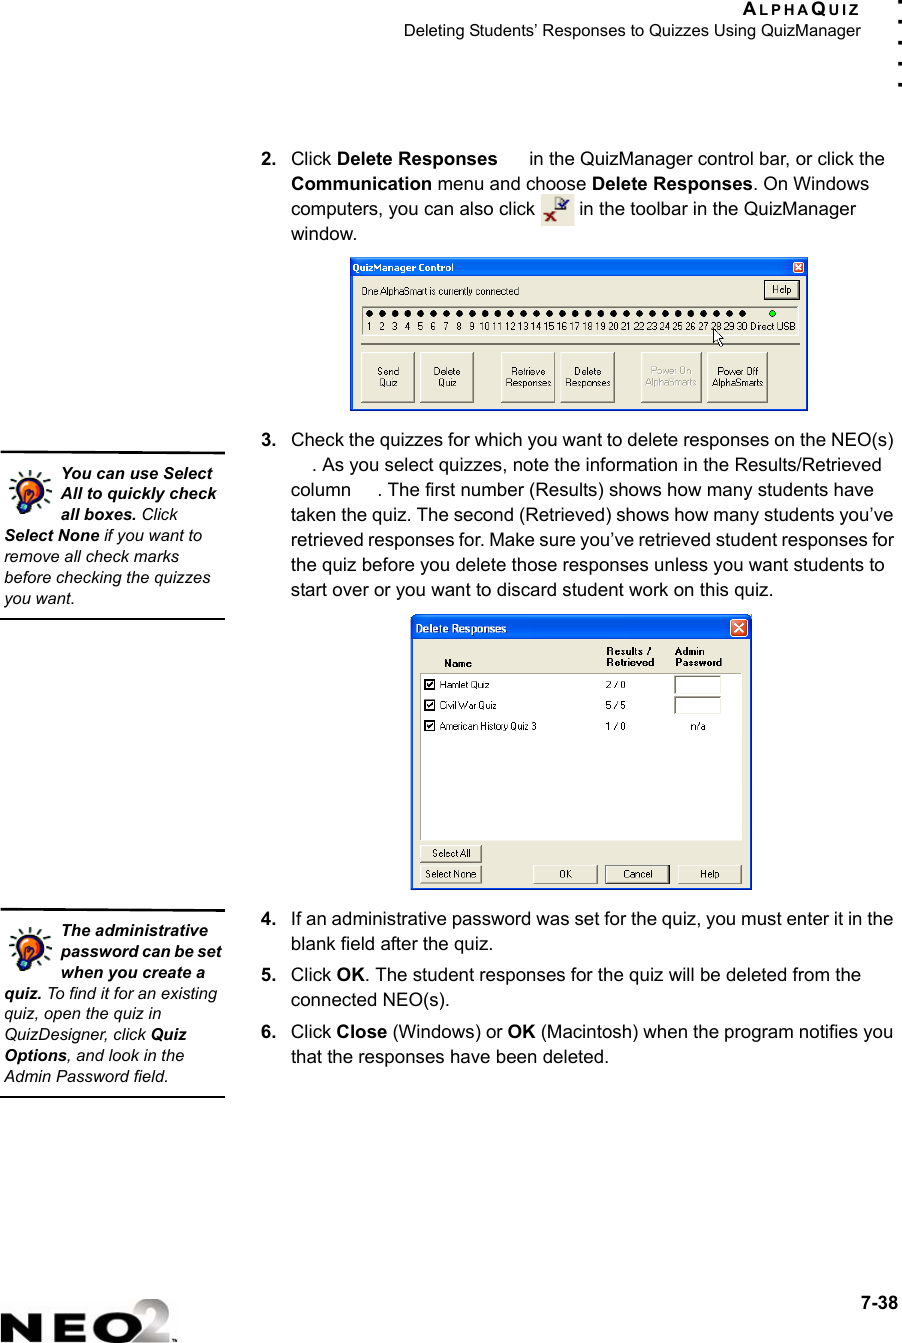
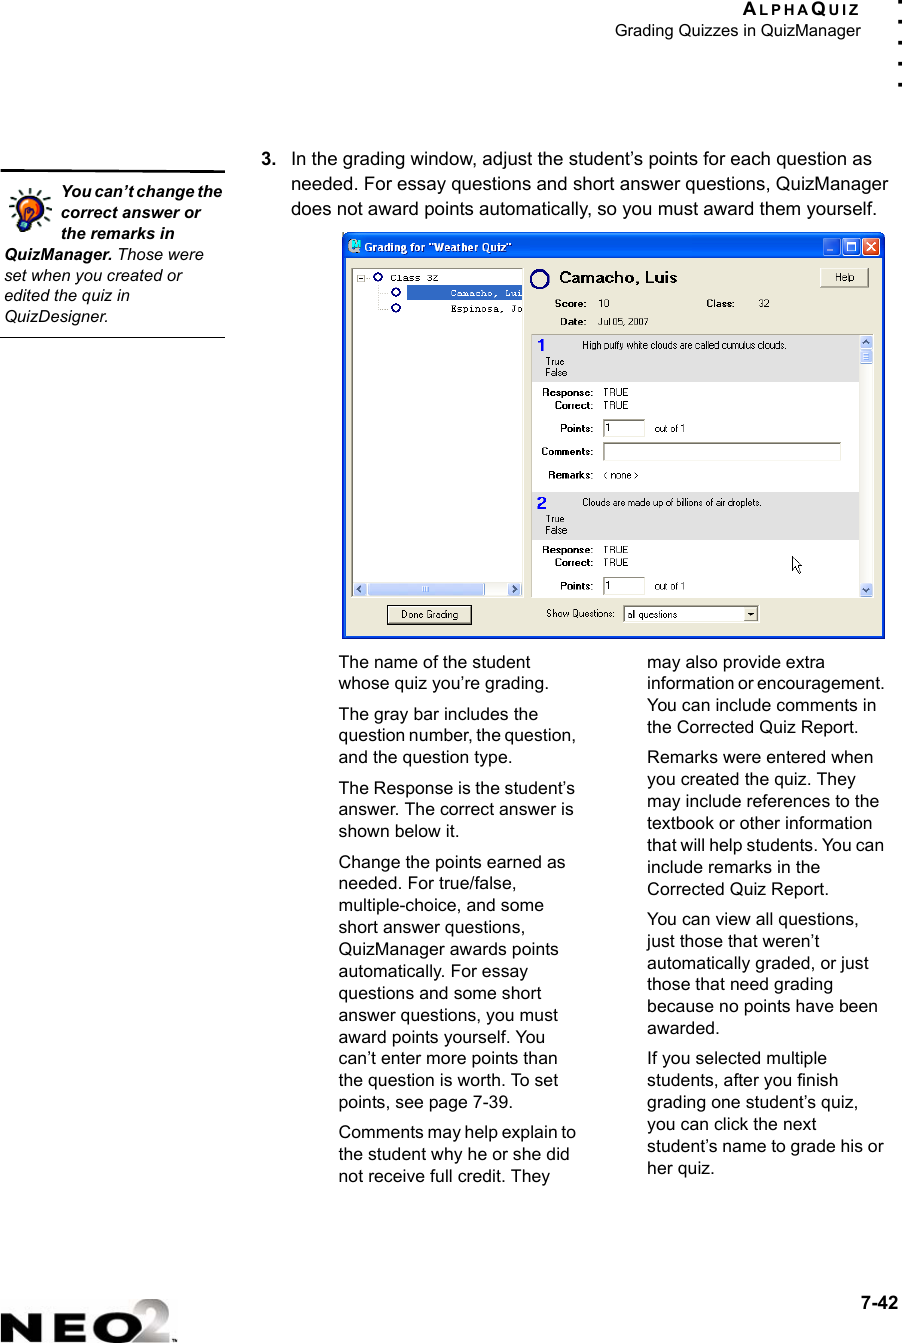
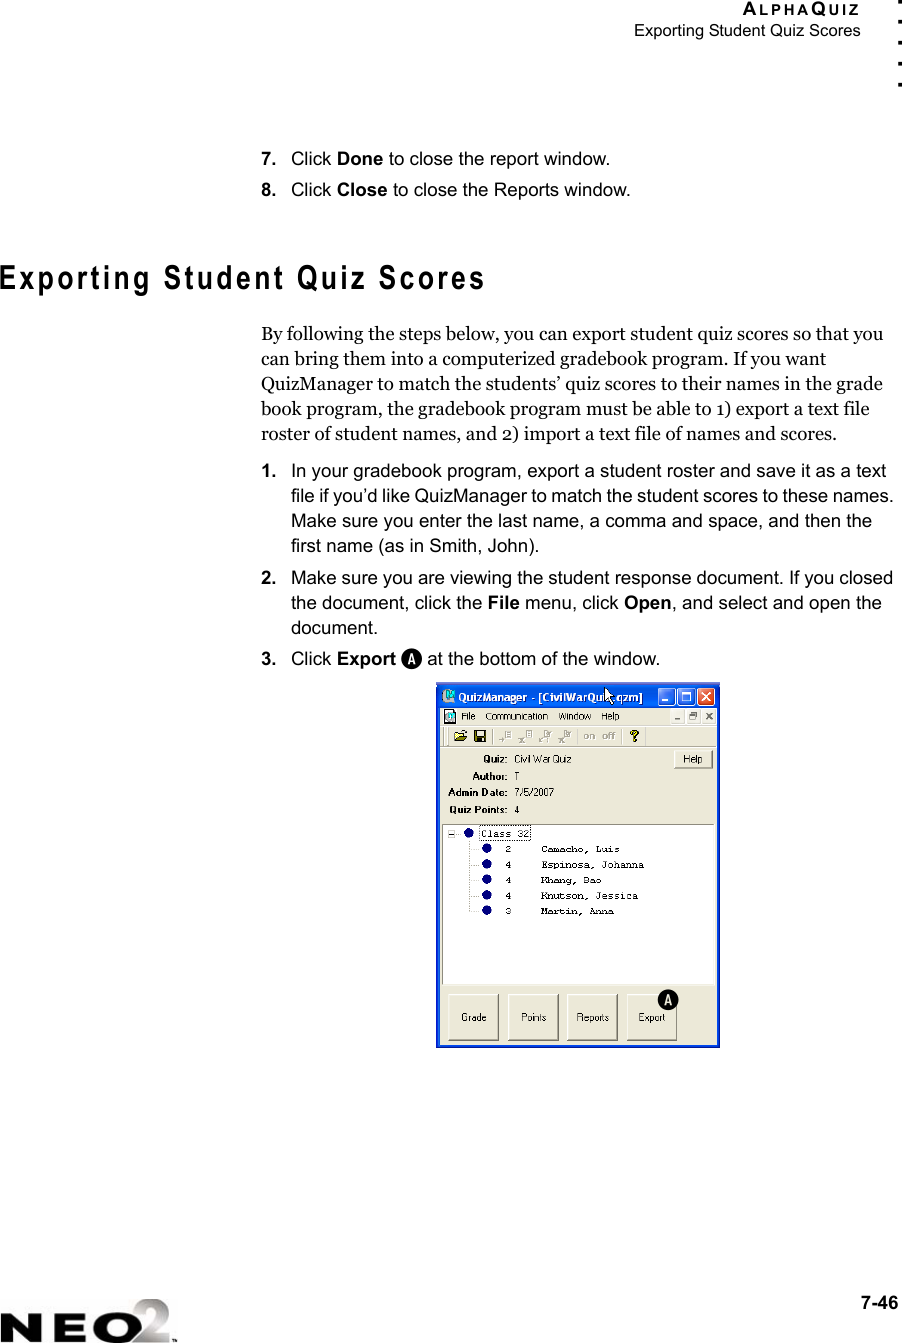
![CONTROL PANELChange Keyboard Settings4-13. . . . .When you switch keyboard layouts, all dialog boxes and keyboard commands conform to the new layout. The command keys (ctrl, option, a, for example) remain in the same location, but letter keys are derived from the new layout. For instance, to access the Speed menu, you still press option-a-S, but the S key is in a different location. Important: When you send text to your computer from your NEO using a USB cable and send, the computer must use a QWERTY layout. To change the keyboard layout, follow these steps:1. Do one of the following:•From the Control Panel, select Change Keyboard Settings, then select Change Keyboard layout.•From within a SmartApplet, press option-a-L. 2. Select a keyboard layout from the following choices:•Press 1 to select the QWERTY layout. •Press 2 to select the Dvorak layout. The illustrations shown in these steps show ANSI (US) keyboards. ISO (European) keyboard layouts vary slightly. If you have an ISO keyboard and you want to check key locations for different specialized layouts, use the Control Panel’s View Keyboard Layout option (see page 4-11).on/off file 1 file 2 file 3 file 4 file 5 file 6 file 7 file 8 print spellcheck find clearfile home end applets sendtabQ W E RT Y U I O P{[}]|\entercaps lockA S D F G H J K L:;"'shiftZ X C V B N M<,>.?/shiftcontrol altoptiondeleteesc!1@2#3$4%5^6&7*8(9)0_-+=backspace~`cmdThe standard QWERTY keyboard layouton/off file 1 file 2 file 3 file 4 file 5 file 6 file 7 file 8 print spellcheck find clearfile home end applets sendtab"'<,>.PY F G C R L?/+=|\entercaps lockA O E U I D H T N S_-shift:;Q J K X B MW V Zshiftcontrol altoptiondeleteesc!1@2#3$4%5^6&7*8(9)0{[}]backspace~`cmdThe Dvorak keyboard layout](https://usermanual.wiki/Renaissance-Learning/NEO2/User-Guide-825941-Page-37.png)
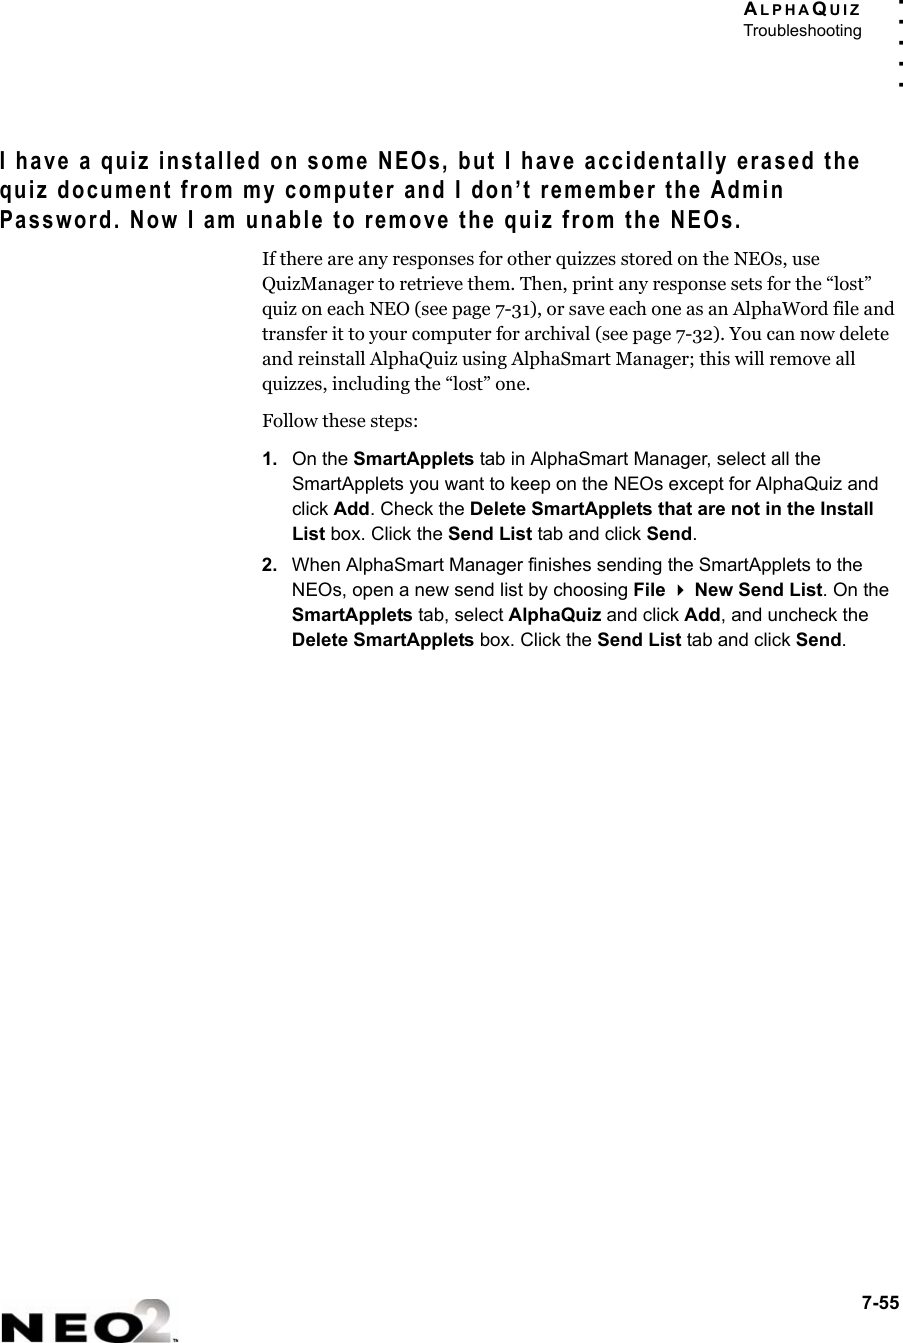
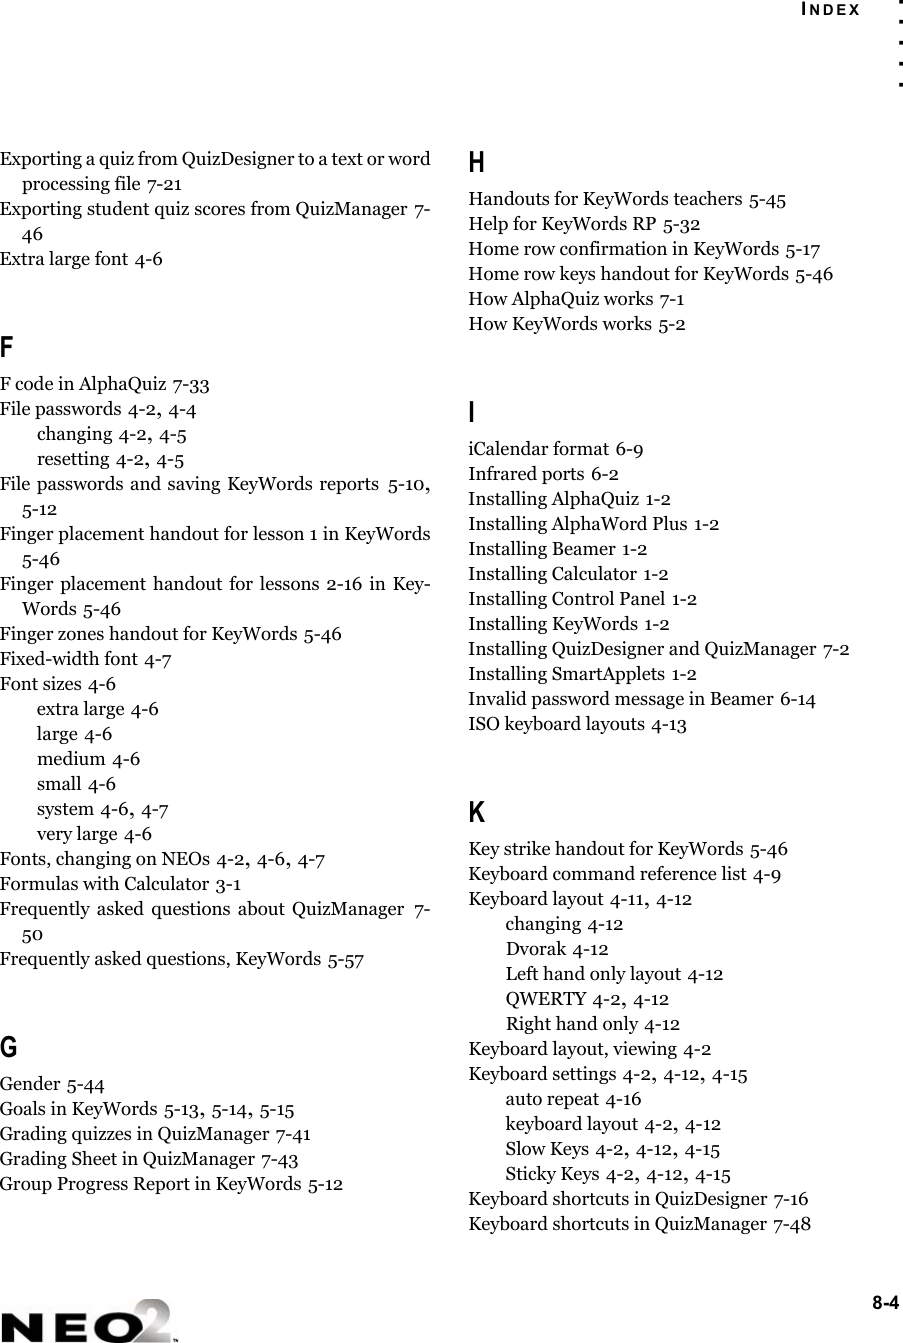
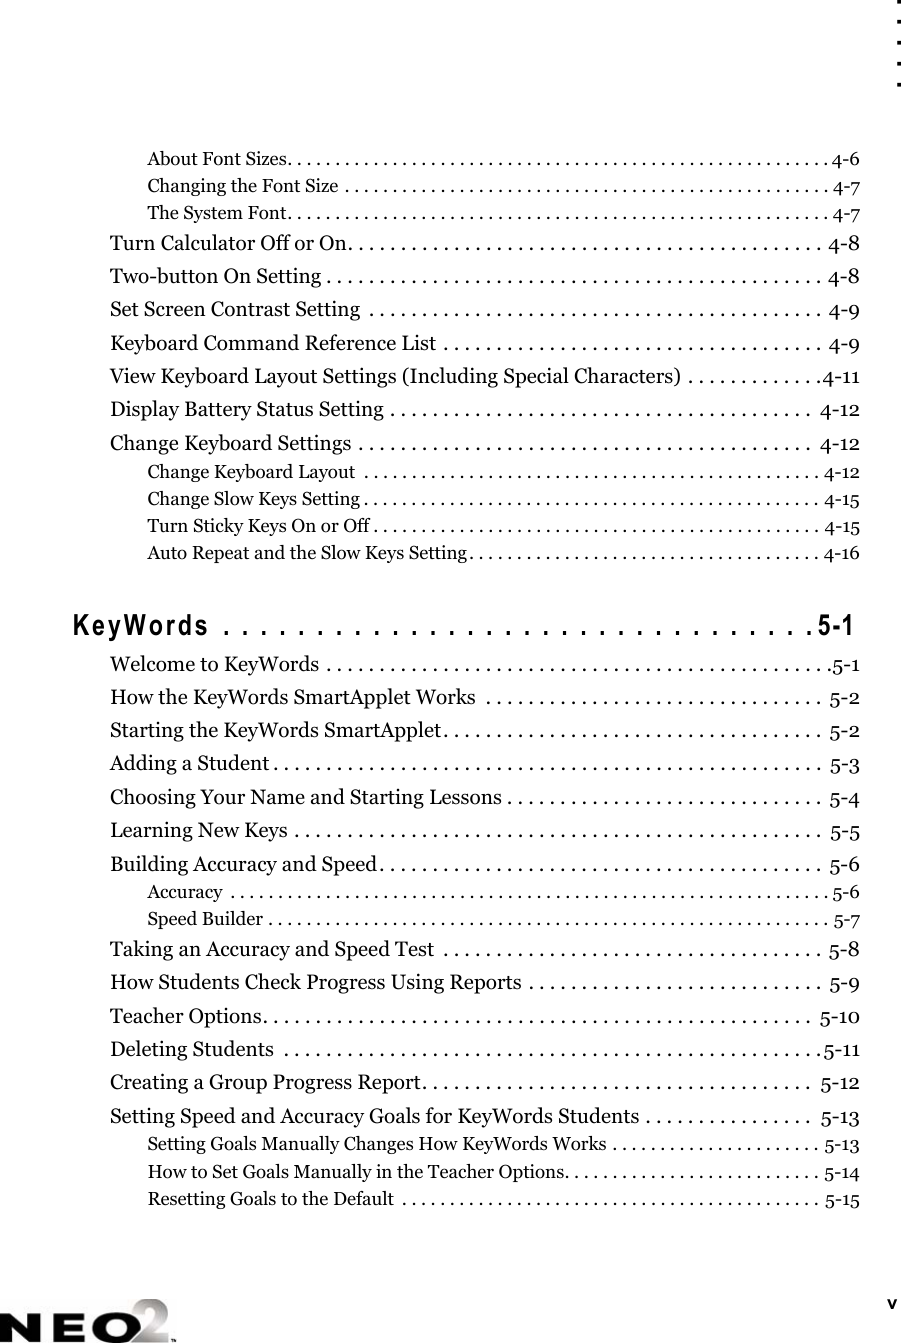
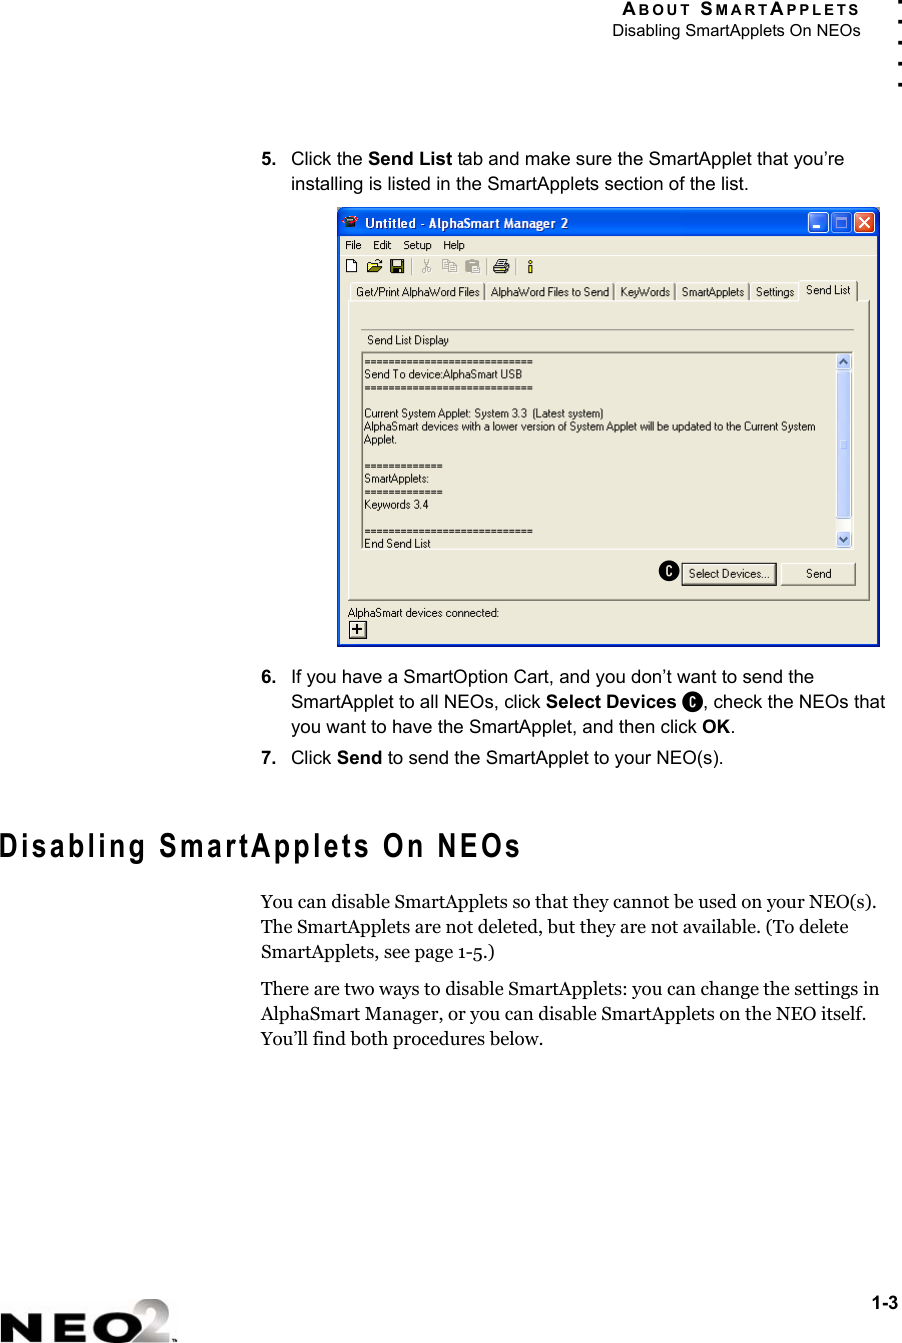
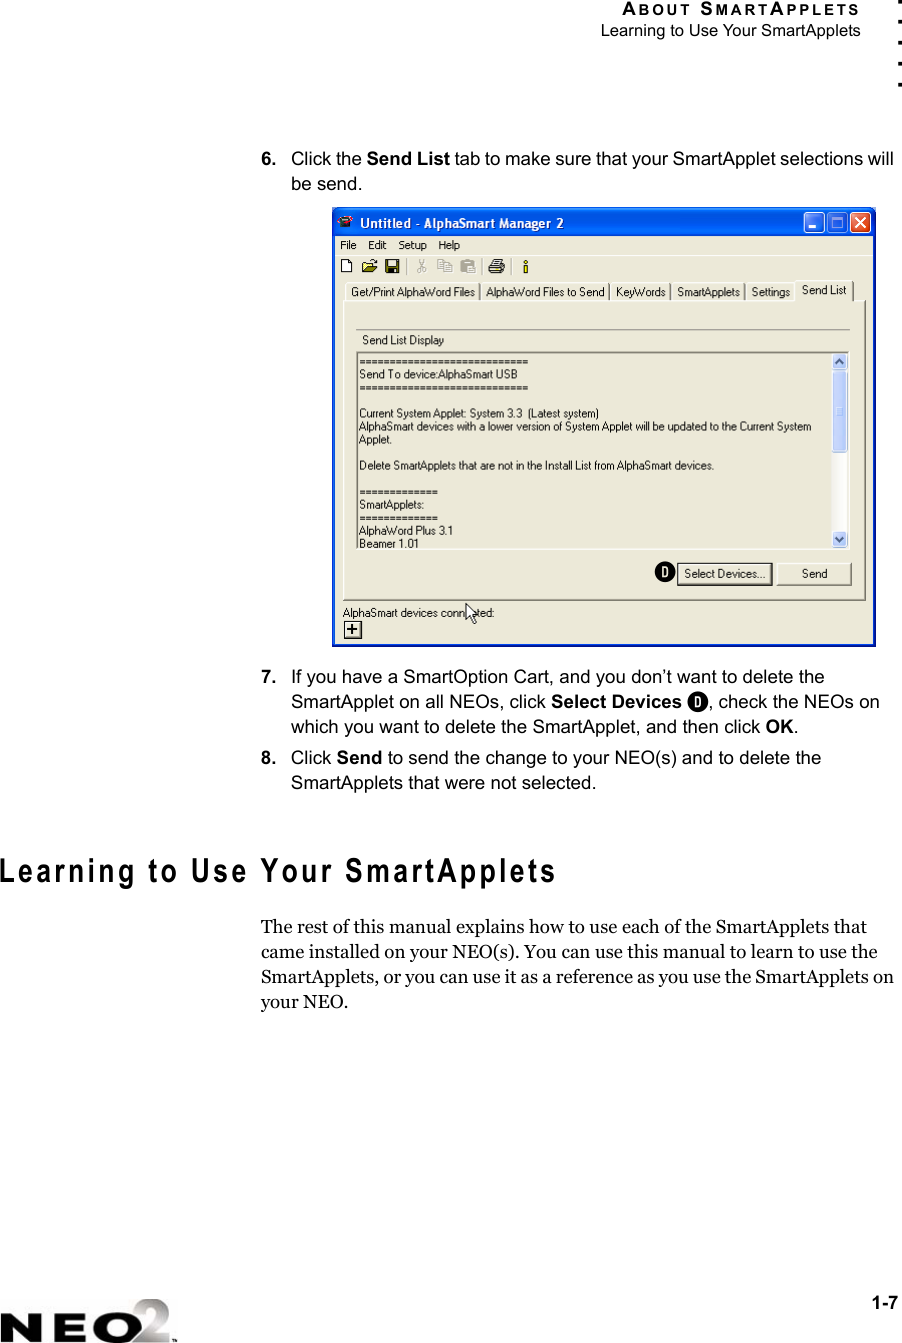
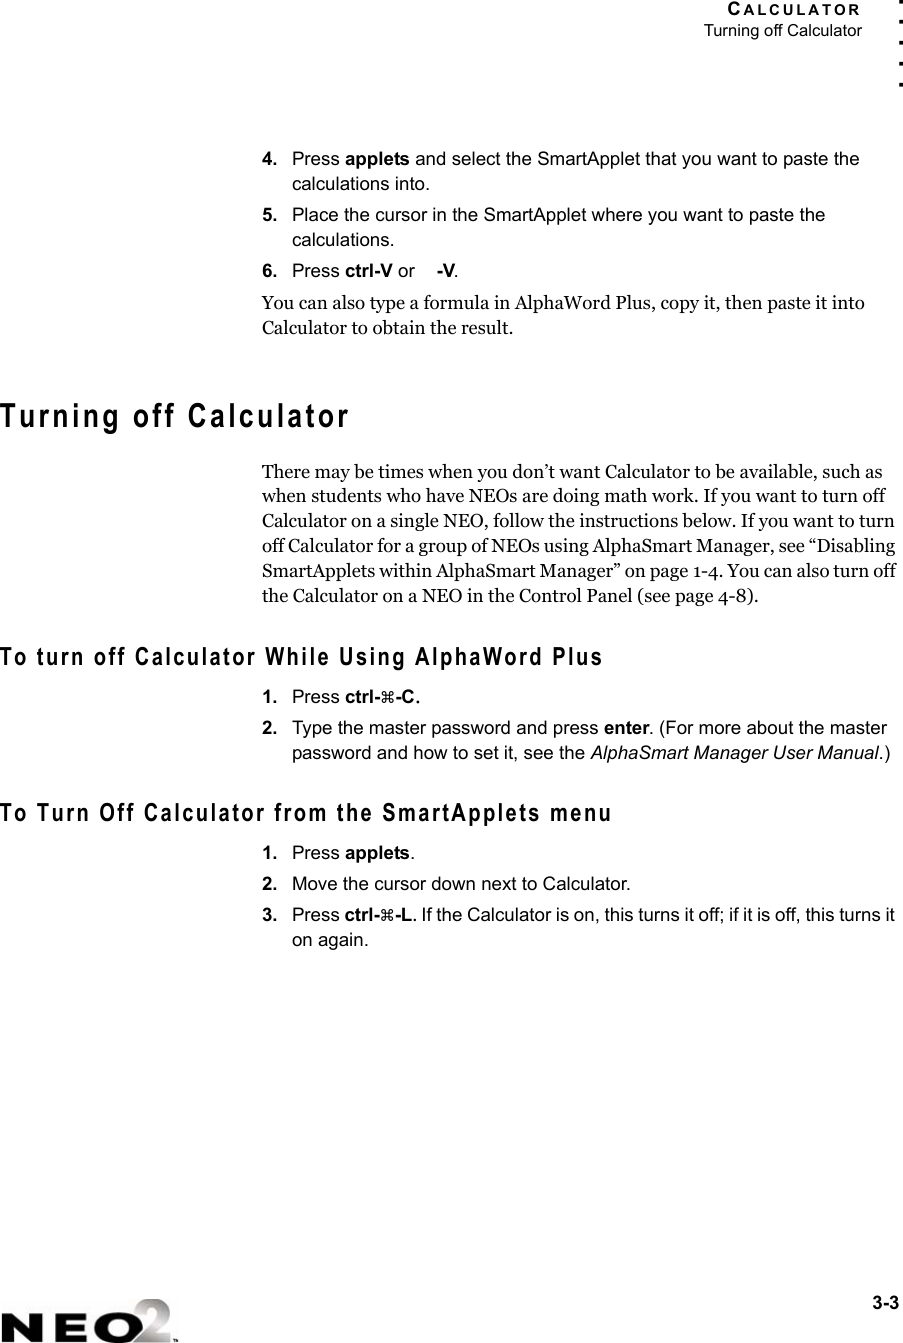
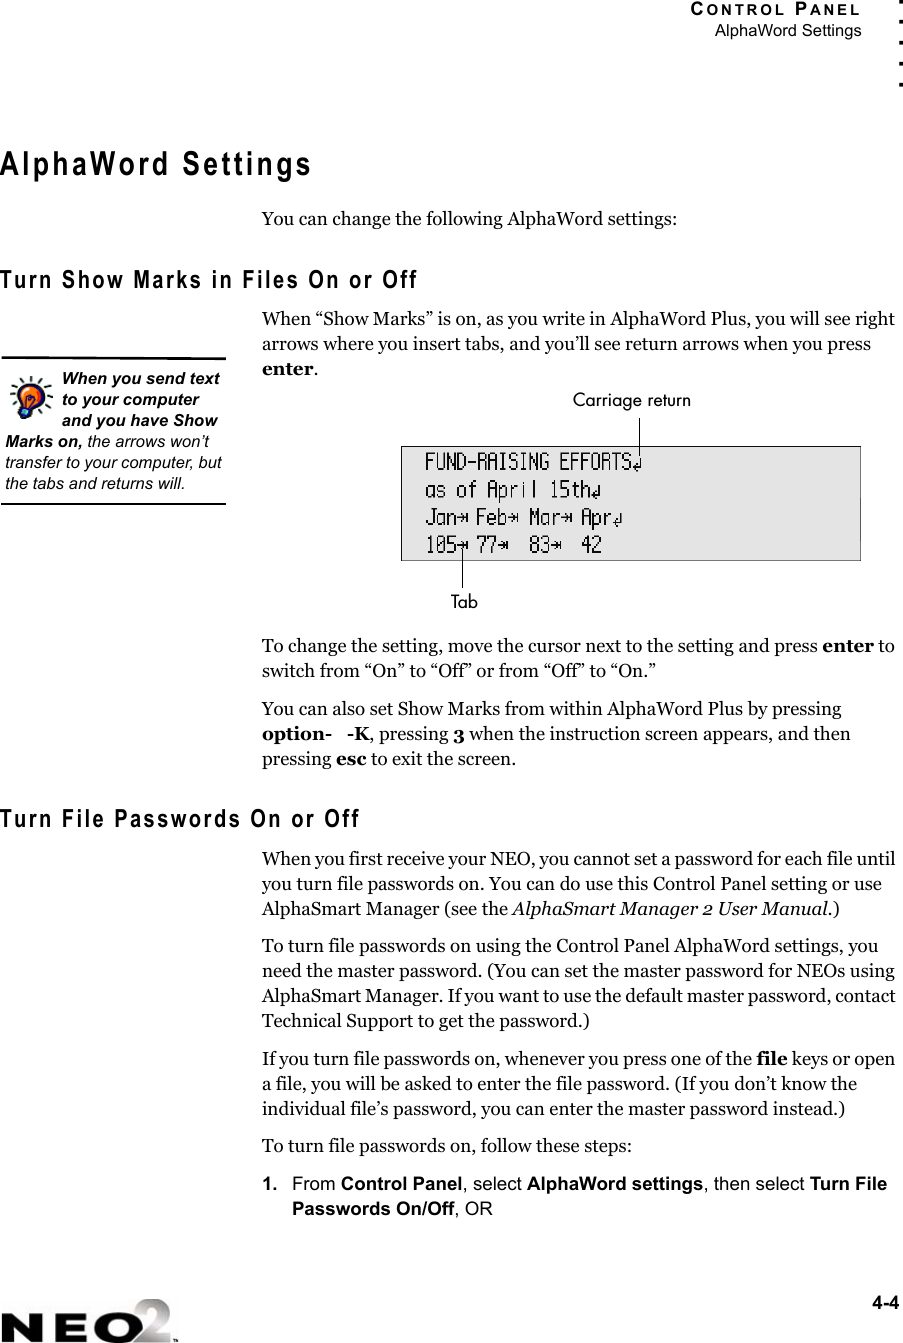
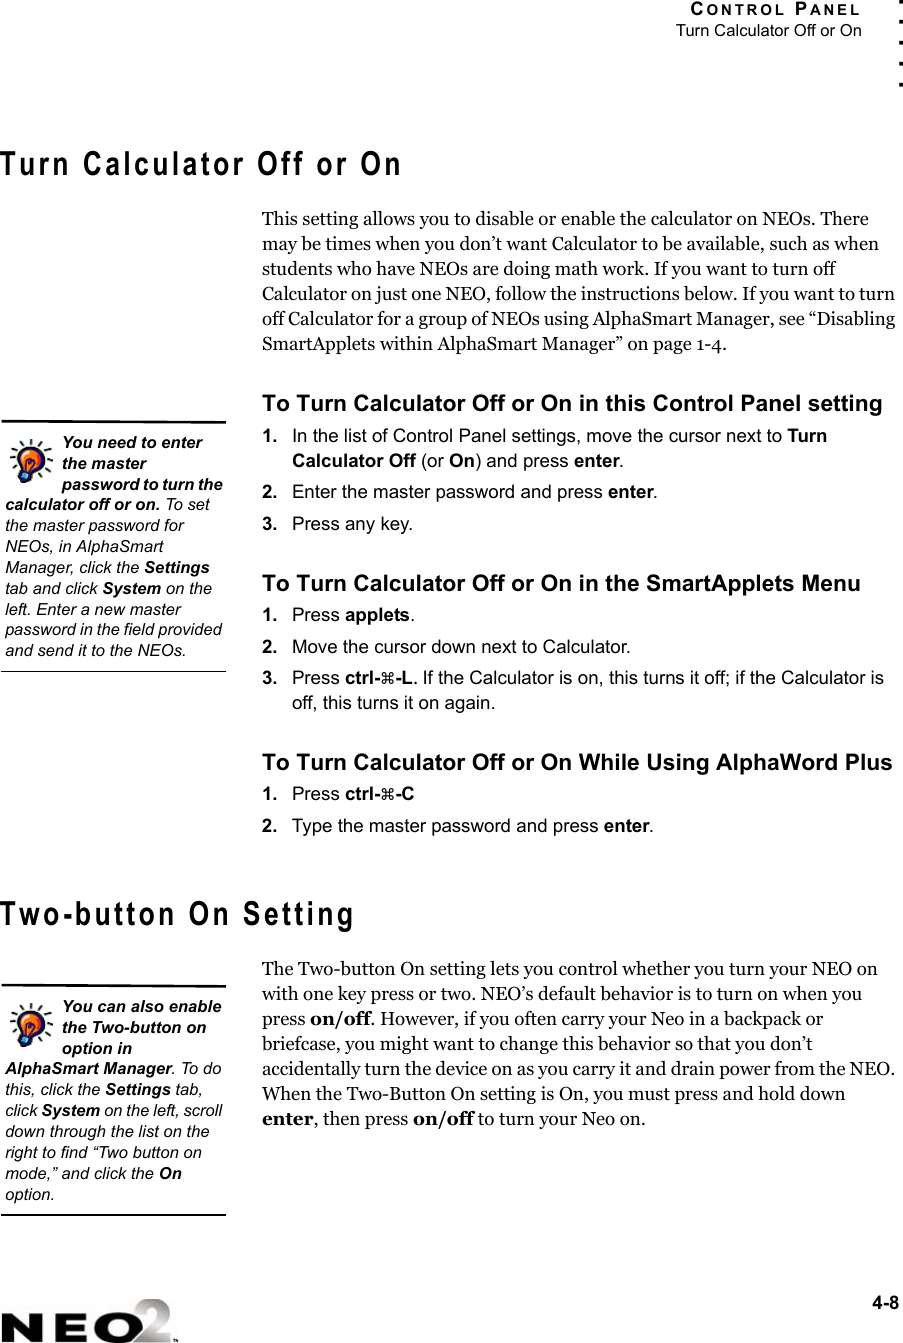
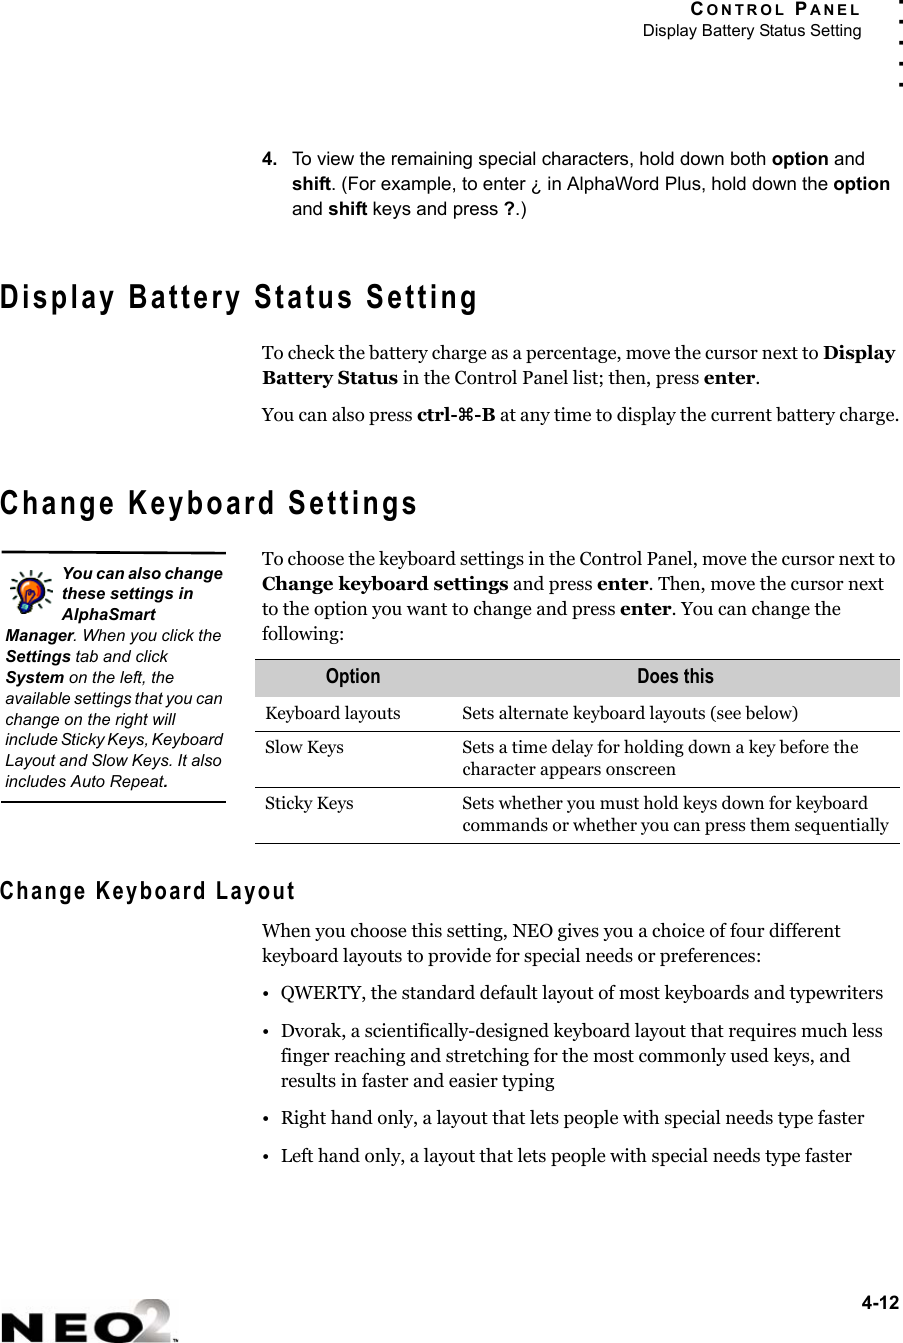
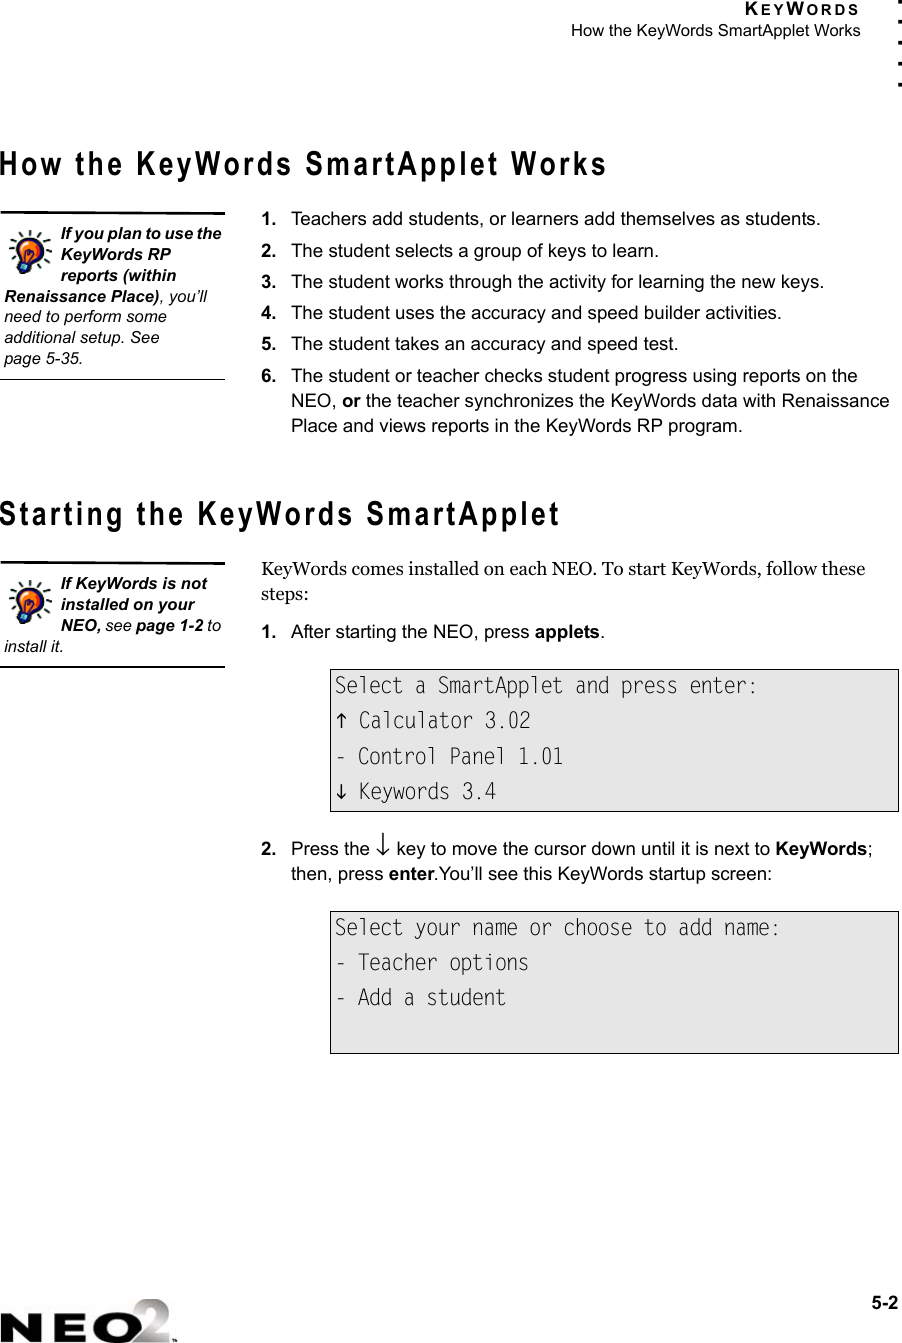
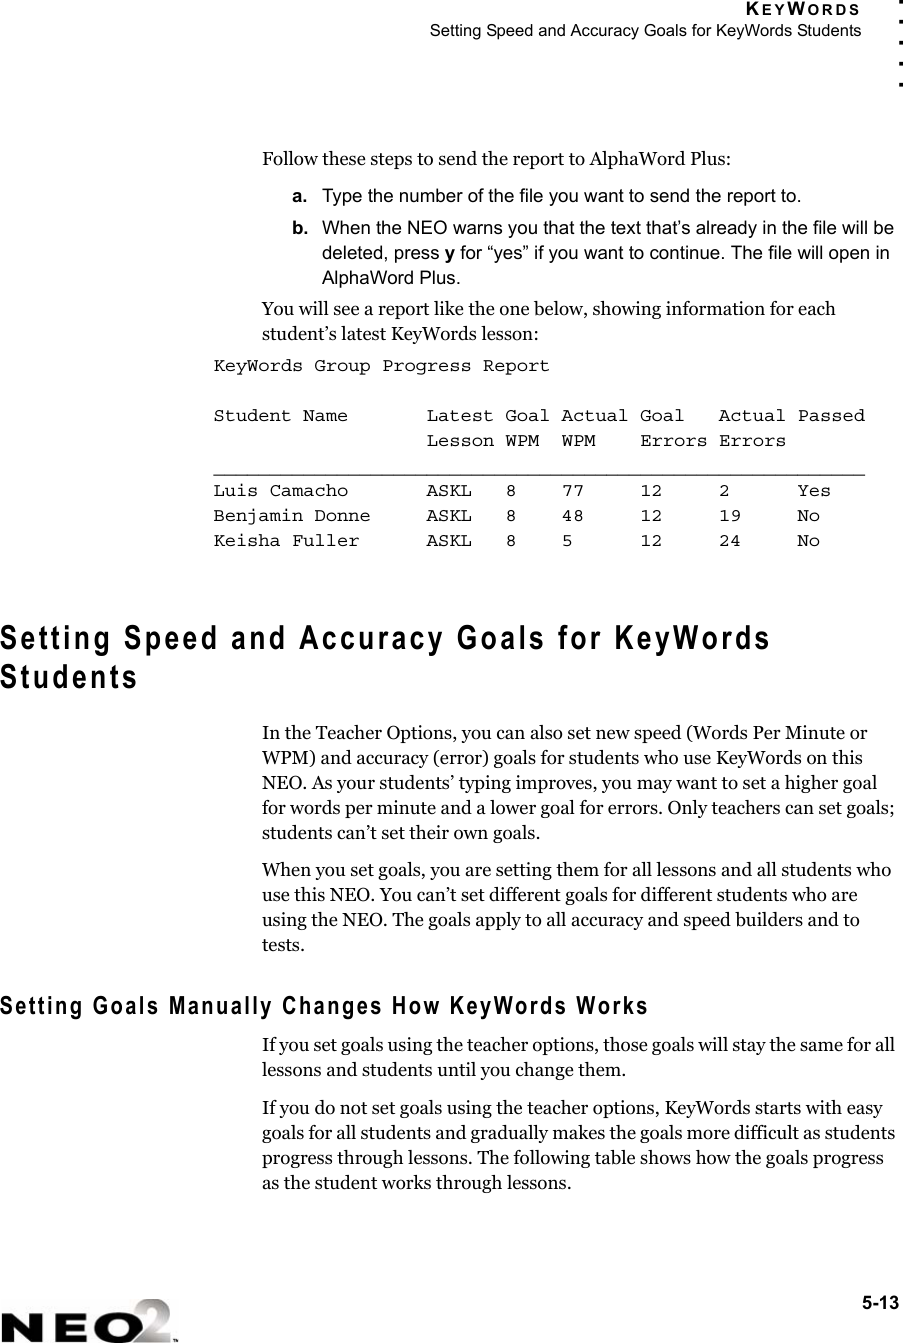
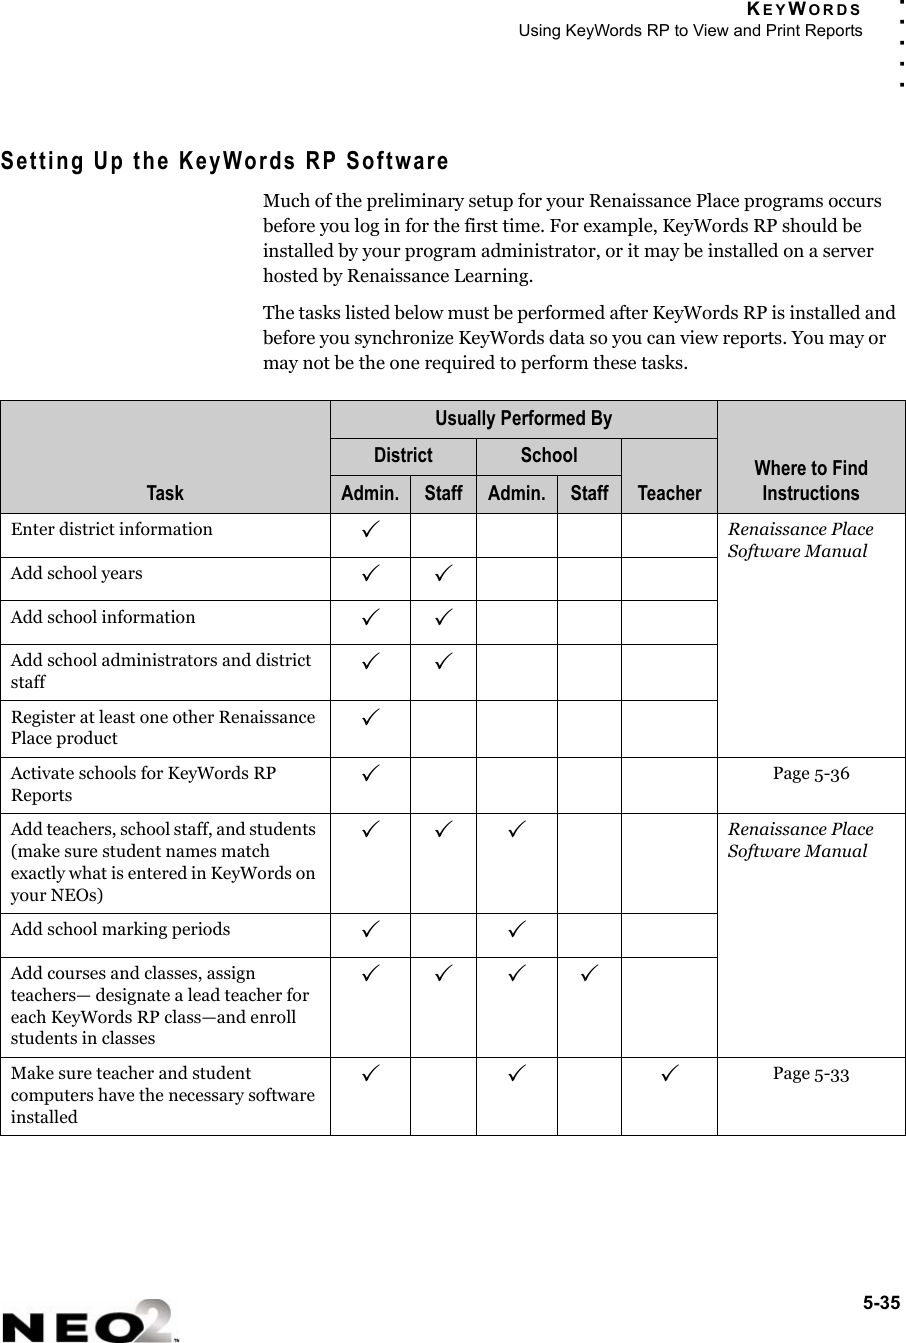
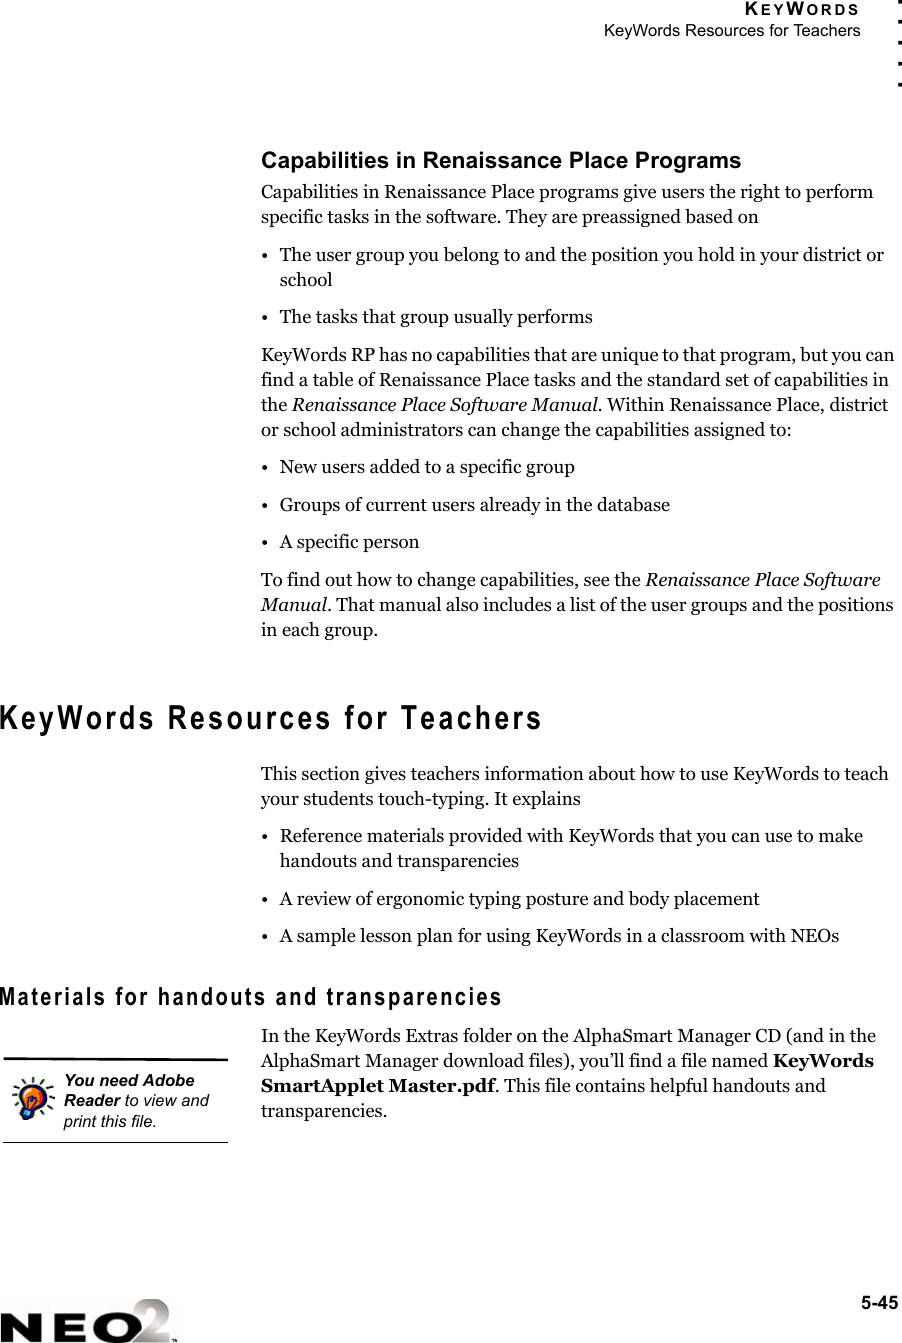
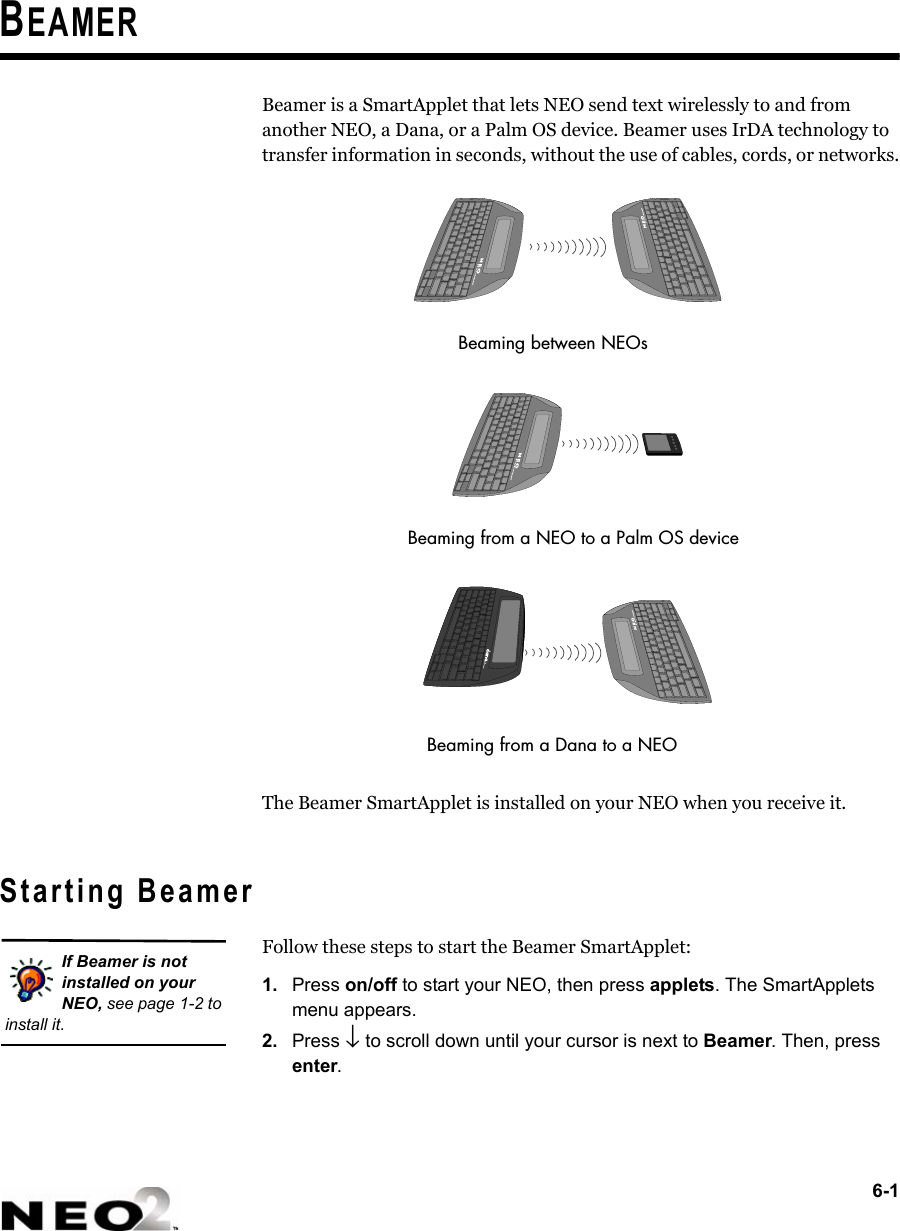
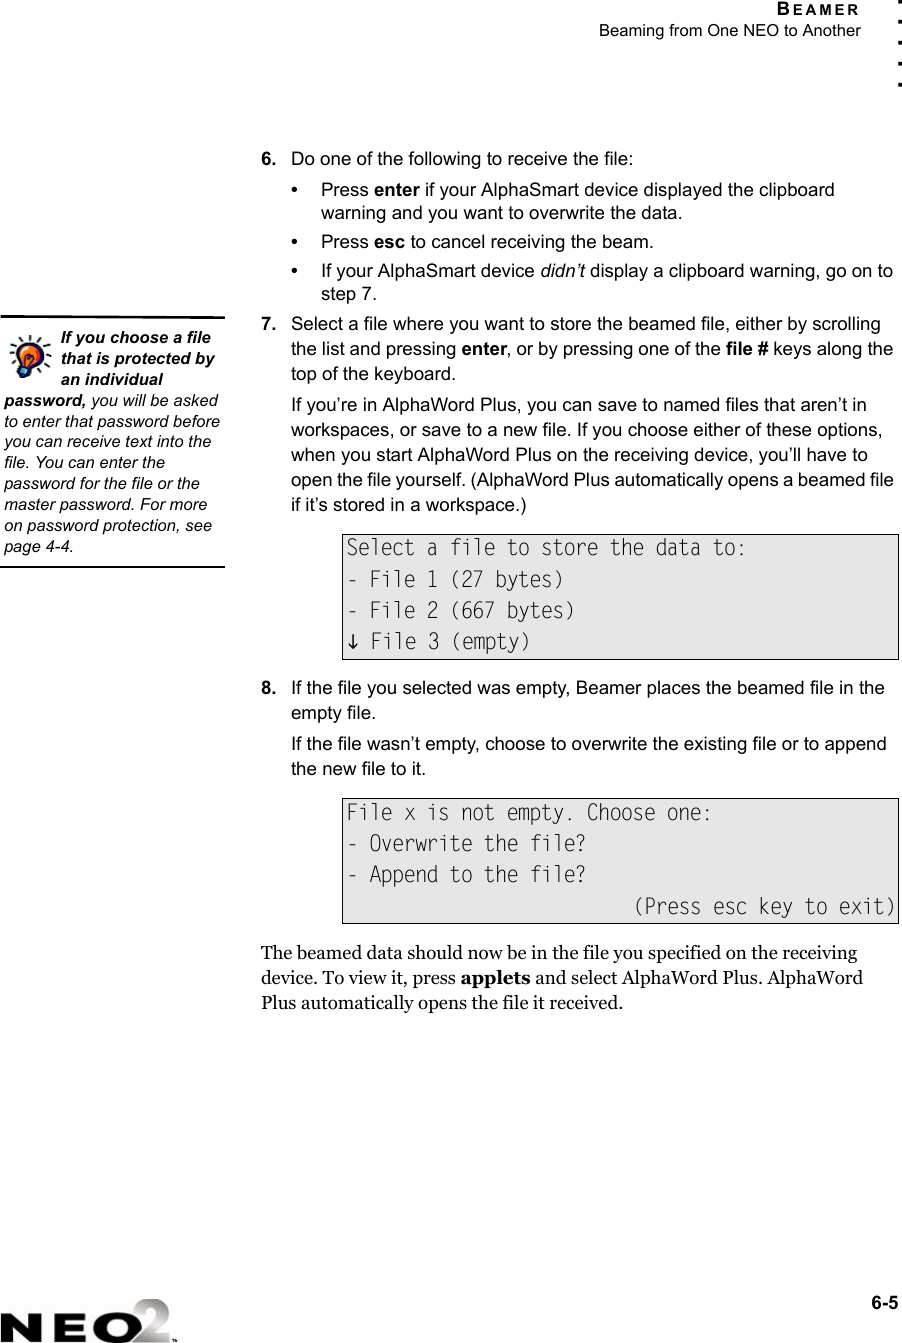
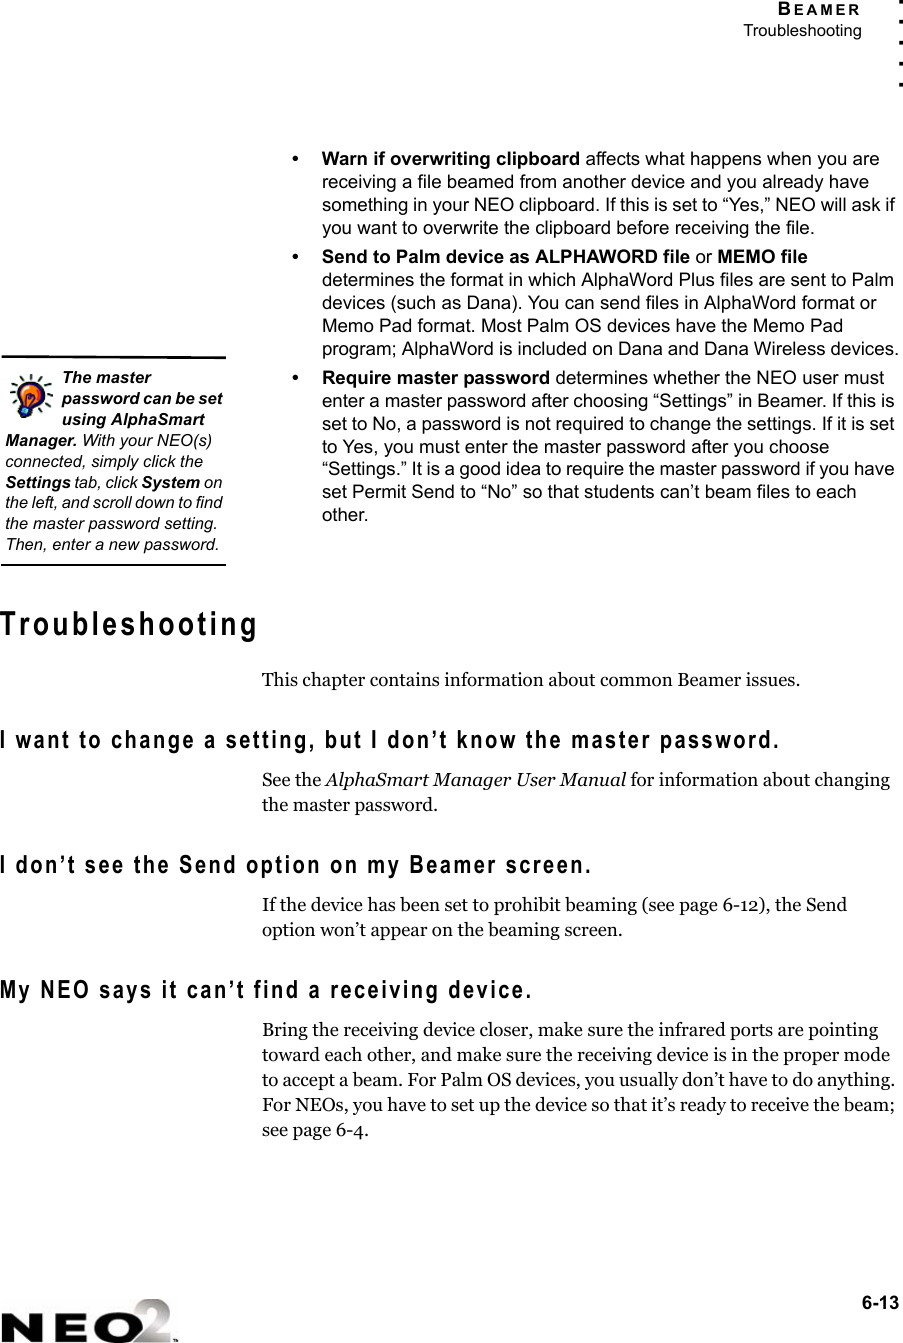
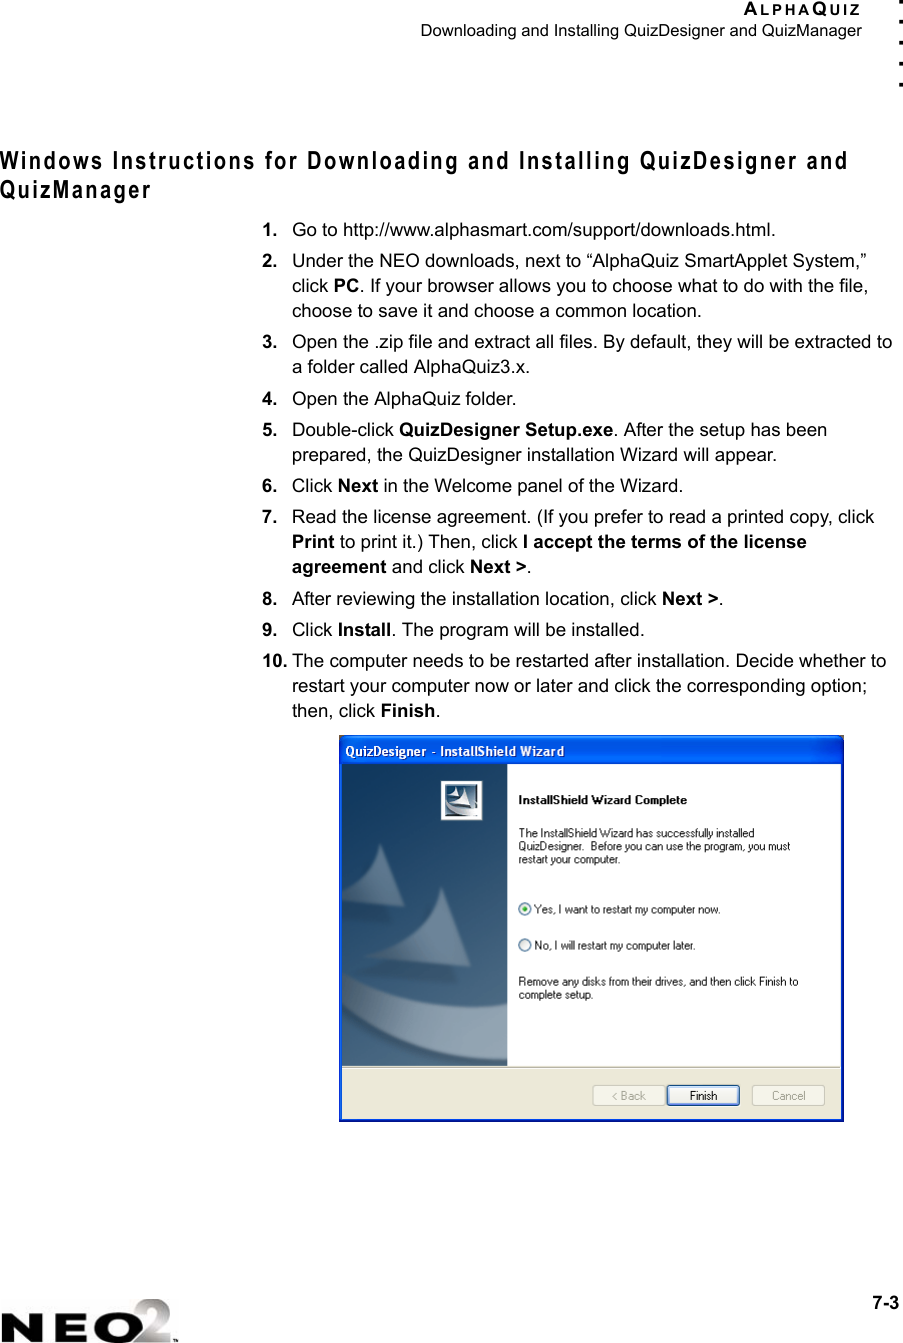
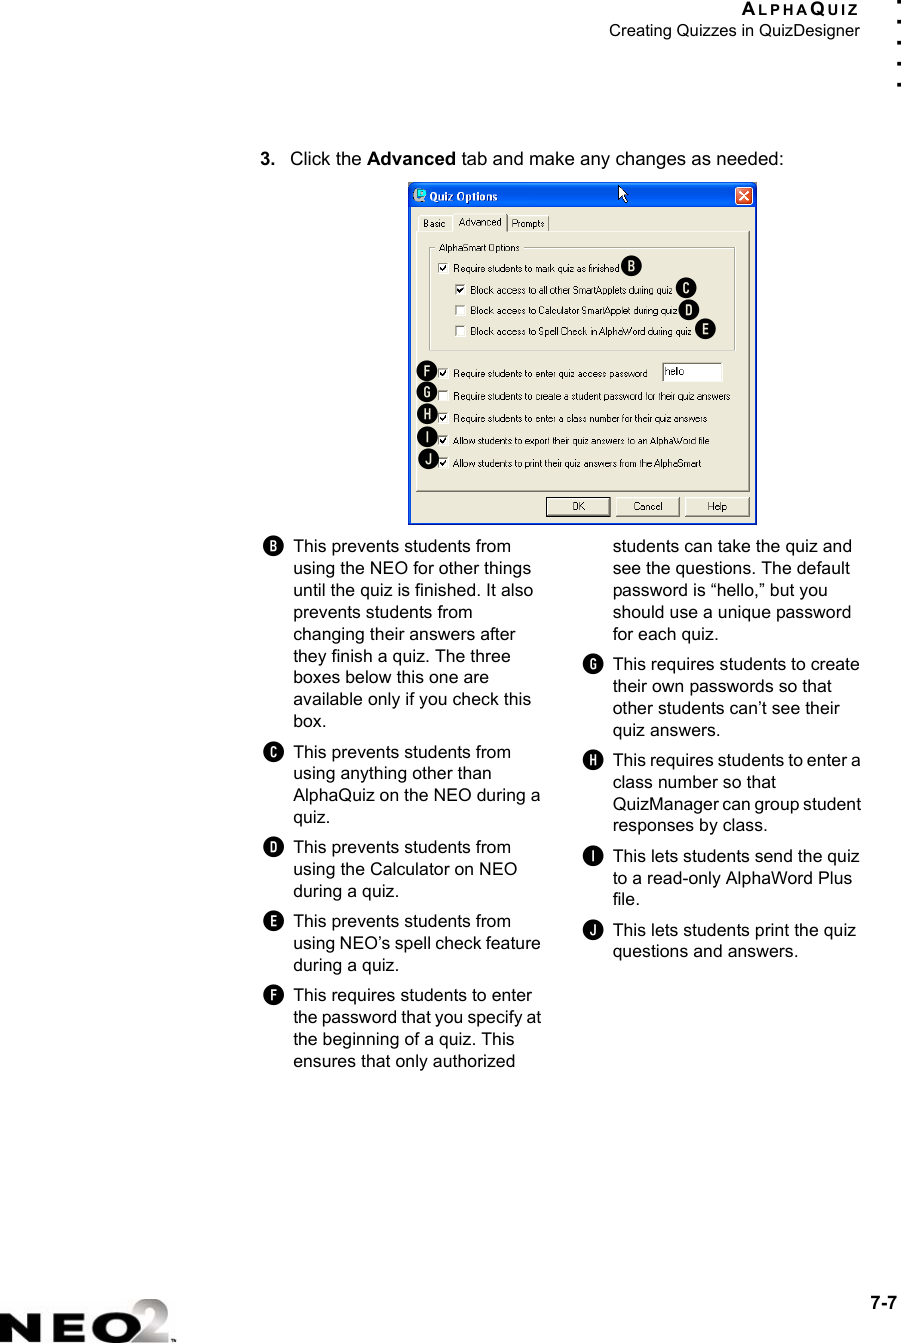
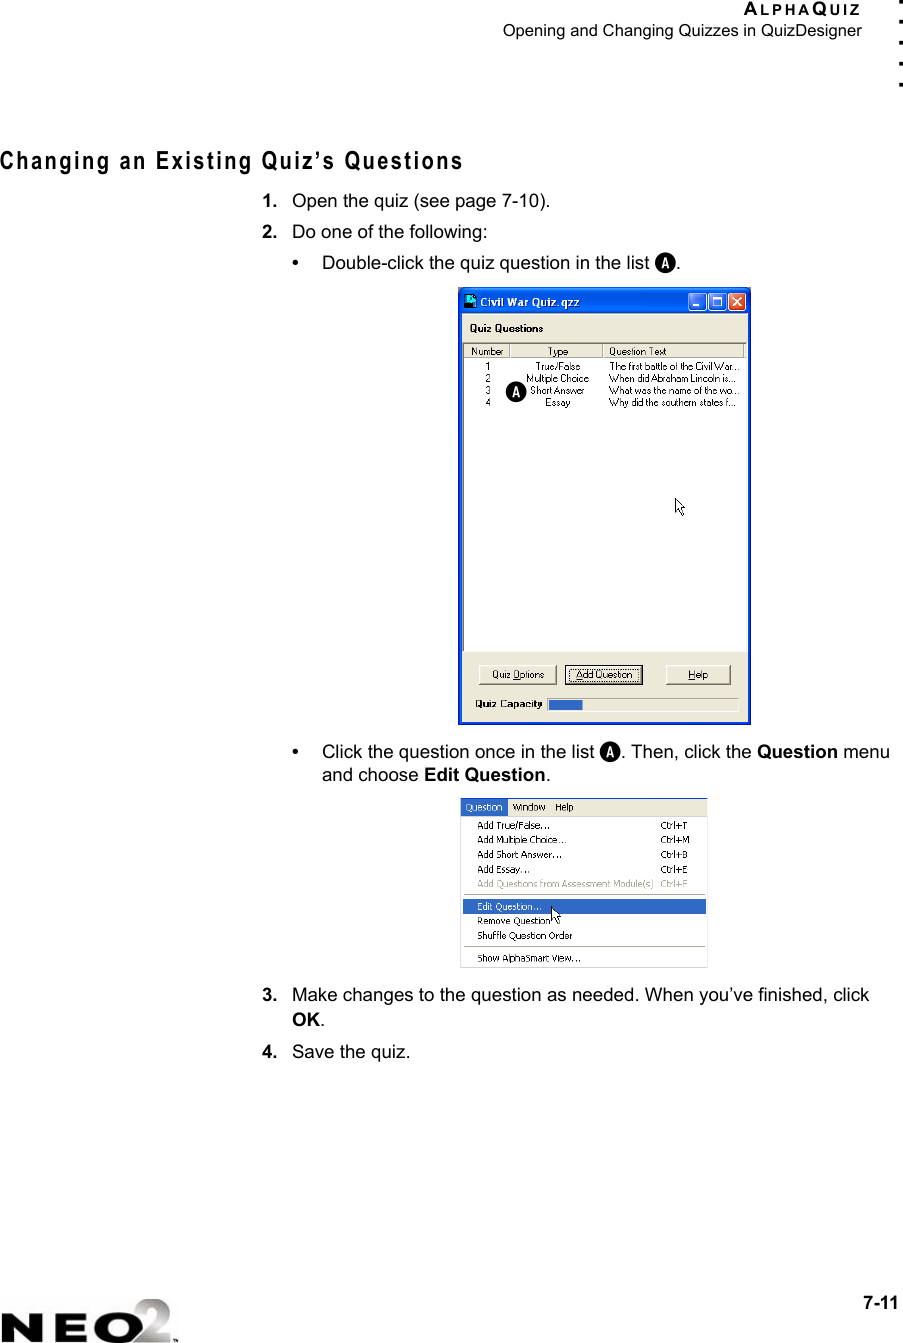
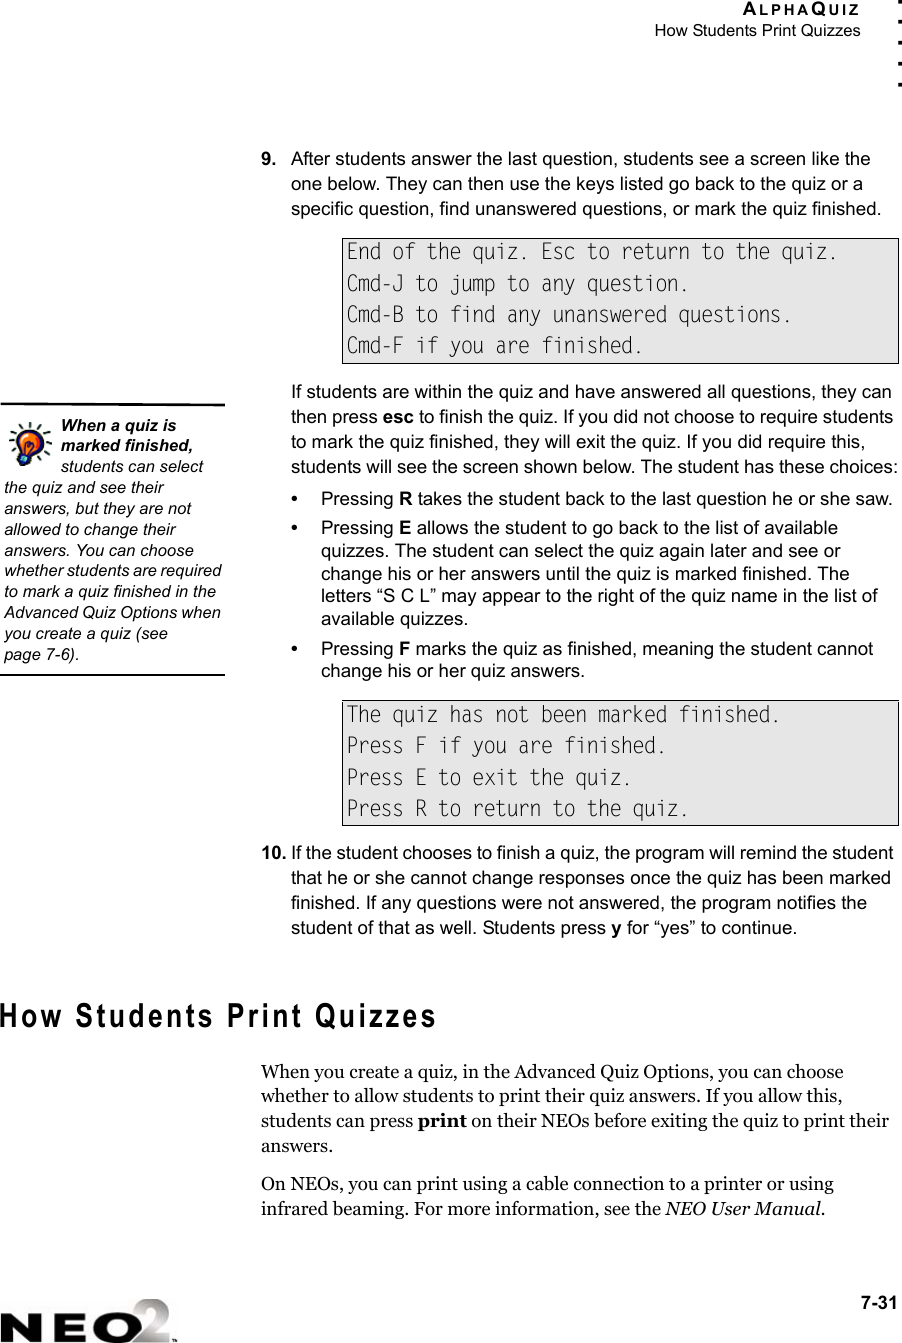
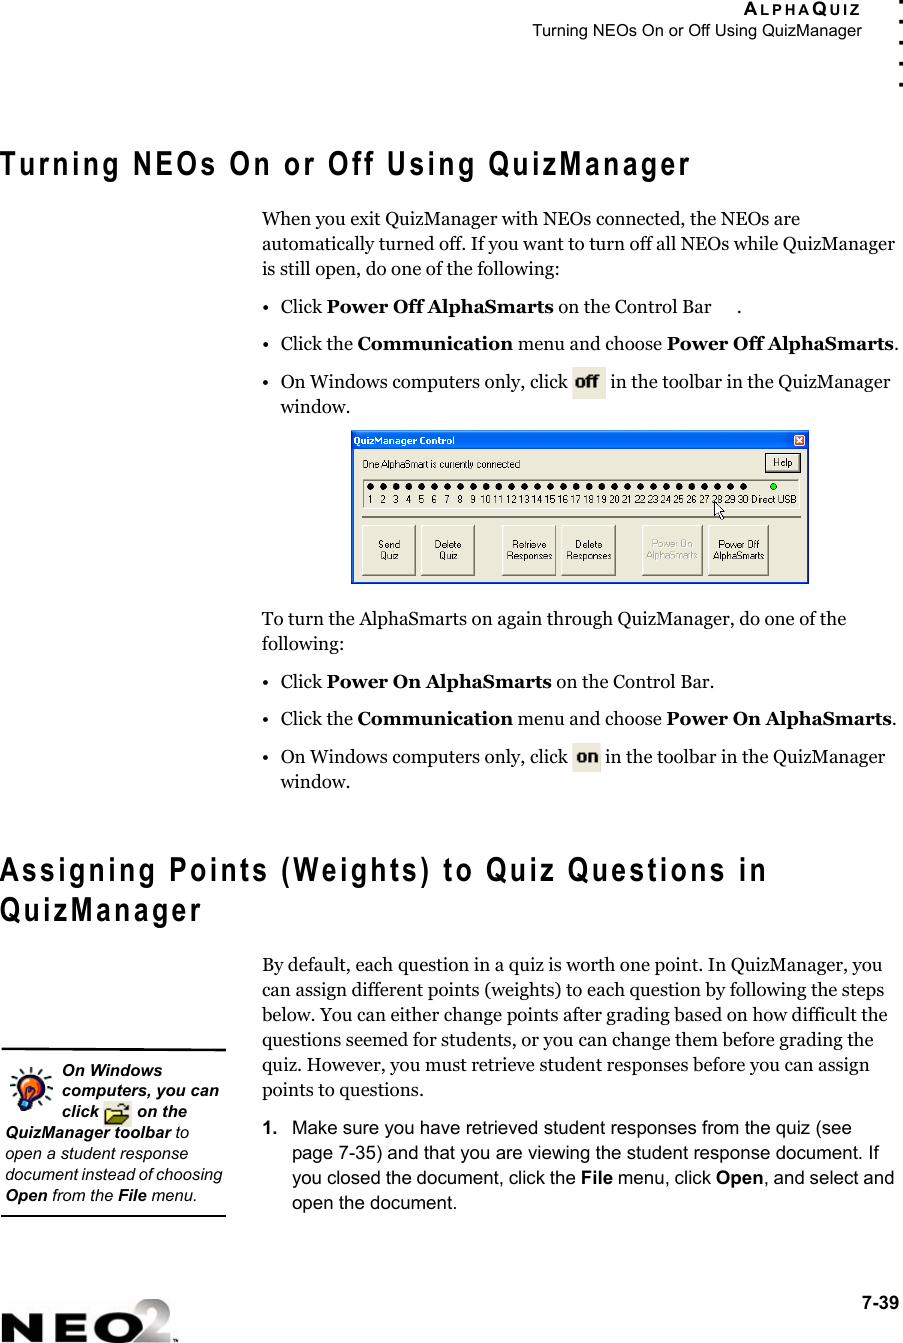
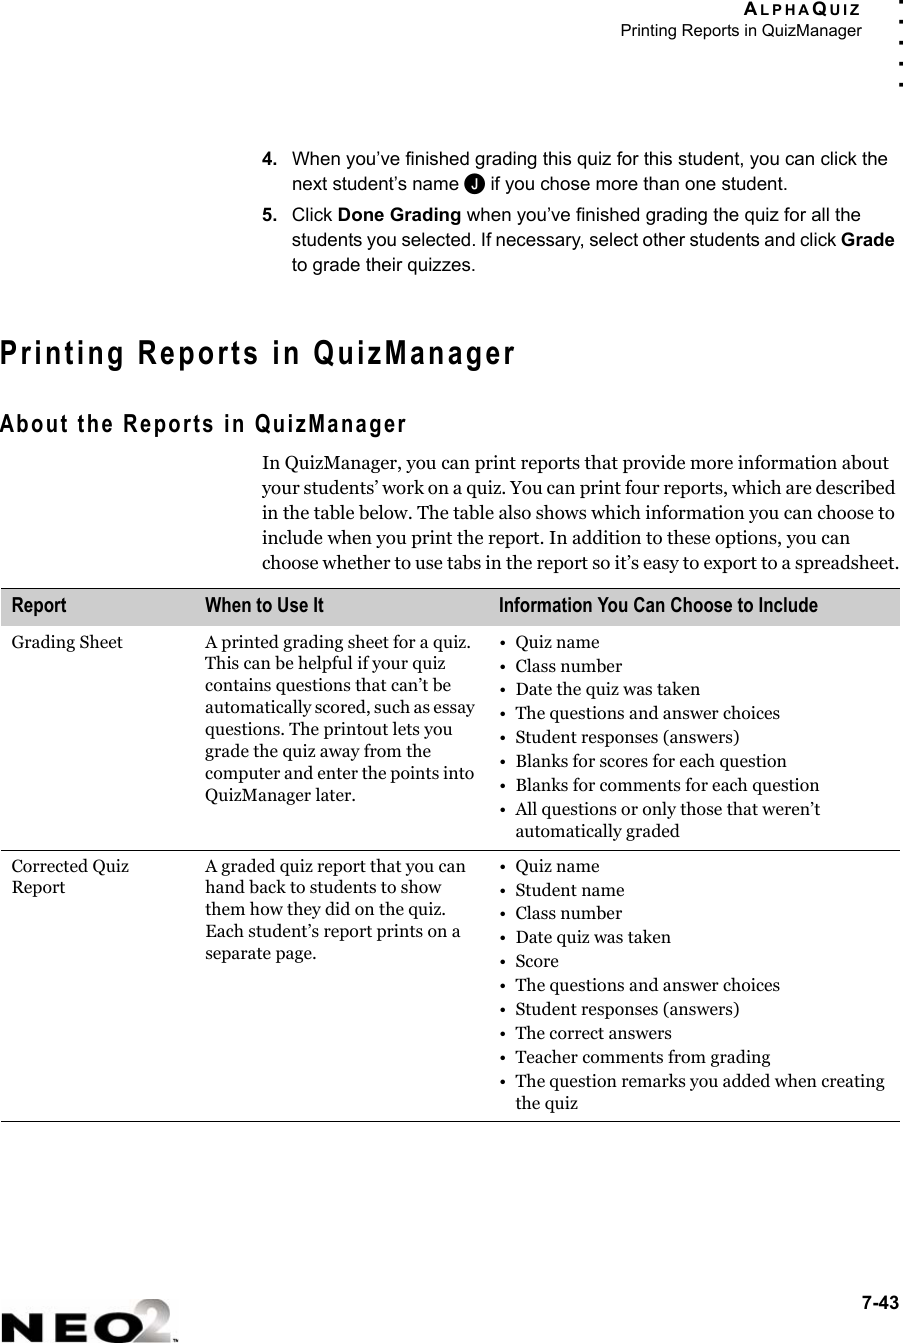
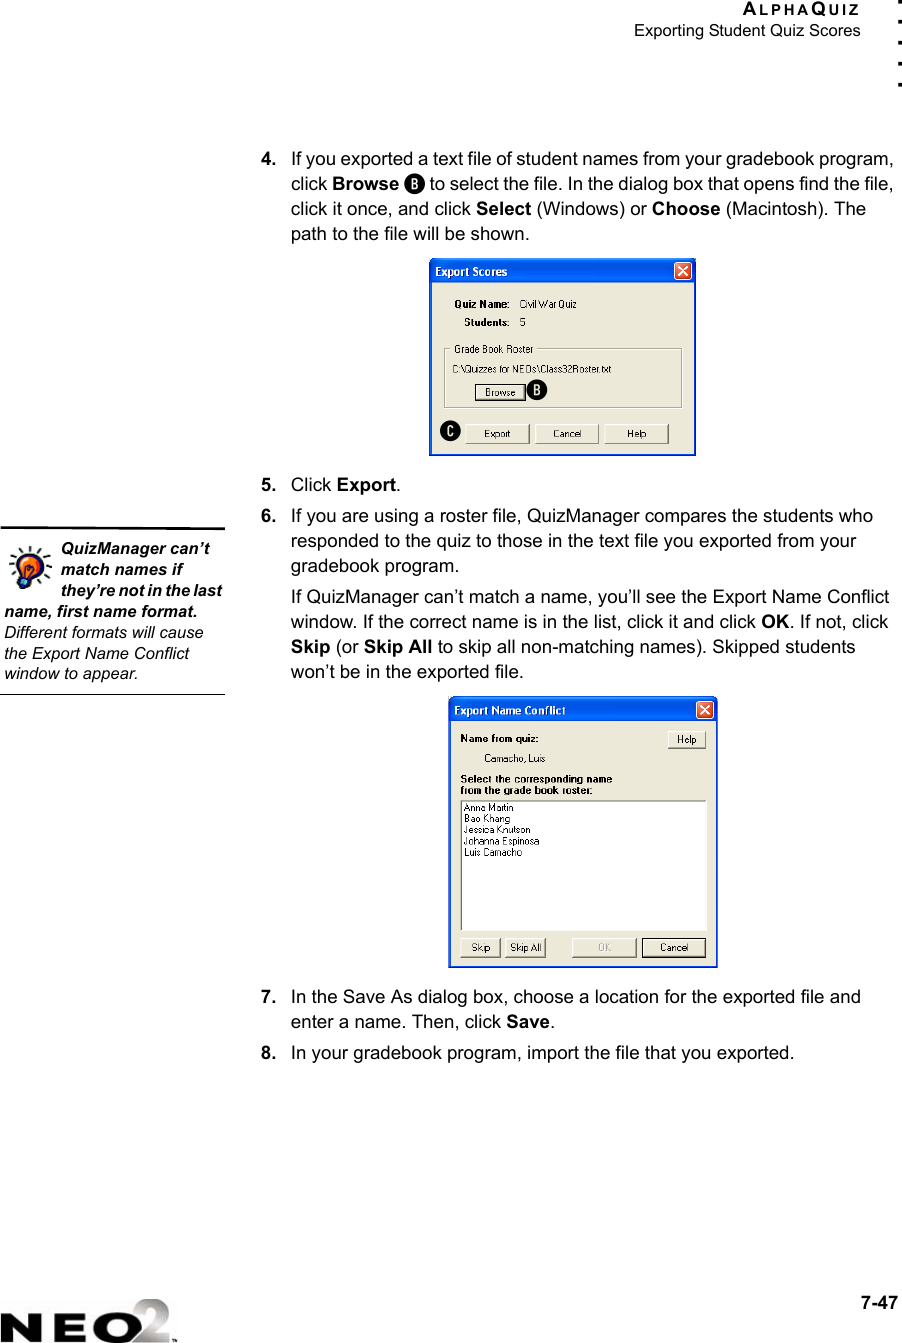
![CONTROL PANELChange Keyboard Settings4-14. . . . .•Press 3 to select the right hand only layout. •Press 4 to select the left hand only layout. 3. When the NEO notifies you that the keyboard layout has been changed, press any key to continue. If you chose a layout other than QWERTY, the next time you start the NEO, the startup screen will include the keyboard layout you’ve chosen.on/off file 1 file 2 file 3 file 4 file 5 file 6 file 7 file 8 print spellcheck find clearfile home end applets sendtab$4%5^6>.O R S U Y B:;+=|\entercaps lock&7*8(9A E H T D C K_-shift)0Z X<,I N WV G"'shiftcontrol altoptiondeleteesc!1@2#3Q J L M F P?/{[}]backspace~`cmdThe right one-handed keyboard layouton/off file 1 file 2 file 3 file 4 file 5 file 6 file 7 file 8 print spellcheck find clearfile home end applets sendtab$4%5^6>.O R S U Y B:;+=|\entercaps lock&7*8(9A E H T D C K_-shift)0Z X<,I N WV G"'shiftcontrol altoptiondeleteesc!1@2#3Q J L M F P?/{[}]backspace~`cmdThe right one-handed keyboard layouton/off file 1 file 2 file 3 file 4 file 5 file 6 file 7 file 8 print spellcheck find clearfile home end applets sendtab:;Q B YU R S O>.^6%5+=|\entercaps lock_-K C D T H E A Z*8&7shift"'X G V W N I<,)0(9shiftcontrol altoptiondeleteesc{[}]?/P F M L J$4#3@2!1backspace~`cmdThe left one-handed keyboard layout](https://usermanual.wiki/Renaissance-Learning/NEO2/User-Guide-825941-Page-38.png)
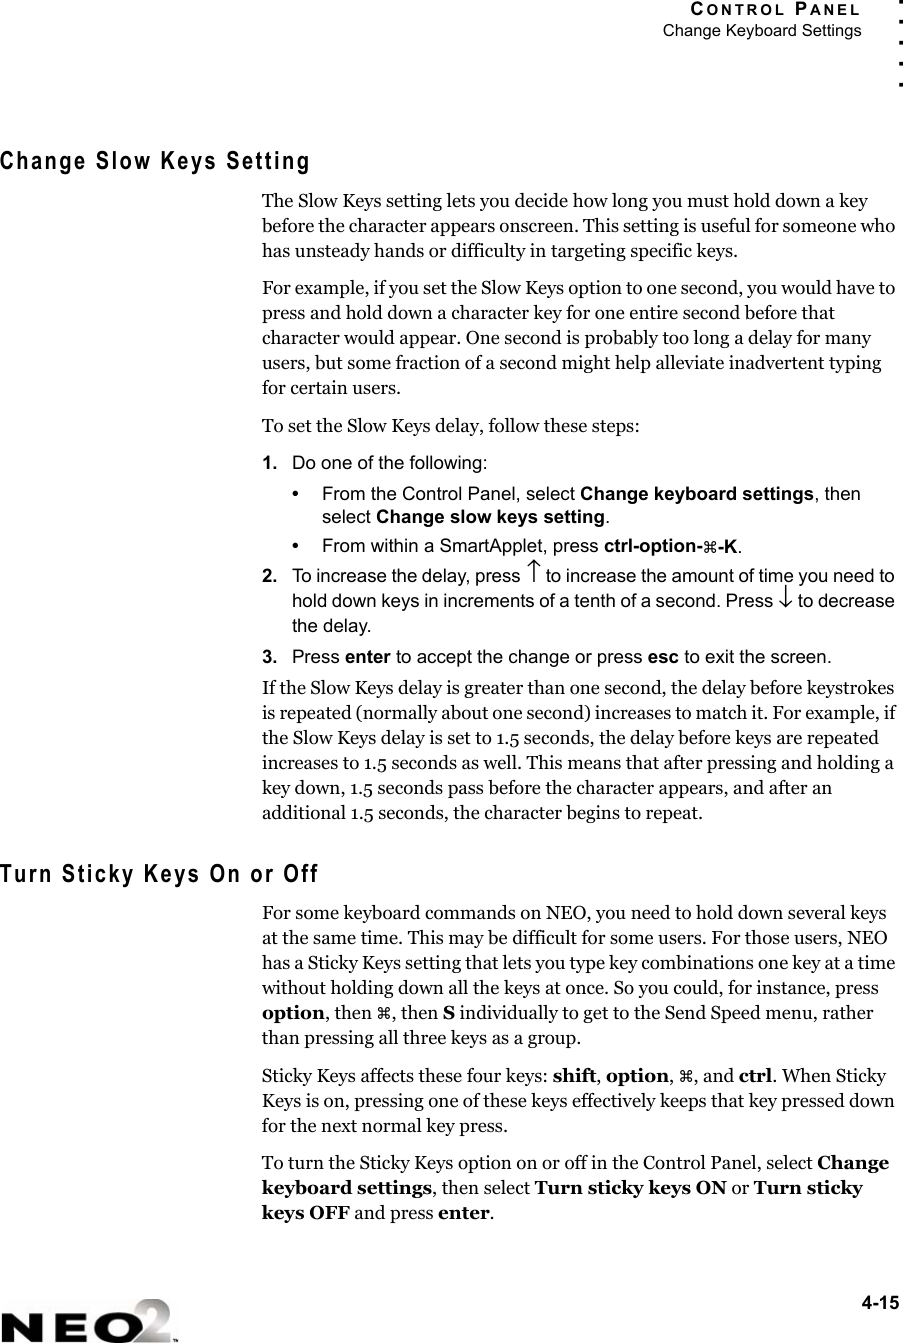
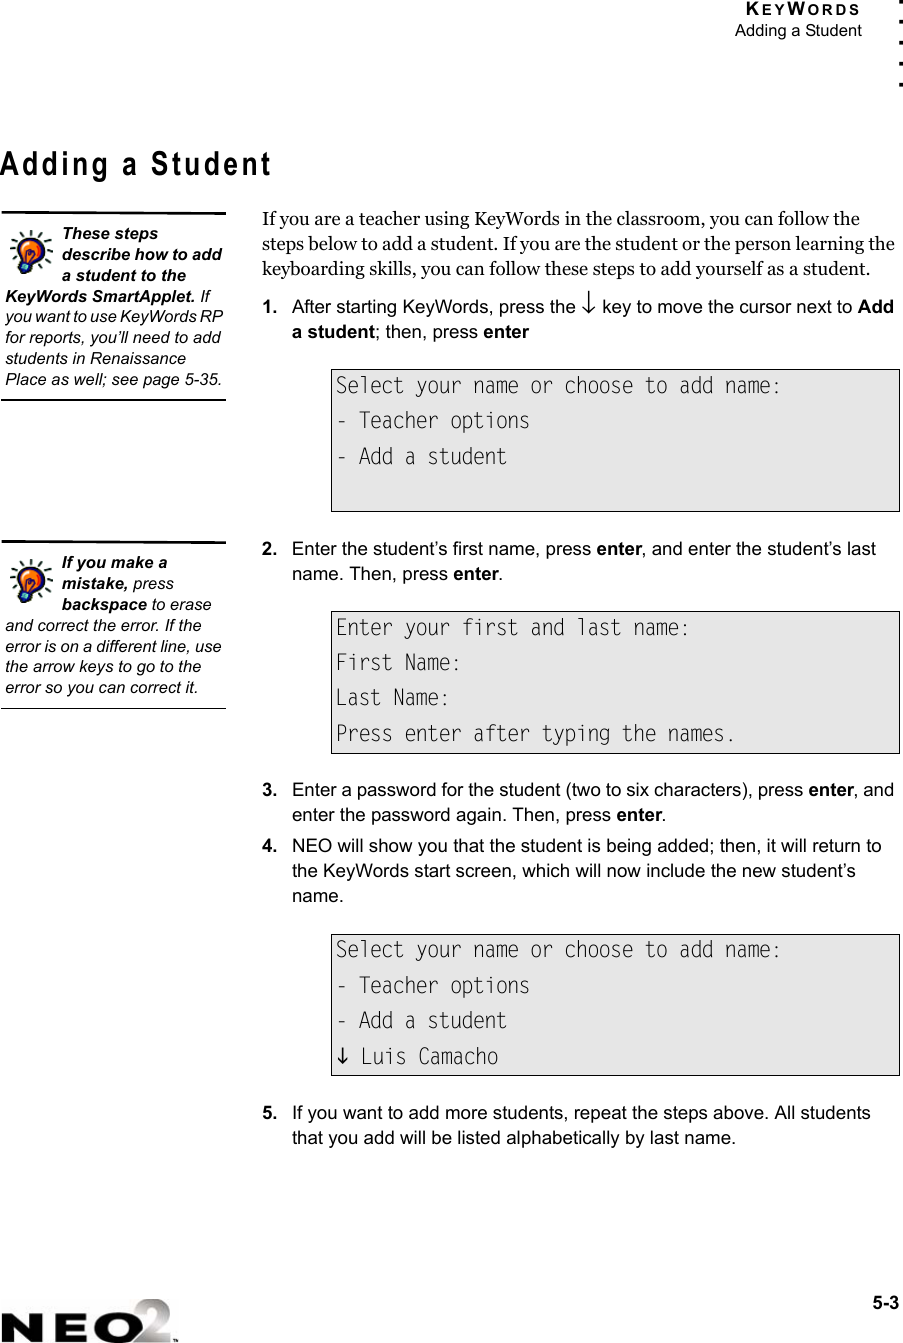

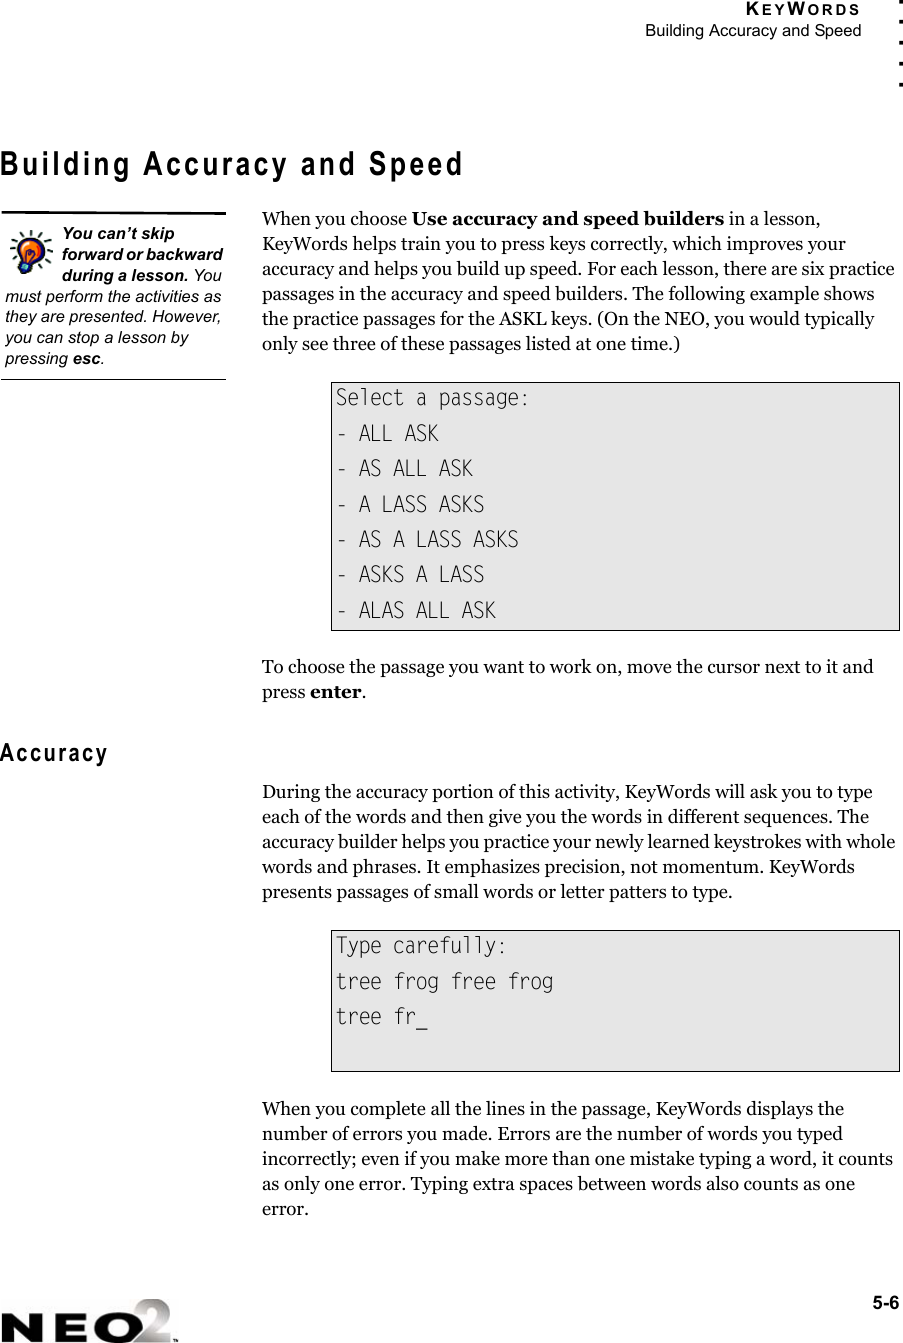
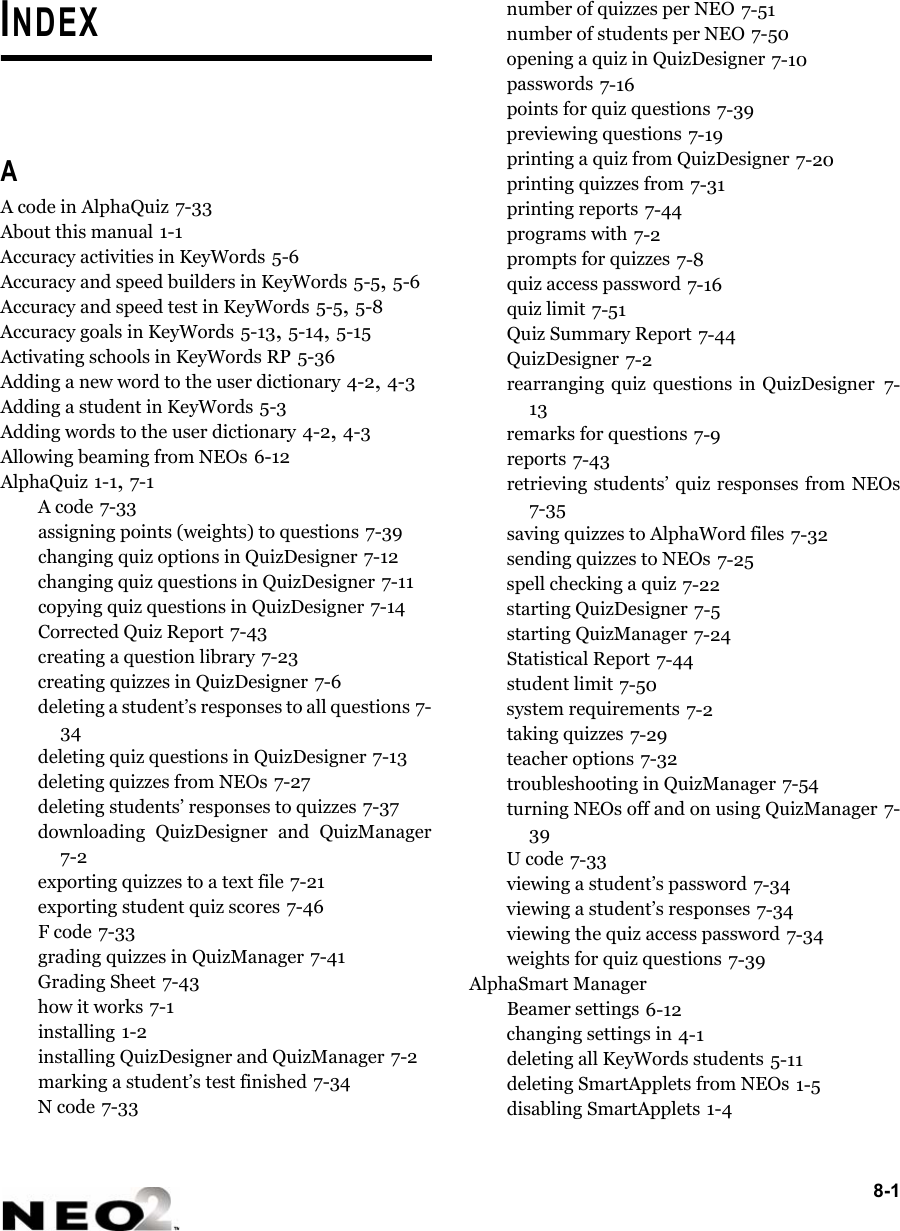
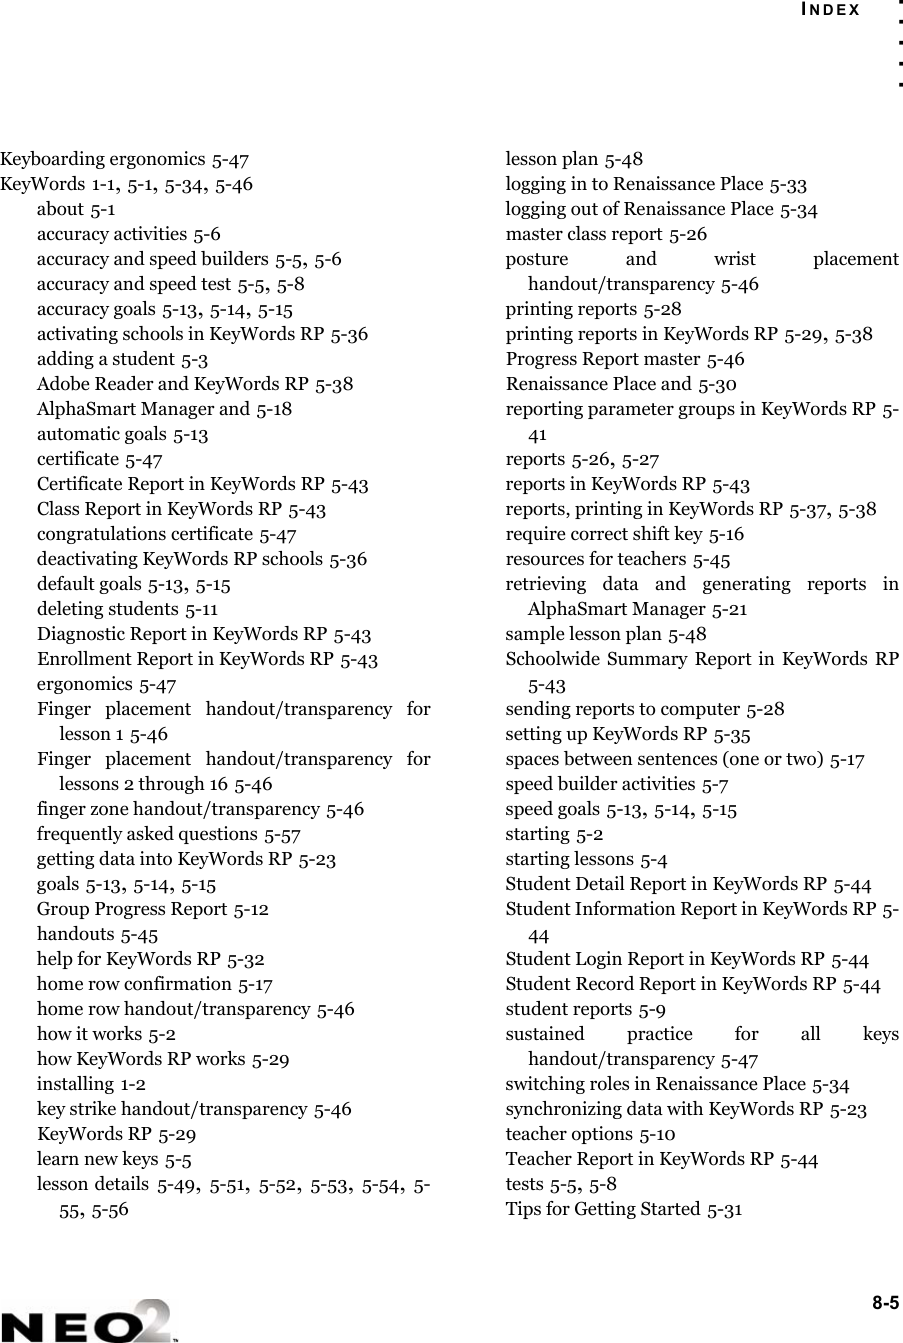
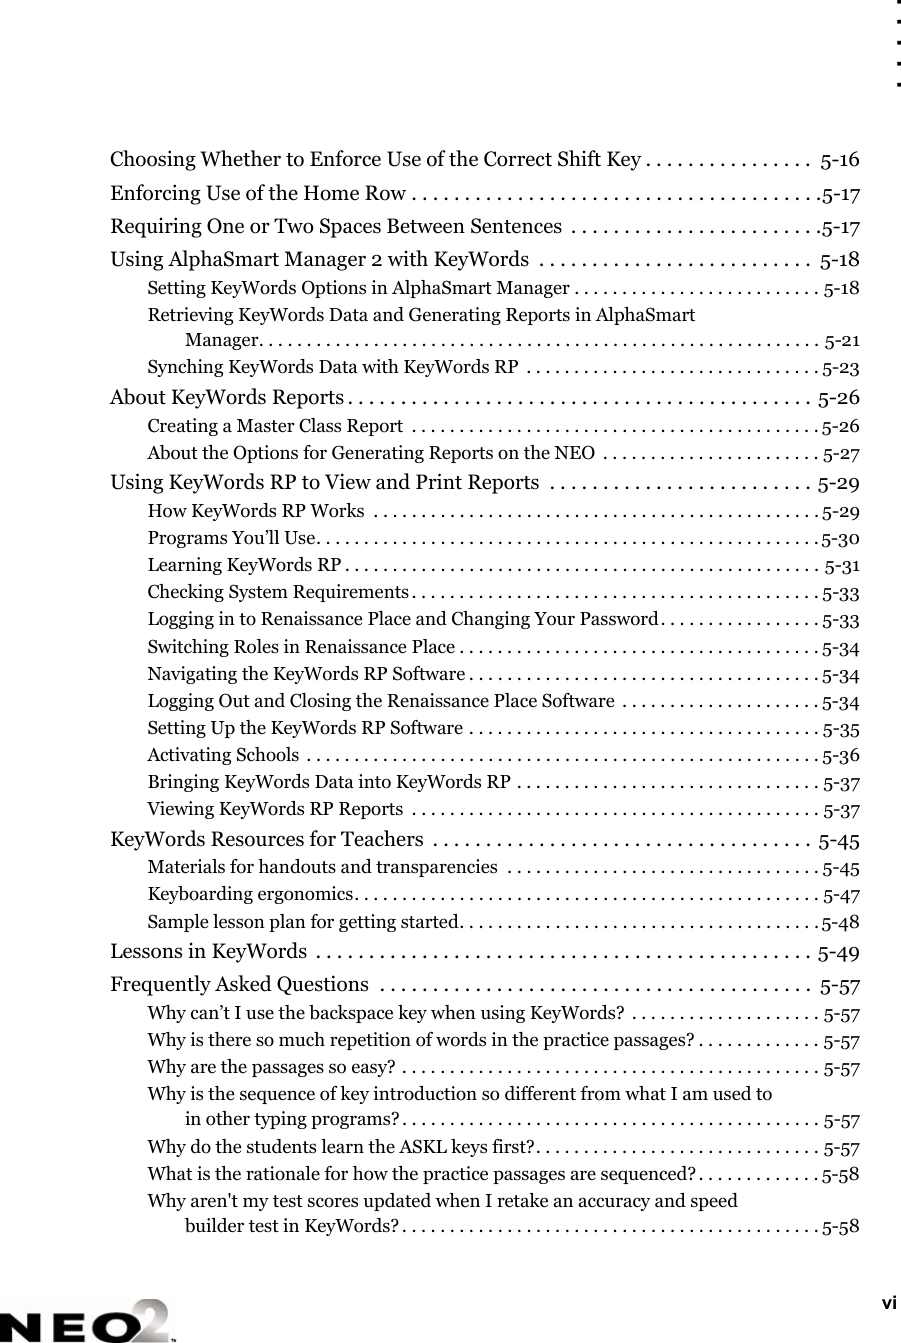
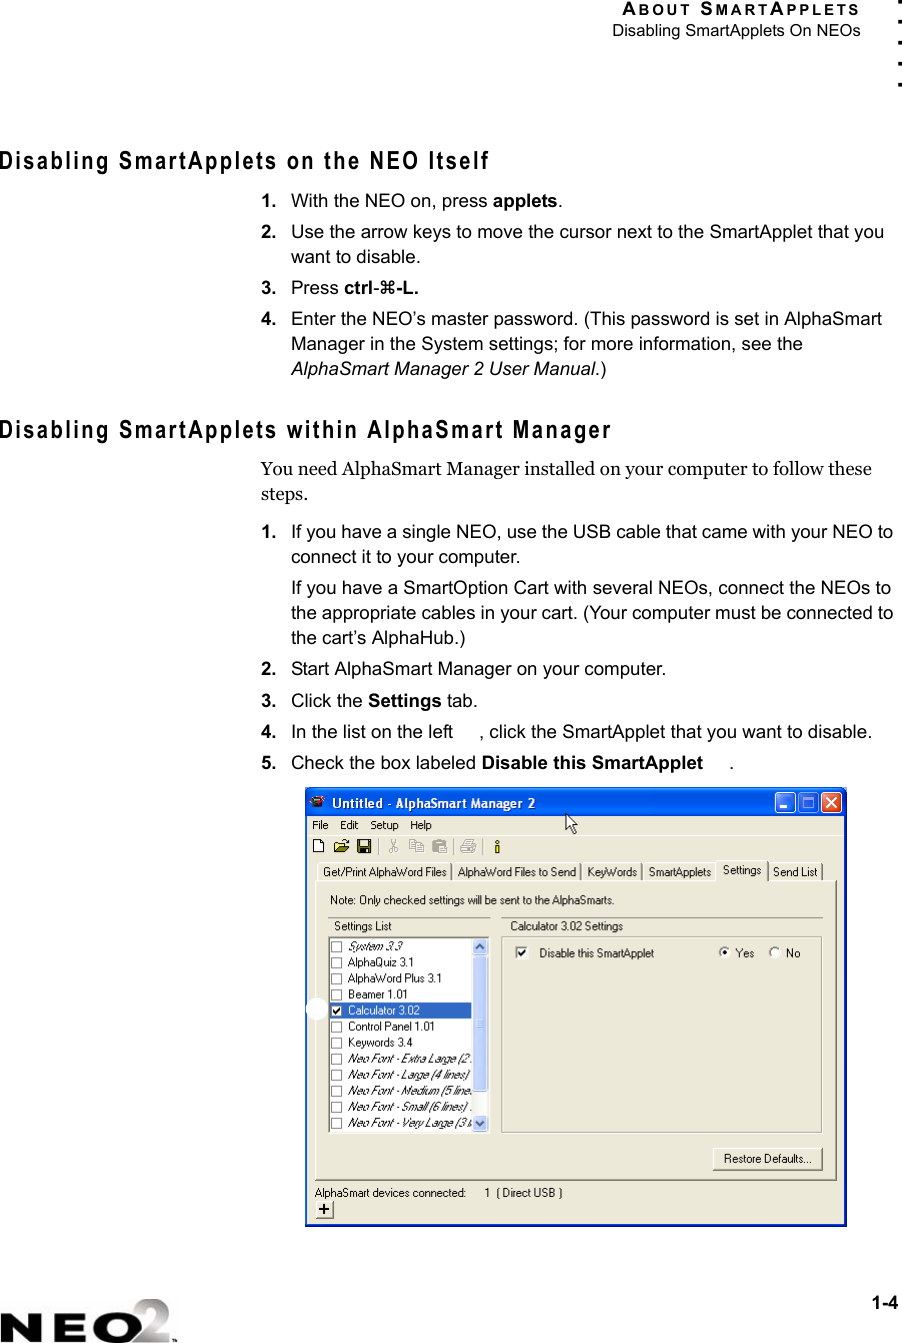
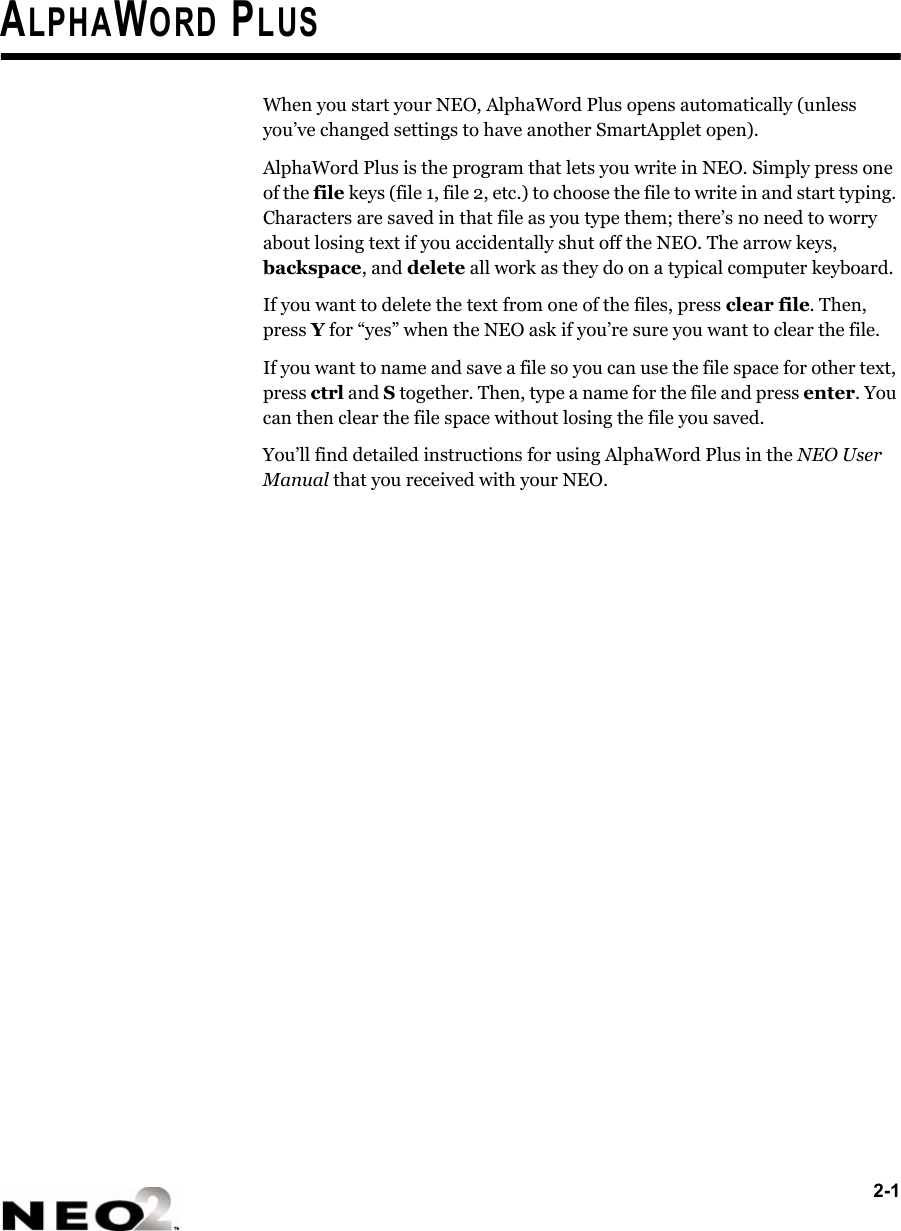
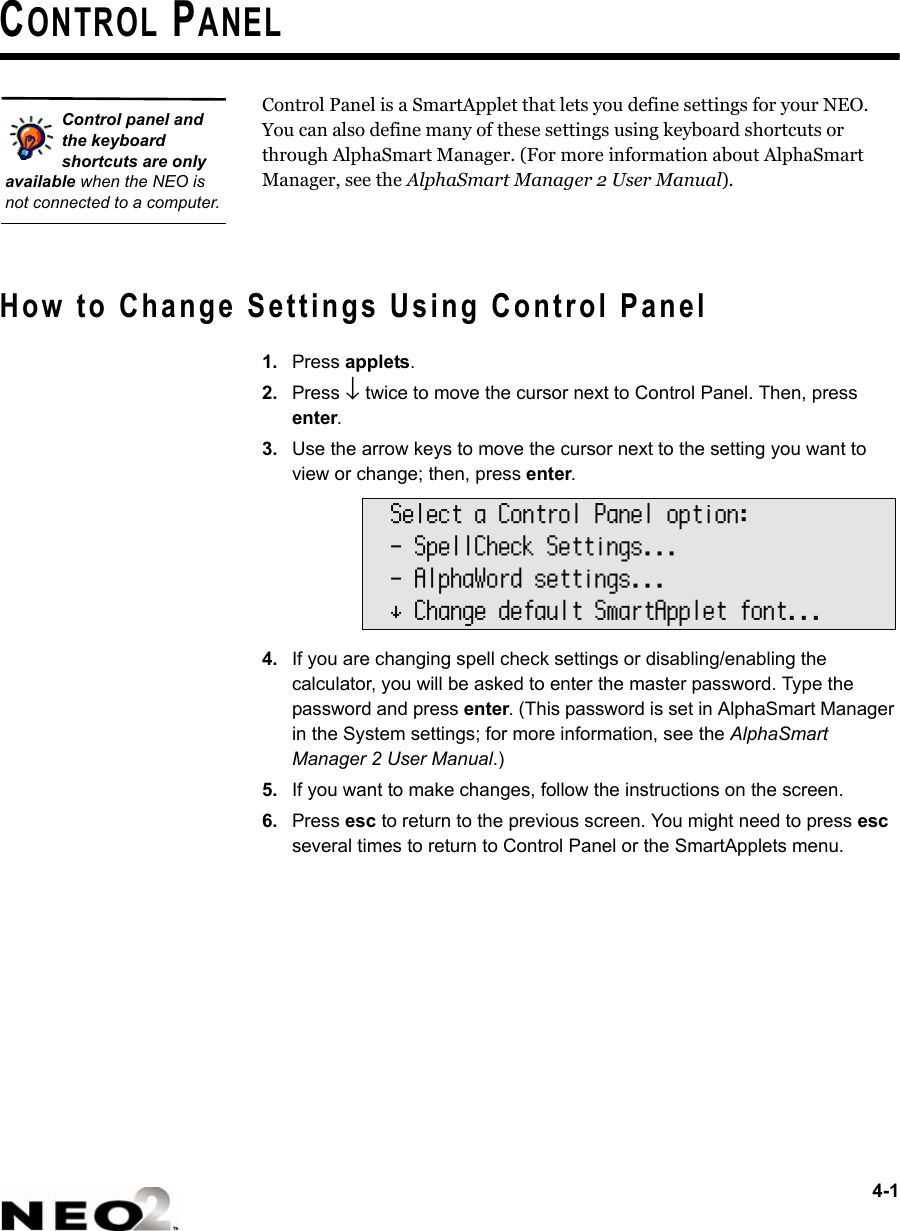
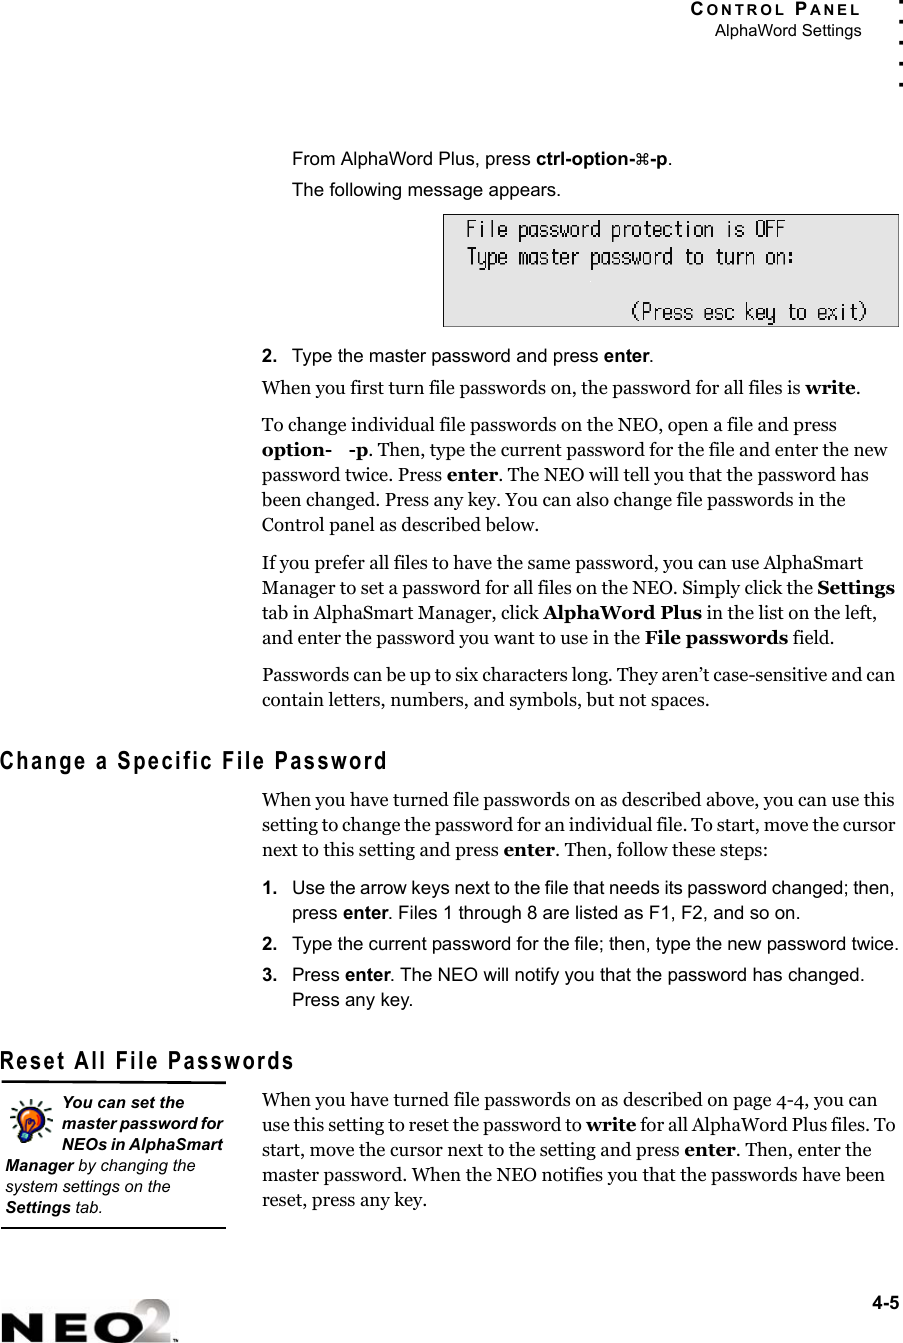
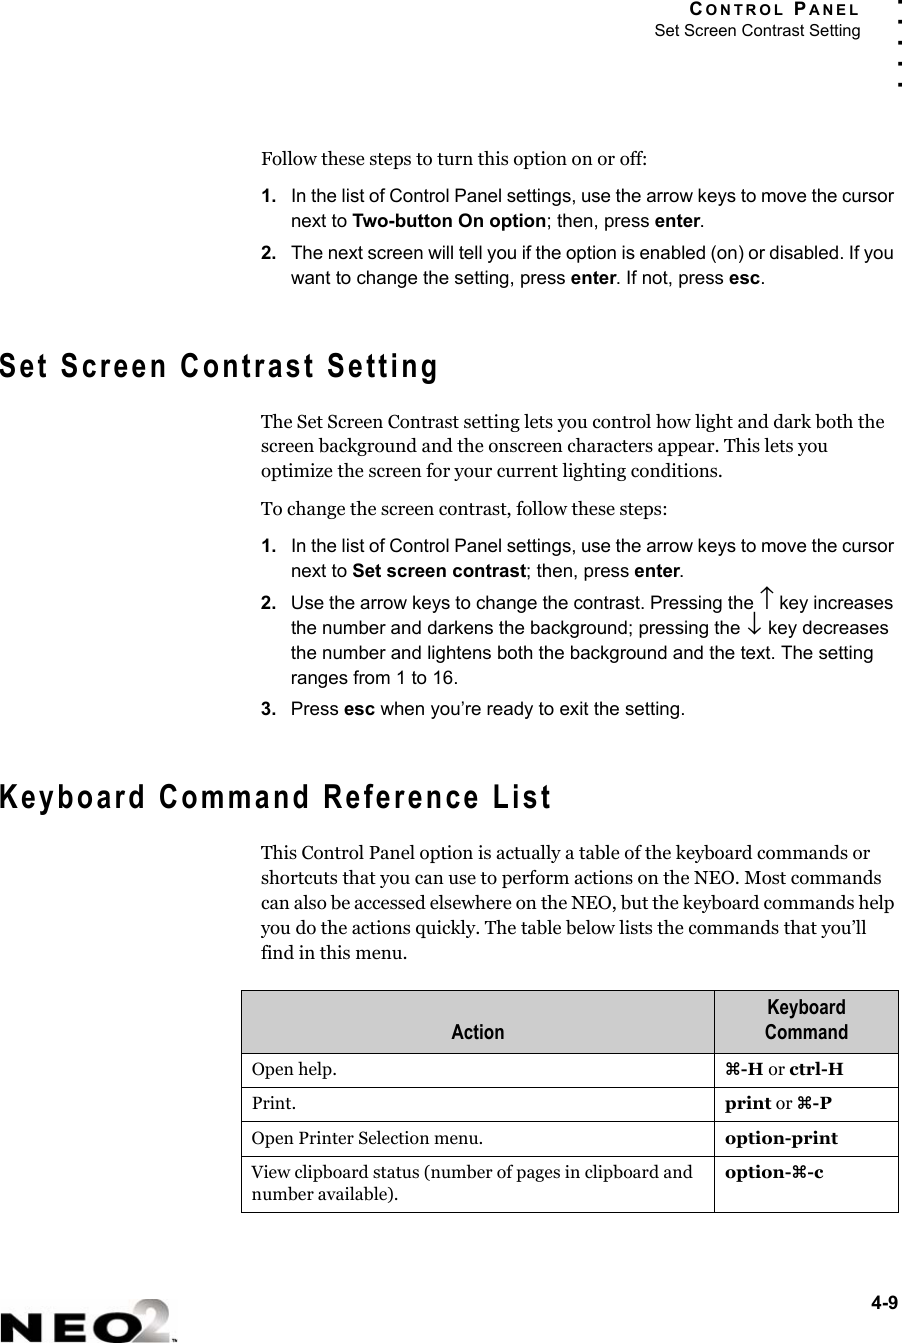
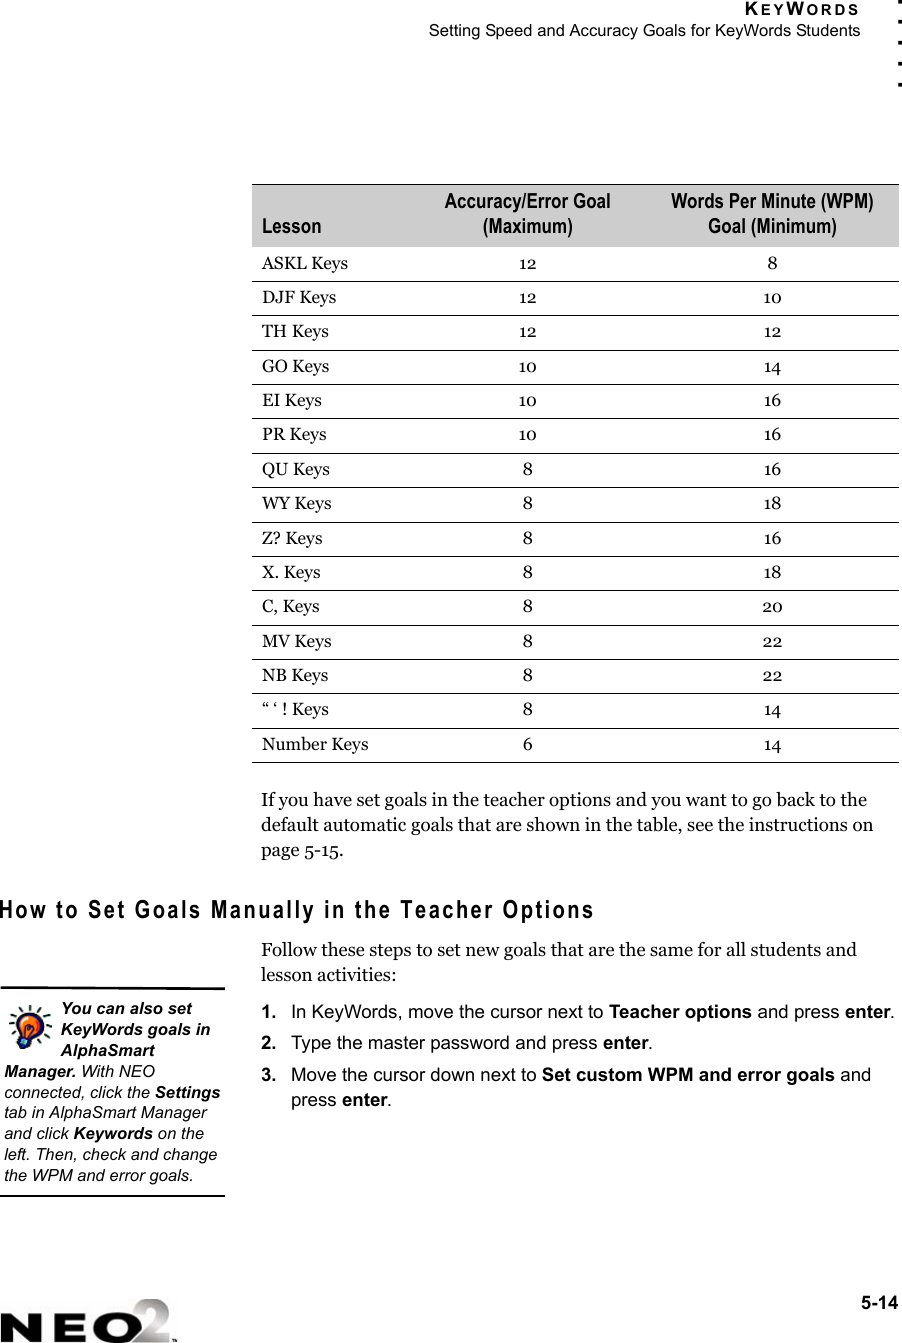
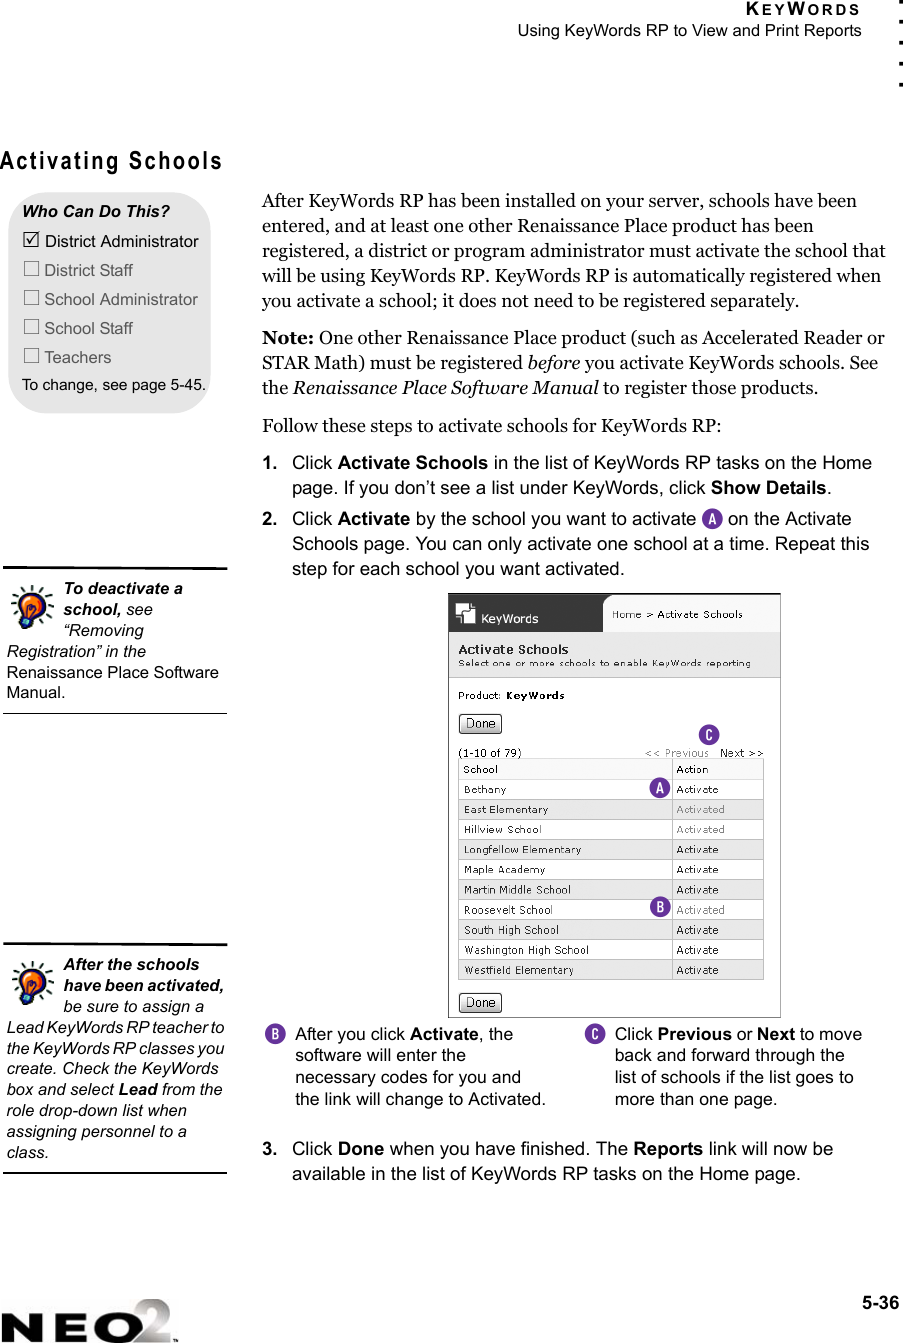
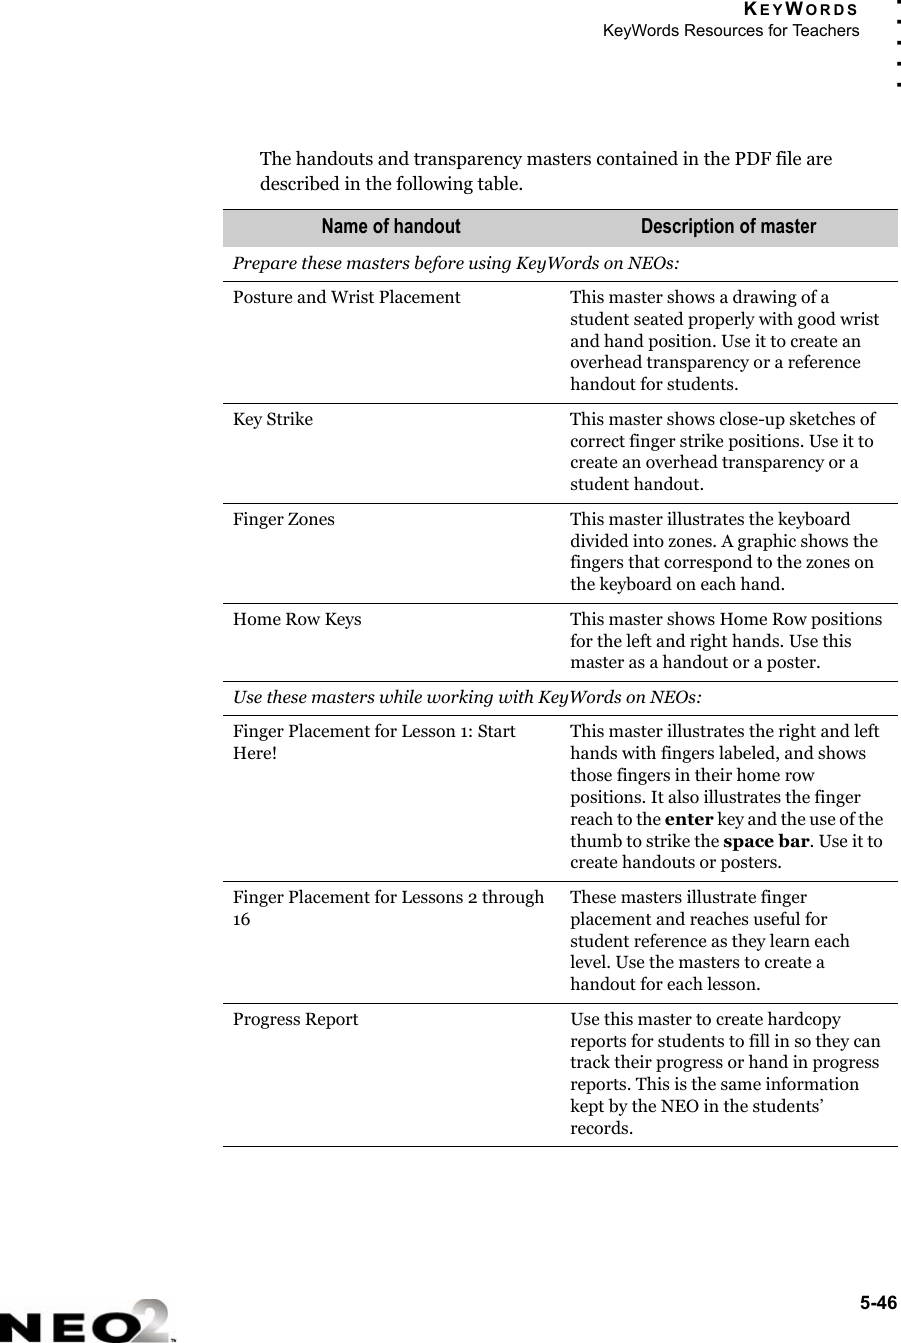
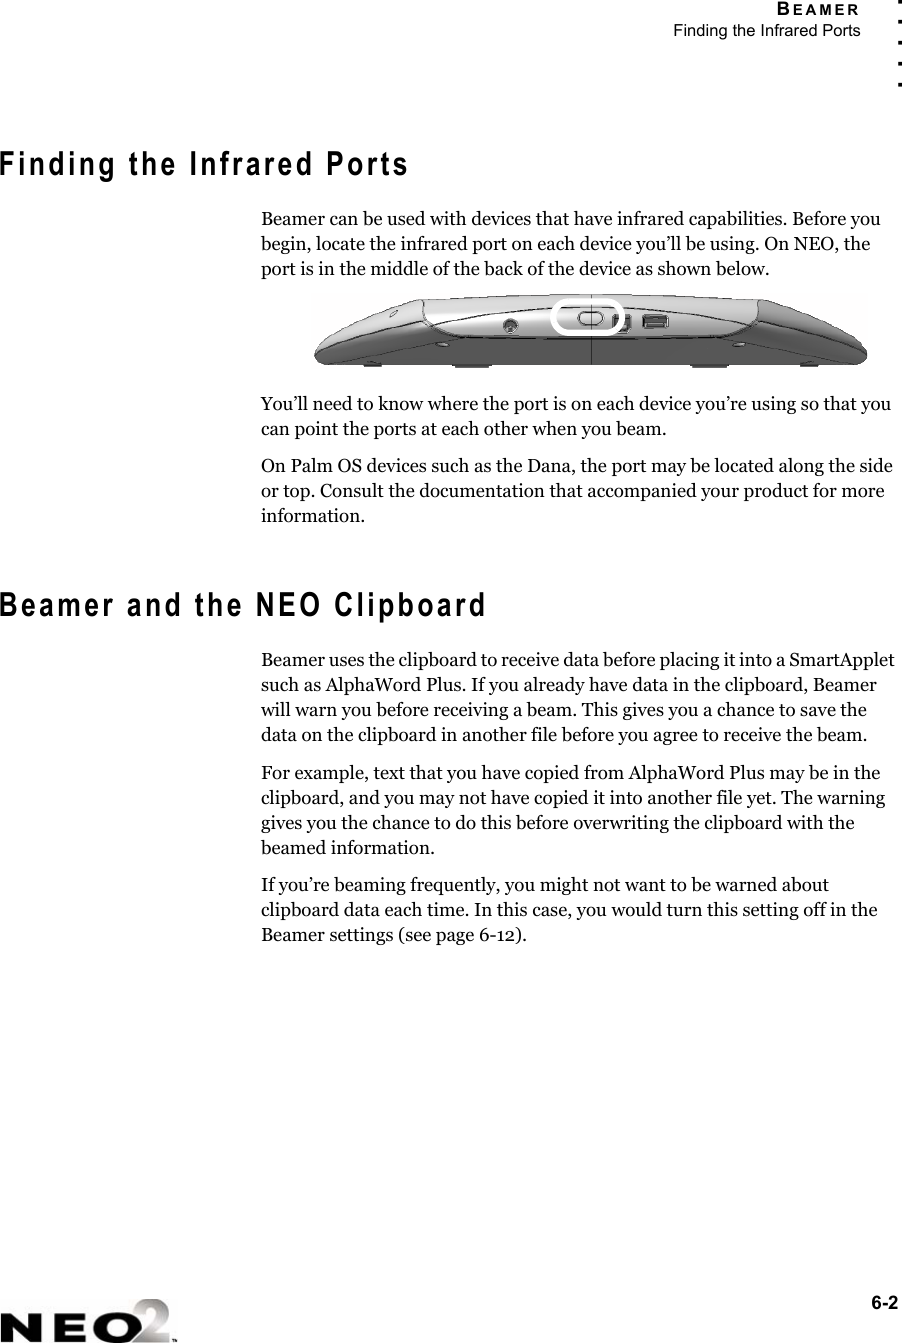
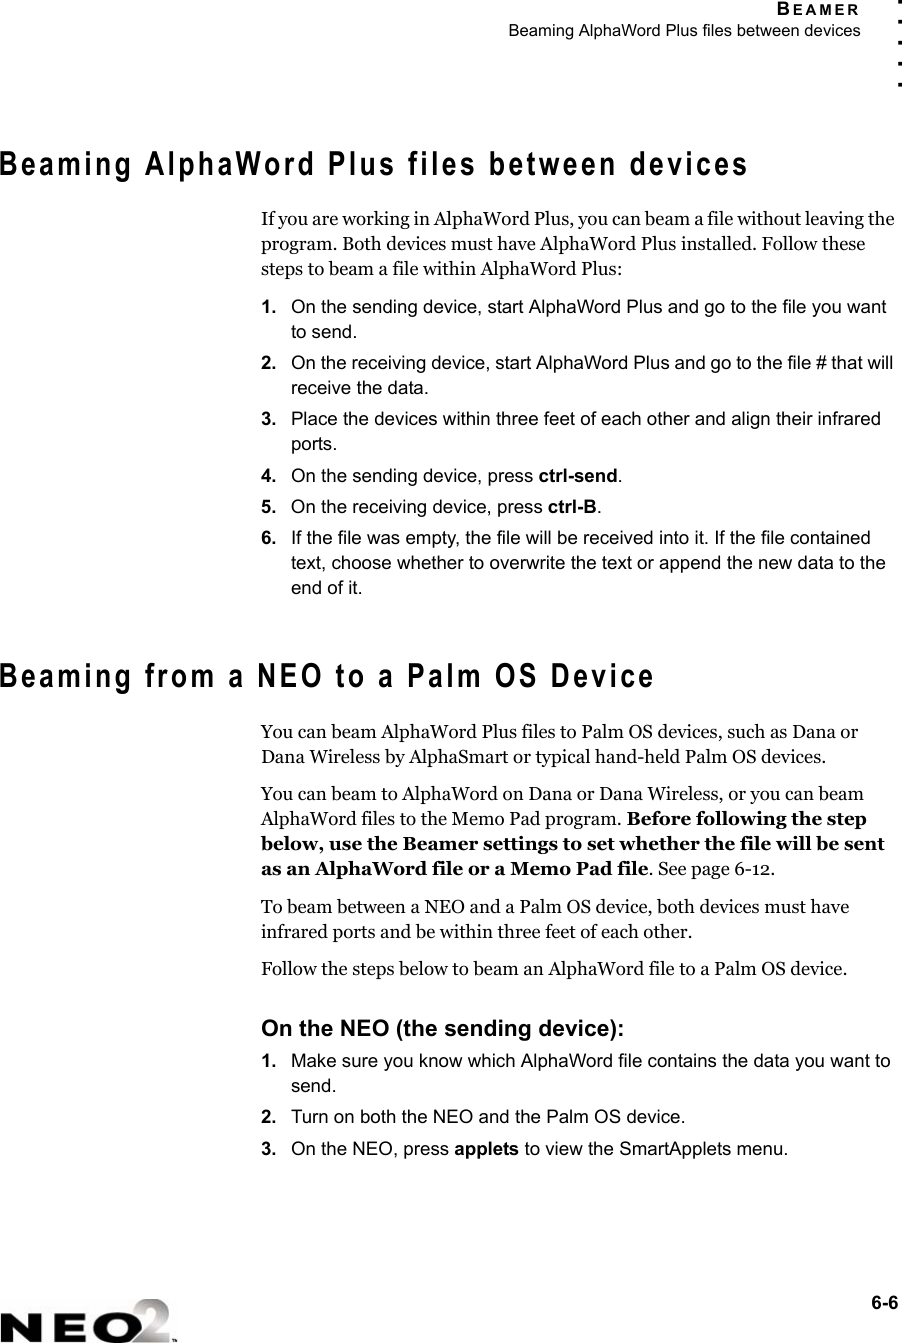
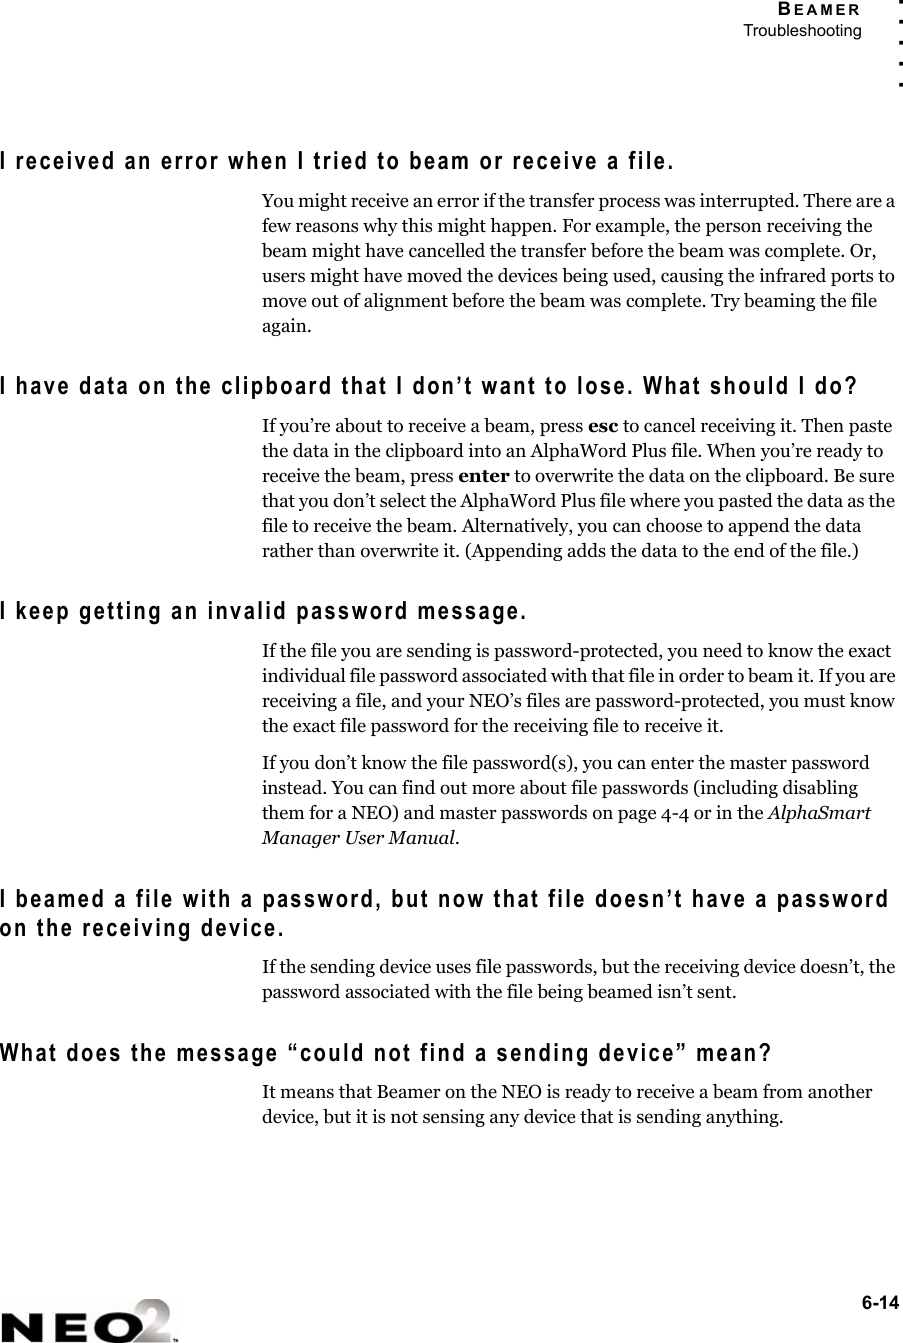
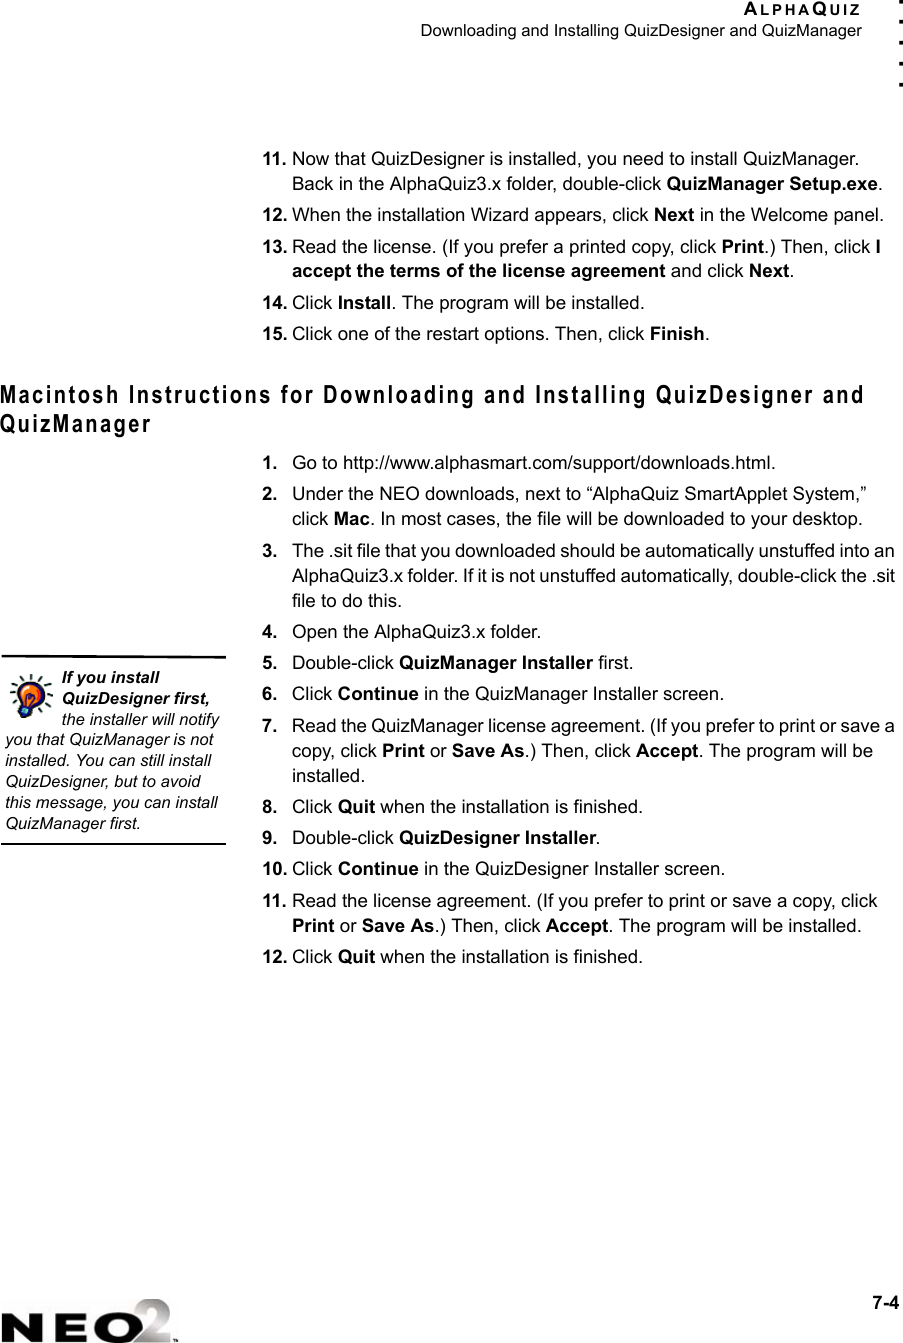
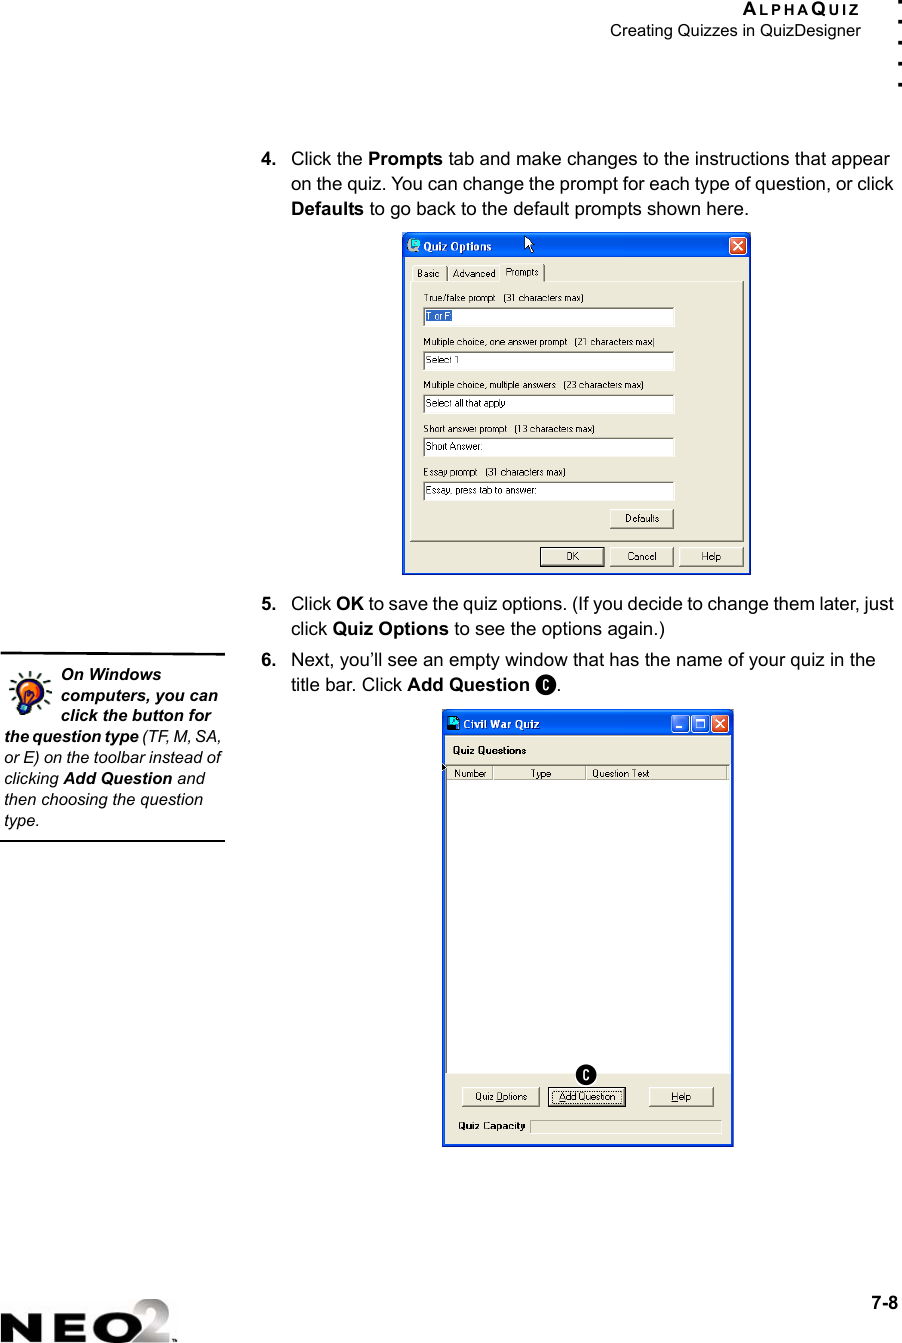
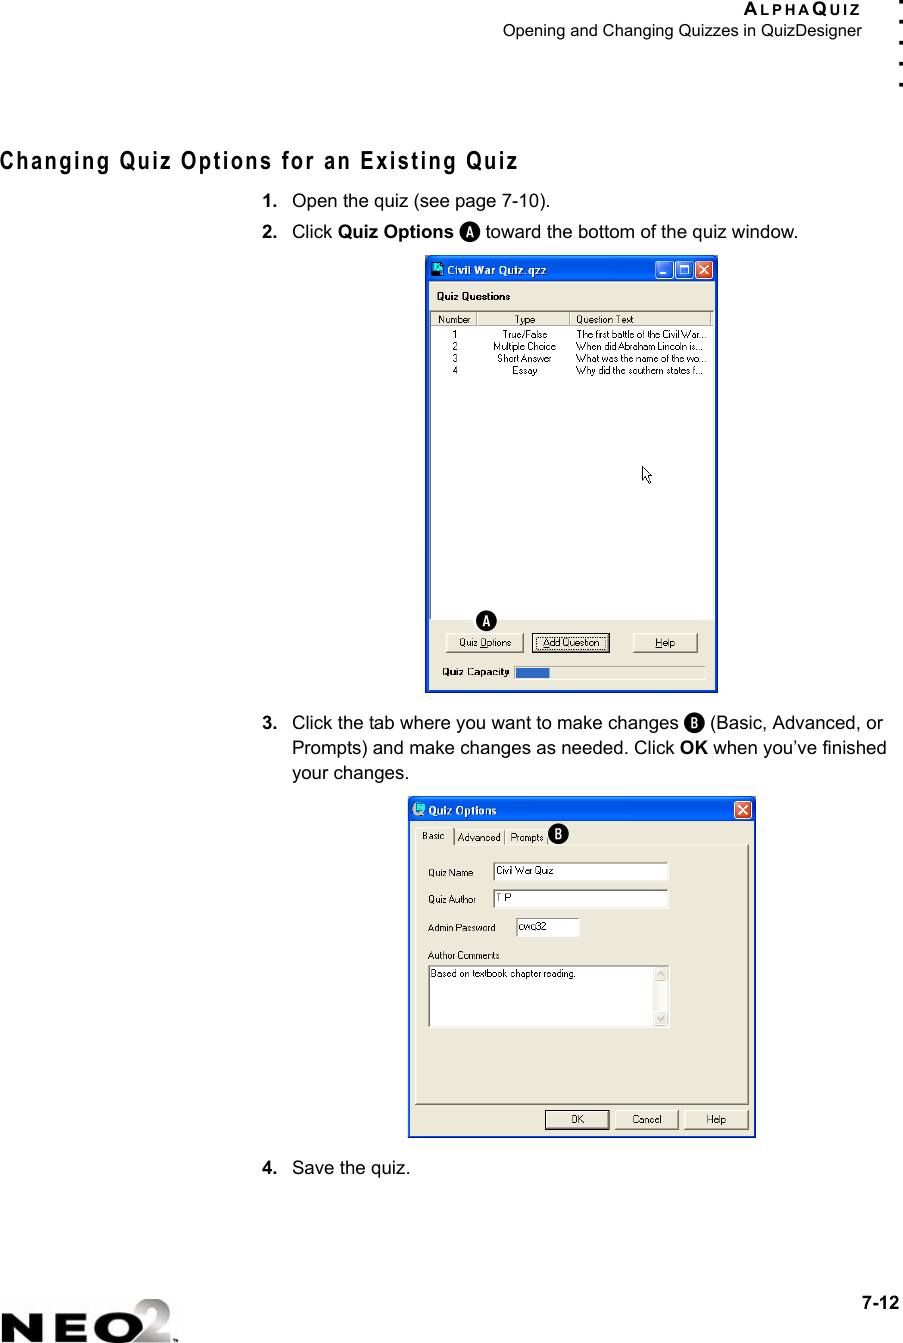
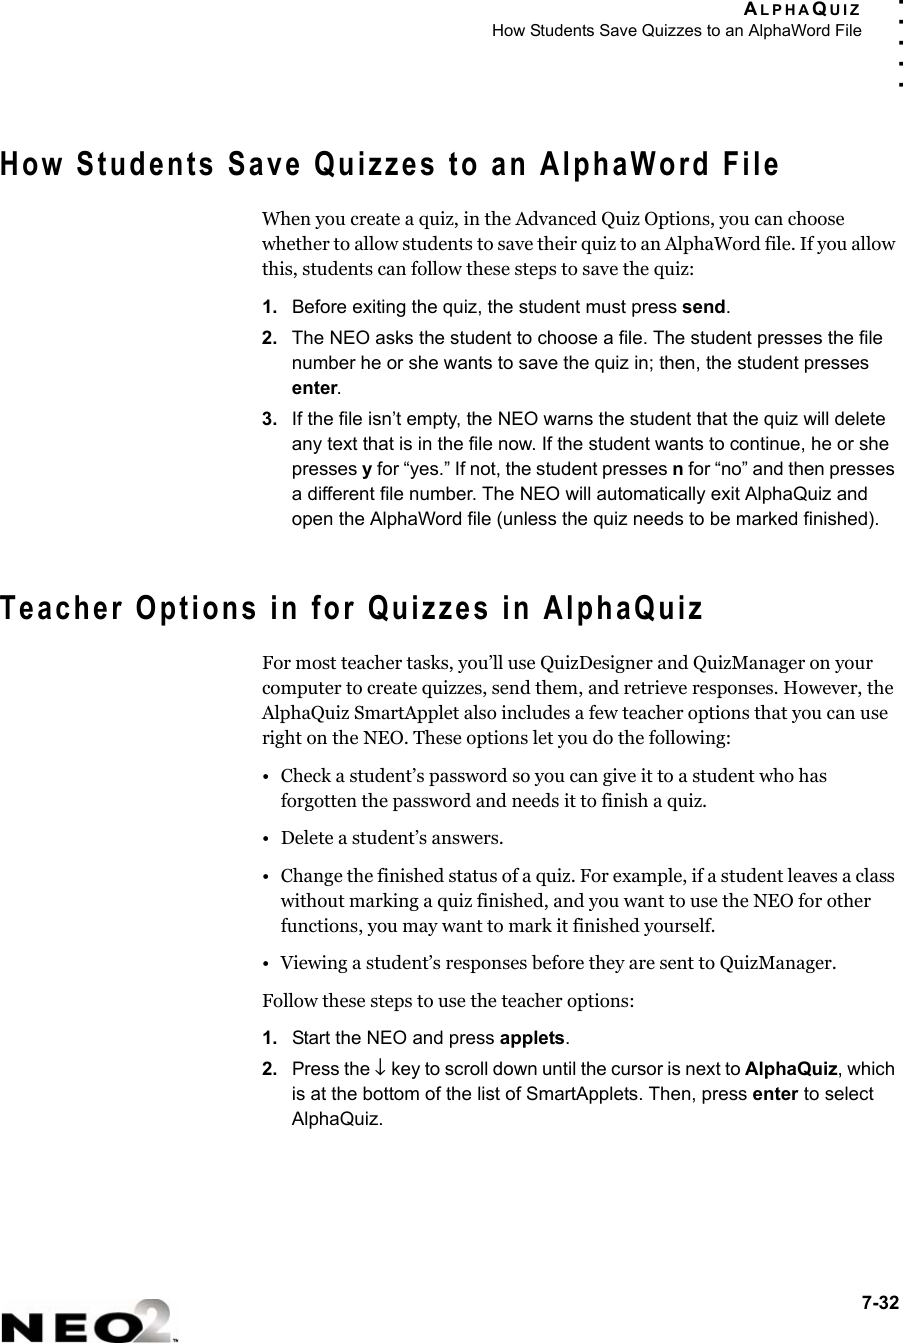
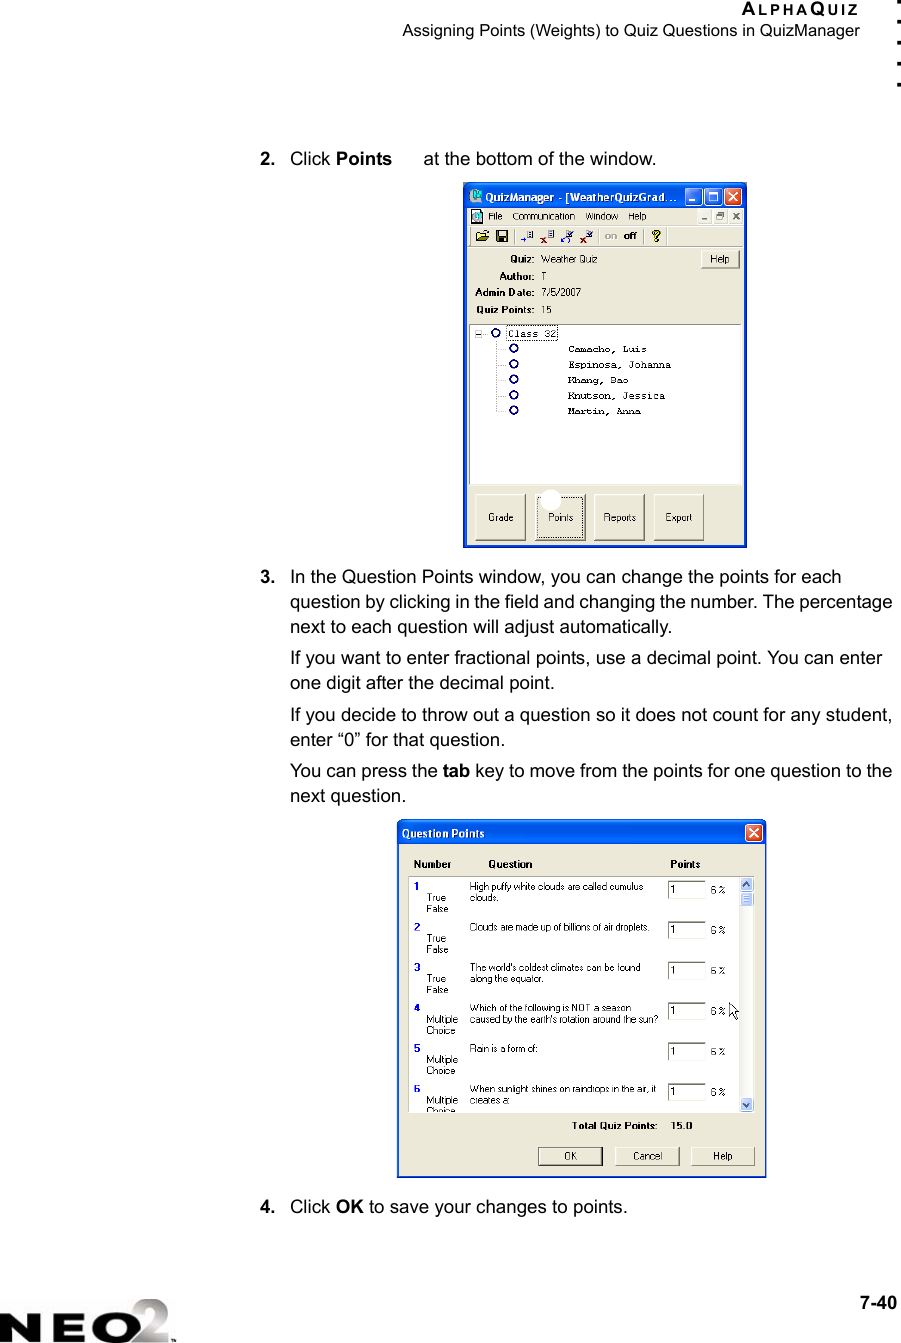
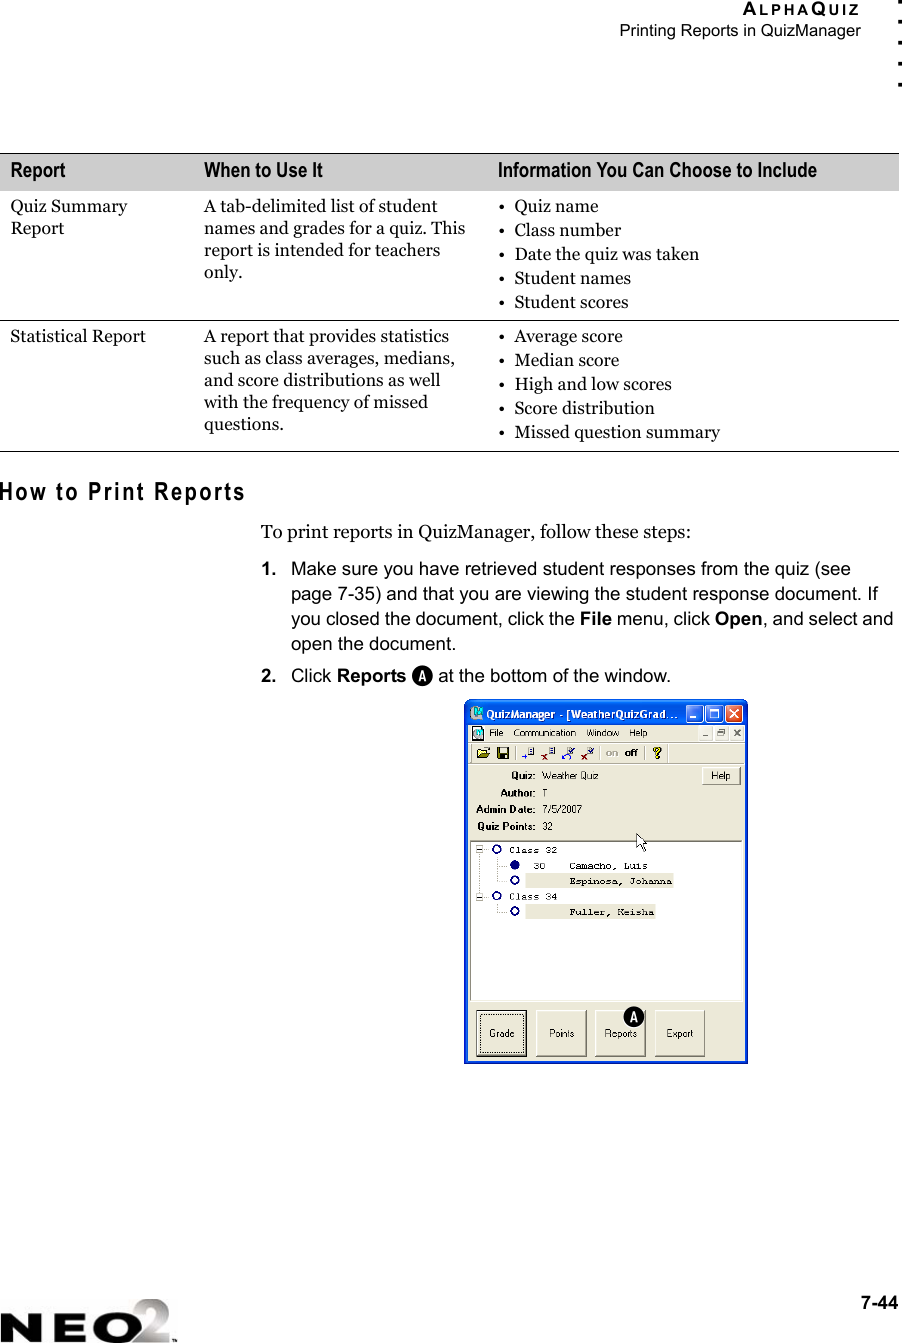
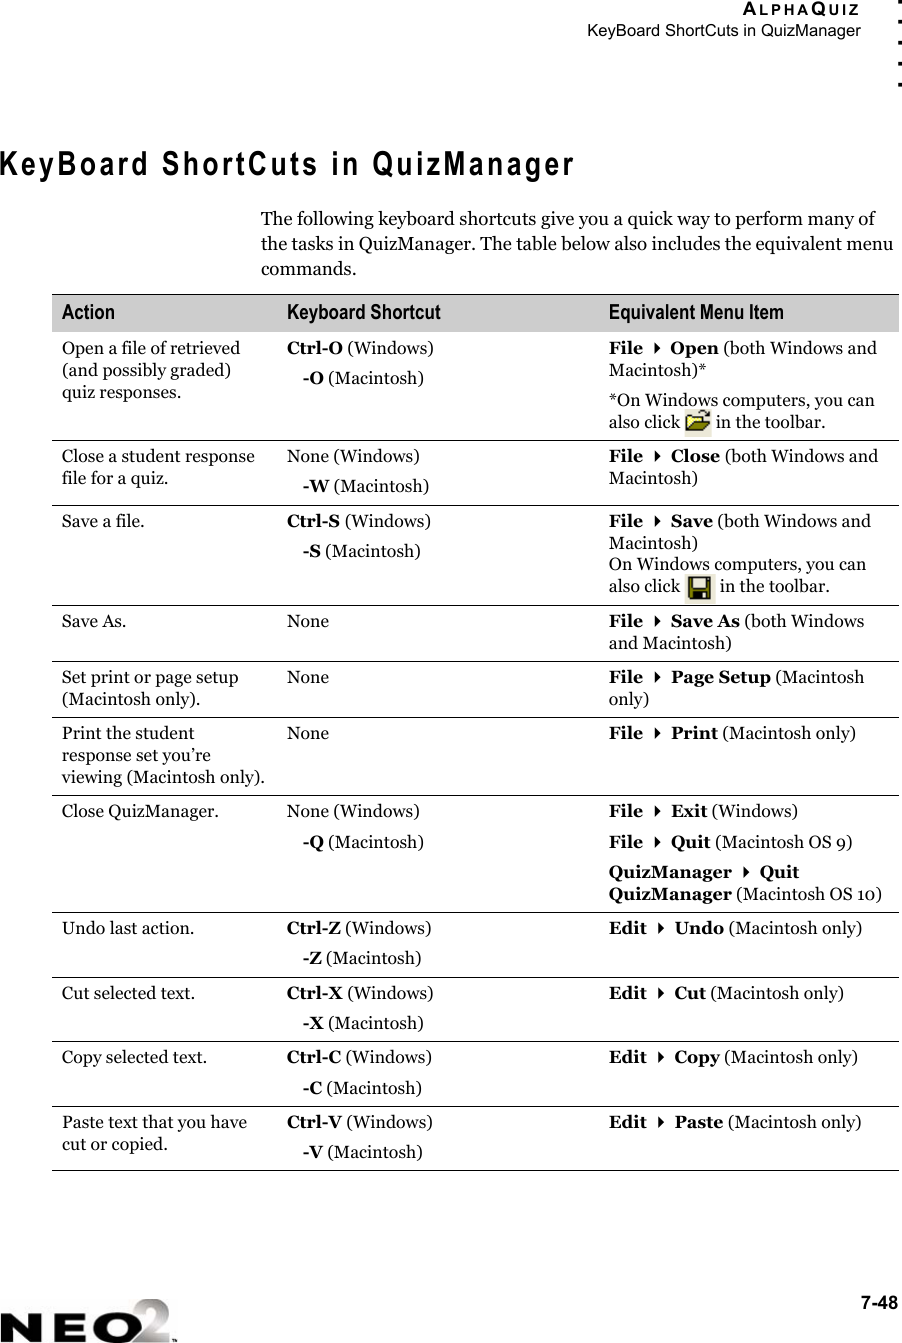
![KEYWORDSBuilding Accuracy and Speed5-7. . . . .KeyWords compares your accuracy (number of errors) to the passing criteria (see page 5-13). If you don’t meet the passing criteria, a message will tell you to type more carefully so you make fewer mistakes, and you will not go to the speed builder. Instead, you will go back to the screen where you can select passages.If you meet the passing criteria, you will see a message like the one below, and when you press the space bar, you will go on to the speed builder.Speed BuilderAfter you pass the accuracy activity, KeyWords gives you a speed builder activity. You cannot go straight to the speed builder activity; it always starts automatically after you pass the accuracy activity. Even if you’ve completed the accuracy activity before, you must go through it again before you can work on the speed builder.KeyWords shows you your goal before the activity, and afterwards, it shows you whether you met the goal. (To set goals, see page 5-13.) Goals are based on the number of words you type per minute. Type the text on the screen and press the space bar when asked to do so.When you finish the activity, a message will show you whether you met your goal. If you met your goal, you will see a message like this:You had 20 errors. You will need 12 or fewerto continue. Please type more carefully so youmake fewer mistakes.(Press [SPACE BAR] to continue.)Nice job! You only made 1 error.You are now ready for Speed Builder.(Press [SPACE BAR] to continue.)Way to go! Your typing rate was 20words per minute. Your goal rate was8 words per minute. You passed!(Press [SPACE BAR] to continue.)](https://usermanual.wiki/Renaissance-Learning/NEO2/User-Guide-825941-Page-47.png)
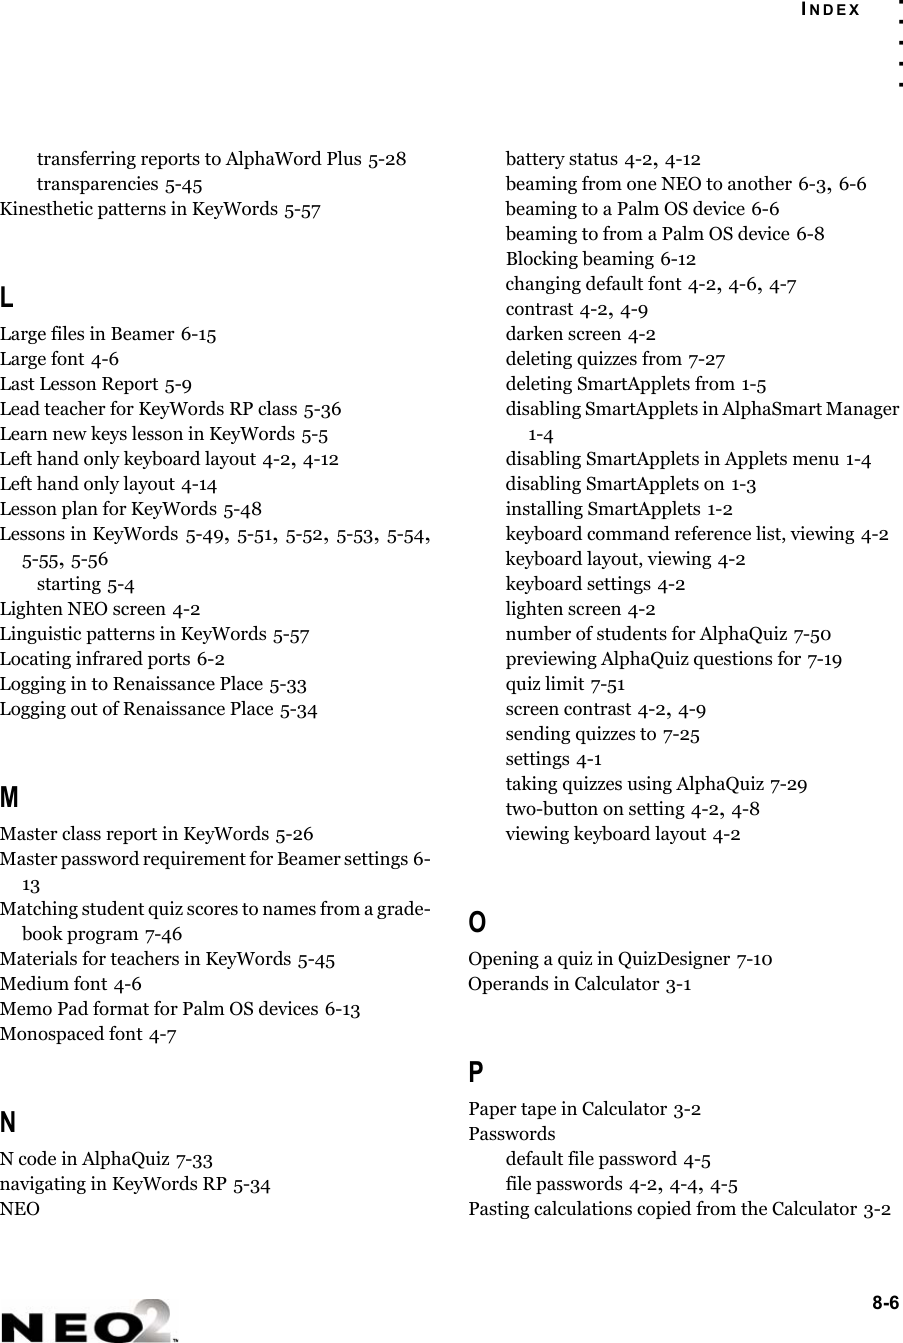
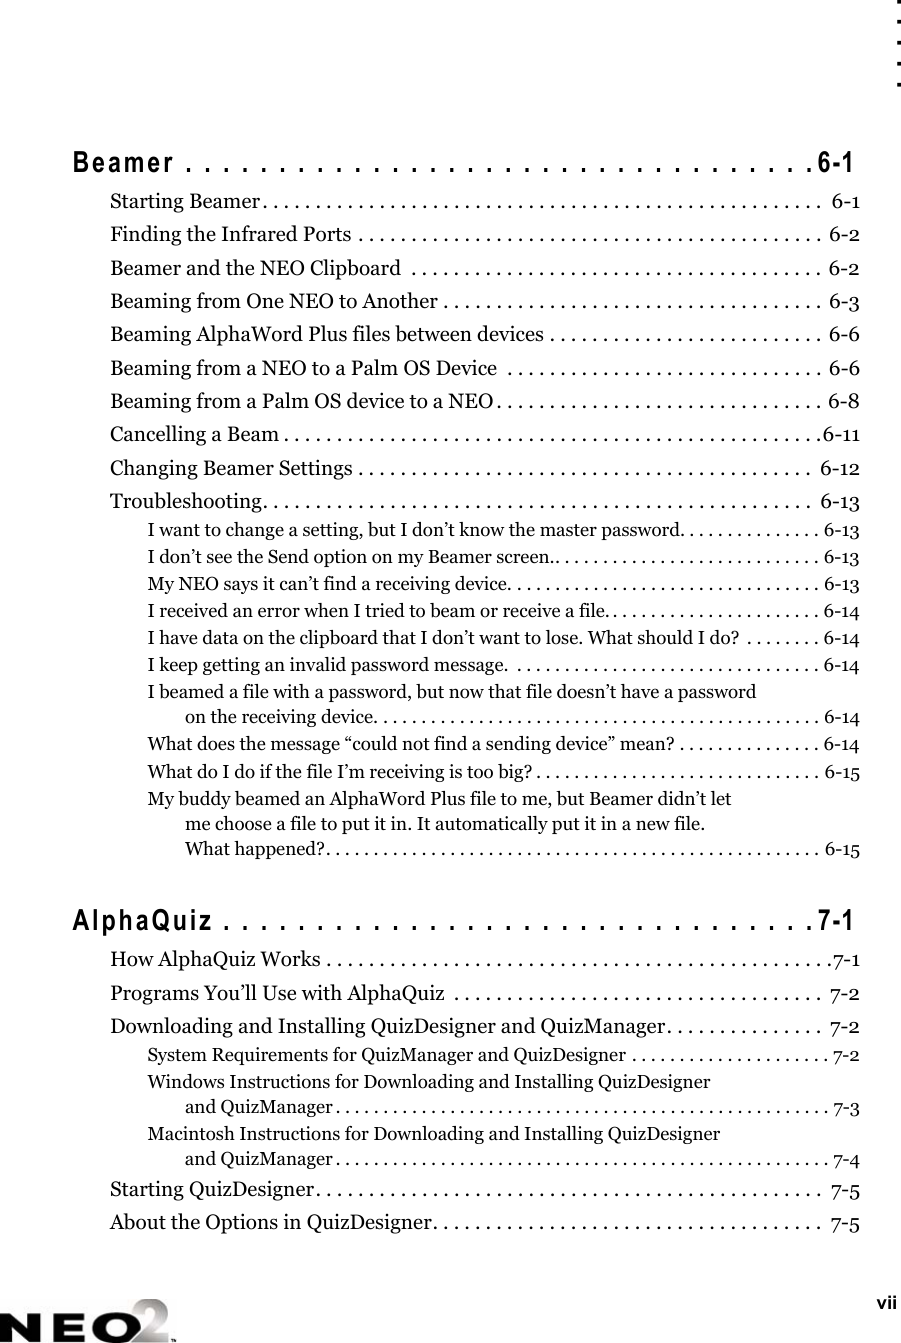
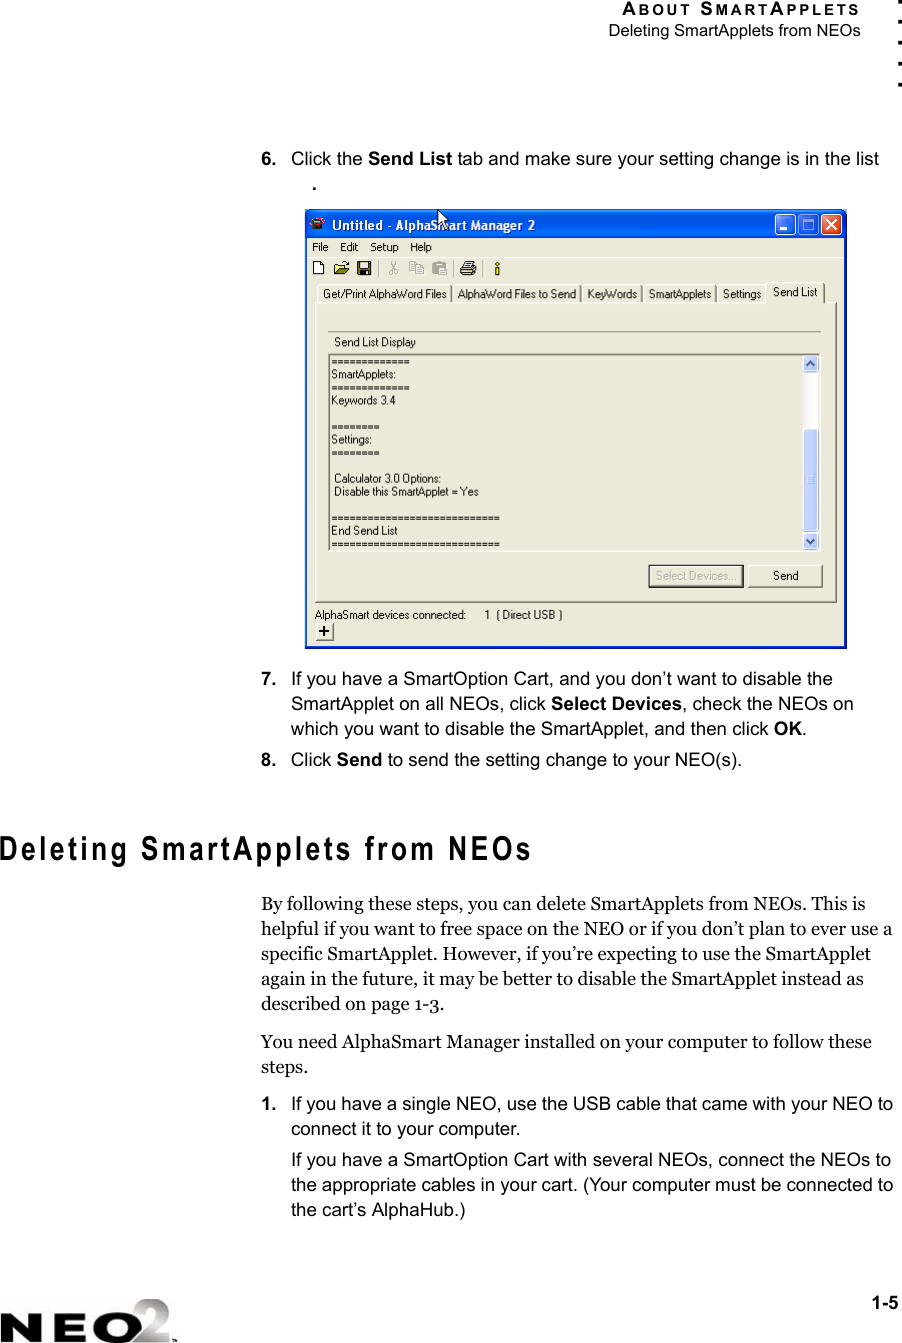
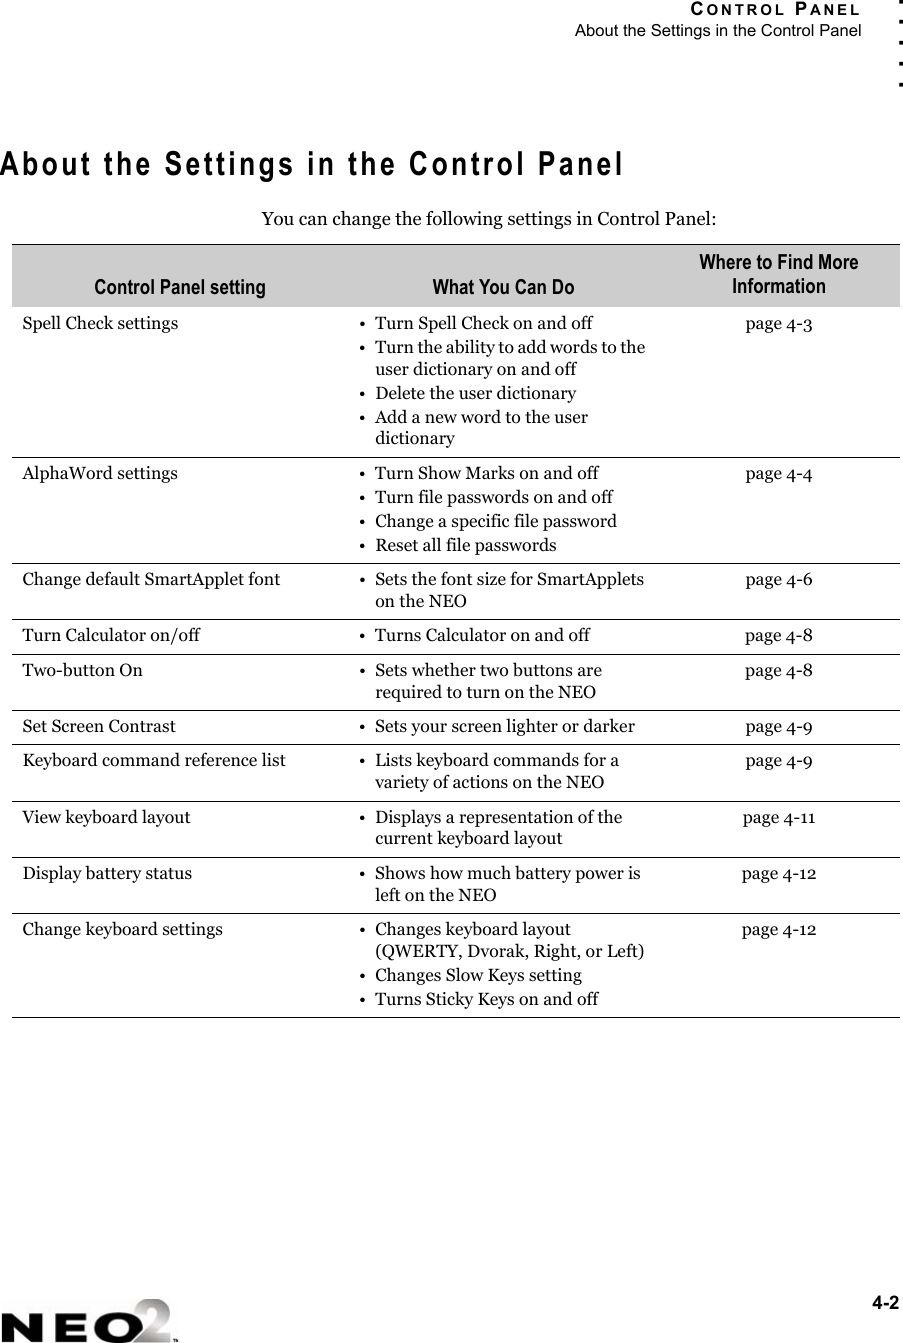
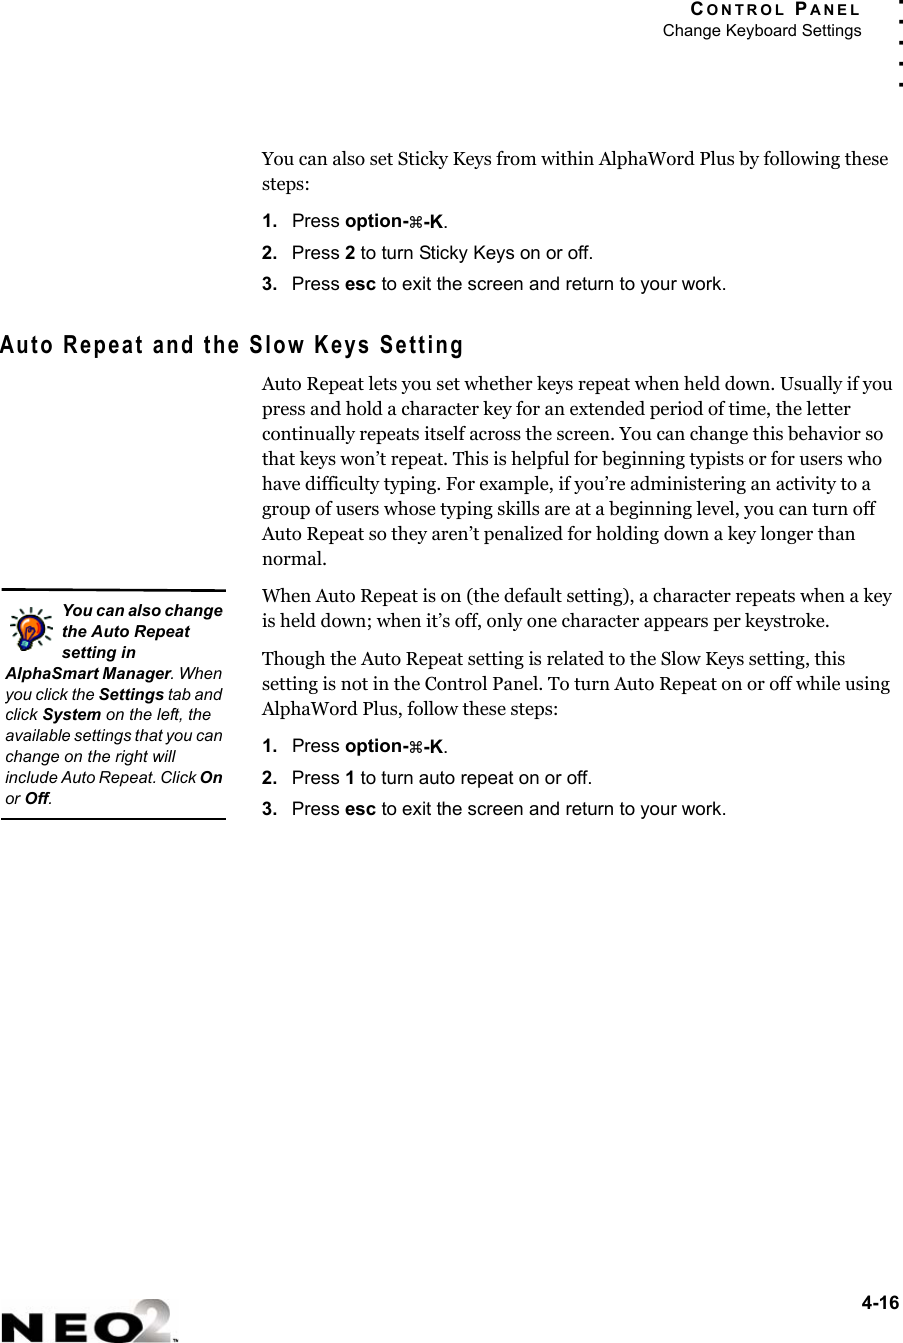
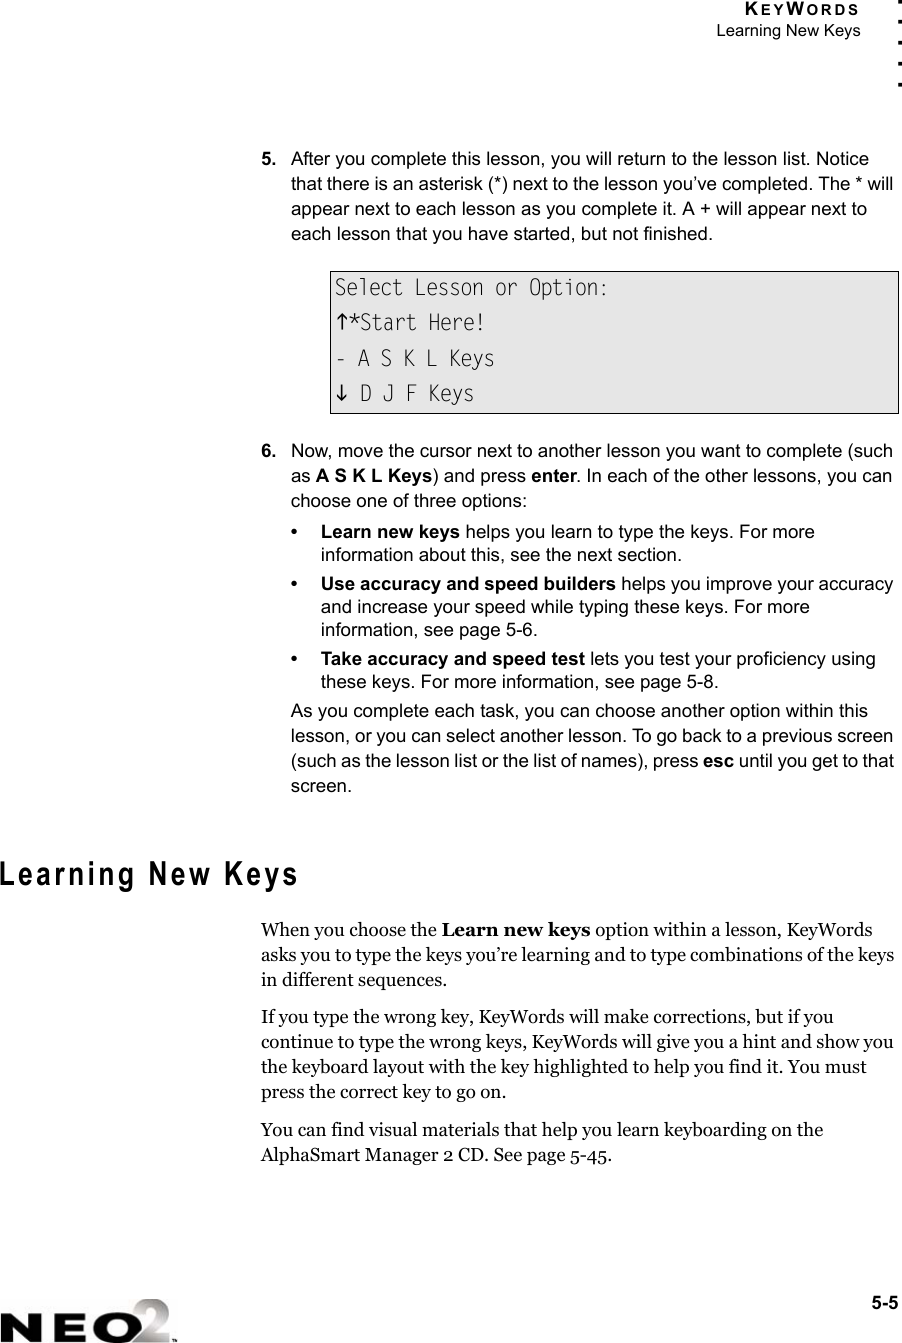
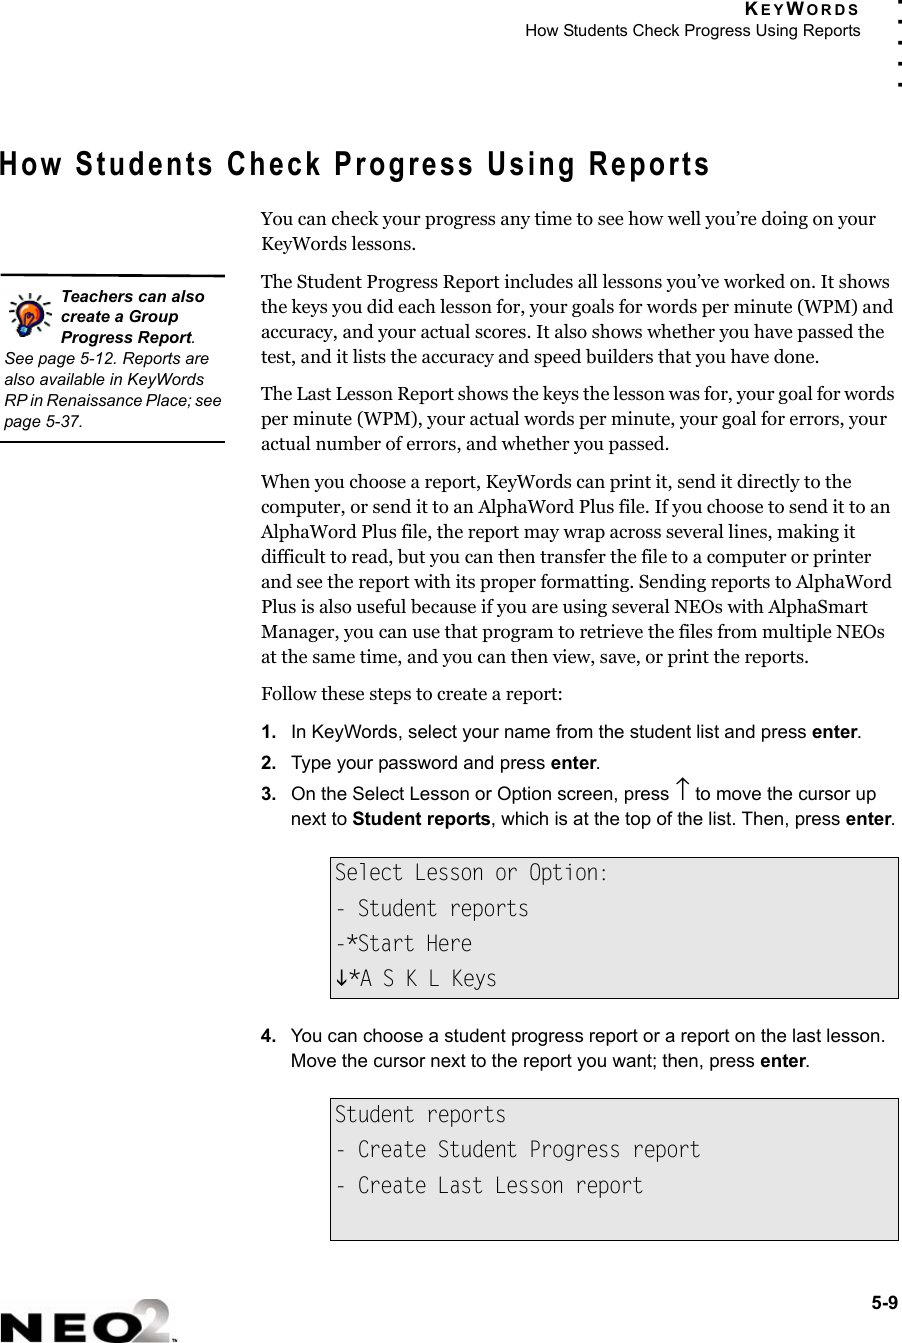
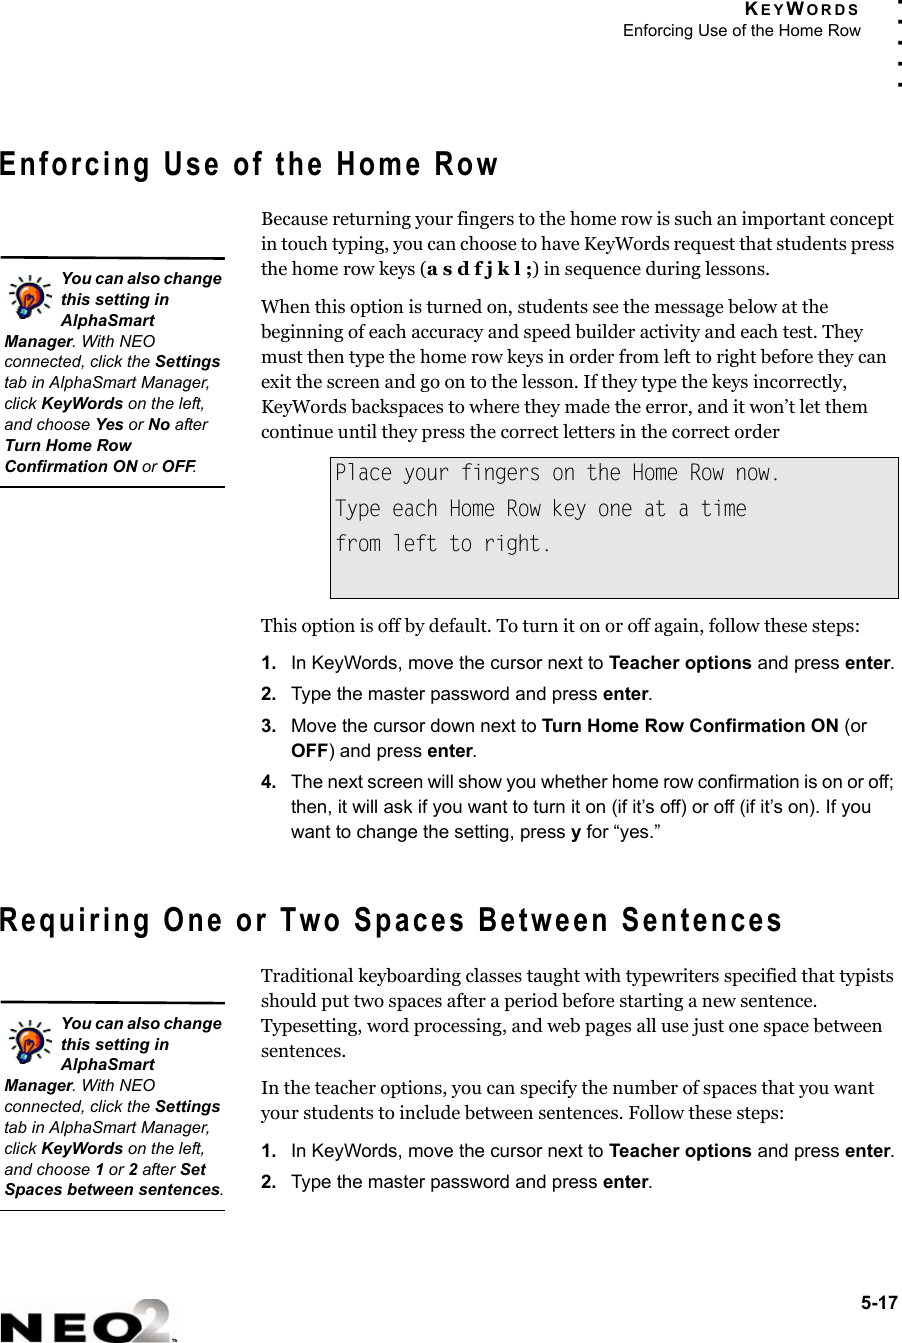
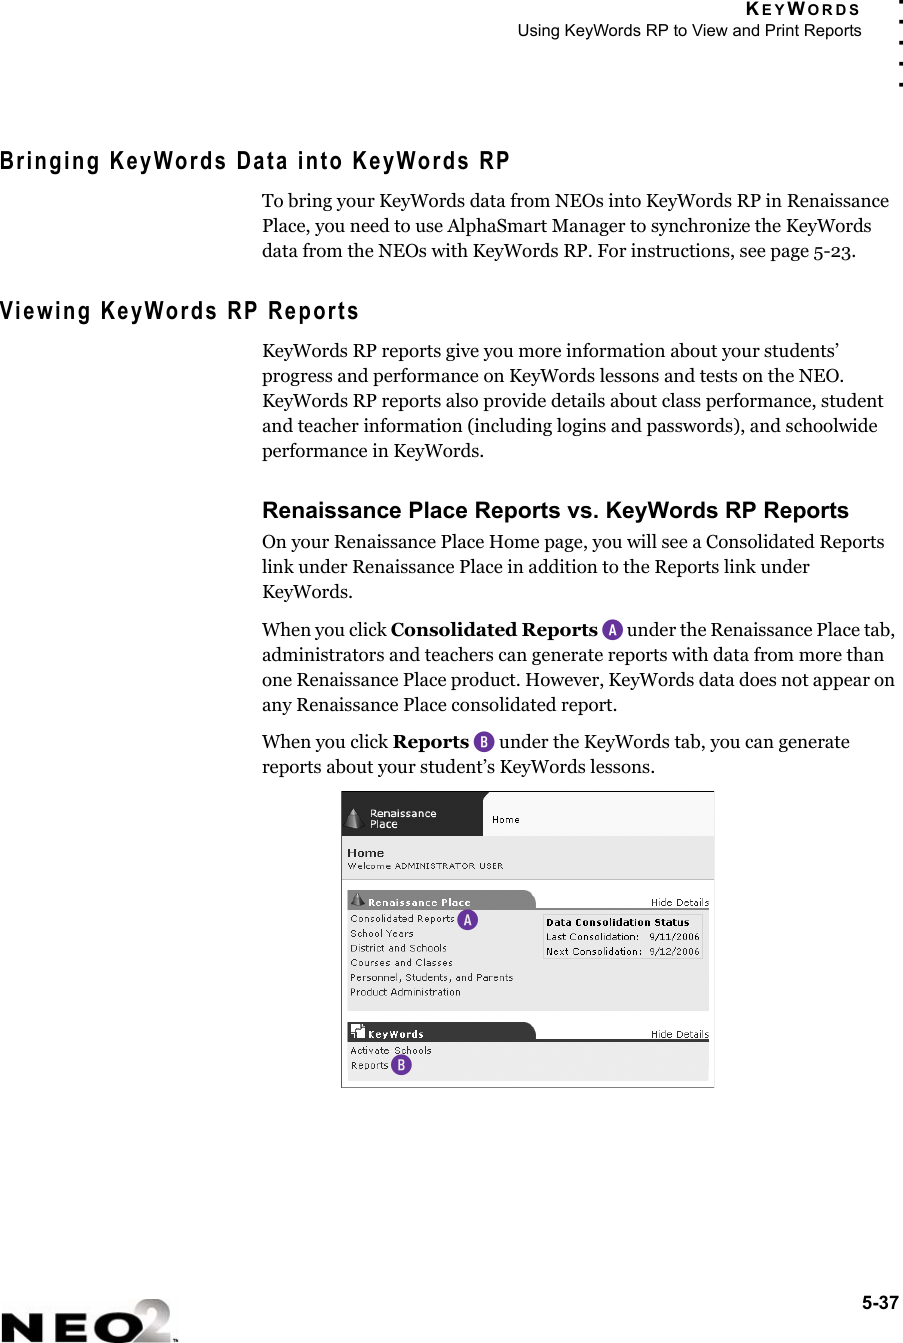
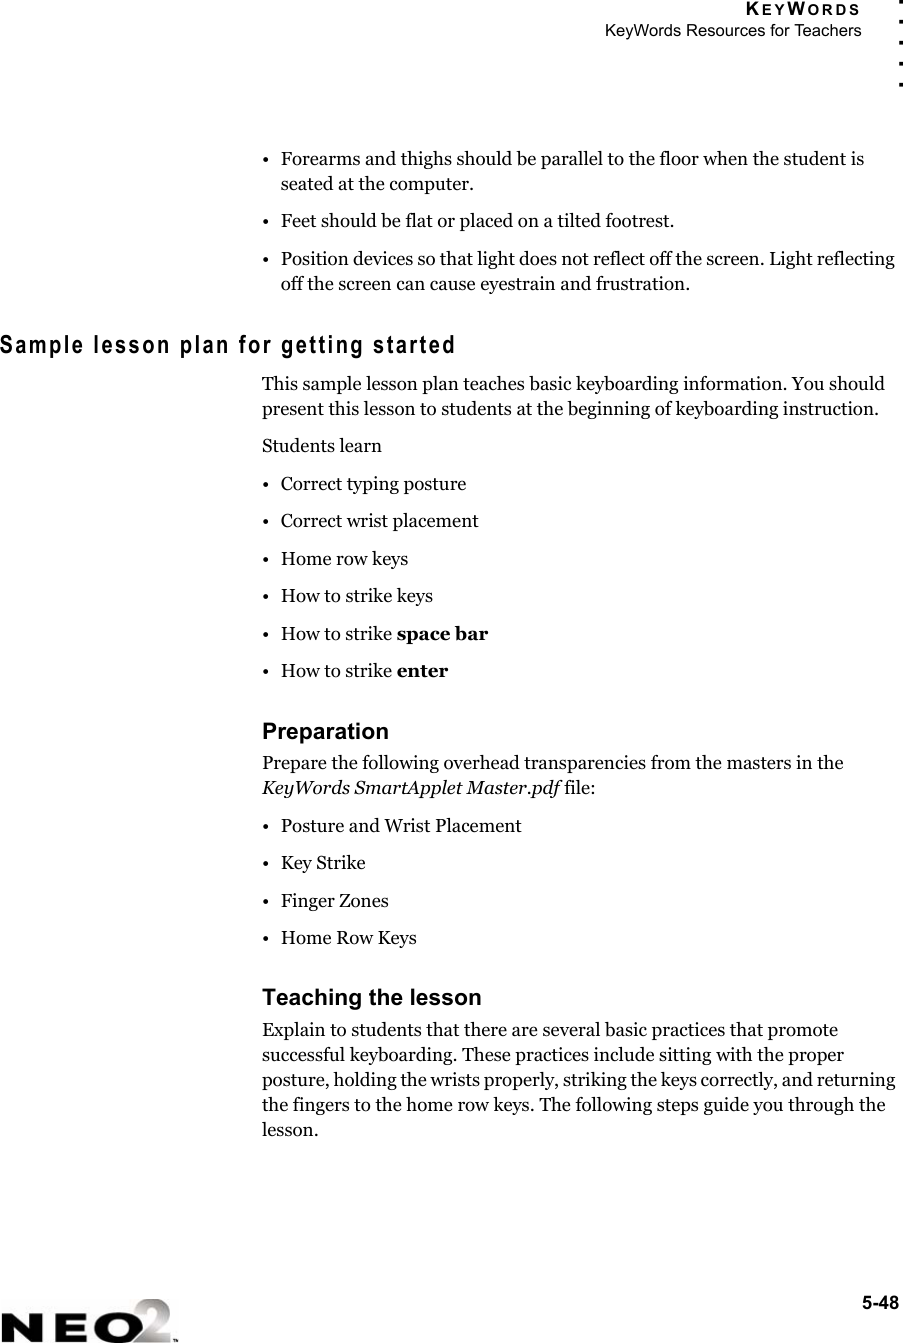
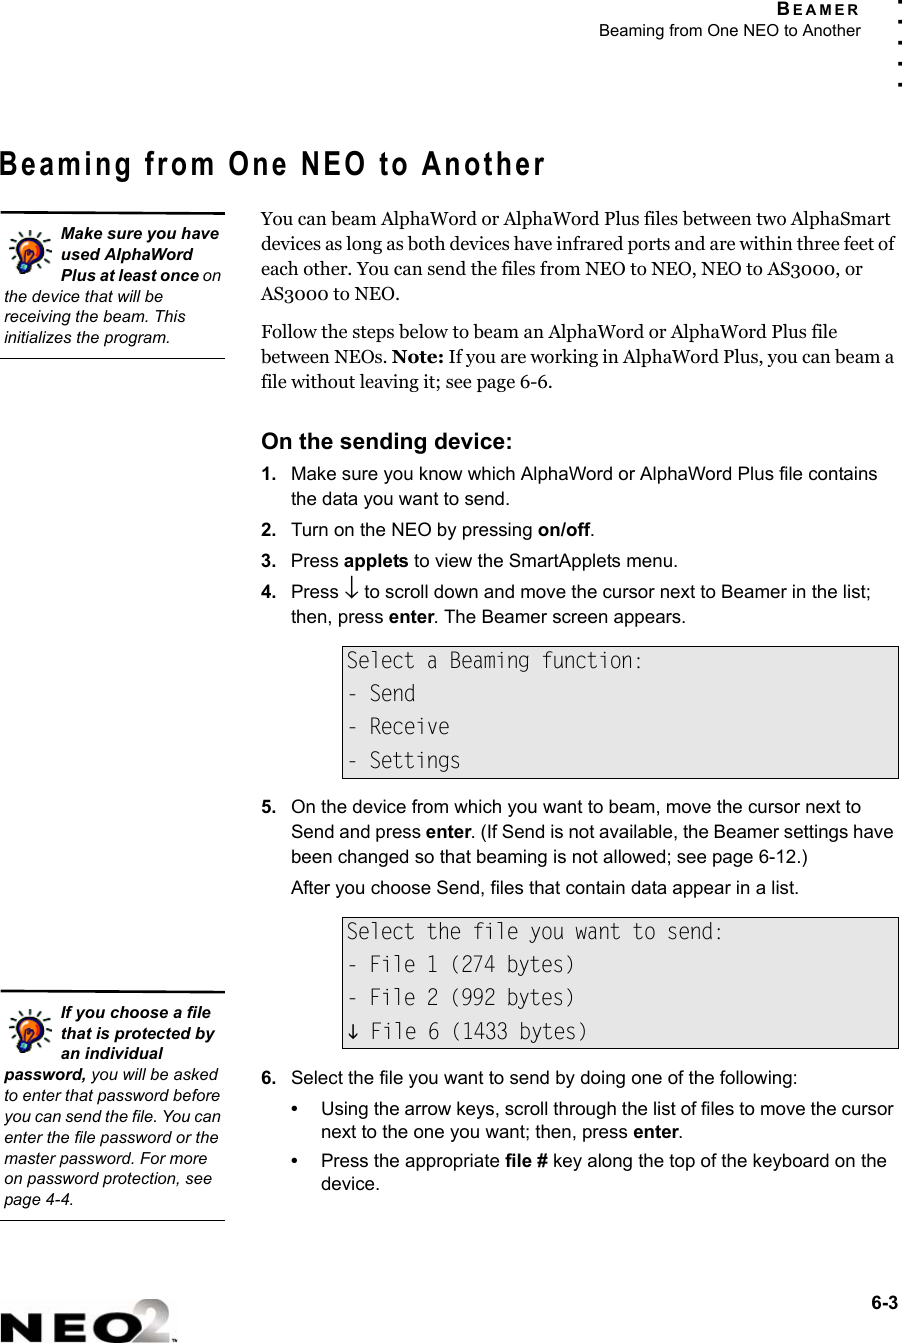
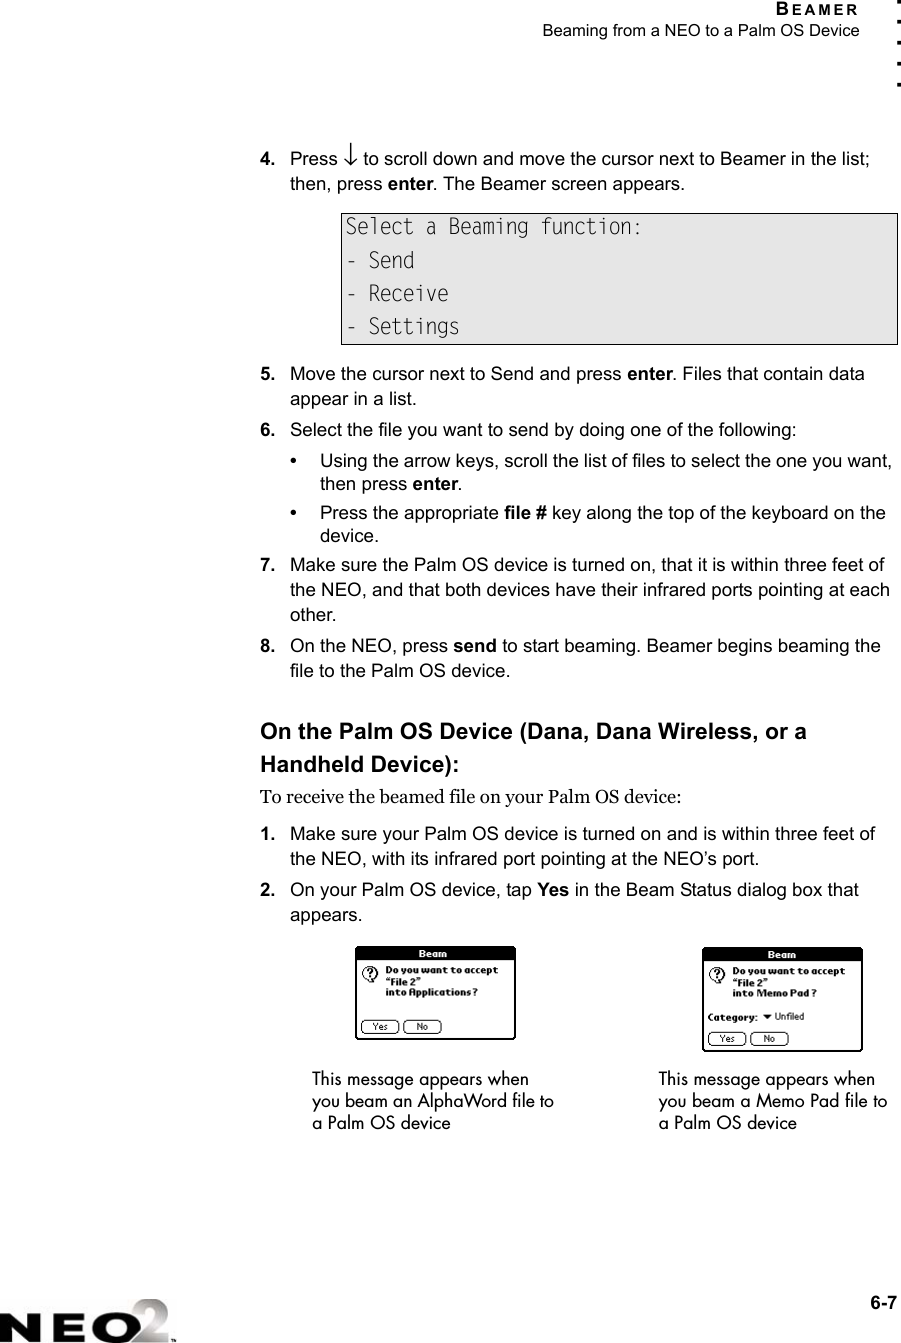
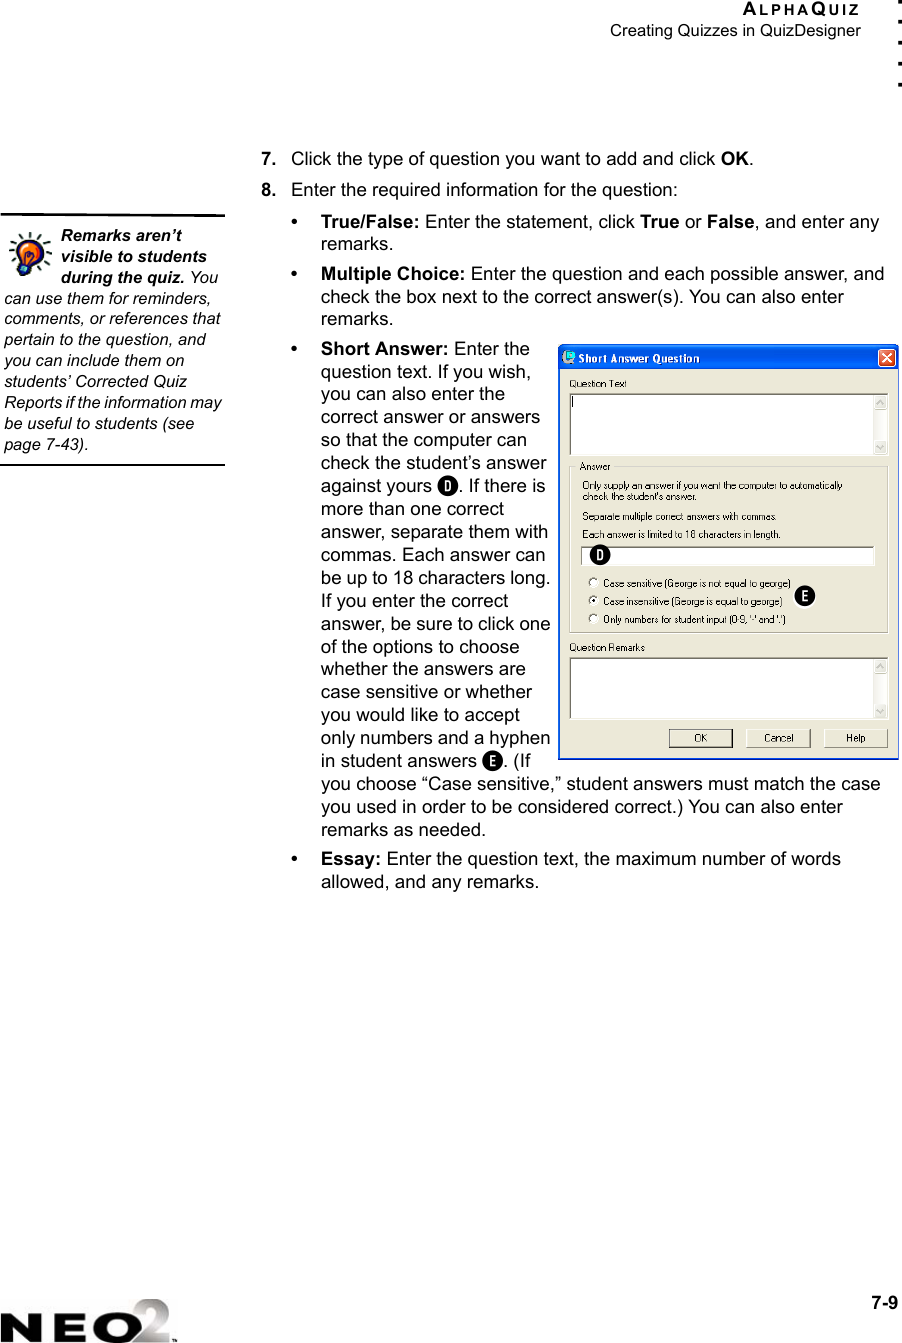
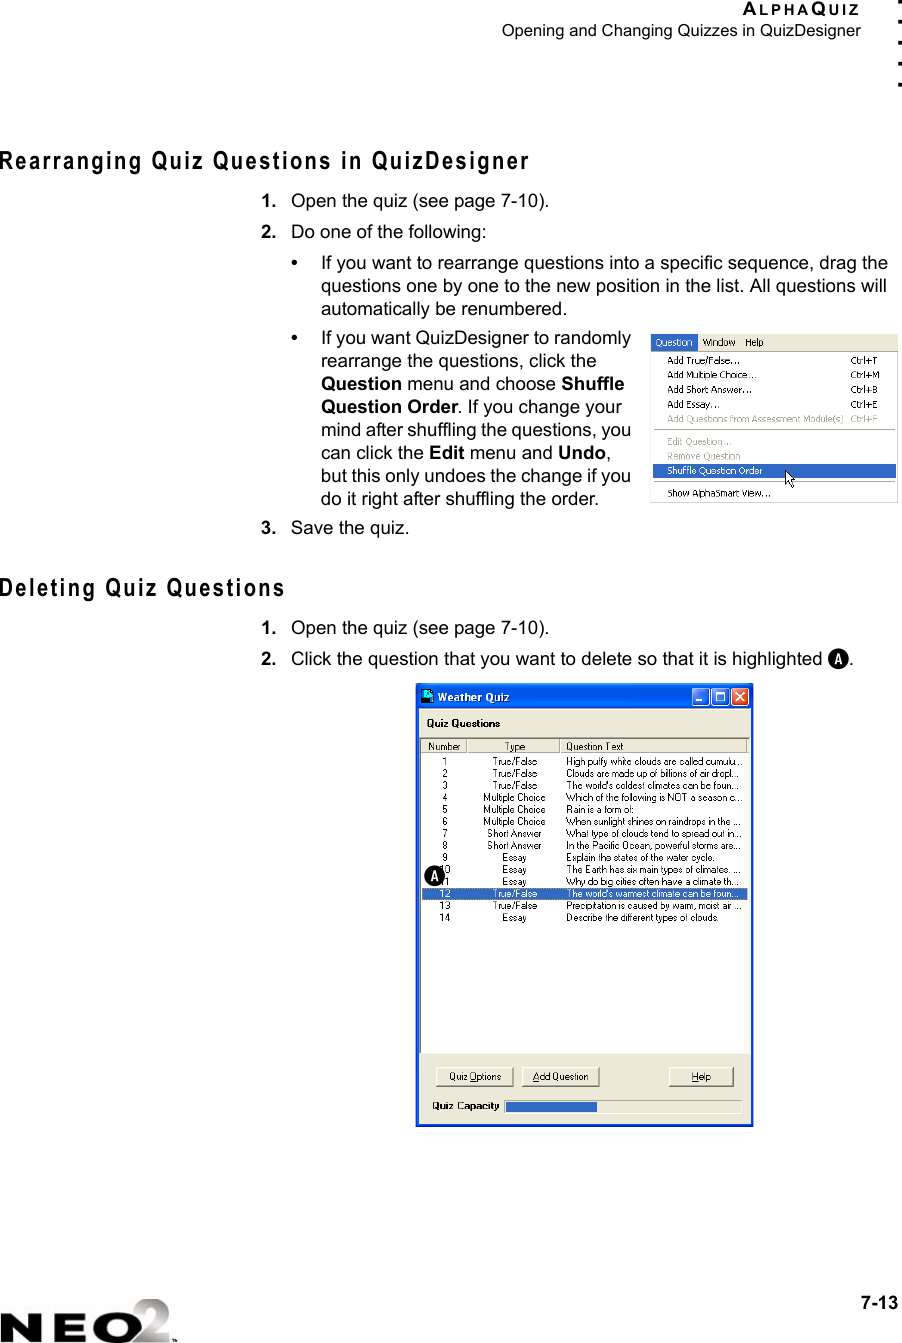
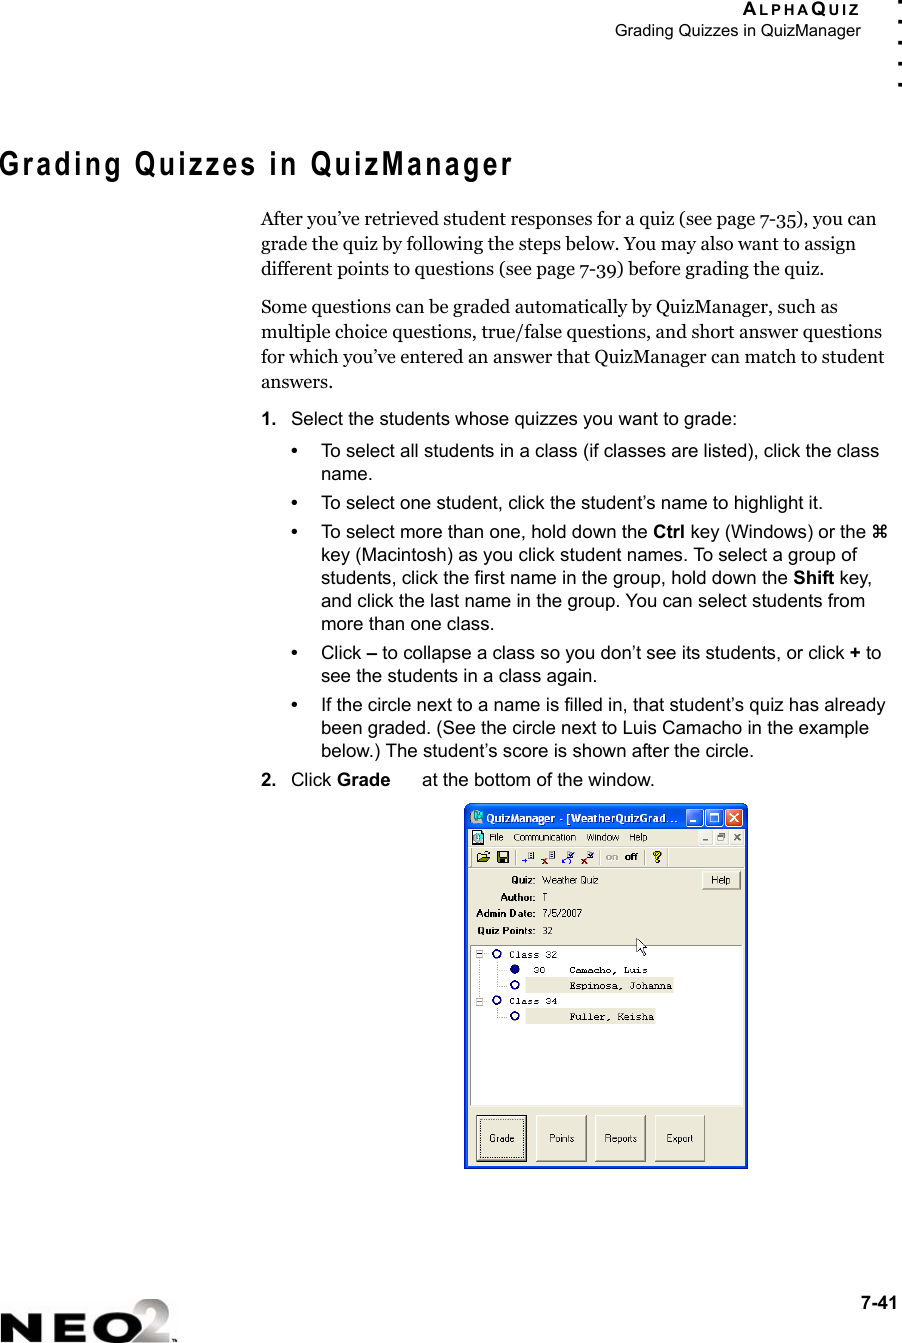
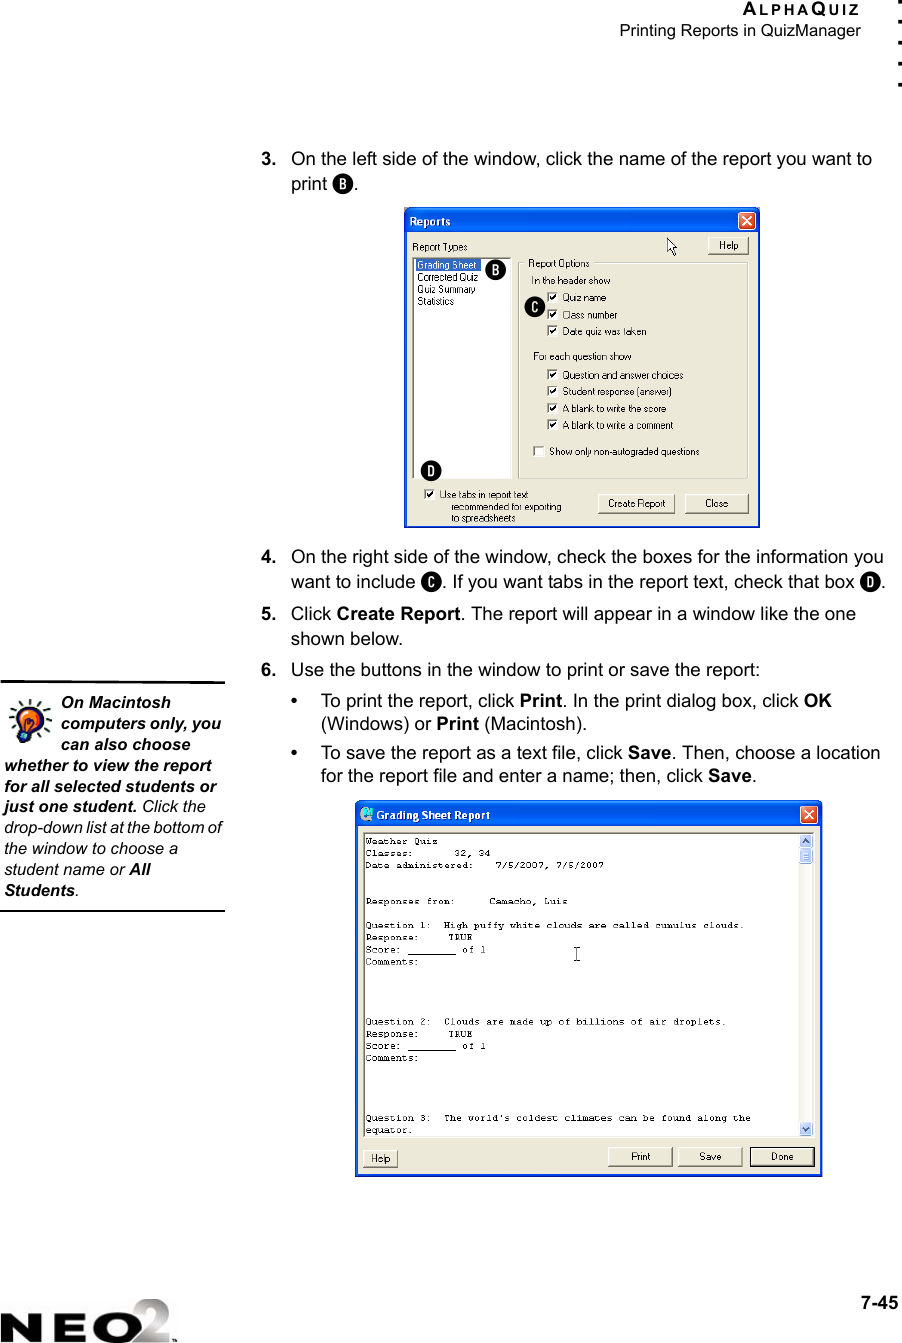
![KEYWORDSTaking an Accuracy and Speed Test5-8. . . . .If not, you will see a message like the one below. Then, you will see a message asking if you want to try the speed builder again. Press y for yes or n for no.Taking an Accuracy and Speed TestThe third option in each lesson, Take accuracy and speed test, lets you test your progress. Each lesson has four different tests that you can take. You can retake a test anytime. Your record shows only your best results.When you choose this option, the NEO shows the goals you need to meet for accuracy and speed in order to pass the test.As in the accuracy builder, the number of errors is counted as the number of incorrectly typed words. Even if you make more than one mistake while typing a word, it counts as only one error. Typing extra spaces between words also counts as an error.The top two lines on the screen show you the text to type and when to press enter. After you’ve typed the text, the screen shows your accuracy and speed scores, your goal, and whether you passed for accuracy and for speed. Note that you may pass either accuracy or speed without passing the other element. When you press the space bar after viewing the score, you’ll return to the lesson screen.Your typing rate was 5 words perminute. You need to type 8 words perminute or more.(Press [SPACE BAR] to continue.)Your goal for the Speed and AccuracyTest is 12 Words Per Minute with12 errors or fewer.(Press [SPACE BAR] to continue.)Your score Your goal Passed40 WPM 8 WPM Yes7 Errors 10 Errors Yes(Press [SPACE BAR] to continue.)](https://usermanual.wiki/Renaissance-Learning/NEO2/User-Guide-825941-Page-48.png)
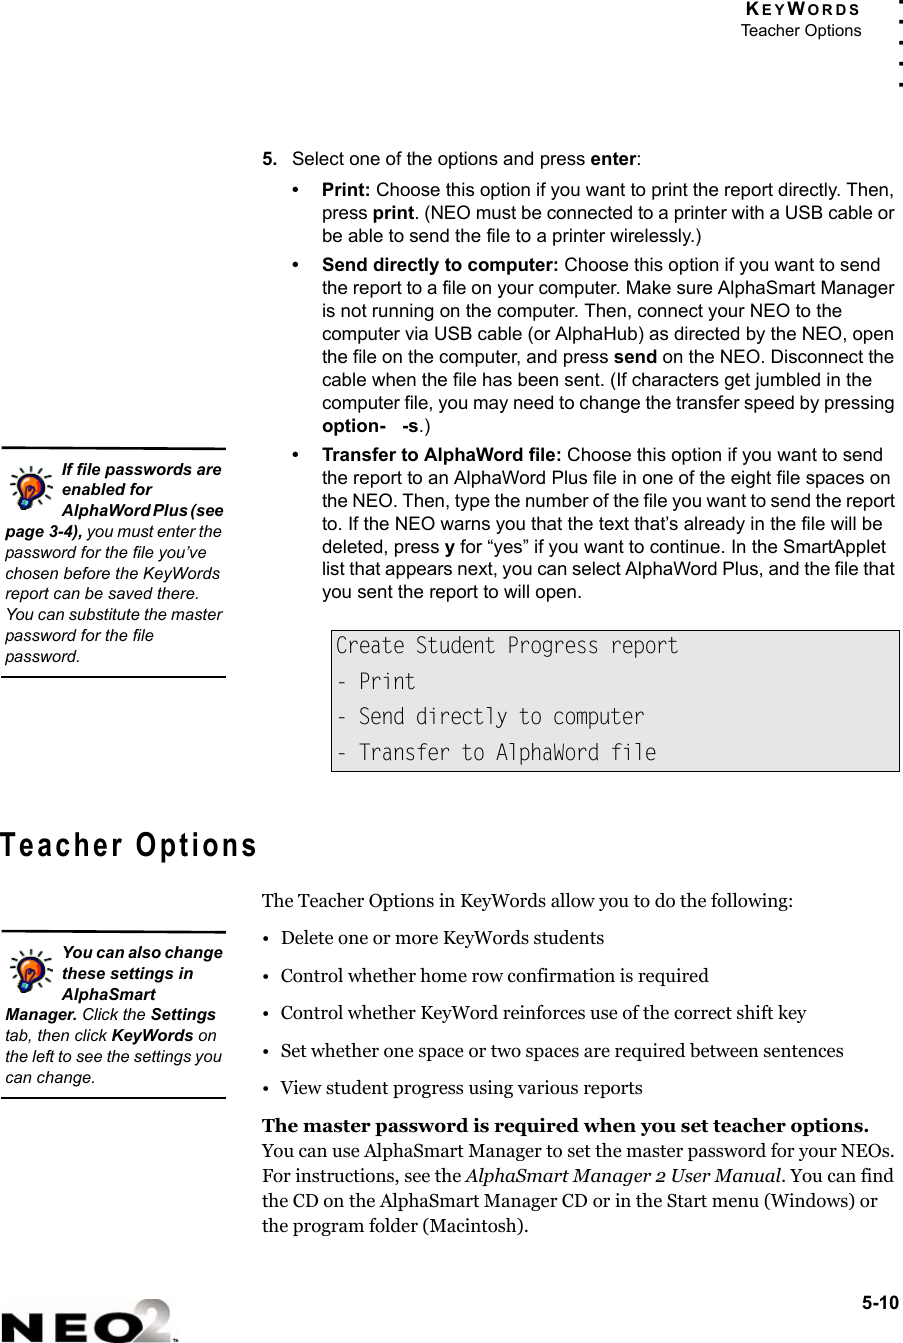
![KEYWORDSSetting Speed and Accuracy Goals for KeyWords Students5-15. . . . .4. To make the words per minute (WPM) goal higher, press the ↑ key. To decrease it, press the ↓ key.5. Press the space bar.6. To increase the number of allowable errors, press the ↑ key. To decrease it, press the ↓ key.Resetting Goals to the DefaultFollow these steps to change back to the default goals, which change as students progress through the lessons. (See the table that starts onpage 5-14.)1. In KeyWords, move the cursor next to Teacher options and press enter.2. Type the master password and press enter.3. Move the cursor down next to Reset WPM and error goals to default and press enter.4. A message will tell you that the goals have been reset. Press the space bar.Use the arrow keys to change thewords per minute:8(Press [SPACE BAR] to continue.)Use the arrow keys to change theAllowable errors:12(Press [SPACE BAR] to continue.)You can also reset KeyWords goals in AlphaSmart Manager. With NEO connected, click the Settings tab in AlphaSmart Manager and click Keywords on the left. Then, choose Yes after Reset WPM/error goals to default.](https://usermanual.wiki/Renaissance-Learning/NEO2/User-Guide-825941-Page-55.png)
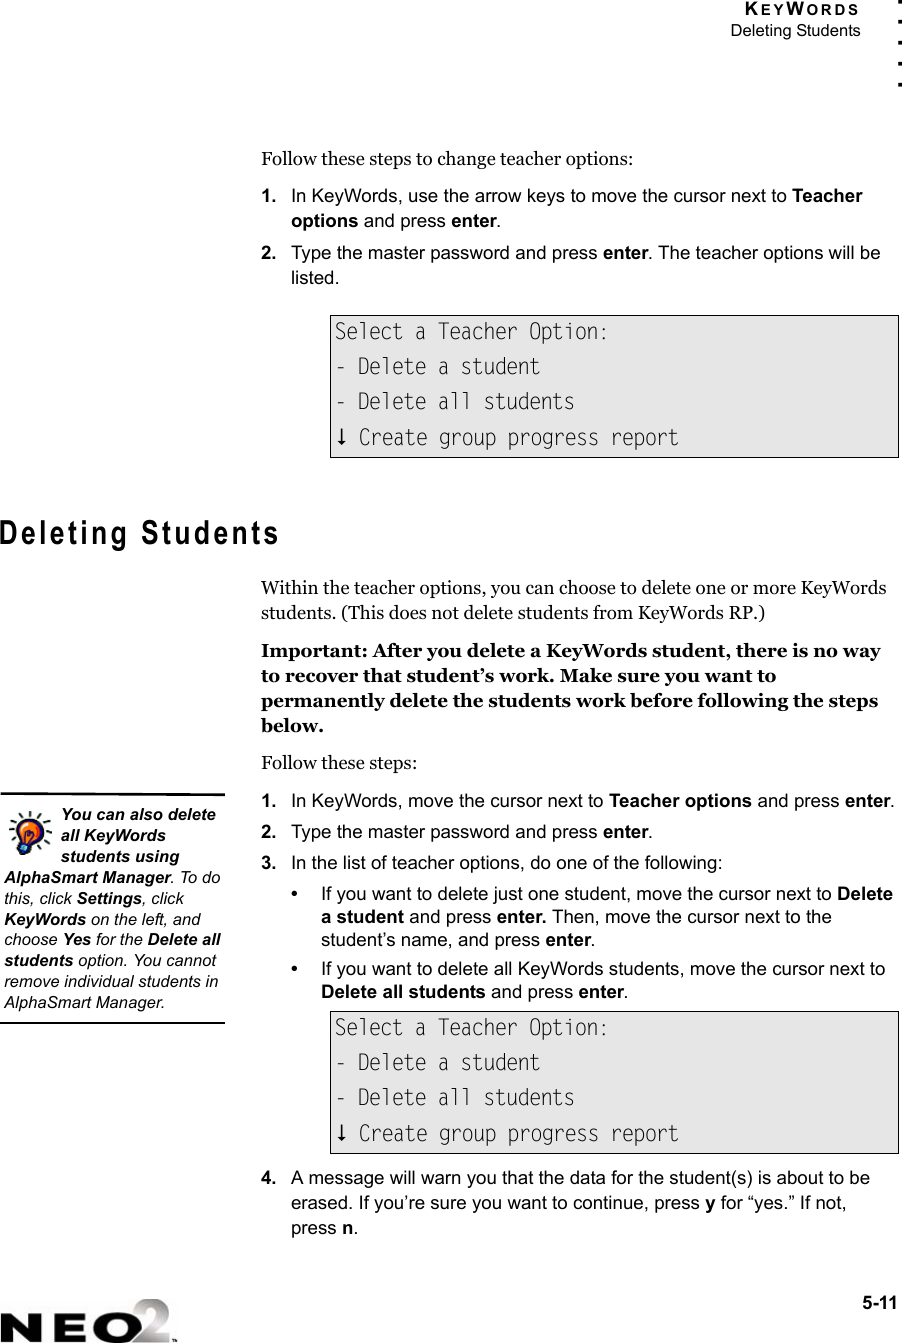
![KEYWORDSChoosing Whether to Enforce Use of the Correct Shift Key5-16. . . . .Choosing Whether to Enforce Use of the Correct Shift KeyFor faster and more accurate touch typing, students should learn to type a capital letter by holding down the shift key with the opposite hand from the one that is typing the letter. For example, to type “A,” you should hold down the shift key using the little finger of the right hand while typing a with the little finder of the left hand.If you choose to enforce this practice, in the teacher options, Correct Shift Key Enforcement should be “On” (as it is when you first receive the NEO). If it is on, when students are learning new keys in lessons that require them to type capital letters, NEO will notify them if they use the incorrect shift key. (See the sample message below.)Follow these steps to turn this option on or off:1. In KeyWords, move the cursor next to Teacher options and press enter.2. Type the master password and press enter.3. Move the cursor down next to Turn require correct shift key ON (or OFF) and press enter.4. The next screen will show you whether correct shift key enforcement is on or off; then, it will ask if you want to turn it on (if it’s off) or off (if it’s on). If you want to change the setting, press y for “yes.”To type a capital A, press the rightshift key.(Hold down the right [shift] key andpress A now.)You can also change this setting in AlphaSmart Manager. With NEO connected, click the Settings tab in AlphaSmart Manager, click KeyWords on the left, and choose Yes or No after Turn Require correct shift key OFF or ON.](https://usermanual.wiki/Renaissance-Learning/NEO2/User-Guide-825941-Page-56.png)


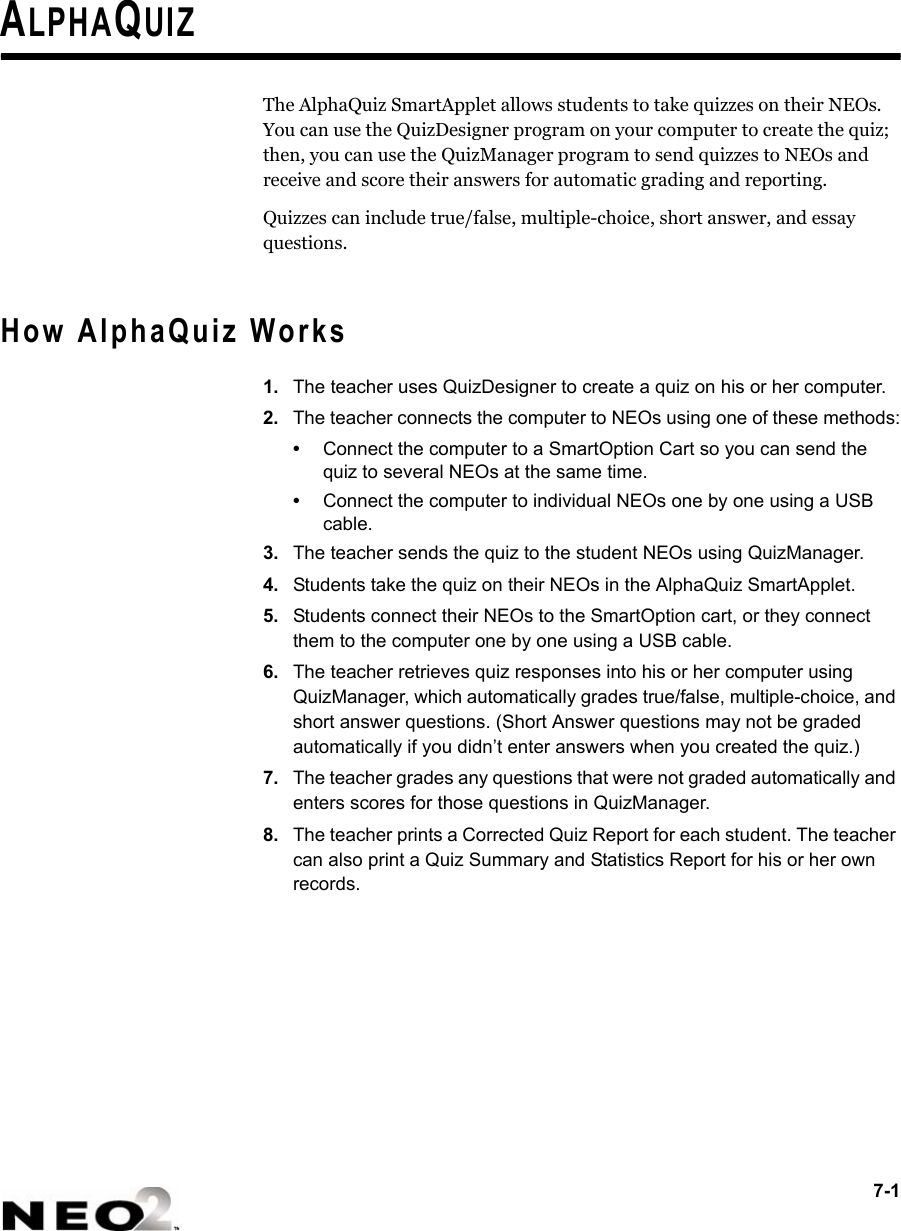
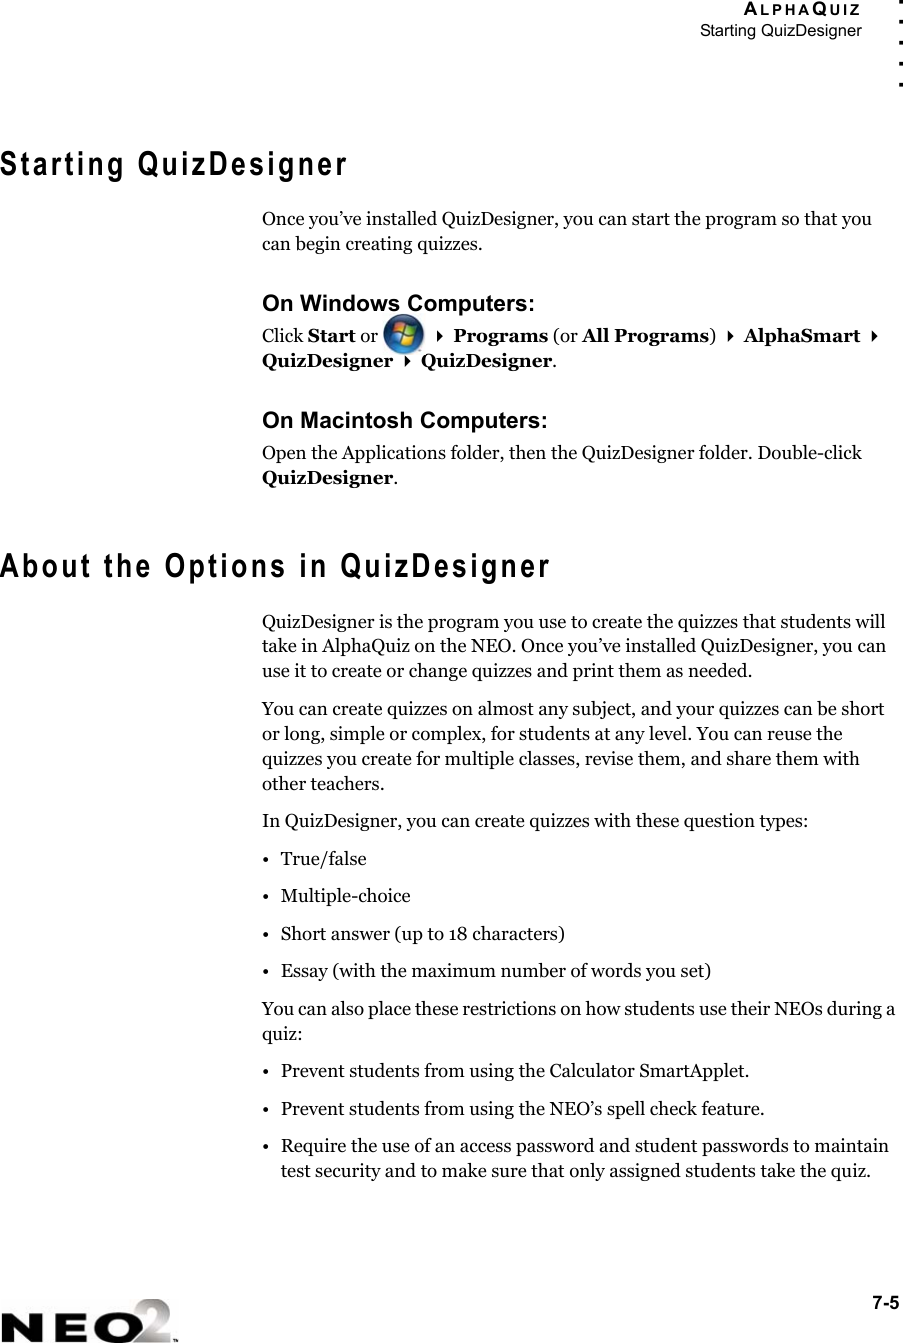
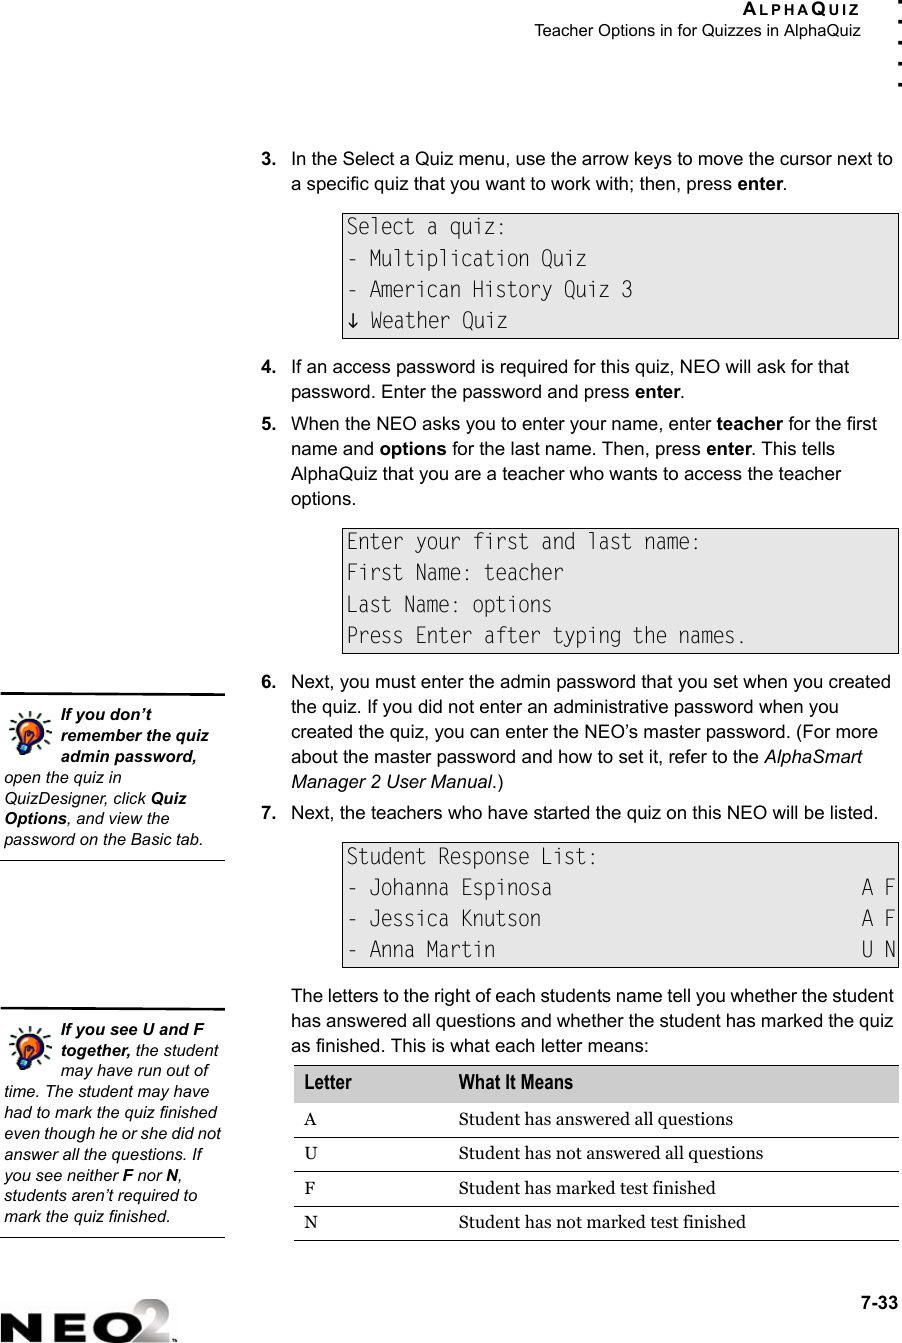
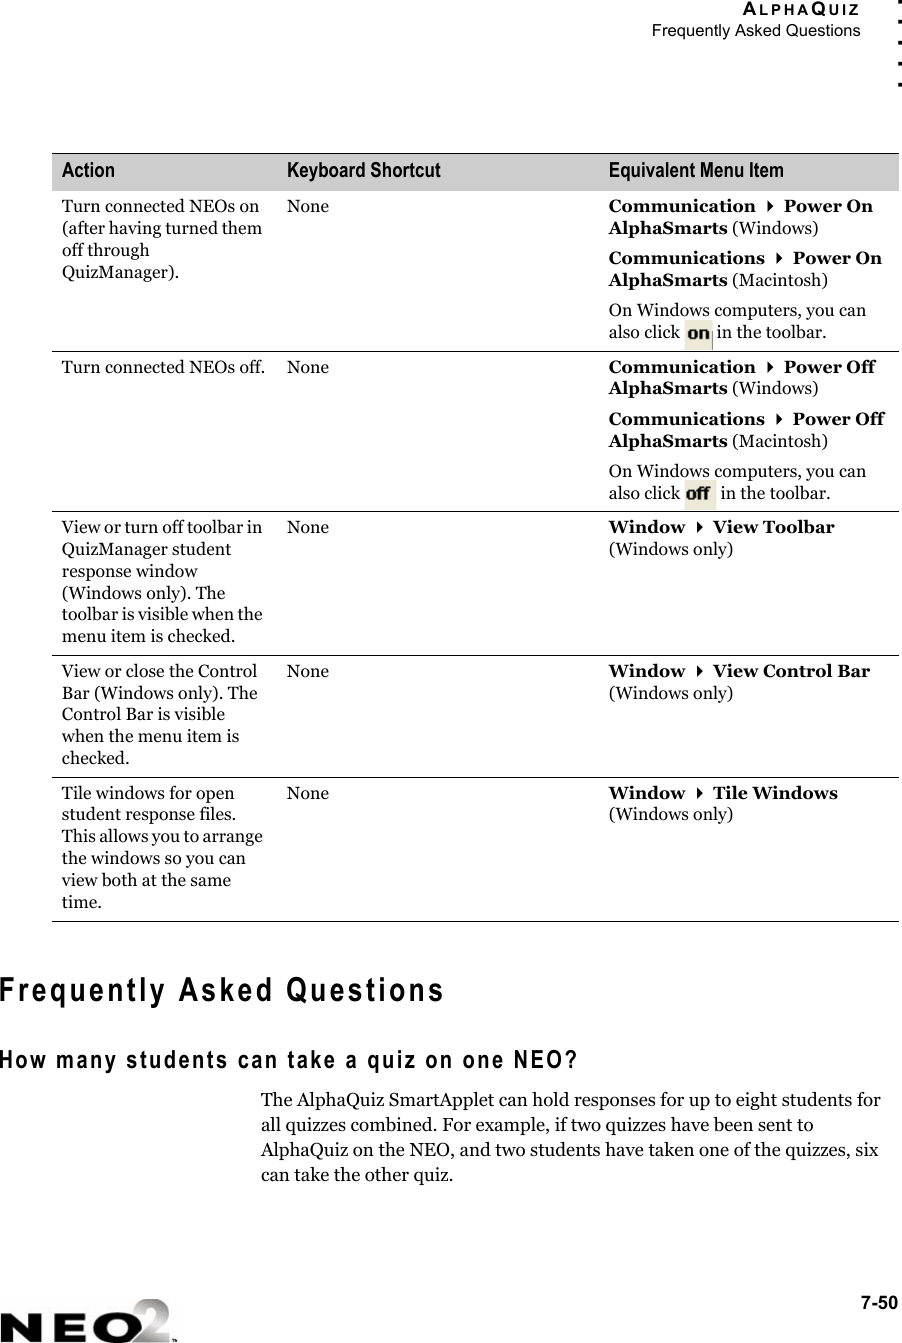
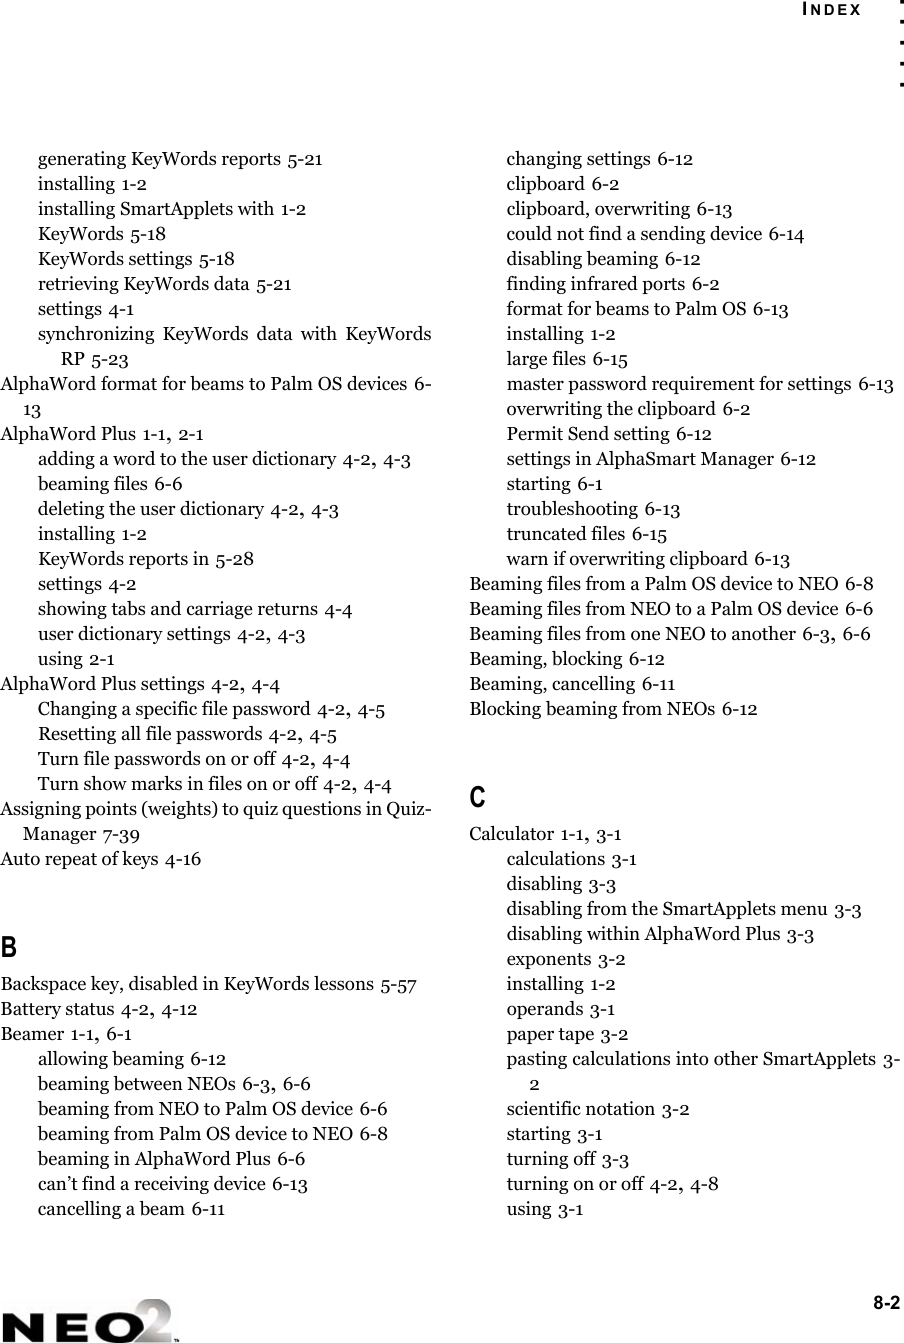
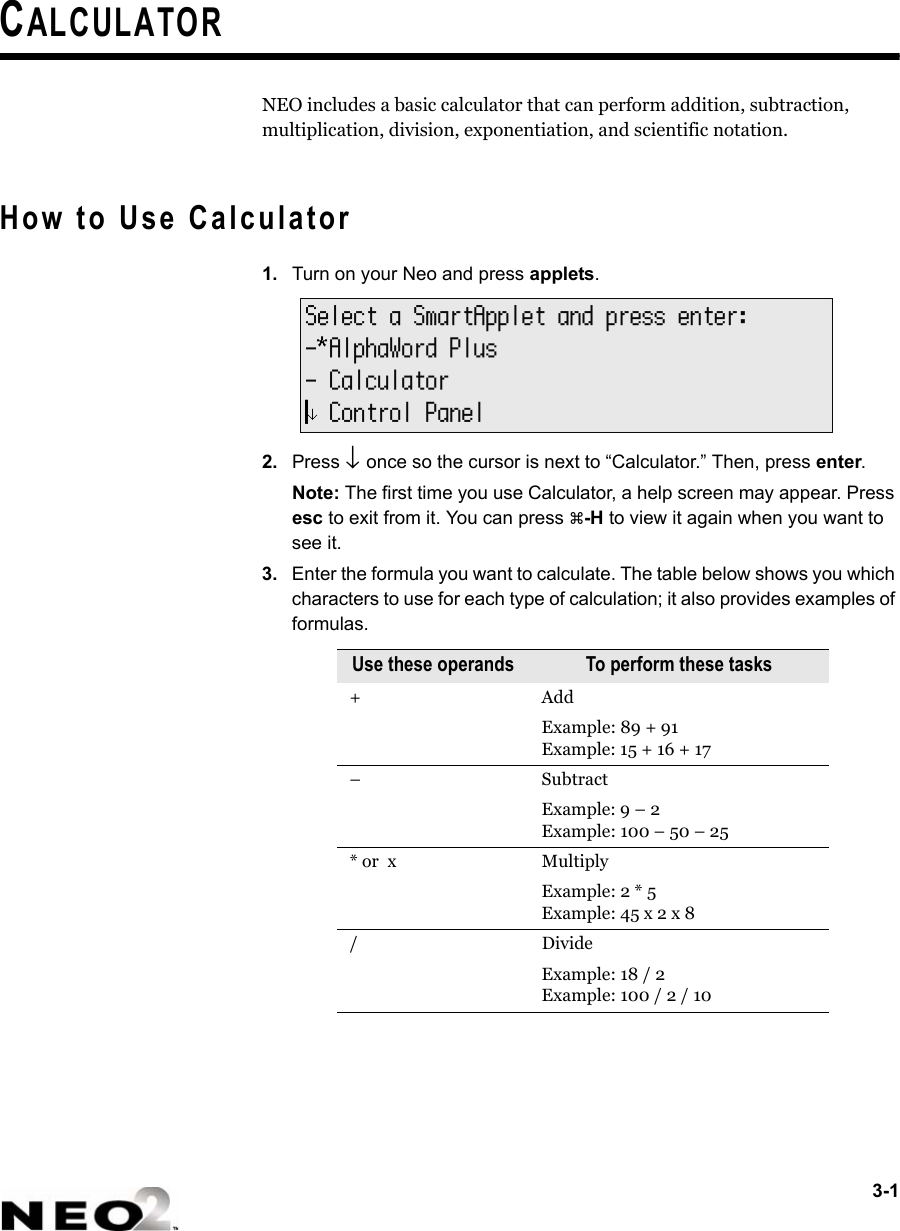
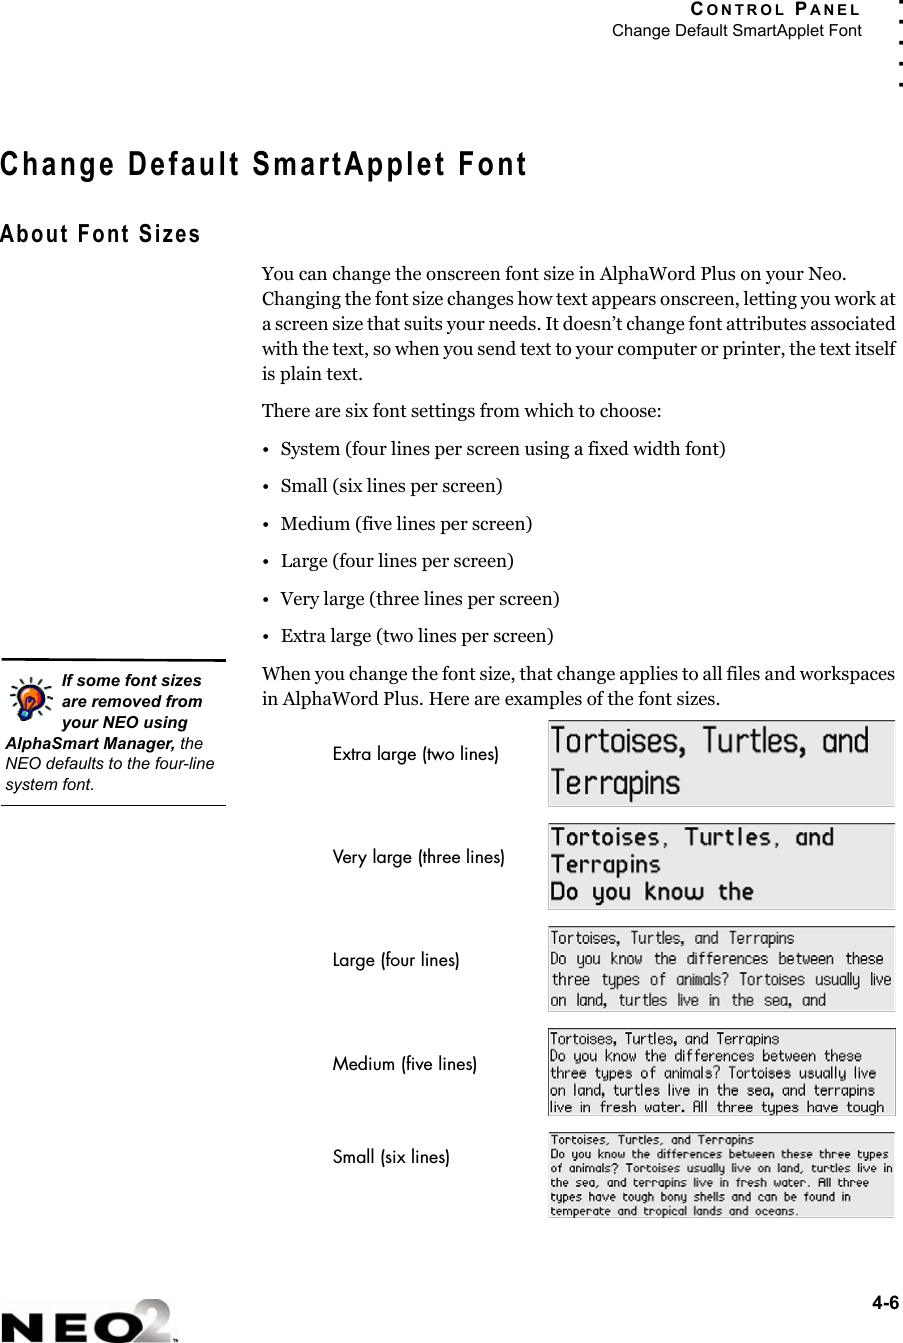
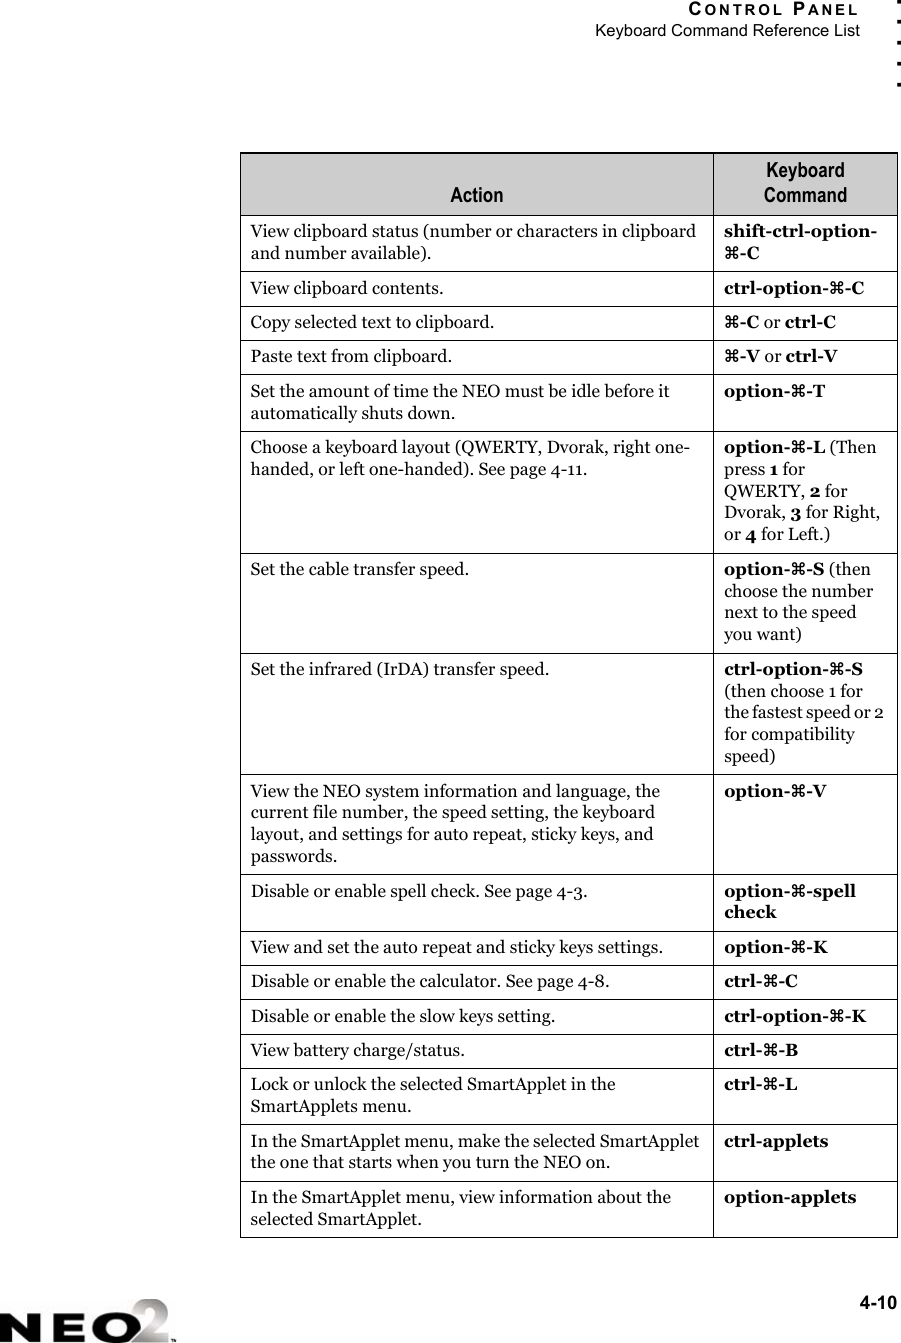
![ALPHAQUIZKeyBoard ShortCuts in QuizManager7-49. . . . .Clear all text in the field your cursor is in (Macintosh computers only).None Edit Clear (Macintosh only)Select all text in the field your cursor is in (Macintosh computers only)Ctrl-A (Windows)-A (Macintosh)Edit Select All (Macintosh only)Go to the next student’s responses.Ctrl-] (Windows)-] (Macintosh)Edit Next Student (Macintosh only)Go to the previous student’s responses.Ctrl-[ (Windows)-[ (Macintosh)Edit Previous Student (Macintosh only)Send a quiz to NEOs. None Communication Send Quiz (Windows)Communications Send Quiz (Macintosh)On Windows computers, you can also click in the toolbar.Delete a quiz from NEOs. None Communication Delete Quiz (Windows)Communications Delete Quiz (Macintosh)On Windows computers, you can also click in the toolbar.Retrieve student responses to quizzes from NEOs.None Communication Retrieve Responses (Windows)Communications Retrieve Responses (Macintosh)On Windows computers, you can also click in the toolbar.Delete student quiz responses from NEOs.None Communication Delete Responses (Windows)Communications Delete Responses (Macintosh)On Windows computers, you can also click in the toolbar.Action Keyboard Shortcut Equivalent Menu Item](https://usermanual.wiki/Renaissance-Learning/NEO2/User-Guide-825941-Page-163.png)