SGS Technologies 01 DRINK MEASURING TRANSMITTER User Manual
SGS Technologies, LLC DRINK MEASURING TRANSMITTER
UserManual.wiki
>
SGS Technologies
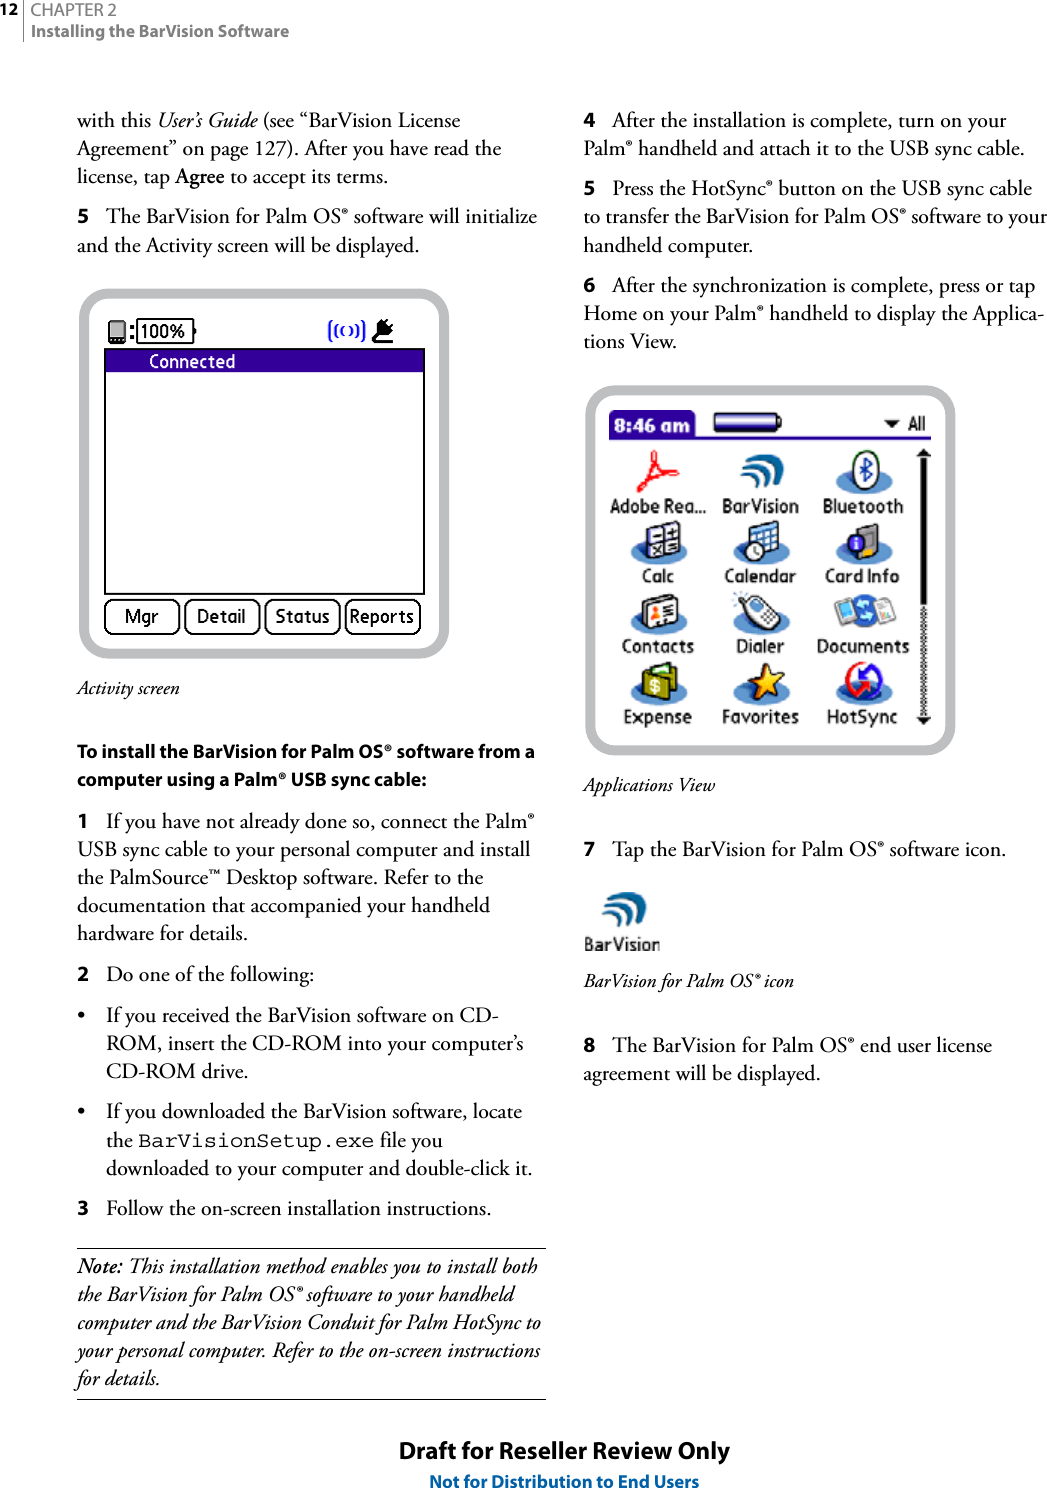
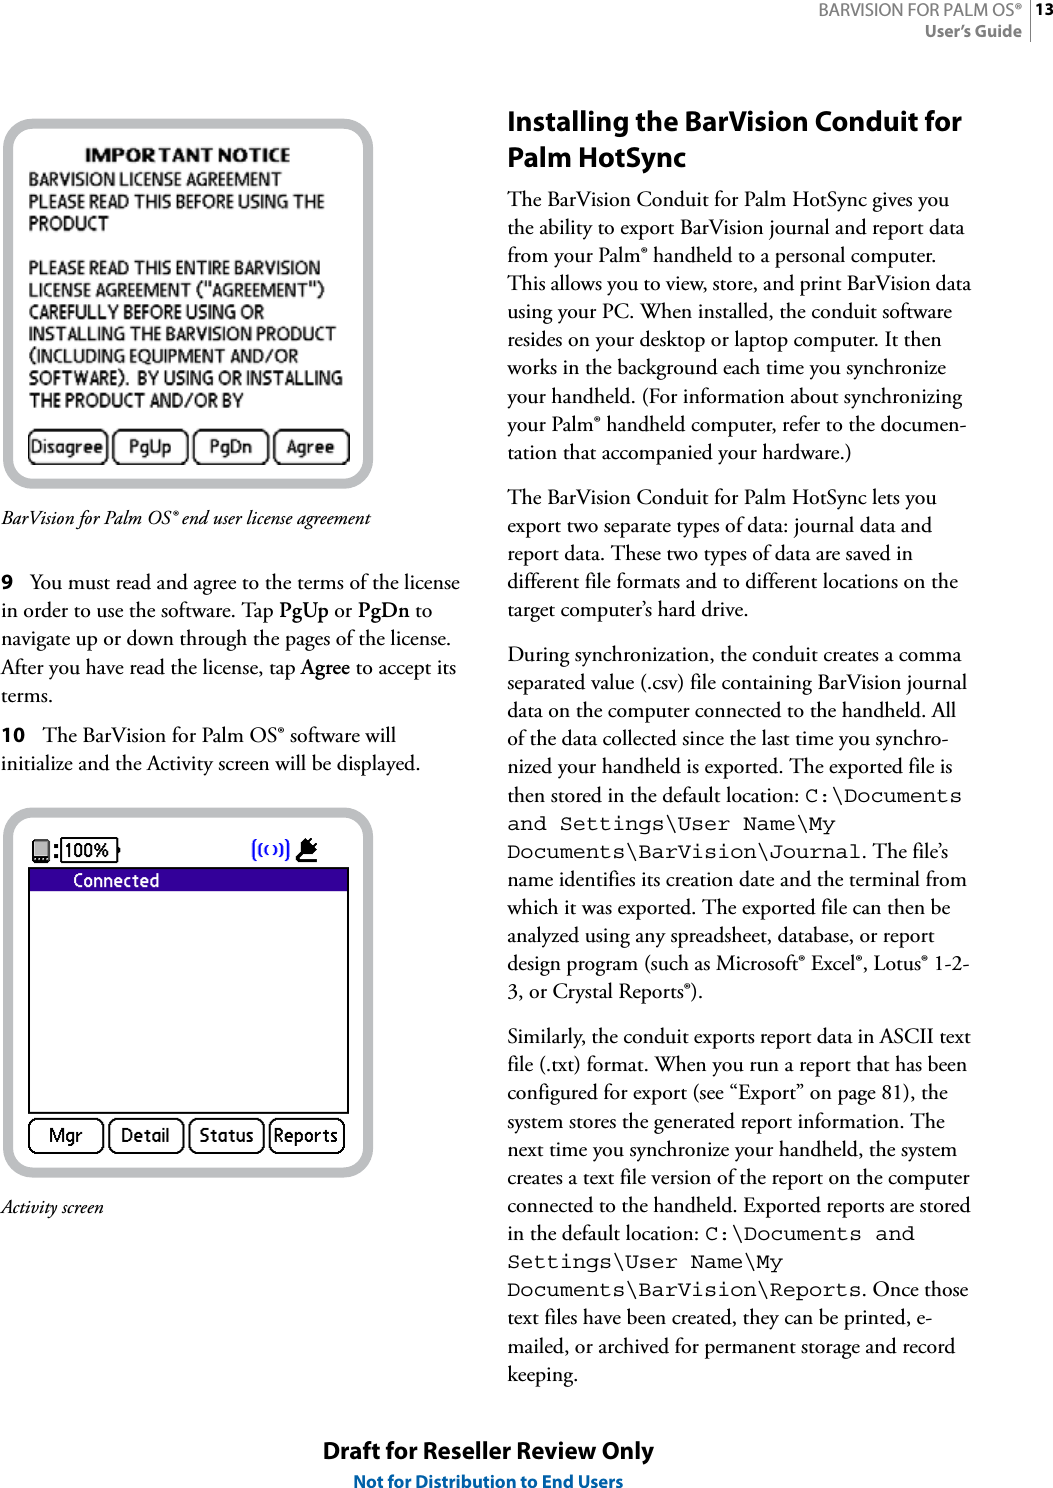
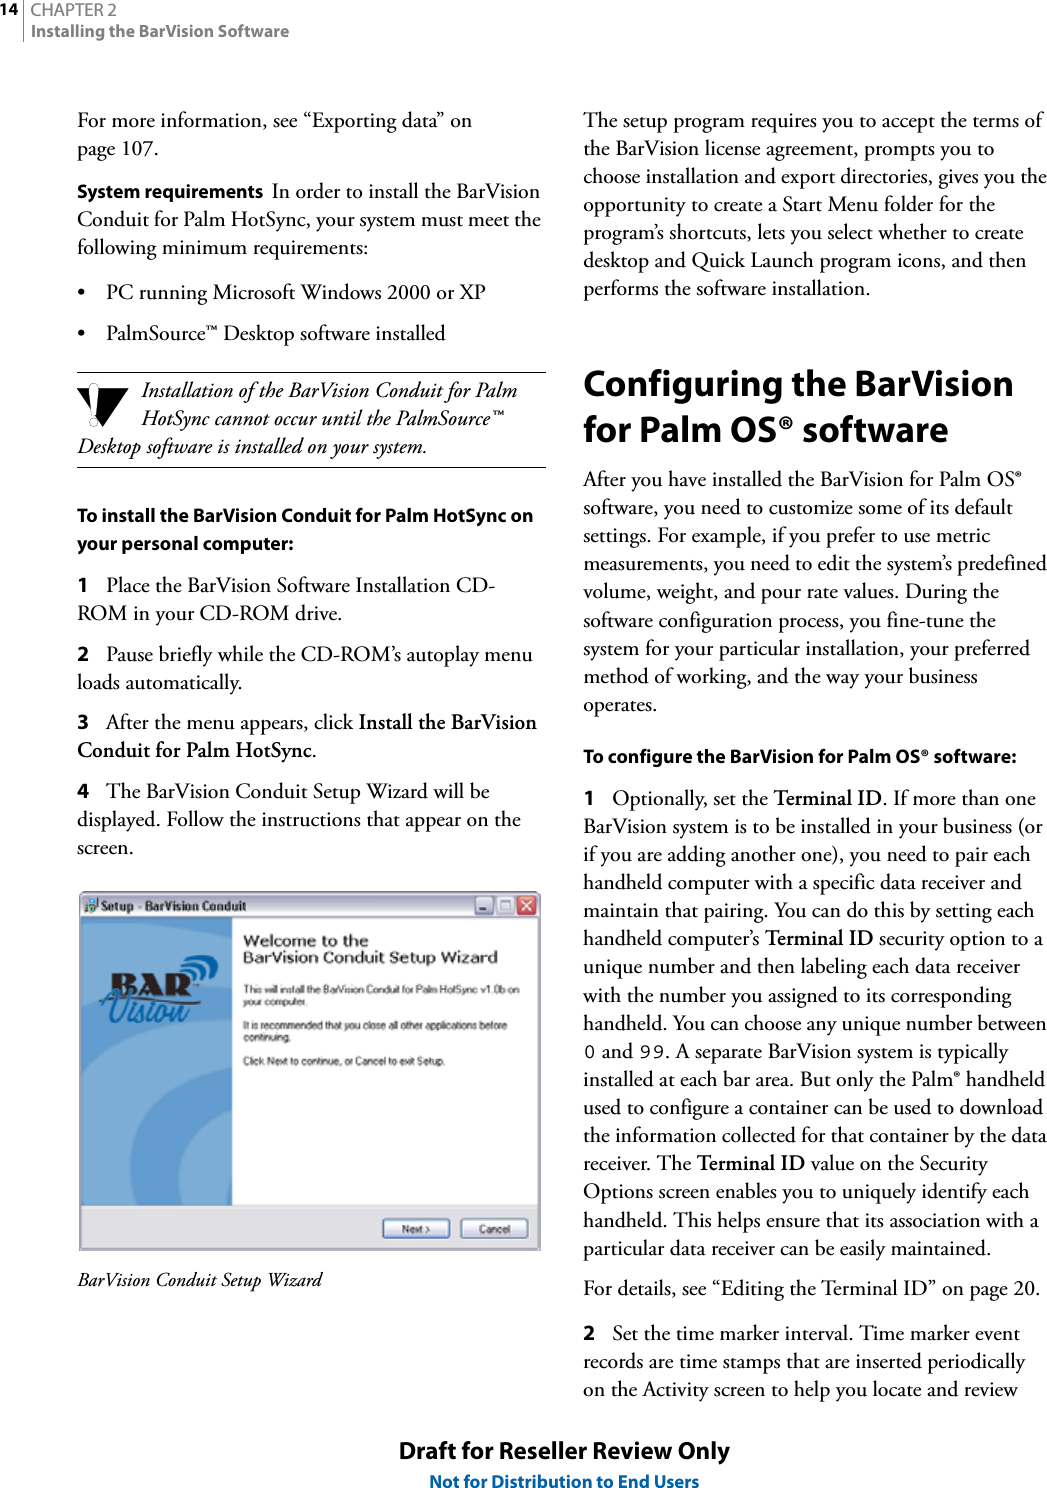
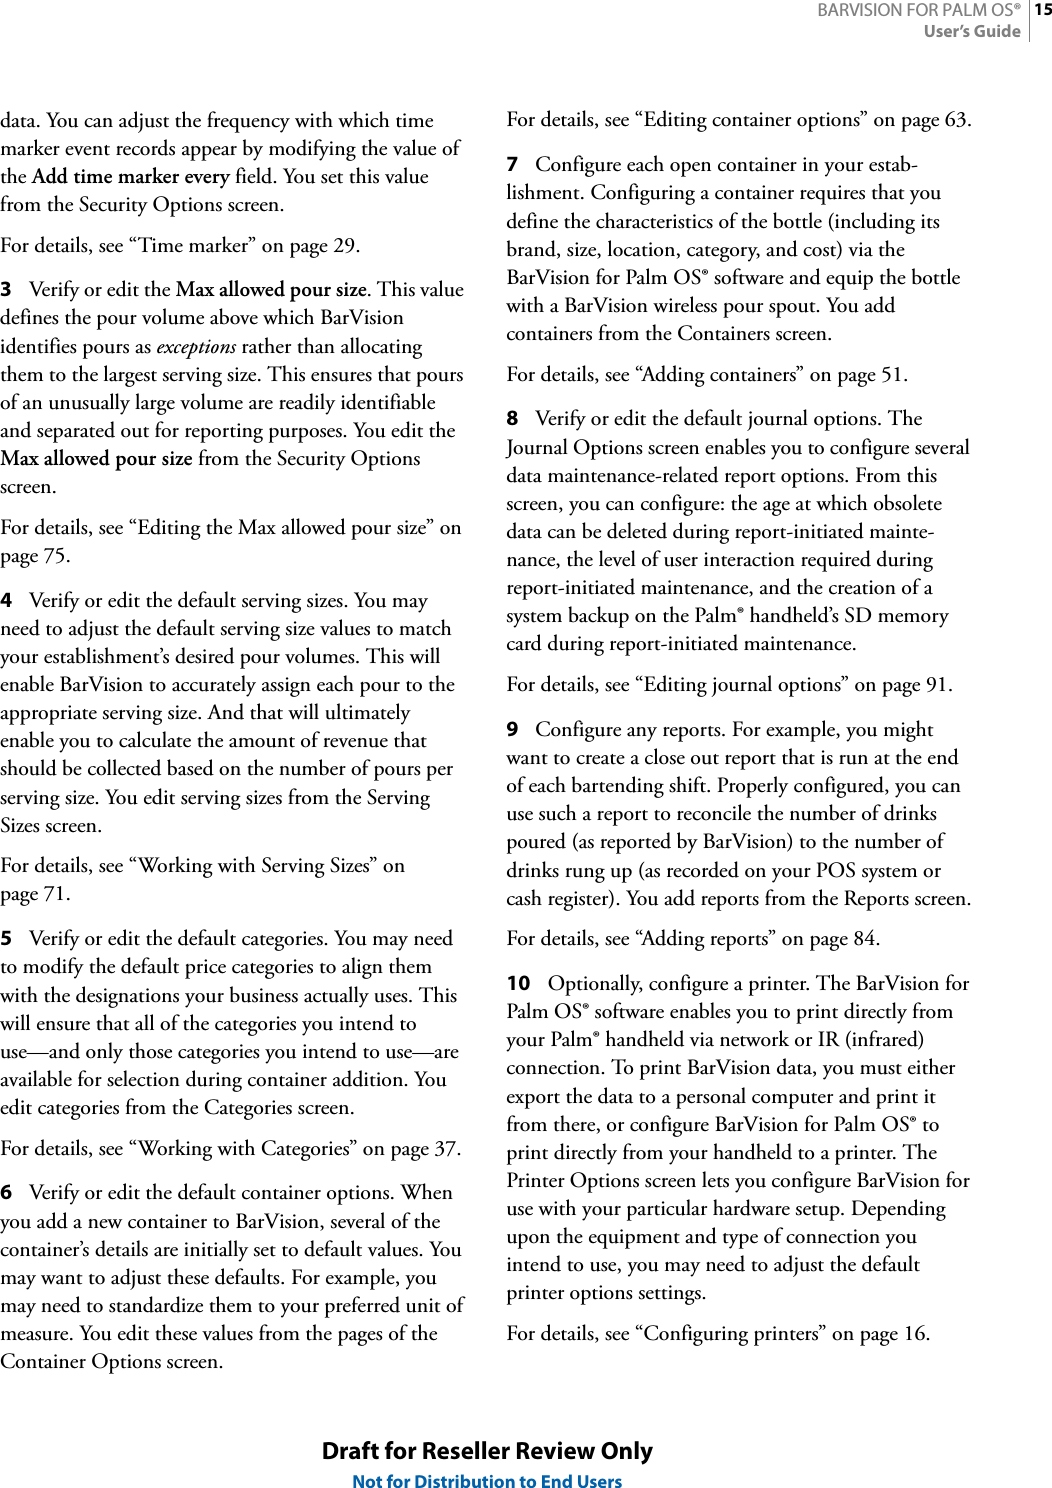
>
01 User Manual
USERS MANUAL
Navigation menu
Upload a User Manual
Namespaces
Wiki Guide
HTML
PDF
Info
Views
User Manual
Discussion / Help
Navigation
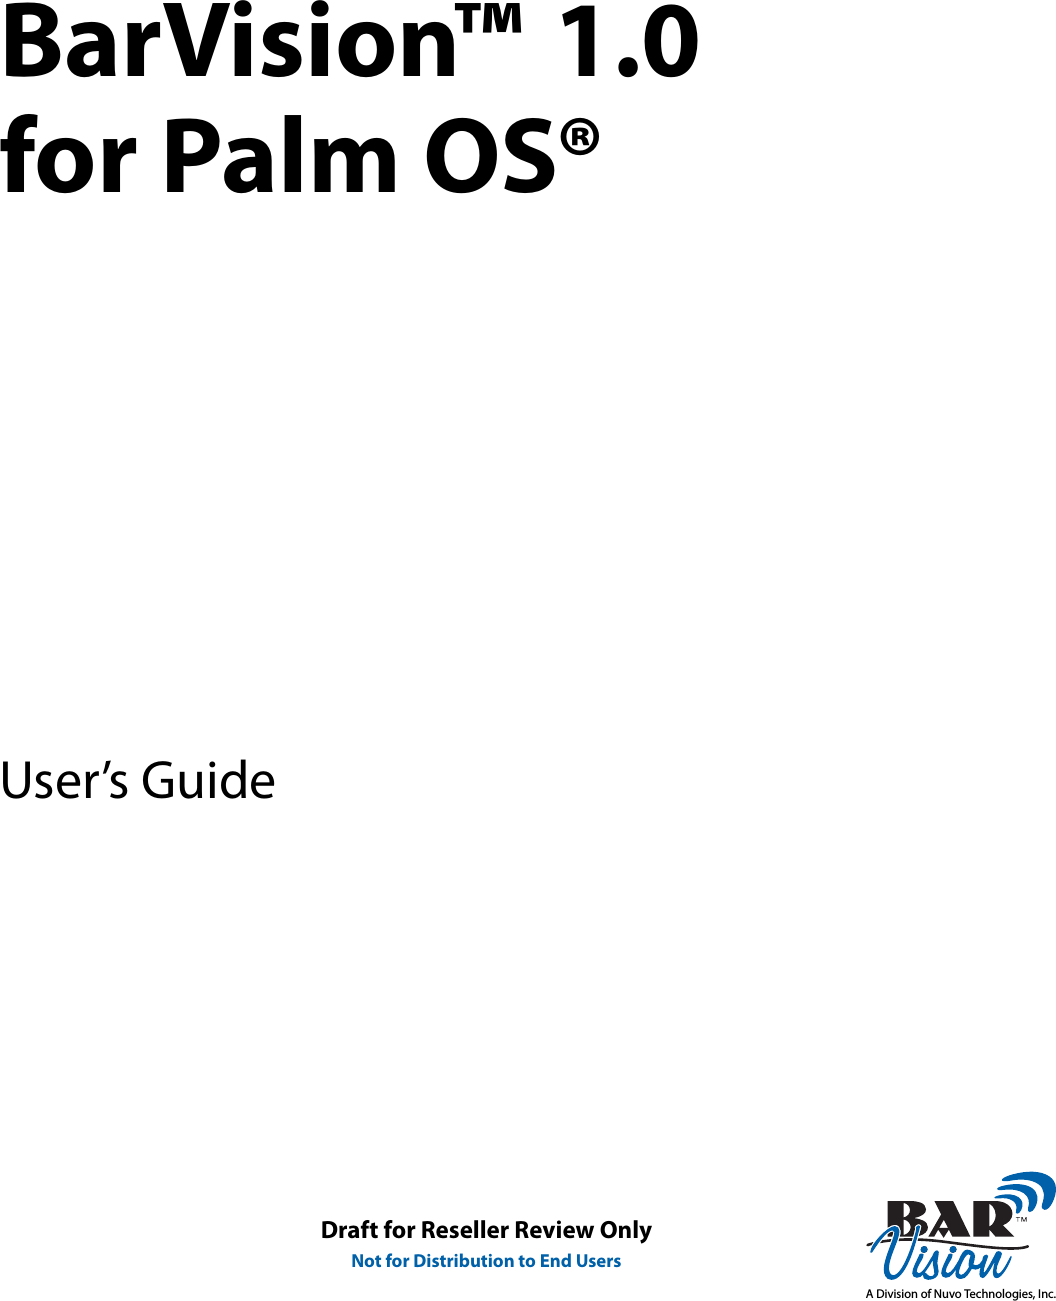


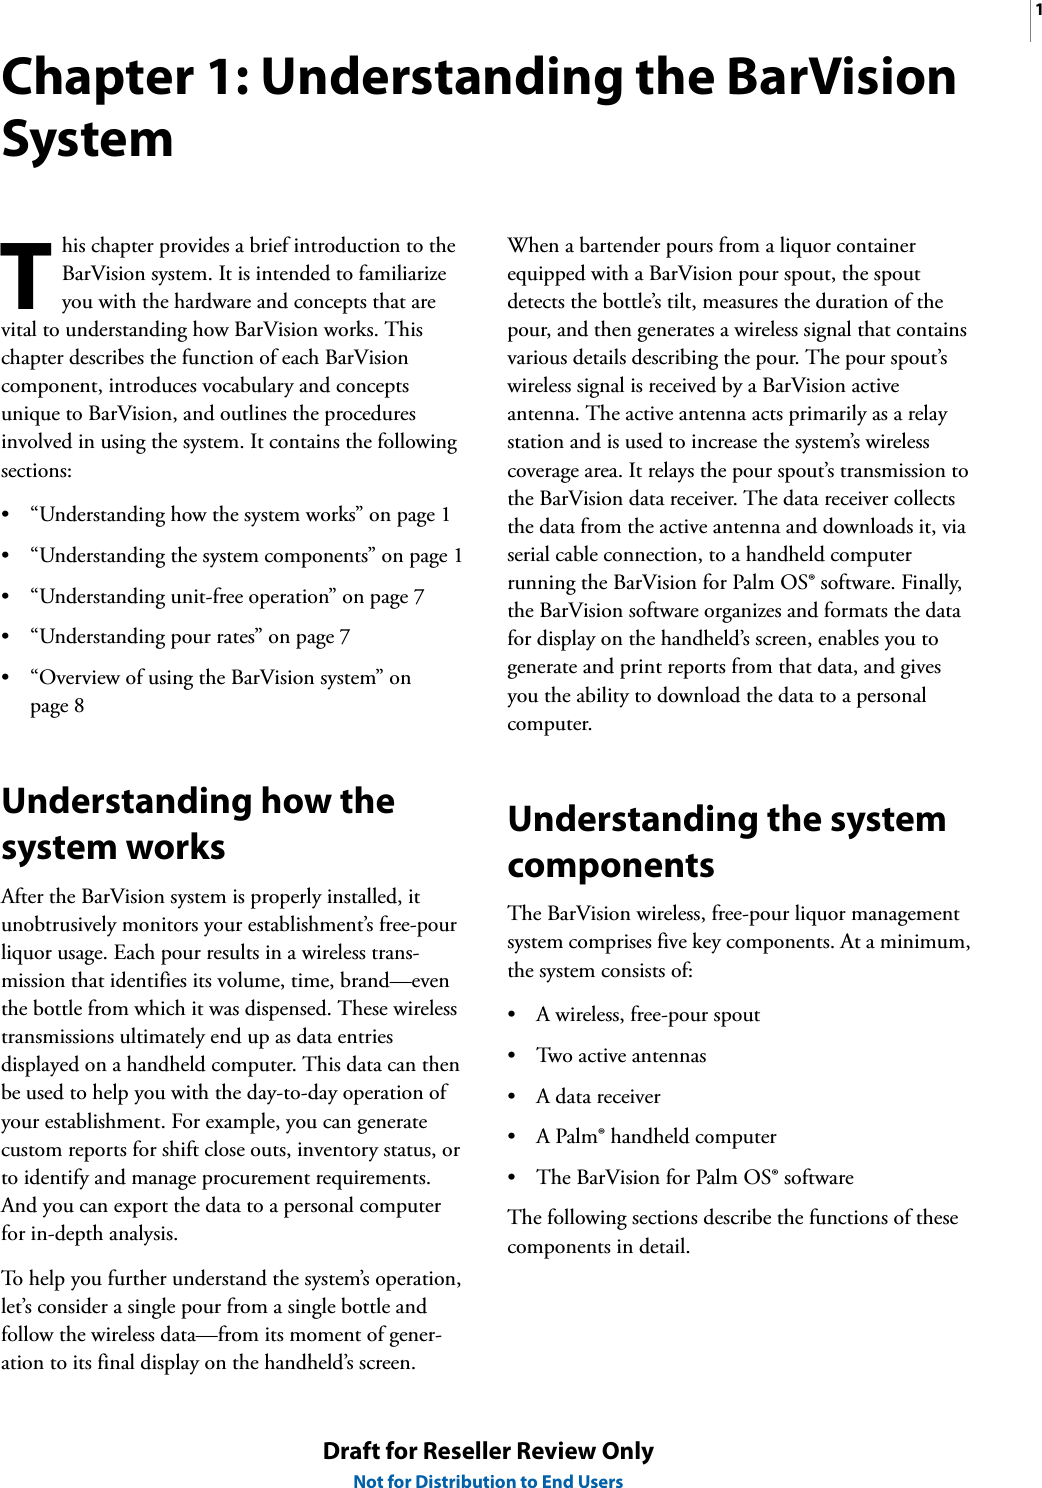
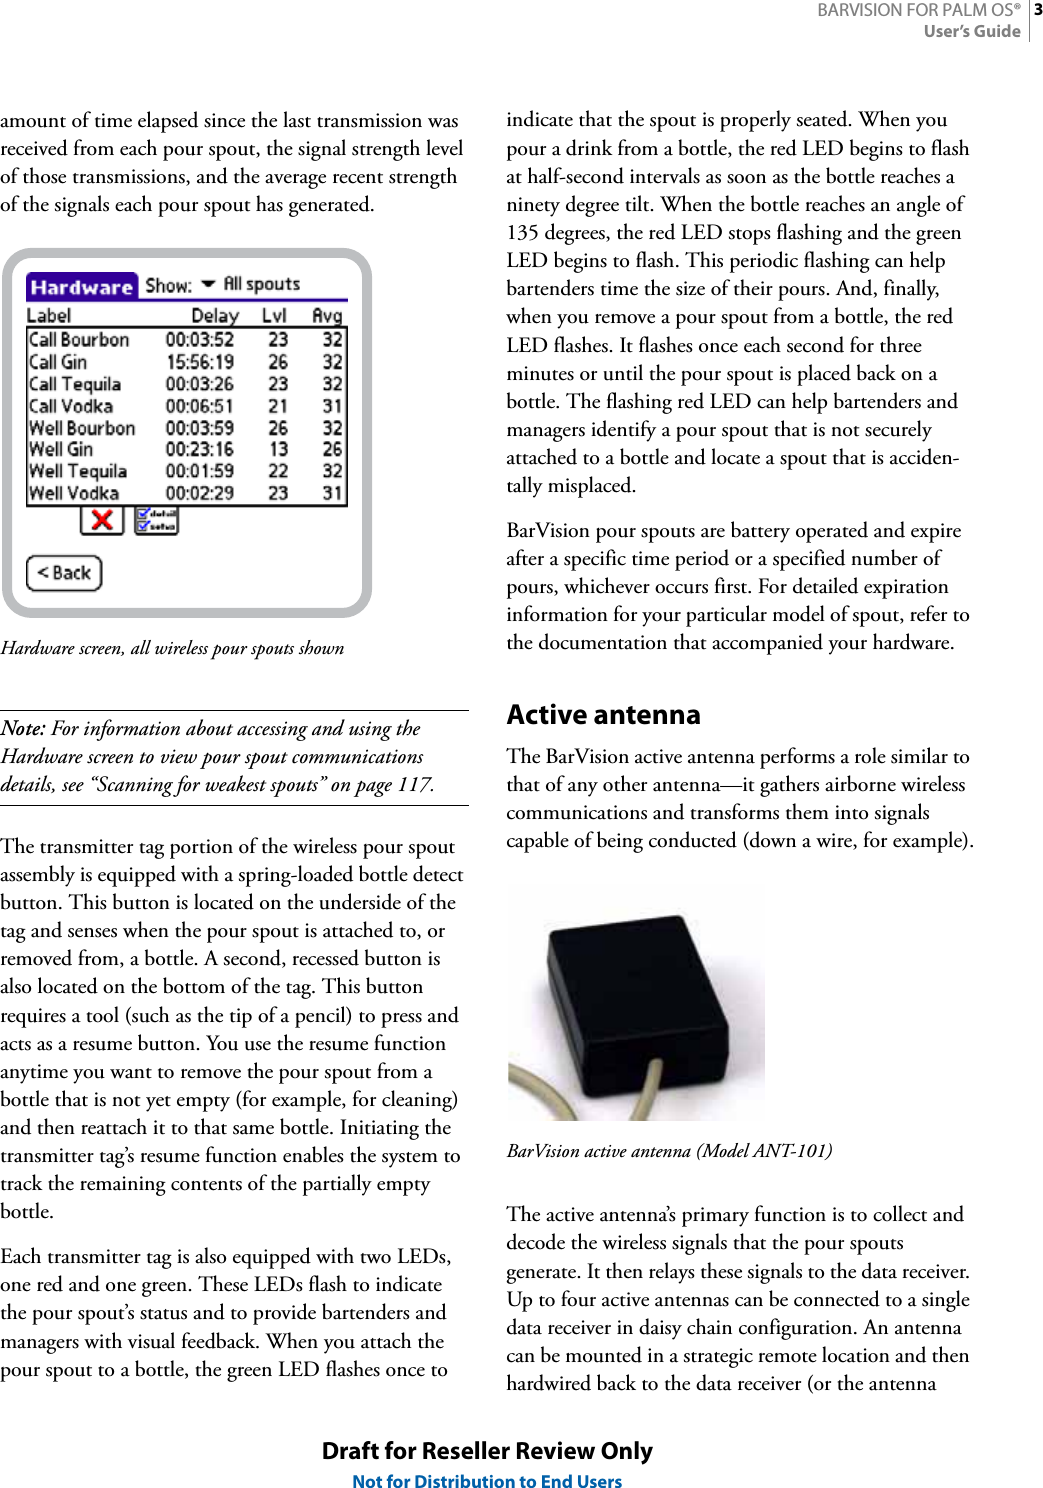
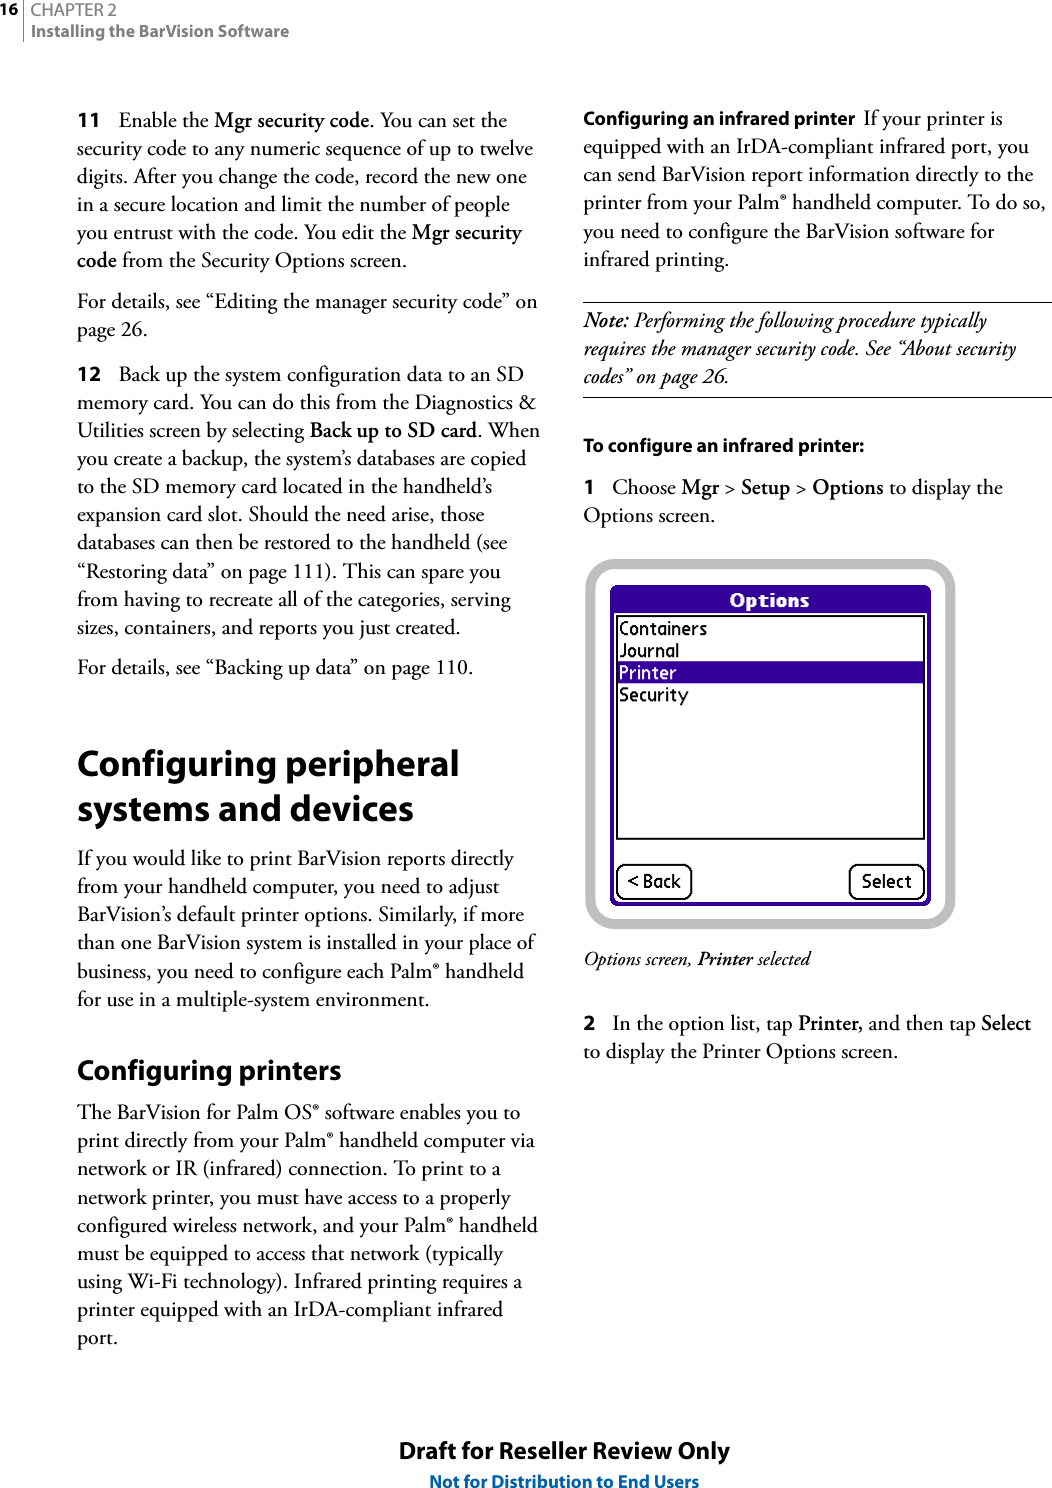
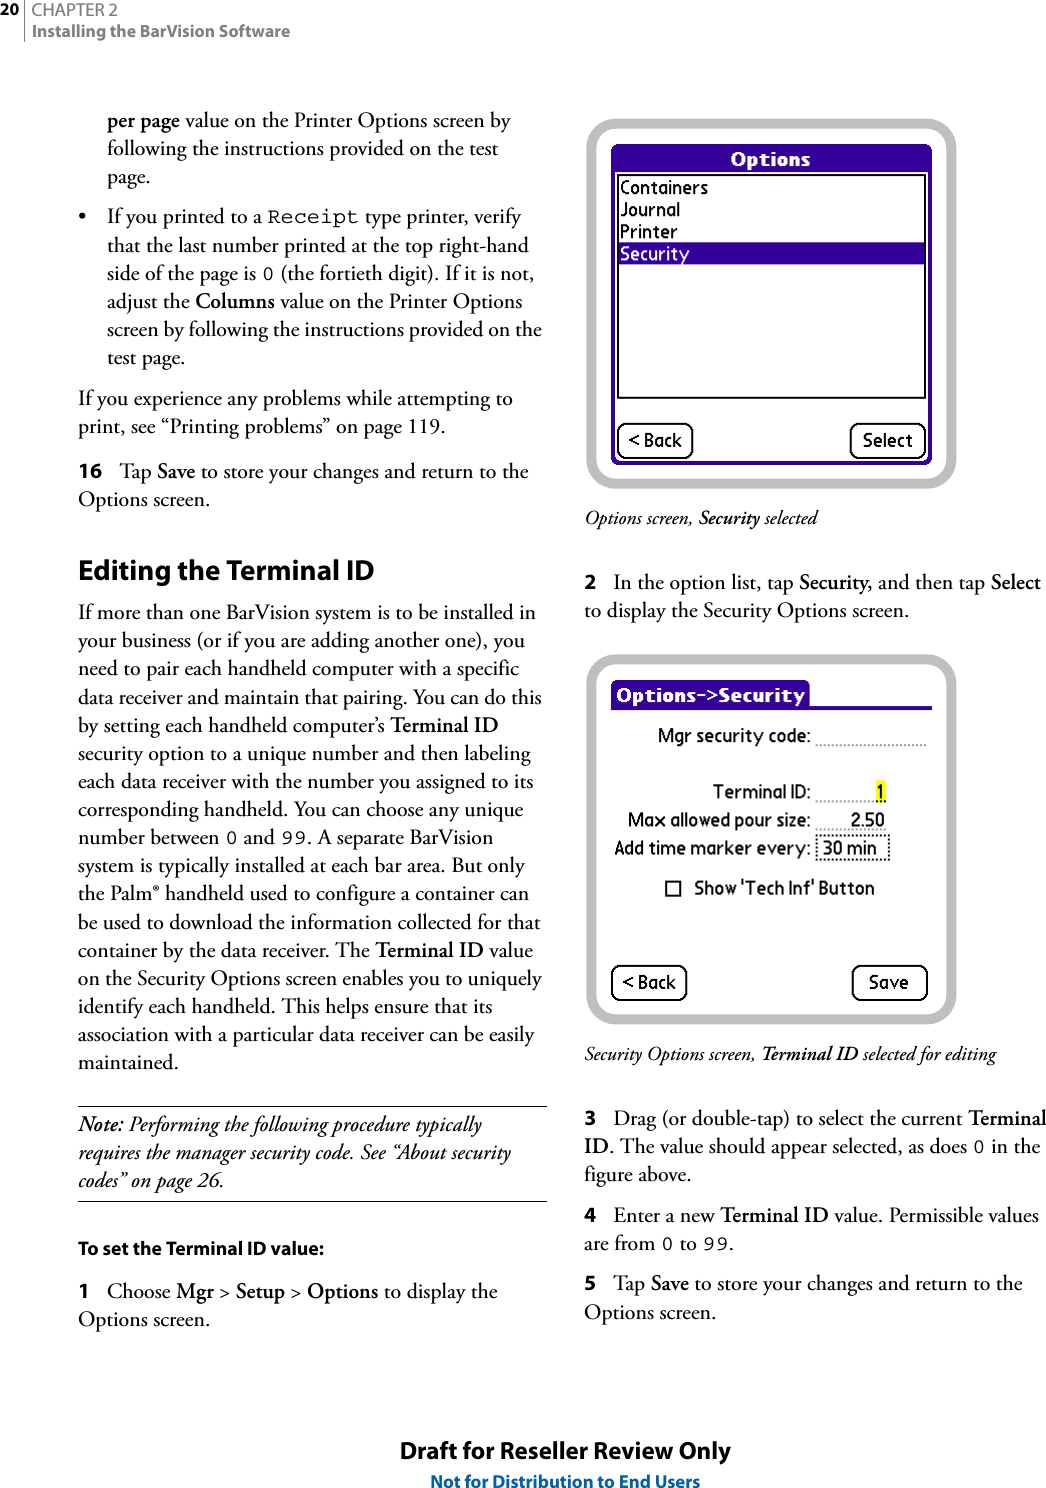
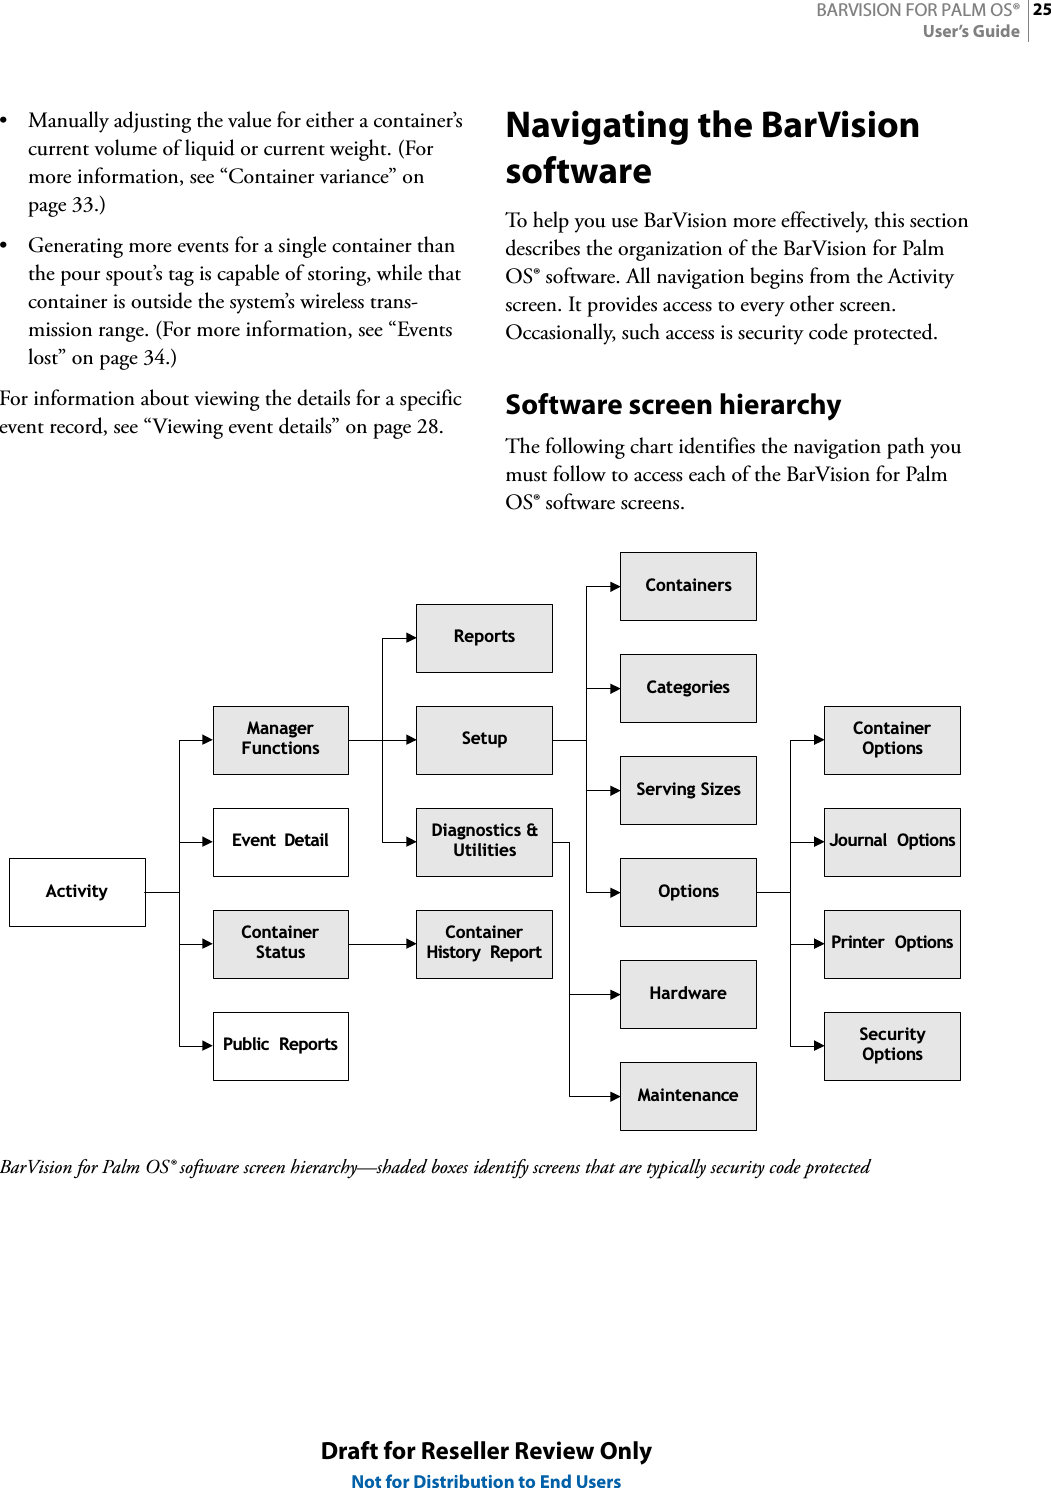
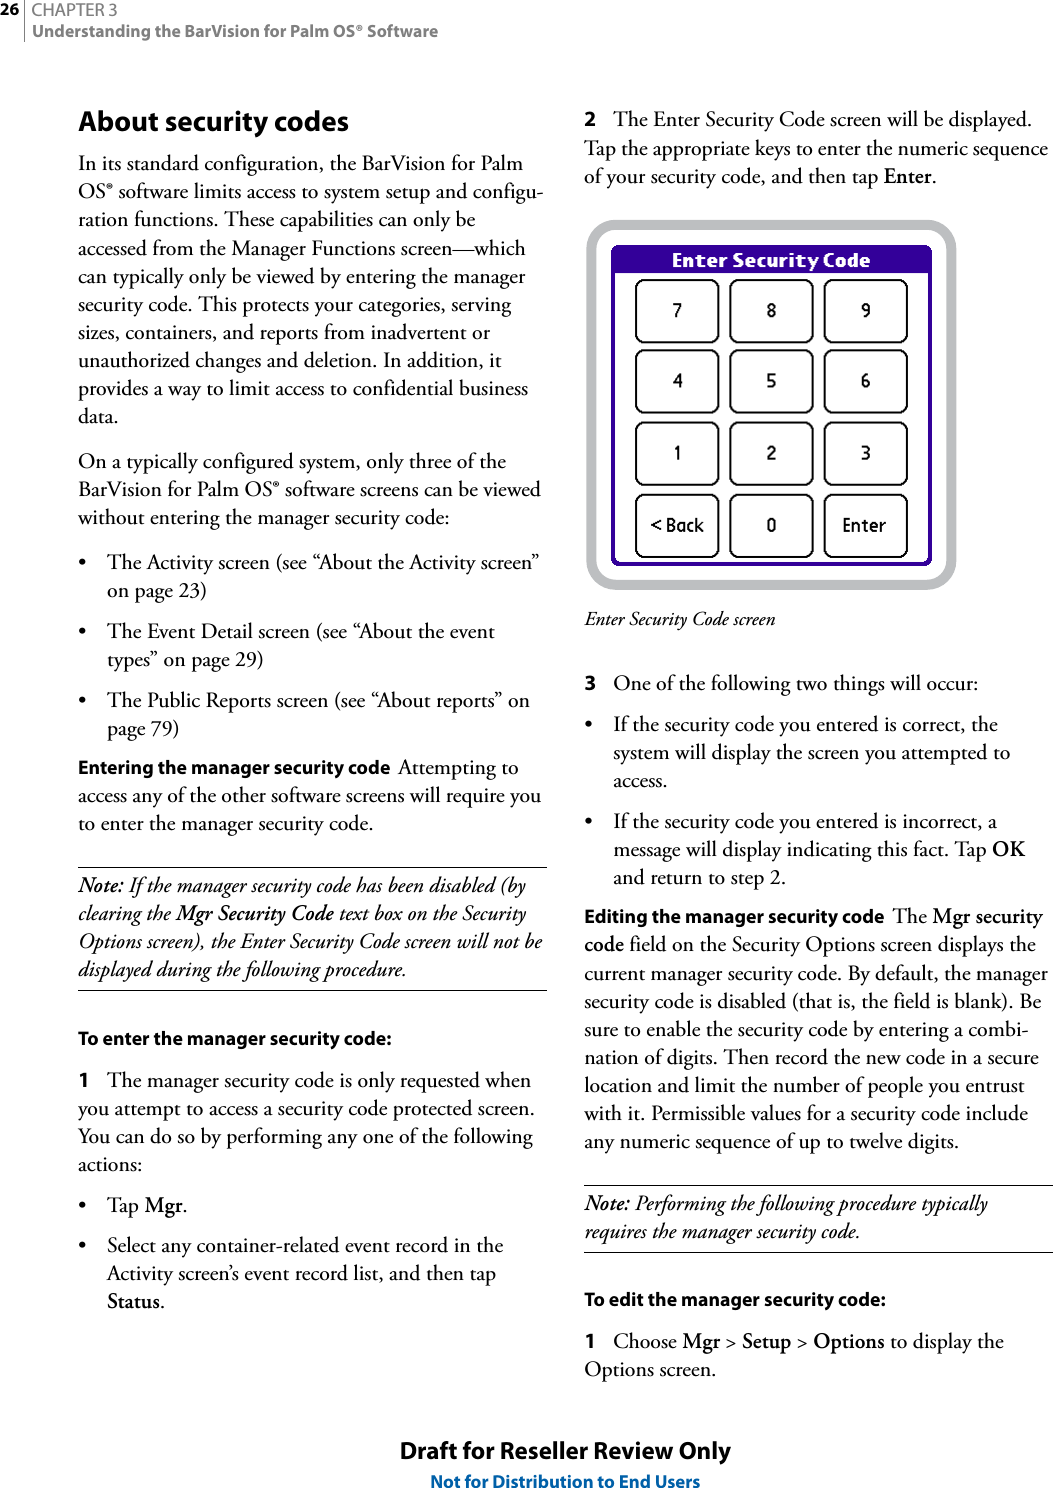
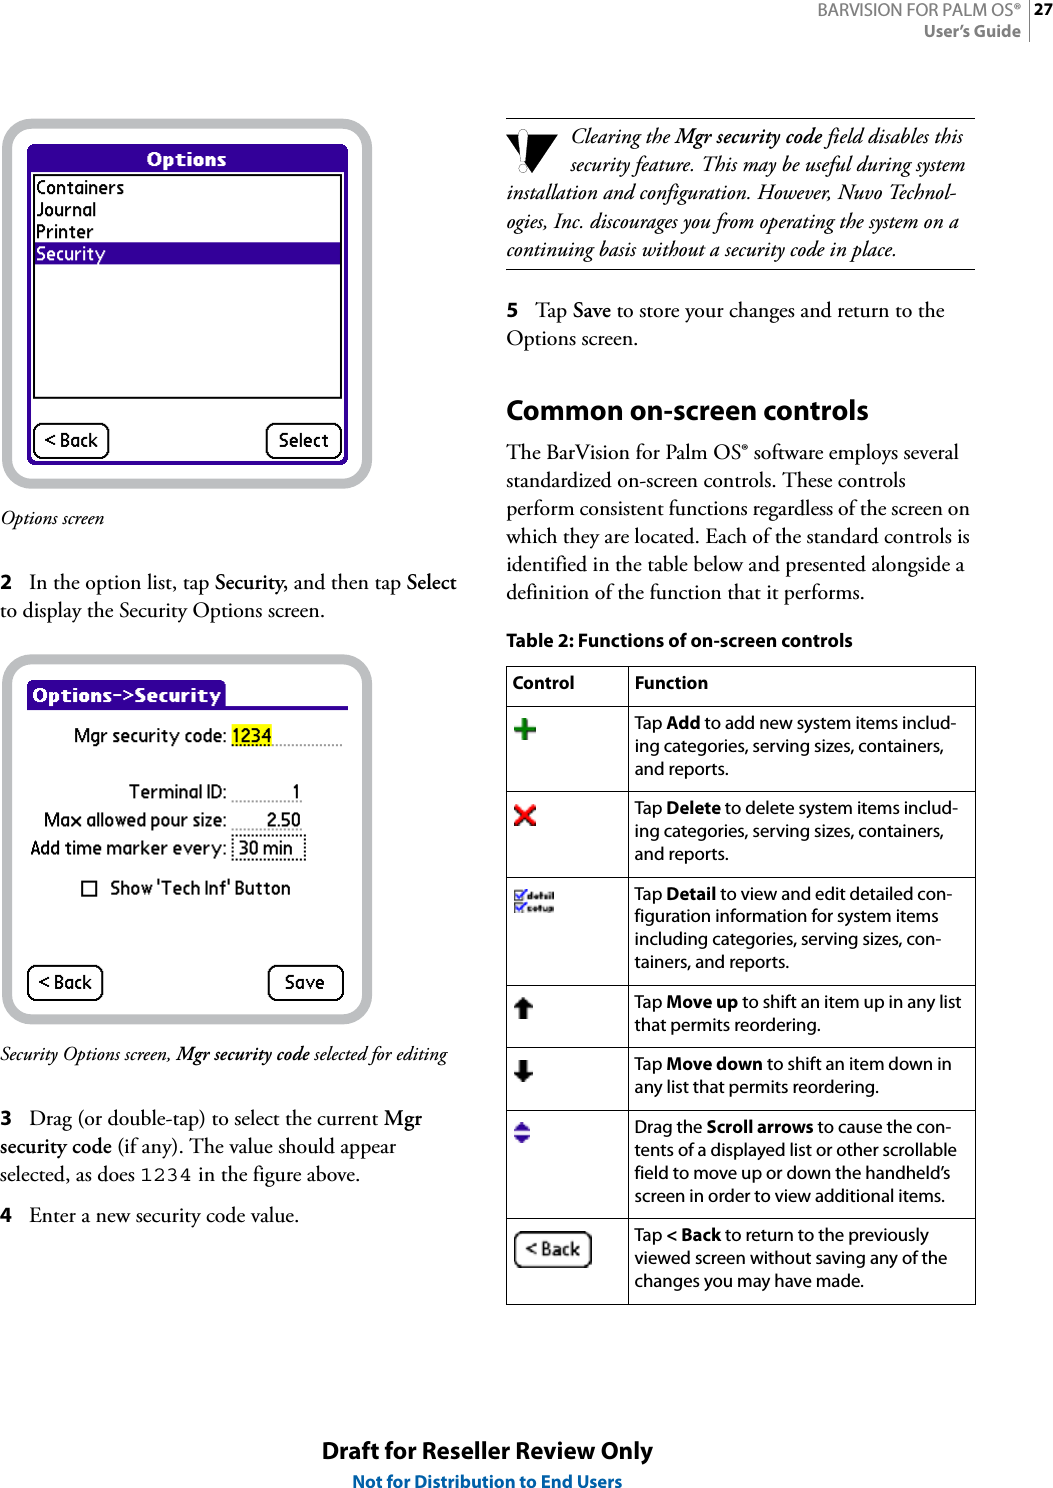
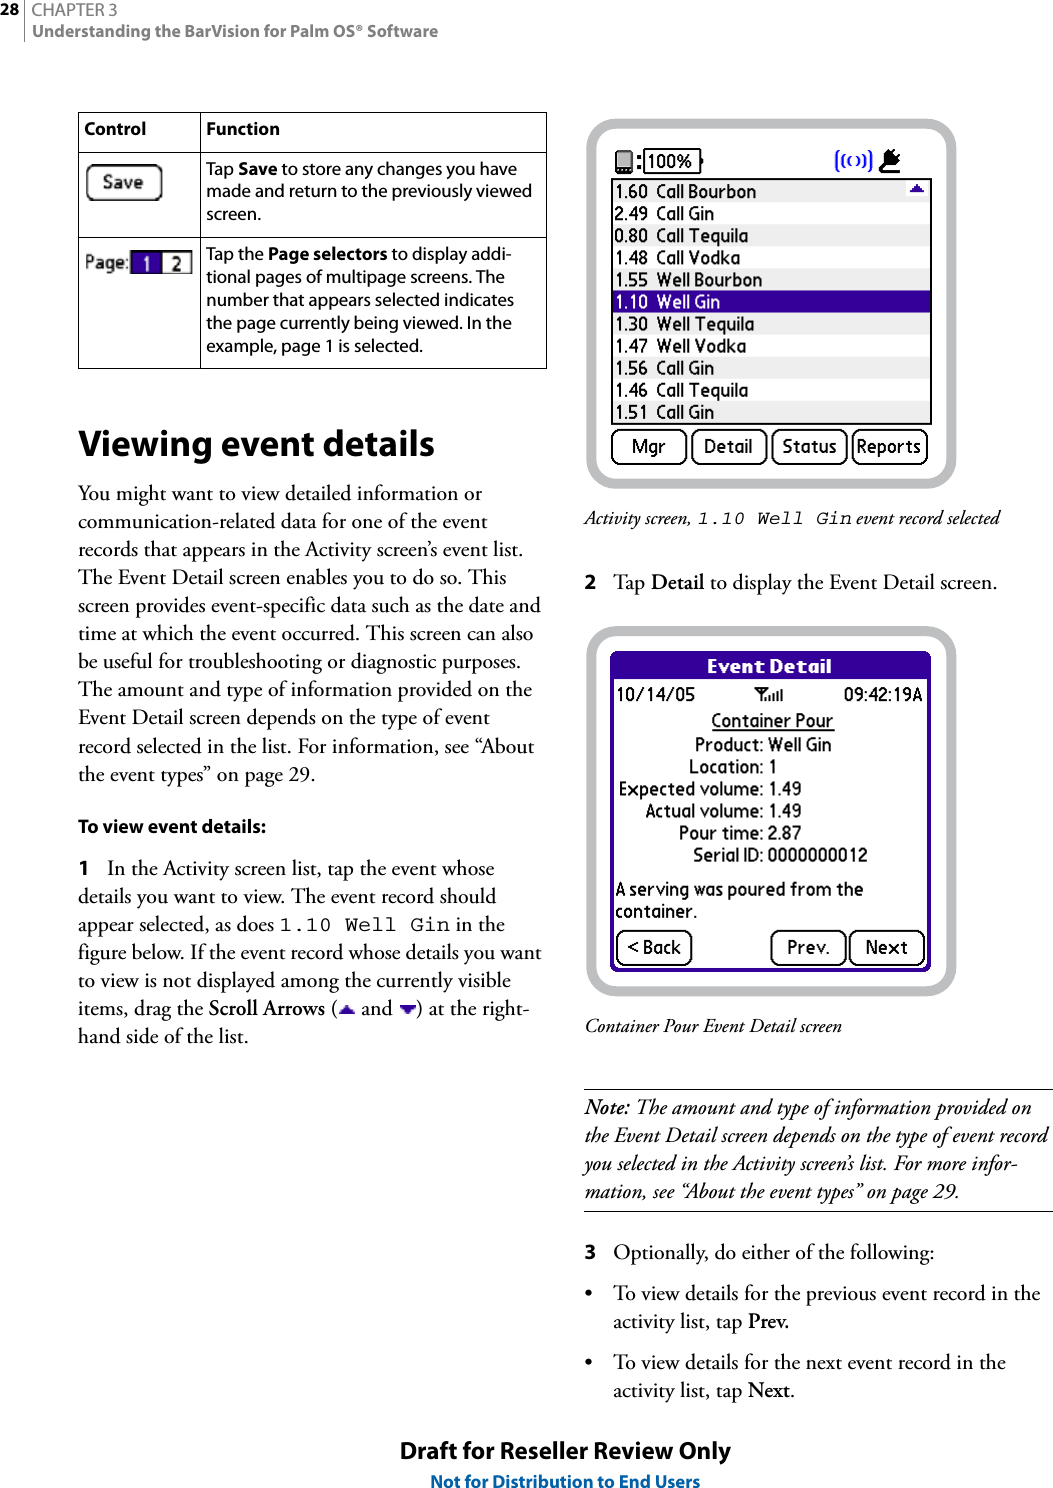
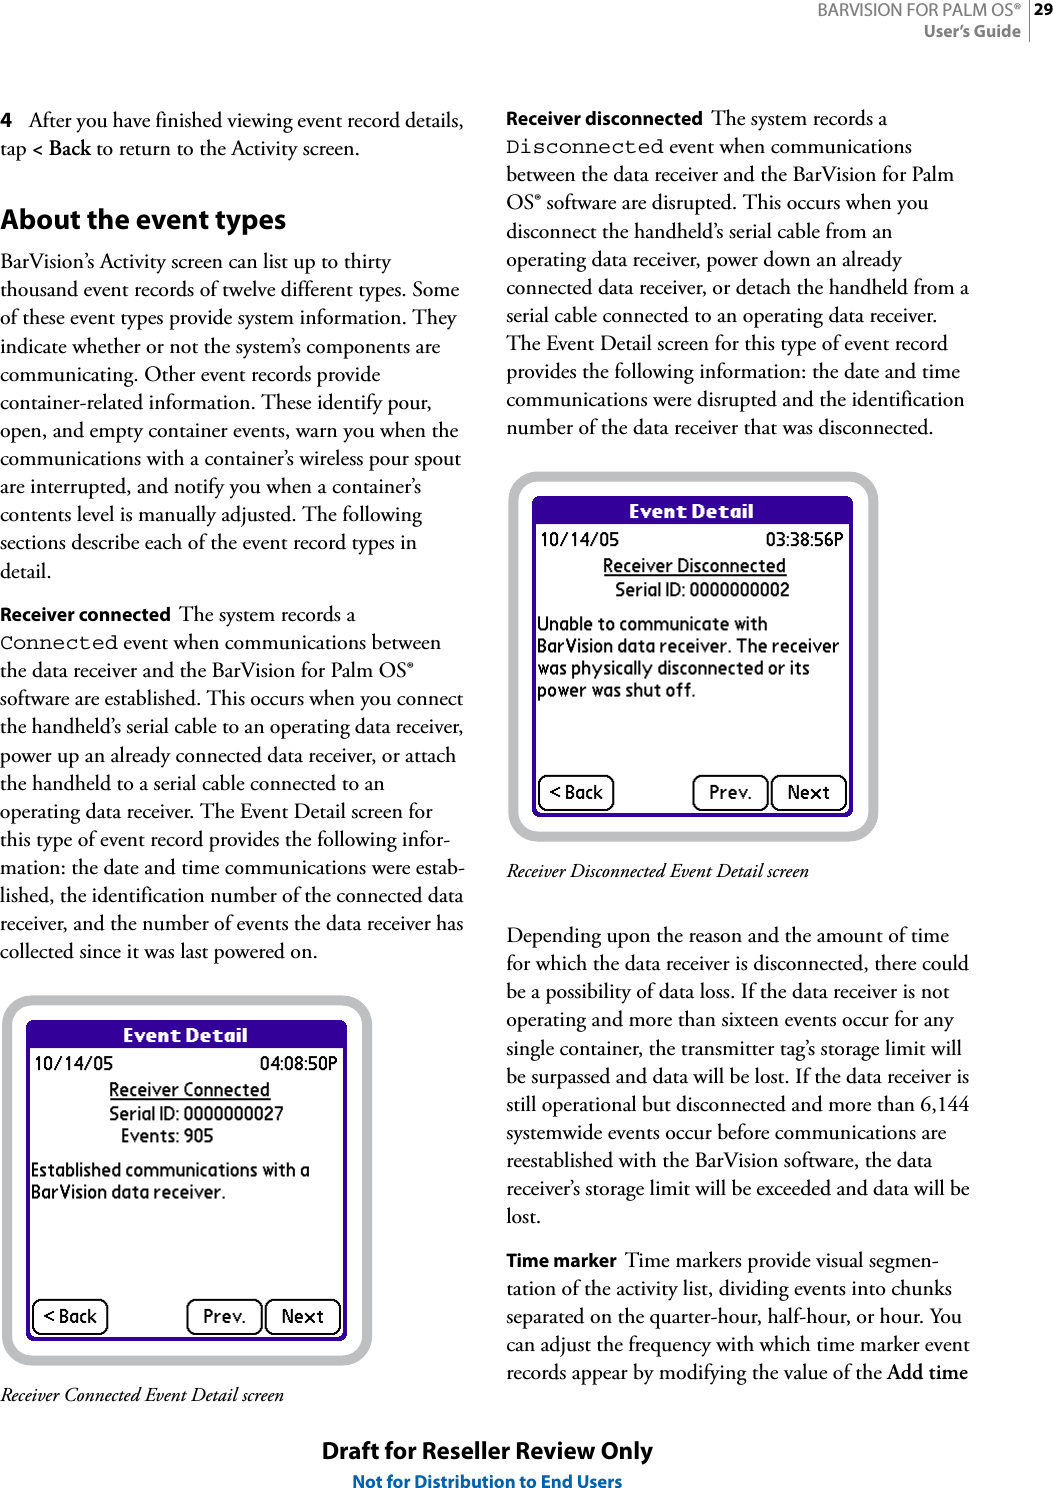
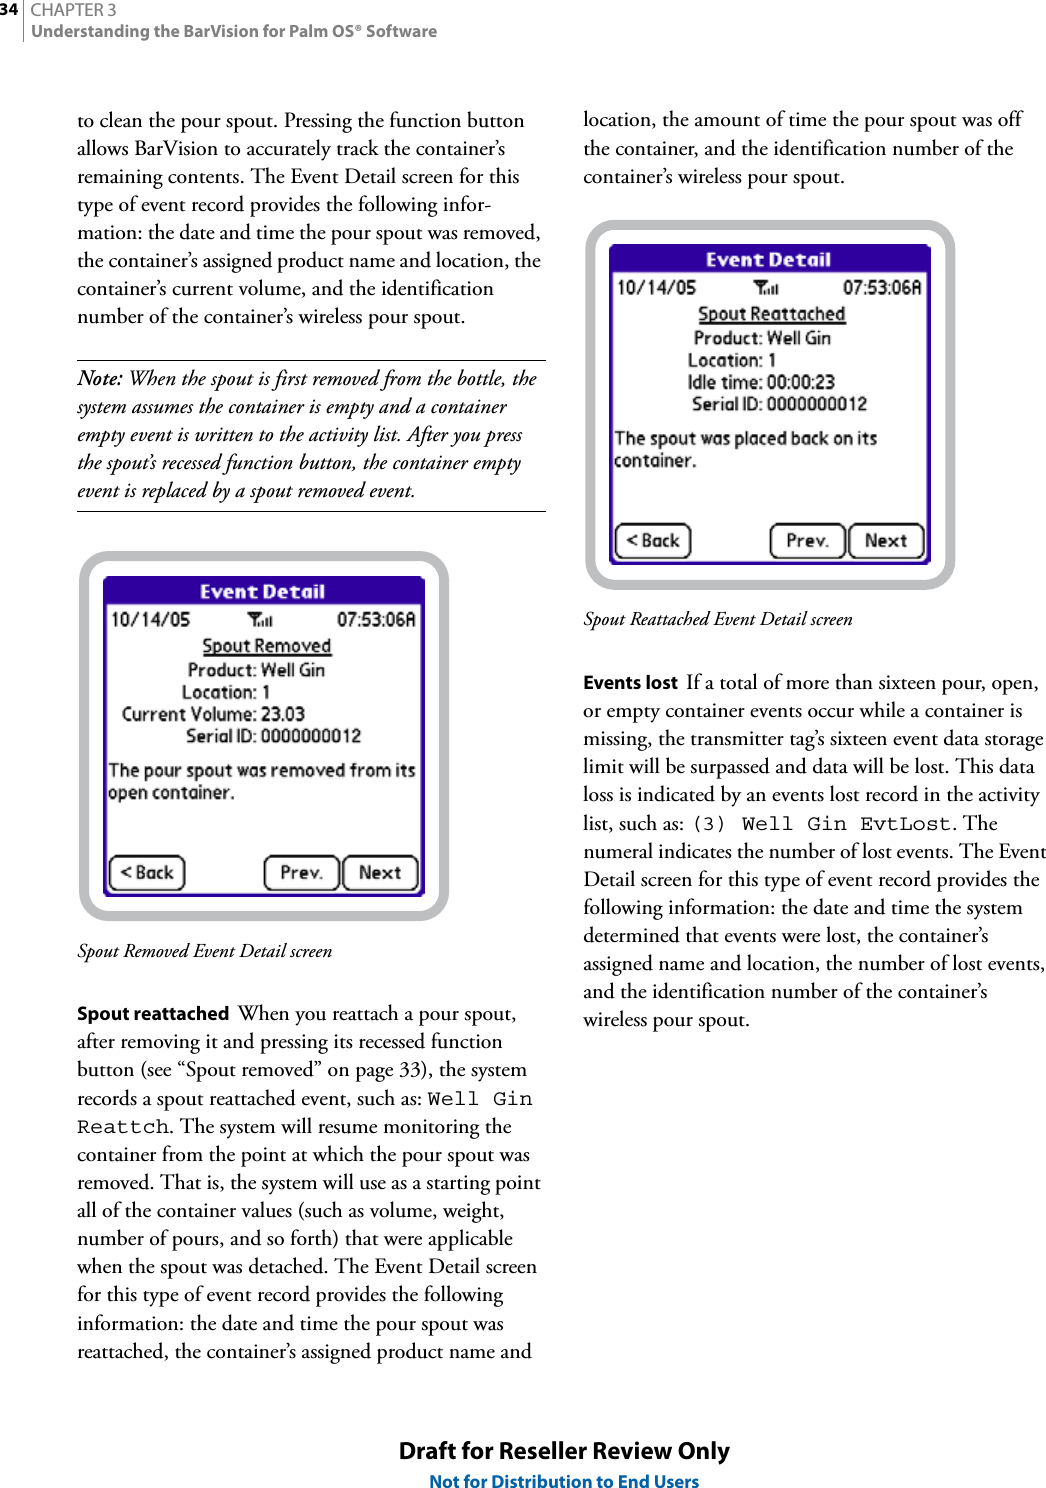
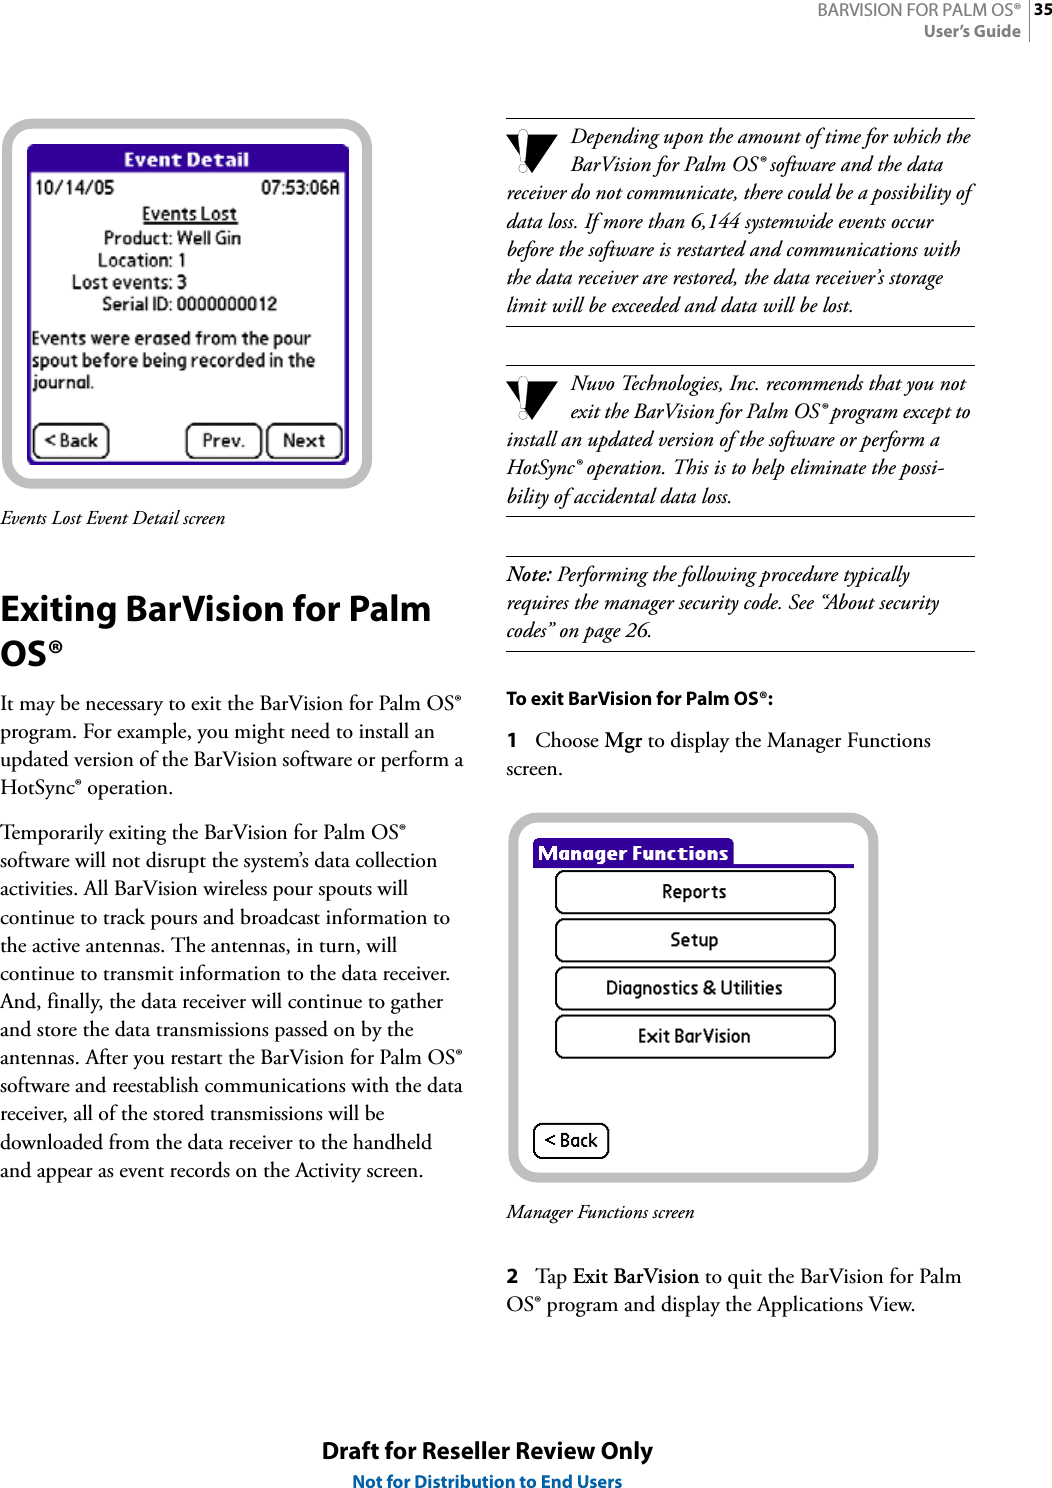
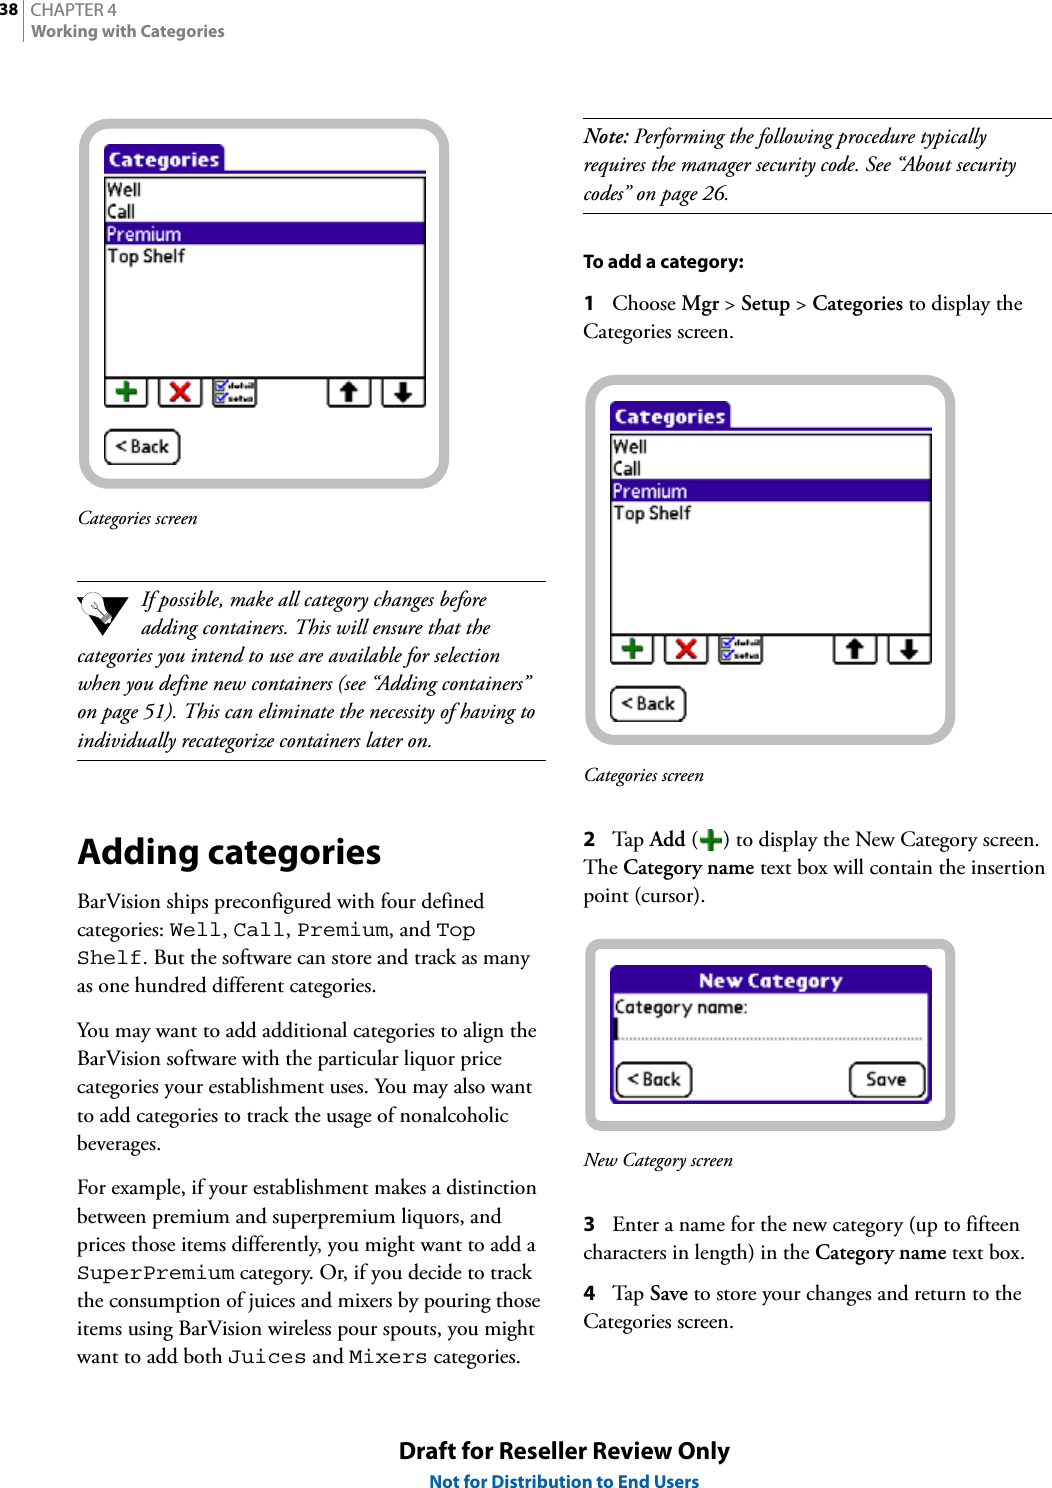
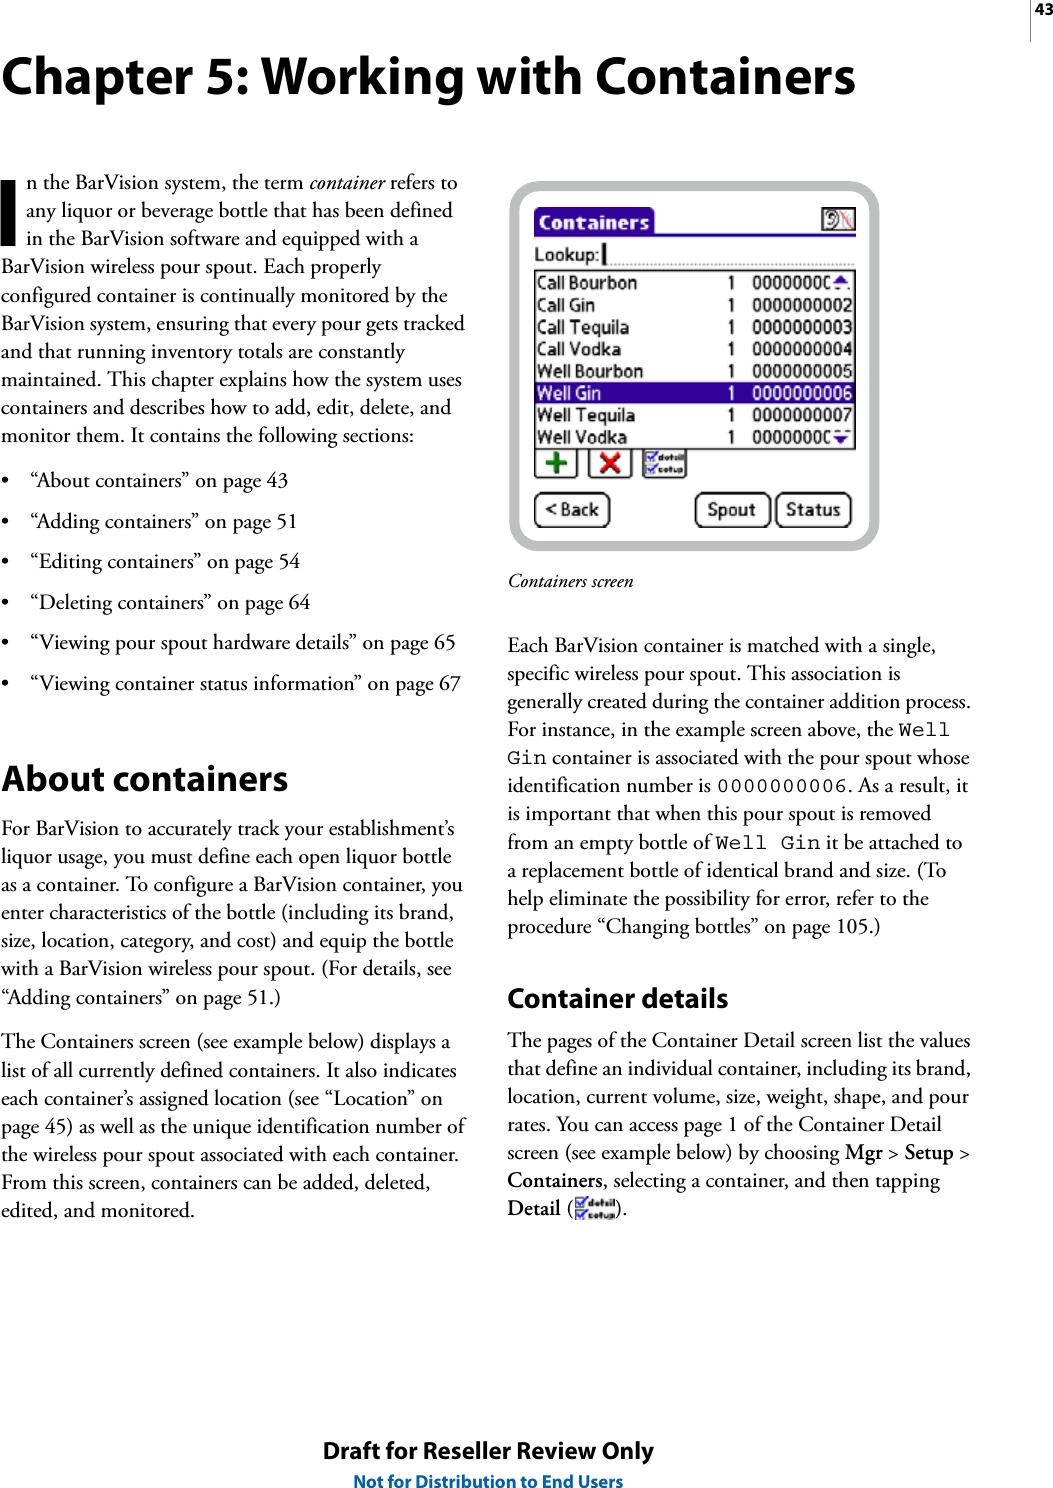
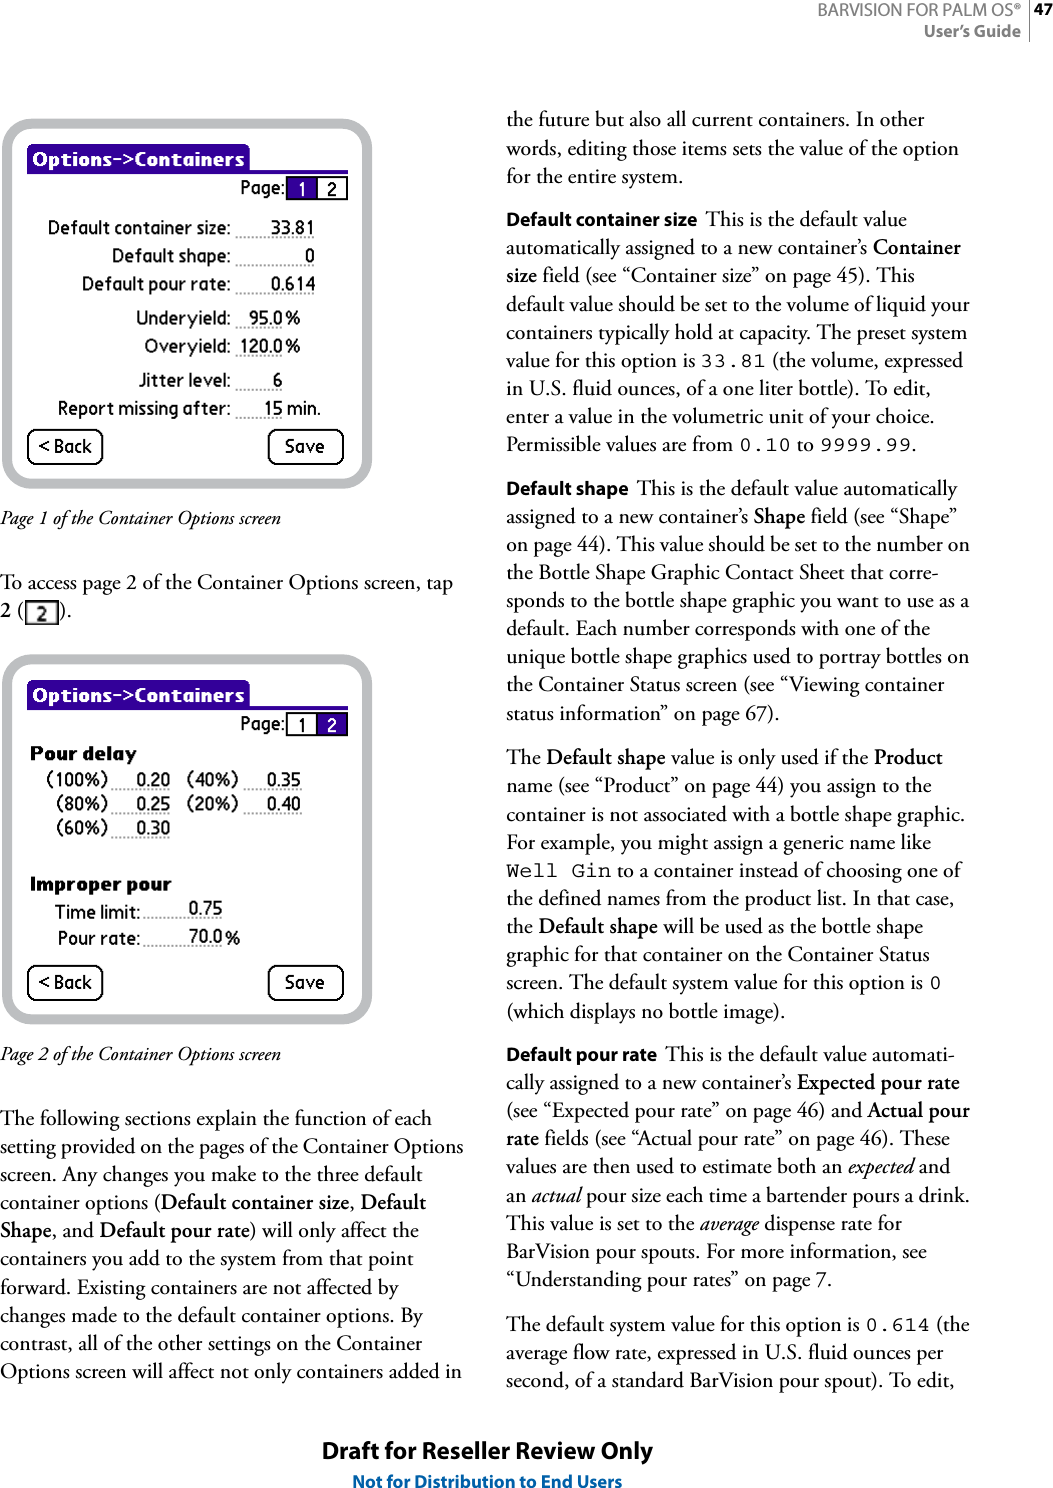
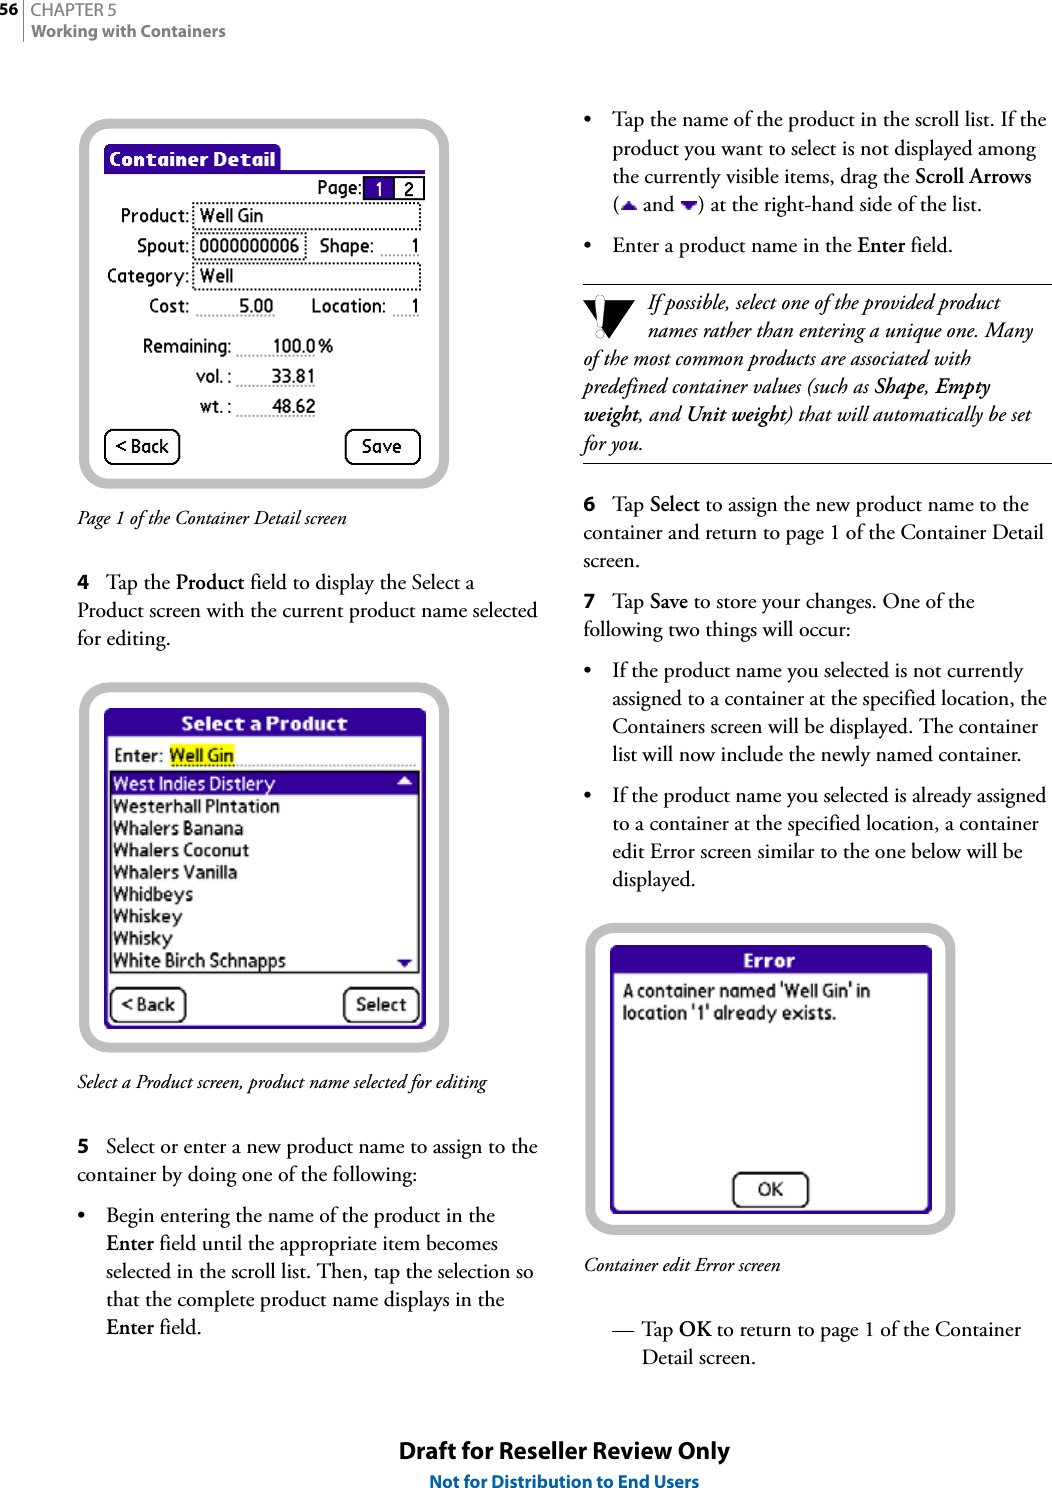
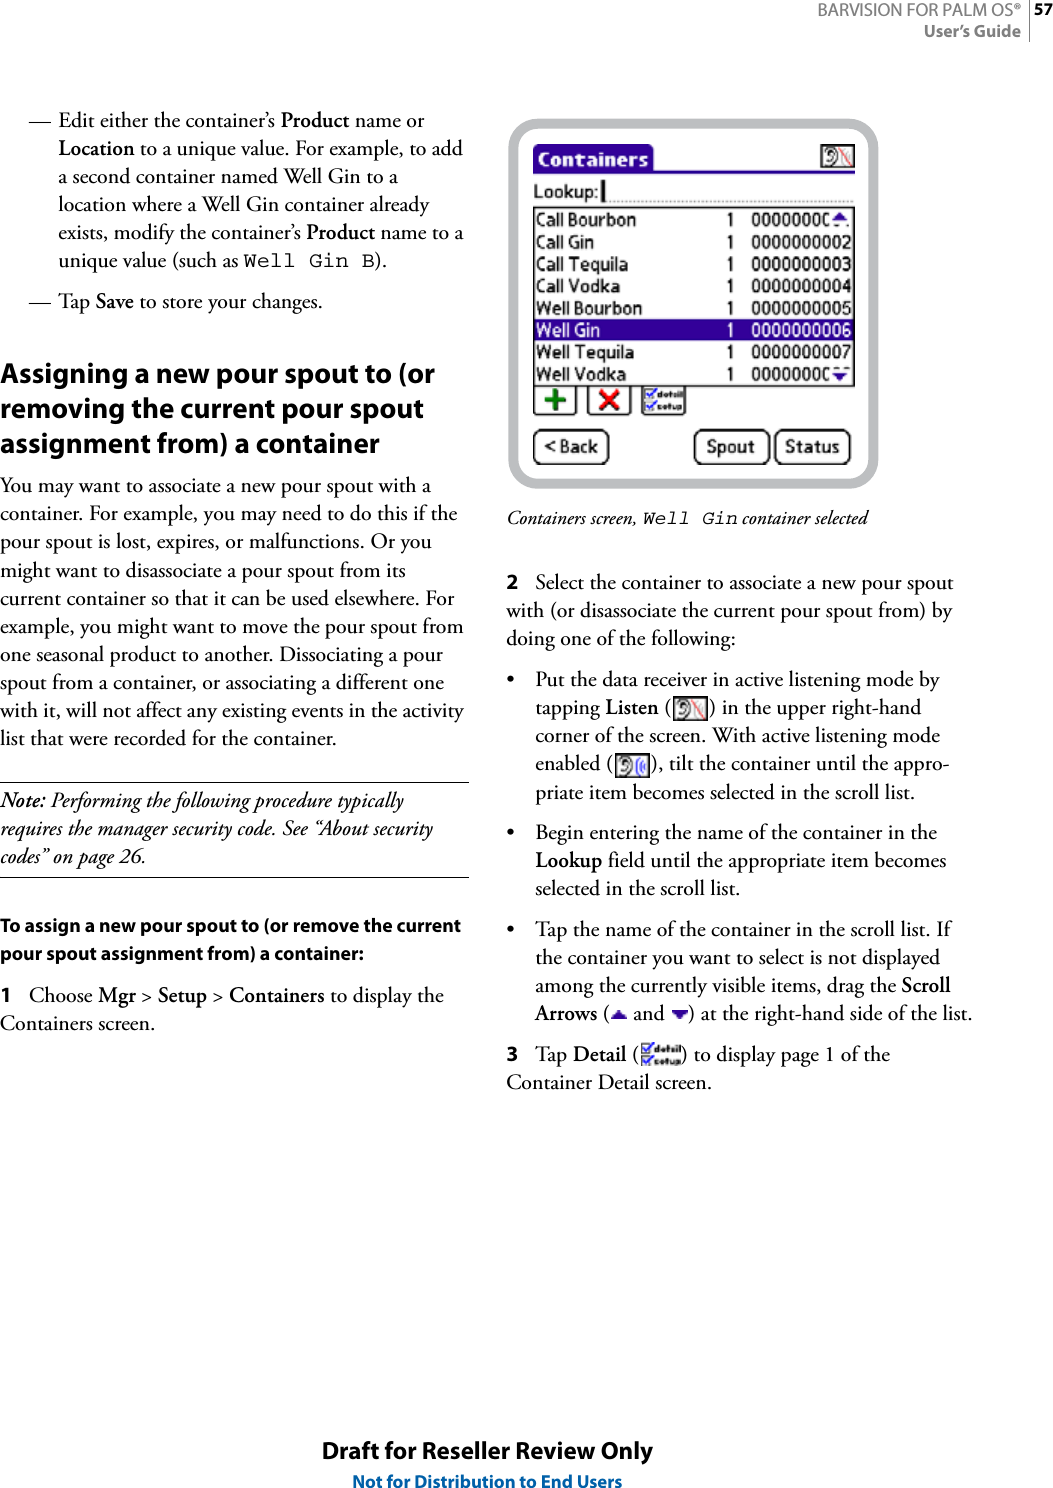
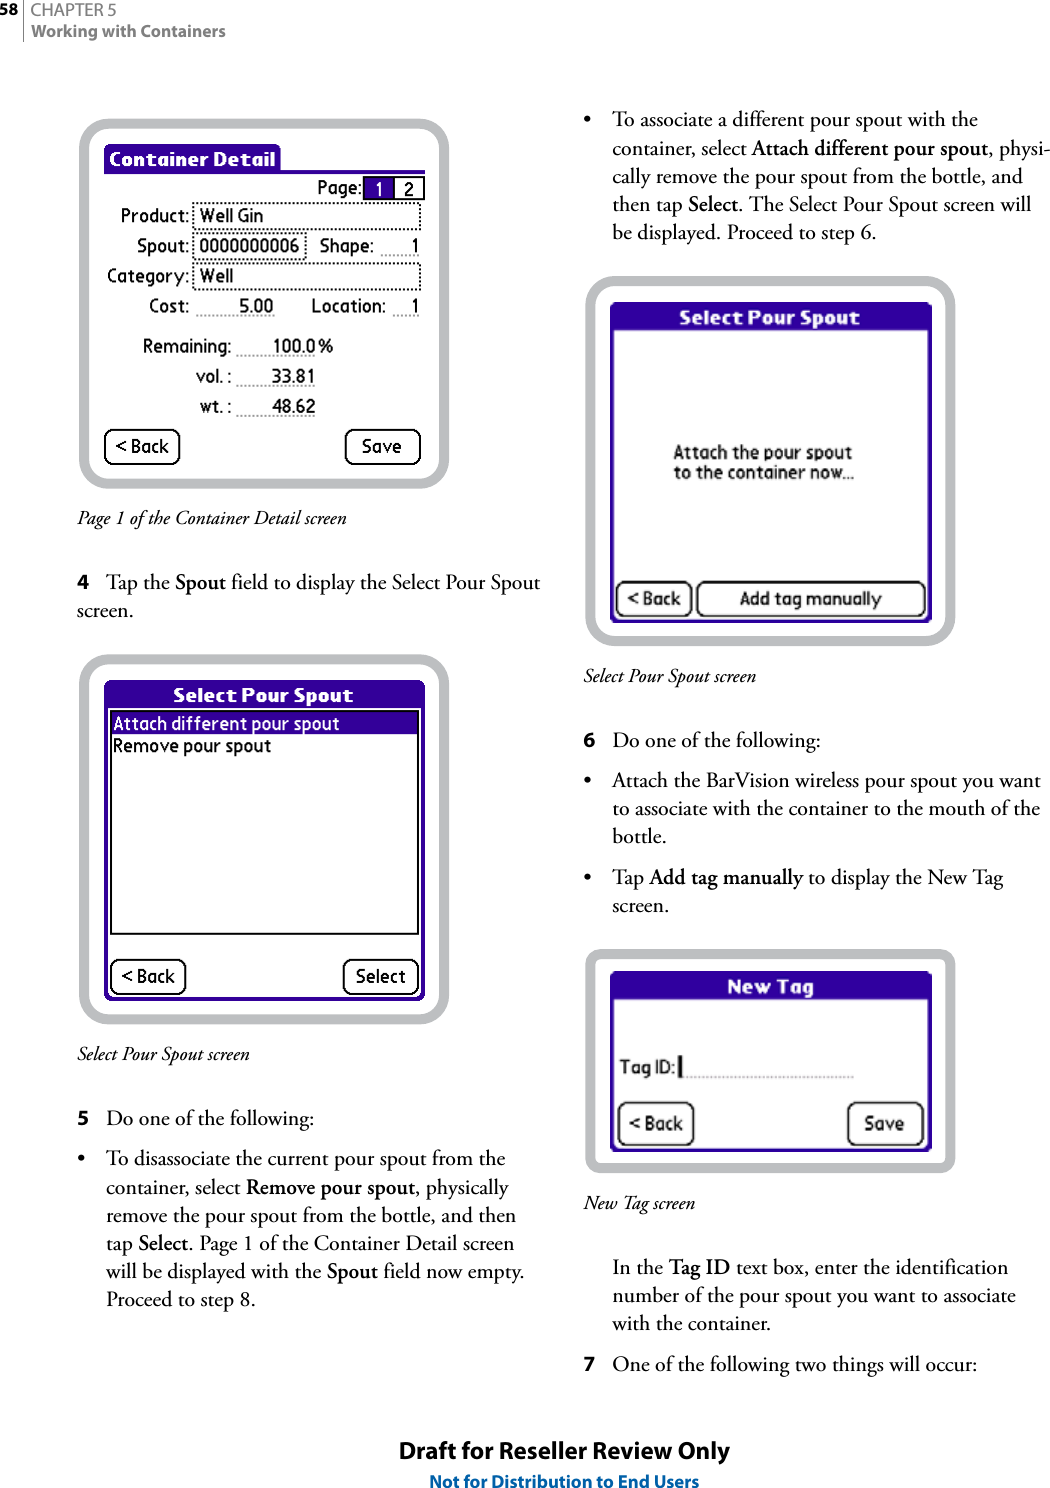
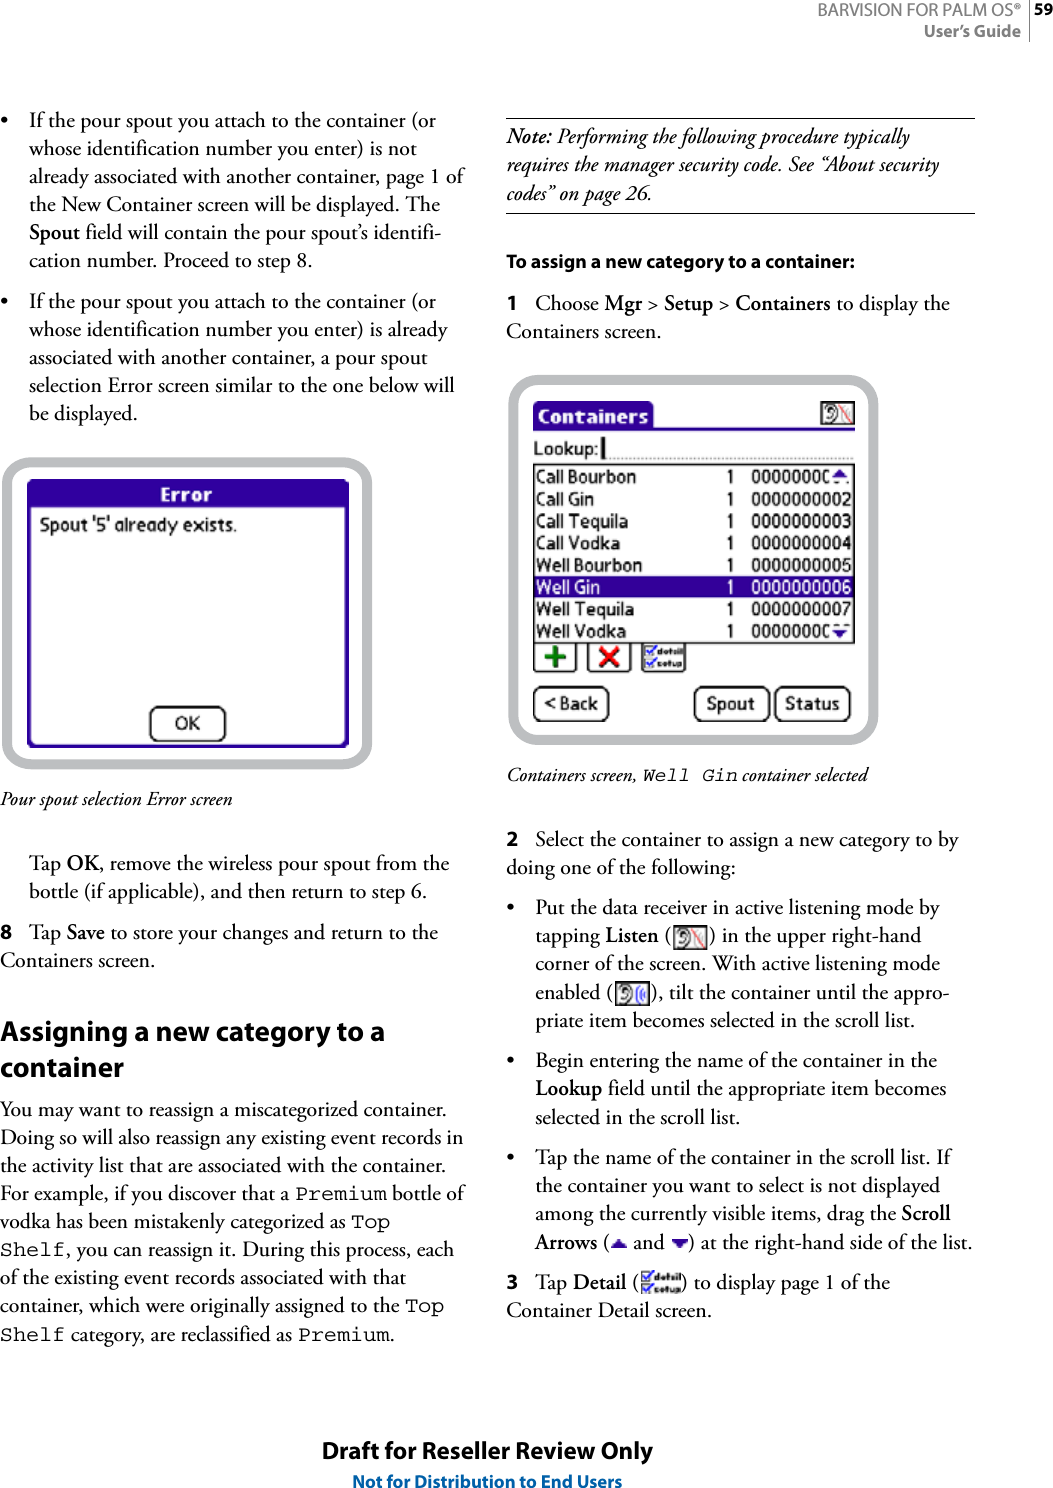
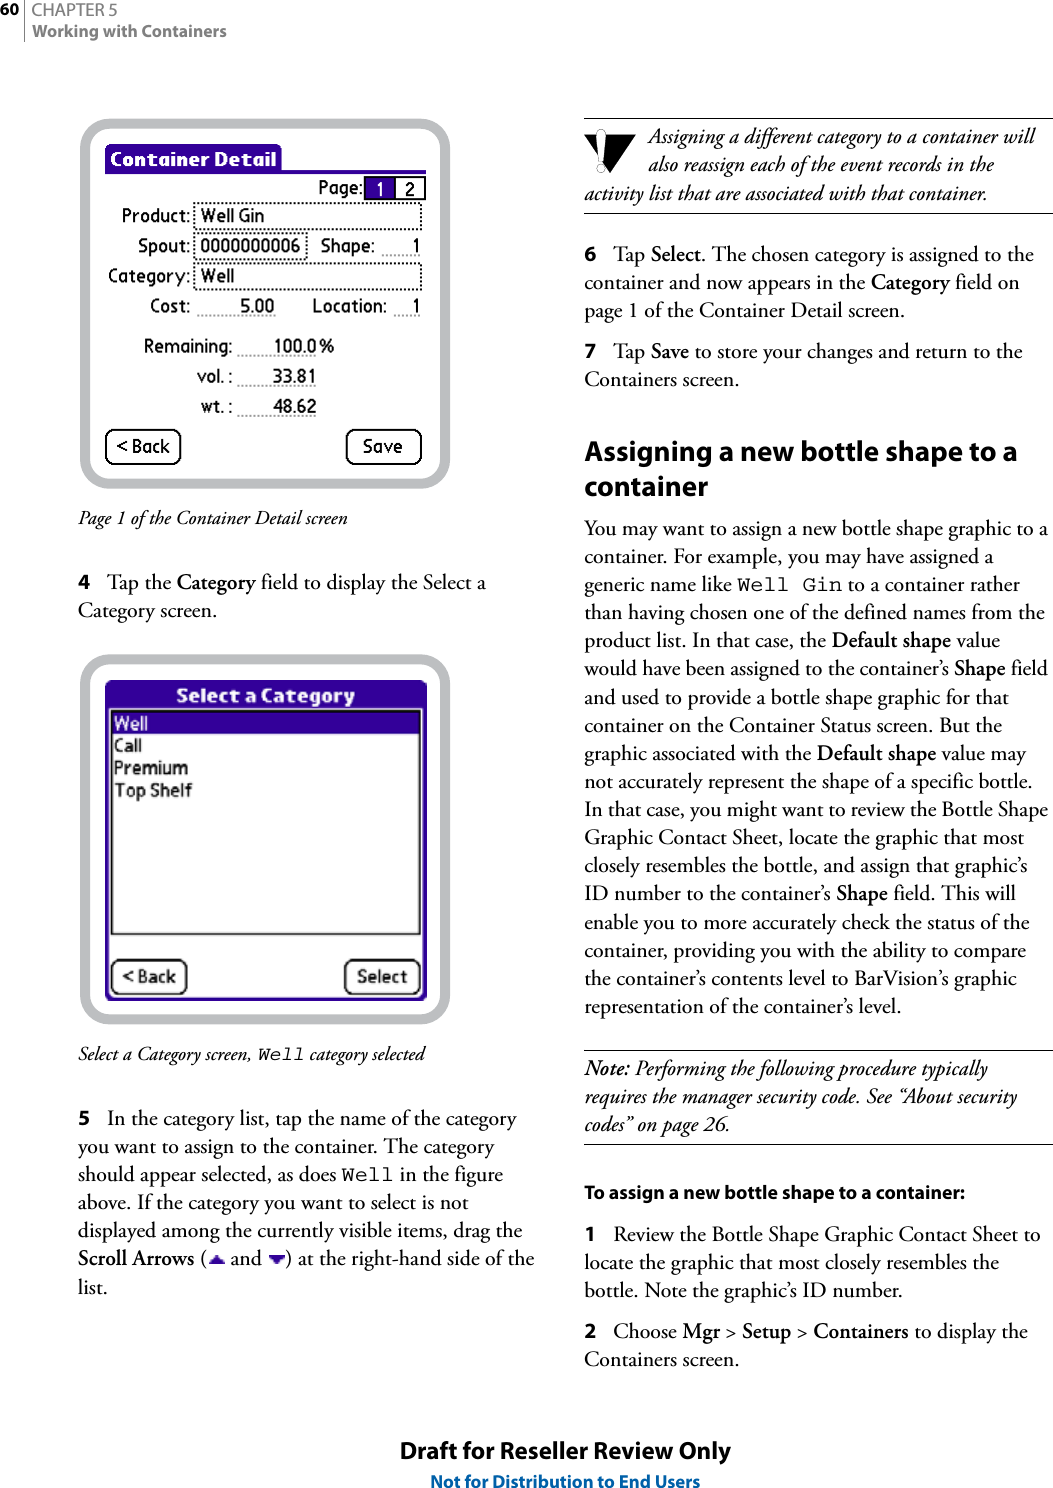
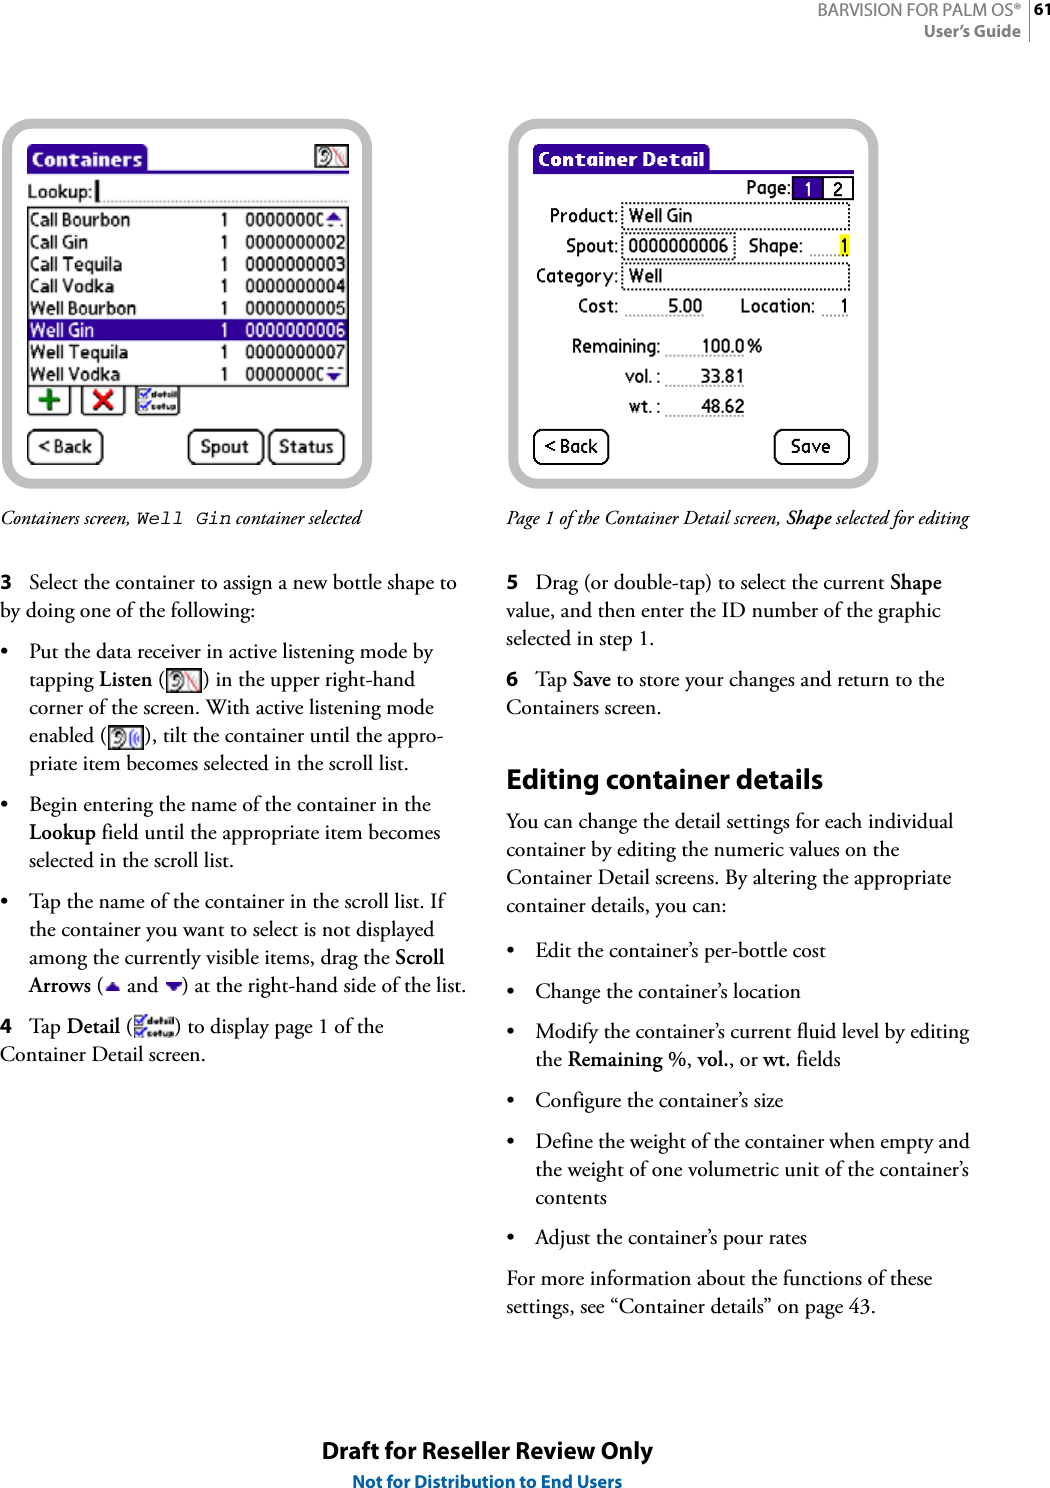
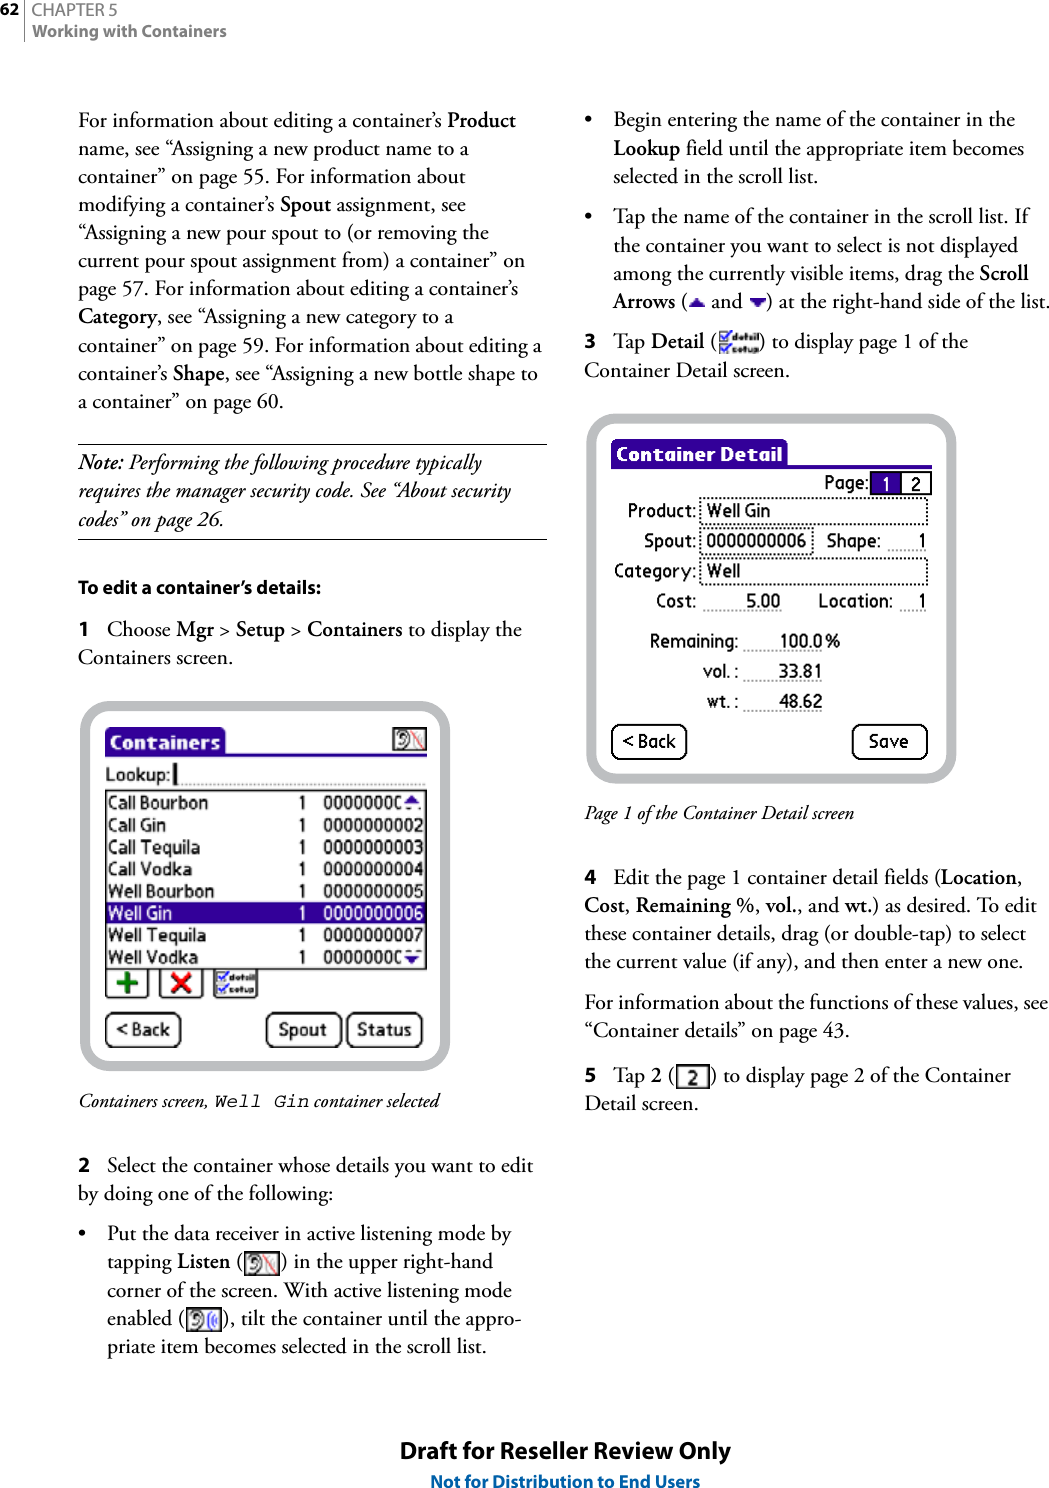
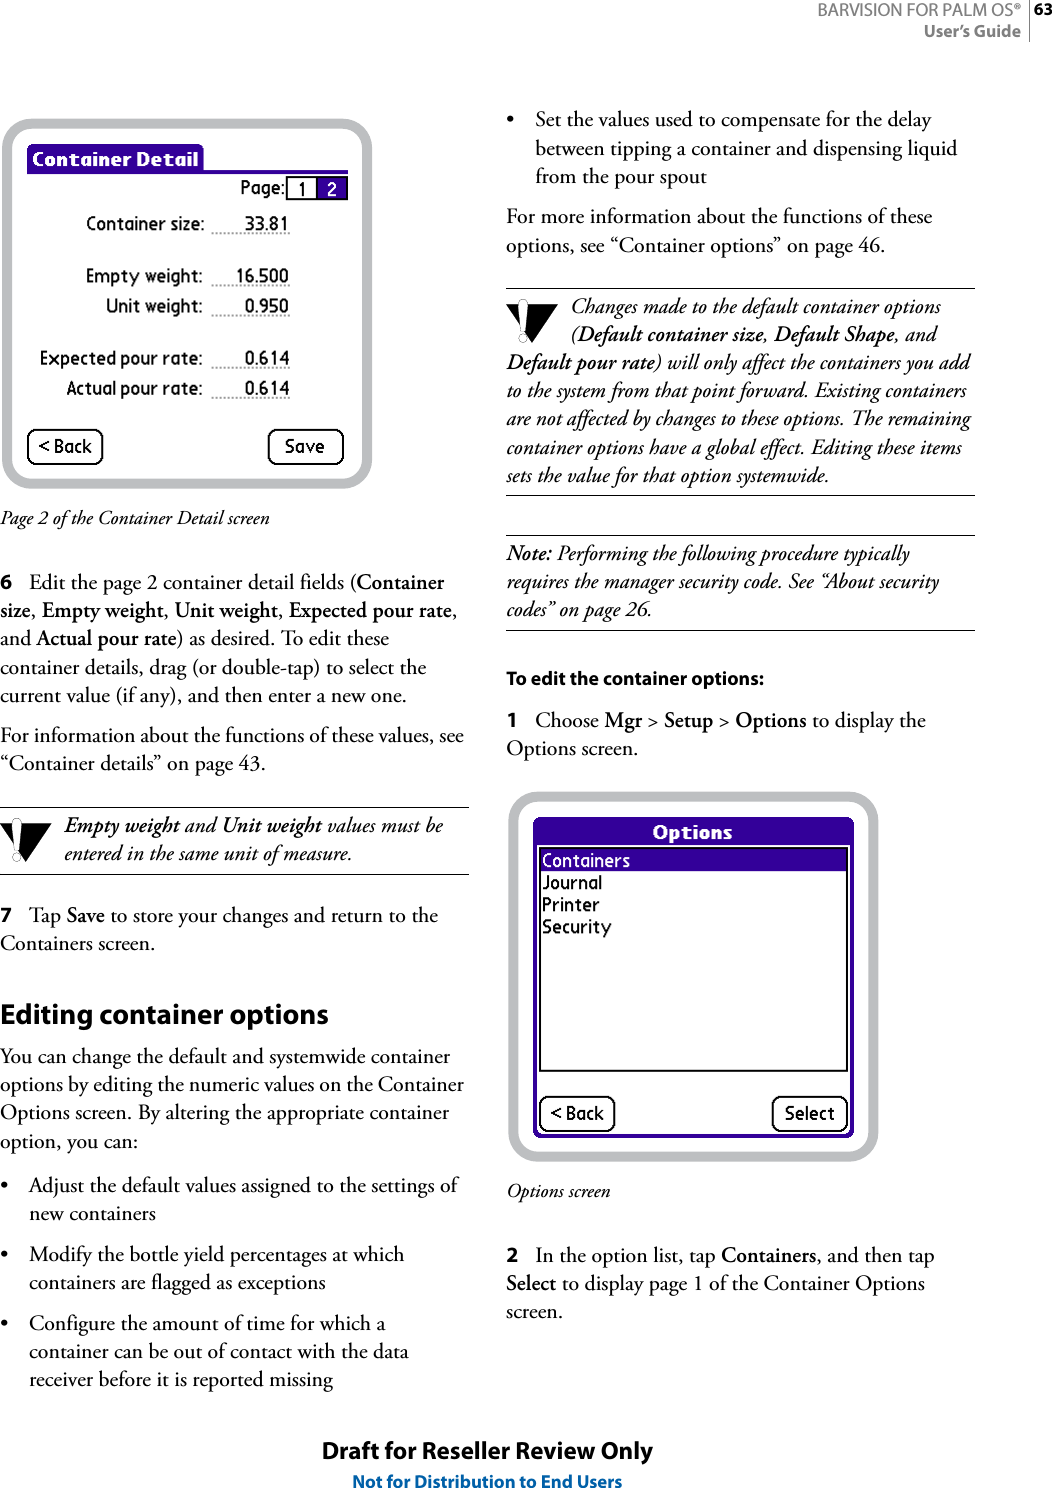
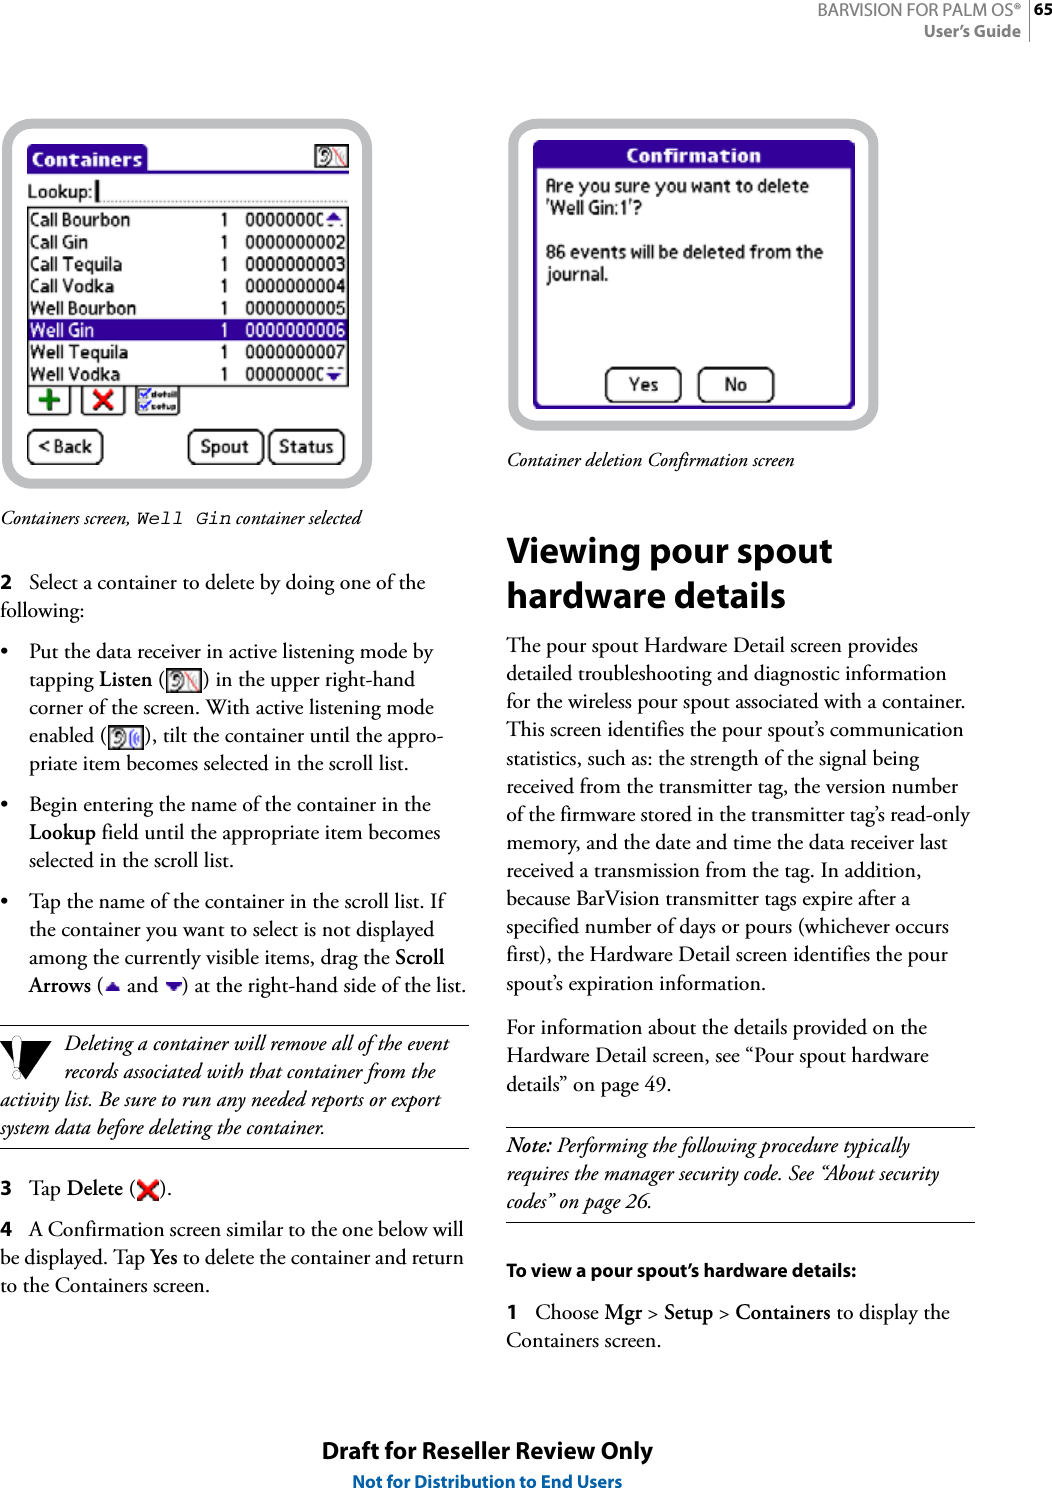
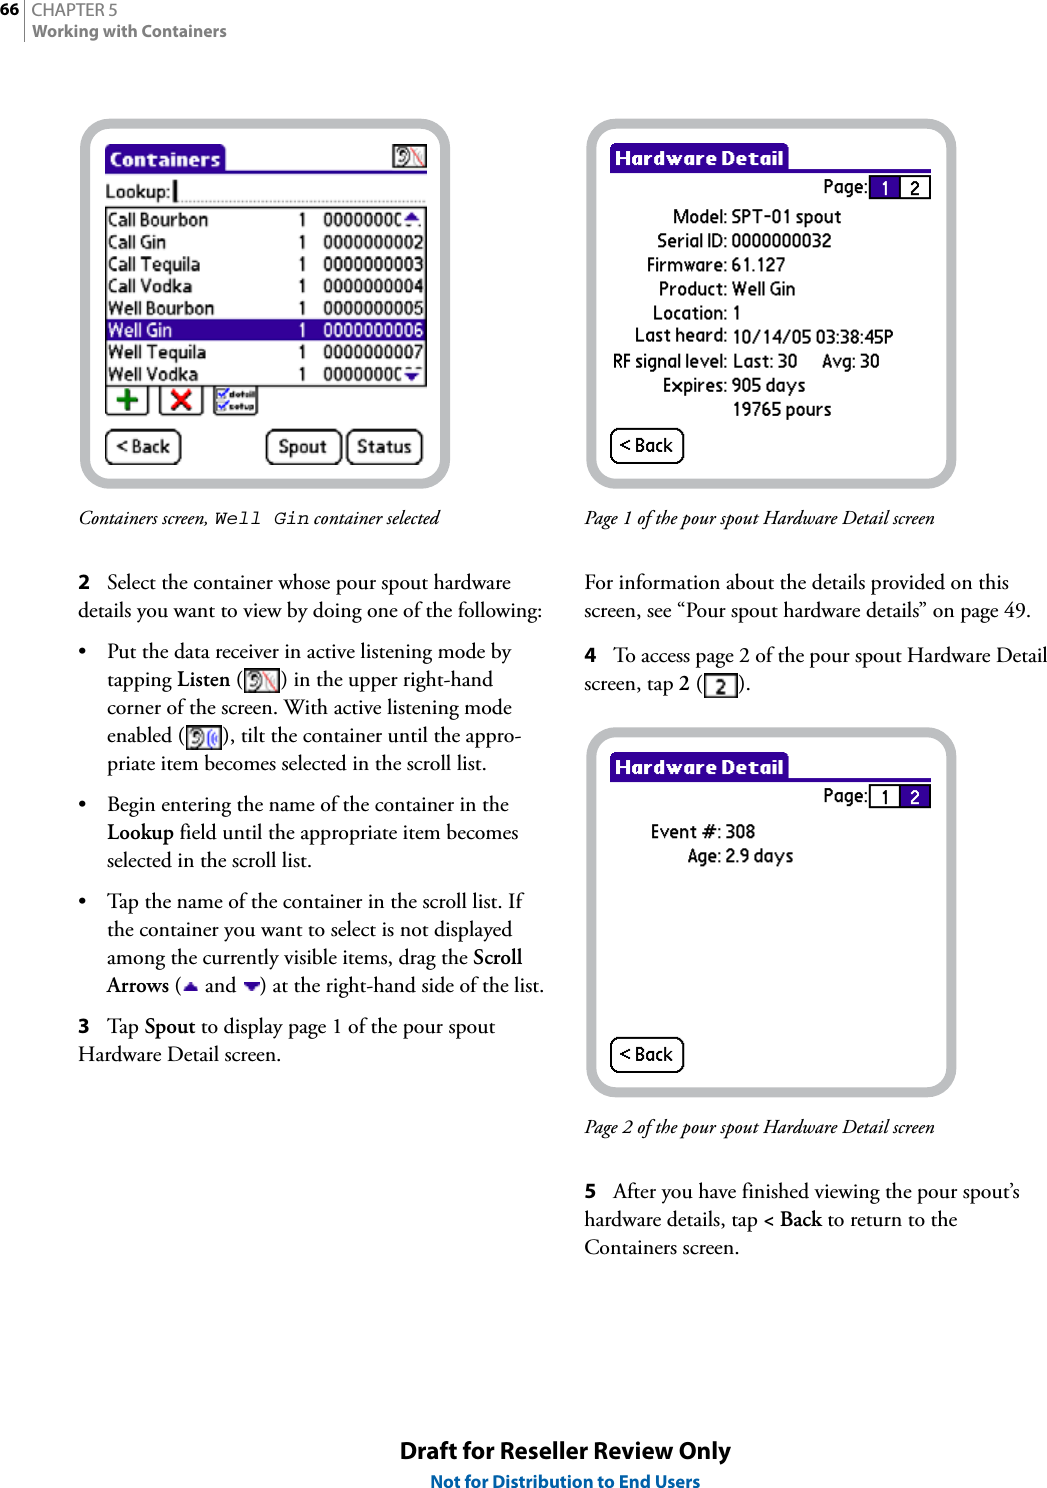
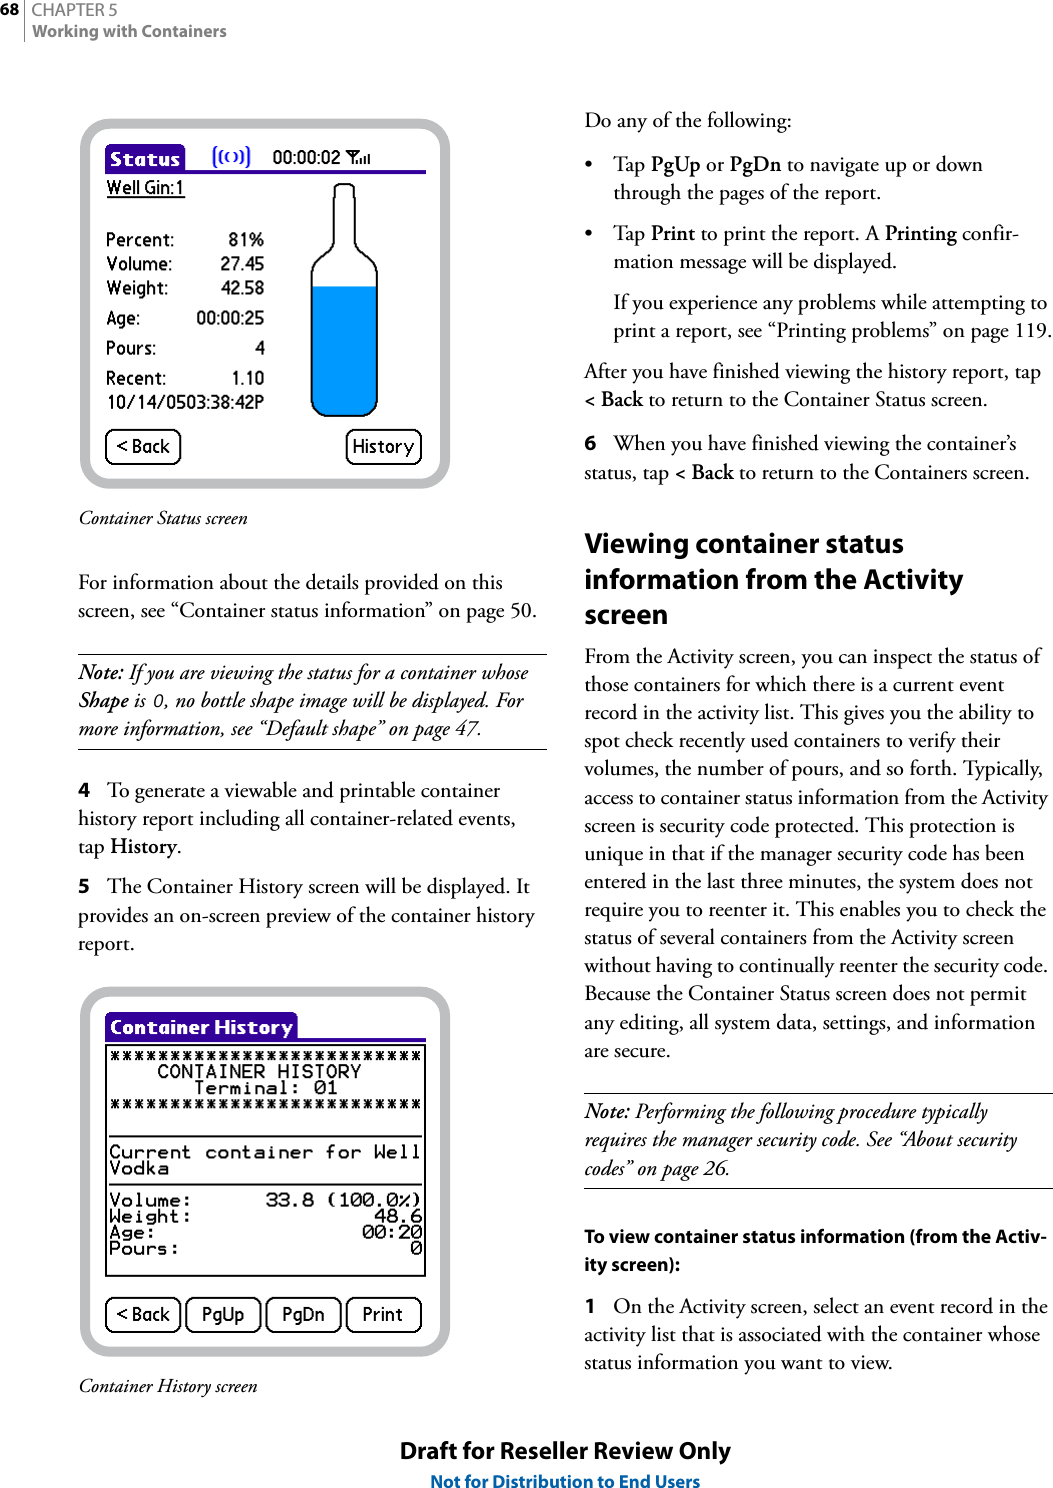
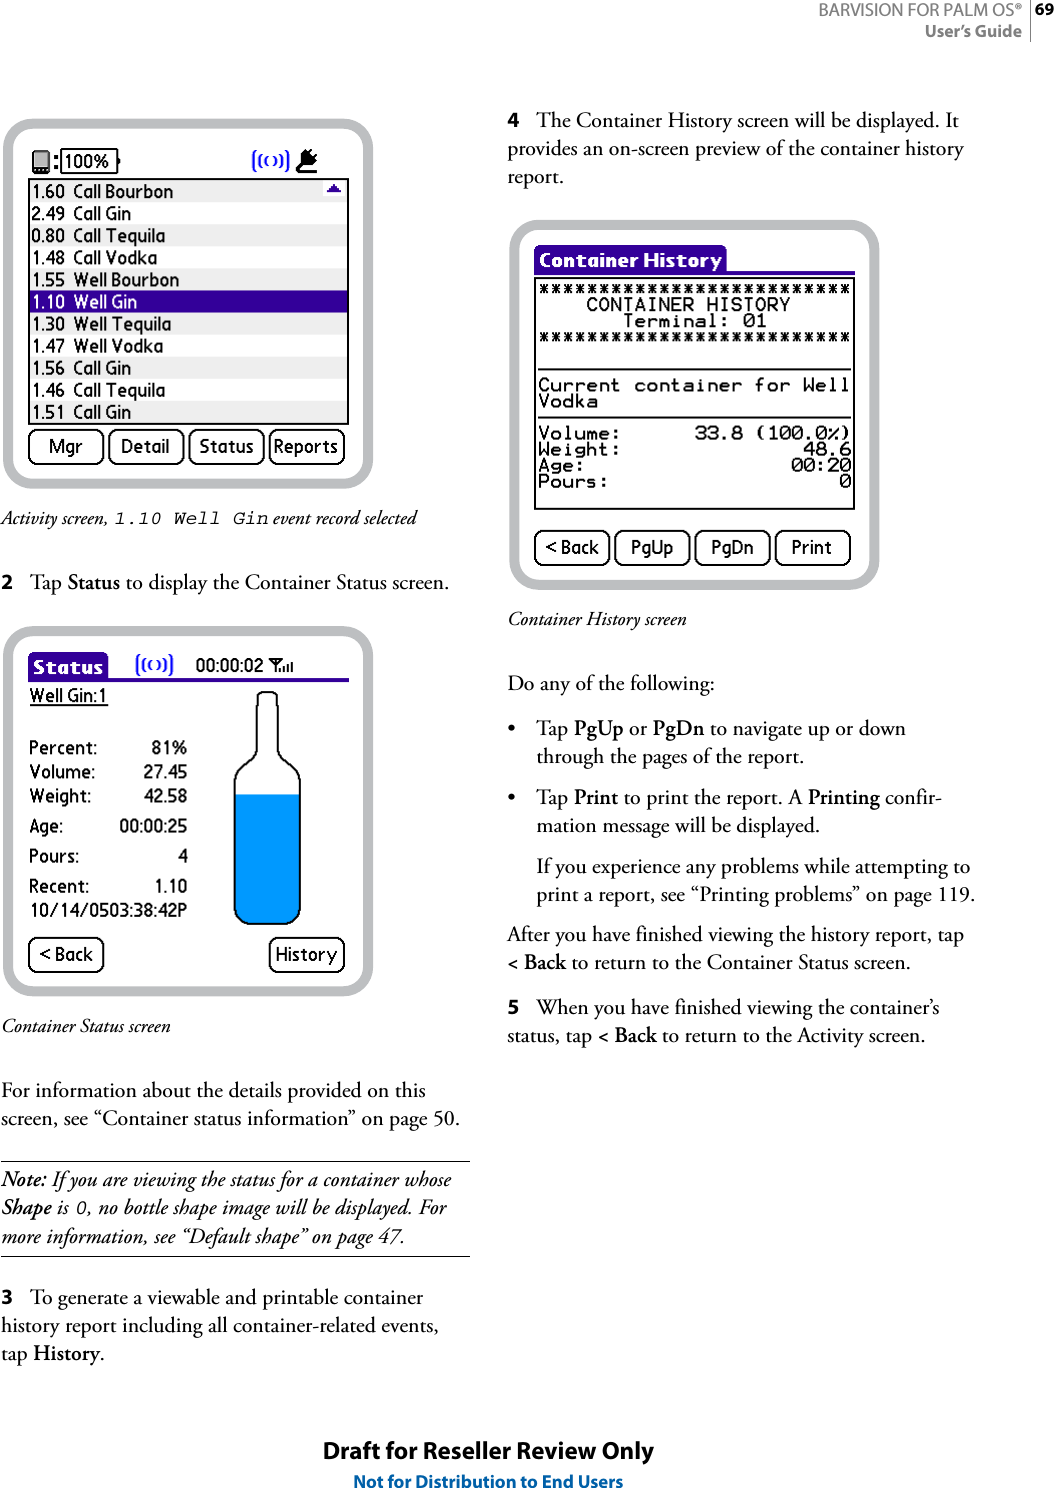
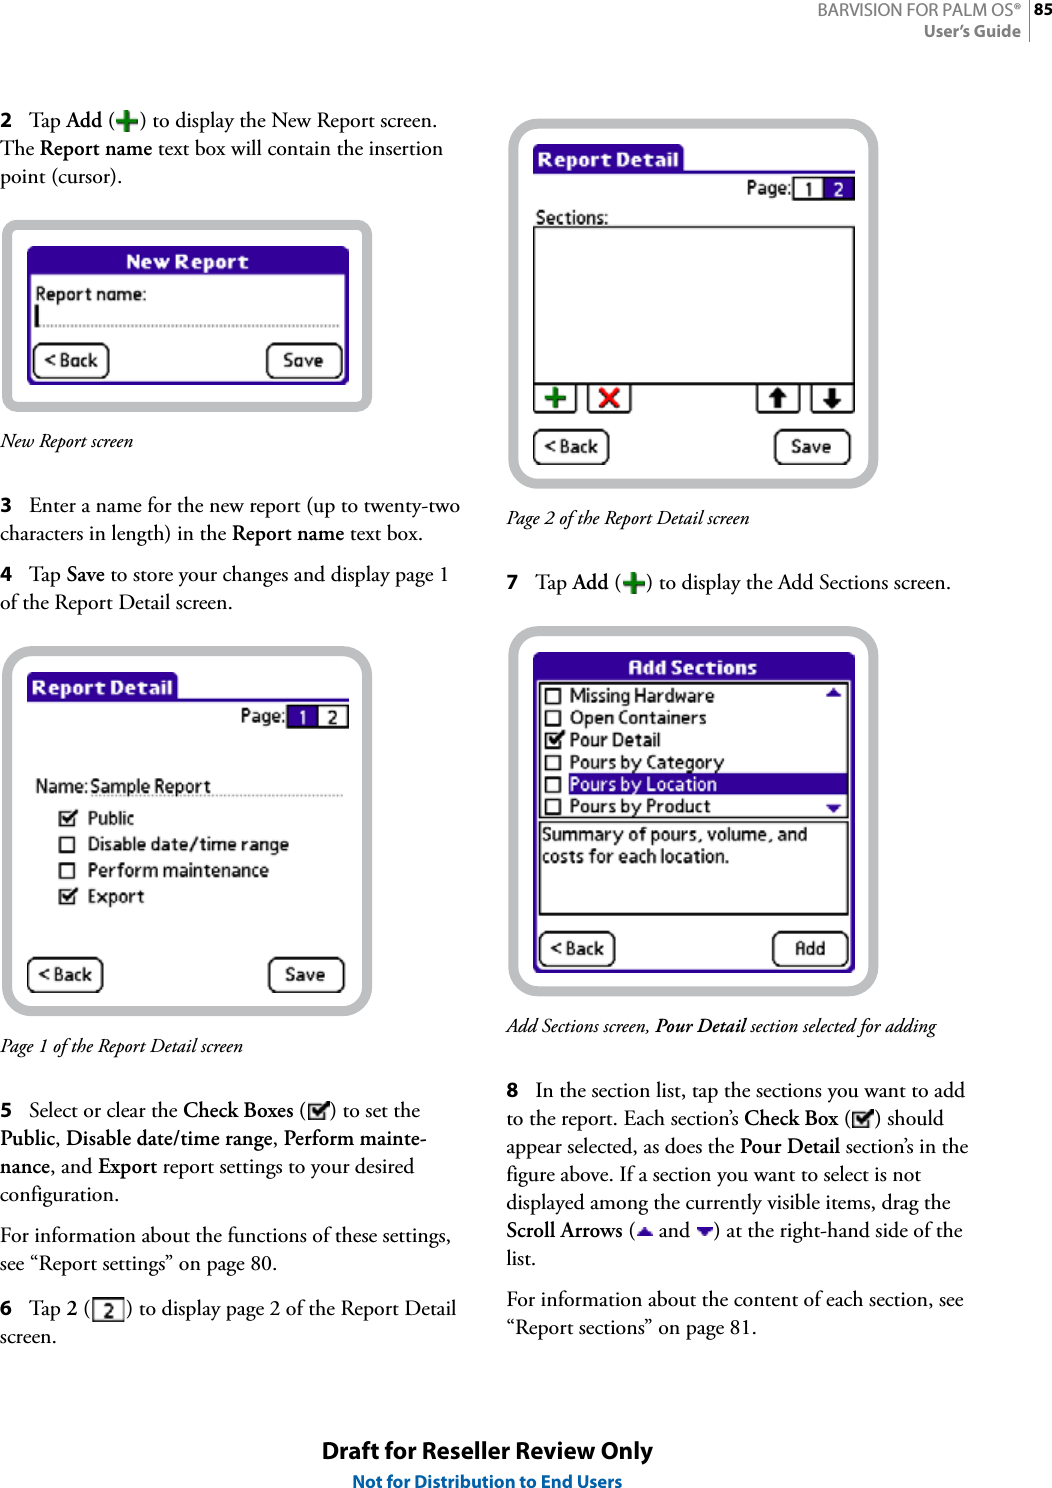
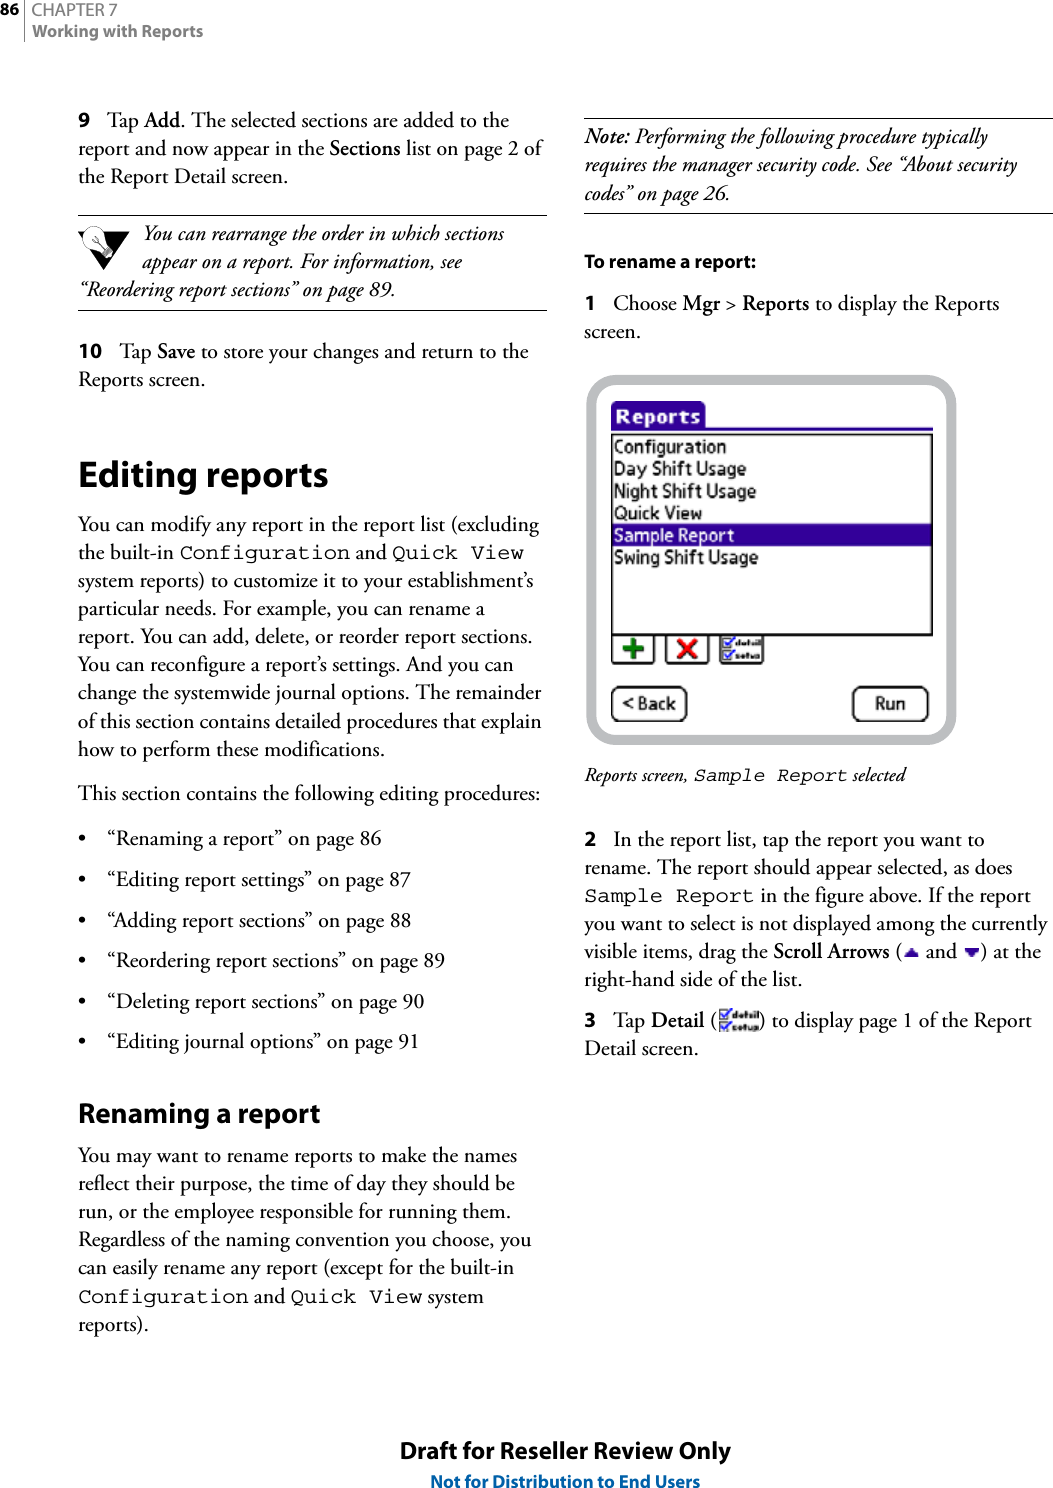
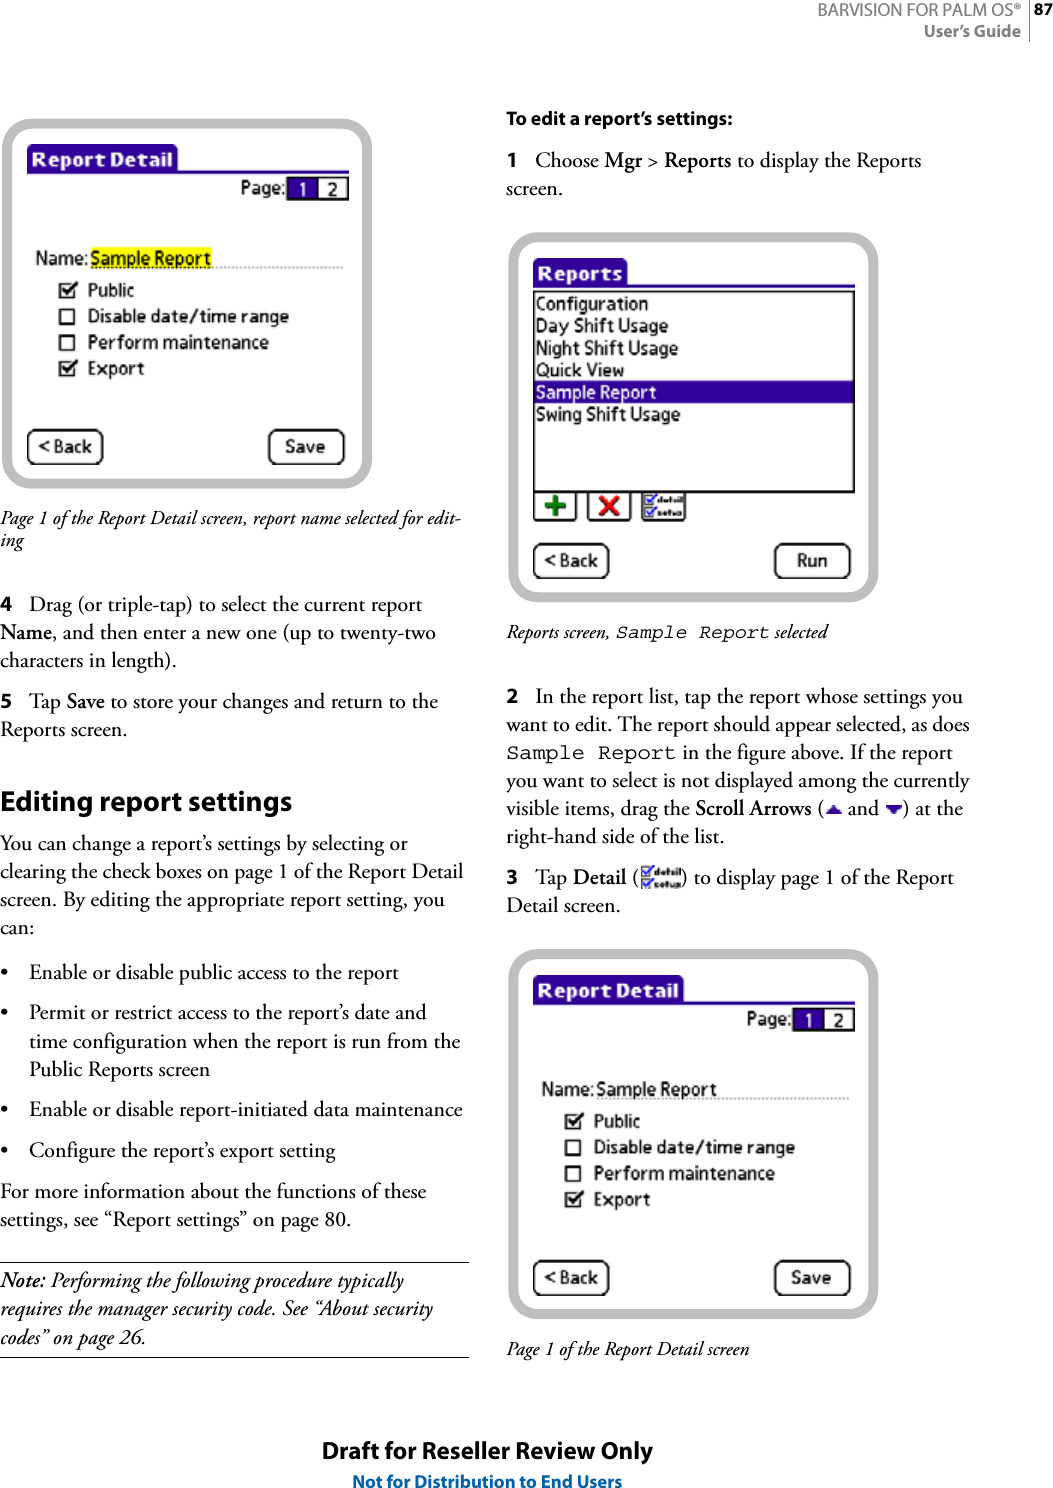
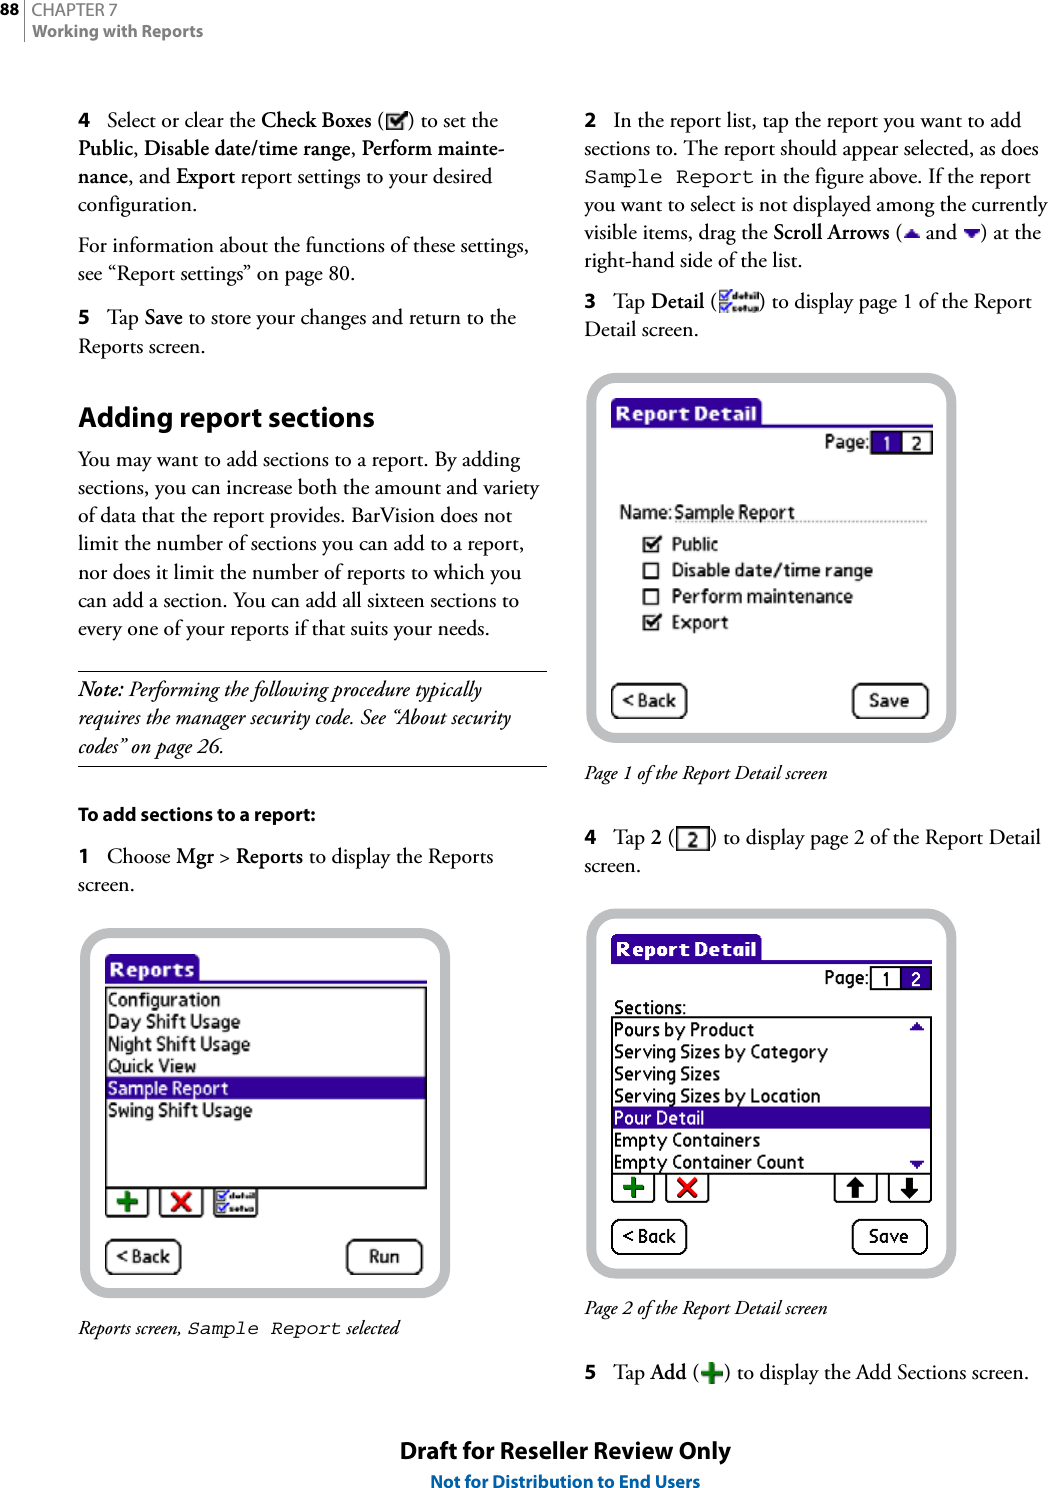
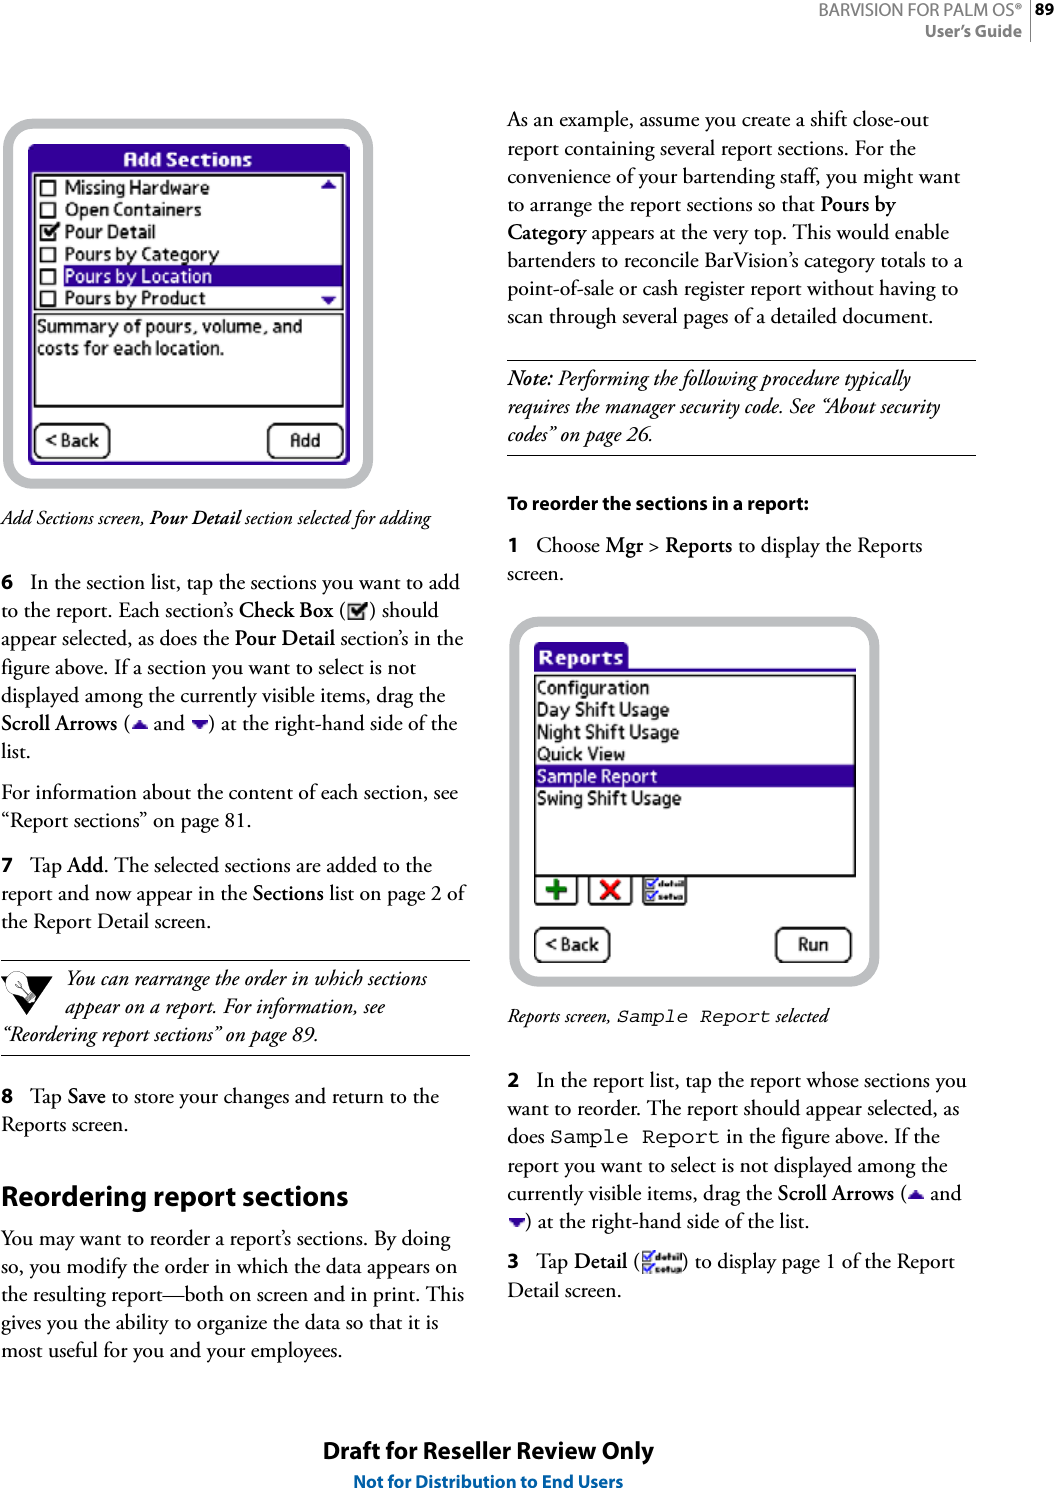
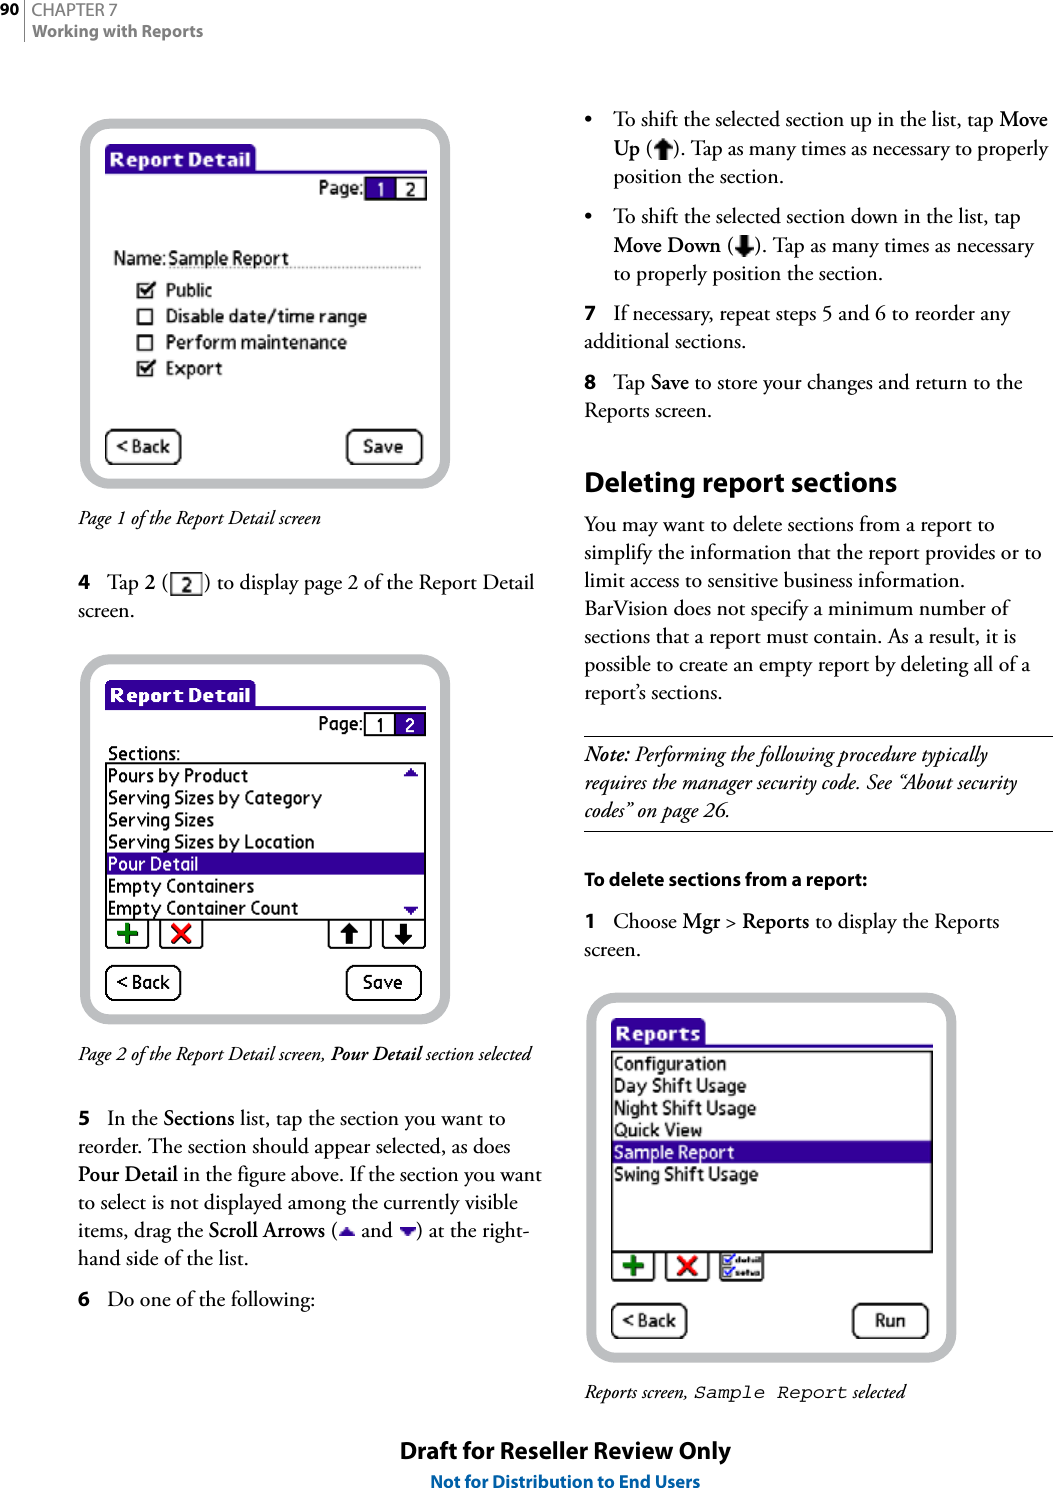
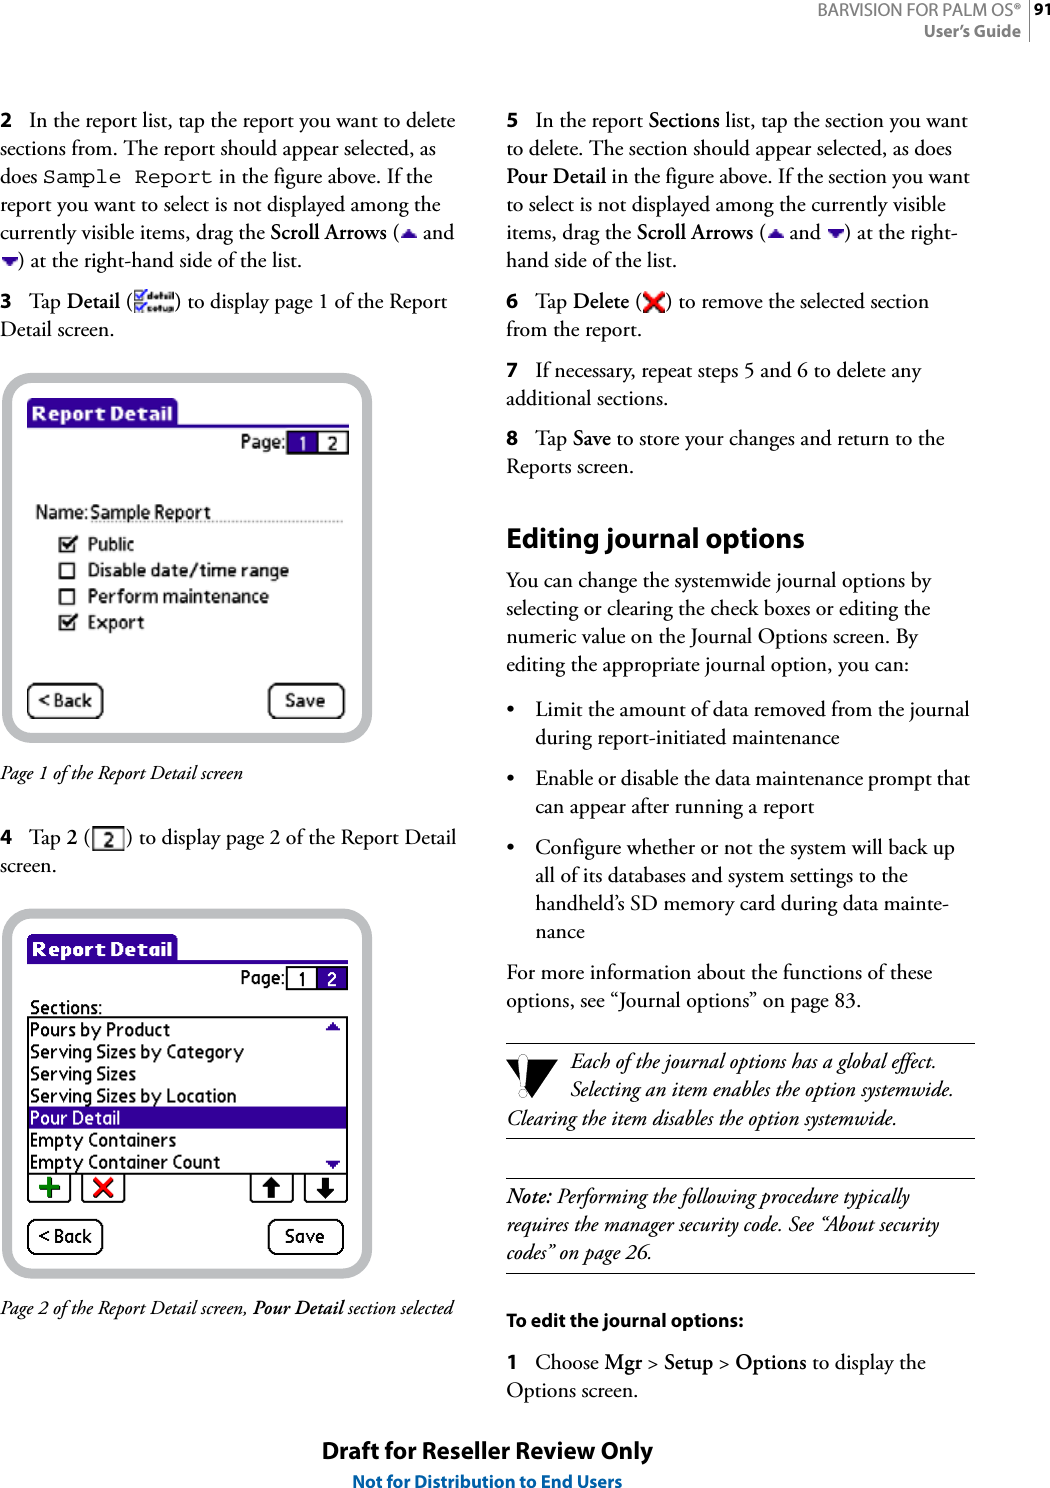
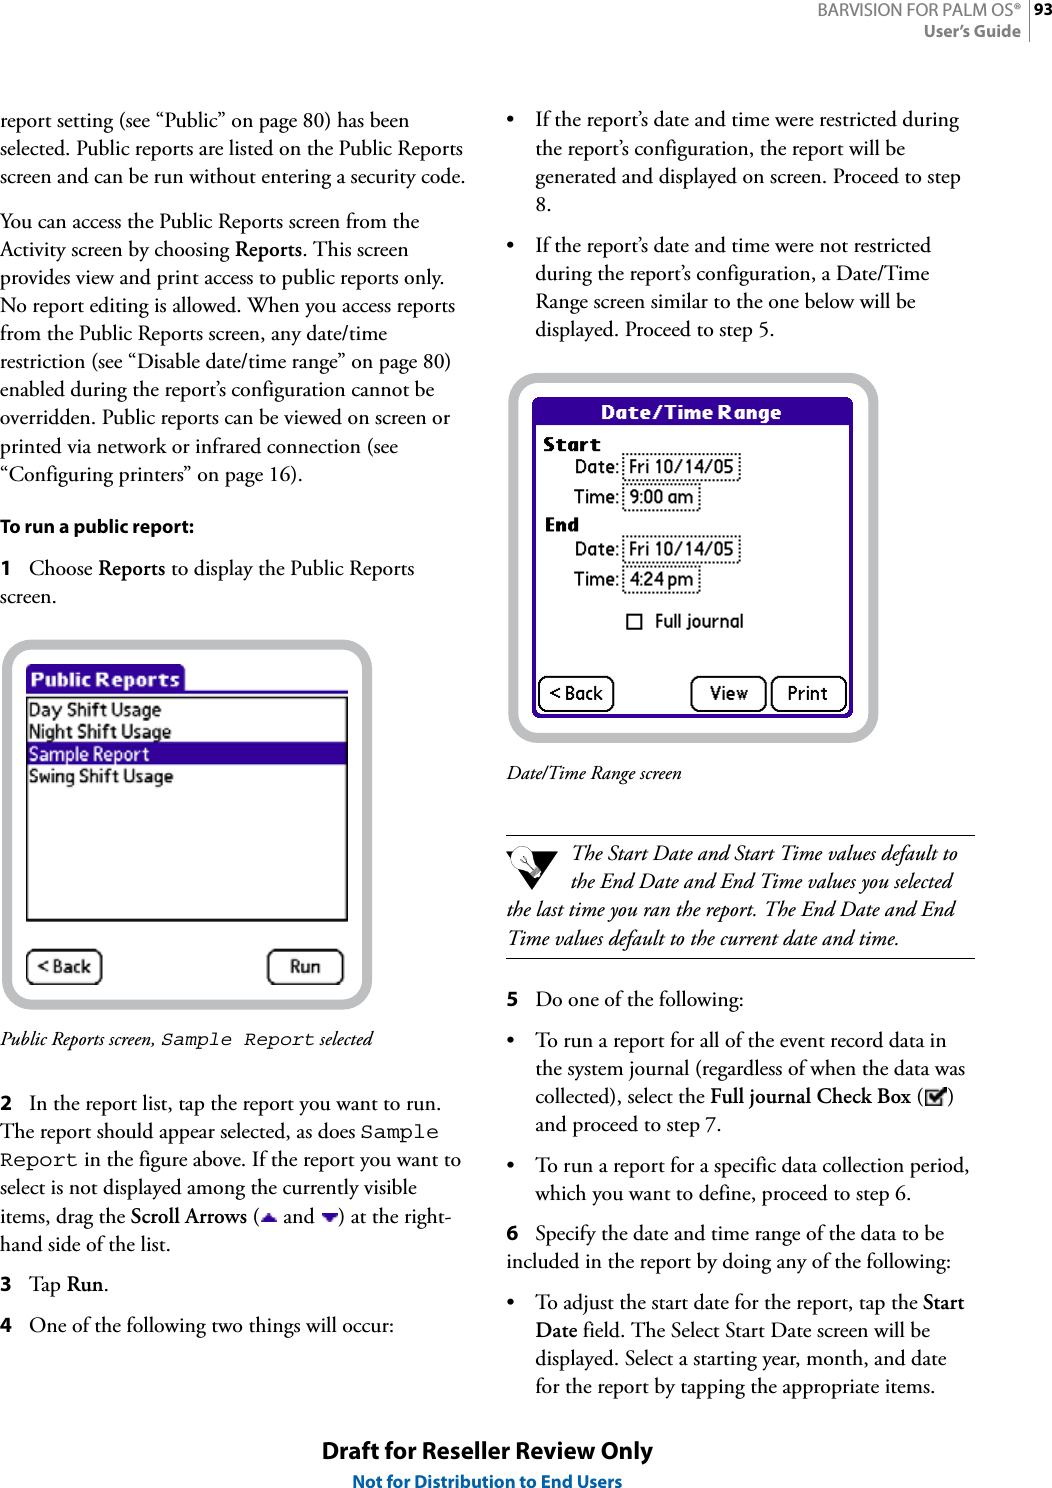
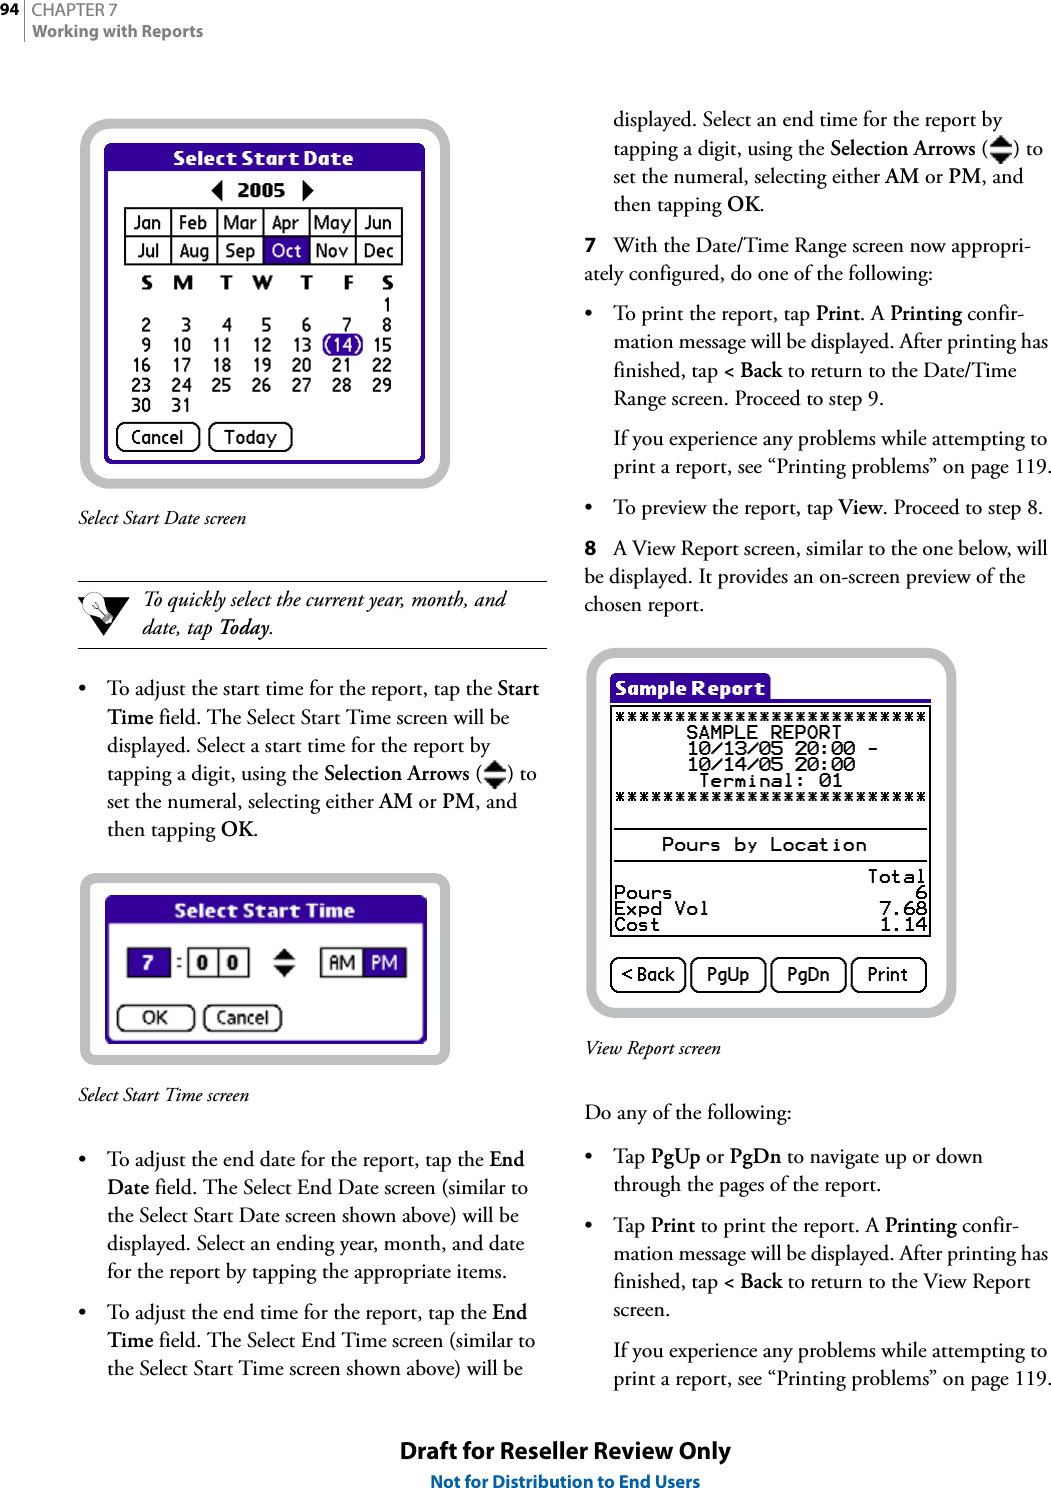
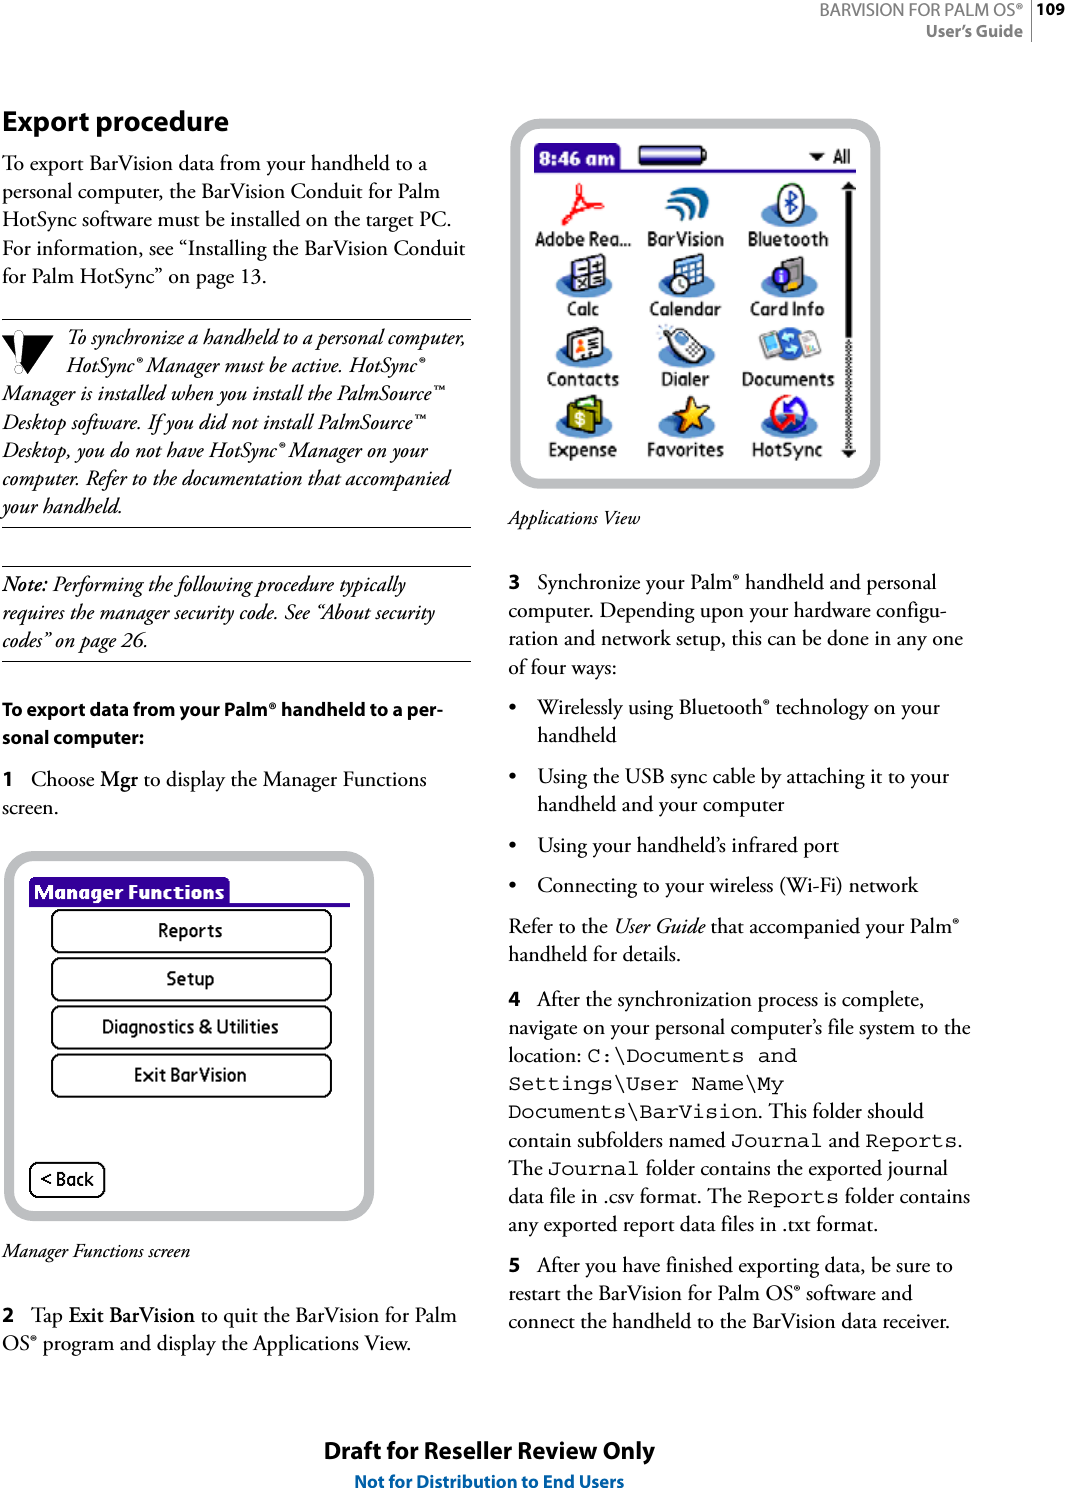
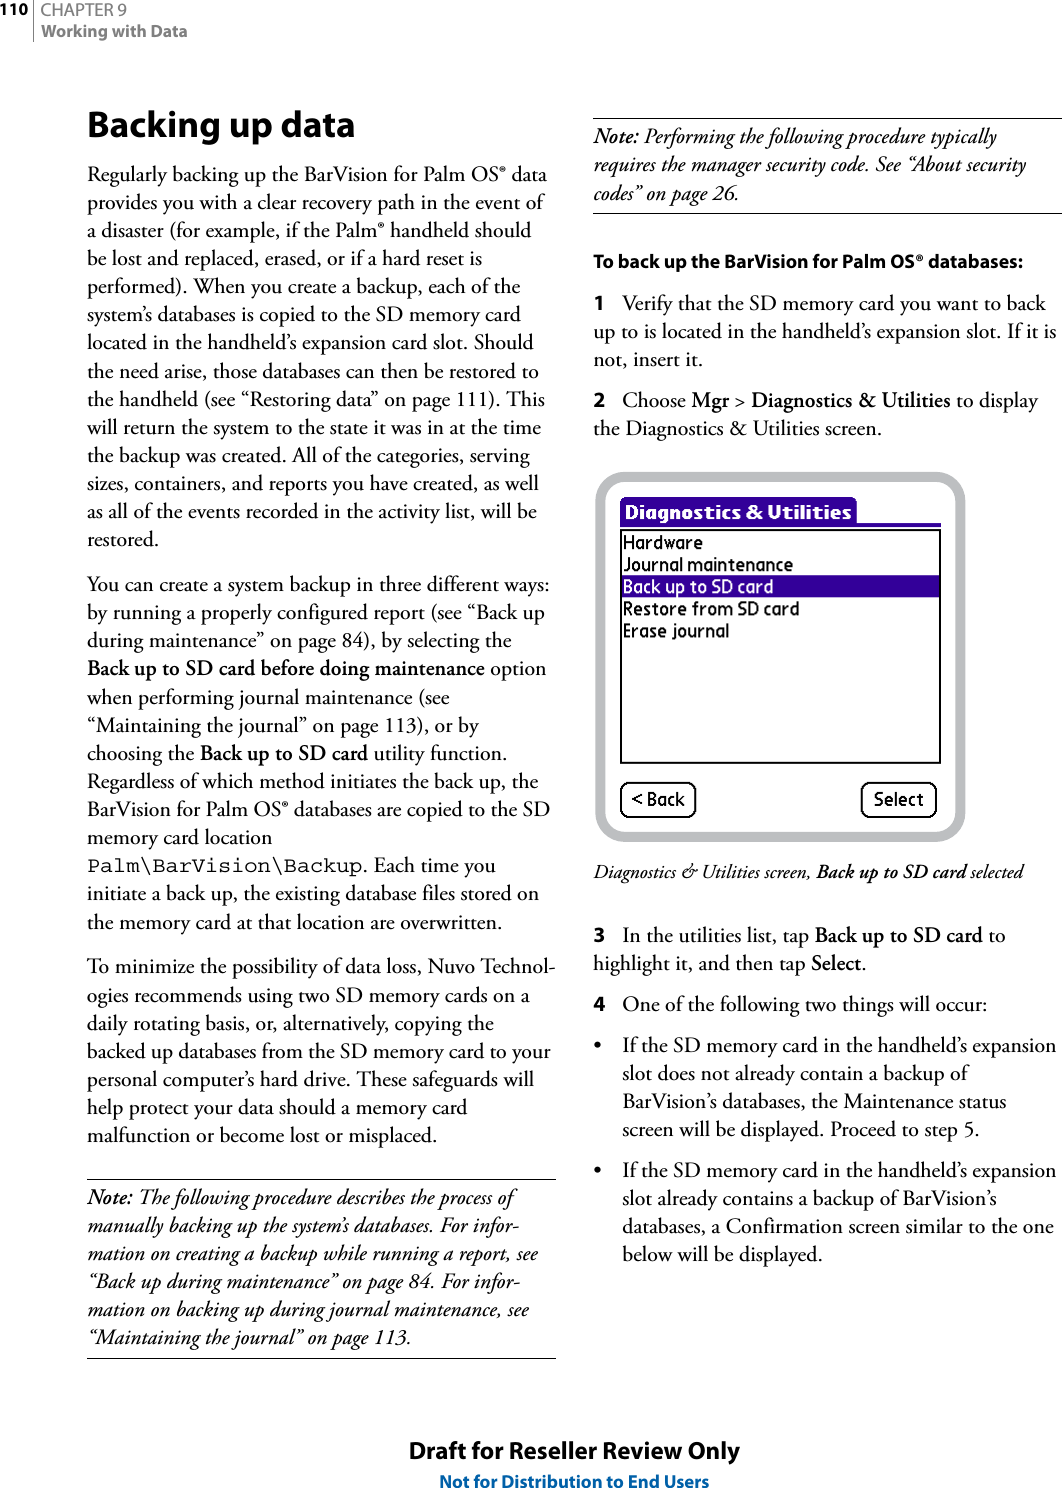
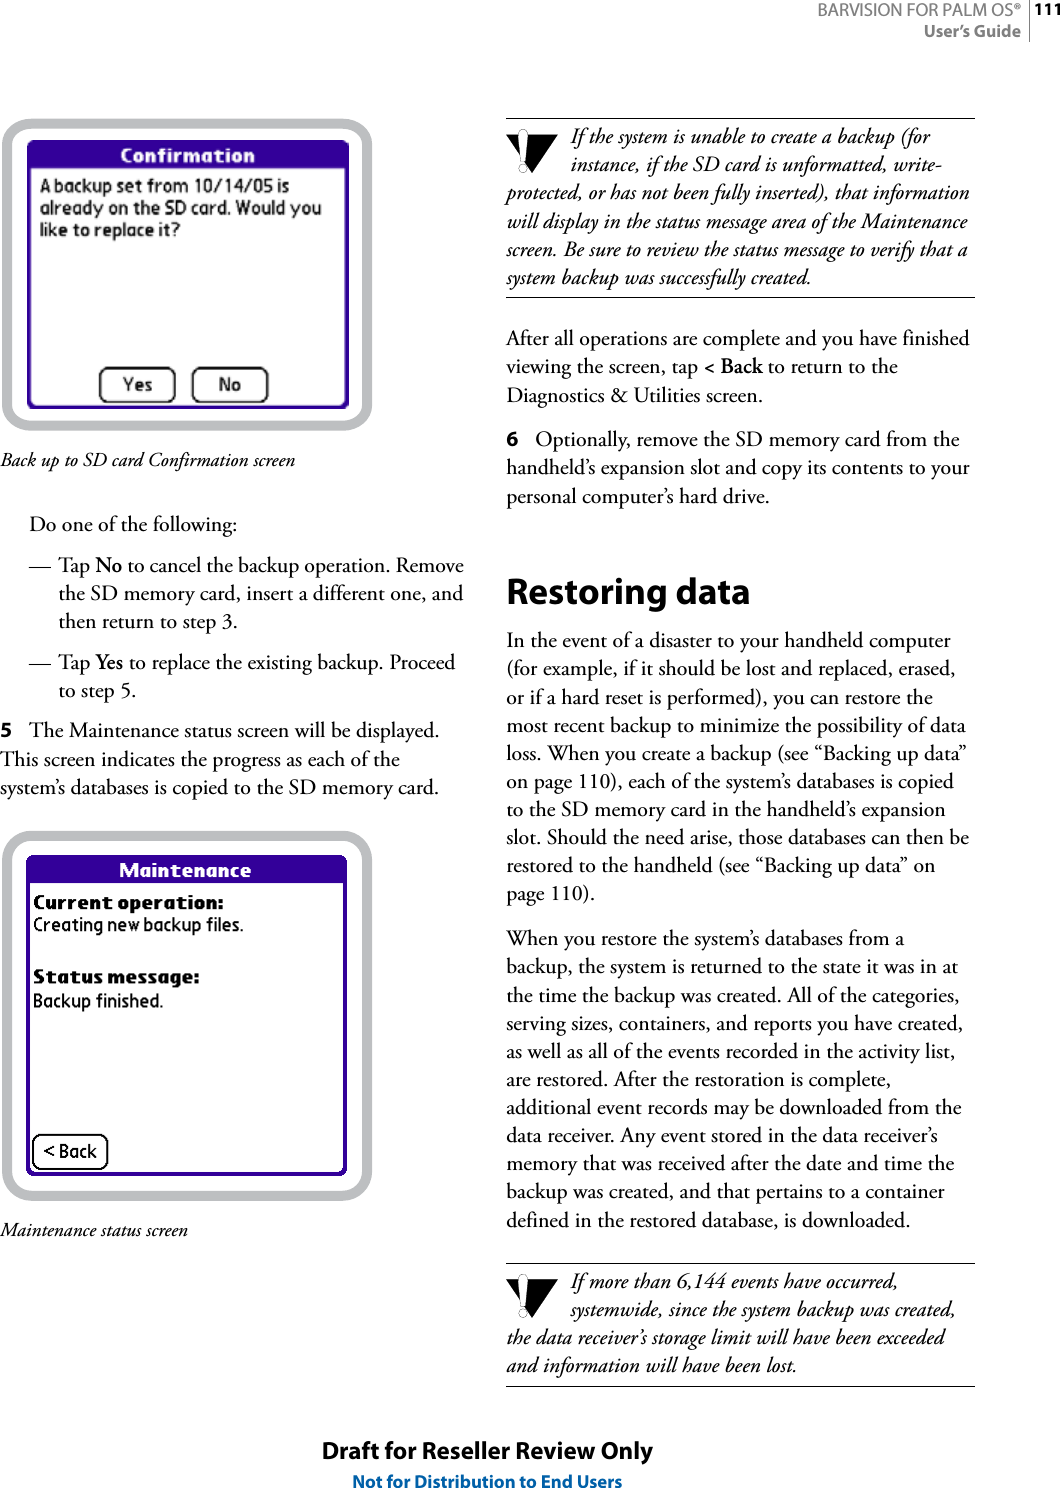
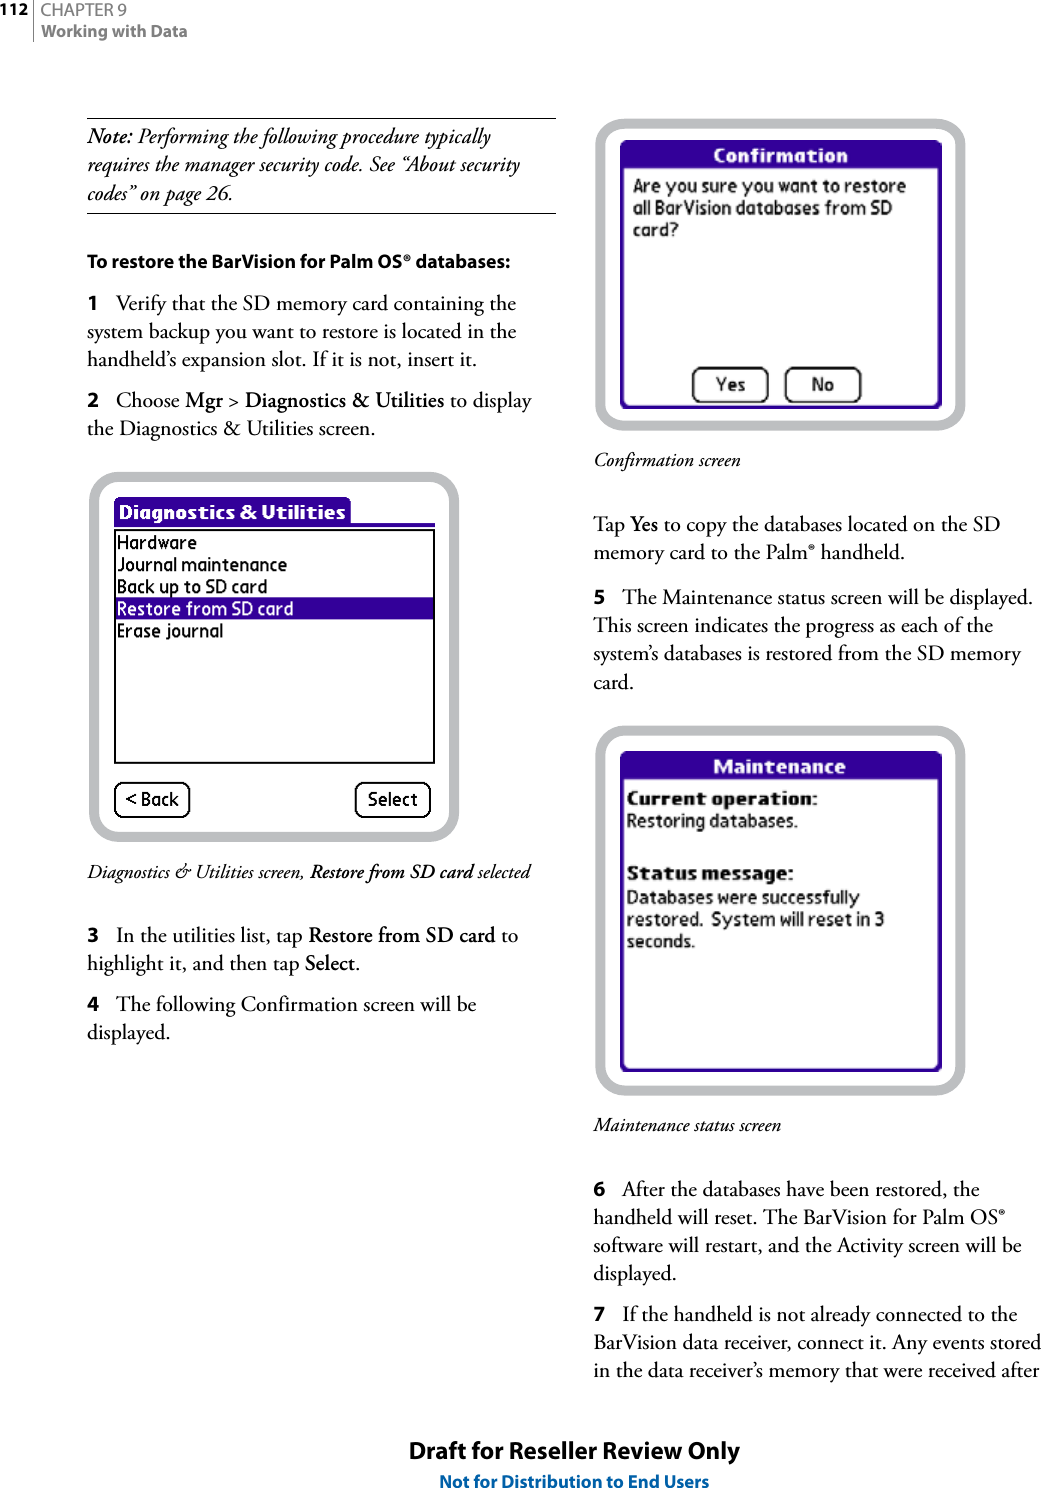
![CHAPTER 12Understanding the BarVision SystemDraft for Reseller Review OnlyNot for Distribution to End UsersPour spoutThe BarVision wireless, free-pour spout is composed of a wireless transmitter tag, a plastic cork, a metal nozzle, and an optional twist-lock collar. The transmitter tag is one of the components that makes the BarVision pour spout unique. It houses the electronics that detect important data and that generate the wireless signals used to transmit the data to the rest of the system.BarVision wireless, free-pour spout (Model SPT-101-20)The BarVision pour spout serves four primary functions: it measures the duration of each pour dispensed from the container, it identifies any pours that occur at a less than optimal bottle tilt angle, it senses when it has been removed from one bottle and attached to another, and it generates the wireless signals that communicate the details of each of these events to the rest of the system. Every open liquor container in your establishment, whose contents you wish to track, should be equipped with a BarVision wireless pour spout. BarVision uses the term container to refer to an open bottle of a particular brand at a particular location.Each BarVision pour spout is factory programmed with its own unique identification number. The user then programs the system to associate a uniquely numbered pour spout with a specific liquor container. This association is typically established during the container addition process (see “Adding containers” on page 51) when the system is initially installed. After such a relationship has been established, it is important that when the spout is removed from an empty bottle it be attached to a replacement bottle of identical brand and size at the same storage location. If necessary, the association between a specific pour spout and a specific brand of liquor can be removed or changed [see “Assigning a new pour spout to (or removing the current pour spout assignment from) a container” on page 57]. This might be required, for example, if a pour spout is misplaced or damaged.BarVision pour spouts communicate using wireless transmissions. As a result, their communication range is limited. The range is maximized when there is a clear line of sight between a pour spout and an active antenna. Range may be limited or communications even impossible when there is no clear line of sight. If necessary, the system’s wireless coverage range can be expanded by adding additional active antennas. Refer to the BarVision Hardware Installation Guide for details.BarVision pour spouts are equipped with built-in memory. This memory enables the spout to store infor-mation about the sixteen most recently occurring events. For example, each time a serving is poured or the pour spout is removed from or attached to a bottle, a new event record is generated and stored in the pour spout’s memory. Pour spouts periodically transmit the list of events stored in their memory. This means that each stored event gets transmitted multiple times. This redundancy helps ensure the reliability of the system and protects against data loss and missed communica-tions.If a total of more than sixteen events occur while the pour spout and data receiver are unable to commu-nicate (for example, if the pour spout is out of wireless range or the data receiver has lost power), the pour spout’s sixteen event data storage limit will be exceeded and data will be lost. If this is to happen, the BarVision software will indicate that events were lost and identify the number of lost events.The BarVision for Palm OS® software enables you to view communications statistics for all of the wireless pour spouts at a glance. This can be done from the Hardware screen after system installation is complete. From the Hardware screen you can view the product name that has been assigned to each pour spout, the](https://usermanual.wiki/SGS-Technologies/01/User-Guide-620206-Page-17.png)