Sage Alerting Systems 3644 Emergency Alrt System Encoder/Decoder User Manual ENDEC Manual
Sage Alerting Systems, Inc. Emergency Alrt System Encoder/Decoder ENDEC Manual
UserManual.wiki
>
Sage Alerting Systems
>
3644 User Manual
user manual
Navigation menu
Upload a User Manual
Namespaces
Wiki Guide
HTML
PDF
Info
Views
User Manual
Discussion / Help
Navigation


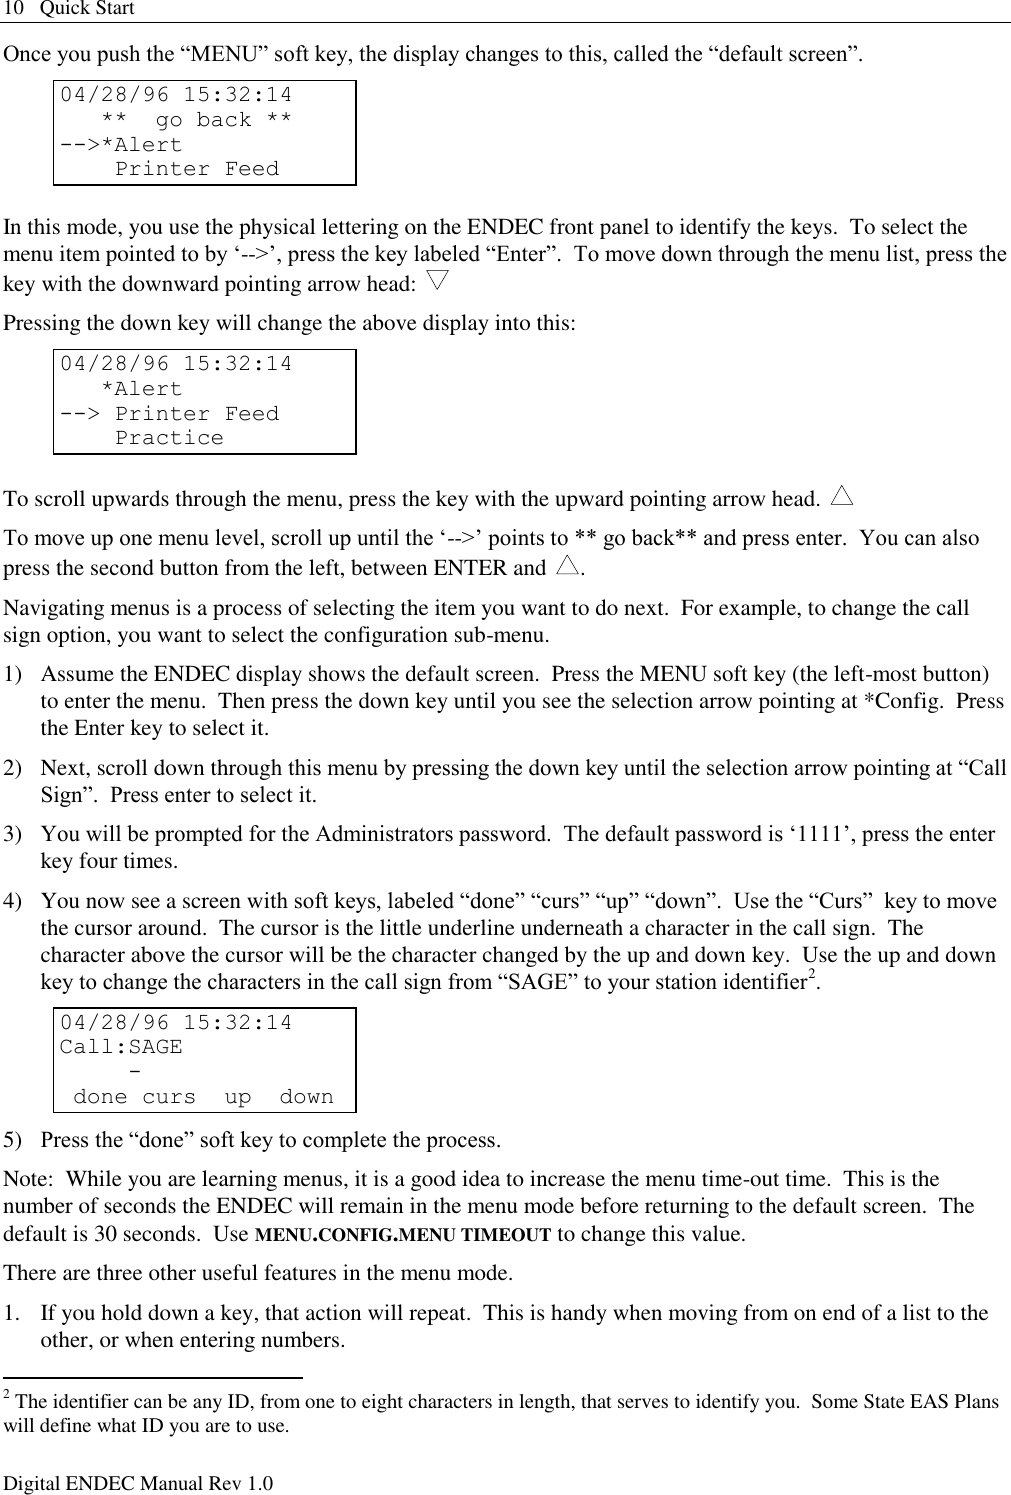


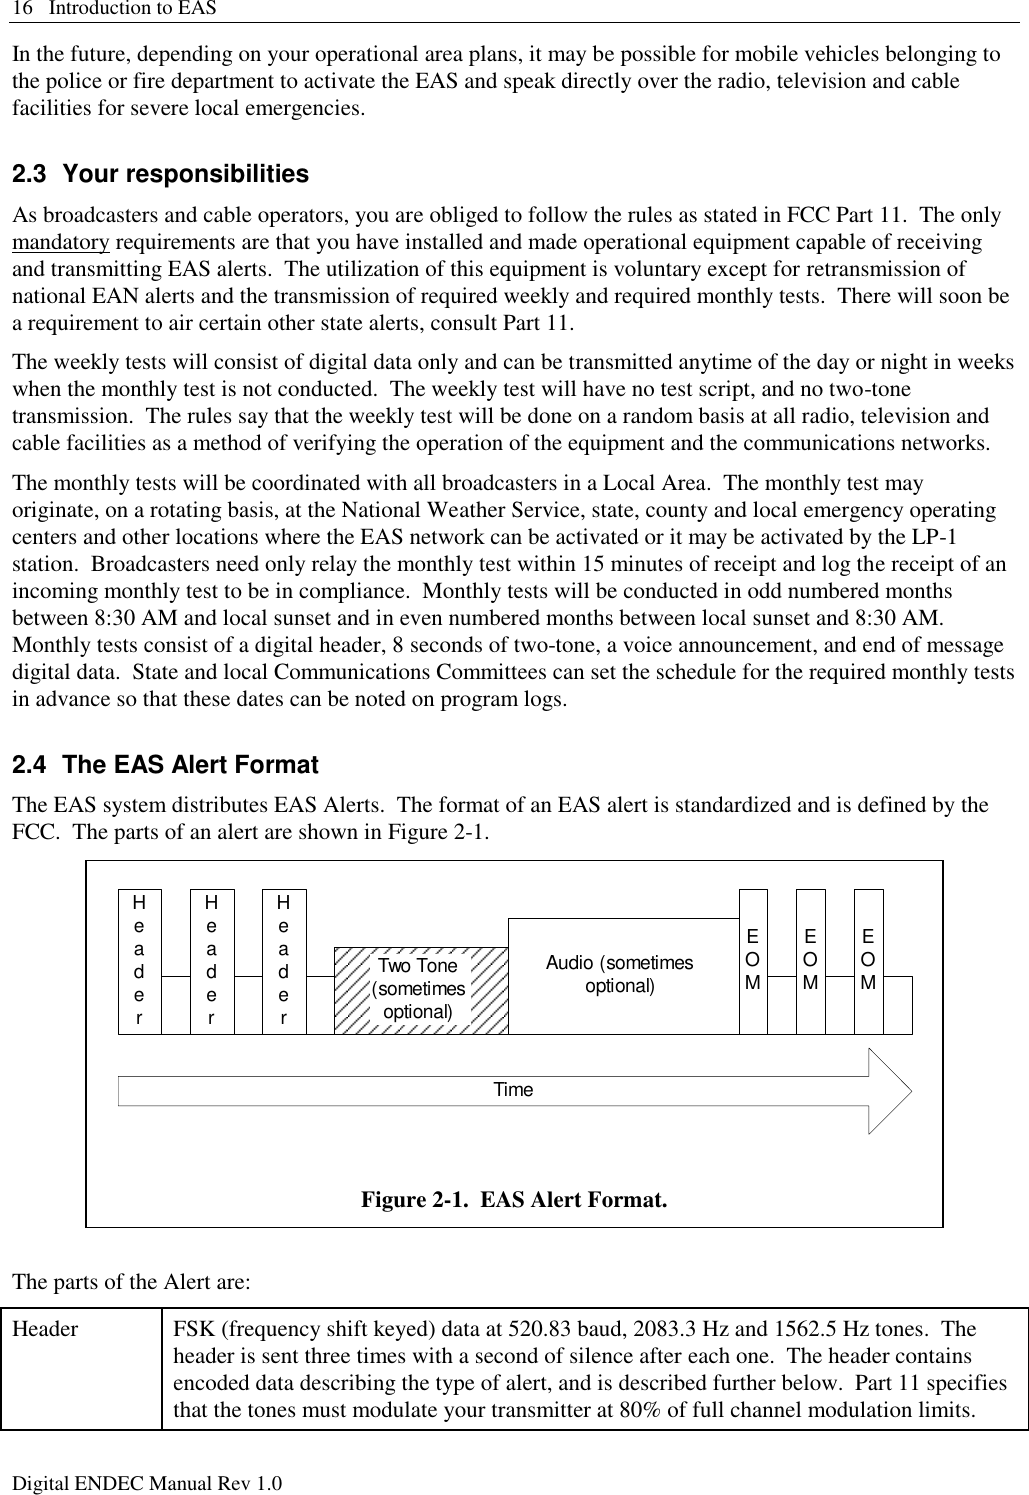

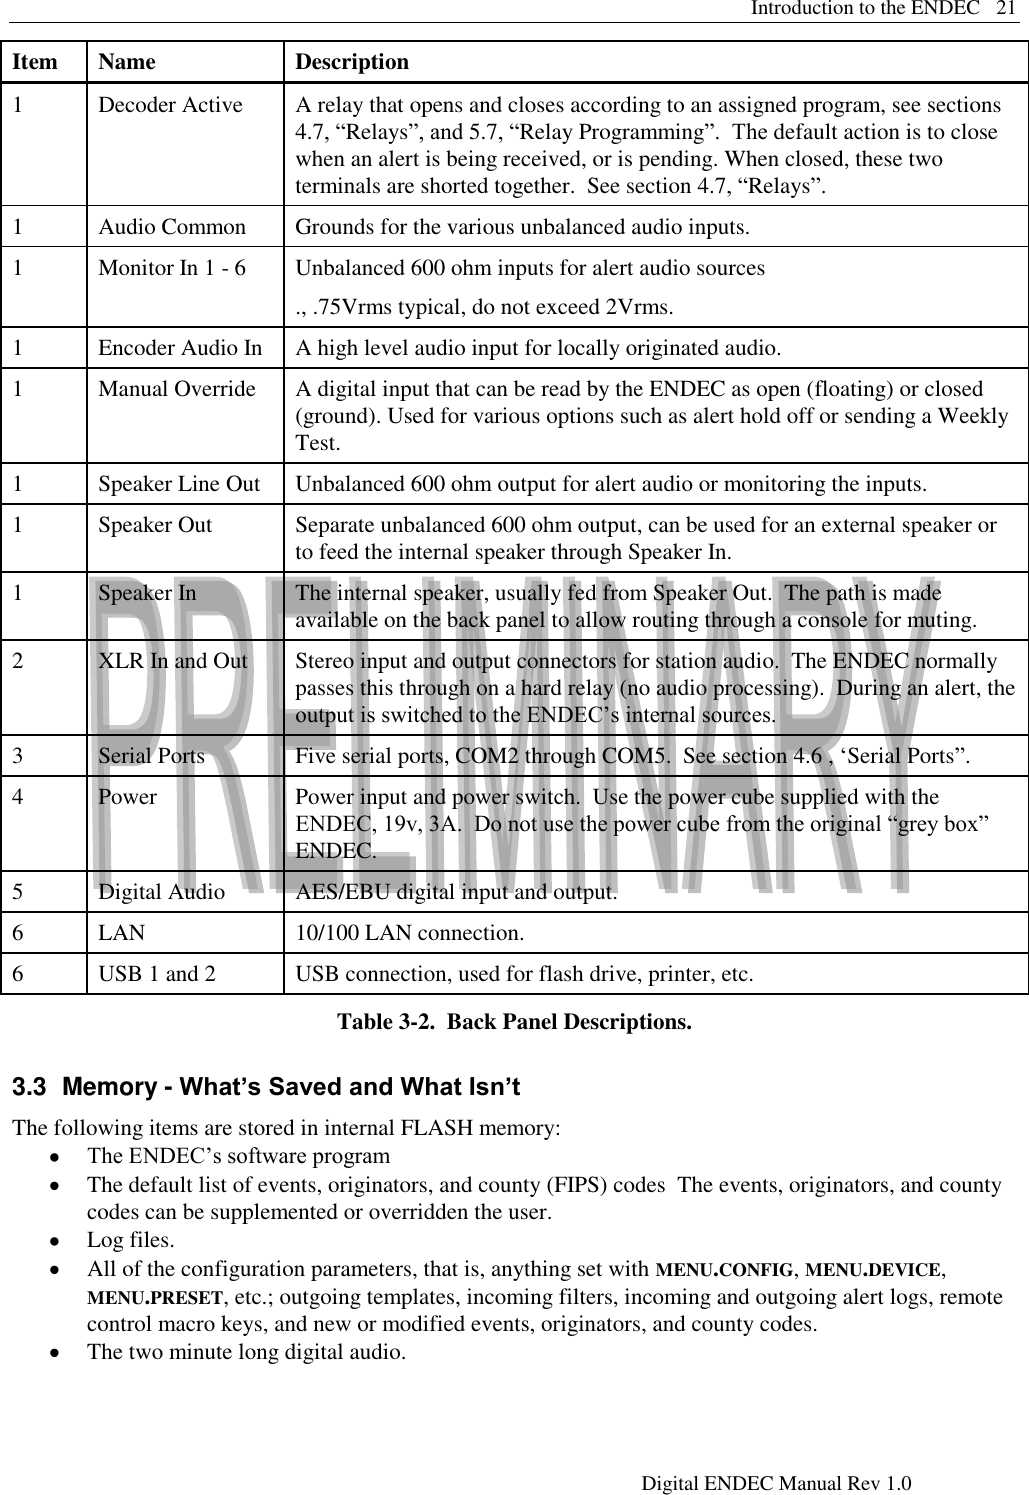


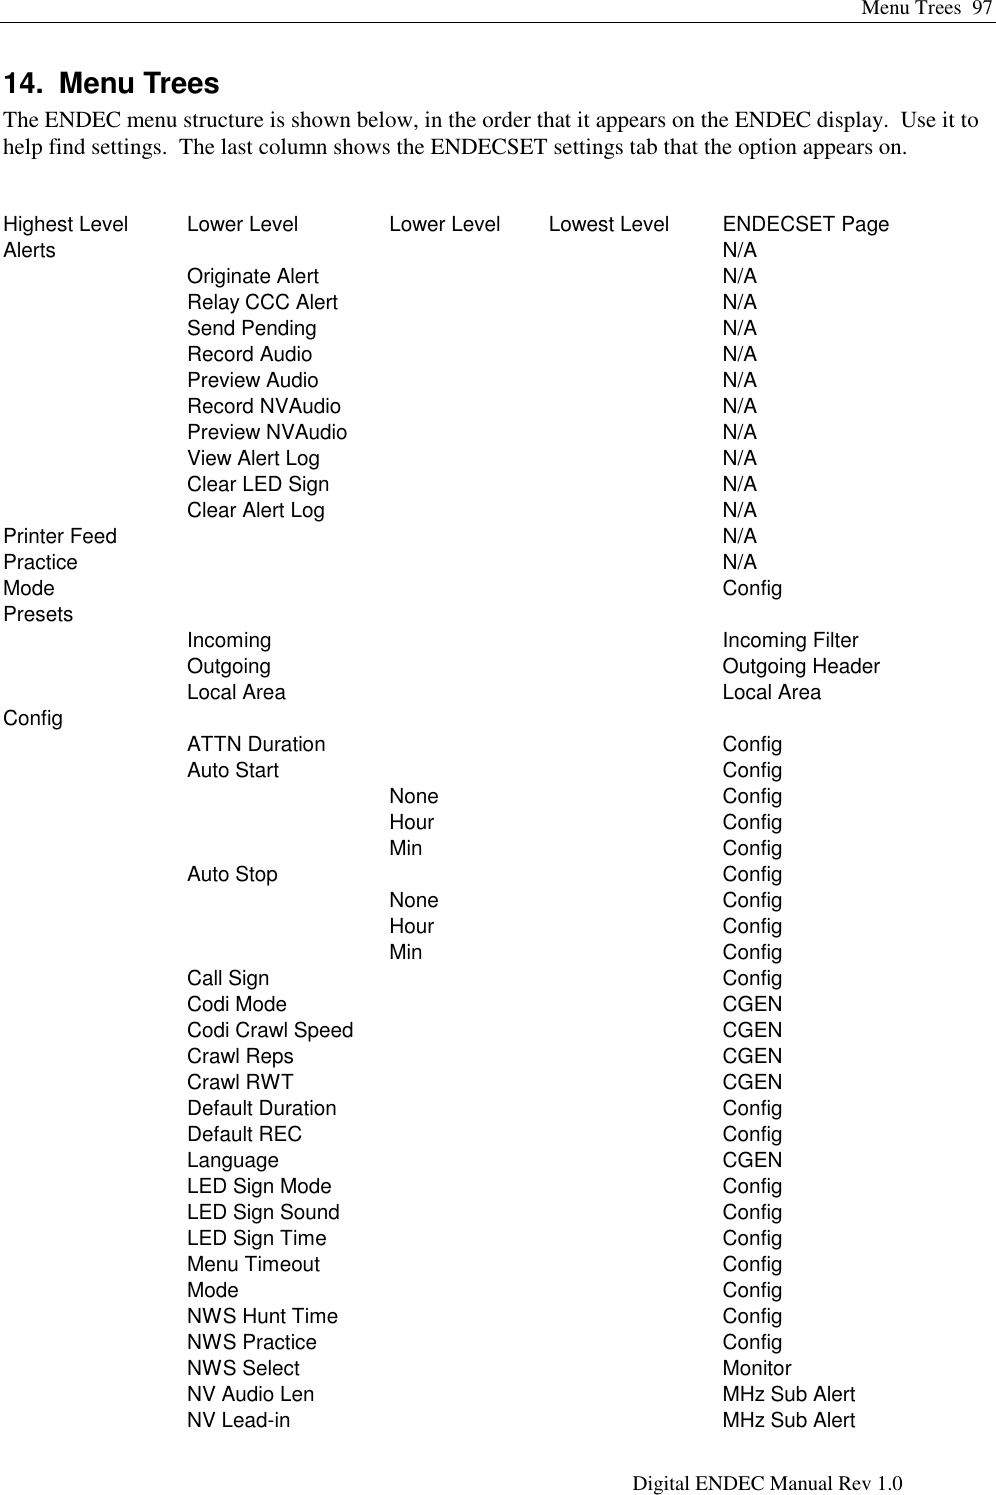
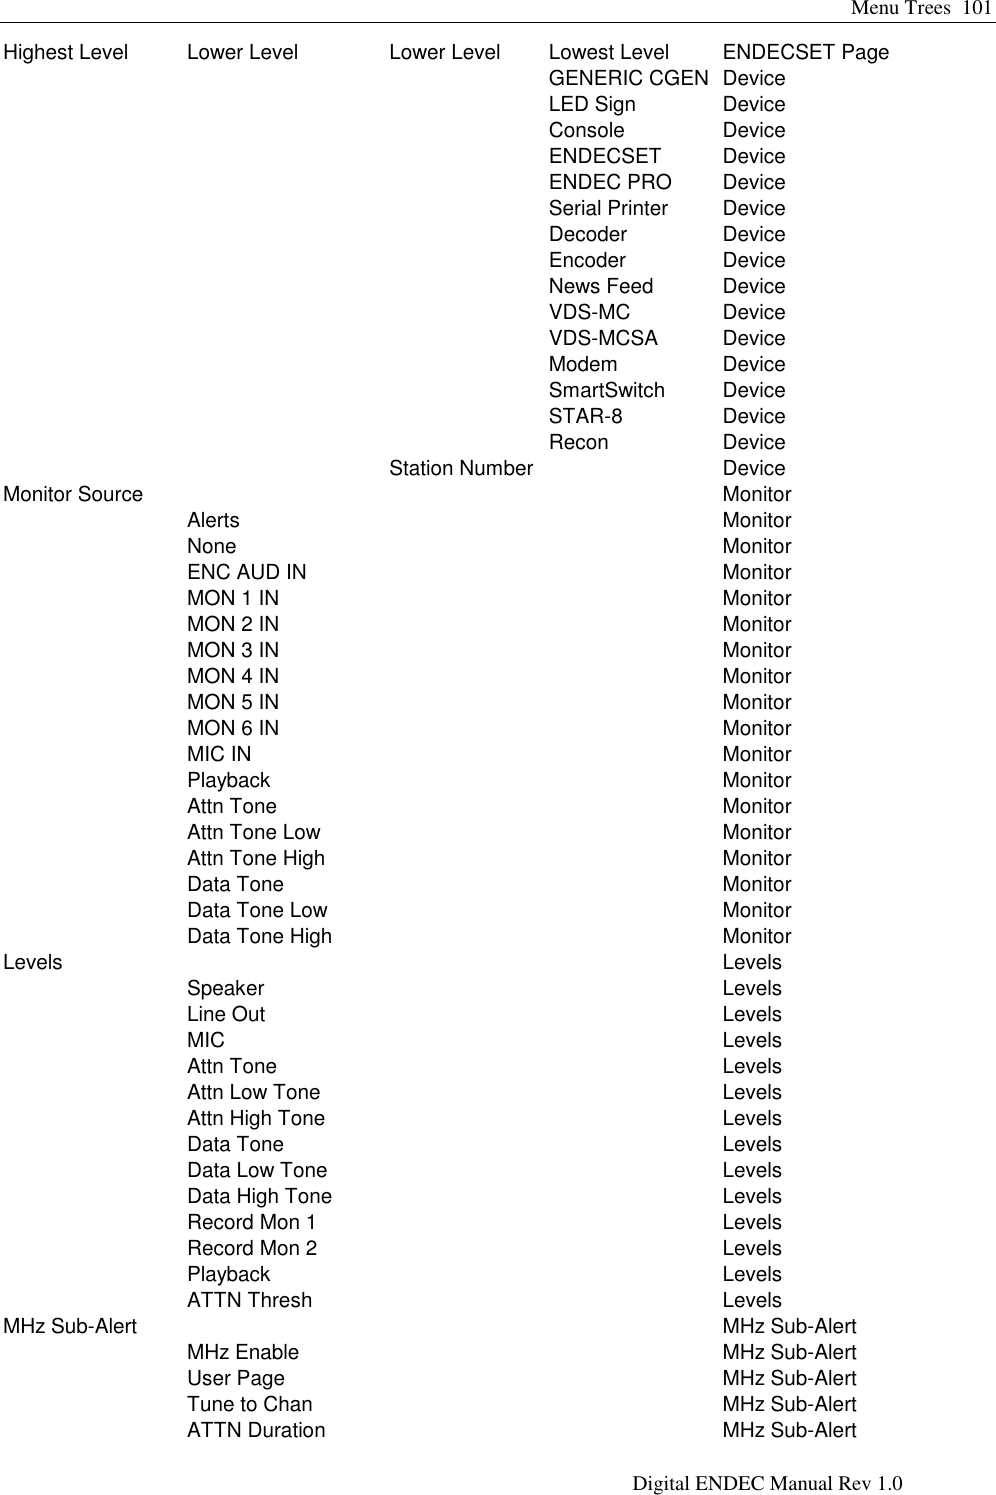
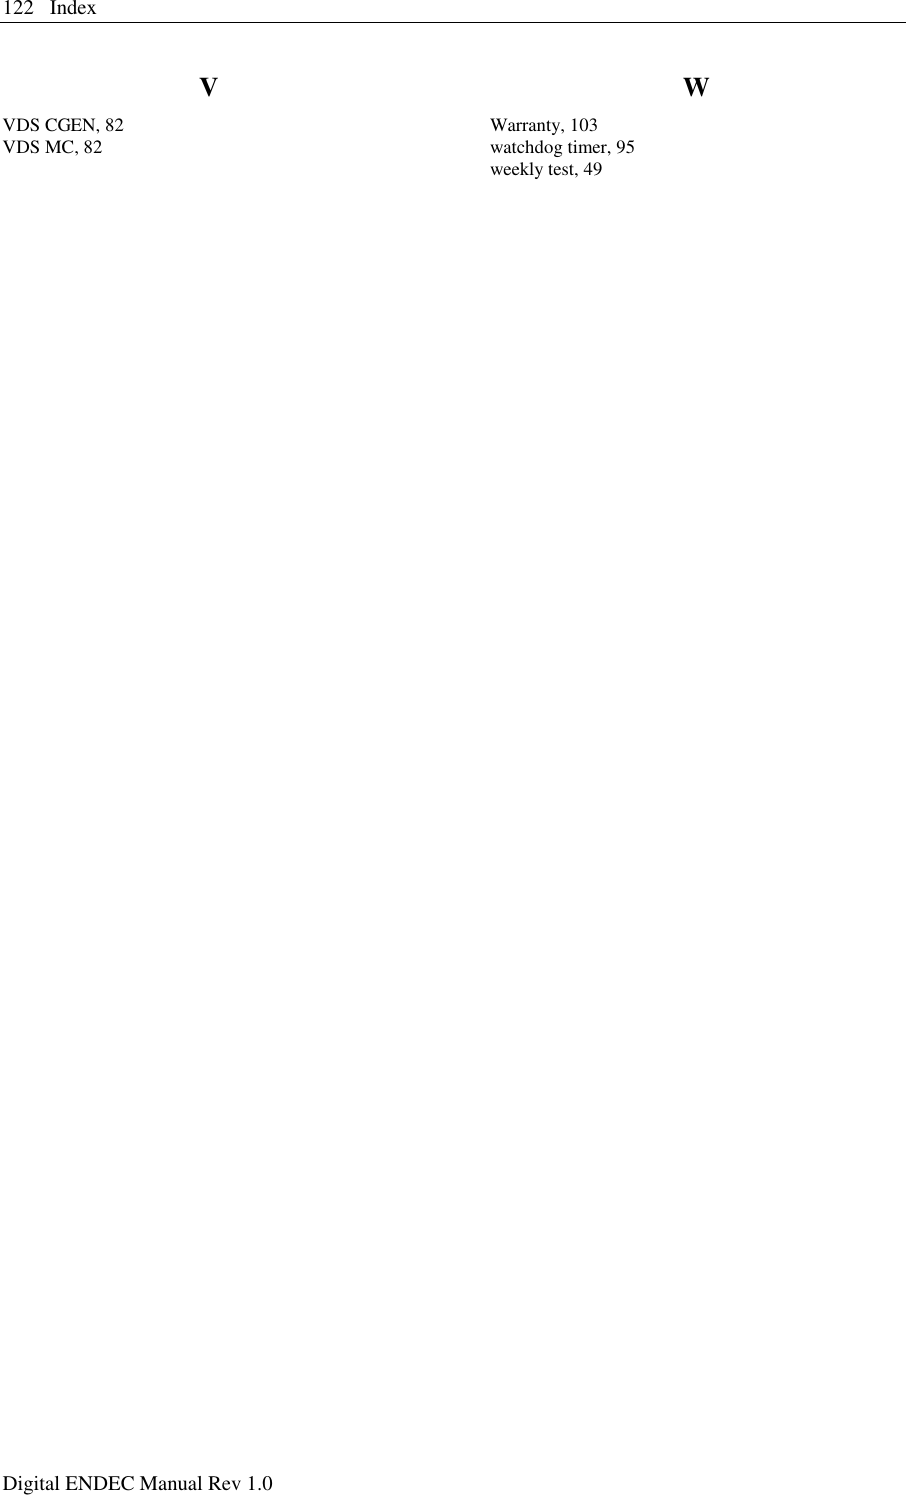
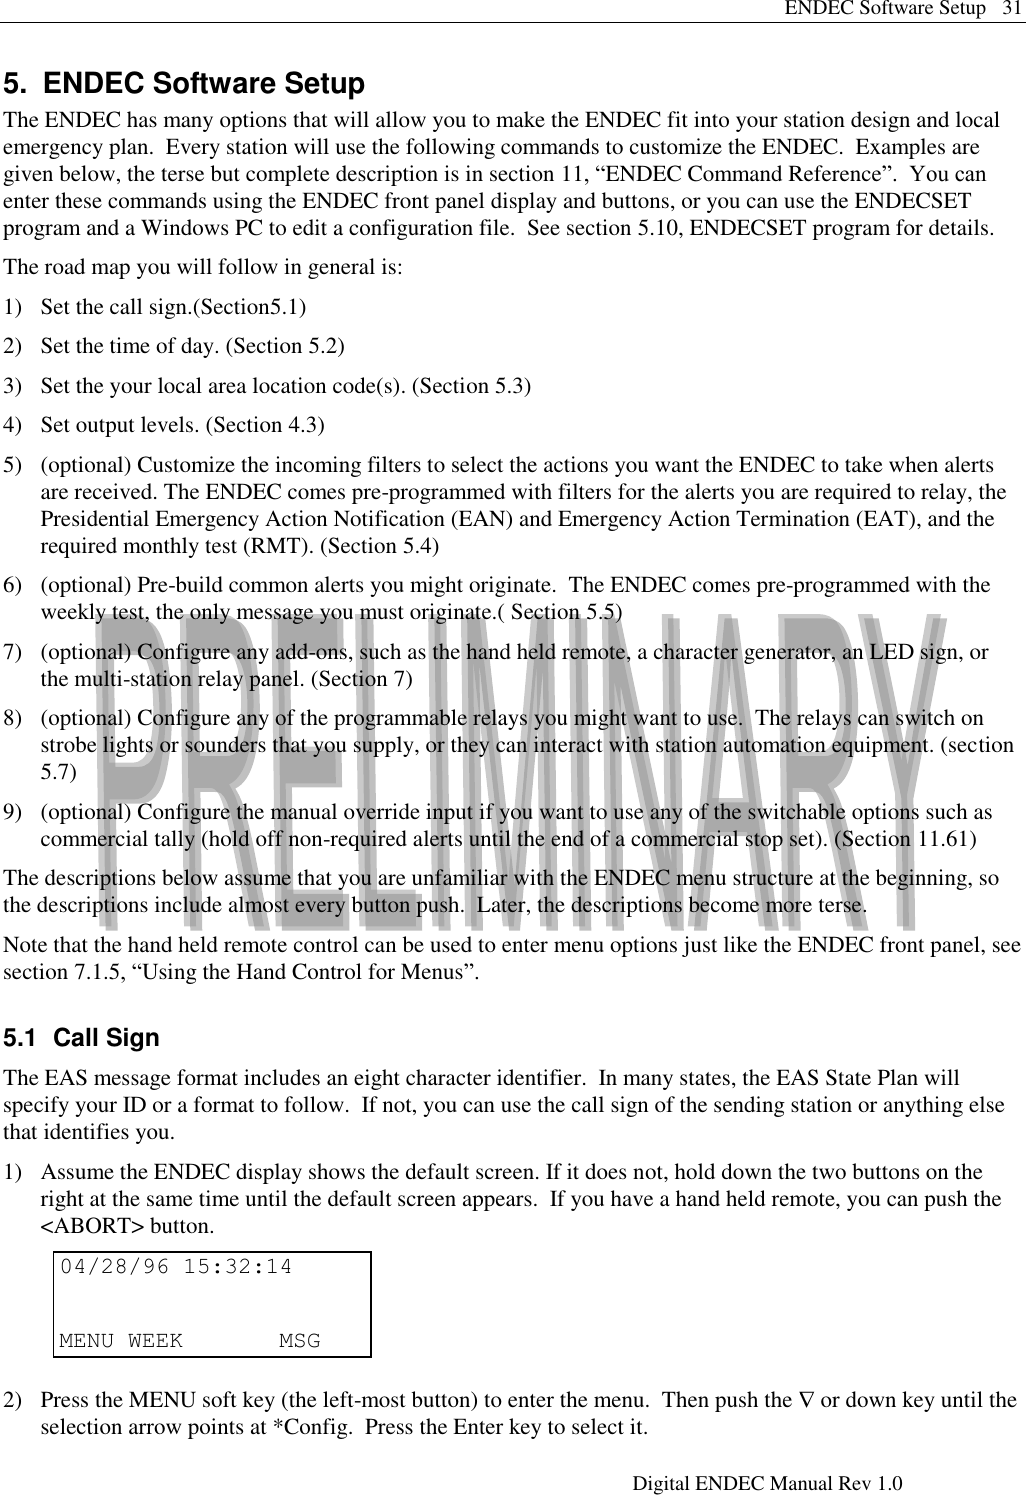
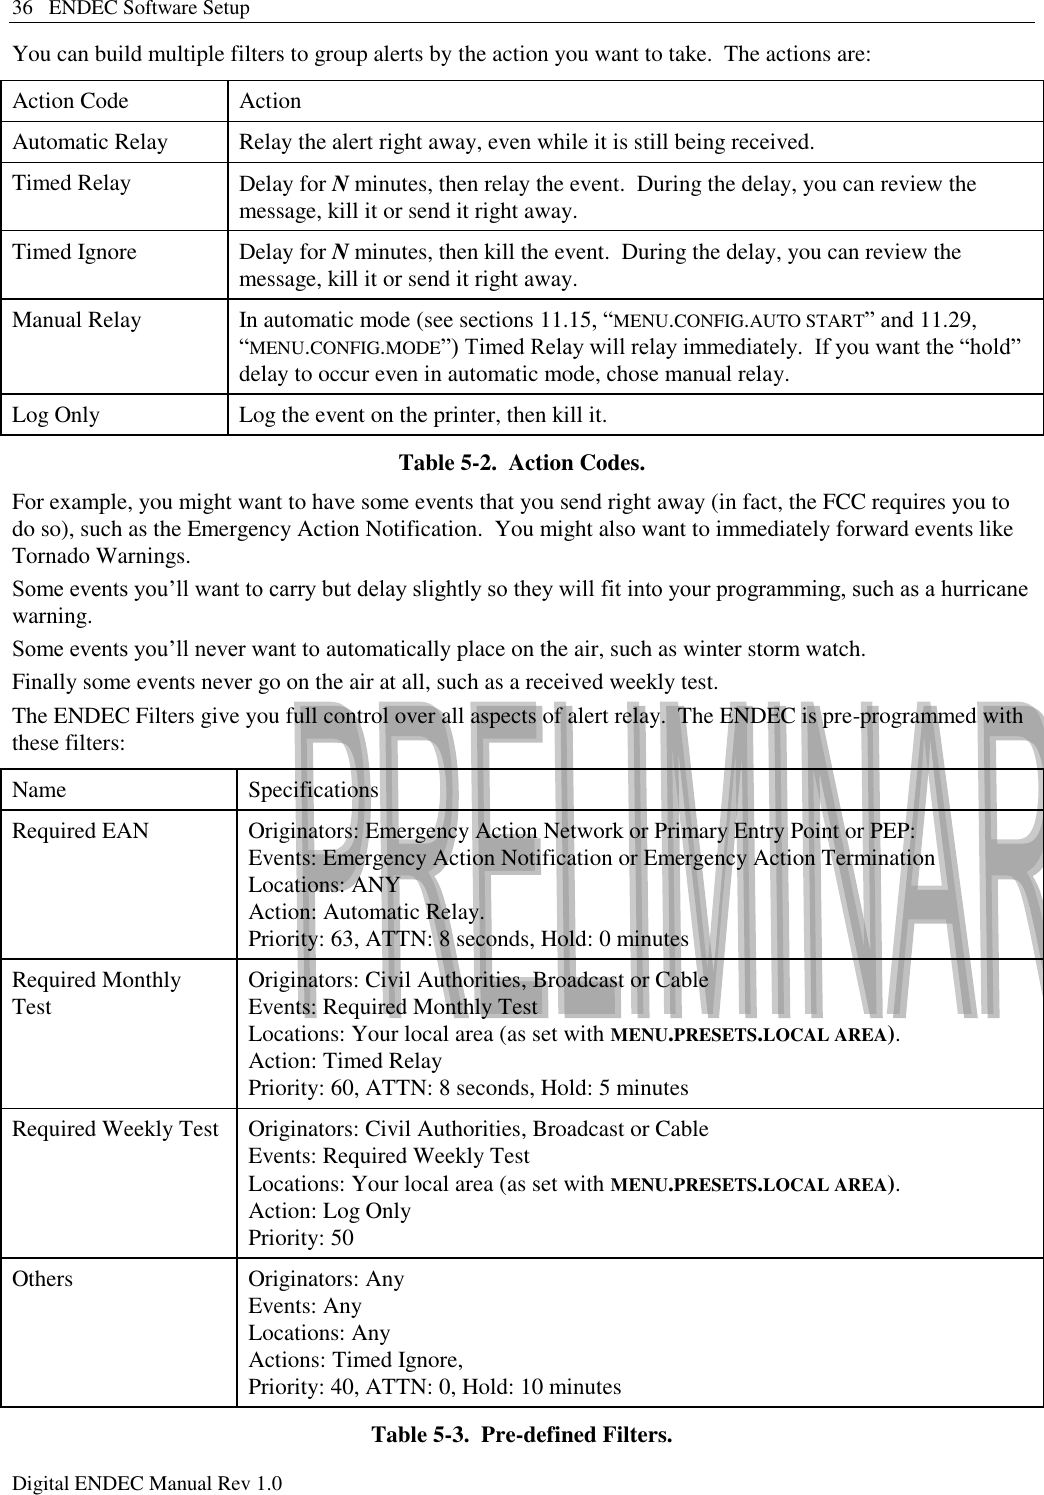
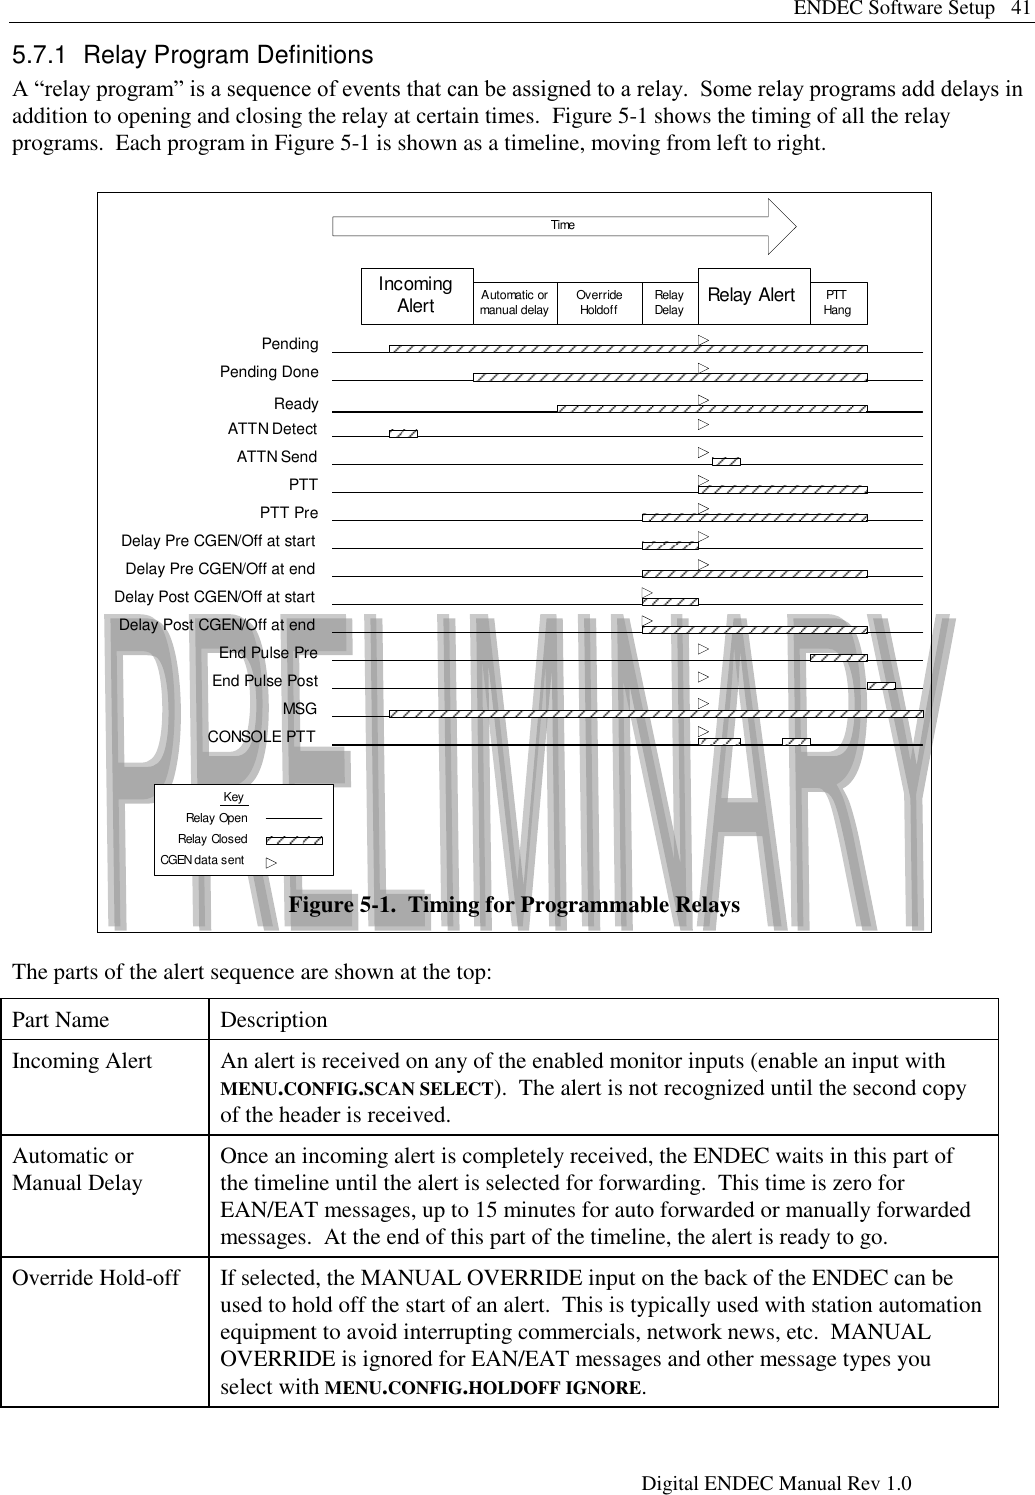
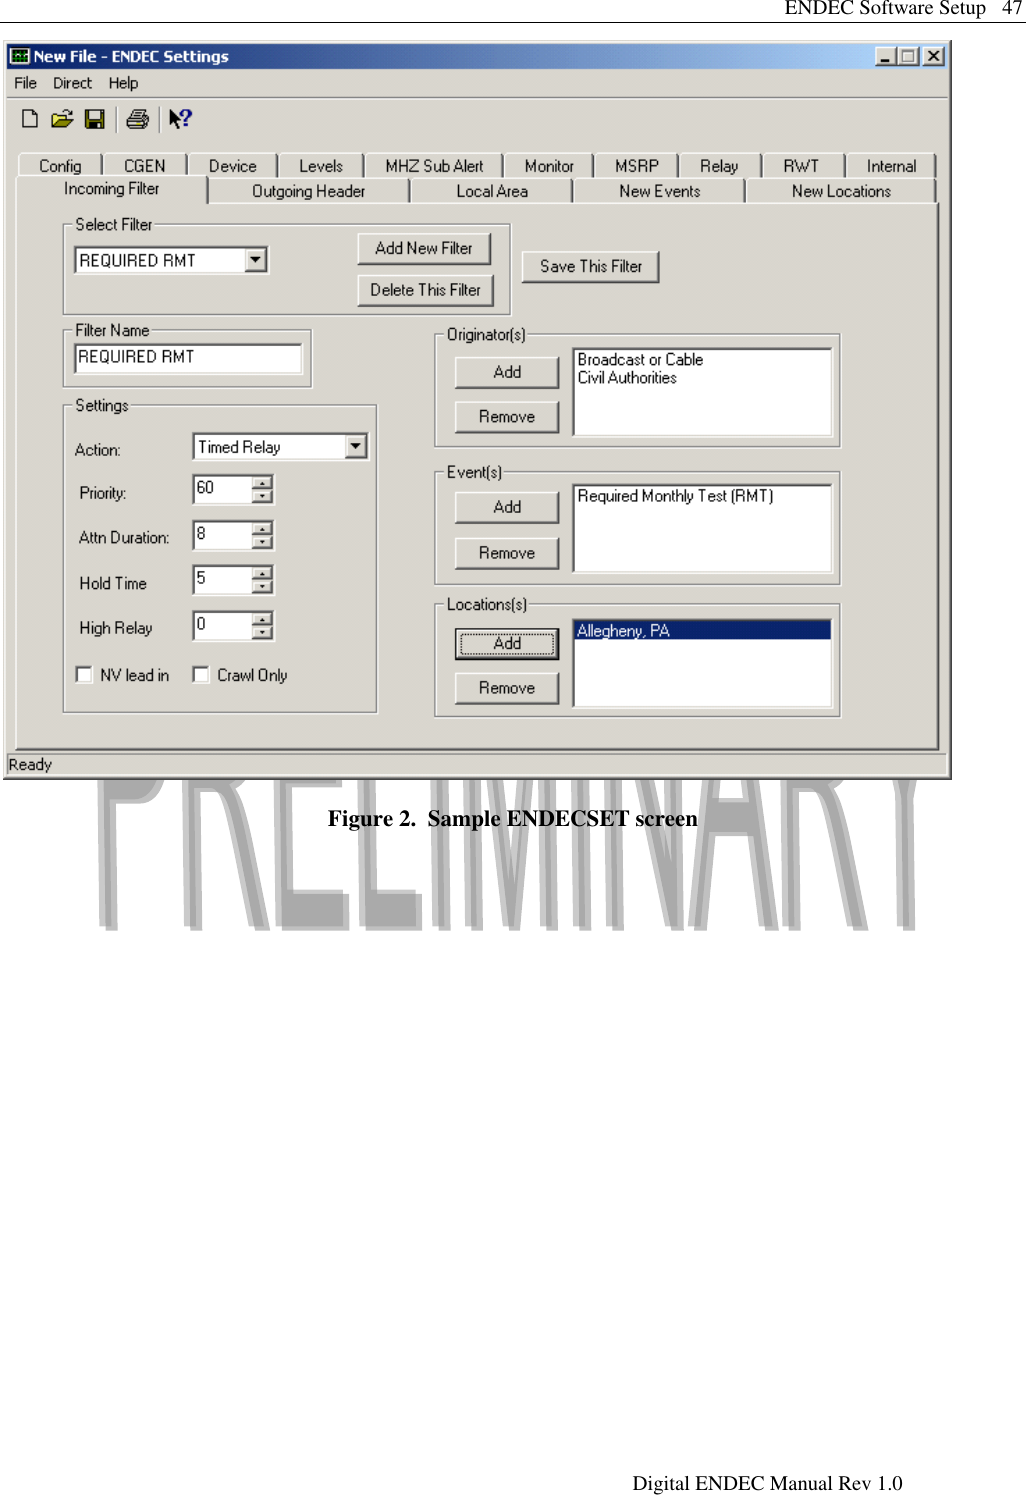
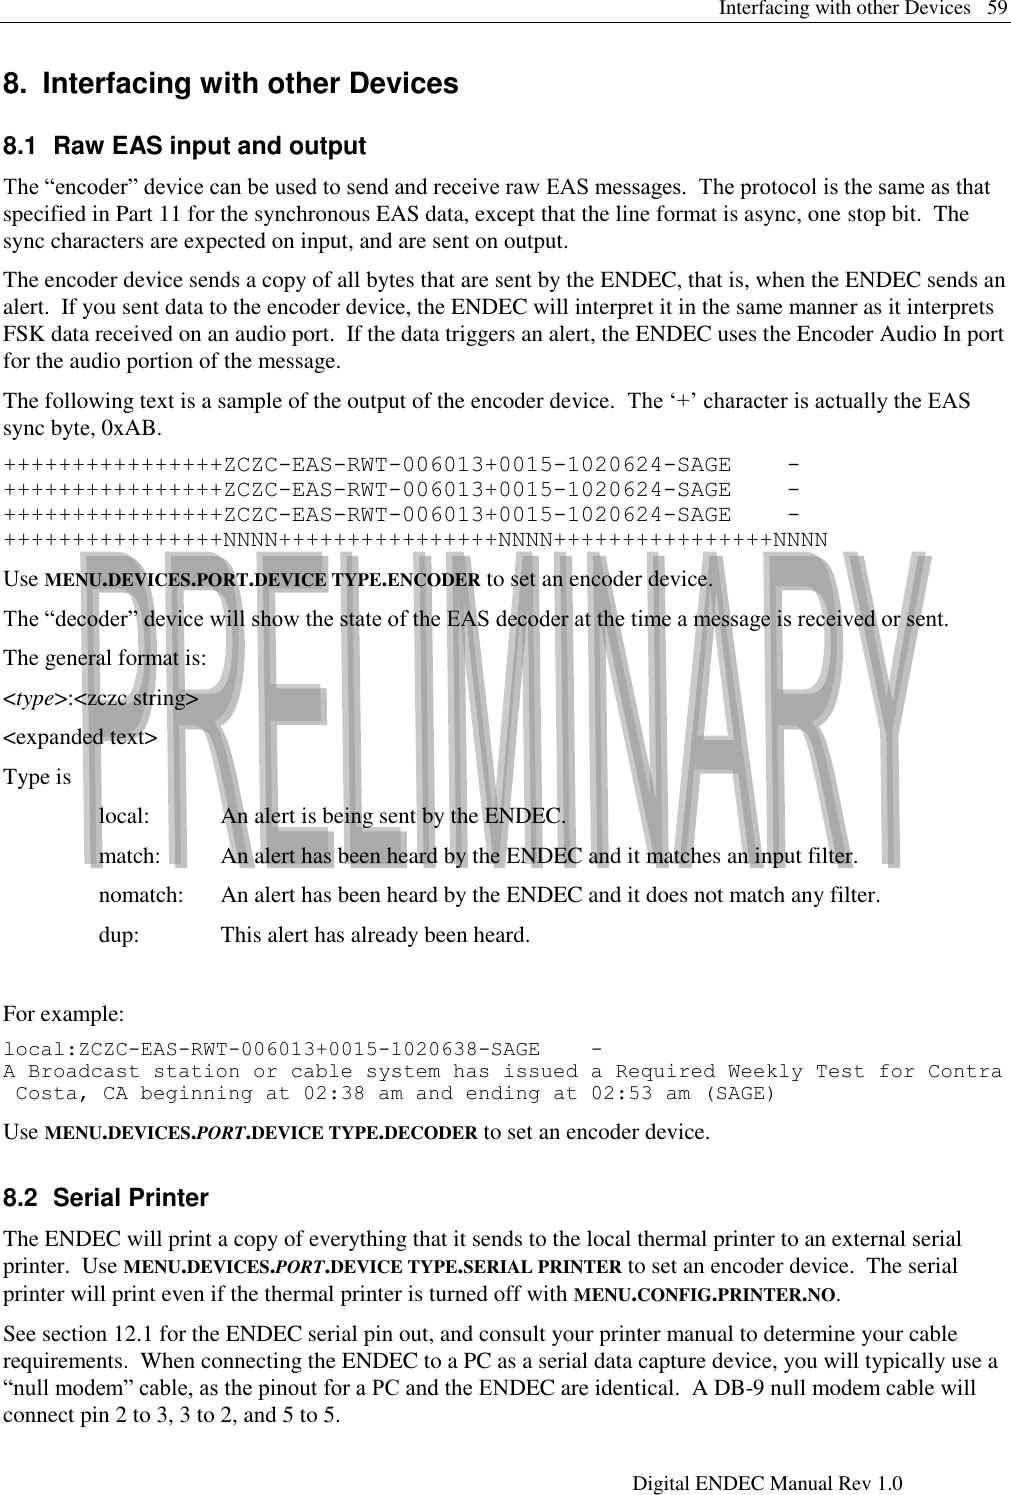
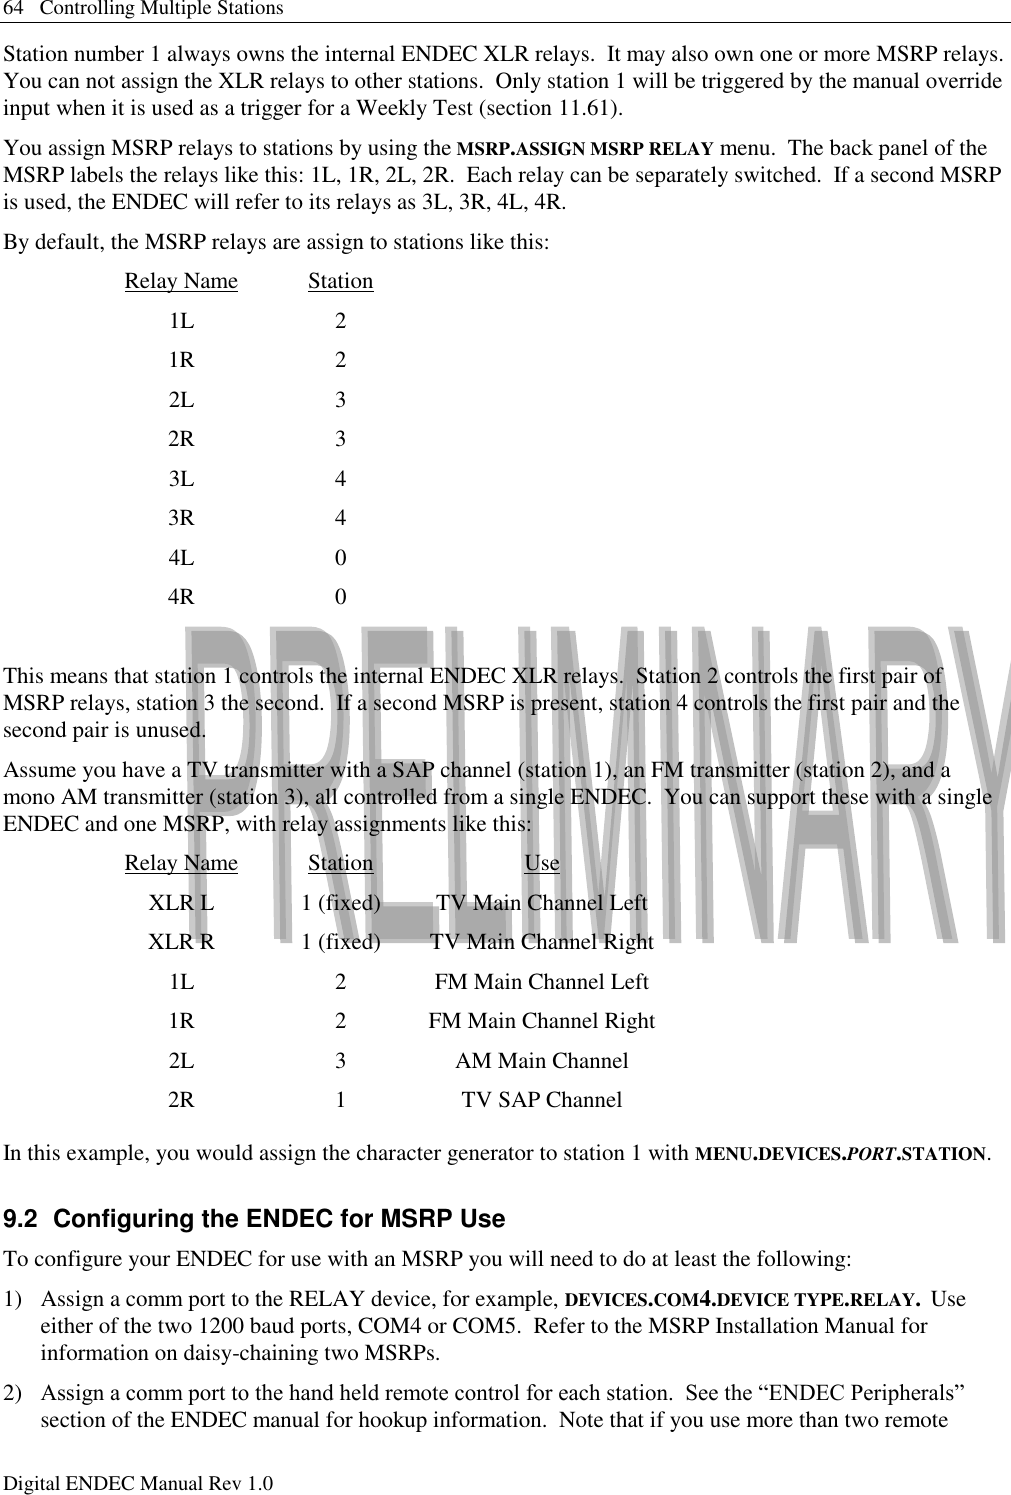
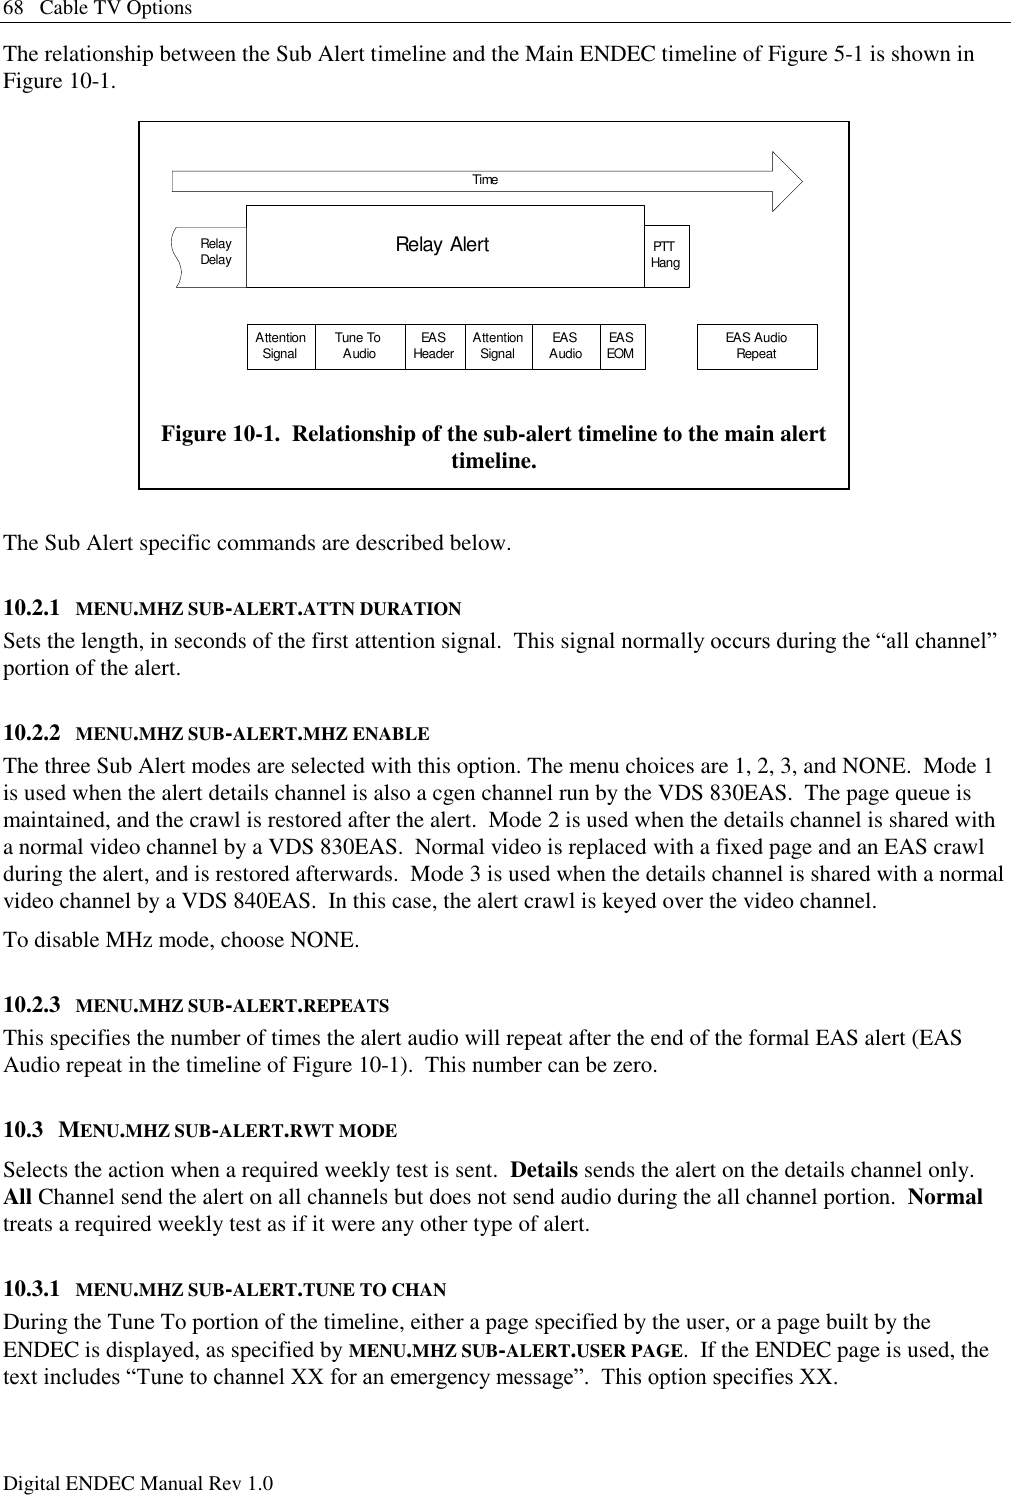
![ENDEC Hardware Setup 27 Digital ENDEC Manual Rev 1.0 Data Tone The data tone level works in a manner similar to the Attn tone (Figure 4-3). The tones are not combined, however, only one tone is on at a time. The individual tone settings can be used to compensate for any twist in the transmission levels. Set the individual tones to achieve the proper balance, then set data tone to get the desired output level. Data Low Tone Data low tone, 1562.5 Hz. Data High Tone Data high tone, 2083.3 Hz. Record Mon 1 Sets the level used by codec #1 to record into the digital audio store. The default setting is recommended. Record Mon 2 Sets the level used by codec #2 to record into the digital audio store. The default setting is recommended. Playback Sets the level used for playback of the digital audio store. A single level is used for all input sources. The various monitor inputs should all be at similar levels before they reach the ENDEC. The default level is recommended. Attn Thresh To avoid false detects, the DSP attention decoder requires a minimum level for the received Attn signal. If the upstream ATTN signal is at a low level, make the Attn threshold lower. If the ENDEC does not decode the Attn signal, it is unable to filter it out of the stored audio and you will hear it on playback. Table 4-2. Levels that can be changed with the levels menu. 4.4 Digital Audio [TBS] Attn HighAttn LowAttn High ToneLevelAttn Low ToneLevelAttn ToneLevelAttn Signal Figure 4-3. DSP-based ATTN signal level adjustments. The Data tone is similar. Individual tones can be adjusted for pre-emphasis.](https://usermanual.wiki/Sage-Alerting-Systems/3644/User-Guide-926990-Page-27.png)
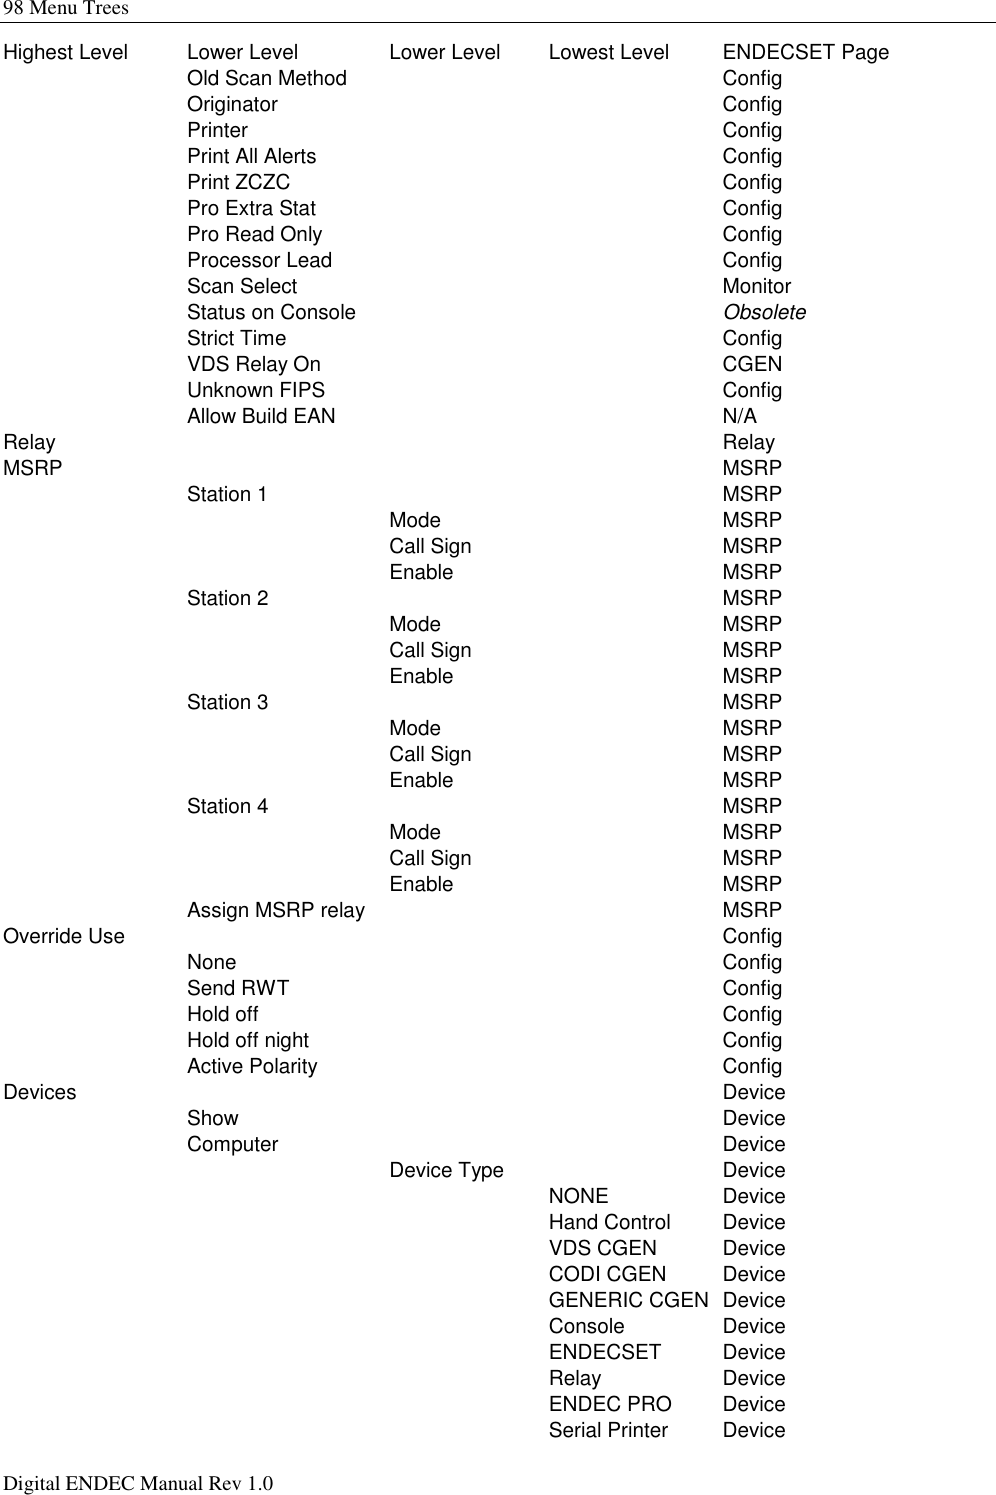
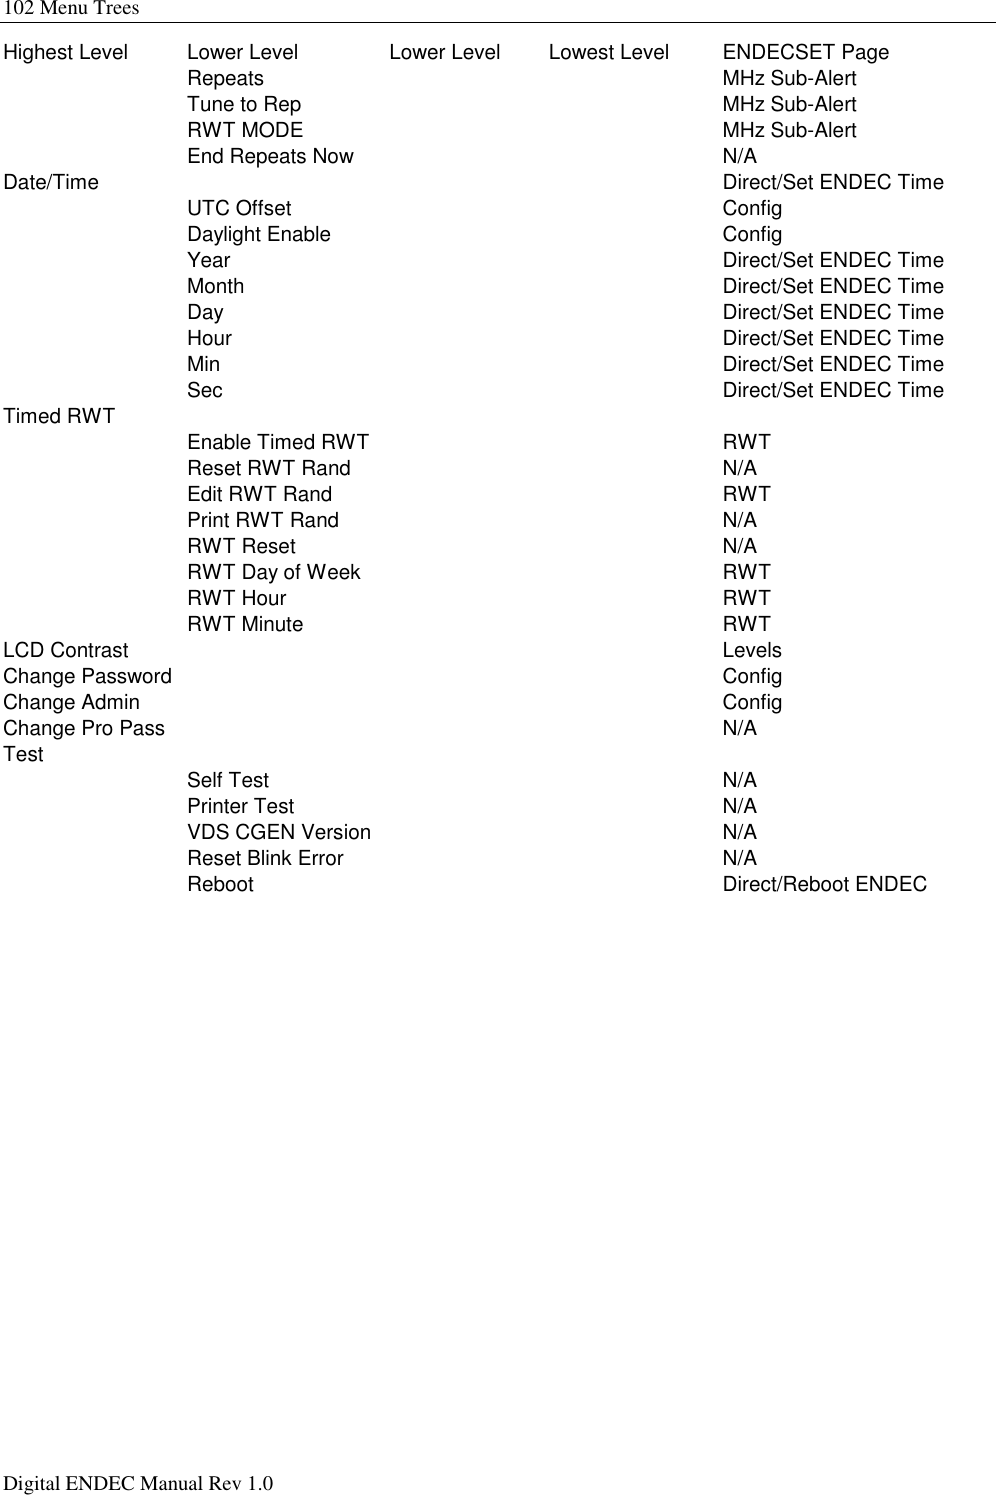
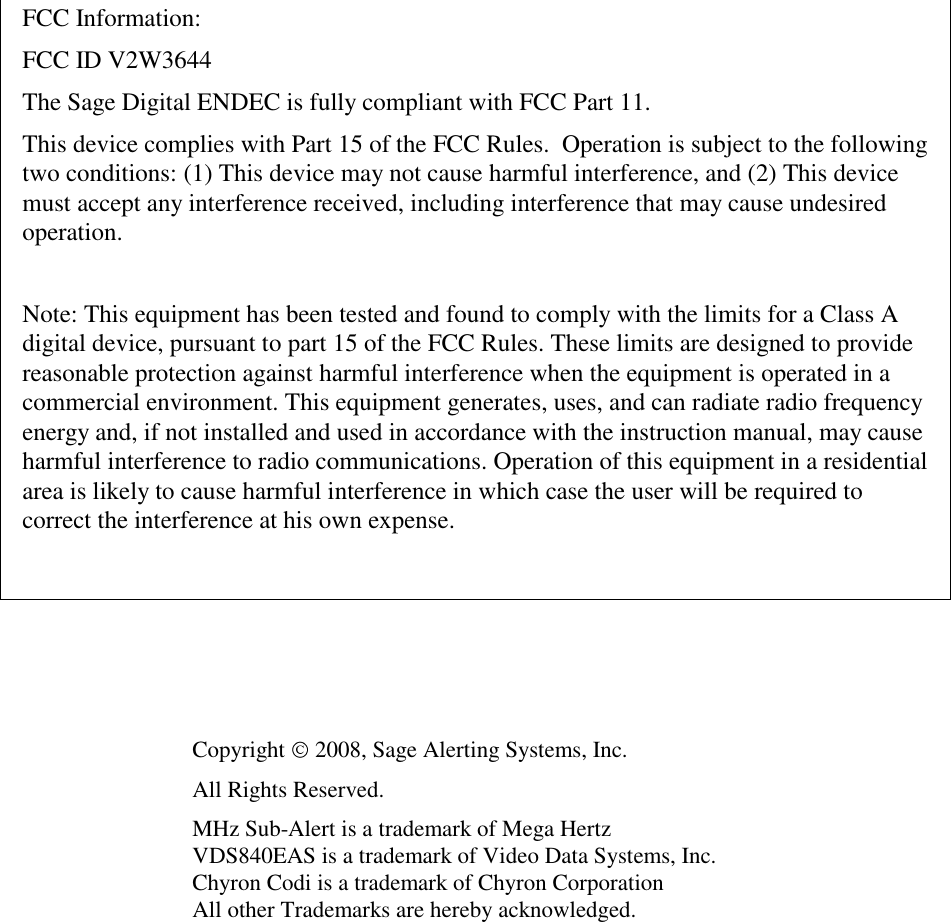
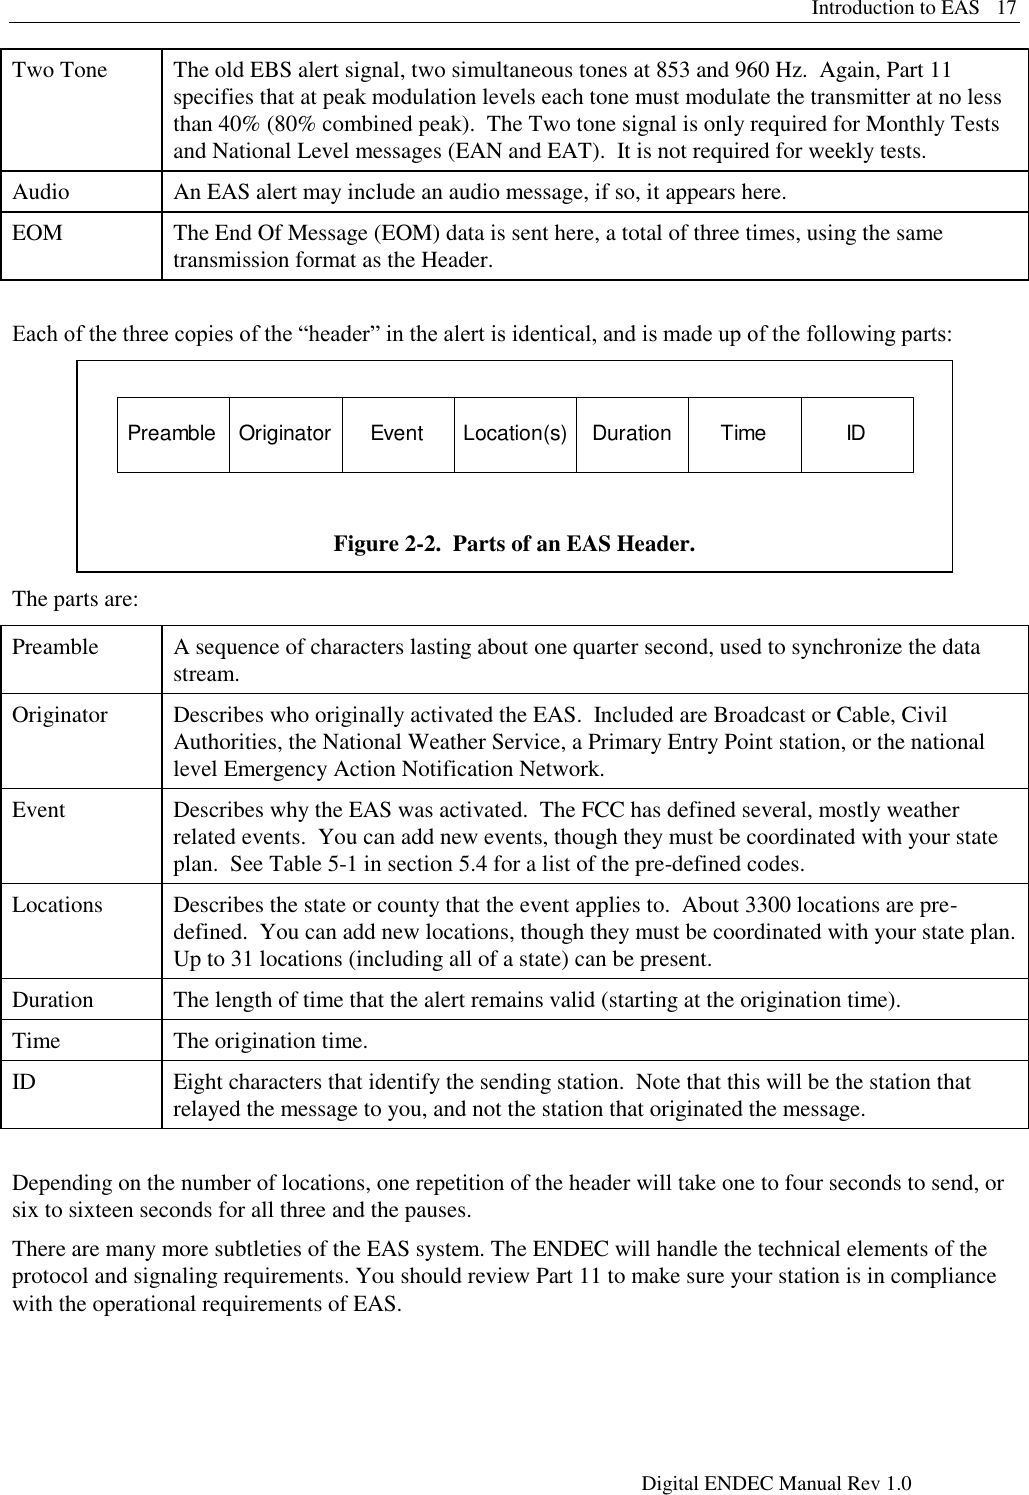
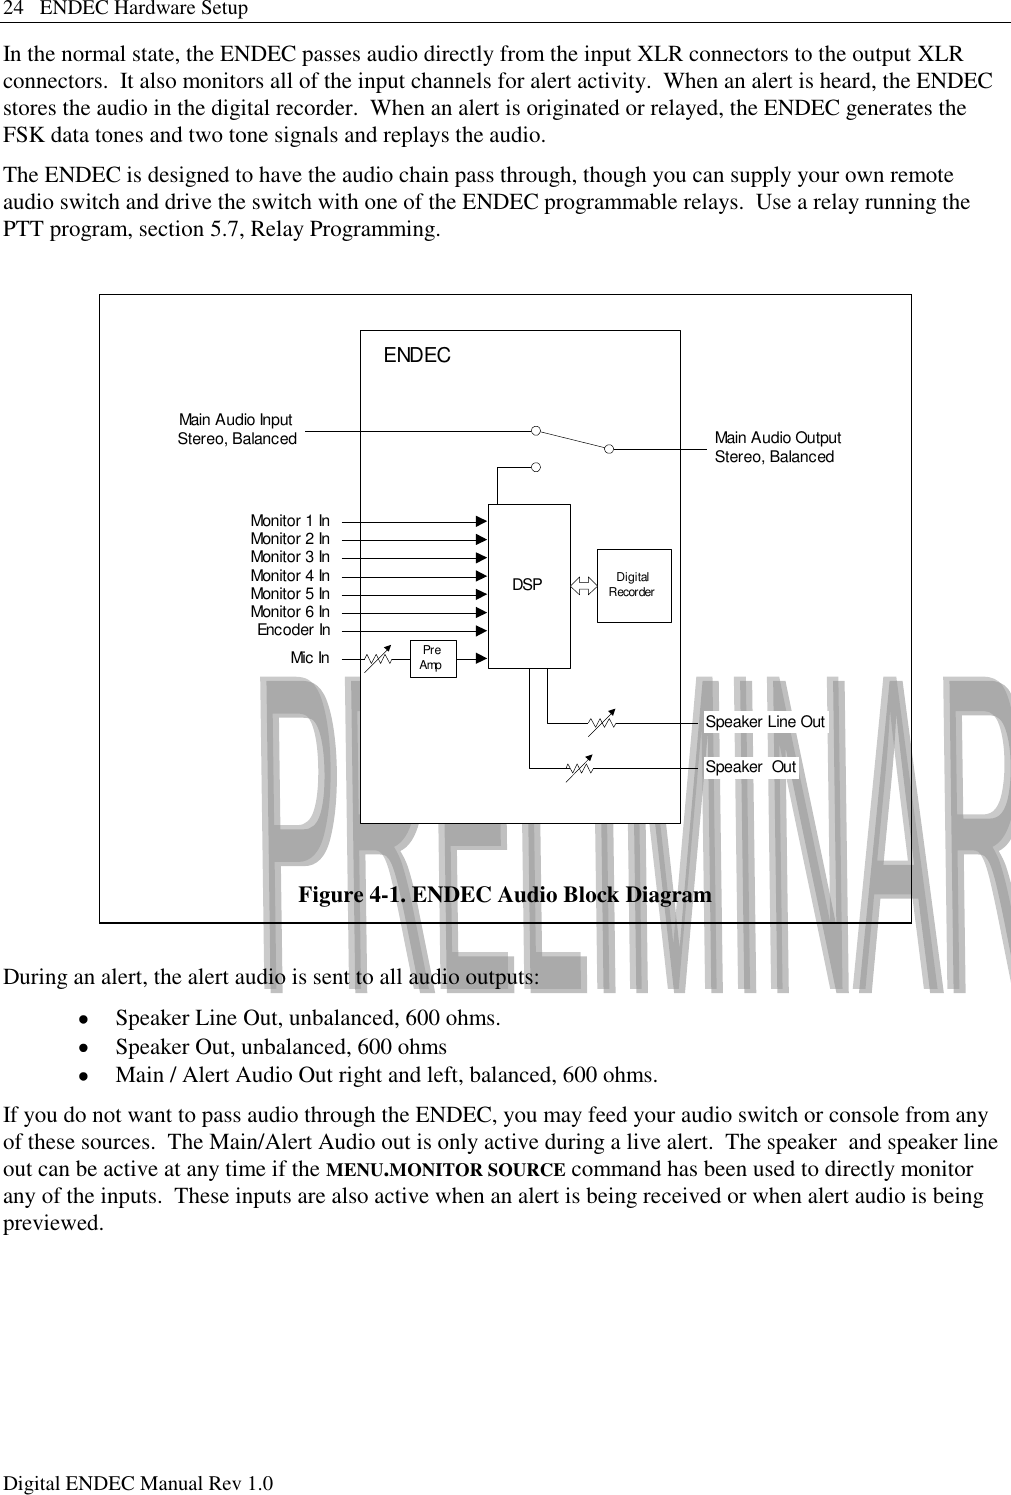
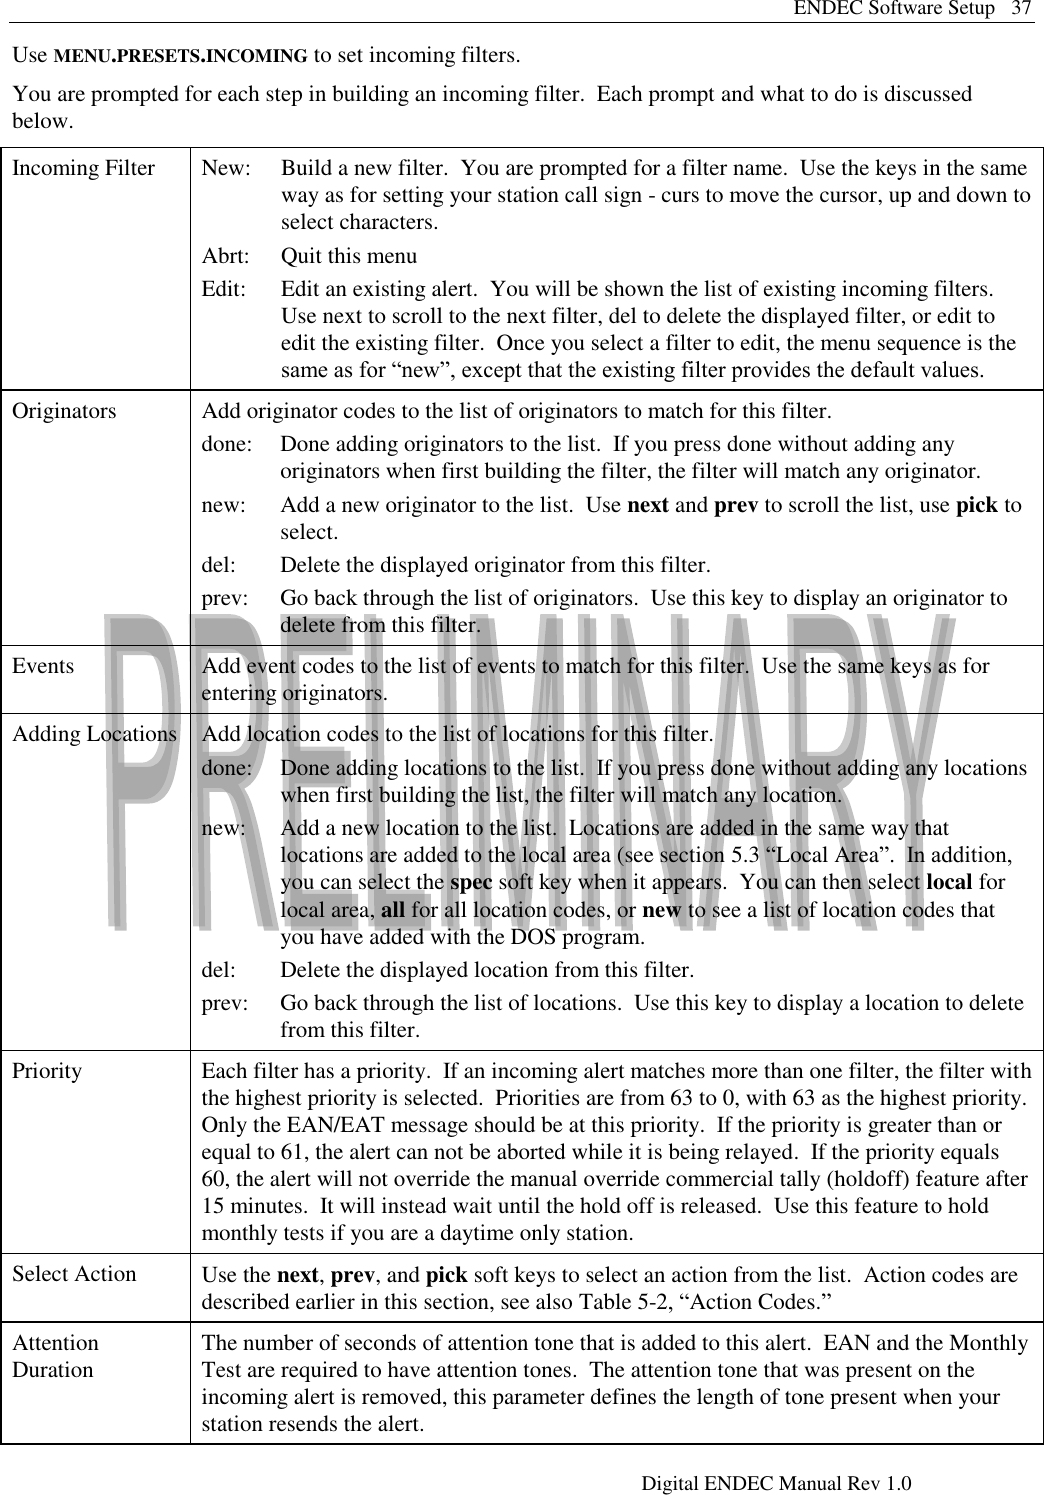
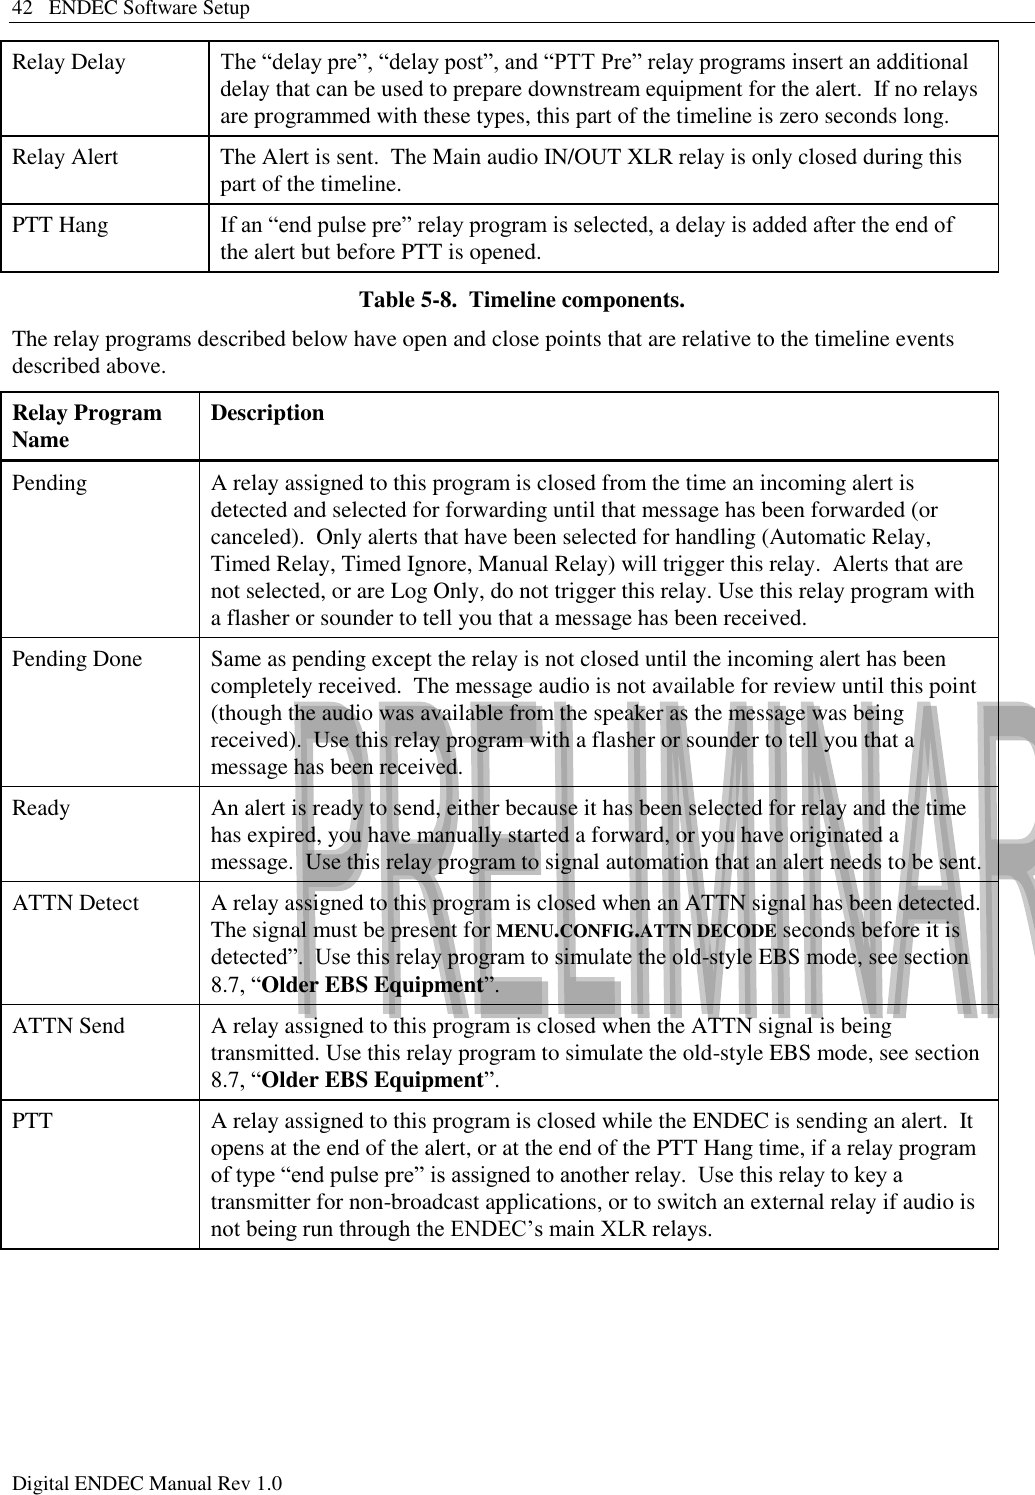
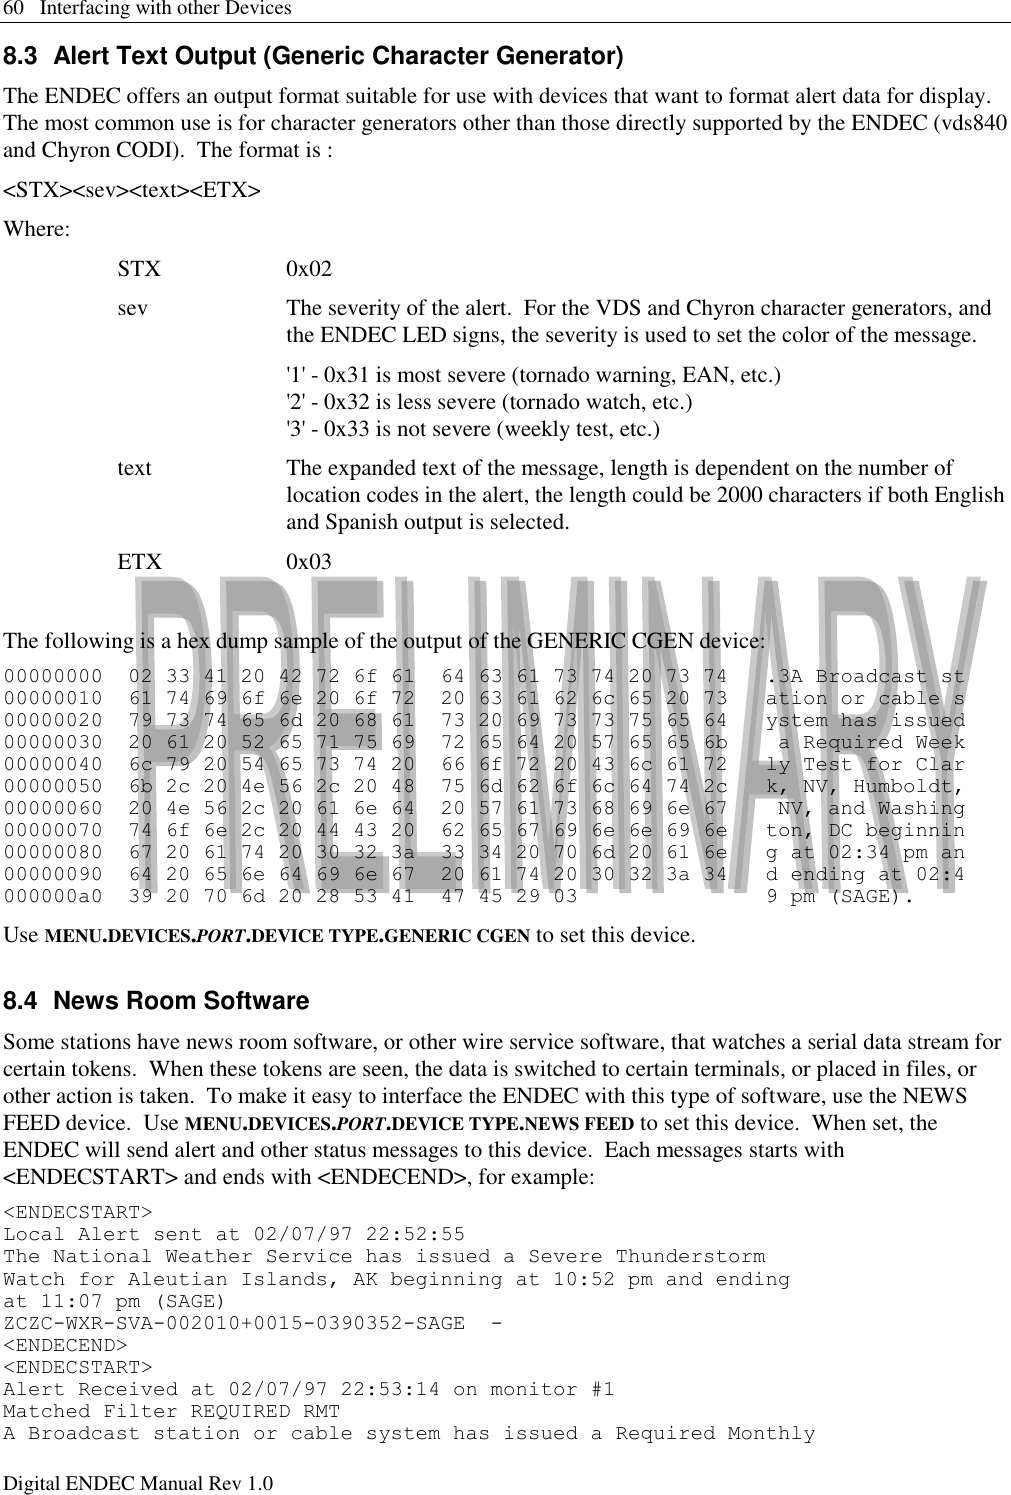
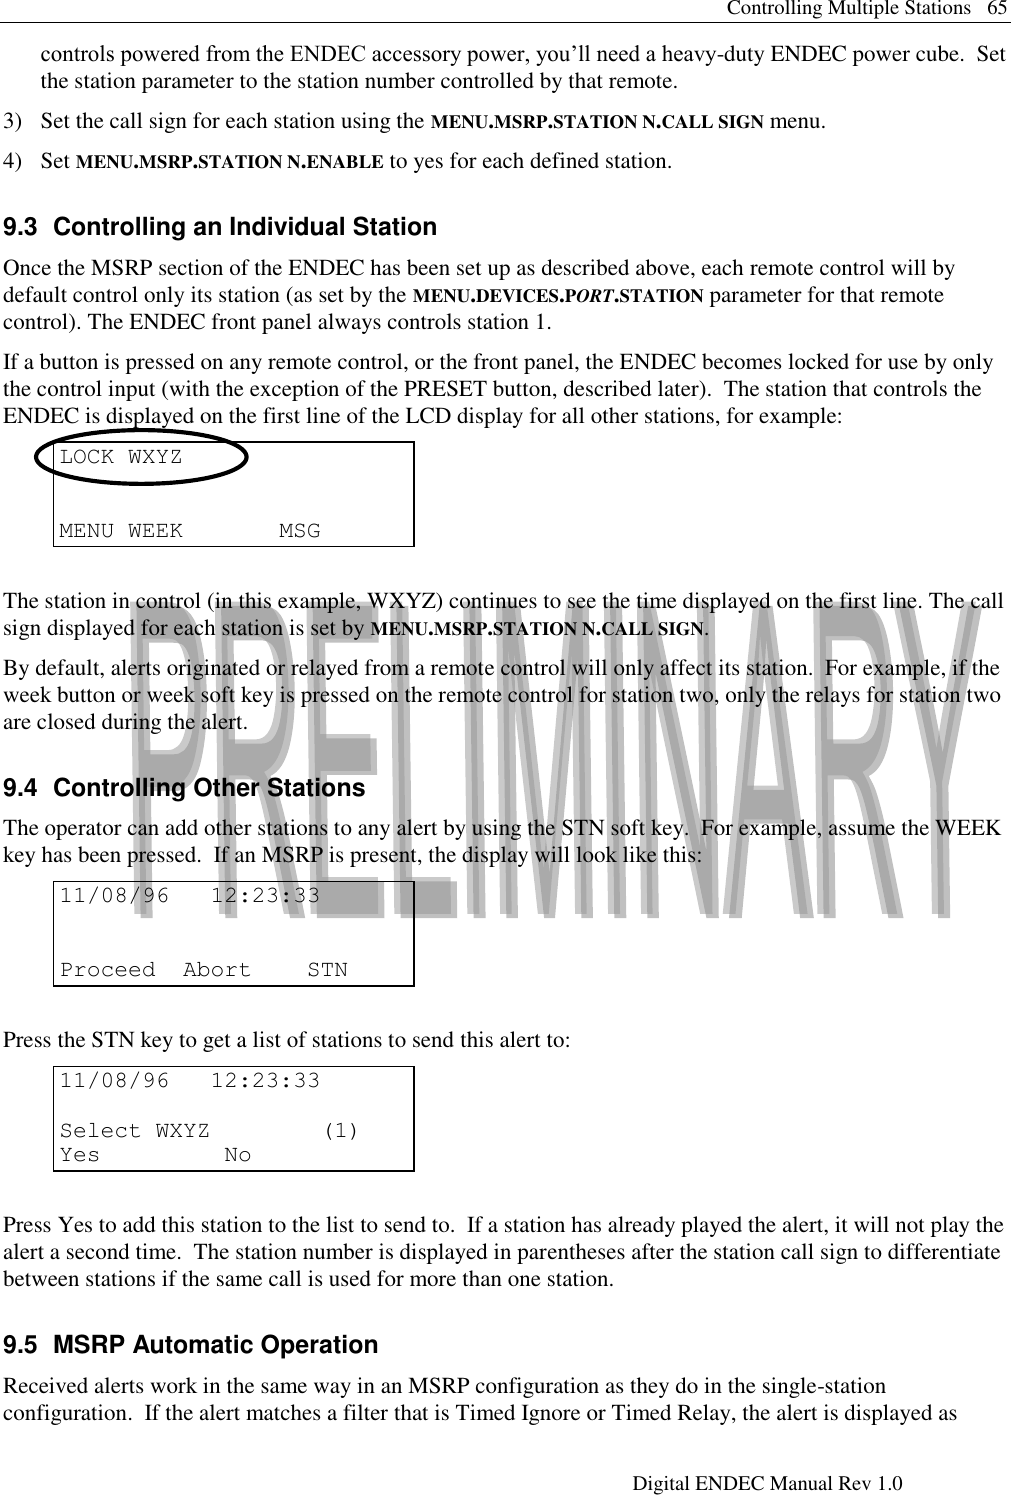
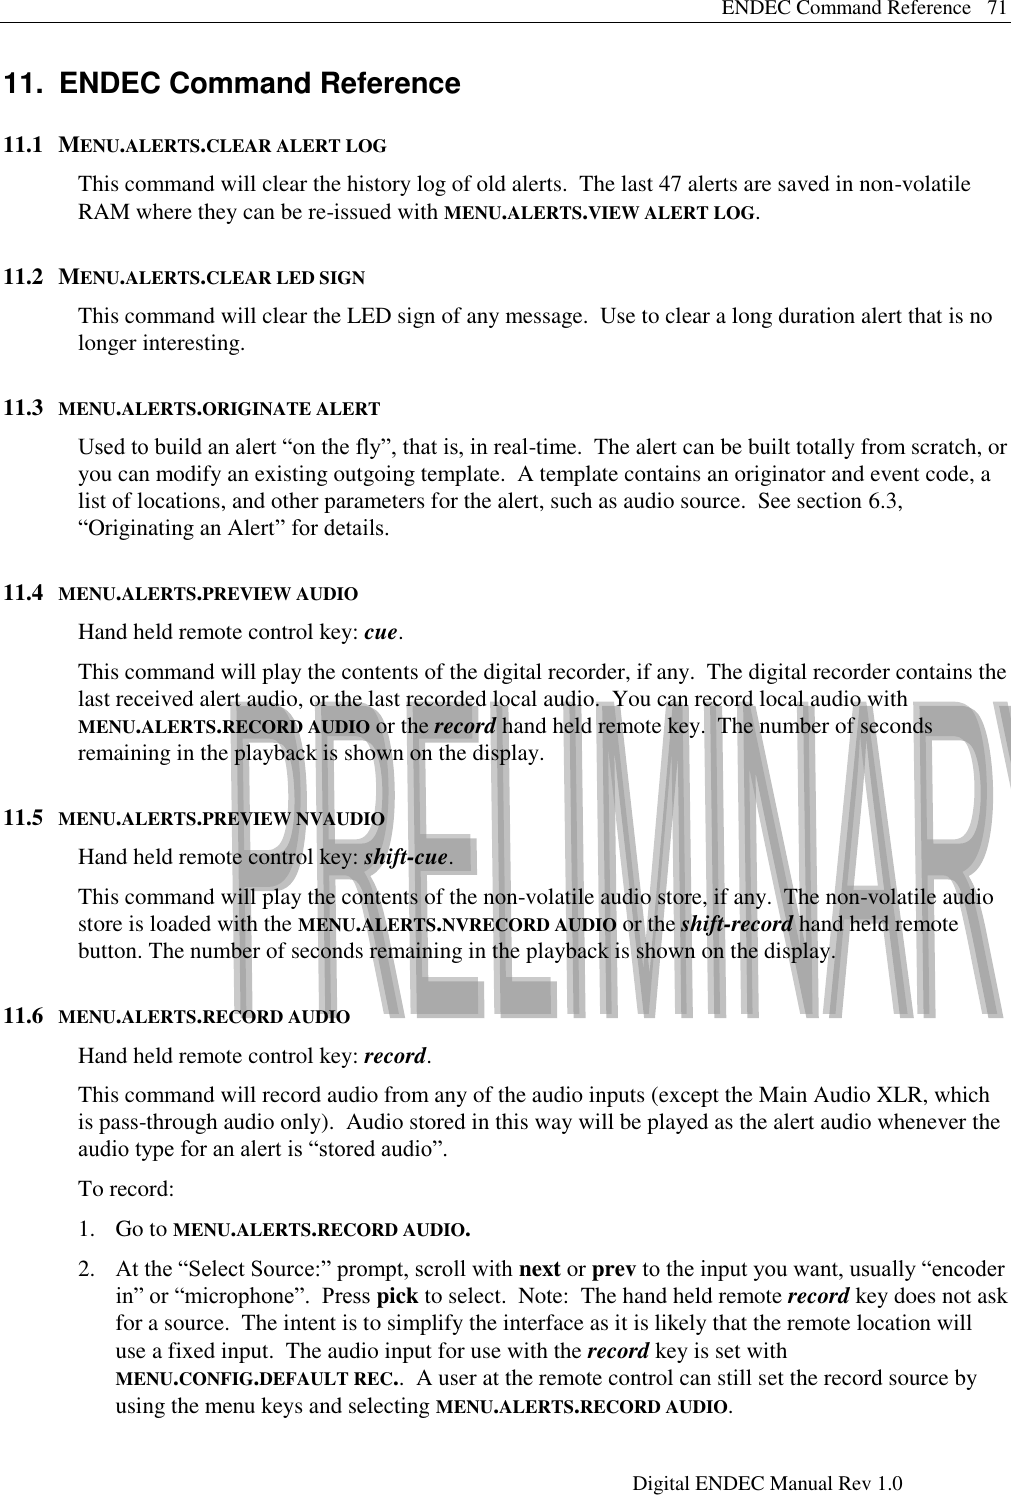
![28 ENDEC Hardware Setup Digital ENDEC Manual Rev 1.0 4.5 Digital Audio Levels [TBS] 4.6 Serial Ports The ENDEC provides six serial ports that can be used for a variety of purposes. Each serial port is wired like an IBM PC 9-pin connector. Pin outs are provided in section 12. The ports run at different baud rates. Two of them can‟t be set for the two stop bits required by the LED signs. Table 4-3 describes each serial port. Table 4-4 shows which of the supported ENDEC peripherals can run on which port. A complete list of all device types is in section 11.50. Serial Port Description COM 2 Fixed at 9600 baud COM 3 Variable baud rate, fixed at one stop bit, can‟t use for LED Sign. COM 4 Fixed at 1200 baud COM 5 Fixed at 1200 baud COM 6 Fixed at 9600 baud Computer Variable baud rate, one stop bit, can‟t use for LED Sign. Table 4-3. Serial Port Descriptions Device Ports VDS CGEN Any, VDS baud rate adjustable with internal jumpers. Chyron CODI Any, Baud rate adjustable with dip switches on CODI rear panel. LED Sign Not Computer or COM 3, any of the others (The LED sign automatically adjusts its baud rate to match the ENDEC). ENDEC PRO/DJ Any, use ENDEC PRO/DJ port menu to change baud rate. Hand Held Remote Any, change baud rate with procedure in section 7.1, “Hand Control” Table 4-4. Device and Port pairings. To assign a device type to a comm port, use MENU.DEVICES.PORT.DEVICE TYPES. To change the baud rate of the variable baud rate ports, use MENU.DEVICES.PORT.BAUD.](https://usermanual.wiki/Sage-Alerting-Systems/3644/User-Guide-926990-Page-28.png)


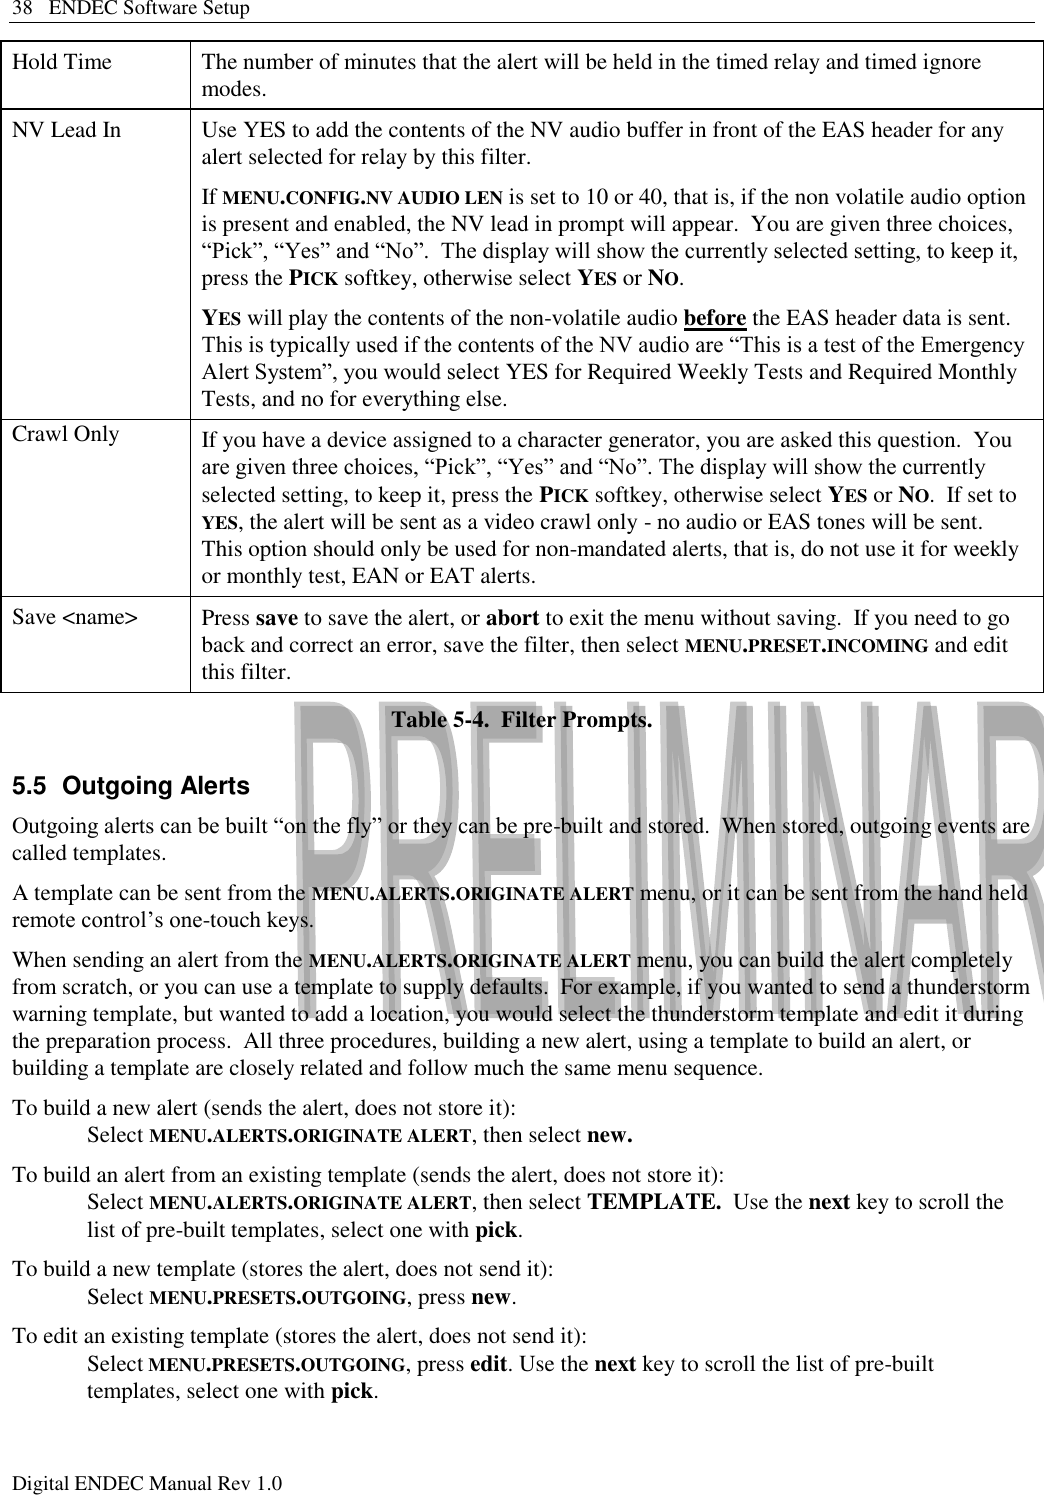

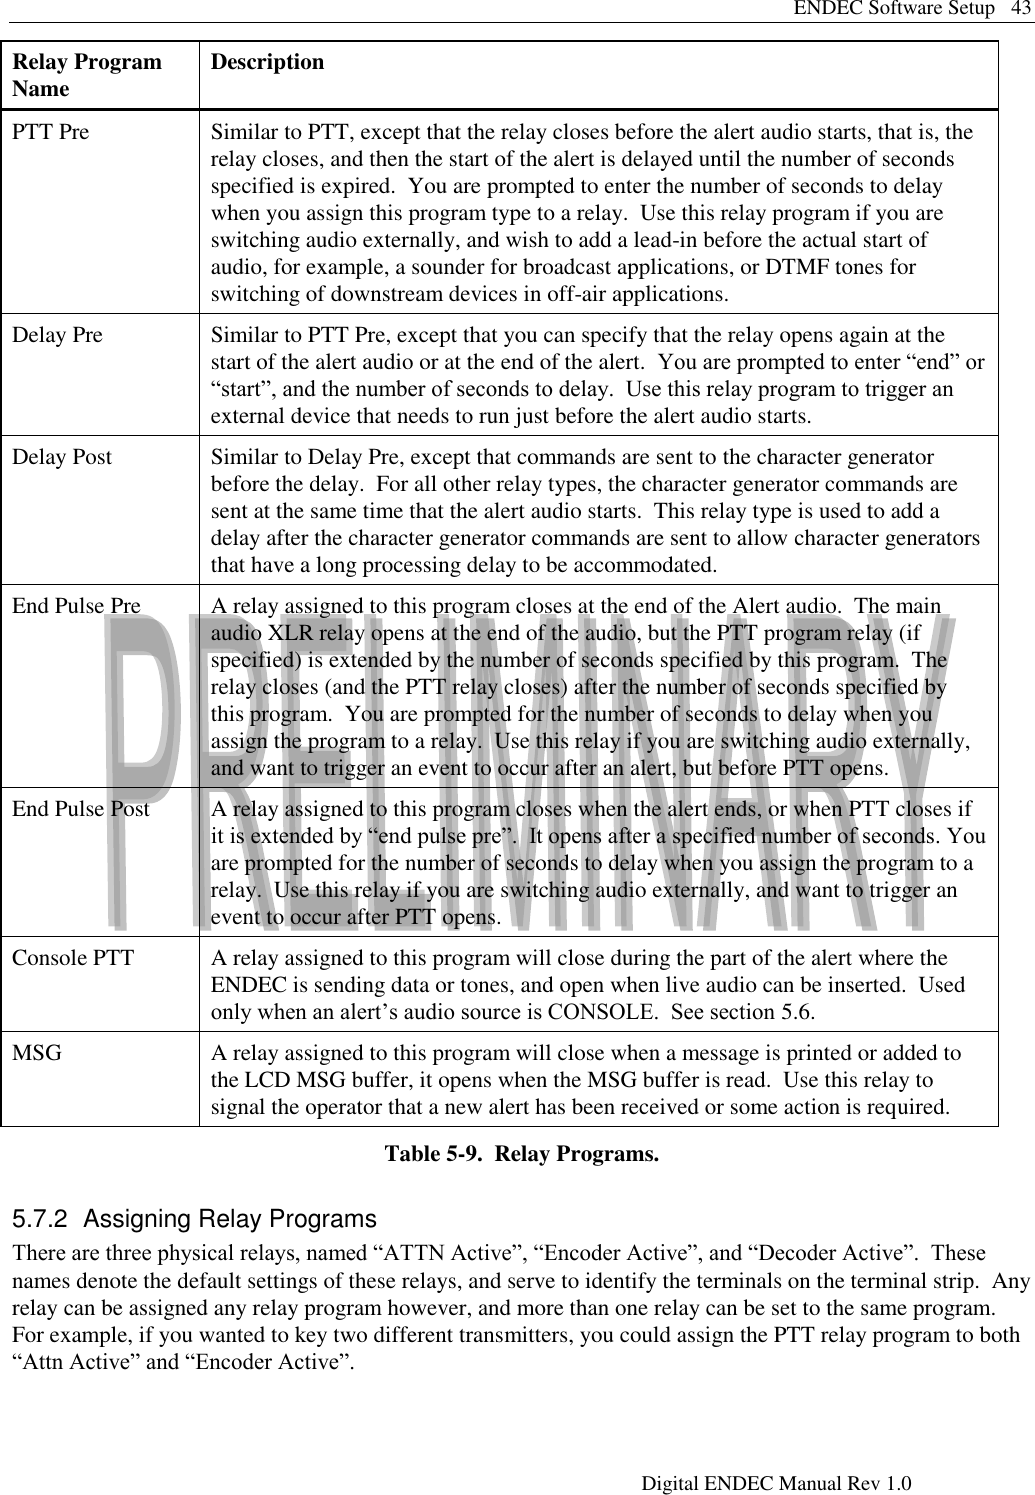


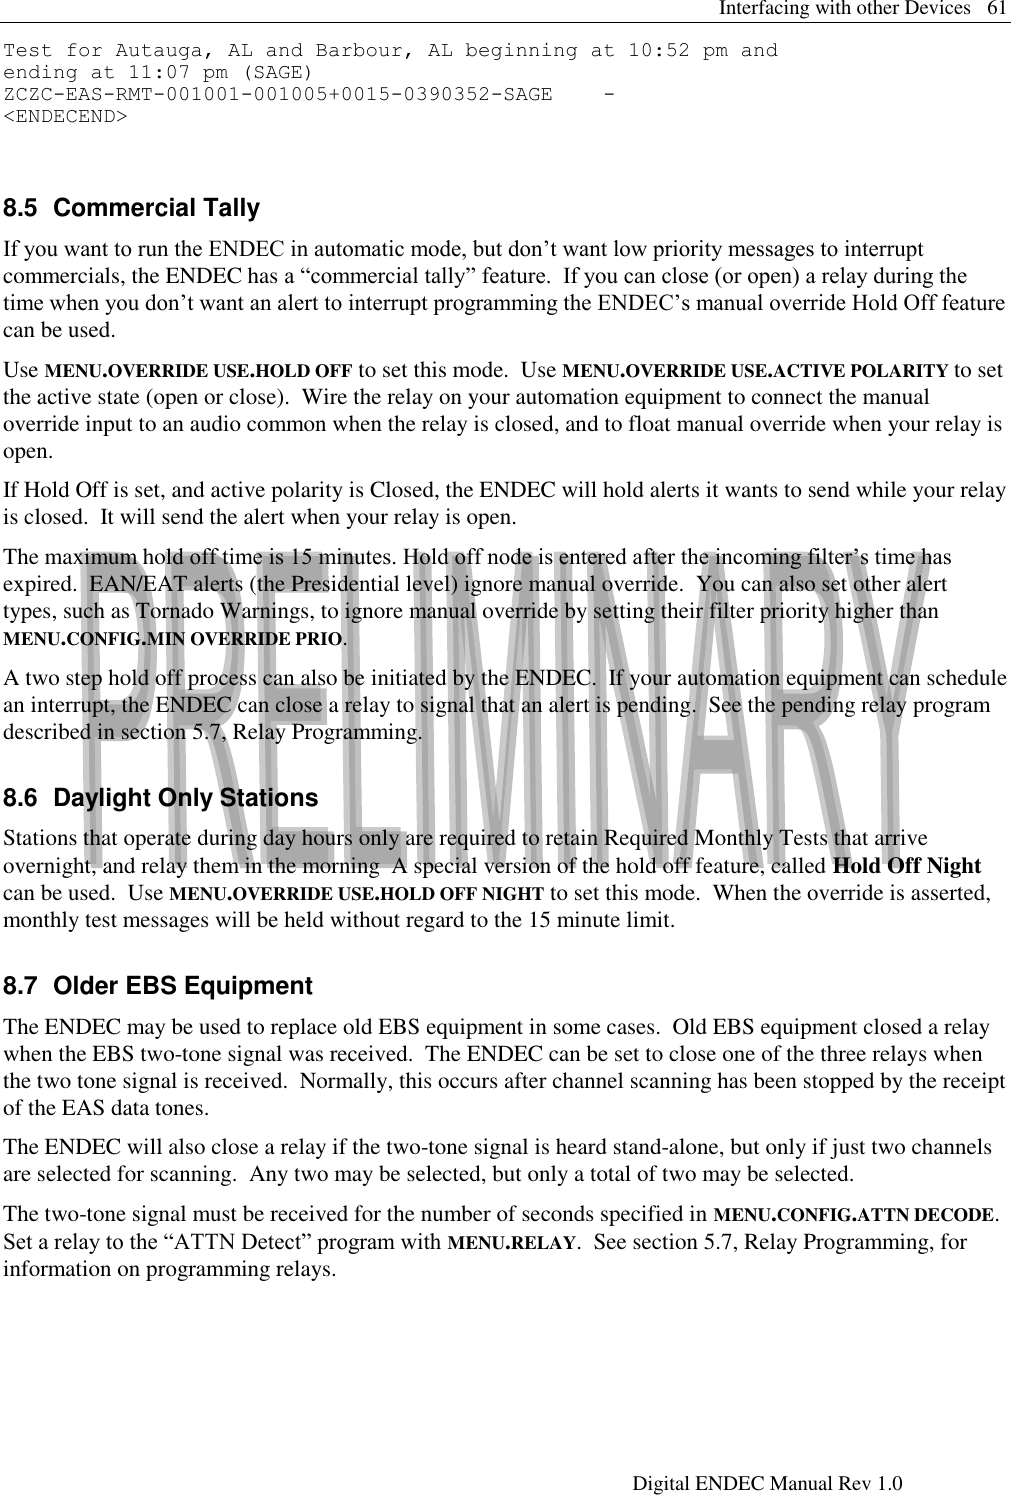

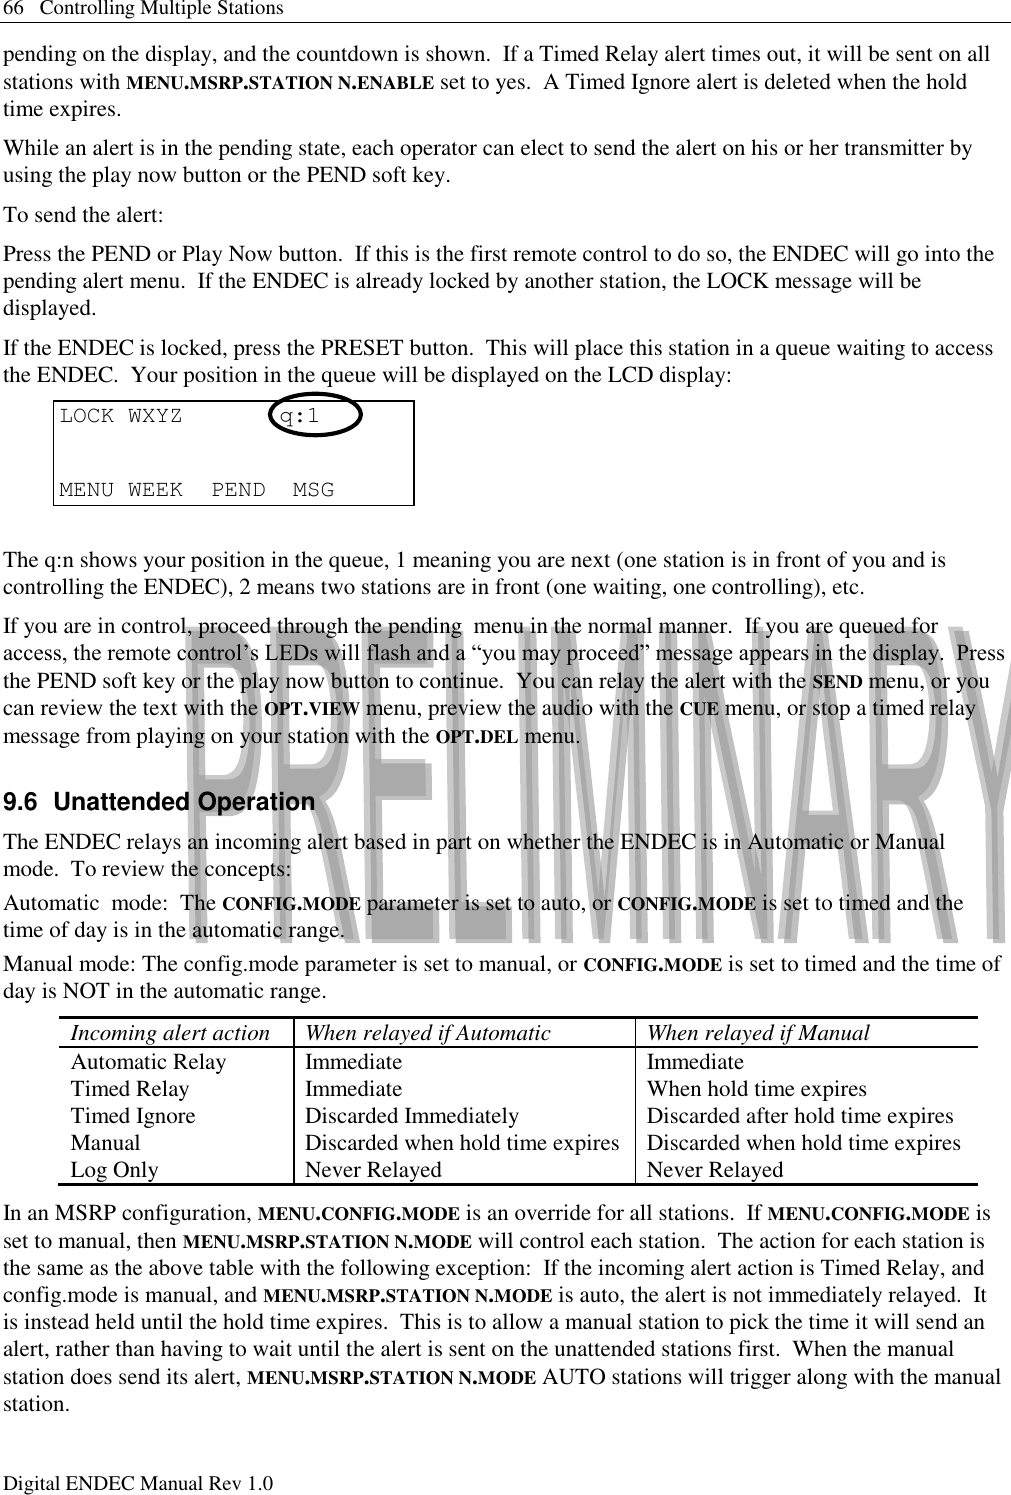


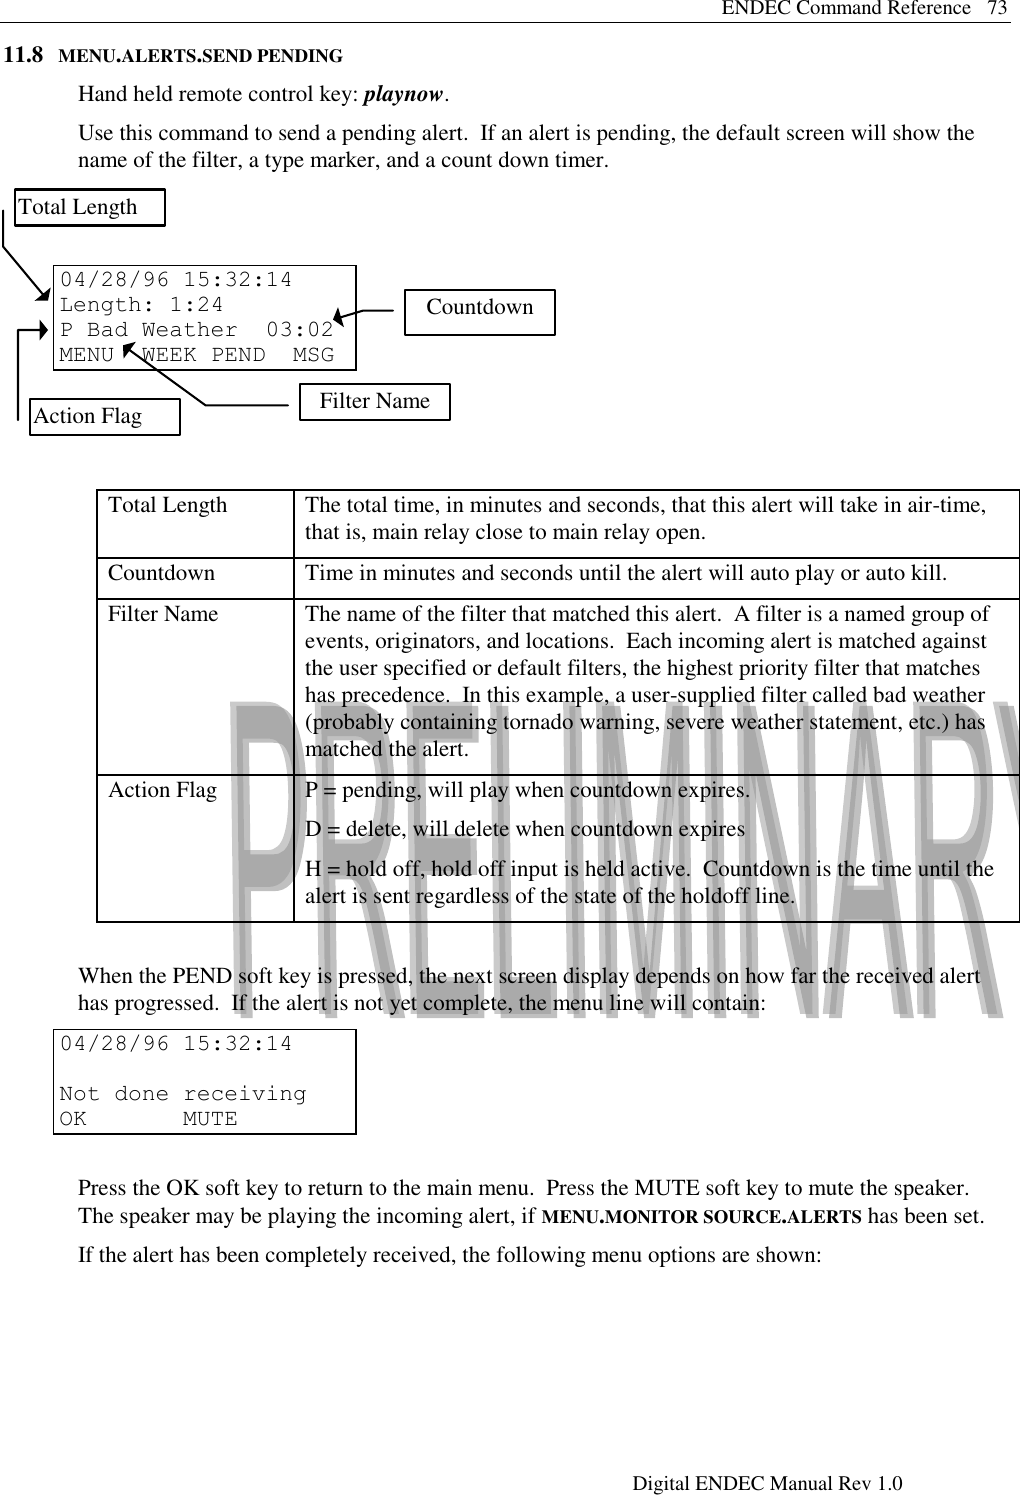


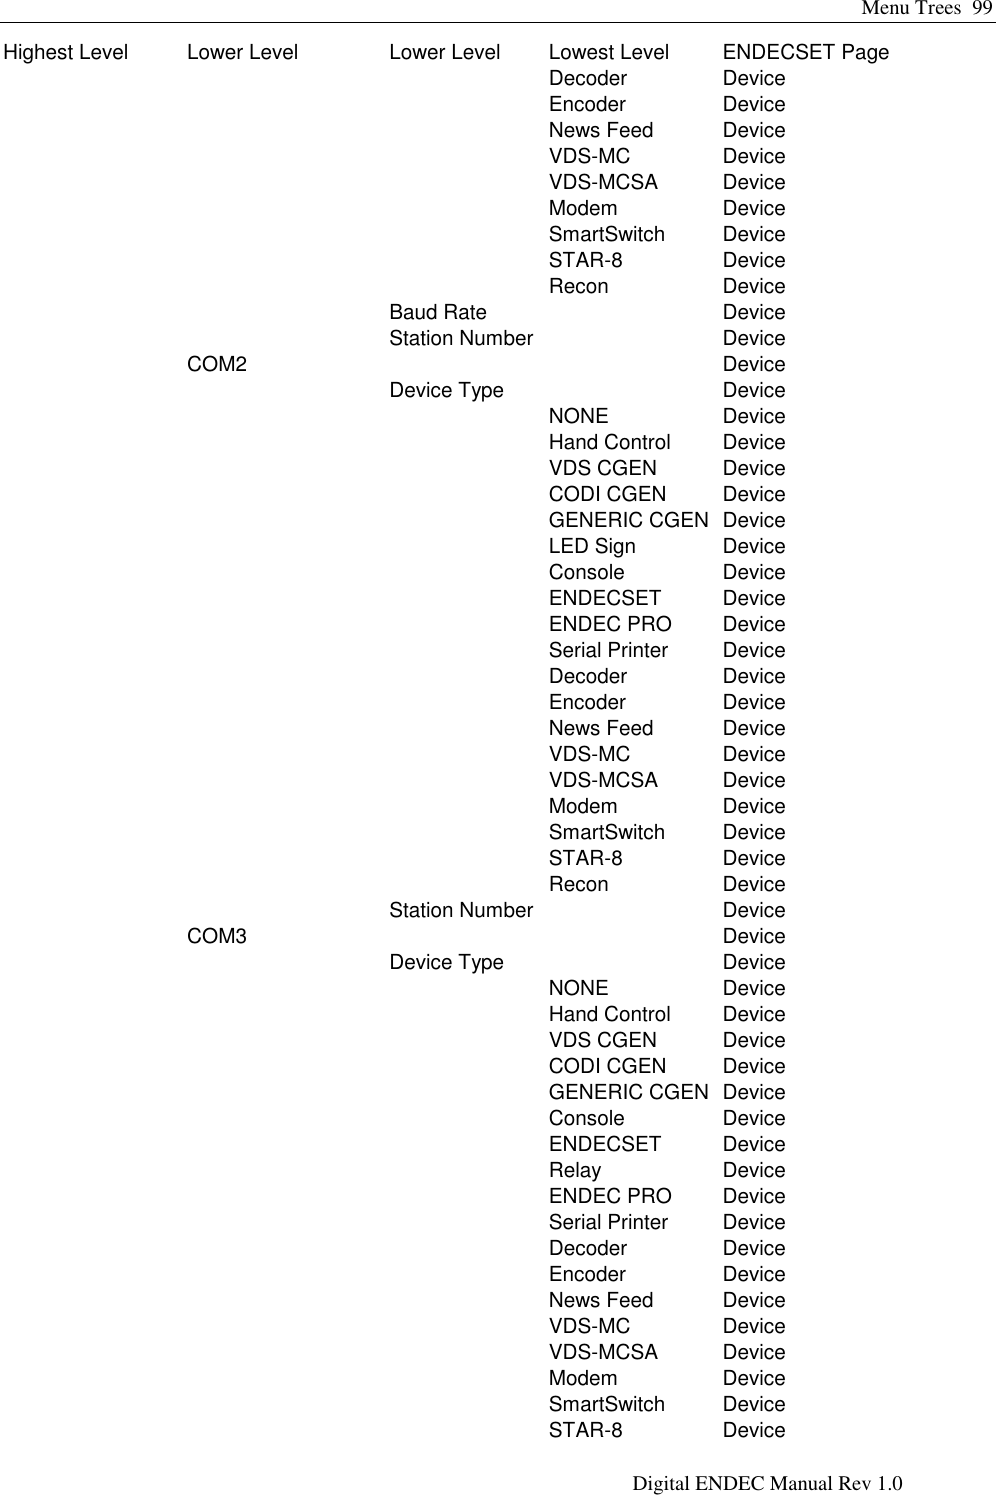
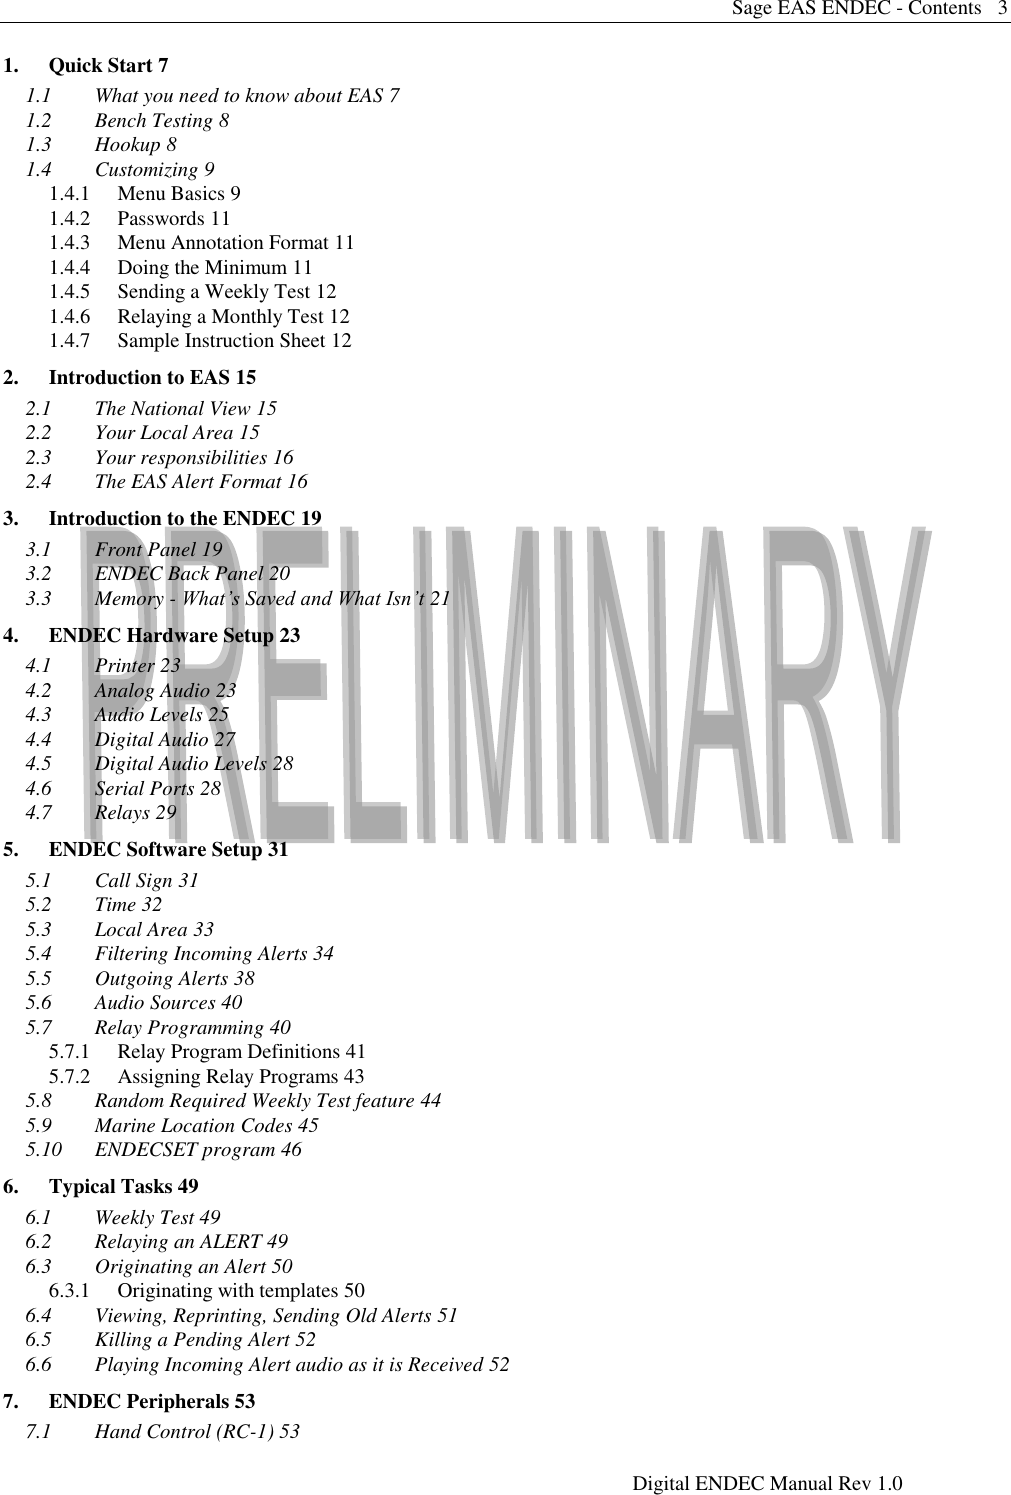
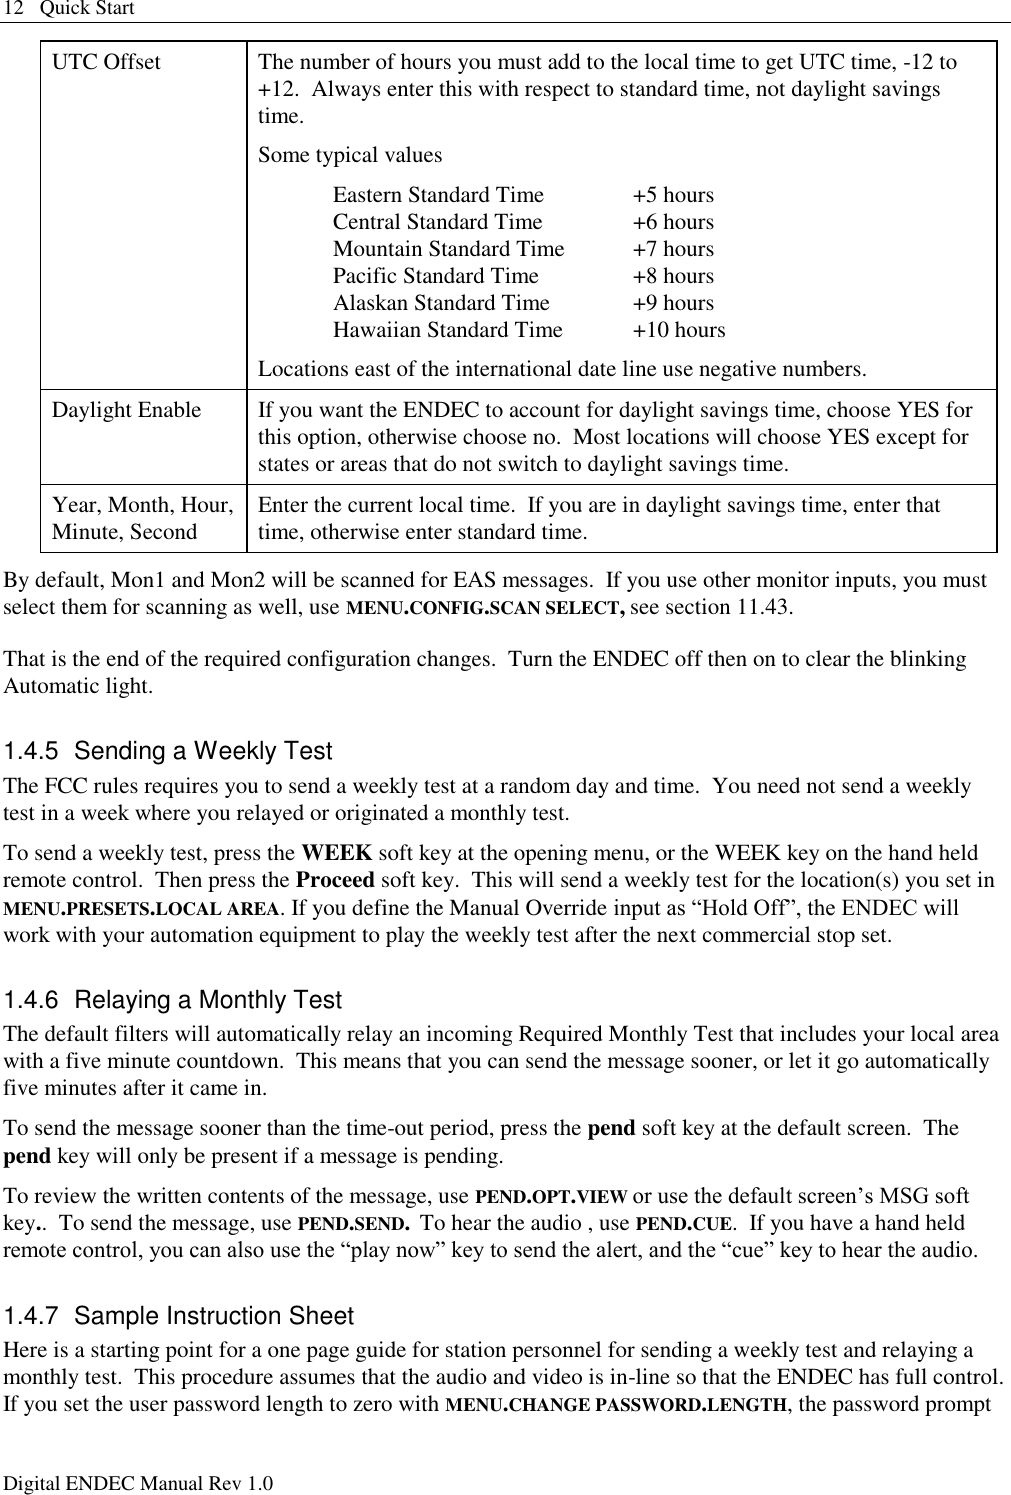
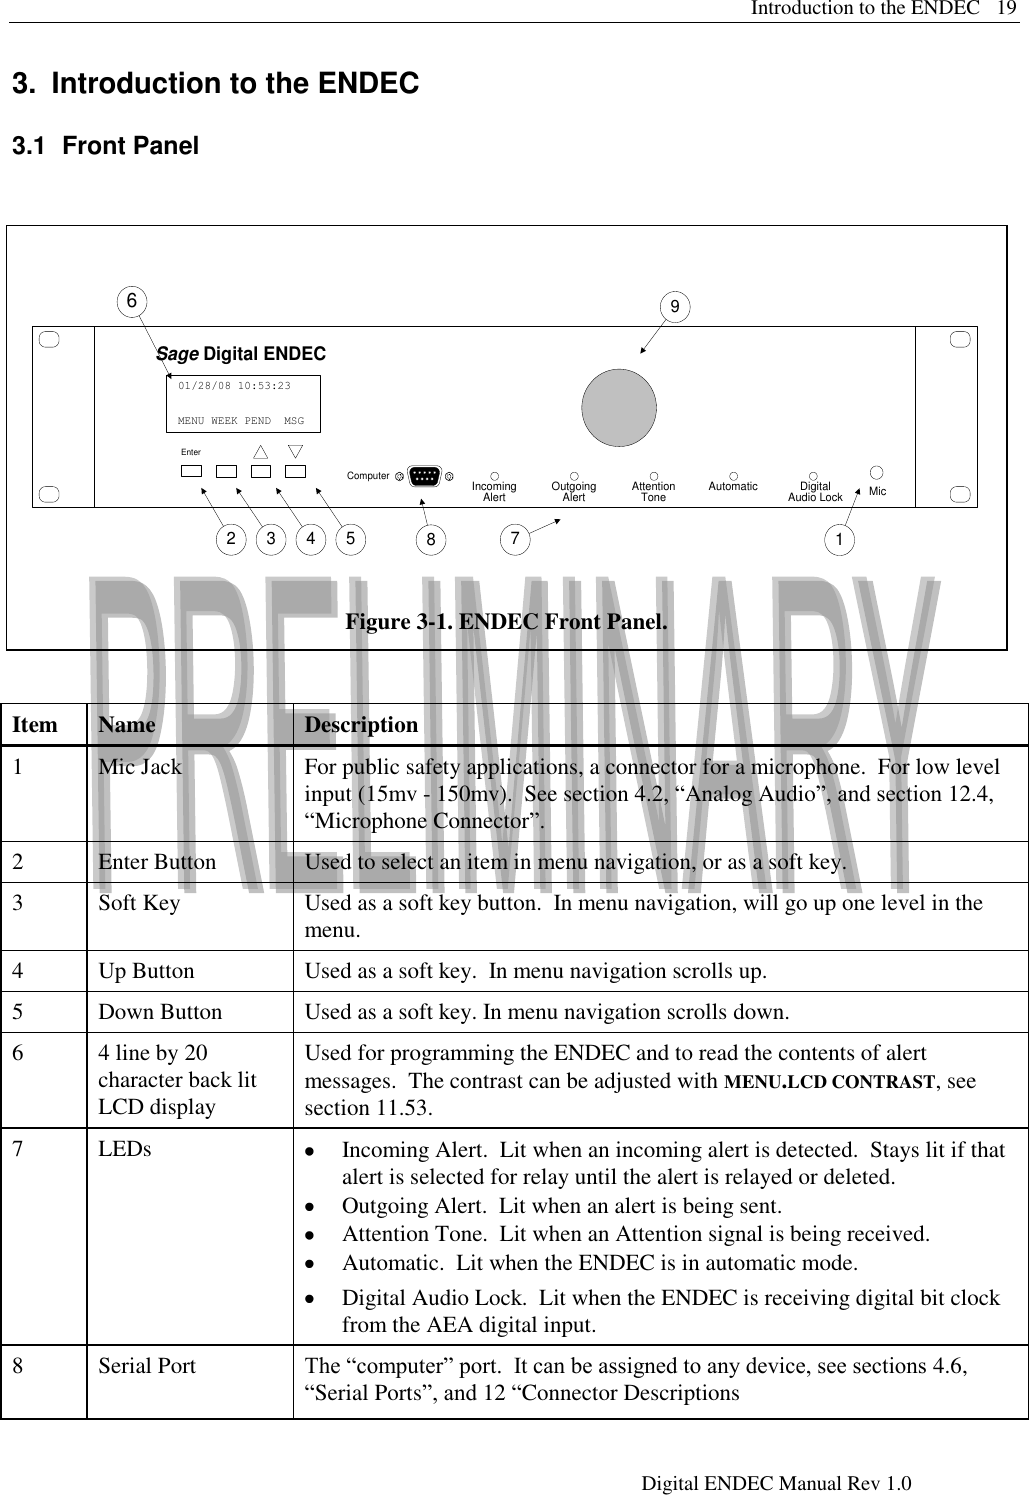
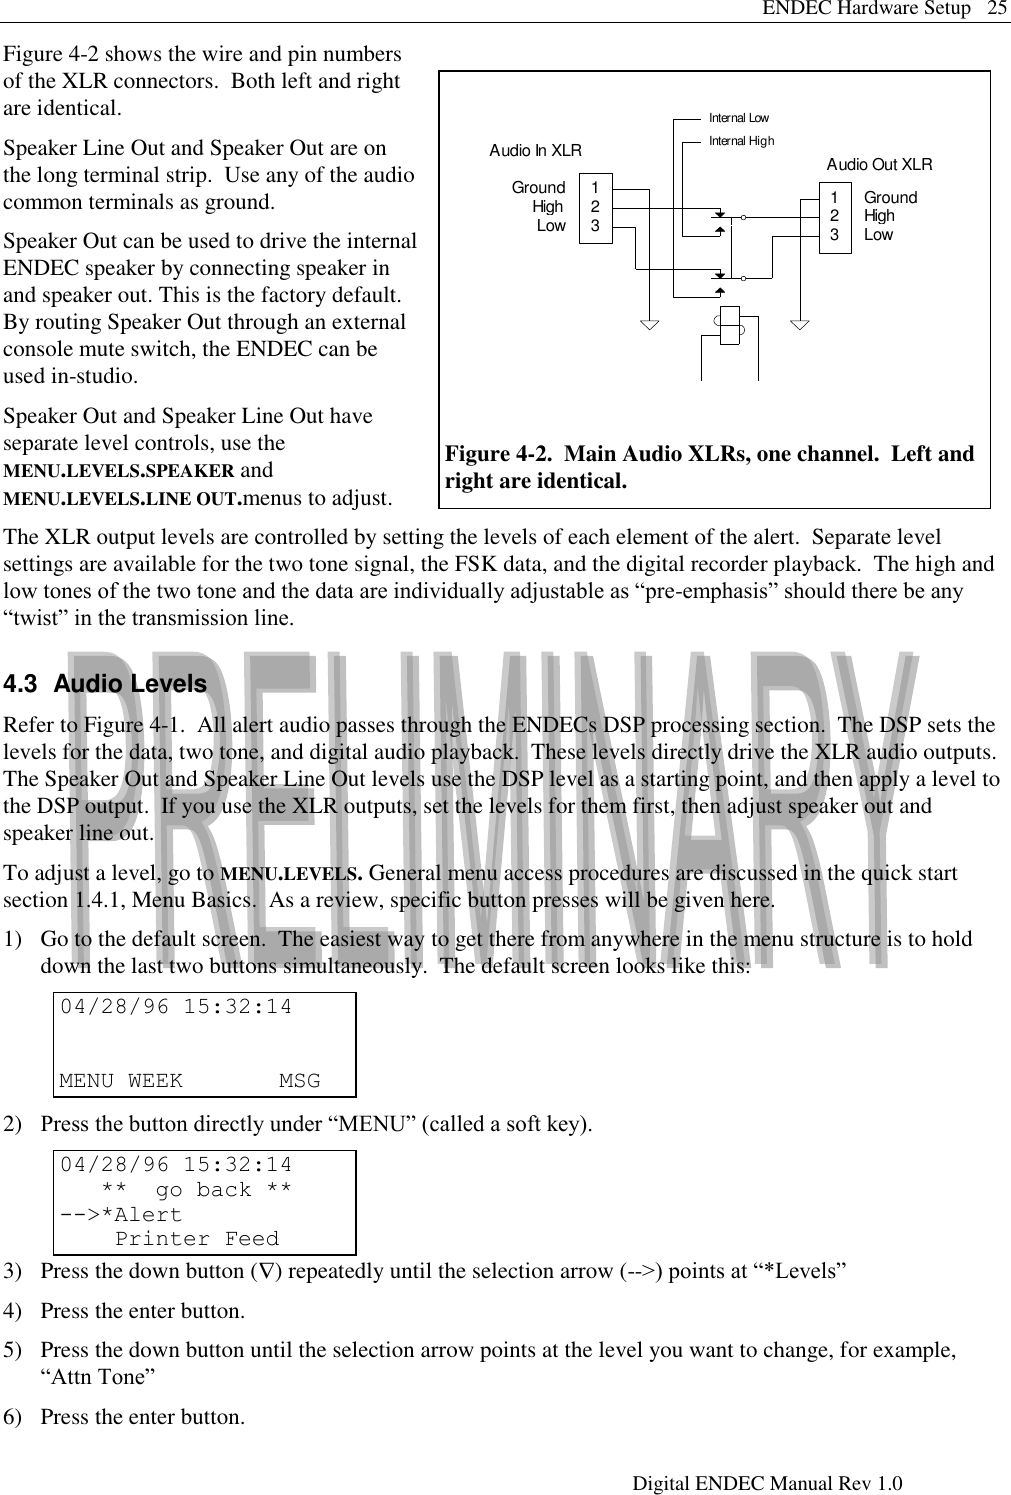
![Connector Descriptions 89 Digital ENDEC Manual Rev 1.0 12. Connector Descriptions 12.1 Serial Port Pin Out The ENDEC‟s serial ports are wired the same as a standard PC or laptop. Each connector is male, and has at least the following pins connected: Pin Use 2 RxD (input) 3 TxD (output) 5 Ground 9 Accessory Power. This pin provides +8v11. See section 12.2 for details. In addition to the above, COM 3 has the following additional pins: Pin Use 1 DCD (input) 4 DTR (output) 7 RTS (output) 8 CTS (input) None of these pins are used for any current application and their state is undefined. To connect a PC to the ENDEC (for use with the DOS parameter save/restore software, ENDEC PRO, or other functions) use a “null modem” cable, that is, swap pins 2 and 3. 12.2 Accessory Power Each ENDEC serial port provides regulated power on pin 9. Some ENDECs (serial numbers 3340 or less) provide +5v, most ENDECs provide +8v. This is intended as the power source for the hand held remote control, though it can be used for any purpose. If you are using the standard ENDEC 15 volt/1 amp power supply, do not source more than 150ma from the accessory power pin. If you are using more than two hand held remote controls, you will need to power the third and fourth remotes from a 9V power cube. The factory default is no power on the ACC PWR pins. To enable these pins, place a jumper on JP16. JP16 is accessible through the printer cover plate, see Figure 12-1 and Figure 12-2. Remove the plate as if you were changing paper. Lift the printer slider plate up (rather than pulling it forward). JP16 is underneath the metal cup that holds the paper, near its right hand edge. 11 Some ENDECs provide +5v on this pin. [TBS] Figure 12-1. Location of Accessory Power Enable Jumper JP16.](https://usermanual.wiki/Sage-Alerting-Systems/3644/User-Guide-926990-Page-89.png)
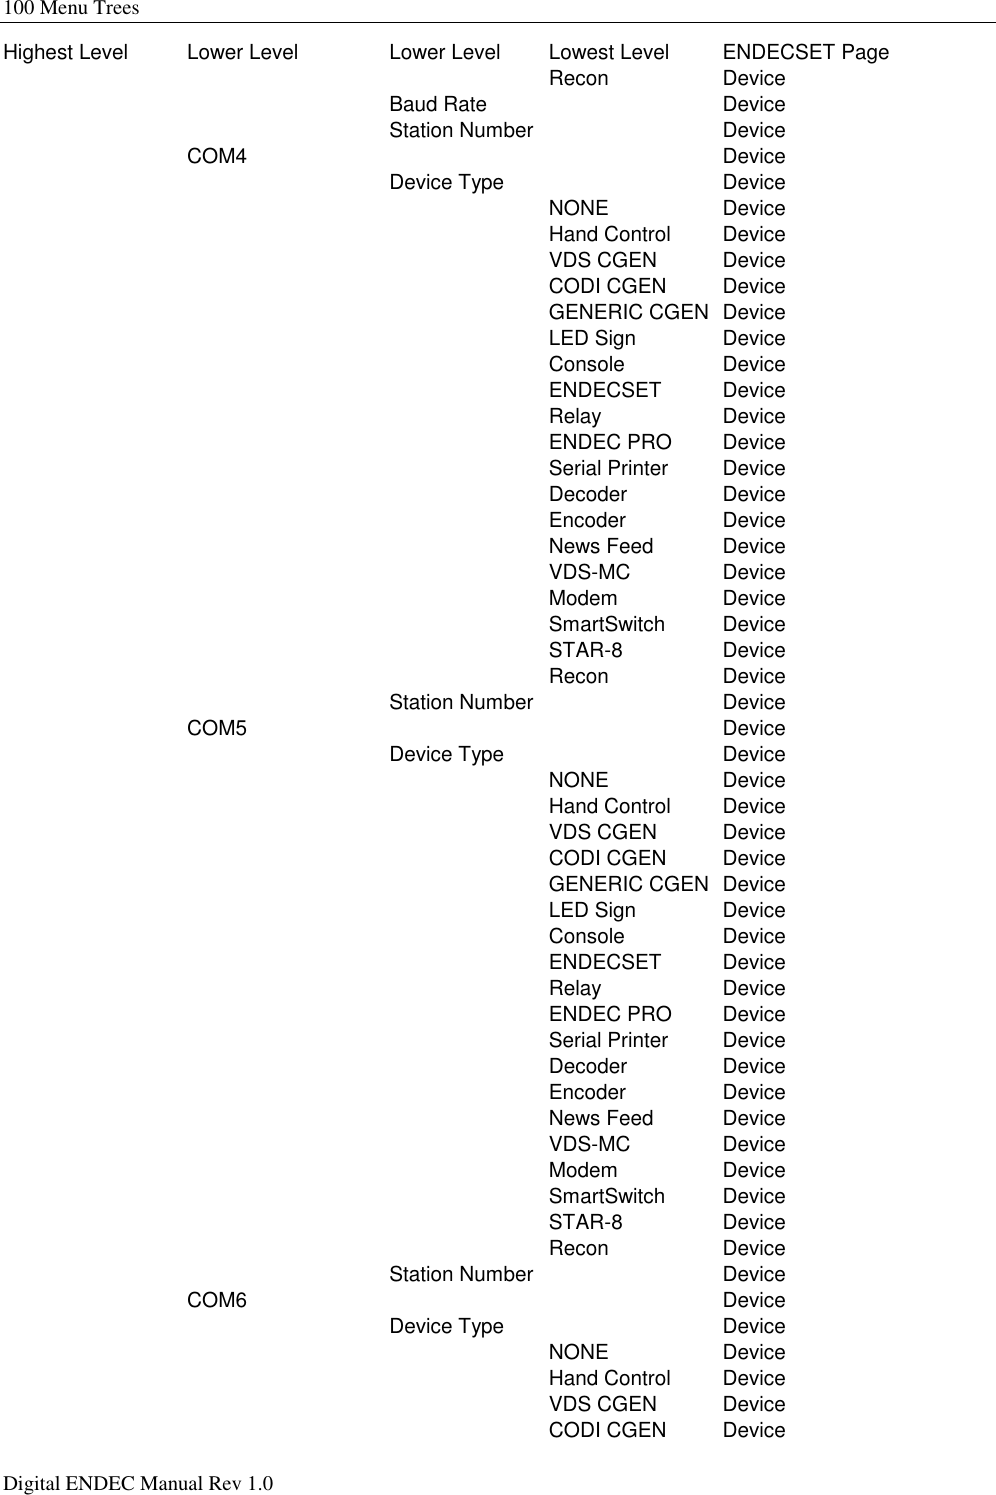
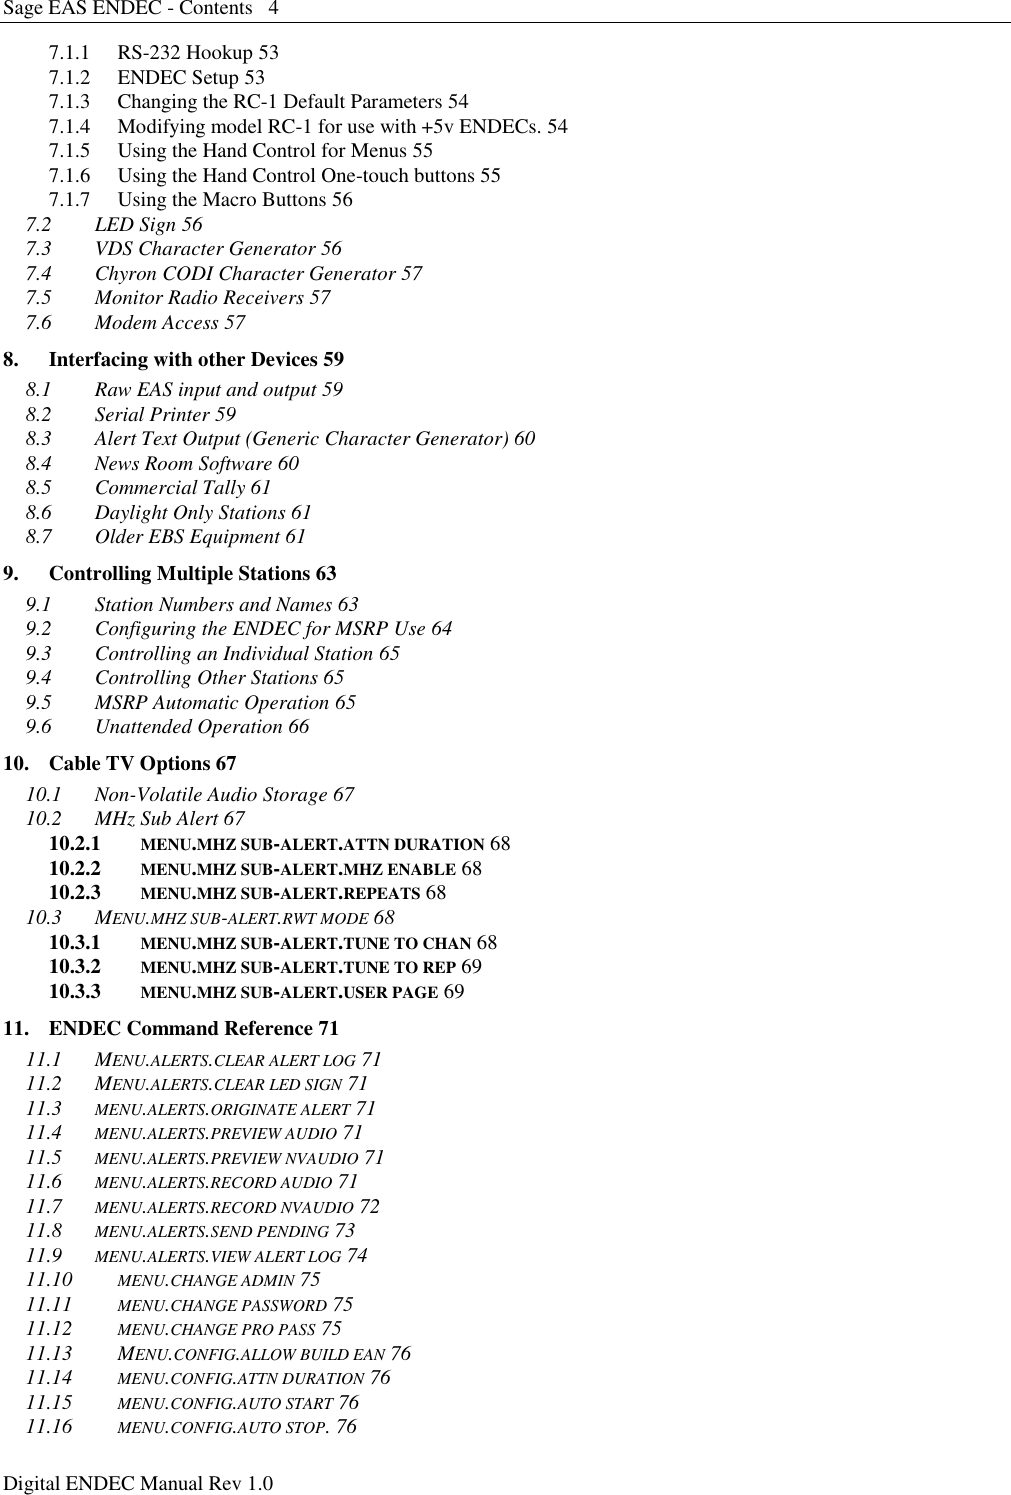
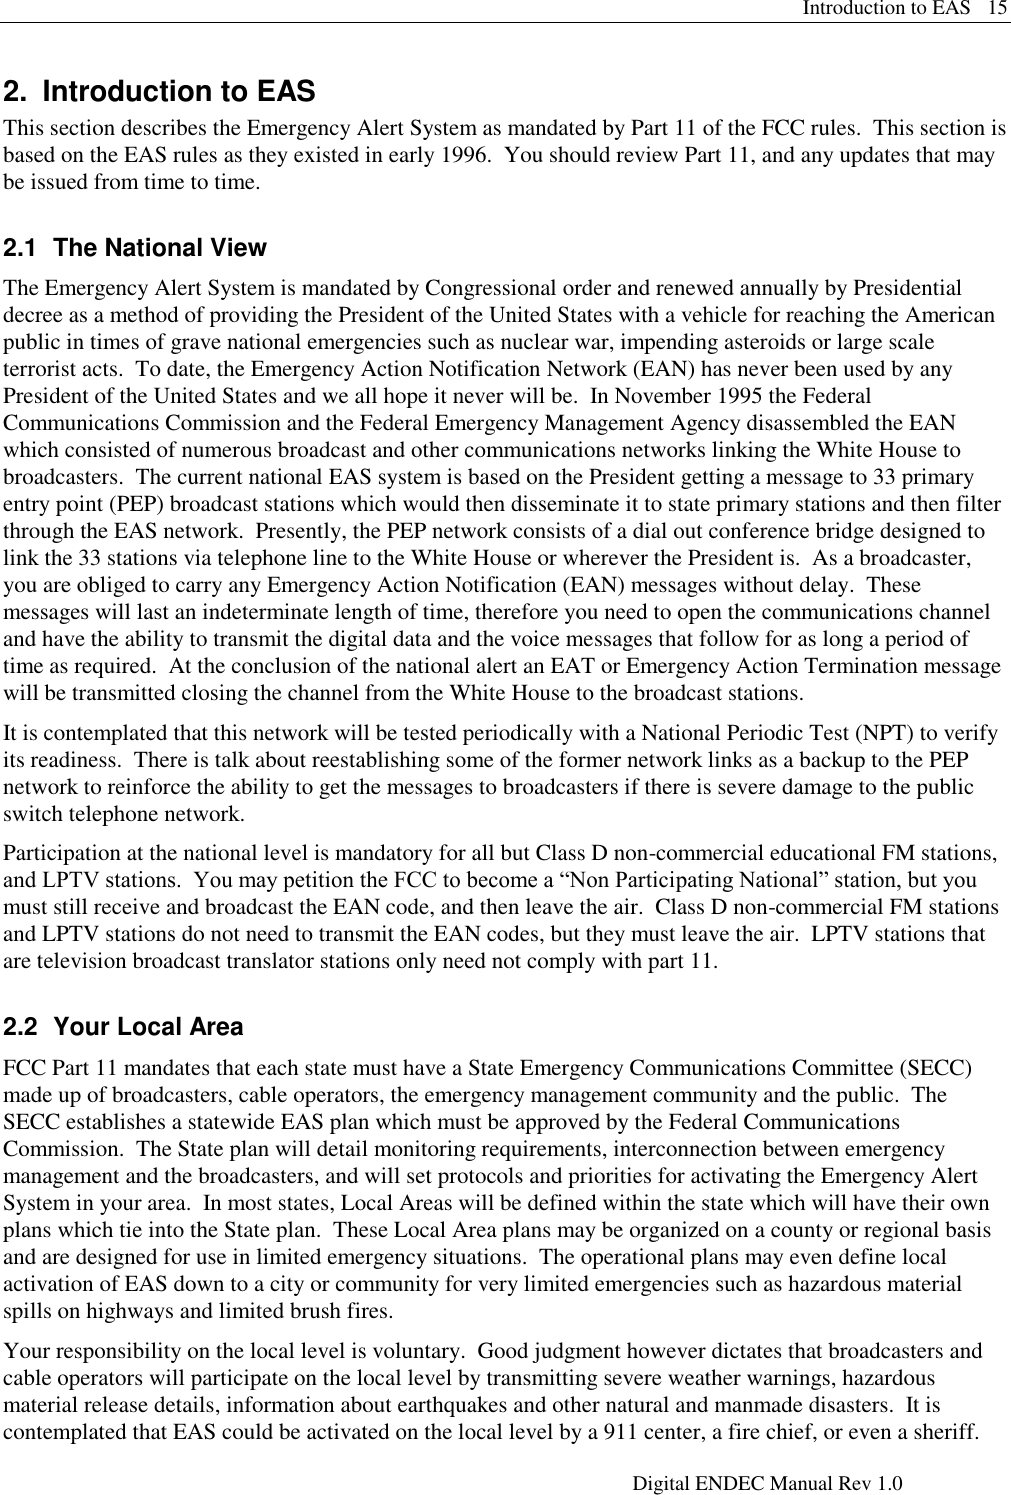
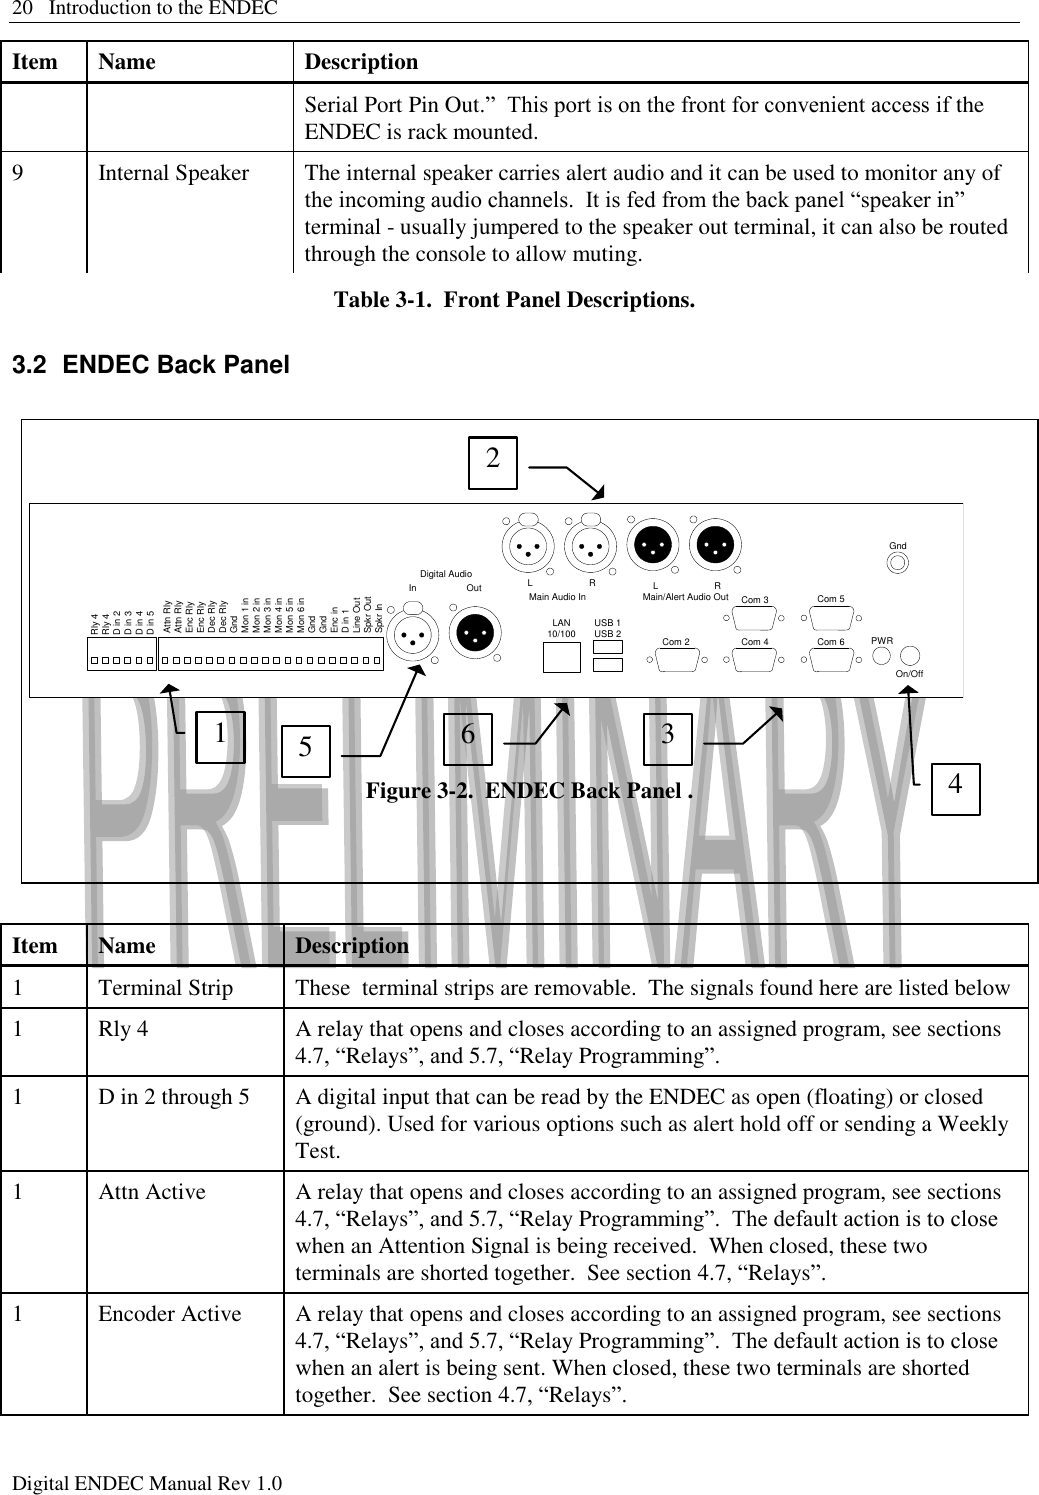
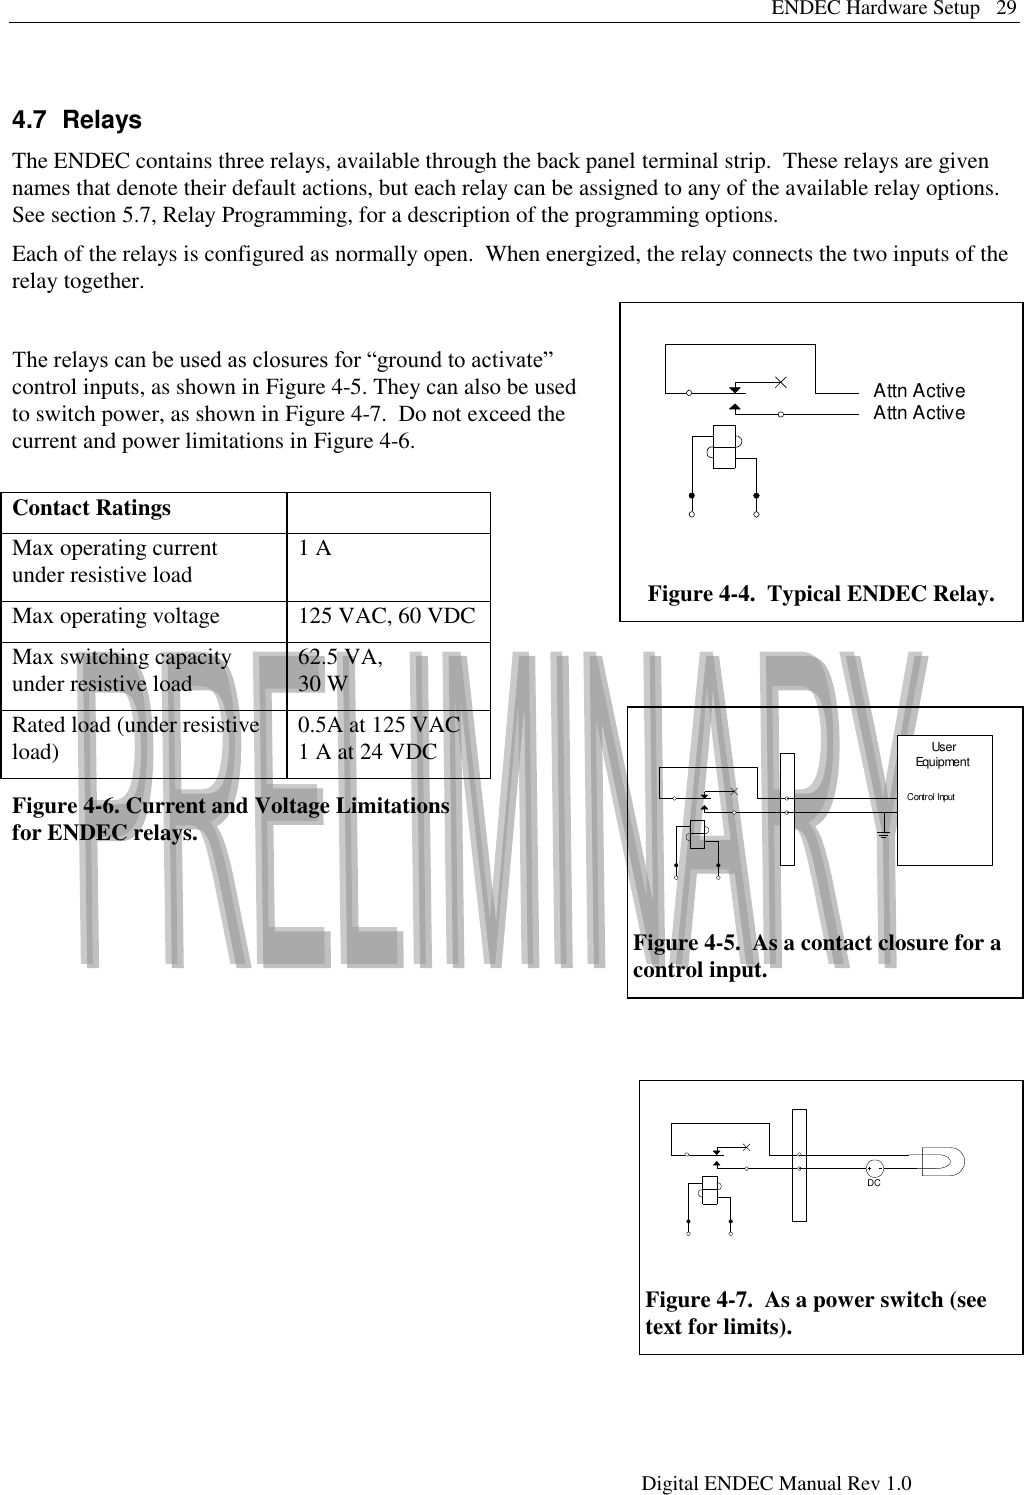
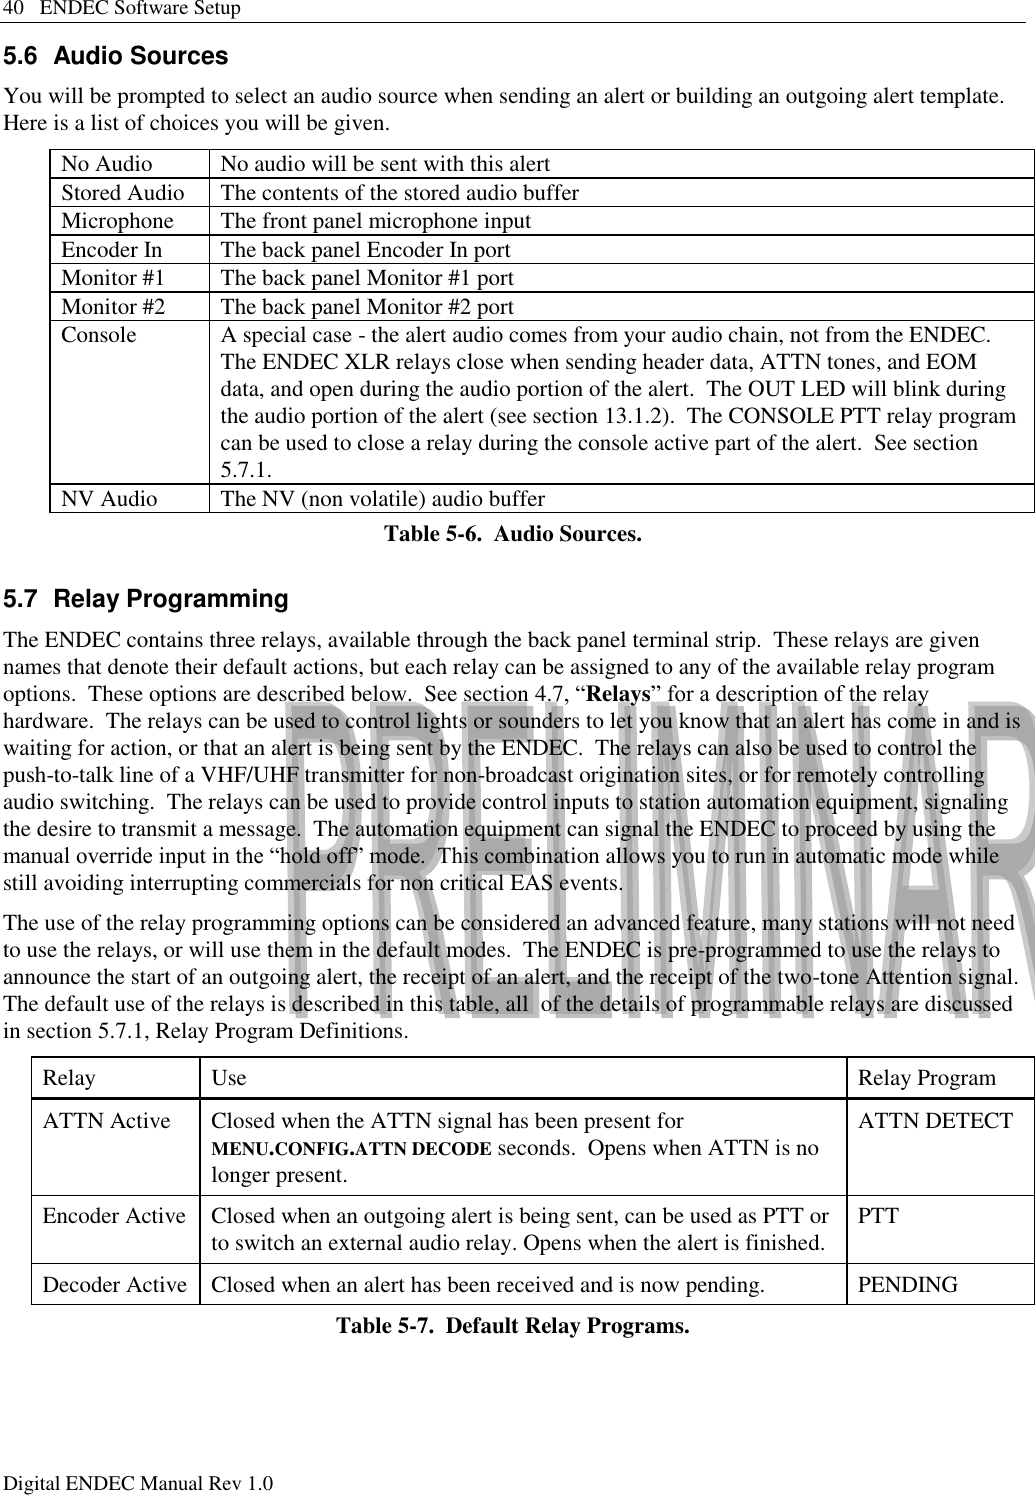
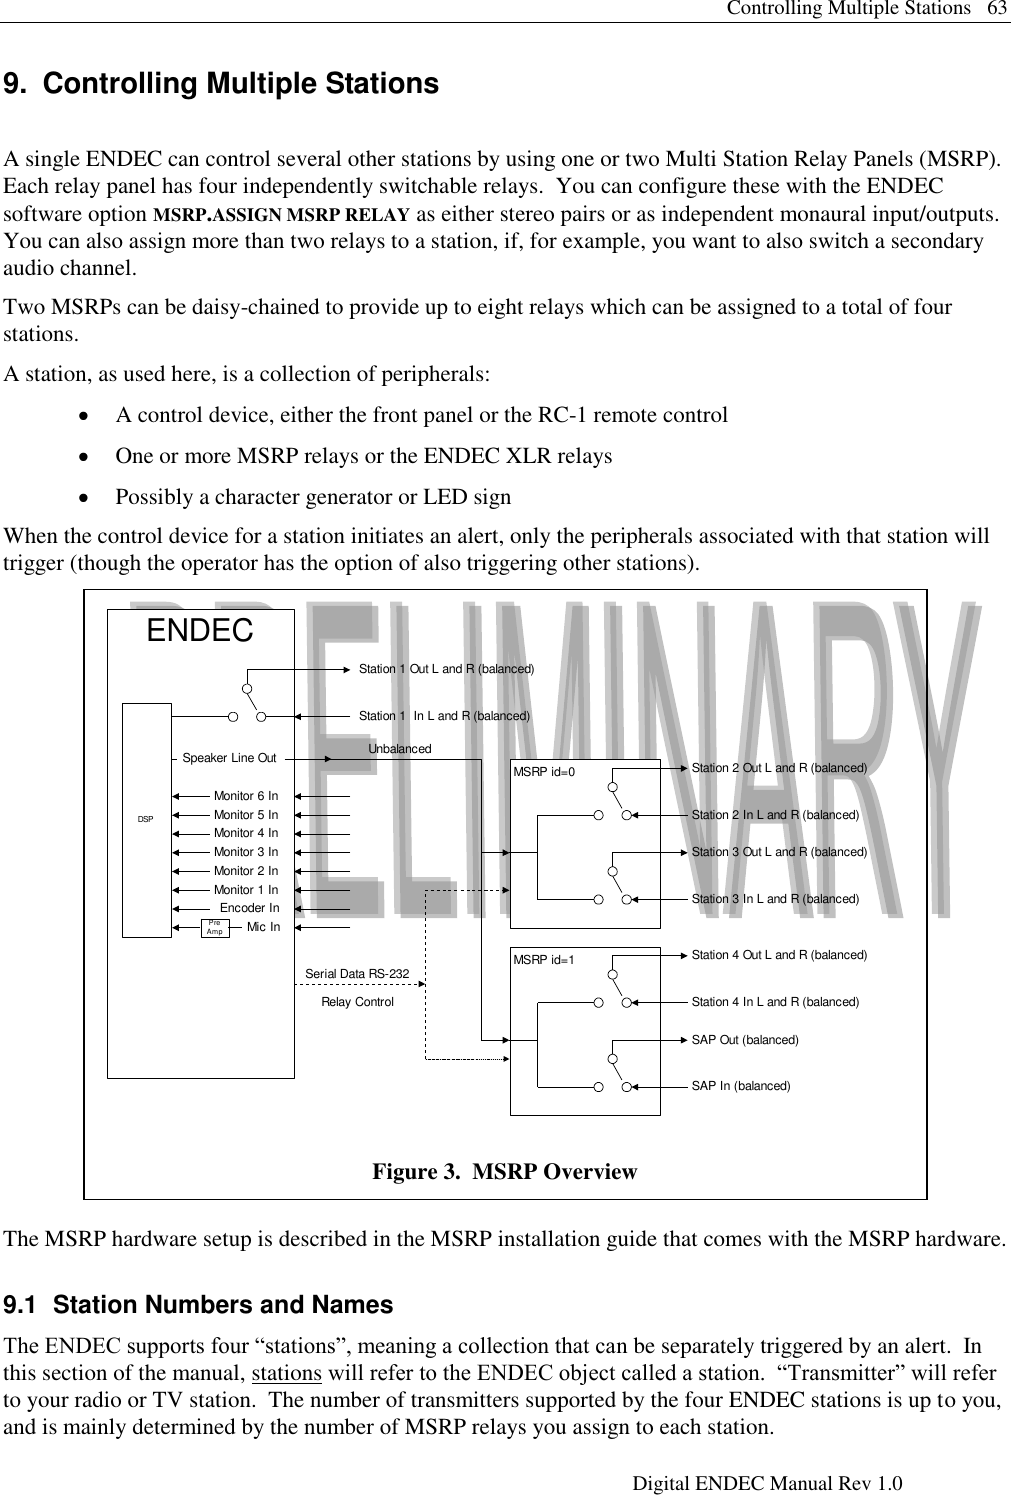
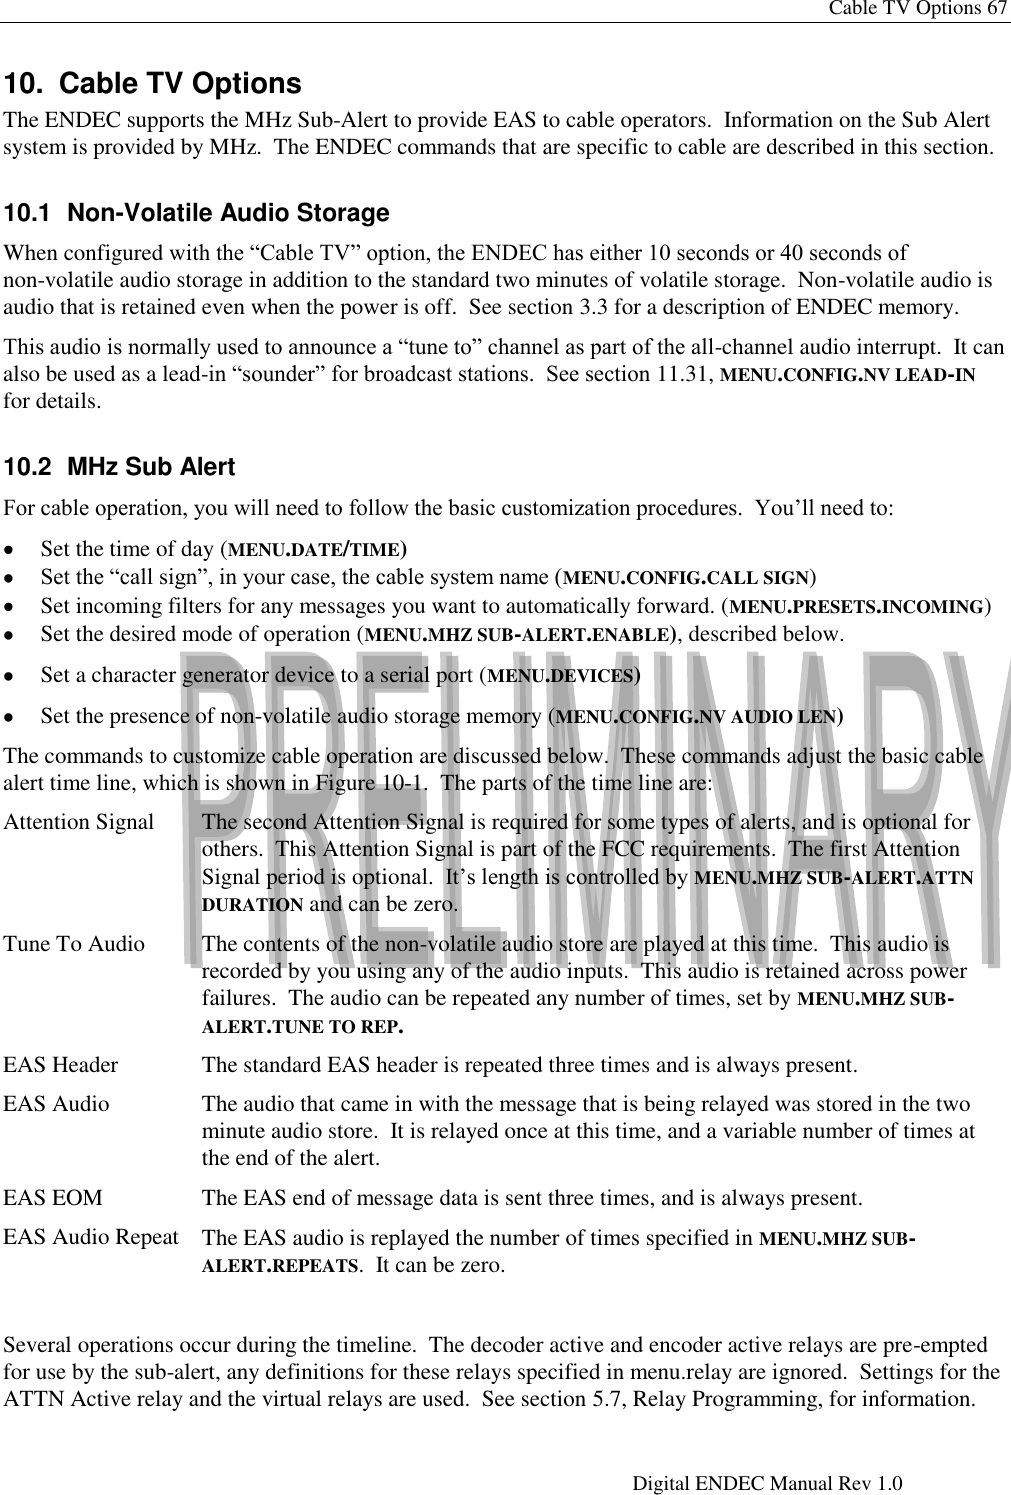
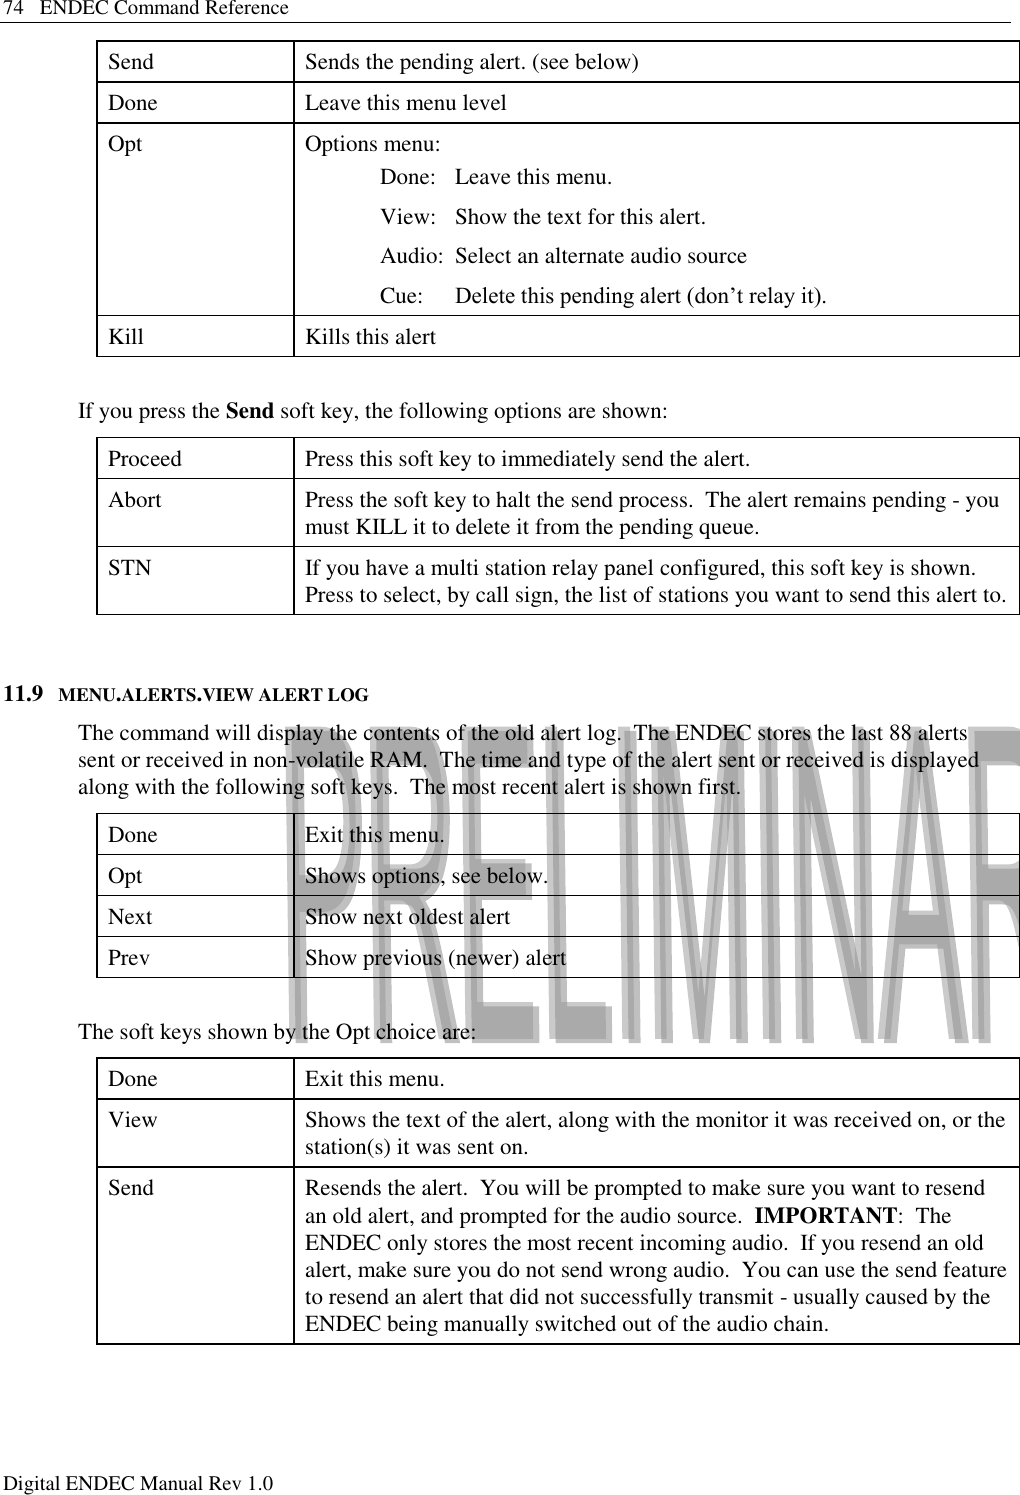
![90 Connector Descriptions Digital ENDEC Manual Rev 1.0 12.3 Hand Controller Cable The RC-1 comes with a DB-9 to RJ-11 adapter. The pin out of the adapter is shown below. RJ-11 Adapter Pin DB-9 Pin Use (ENDEC Point of view) 1 5 Ground 2 9 Acc Power12 3 - nc 4 2 RS-232 Receive 5 - nc 6 3 RS-232 Transmit The adapter is connected to the RC-1 with a modular six-wire line cord that reverses the pins from one end to the other. Use only the cord that comes with the RC-1 or a replacement that reverses, such as Radio Shack Cat No. 279-422. Use of an improper cord can damage the RC-1 and the ENDEC. The pin out of the RC-1 Hand Held Remote Control RJ-11 jack is shown below. Hand Control RJ-11 Pin Signal Name (RC-1 point of view) 1 RS-232 Receive 3 RS-232 Transmit 5 8V @ 80ma 6 Ground 12 Install a jumper on the ENDEC main PCB at location JP16 (accessible by removing the printer cover plate). See section 12.2 [TBS] Figure 12-2. Location of JP16. 16 Figure 12-3. Modular Jack Pin Numbers.](https://usermanual.wiki/Sage-Alerting-Systems/3644/User-Guide-926990-Page-90.png)
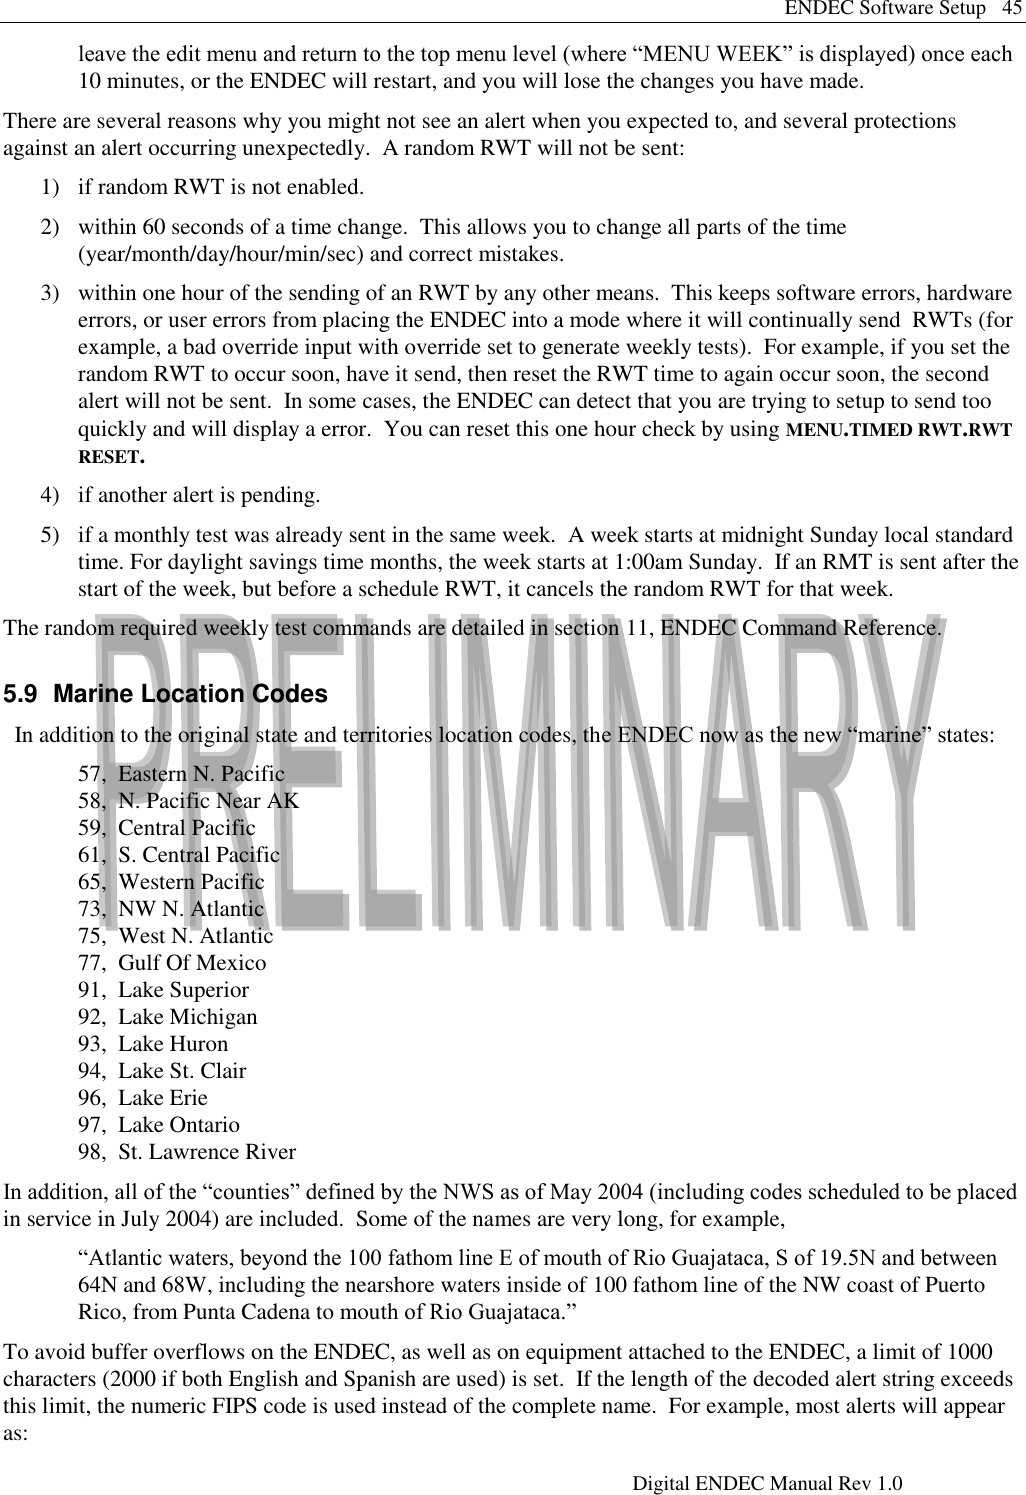
![Connector Descriptions 91 Digital ENDEC Manual Rev 1.0 12.4 Microphone Connector The ENDEC front panel microphone connector is meant for use in public safety applications. Broadcasters will typically make use of the high level Encoder Audio In input on the back panel. The microphone input is amplified, the gain is controlled by MENU.LEVELS.MIC. The microphone input is designed for use with a low-impedance (~200 ohms) dynamic microphone providing at least 20 mV into a 1K load at 100 microbars sound pressure, (e.g., Shure 527B or equal). [TBS] Figure 12-4. ENDEC Mic Connector (Front View). ENDEC MIC connector Pin. Signal Name Tip Audio In Ring Ground Sleeve Ground](https://usermanual.wiki/Sage-Alerting-Systems/3644/User-Guide-926990-Page-91.png)

![Troubleshooting 95 Digital ENDEC Manual Rev 1.0 The paper must be inserted so that the coated side is next to the print head. See section Error! Reference source not found., “Error! Reference source not found.”. The time display is incorrect. If the time is not retained across power off, the clock battery is low. See section Error! Reference source not found., “Error! Reference source not found.”. The ENDEC resets while I‟m entering commands. The ENDEC contains a watchdog timer that will reset the ENDEC if it does not seem to be operating normally. If the ENDEC does not return to the highest menu level (the default screen) for ten minutes, and it is not sending a long alert such as an EAN, the ENDEC assumes that it is in a loop and resets. Thus, if you are in a lower level menu for more than ten minutes, the ENDEC will reset. This is normal. To increase the watchdog time, use the ENDECSET software program to set internal.softdog to a larger value. 13.3 Resetting the passwords If you forget the user password but remember the administrator‟s password,, you can select a new user password using the MENU.CHANGE PASSWORD command. If you forget the admin password, you must reset it using the following procedure. This procedure intentionally requires physical access to the inside of the ENDEC enclosure. 1) Remove power from the ENDEC. 2) Open the top of the ENDEC by removing all six screws. 3) [TBS]. 4) Both the user and the admin password have now been reset to 1111. Apply power and change the passwords to the desired values with the MENU.CHANGE PASSWORD and MENU.CHANGE ADMIN menus. 13.4 Resetting parameters to factory defaults This procedure can be used if the ENDEC appears to be non-functional, either no LCD display or a frozen LCD display. As this procedure will also reset the passwords to the factory default, it also requires physical access to the inside of the ENDEC enclosure. You do not need this procedure if the self test fails but you can access the menus. The self test does not depend on any user settable parameters, a self test failure is most probably a hardware fault. 1) Remove power from the ENDEC 2) Open the top of the ENDEC by removing all six screws. 3) [TBS] 4) All stored parameters have now been reset. You must reset all of your customizations as if you had just received your ENDEC. You can use the DOS parameter save/restore program to reload your parameters if you had previously saved them. [TBS] Figure 13-1. Location of the factory reset jumper.](https://usermanual.wiki/Sage-Alerting-Systems/3644/User-Guide-926990-Page-95.png)