Samsung Electronics Co SF565P Multi Function Printer User Manual 565P
Samsung Electronics Co Ltd Multi Function Printer 565P
UserManual.wiki
>
Samsung Electronics Co
>
SF565P User Manual
>
Users Manual 2
Contents
1.
Users Manual 1
2.
Users Manual 2
3.
Users Manual 3
Users Manual 2
Navigation menu
Upload a User Manual
Namespaces
Wiki Guide
HTML
PDF
Info
Views
User Manual
Discussion / Help
Navigation
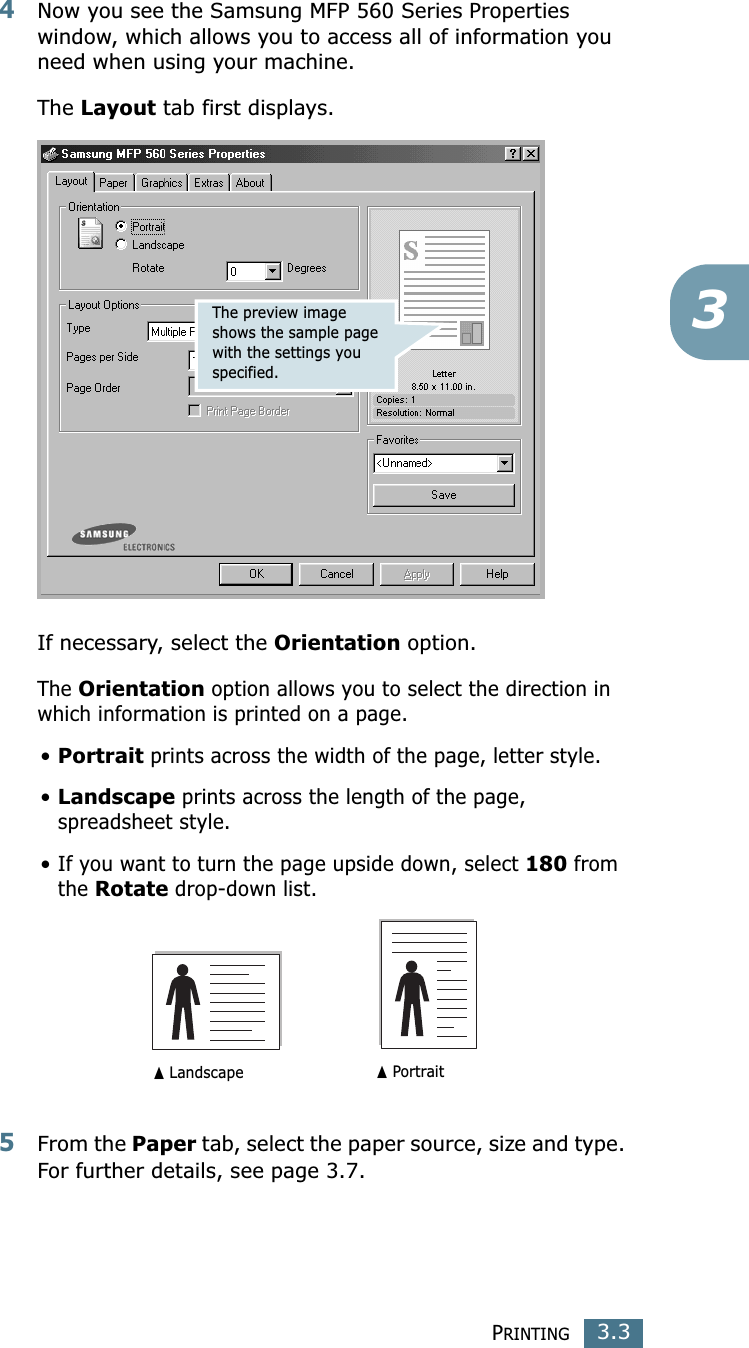
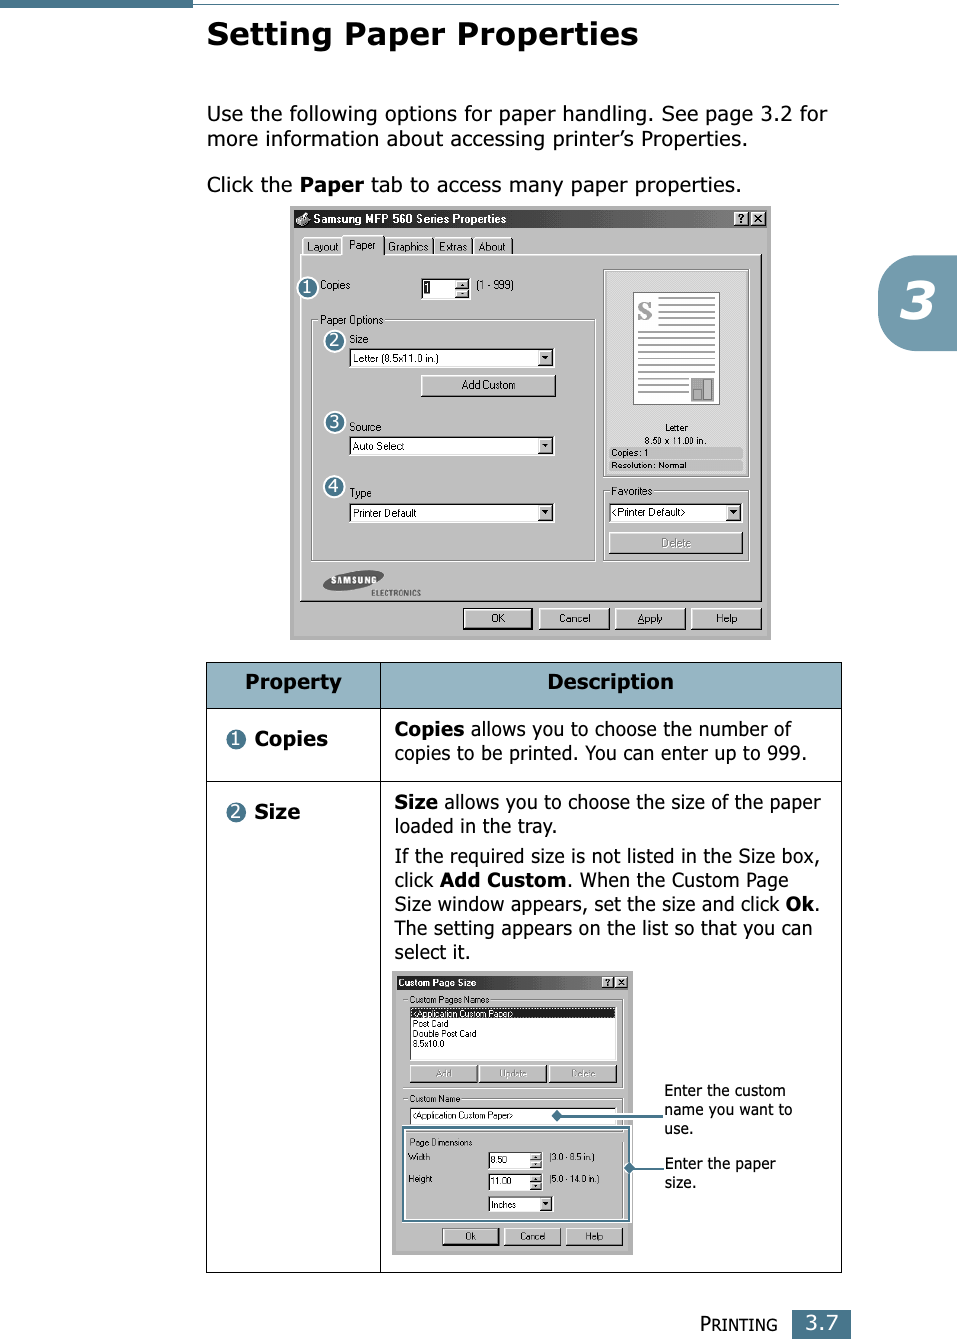
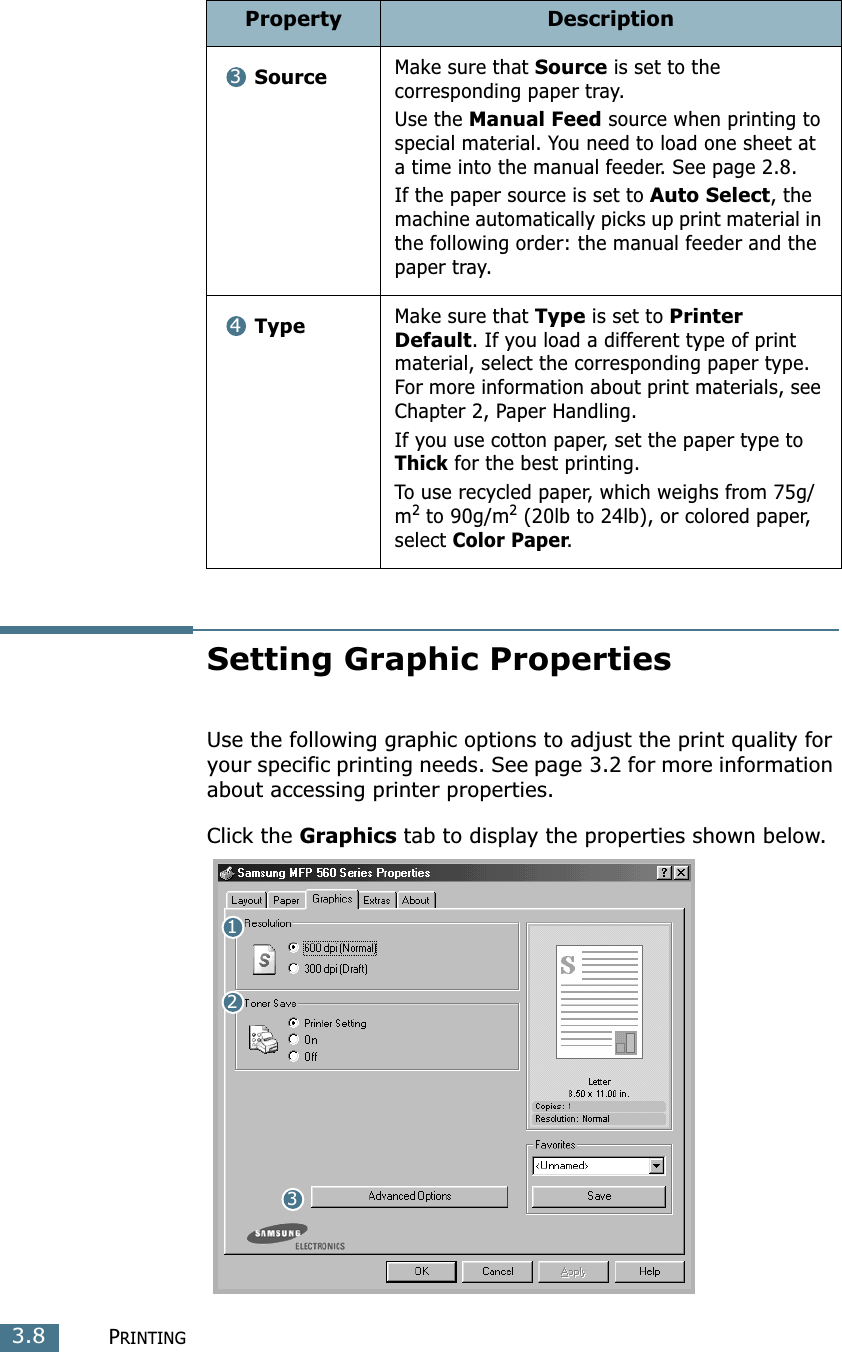
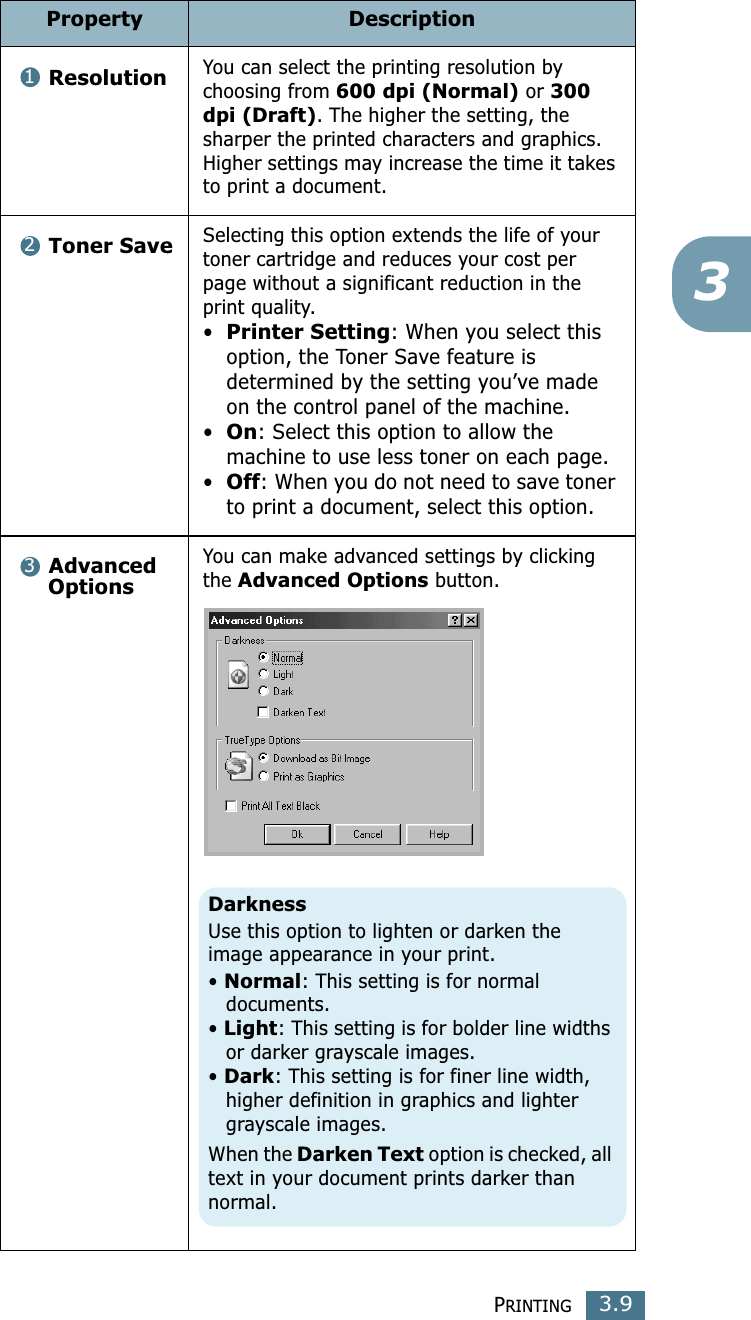
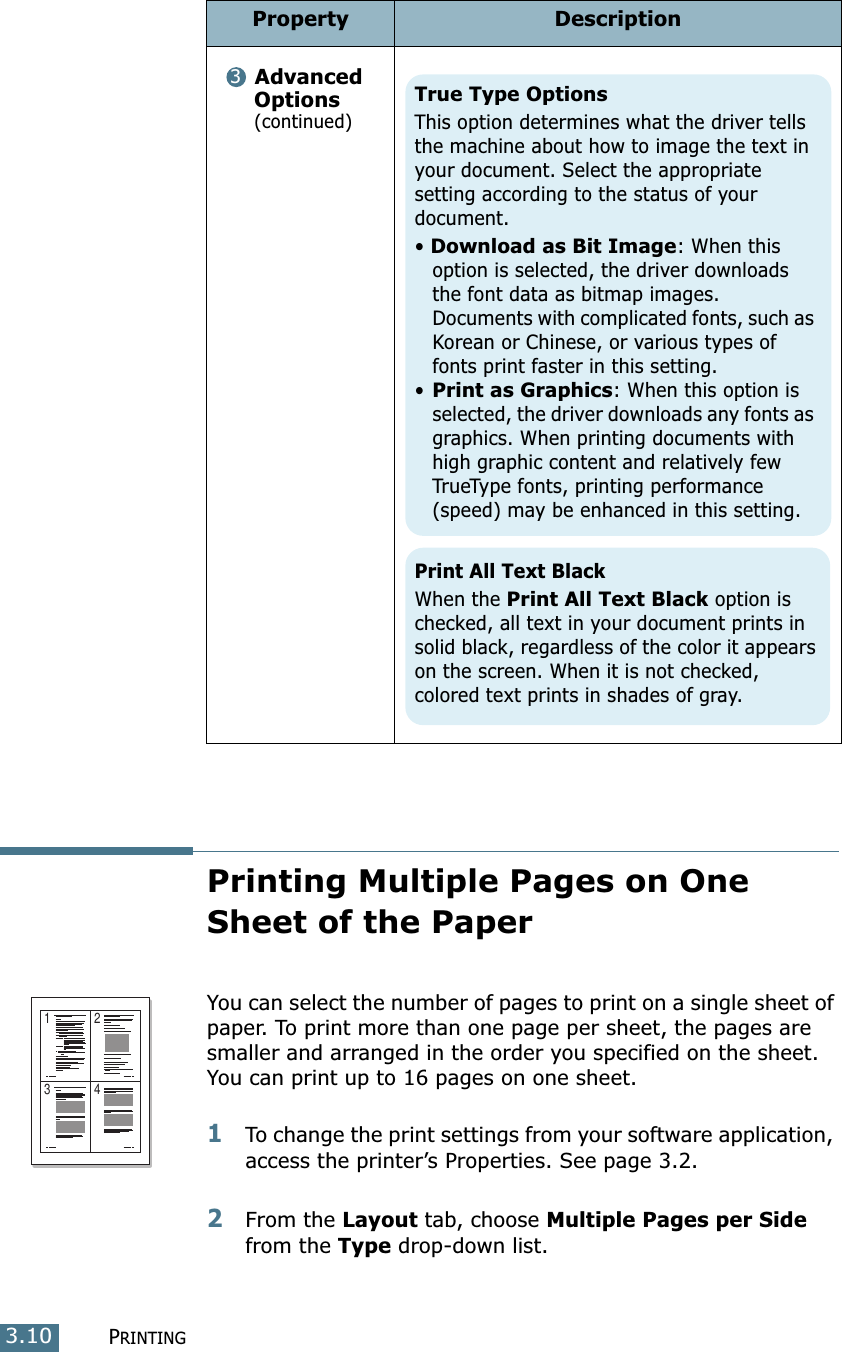


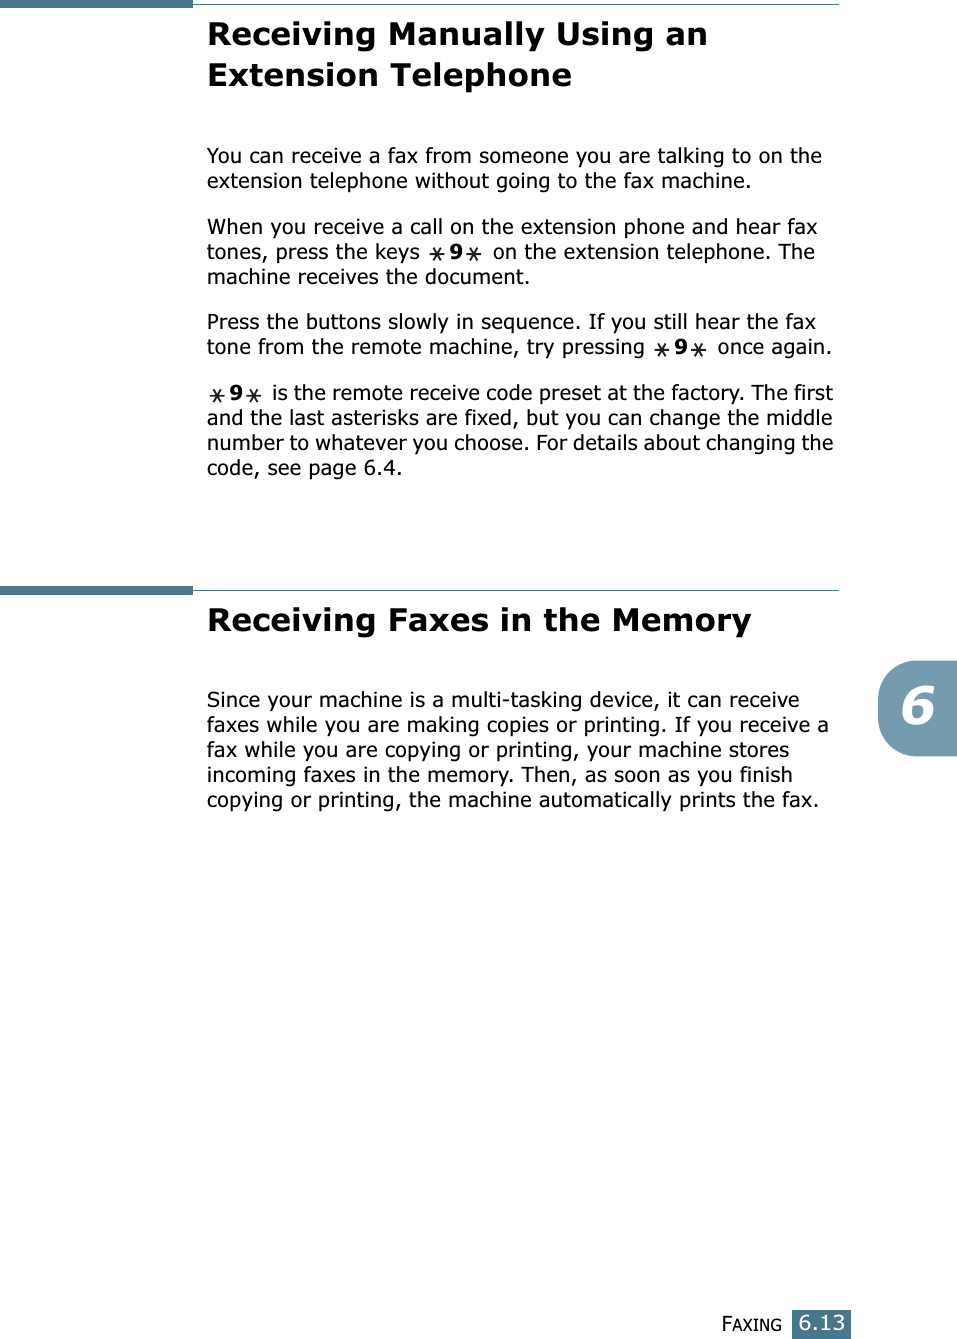

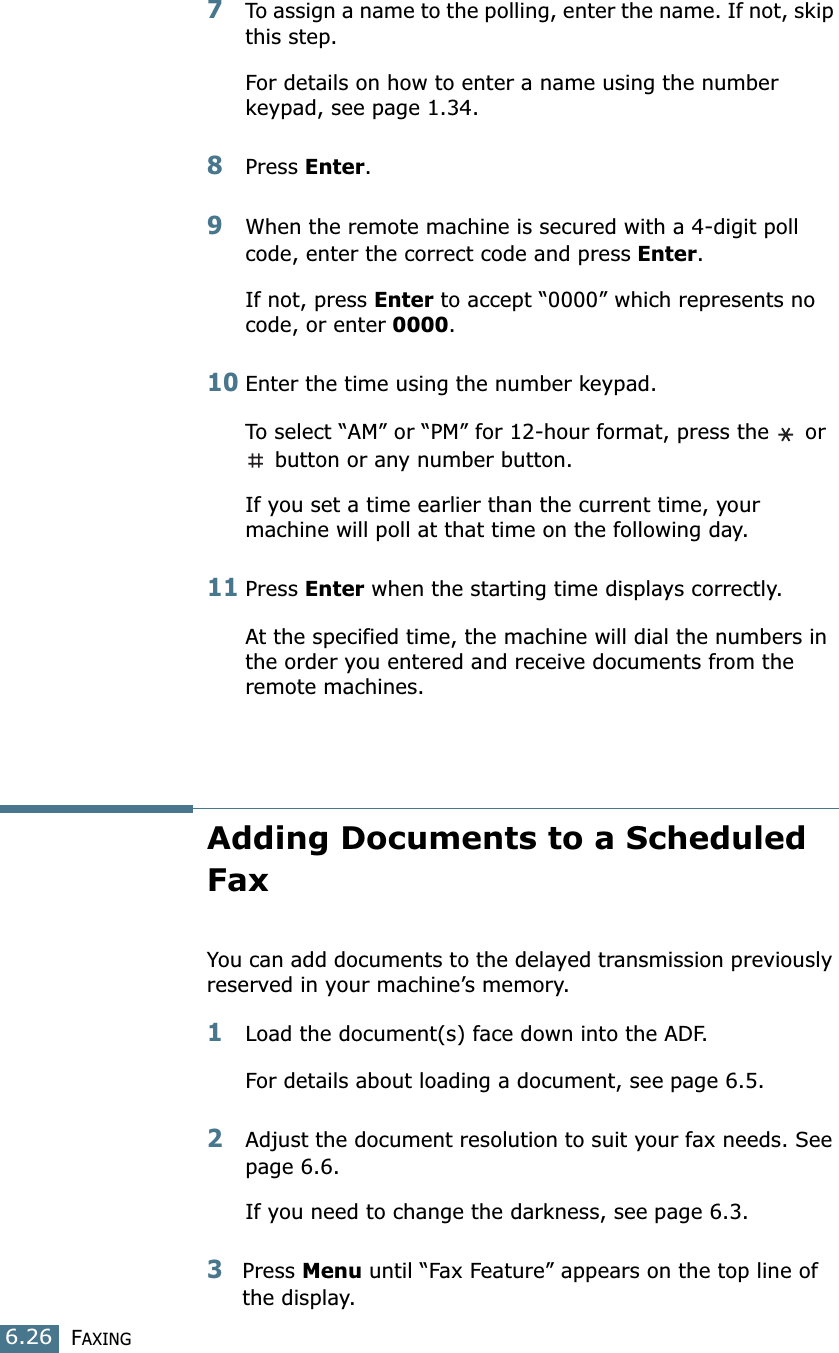

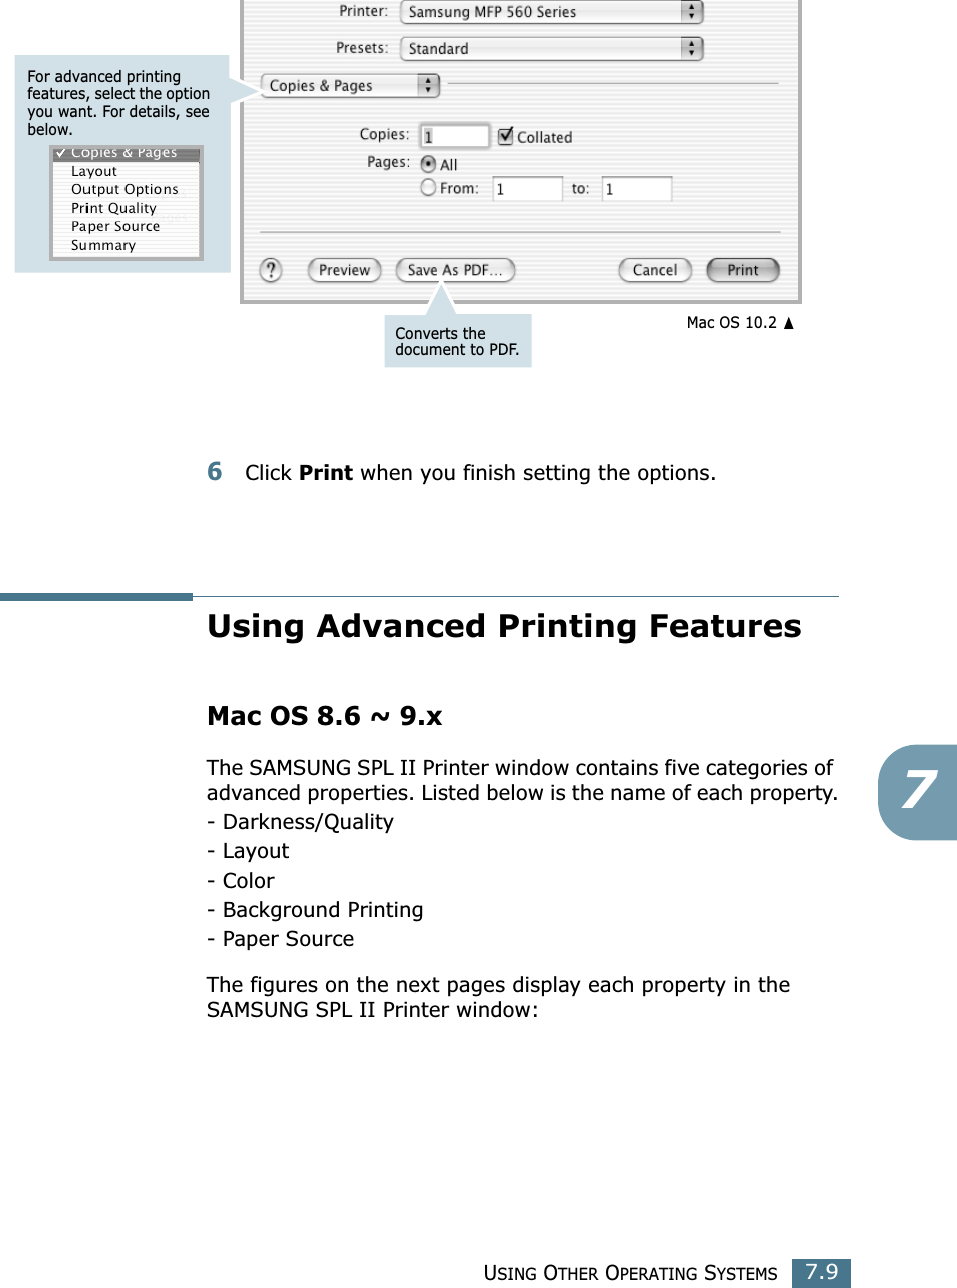
![USING OTHER OPERATING SYSTEMS7.163Insert the printer software CD-ROM. The CD-ROM will automatically run.If the CD-ROM does not automatically run, click the icon at the bottom of the desktop. When the Terminal screen appears, type in:[root@localhost root]#cd /mnt/cdrom/Linux[root@localhost root]#./install.sh NOTE: The installation program runs automatically if you have an autorun software package installed and configured.4Click Install.5When the welcome screen appears, click Next.](https://usermanual.wiki/Samsung-Electronics-Co/SF565P.Users-Manual-2/User-Guide-386433-Page-96.png)