Sun Communications DECT33-S37 US DECT PHONE - BASE User Manual
SunCorp Communications Limited US DECT PHONE - BASE
UserManual.wiki
>
Sun Communications
>
DECT33 S37 User Manual
users manual
Navigation menu
Upload a User Manual
Namespaces
Wiki Guide
HTML
PDF
Info
Views
User Manual
Discussion / Help
Navigation


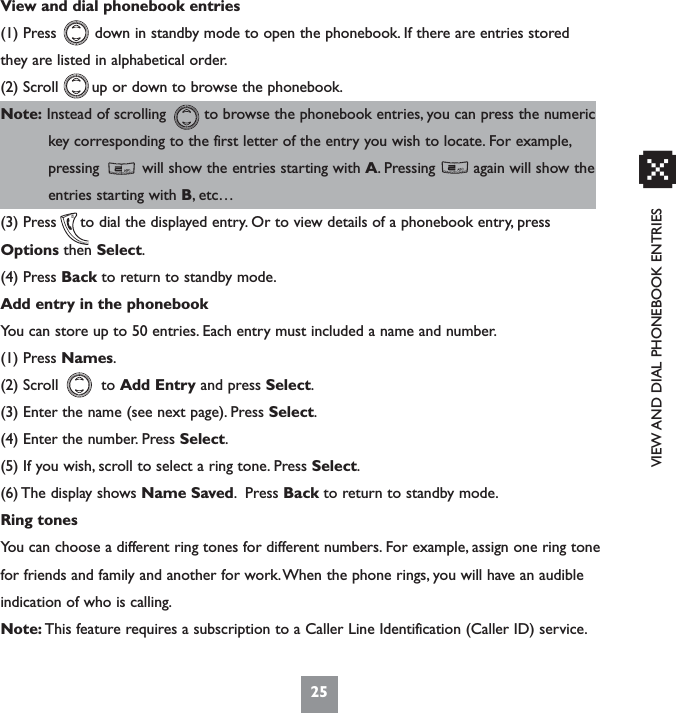
![26Text and number entryFor example, to enter the name ‘Paul’: Press once to enter P, press once to enter A, press twice to enter U, then press three times to enter L.If you make a mistake, press Clear to delete the last character.Names can be up to 12 characters and numbers up to 24 digits.The number ofavailable characters/digits remaining is shown at the top right of the display.When entering a name, the first character is automatically given as an uppercase letter with the rest of the name in lower case lettering. Press to switchbetween upper and lower case, the Abc icon indicates the current letter case.Edit phonebook entry(1) Press down in standby mode.(2) Scroll up or down to the entry and press Options.(3) Scroll to Edit Entry and press Select. Press Clear to delete current name. Enterthe new name then press OK.(4) Press Clear to delete current number. Enter the new number then press OK.(5) Scroll to select the ring tones. Press Select.(6) The display shows [Entry] Saved. Press Back to return to standby.](https://usermanual.wiki/Sun-Communications/DECT33-S37/User-Guide-682336-Page-26.png)
![CHANGE A RING TONE FOR AN ENTRYChange ring tone for an entry(1) Press down in standby mode.(2) Scroll up or down to the entry and press Options.(3) Scroll up or down to Edit Entry and press Select.(4) Press Select twice to display the list of ring tones.(5) Scroll to the ring tone you want and press Select to save the changes.The display shows [Entry] Saved.(6) Press Back to return to standby.Delete phonebook entry(1) Press down in standby mode.(2) Scroll up or down to the entry and press Options.(3) Scroll down to Delete Entry and press Select.The display shows Delete Entry?.(4) Press Ye s to confirm or No to cancel. If Ye s is selected the display shows [Entry] Deleted.(5) Press Back to return to standby.27x](https://usermanual.wiki/Sun-Communications/DECT33-S37/User-Guide-682336-Page-27.png)
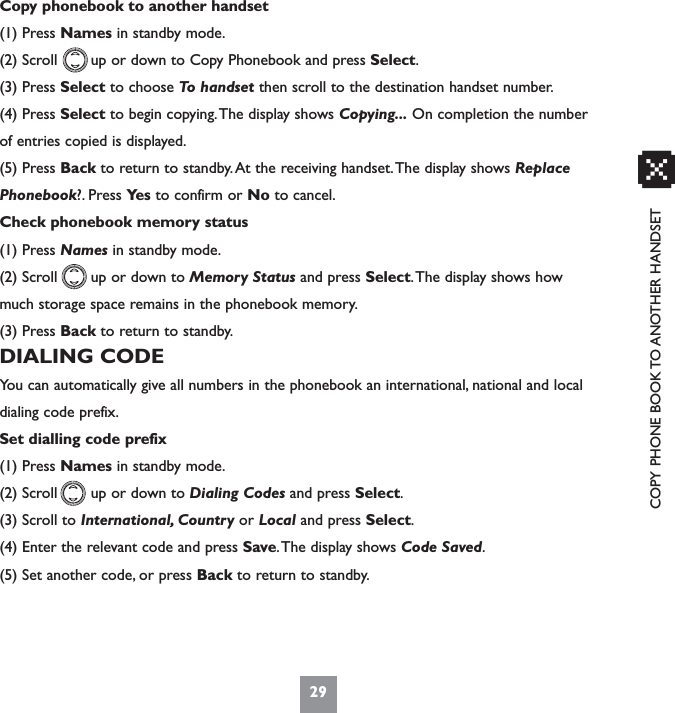
![28Delete all phonebook entries(1) Press Names.(2) Scroll to Delete Phonebook and press Select. Screen shows Delete All?.(3) Press Ye s to confirm or No to cancel If Ye s is selected the display shows All Entries Deleted.(4) Press Back to return to standby.COPYING PHONEBOOK ENTRIESWhen copying phonebook entries, the other handset must be registered to thesame base as your handset. If the other handset does not belong to the correct DECTrange, this function may not be available.Copy entry to another handset(1) Press down in standby mode.(2) Scroll up or down to the entry and press Options.(3) Scroll to Copy Entry and press Select.(4) To Handset is highlighted. Press Select.(5) Scroll up or down to the destination handset number and press Select.The displayshows Copying [Entry] and the entry is copied. Once copied, the display shows[Entry] Copied.(6) Select another entry to be copied or press Back to return to standby.If the receiving handset memory is full, it displays Phonebook Memory Full.The sending handset displays Copying Unsuccessful.](https://usermanual.wiki/Sun-Communications/DECT33-S37/User-Guide-682336-Page-28.png)
![30USEFUL NUMBERSStore a useful numberStore up to 10 of your most important or useful numbers or dialing prefixes in the usefulnumbers list, for example help lines, directory services, etc.(1) Press Menu, scroll up or down to Useful Numbers and press Select.(2) Scroll to an empty space and press Options.(3) Scroll down to Edit and press Select.(4) Enter the name and press Save.(5) Enter the number and press Save(6) Press Back to return to standby.View and dial a useful number(1) Press Menu, scroll or to Useful Numbers and press Select.(2) Scroll to the entry and press Options.(3) Press Select to choose Show Details.(4) Press Dial to call the number. If the number is a prefix, you can enter the rest of the number or add an entry from the phonebook. Press Back to return to standby mode.Edit a useful number(1) Press Menu, scroll up or down to Useful Numbers and press Select.(2) Scroll up or down to the entry and press Options.(3) Scroll down to Edit and press Select.(4) Edit the name, press Save.(5) Edit the number, press Save.The display shows [Entry] Saved.(6) Press Back to return to standby.](https://usermanual.wiki/Sun-Communications/DECT33-S37/User-Guide-682336-Page-30.png)
![DELETE A USEFUL NUMBERDelete a useful number(1) Press Menu, scroll to Useful Numbers and press Select.(2) Scroll to the entry and press Options.(3) Scroll to Delete and press Select.The display shows Delete [Entry]?.(4) Press Ye s to confirm or No to cancel. If Ye s is selected the display shows [Entry] Deleted.(5) Press Back to return to standby.Delete all useful numbers(1) Press Menu, scroll to Useful Numbers and press Select.(2) Press Options, scroll to Delete All and press Select.The display shows Delete All Entries?.(3) Press Ye s to confirm or No to cancel. If Ye s is selected the display shows All Entries Deleted.(4) Press Back to return to standby.31x](https://usermanual.wiki/Sun-Communications/DECT33-S37/User-Guide-682336-Page-31.png)
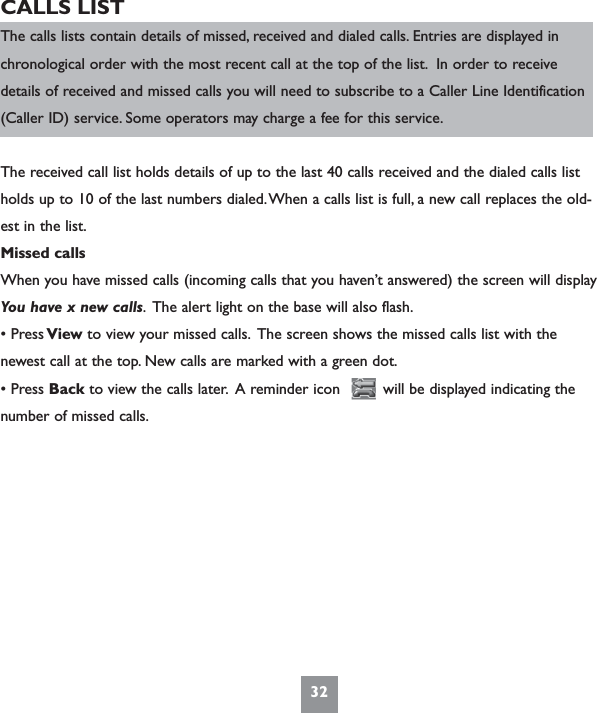
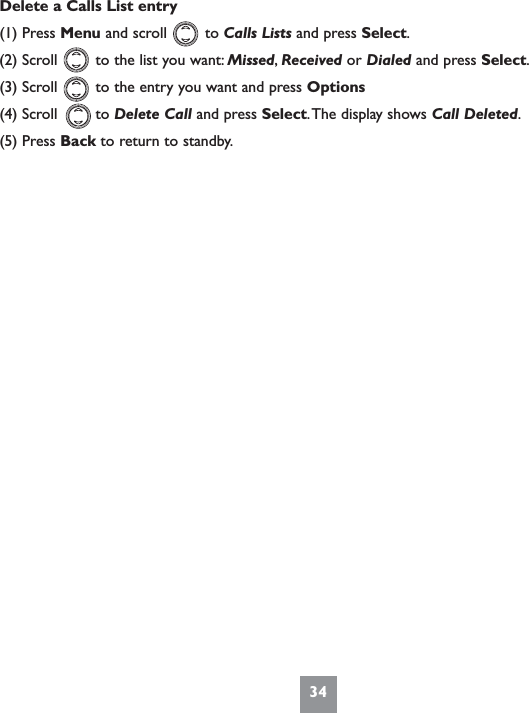
![VIEWING THE CALLS LISTVIEWING THE CALLS LIST(1) Press Menu and scroll to Calls Lists and press Select.(2) Scroll to the list you want: Missed,Received or Dialled and press Select.(3) Scroll to view the entries. If the list is empty, the screen displays Call List(s) Empty.If a calls list contains a number from your phonebook, the name stored with the number will be displayed in the calls list(s).(4) To view further details about the call, press Options then Select to choose Show Details.To dial the number displayed, press .(5) Press Back to return to standby.Save number from the calls list to the phonebook(1) Press Menu and scroll to Calls Lists.(2) Press Select and scroll to the list you want: Missed,Received or Dialed.(3) Press Select then scroll to the entry you want.(4) Press Options and scroll to Save Number.Note: The Save Number option will not be available if the number is already stored in the phonebook. If the phonebook is full when Save Number is selected, the display willshow Phonebook Memory Full and returns to the previous screen.(5) Press Select and enter a name. Press OK.The number is displayed.(6) Press Select and scroll to select the ring tone. Press Select to confirm.The display shows [Entry] Saved.(7) Press Back to return to standby.33x](https://usermanual.wiki/Sun-Communications/DECT33-S37/User-Guide-682336-Page-33.png)