Thomson 2-1230A 2.4 GHz DSS 2-Line Multi Handset Cordless Phone User Manual 25001 DOM IB E 0
Thomson Inc. 2.4 GHz DSS 2-Line Multi Handset Cordless Phone 25001 DOM IB E 0
UserManual.wiki
>
Thomson
>
2 1230A User Manual
User Manual
Navigation menu
Upload a User Manual
Namespaces
Wiki Guide
HTML
PDF
Info
Views
User Manual
Discussion / Help
Navigation
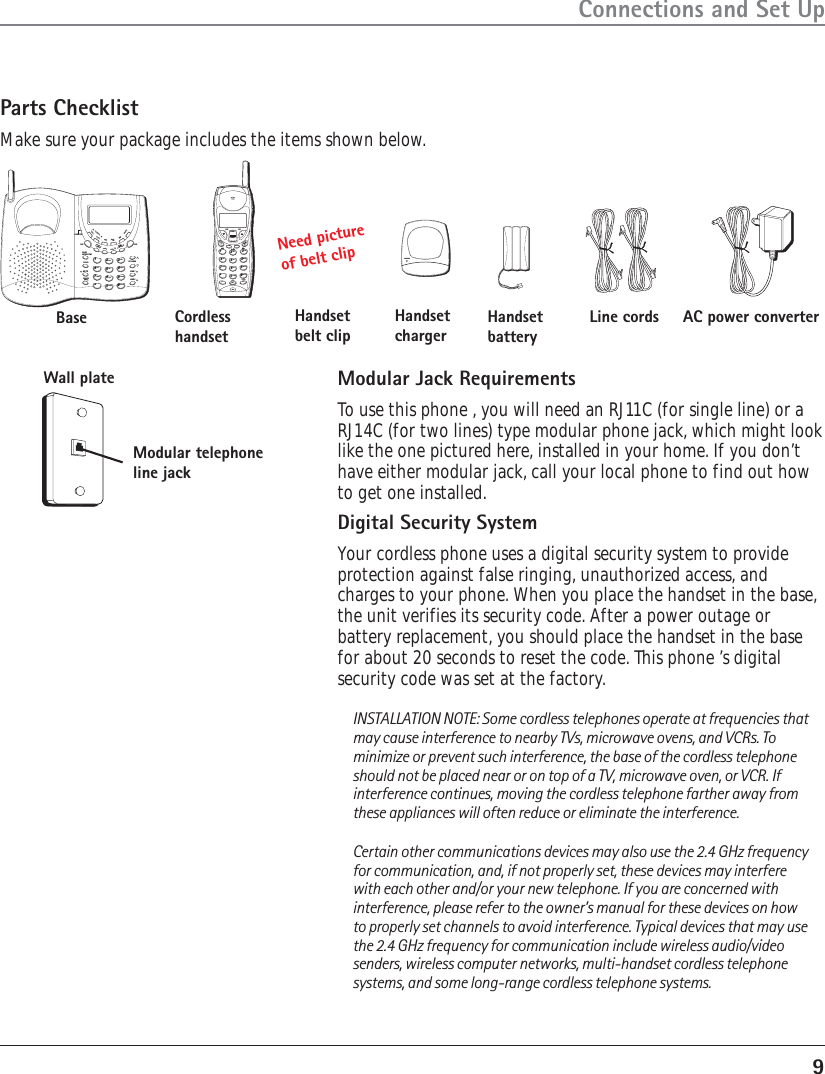

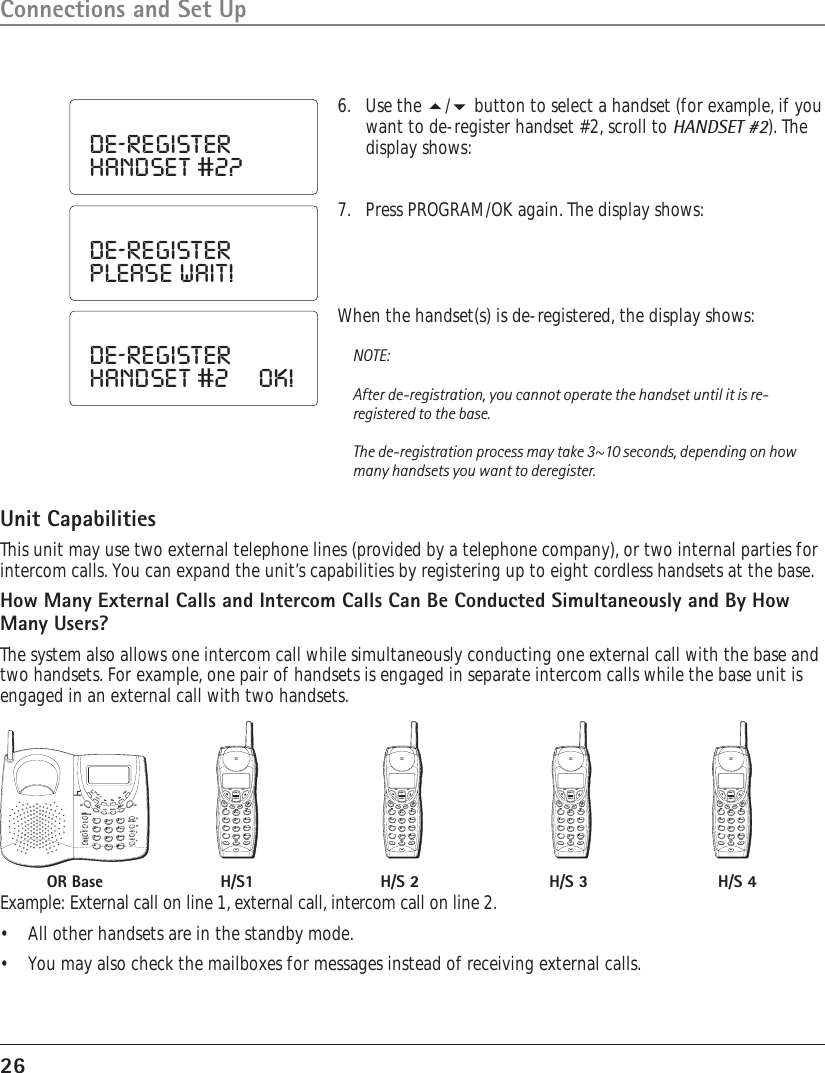


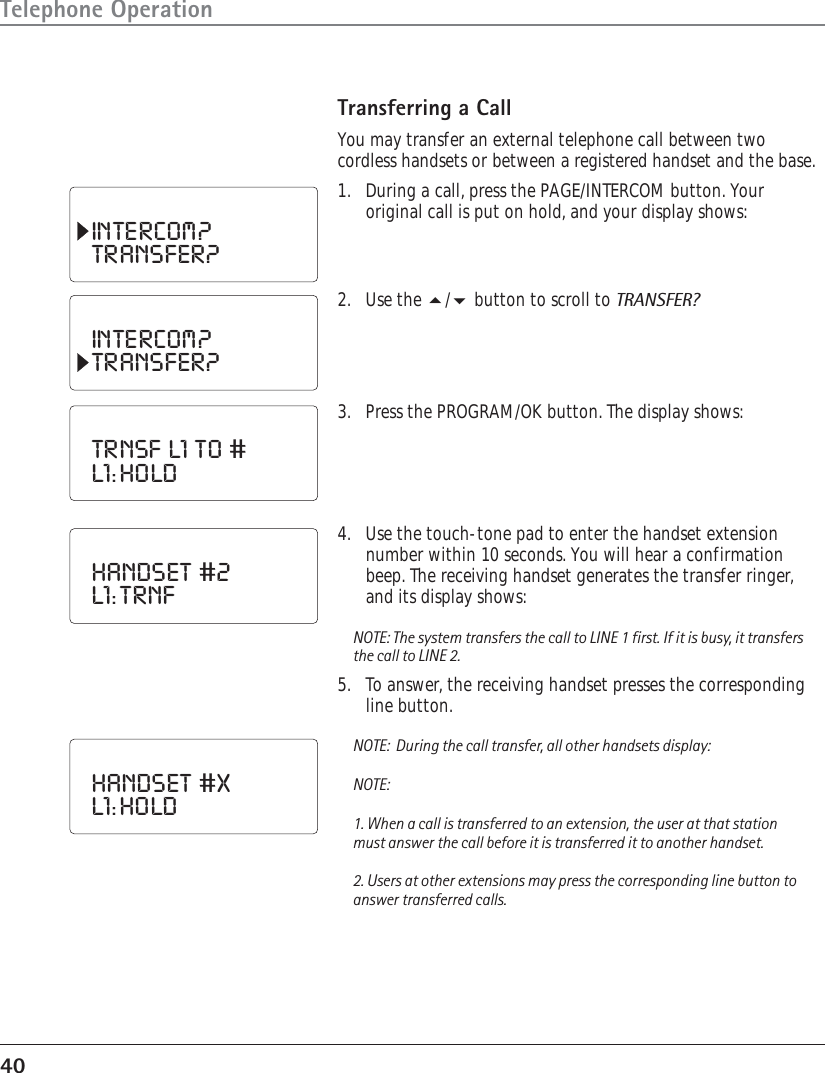
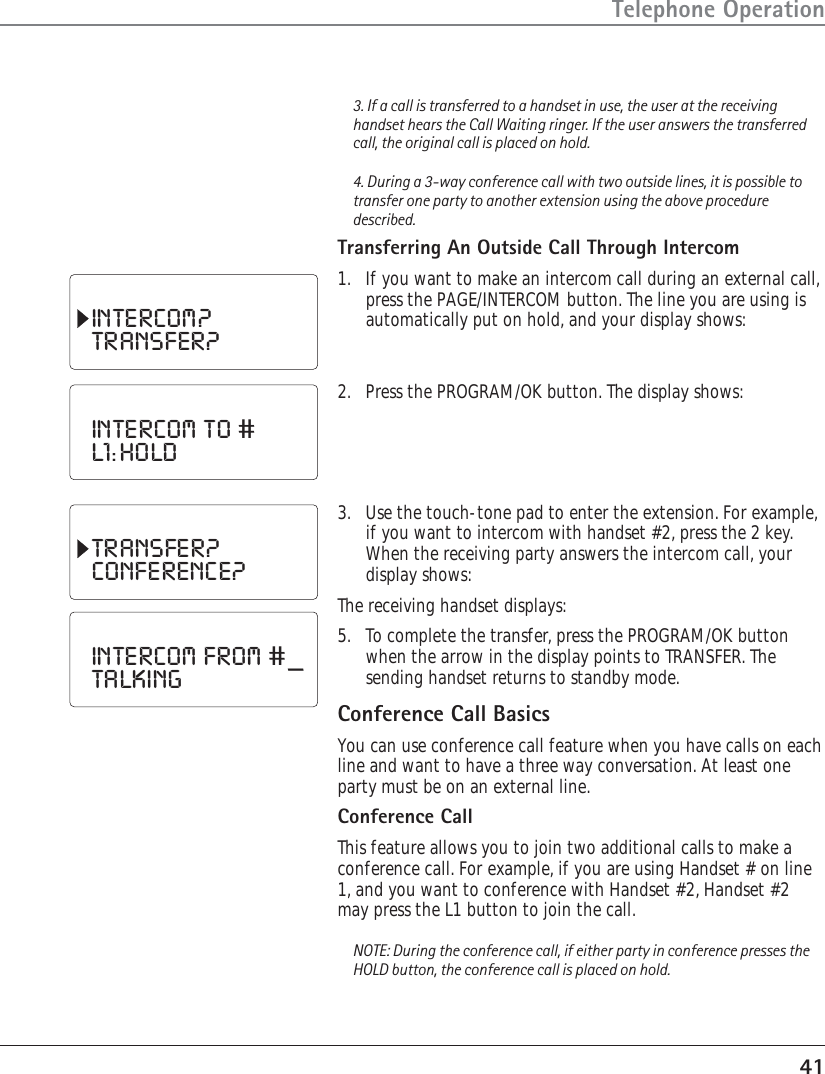

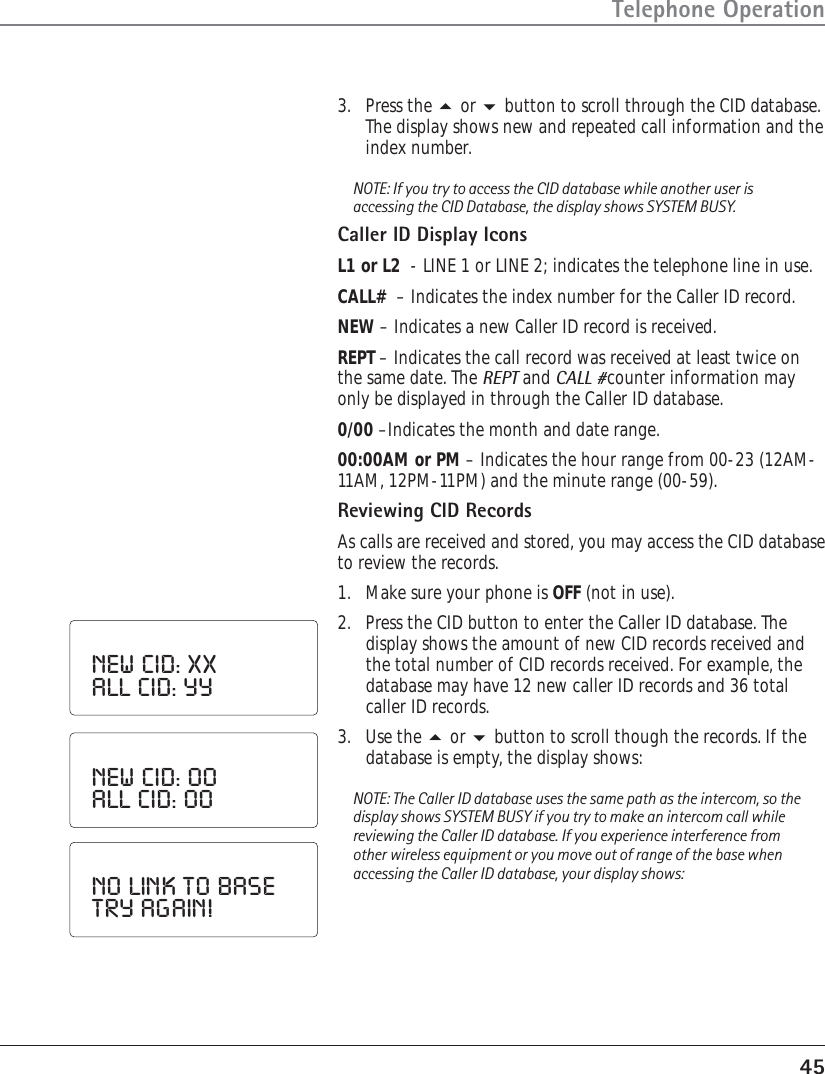
![47Telephone Operation1. Press the REDIAL/FORMAT button to select the telephonenumber format.2. Press the L1 or L2 button, and the number is automaticallydialed.NOTE:1. When you change the dialing format of a displayed number, you donot change the Caller ID database.2. If the line is busy when you presses [LINE 1 or LINE 2] key, the phonewon’t dial the number.3. If the displayed number’s area code is NOT the same as theprogrammed area code, the system automatically adds the number 1 tothe dialing sequence.Transferring A CID Record To Directory MemoryIf you want to store the CID record showing in the display inmemory:1. Press the REDIAL/FORMAT button. The display shows:2. Press the REDIAL/FORMAT button to select the format youwant to store the number in.3. After you select the dialing format, press and hold the DIRbutton to enter directory memory.4. Press the or button, or use the touch-tone pad toenter the memory location number.5. Press the PROGRAM/OK button to confirm. The displayshows:6. Press the or button to scroll to YES, and pressPROGRAM/OK to save. You will hear confirmation tone.NOTE:If the memory location is empty, REPLACE RECORD does not show in thedisplay and the telephone number is automatically stored. A Caller IDrecord must contain a telephone number; otherwise it cannot be storedin directory memory.1-135-922-5123JOHN SMITHL1 11:55 2/01 CALL #15PMREPLACE RECORD?NO?#14MEMO](https://usermanual.wiki/Thomson/2-1230A/User-Guide-423460-Page-47.png)