VELUX America 835403 Remote control User Manual 453347 2014 02 KLR web GB 2 1 indd
VELUX America Inc. Remote control 453347 2014 02 KLR web GB 2 1 indd
UserManual.wiki
>
VELUX America
>
835403 User Manual
>
User guide-1
Contents
1.
Quick guide
2.
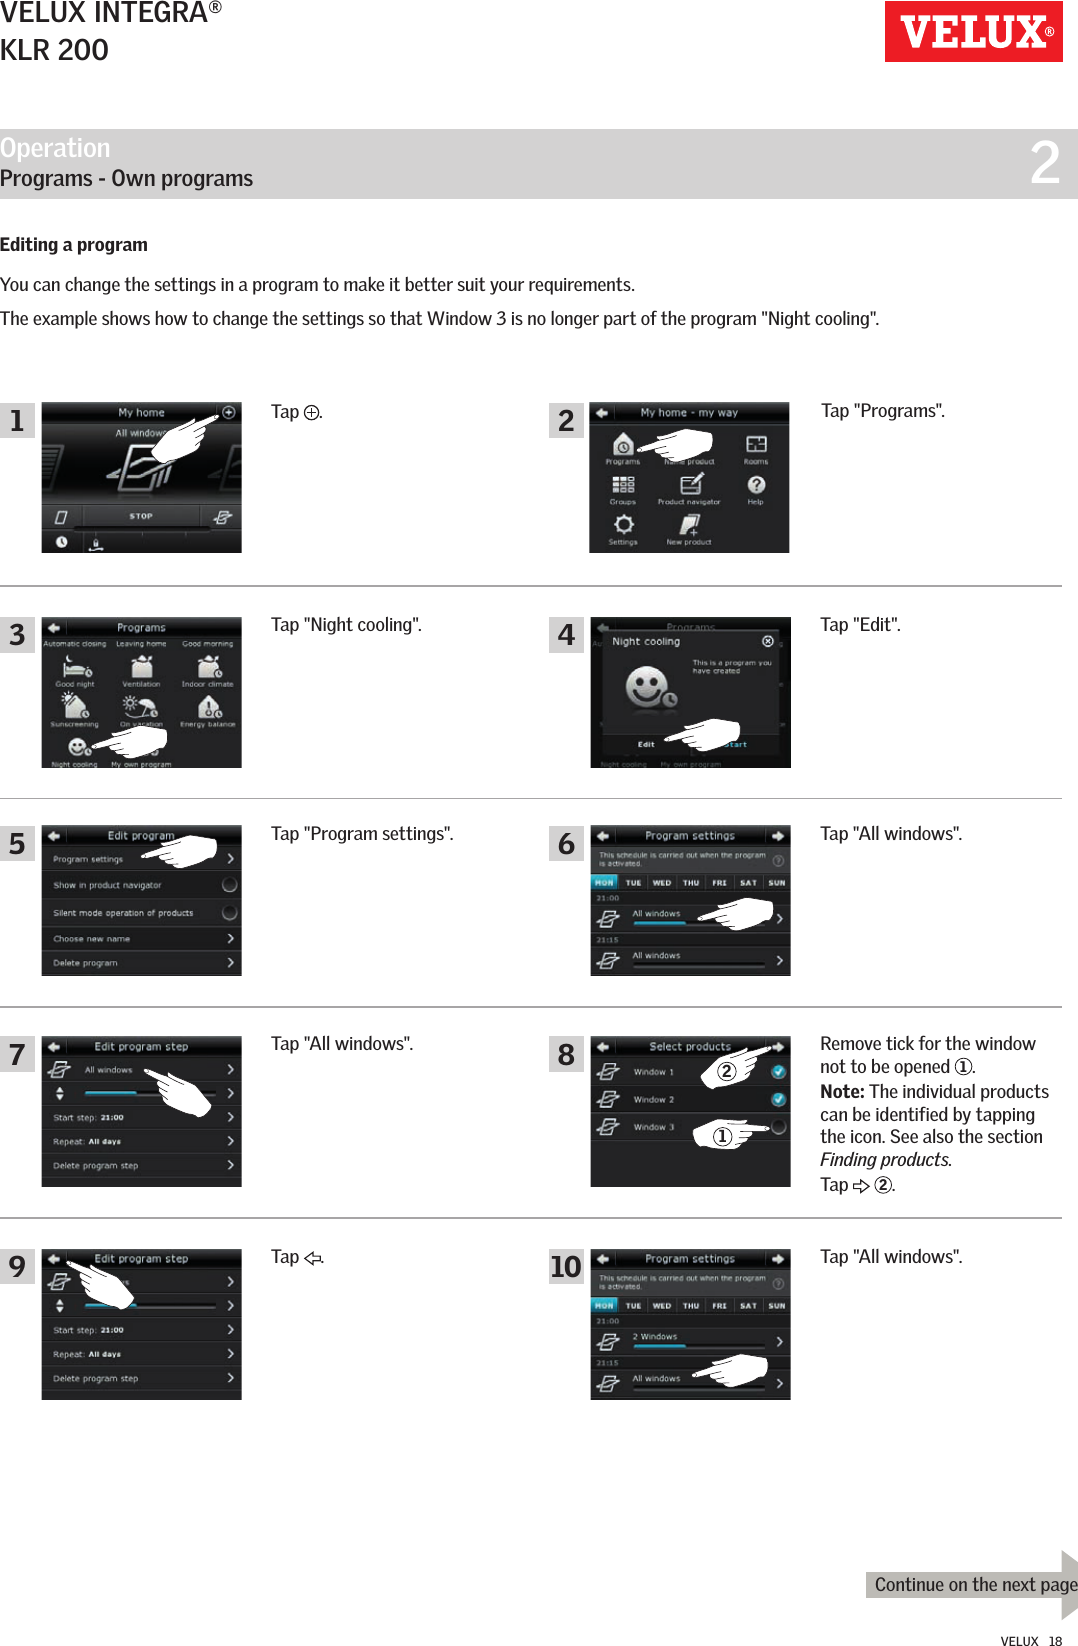
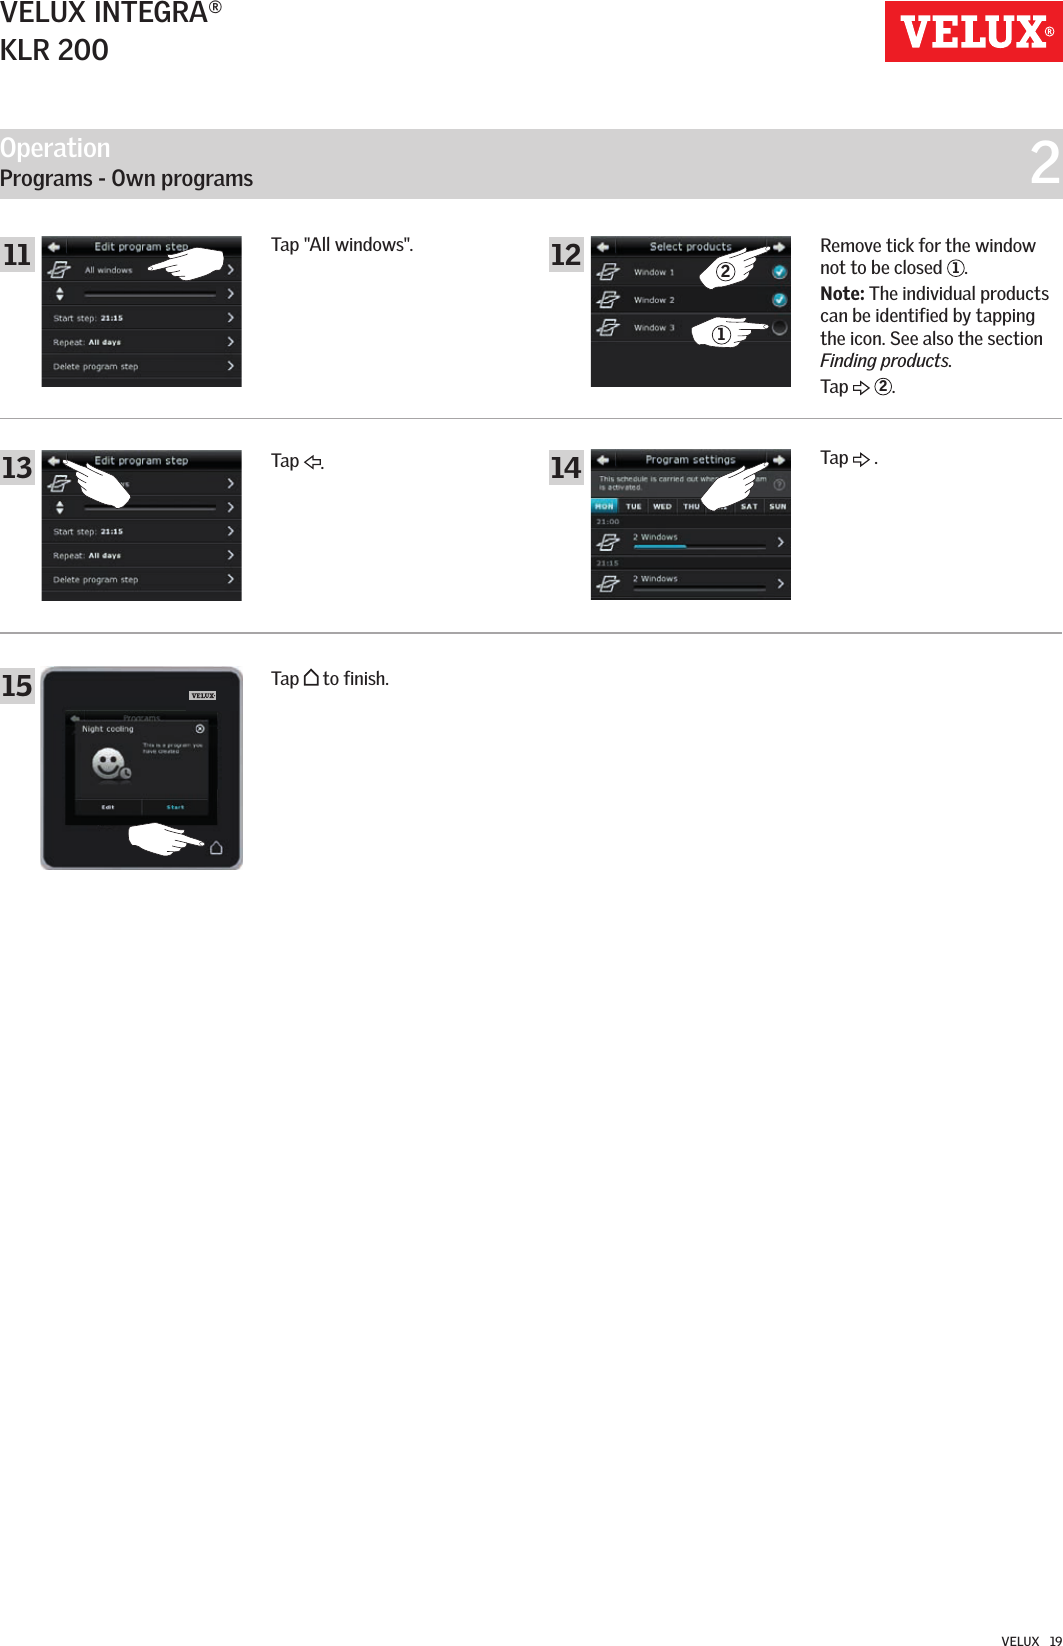
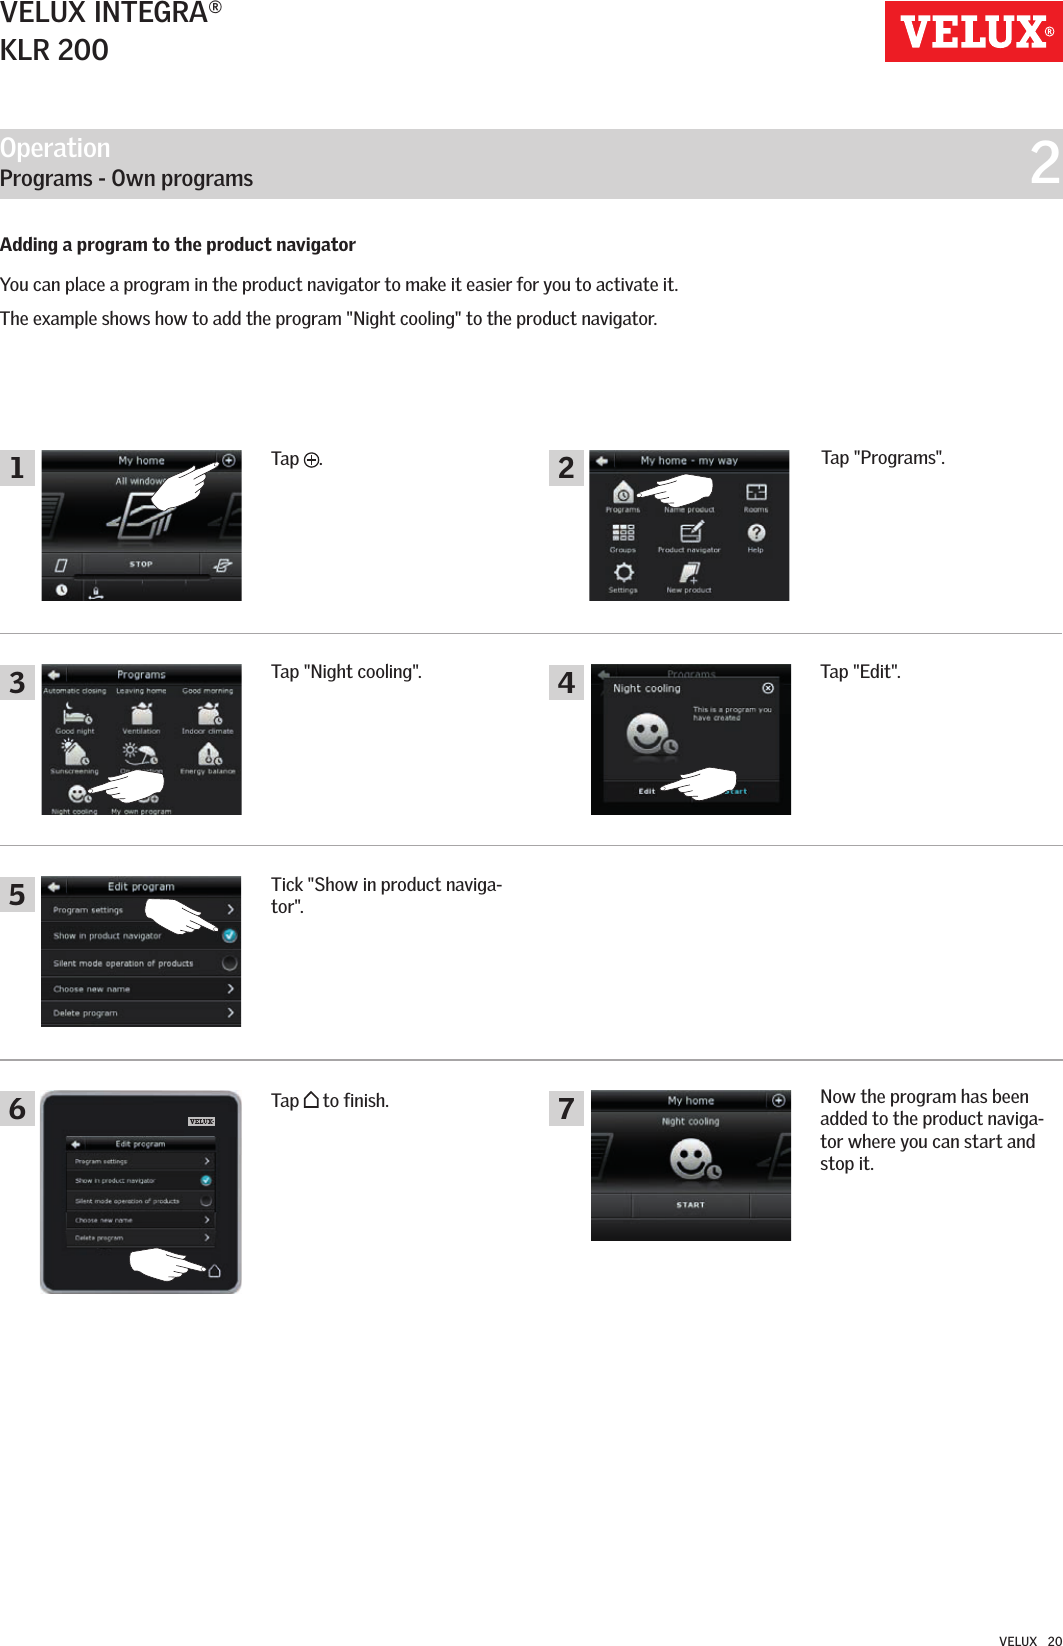
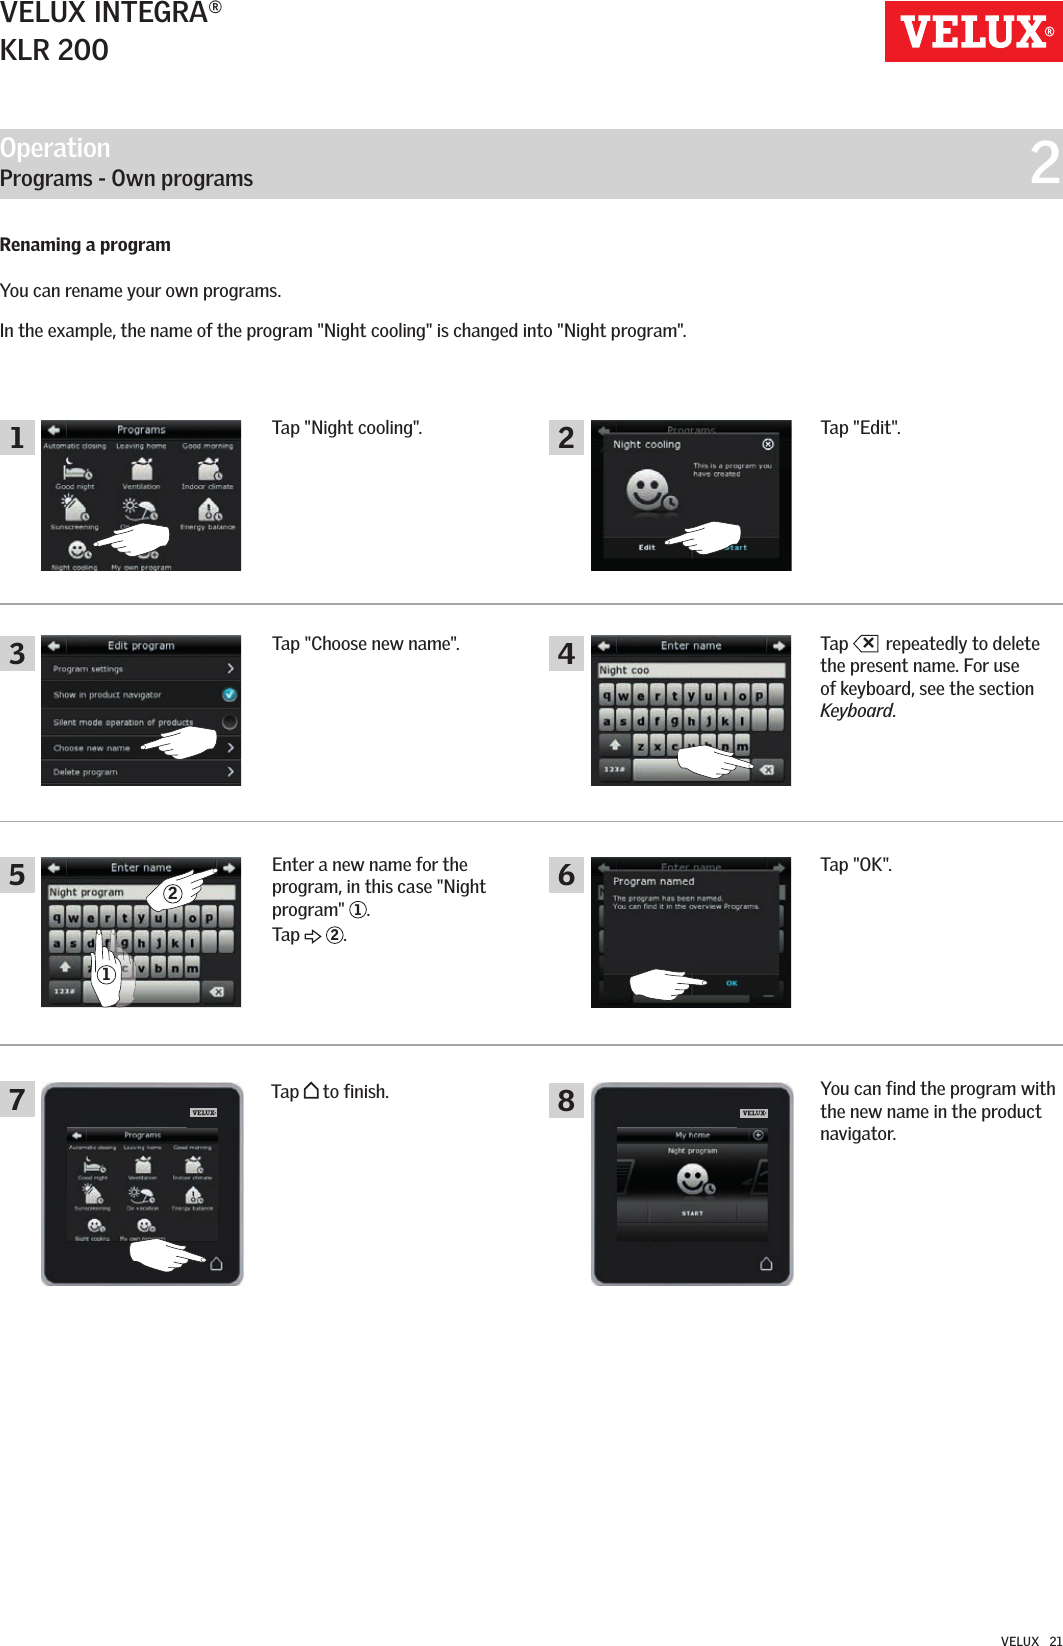
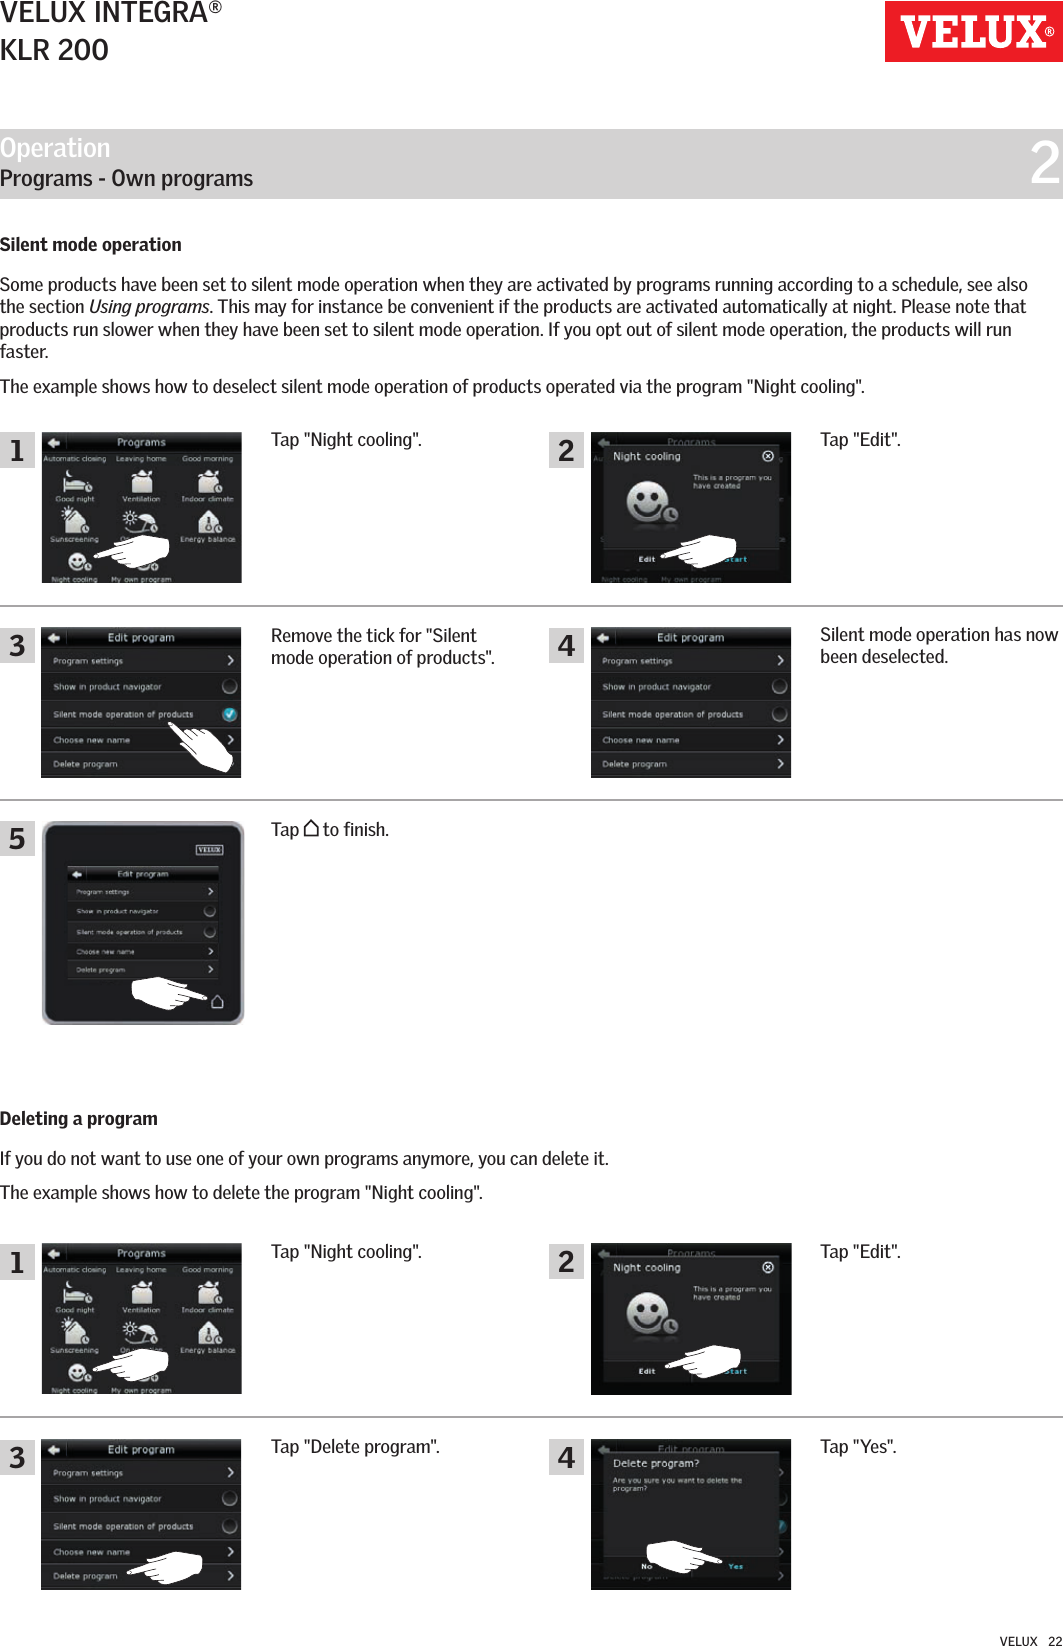
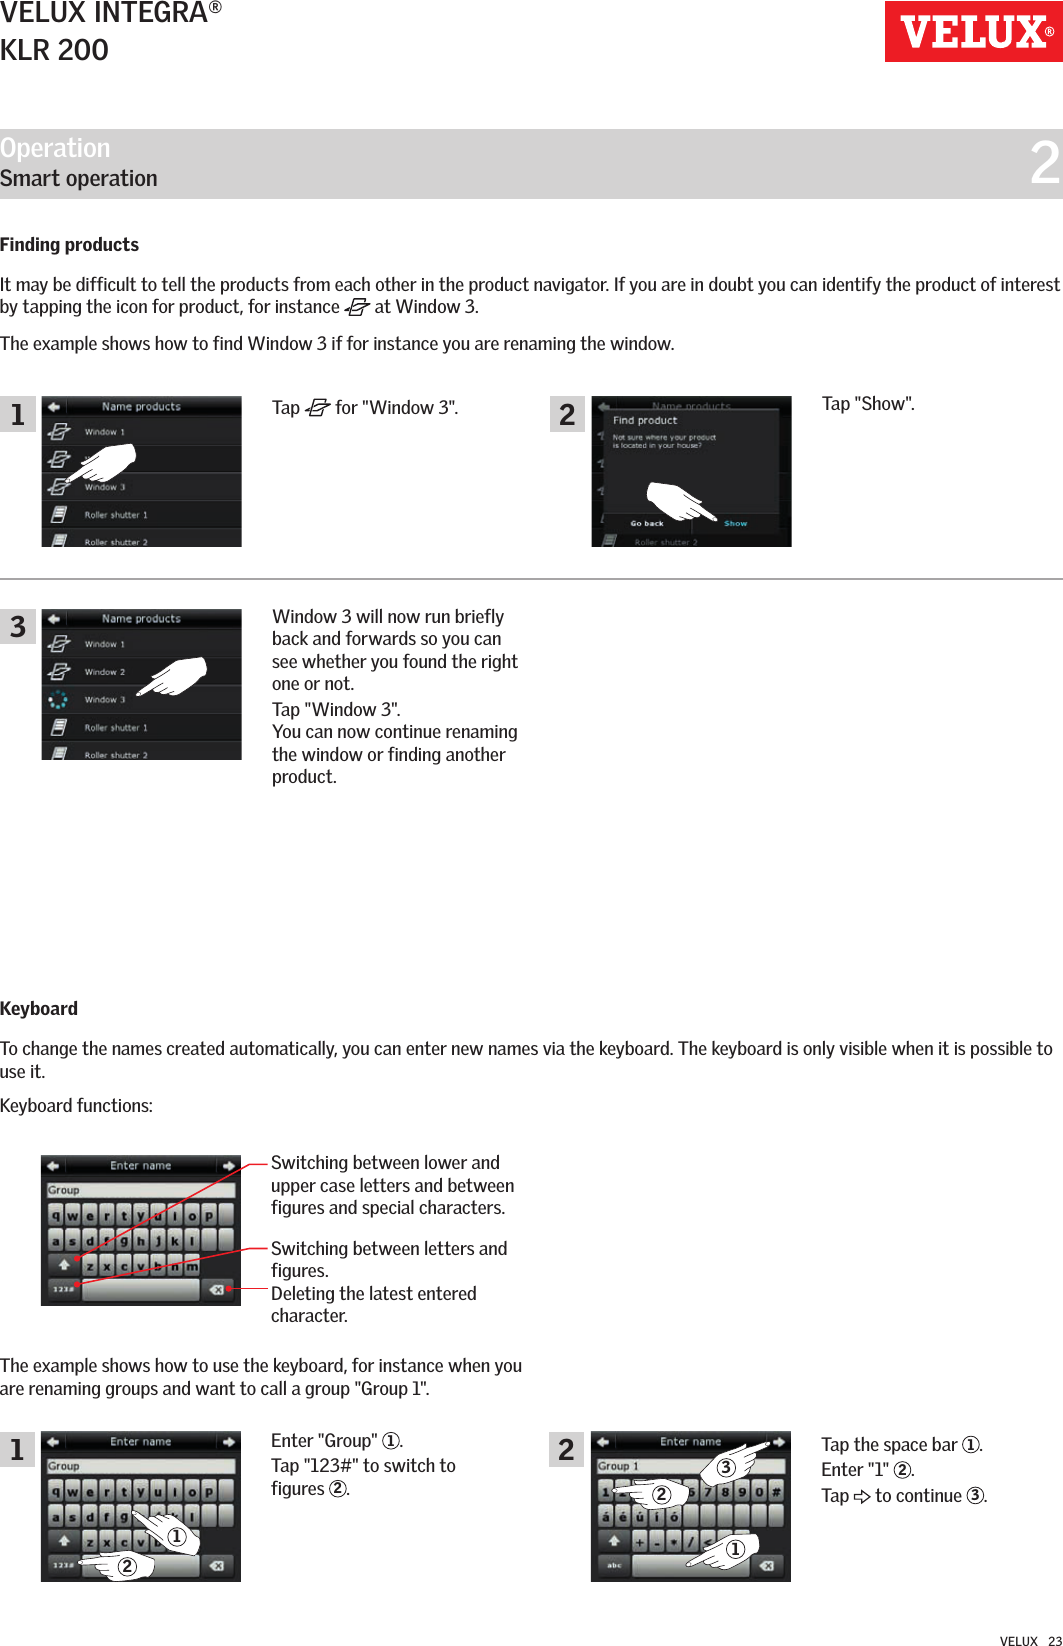
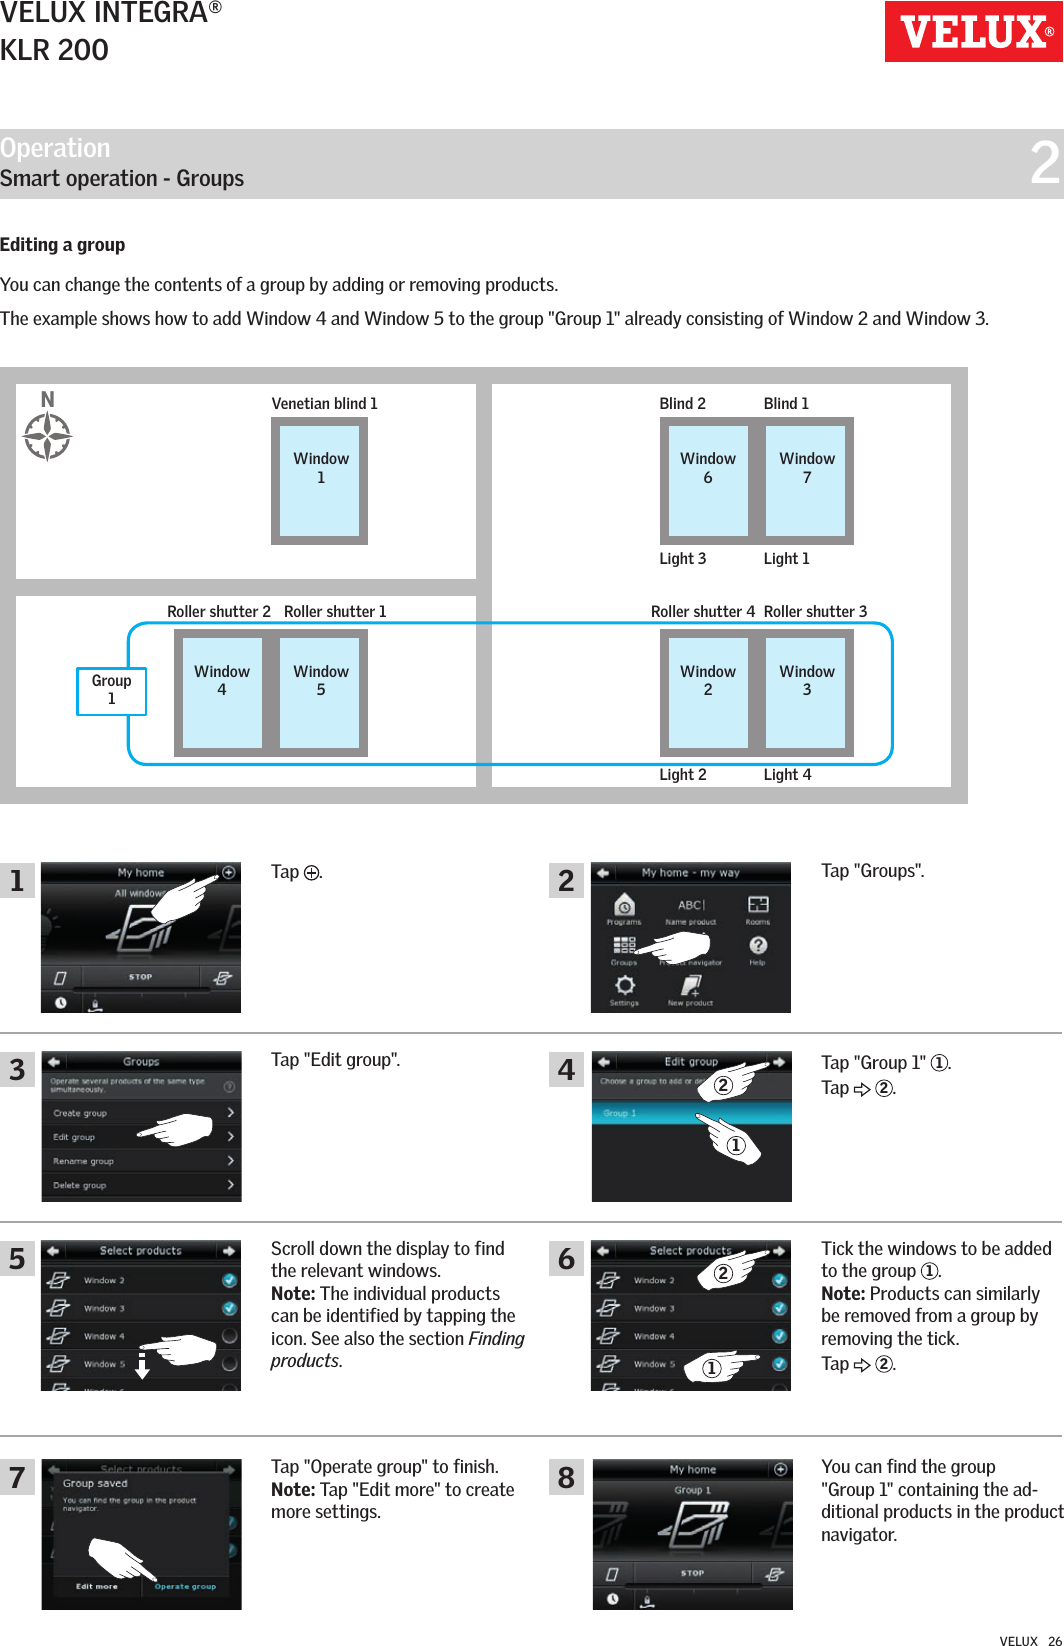
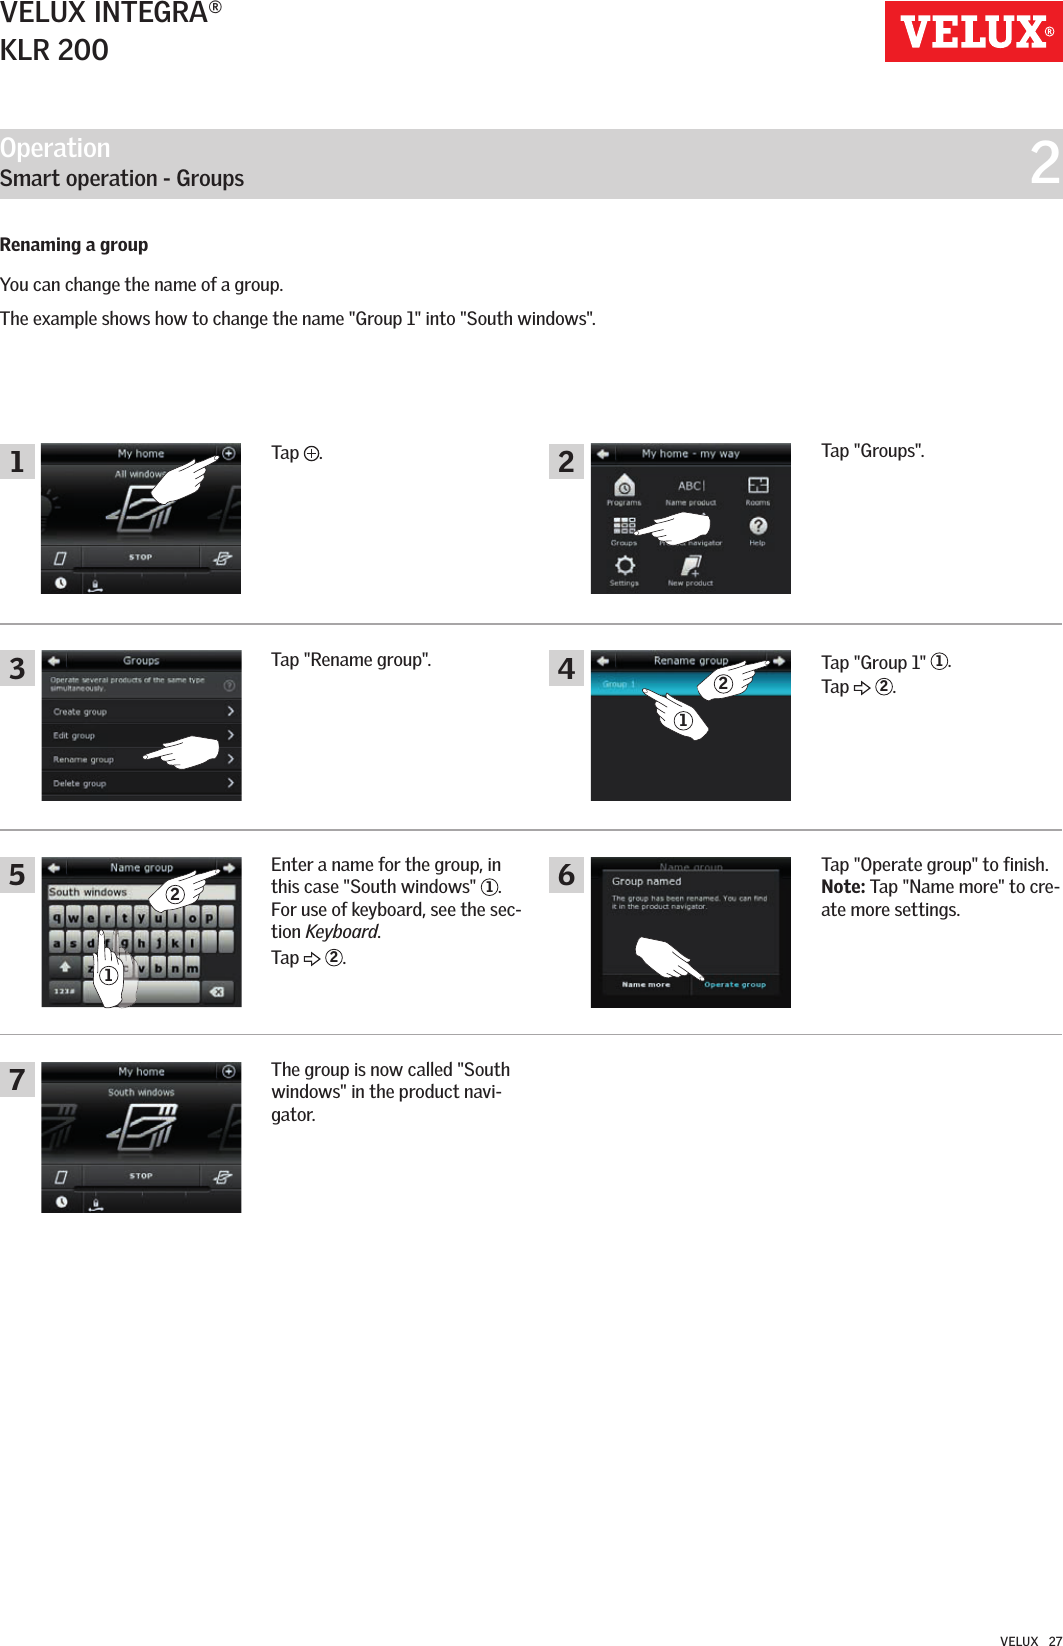
User guide-1
3.
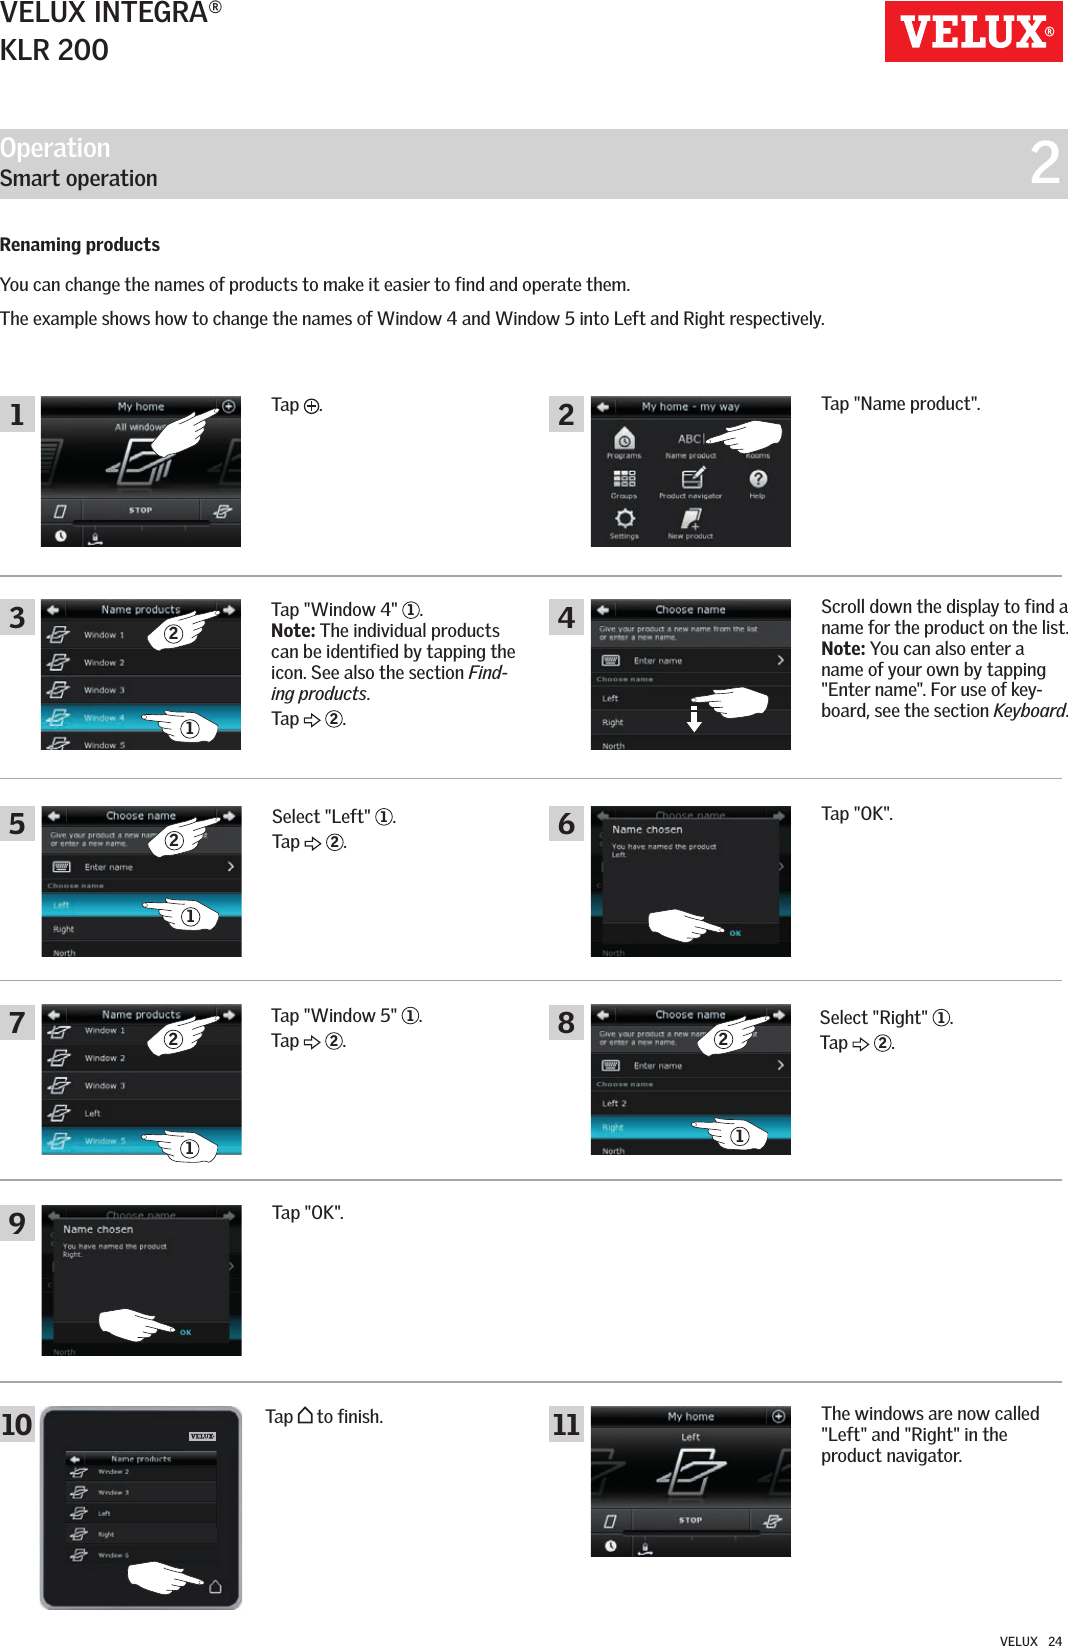
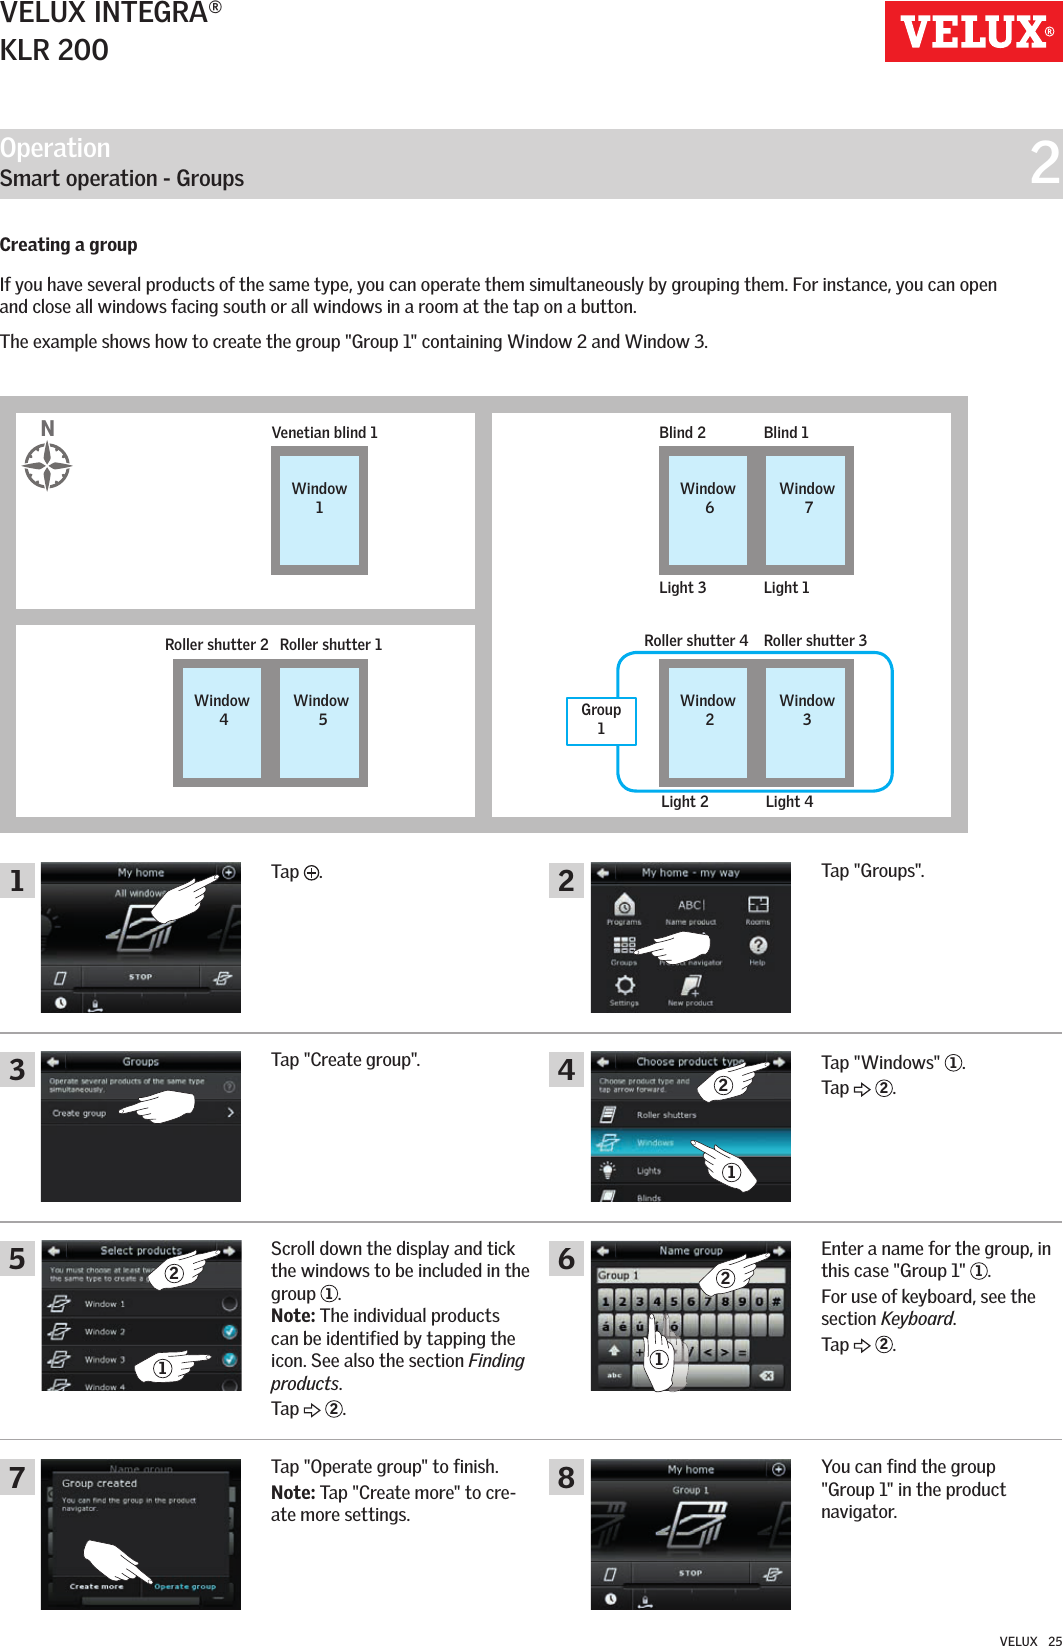
User guide-2
4.
User guide-3
5.
warning
User guide-1
Navigation menu
Upload a User Manual
Namespaces
Wiki Guide
HTML
PDF
Info
Views
User Manual
Discussion / Help
Navigation