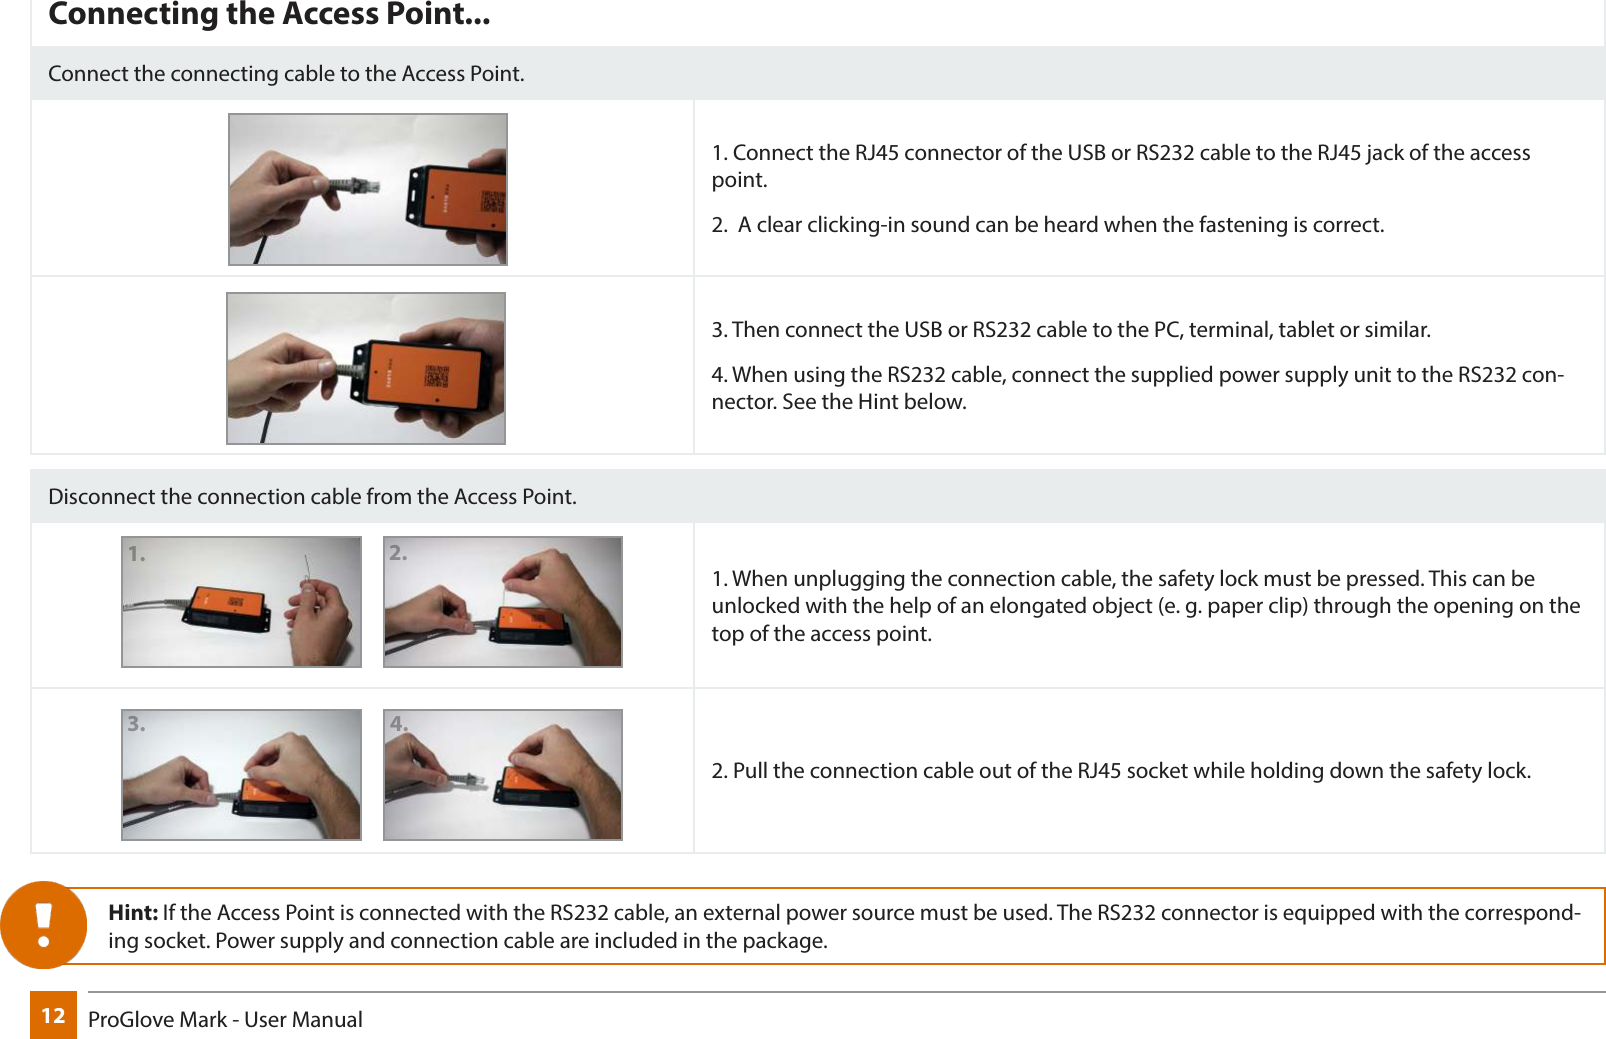
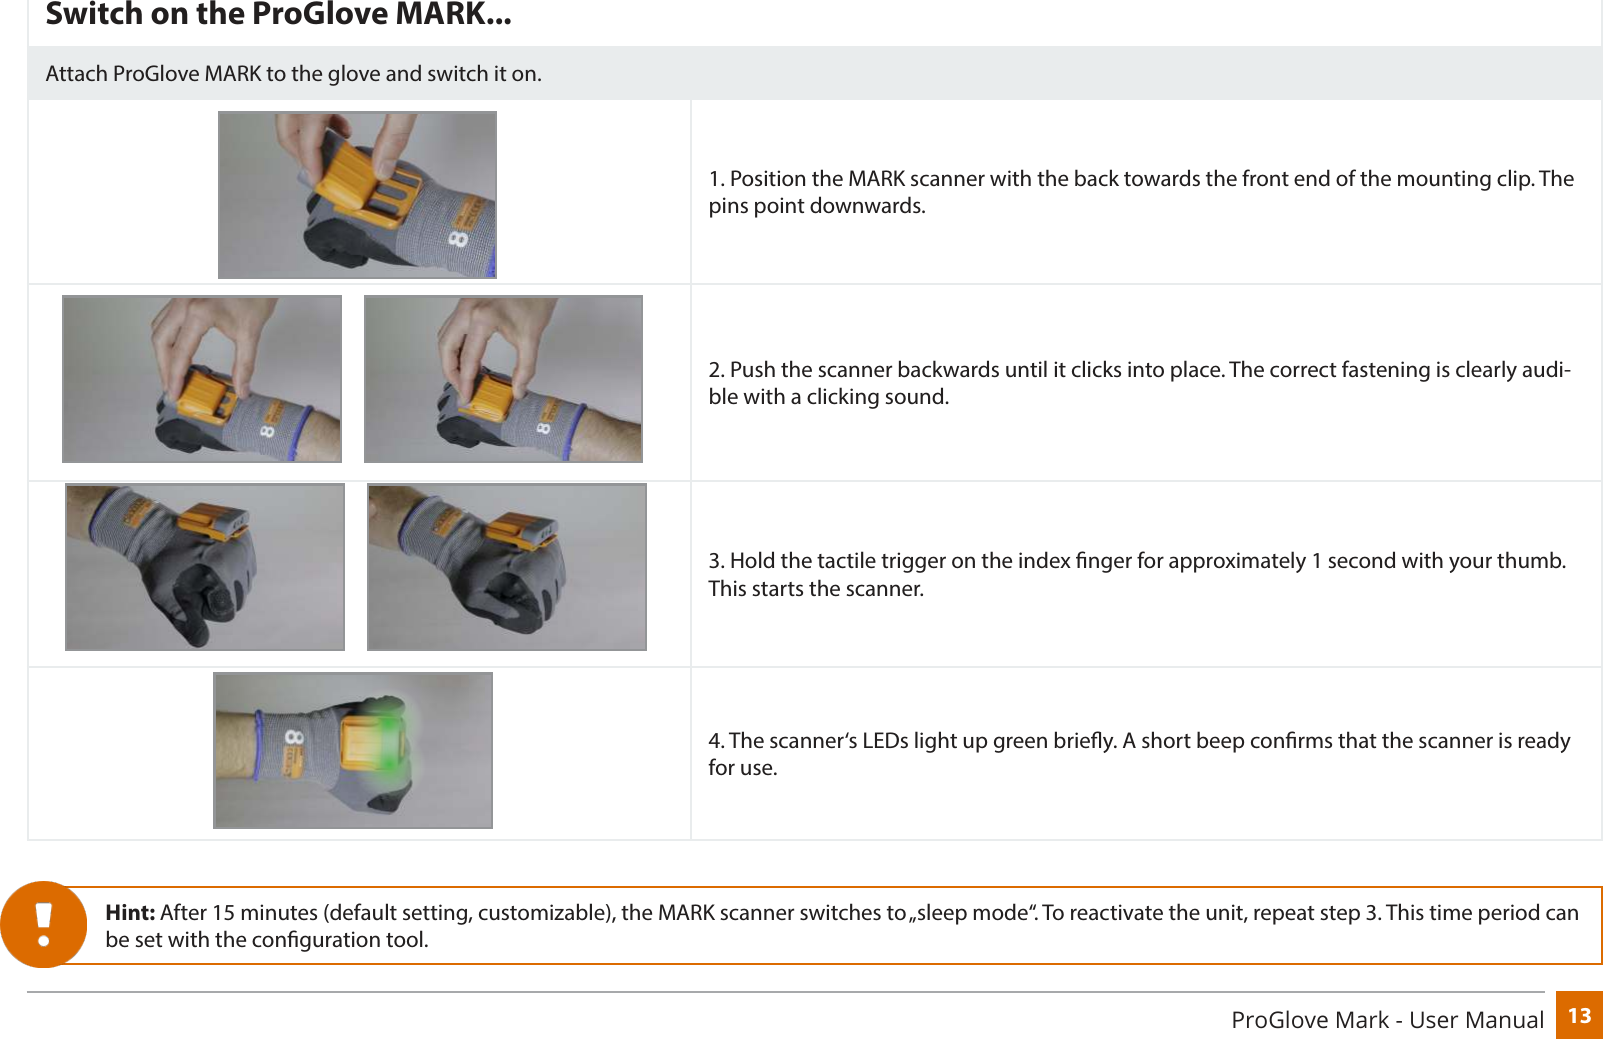
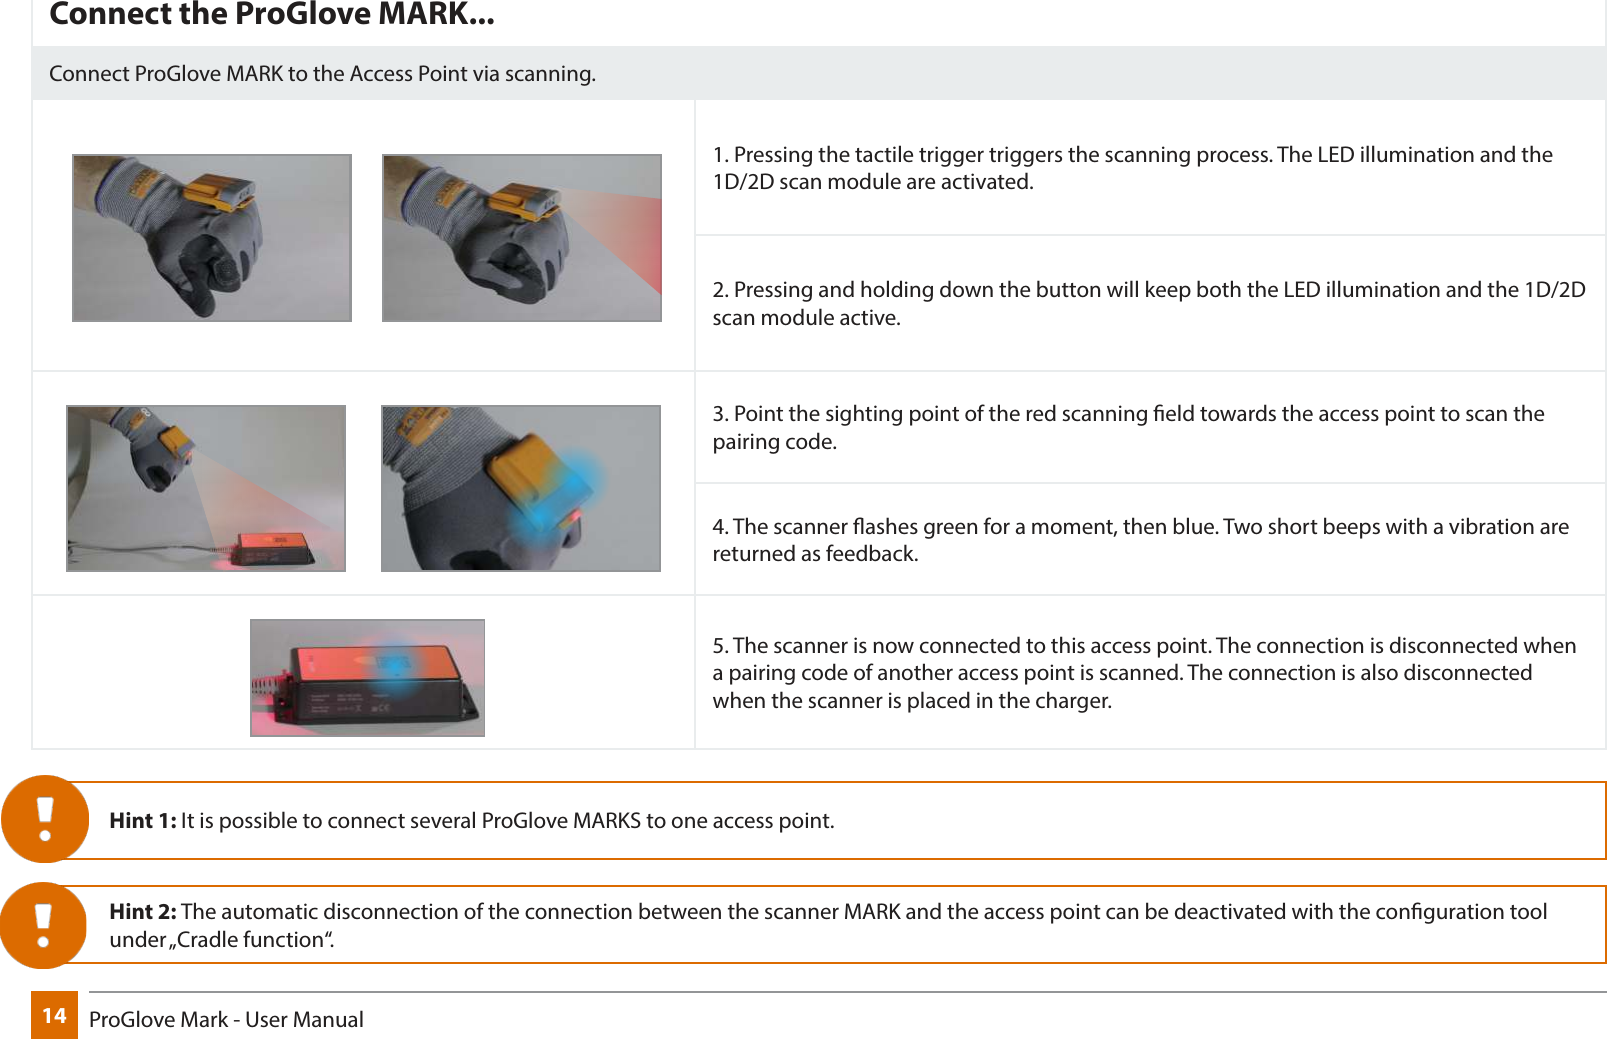
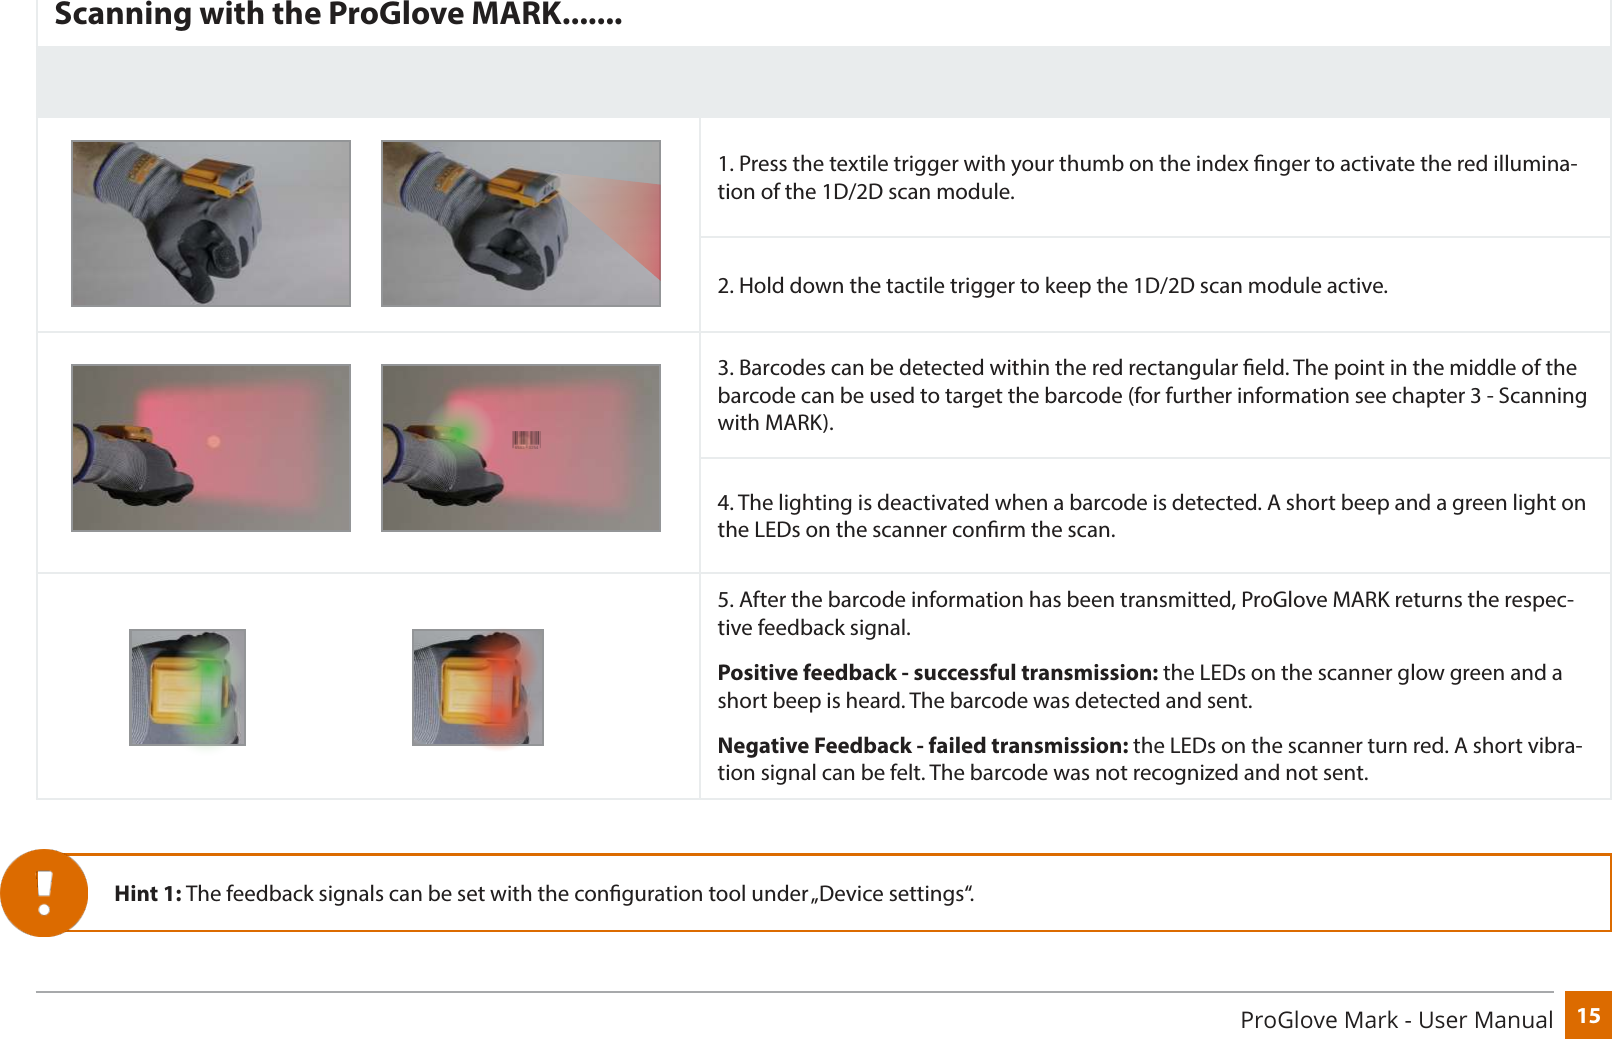
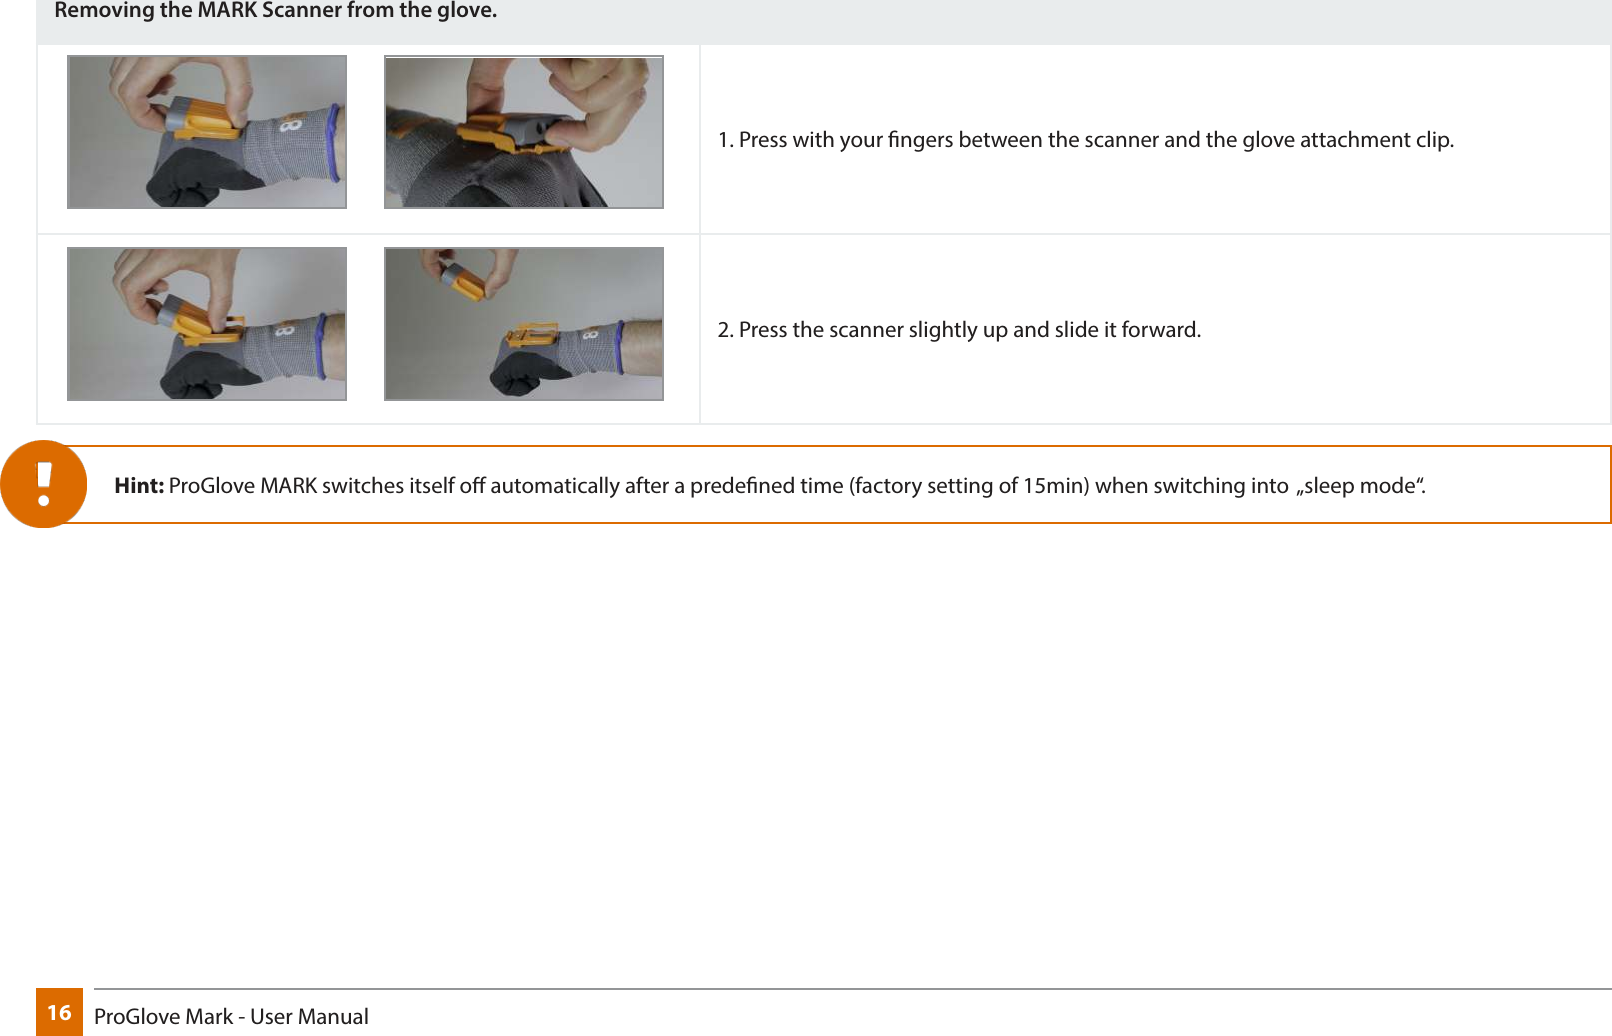
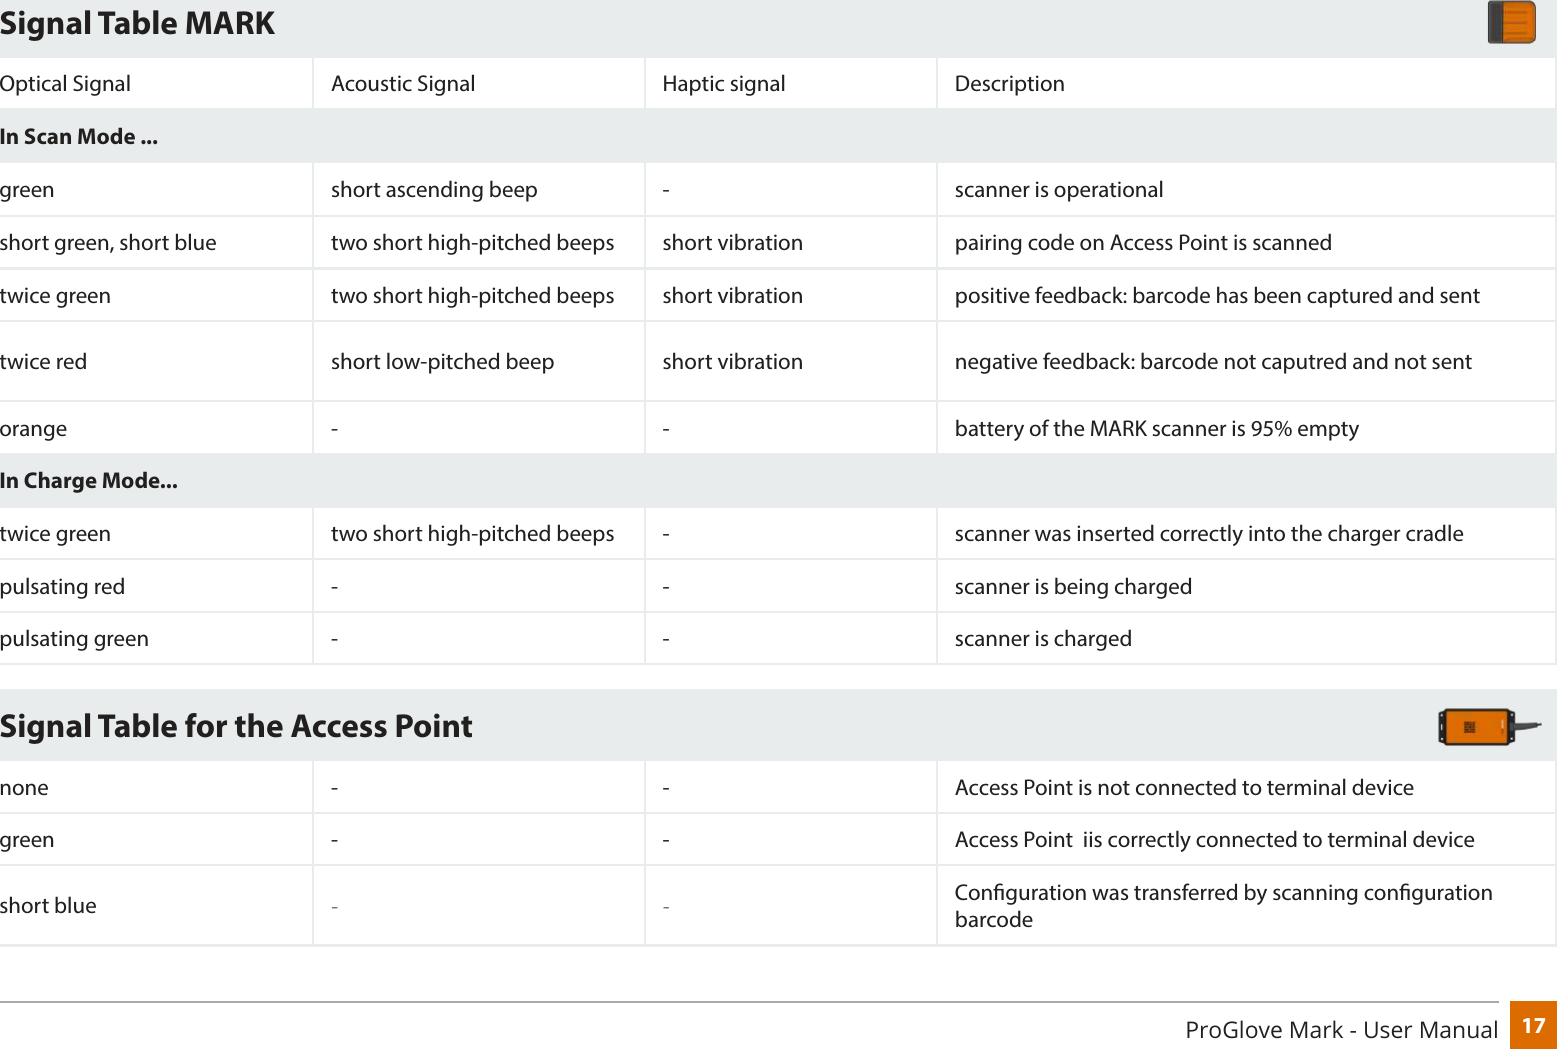
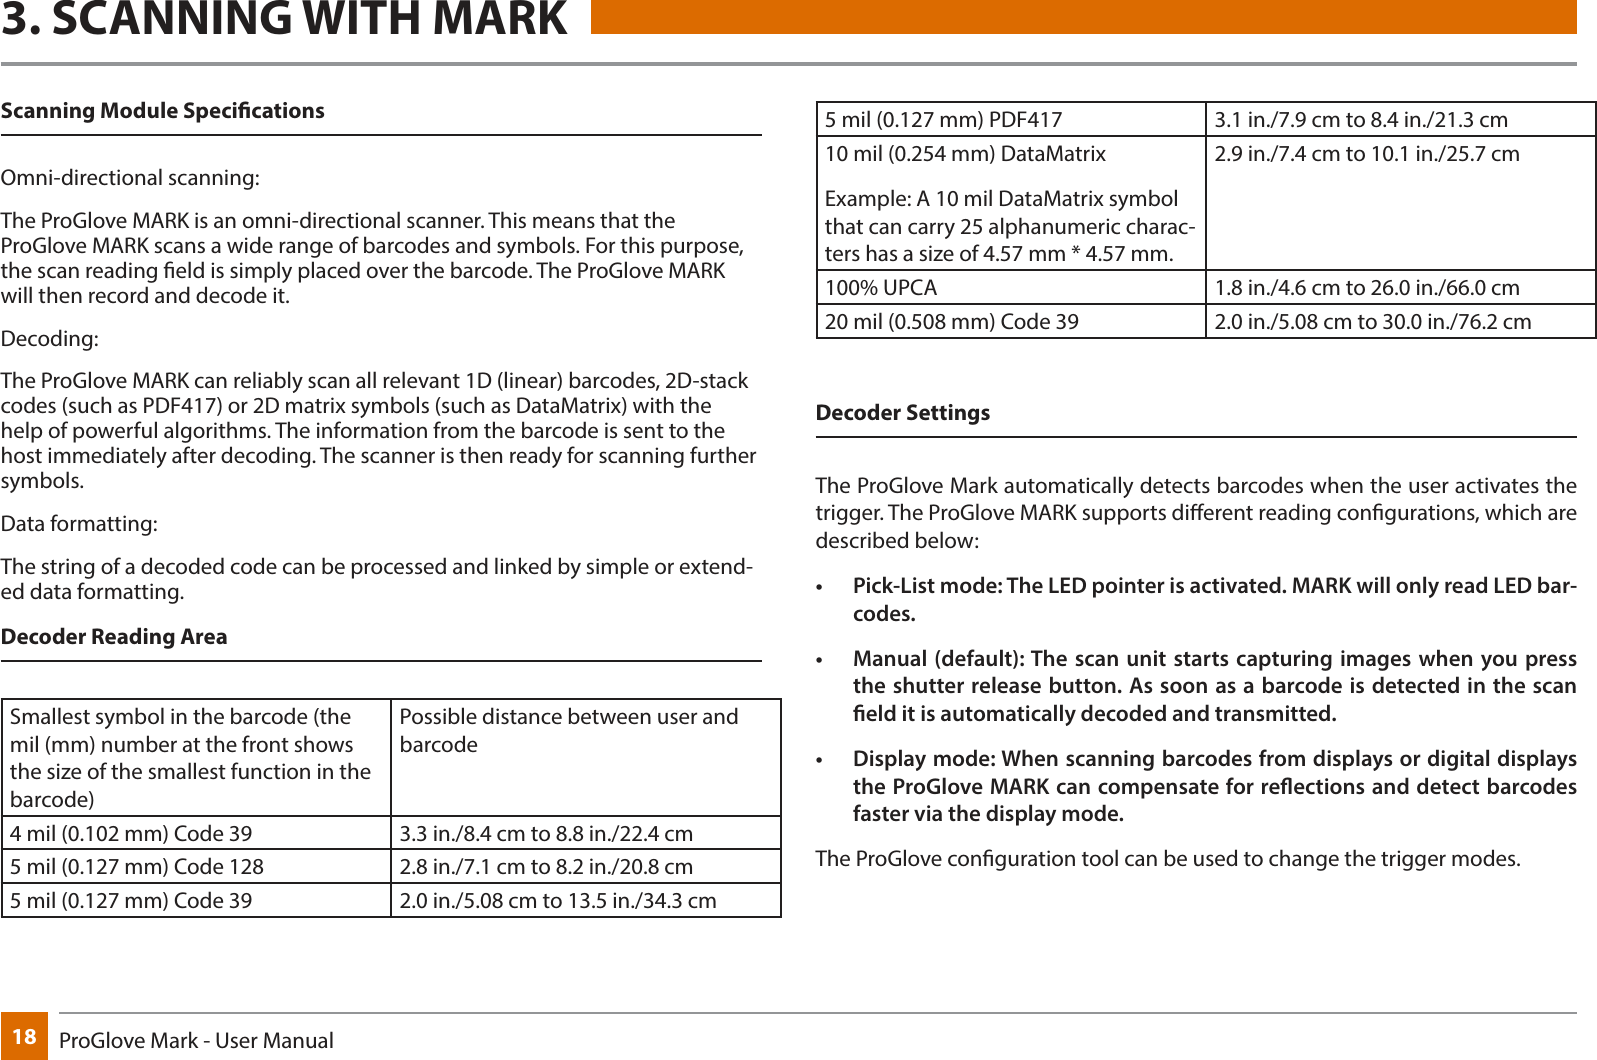
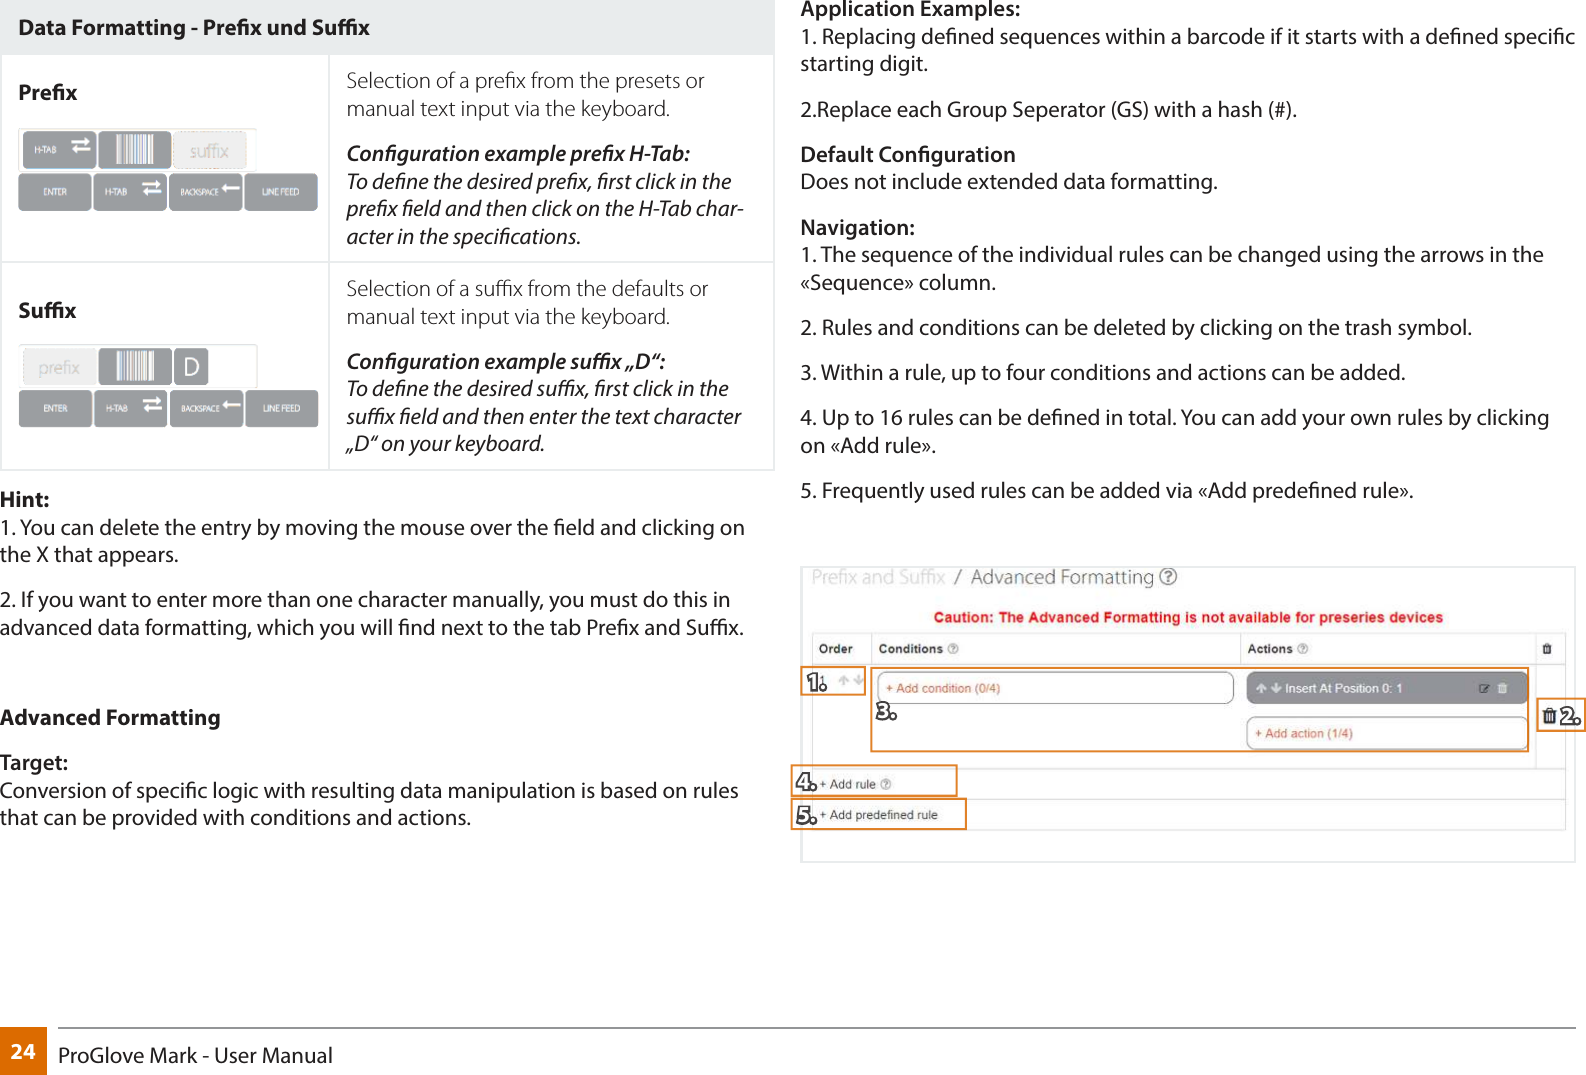
Workaround MARK-ONE-S ProGlove Mark One S Scanner User Manual
Workaround GmbH ProGlove Mark One S Scanner
UserManual.wiki
>
Workaround
>
MARK ONE S User Manual
User Manual
Navigation menu
Upload a User Manual
Namespaces
Wiki Guide
HTML
PDF
Info
Views
User Manual
Discussion / Help
Navigation
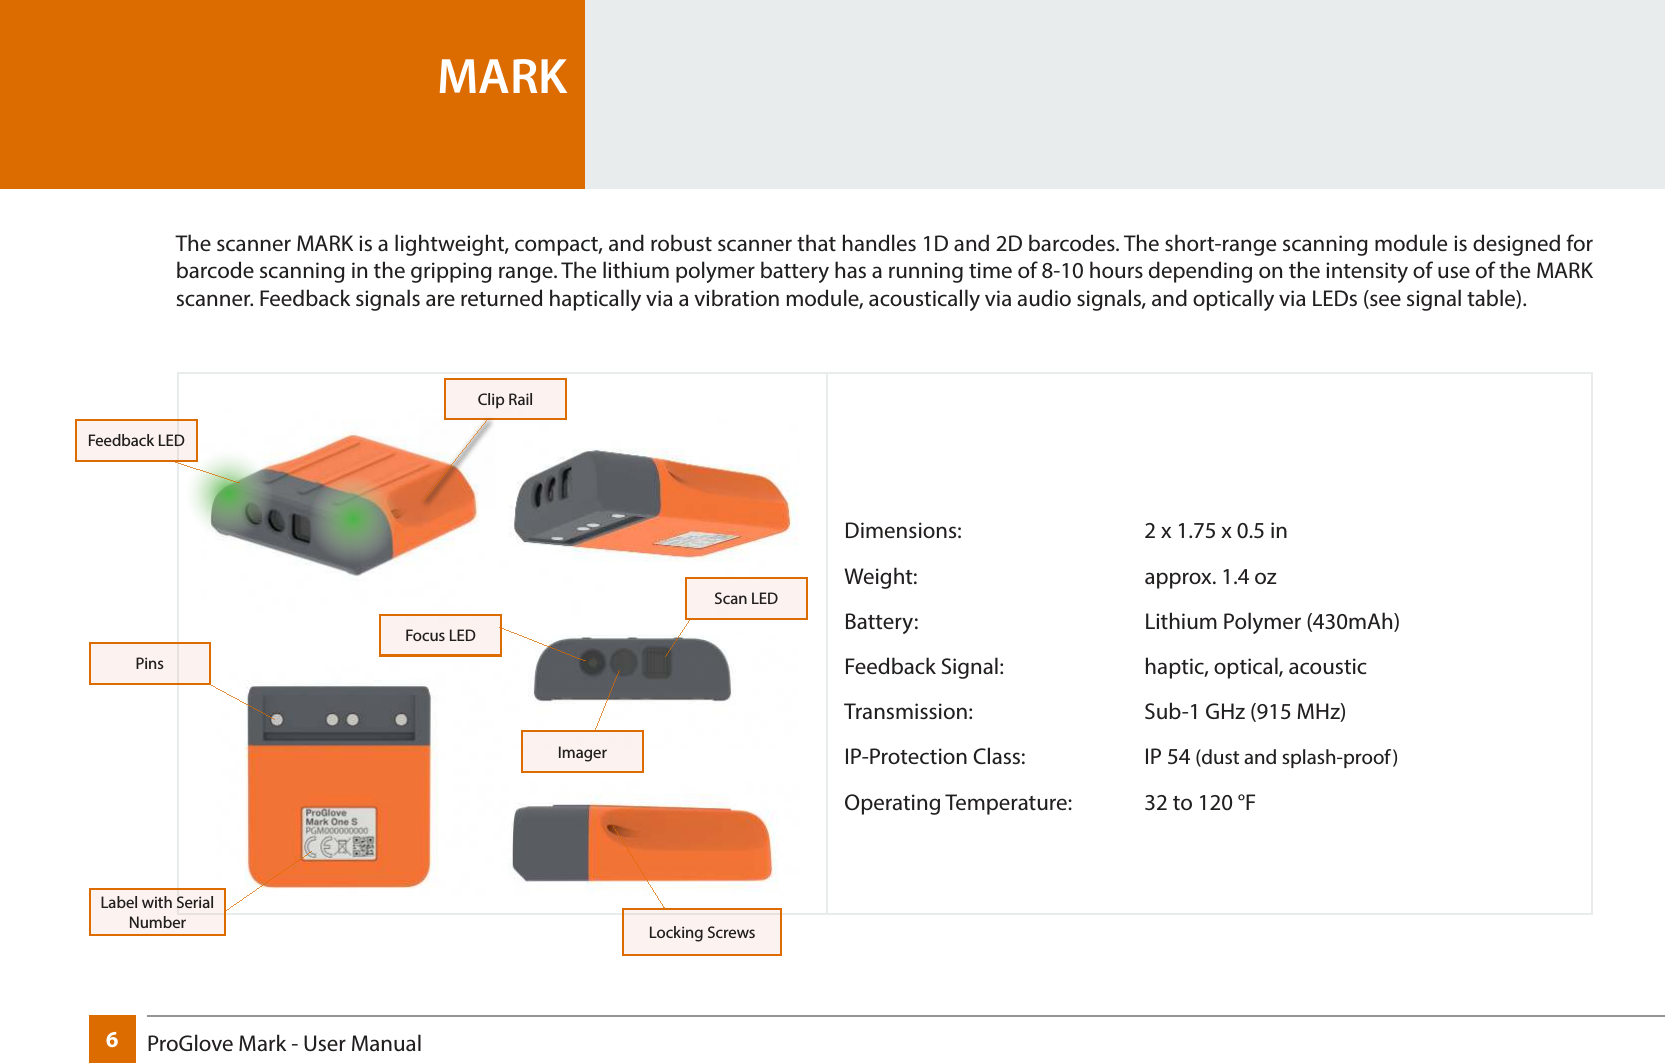
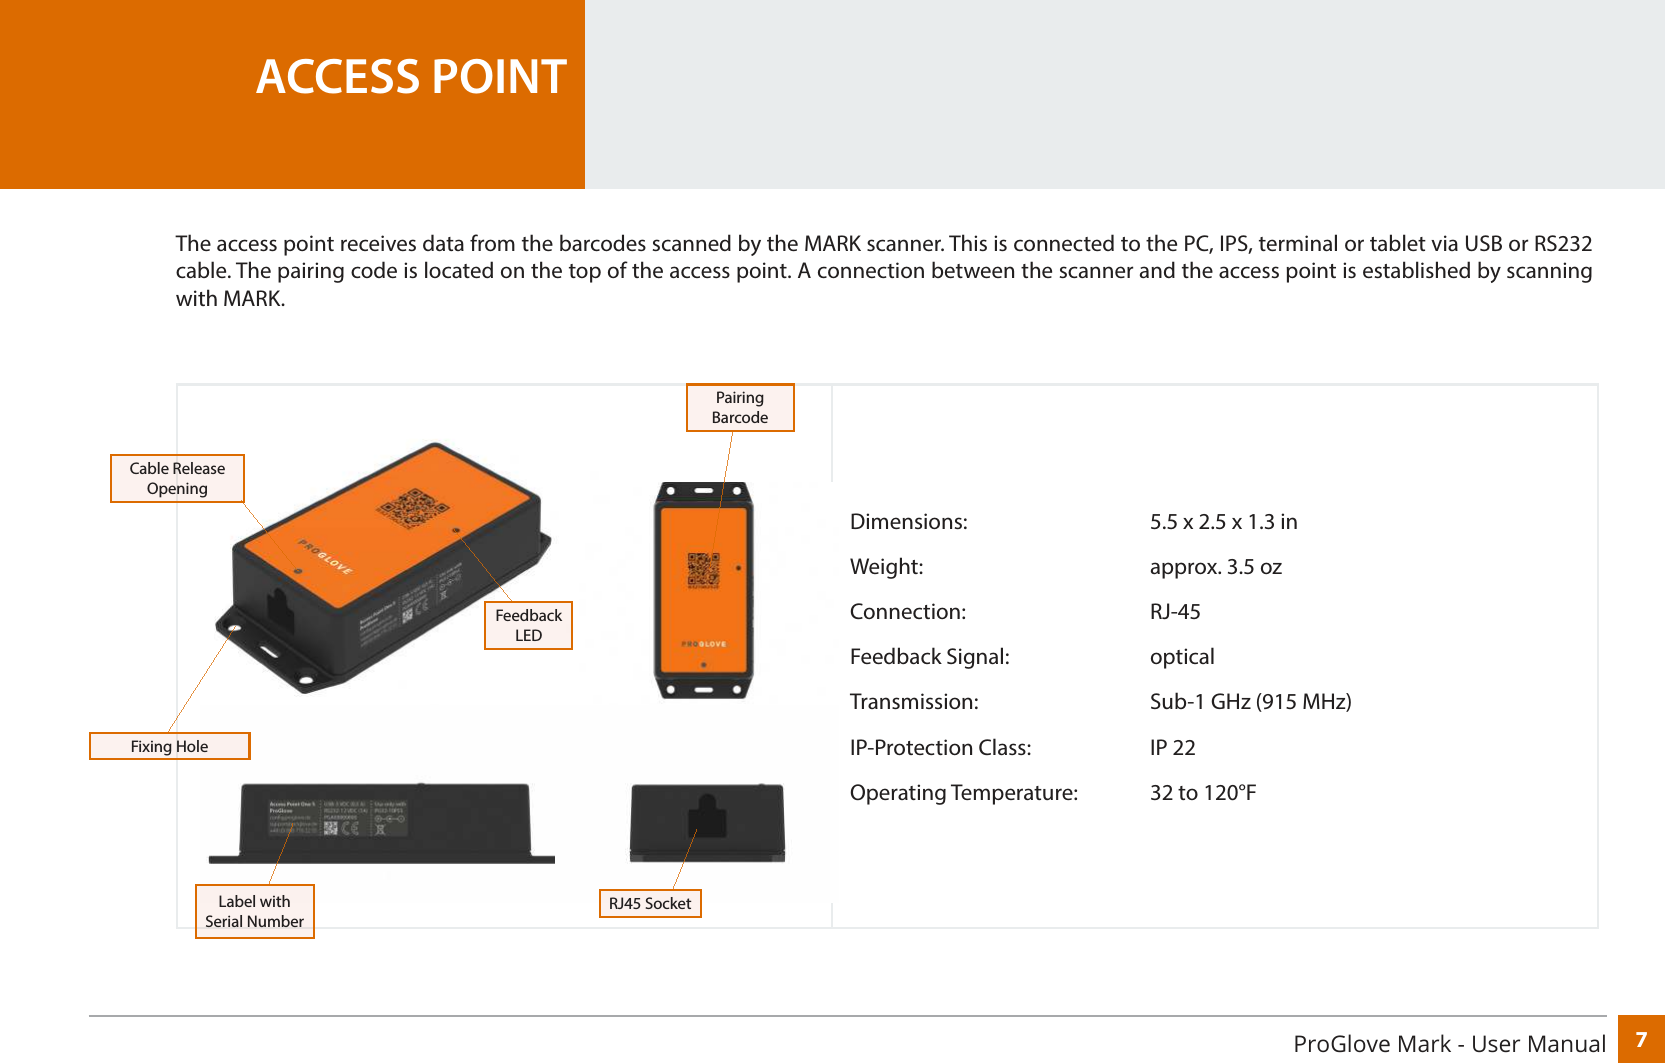
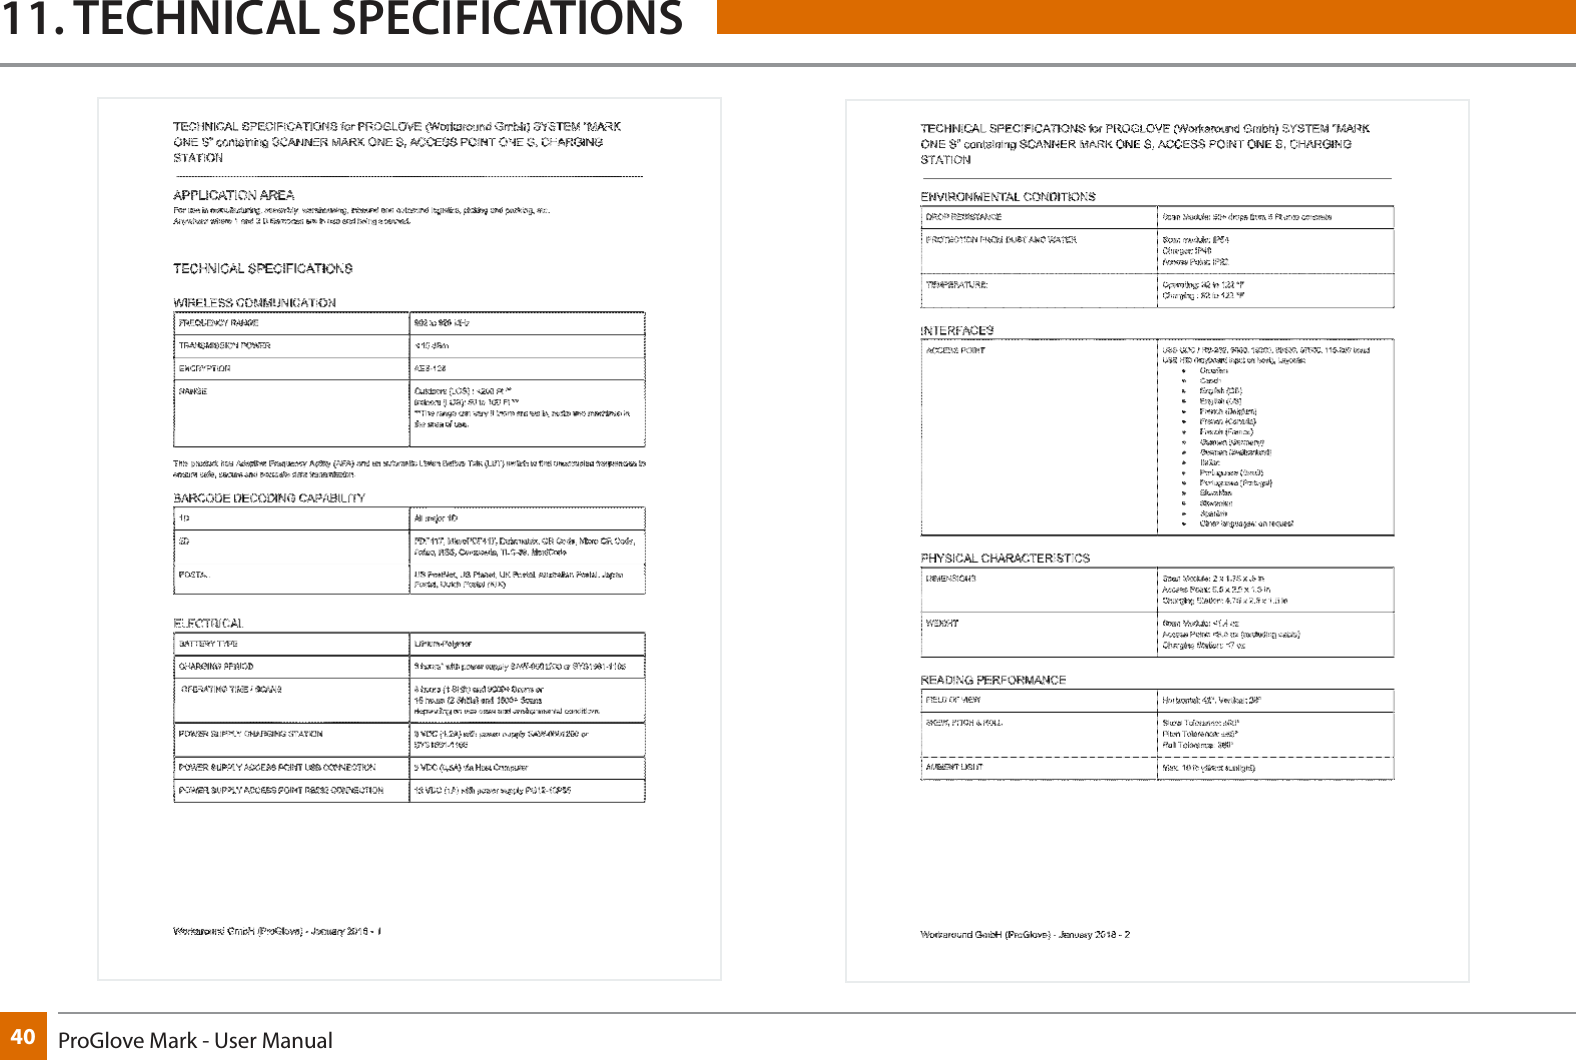
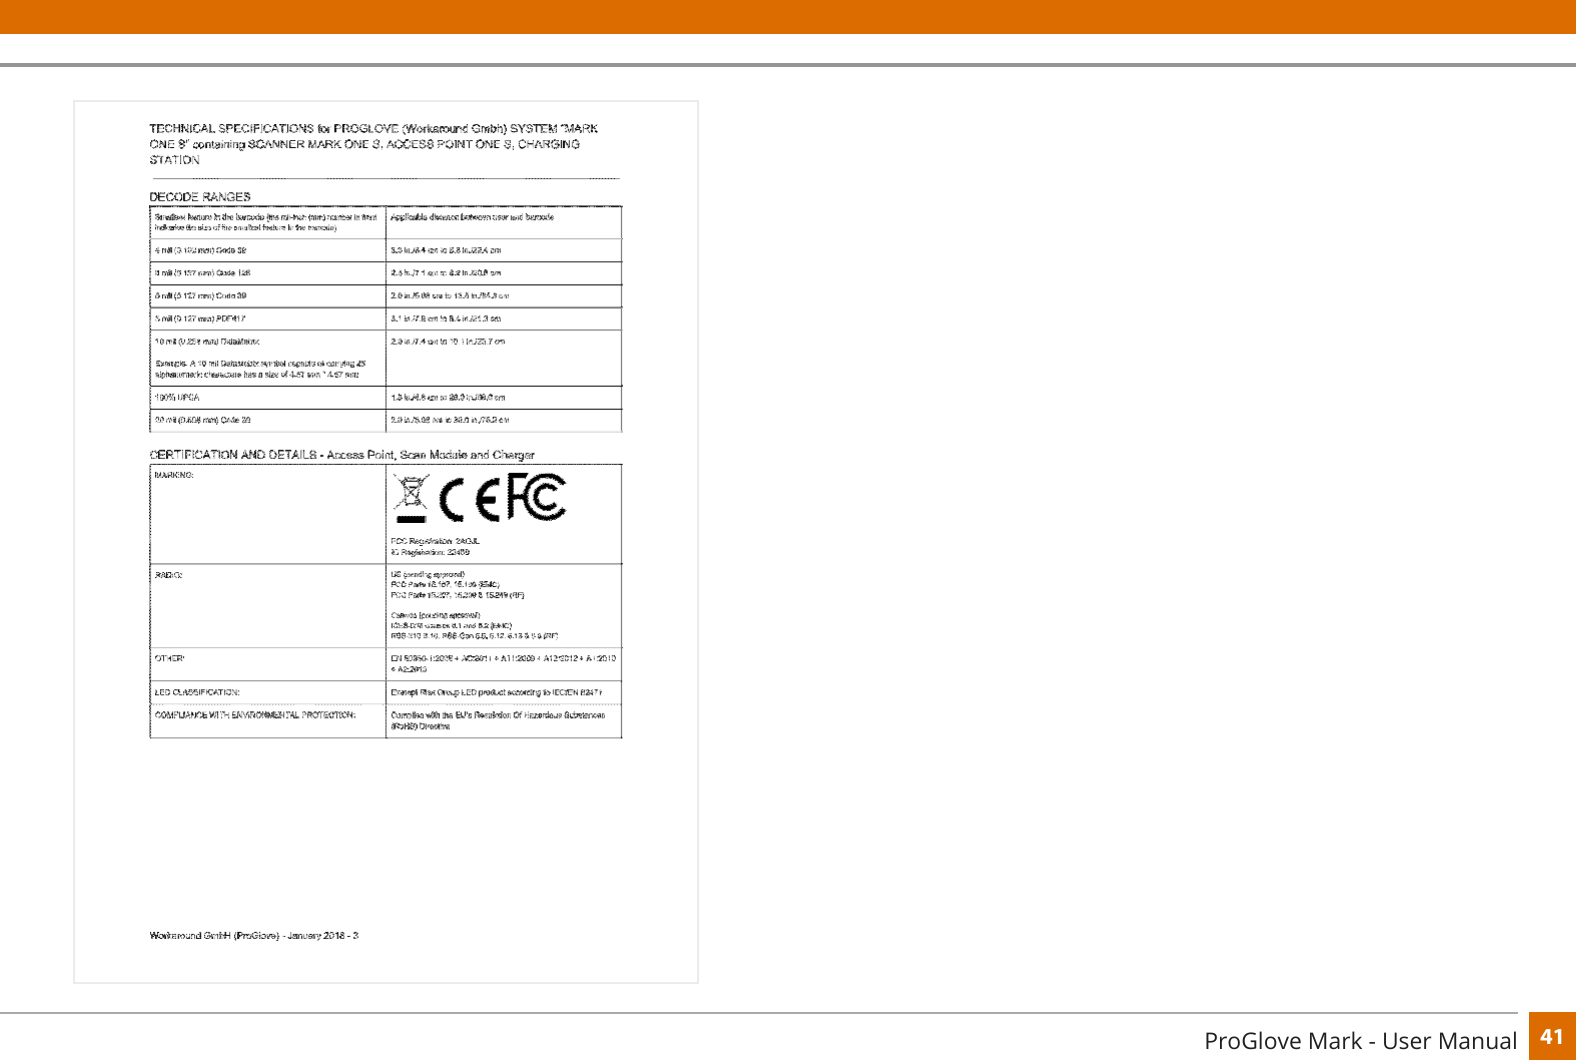
![29ProGlove Mark - User Manual1.6 Is it possible to scan DPM barcodes (direct part marking)?DPM barcodes can be recorded with the ProGlove MARK, but the individual appli-cation should be tested. Due to numerous factors, the performance of needled or lasered barcodes can be limited.1.7 Can several barcodes be detected at the same time?Several barcodes cannot be detected at the same time. However, a barcode can contain several pieces of information (e. g., ArtNr, batch, weight, etc.) that can be analyzed and decoded via the access point - e. g., ArtBNr[TAB]Charge[TAB]Weight[ENTER].1.8 Is the scanner protected against dust and water?The ProGlove MARK is designed for use in industrial environments. The scanner is protected against dust and water on all sides and has the IP rating IP54 according to DIN EN 60529. 1.9 At what temperatures can the ProGlove MARK be used?The ProGlove MARK is designed for use at temperatures between 32 to 120°F. The ProGlove MARK can function in sub zero environments (e.g. Freezer Storage) but no long term tests have occurred to date. Therefore, use below freezing is not rec-ommended.1.10 Can barcodes be read at an oblique angle or on the head?Yes, the ProGlove MARK can detect barcodes rotated both horizontally and verti-cally. A rotation on its own axis (upside down) does not limit the scan performance.1.11 How is data transferred from the MARK to the access point?The data transmission between the ProGlove MARK and the Access Point takes place via the frequency 915 MHz. This frequency band can be used royalty-free and is reserved for short-range devices (e.g. radio microphones). Data transmission only takes place after a successful decoding event. Therefore, ProGlove is a system with low radiation exposure.1.12 Can the data be transferred via Bluetooth or WiFi?No, the data transfer between the MARK and the Access Point is carried out in the sub 1GHz range (frequency 915 MHz) (see 1.11). 1.13 Can the Scanner MARK automatically change the access point depending on the network strength (roaming) or be connected to several access points? Automatic switching of the connection to dierent access points (roaming) is not possible. MARK is connected to a single access point by scanning the pairing bar-code. However, it is possible to connect several MARKs to one access point.1.14 Does the ProGlove MARK have electromagnetic compatibility (EMC, EMC, ETSI) certication? The ProGlove MARK is certied as electromagnetically compatible according to DIN EN 301489-1/-3 and EN 300220-2. The system thus meets the legal require-ments for short-range radios (SRD).](https://usermanual.wiki/Workaround/MARK-ONE-S/User-Guide-3747716-Page-31.png)