ZTE RSU82S1900 Radio Remote Unit User Manual part 1
ZTE Corporation Radio Remote Unit part 1
UserManual.wiki
>
ZTE
>
RSU82S1900 User Manual
>
User Manual part 1
Contents
1.
User Manual
2.
User Manual II
3.
User Manual part 1
4.
User Manual part 2
5.
User Manual part 3
User Manual part 1
Navigation menu
Upload a User Manual
Namespaces
Wiki Guide
HTML
PDF
Info
Views
User Manual
Discussion / Help
Navigation
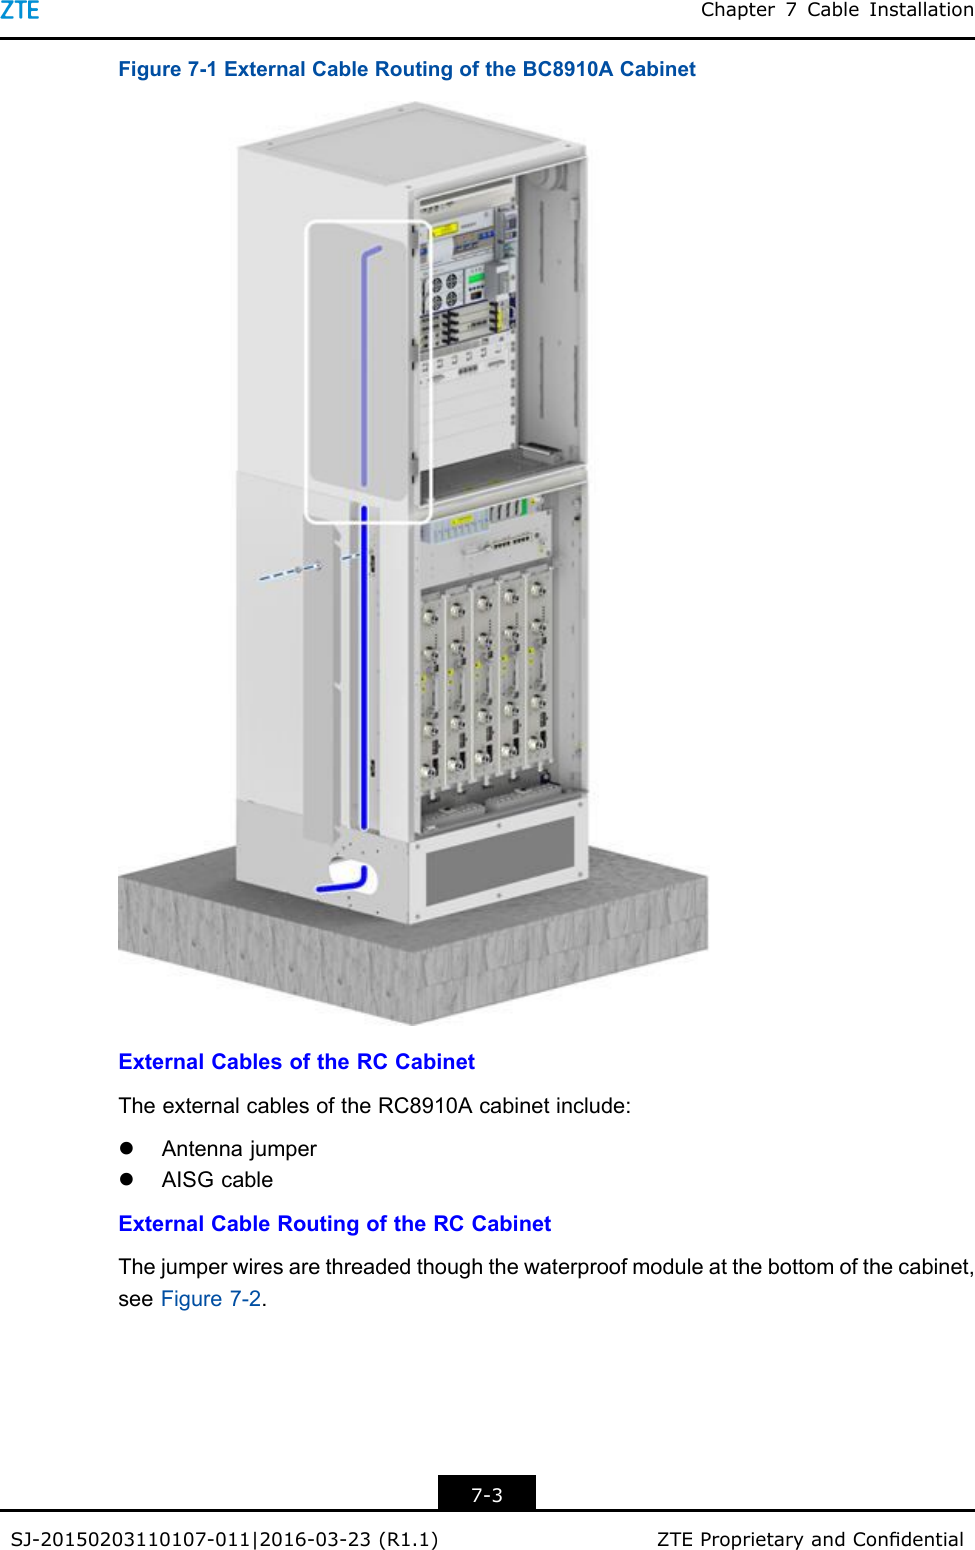
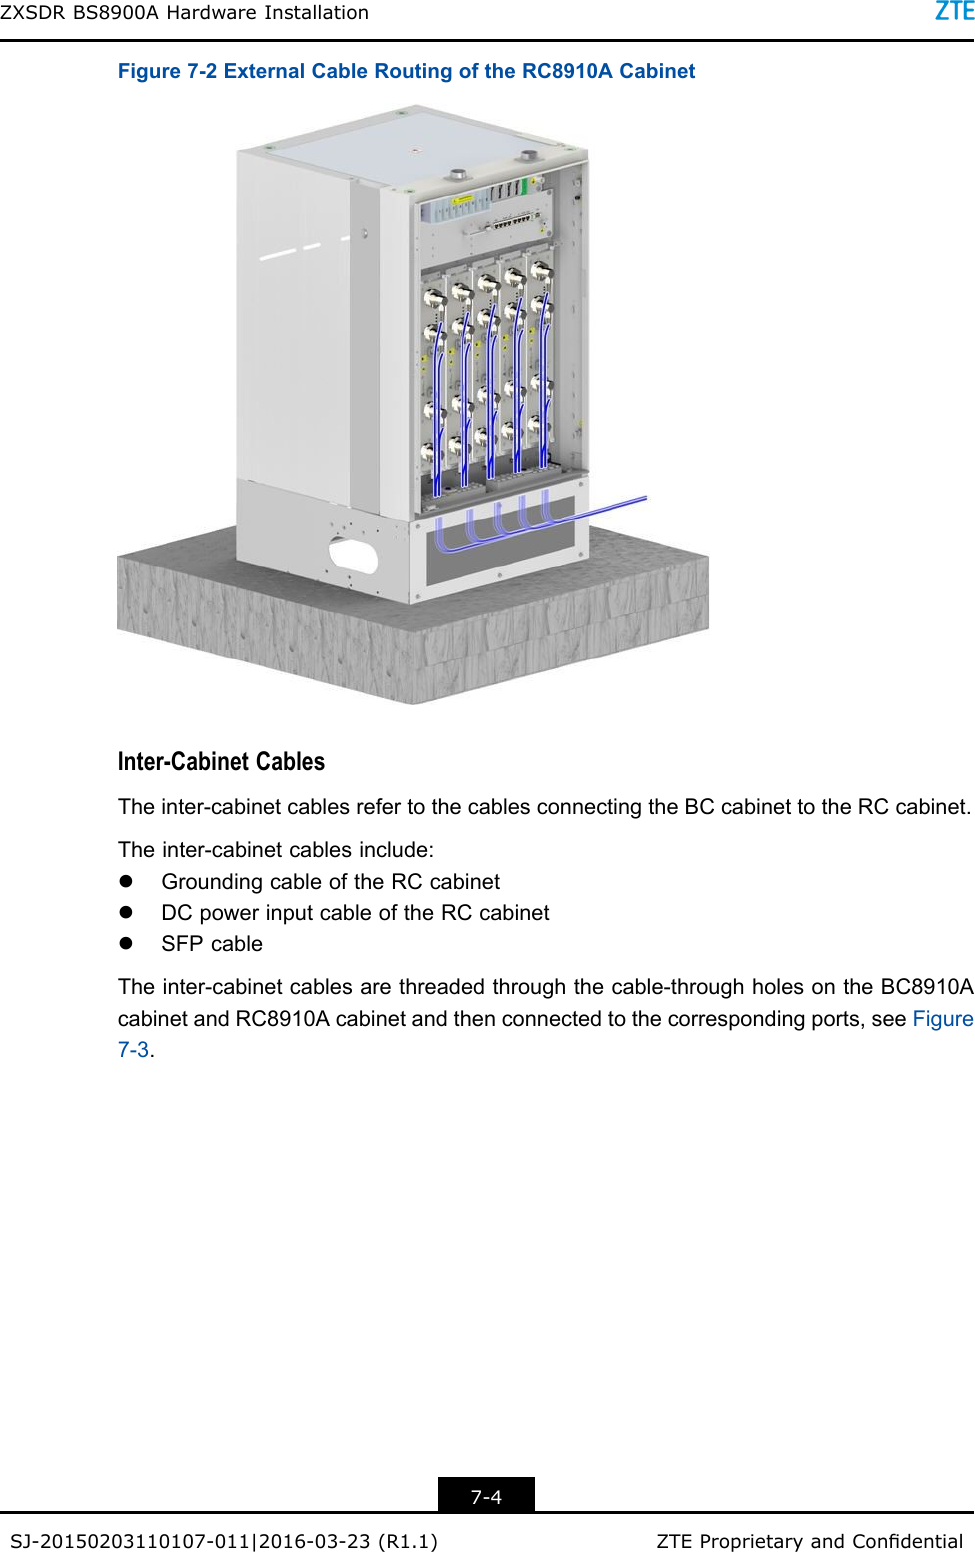
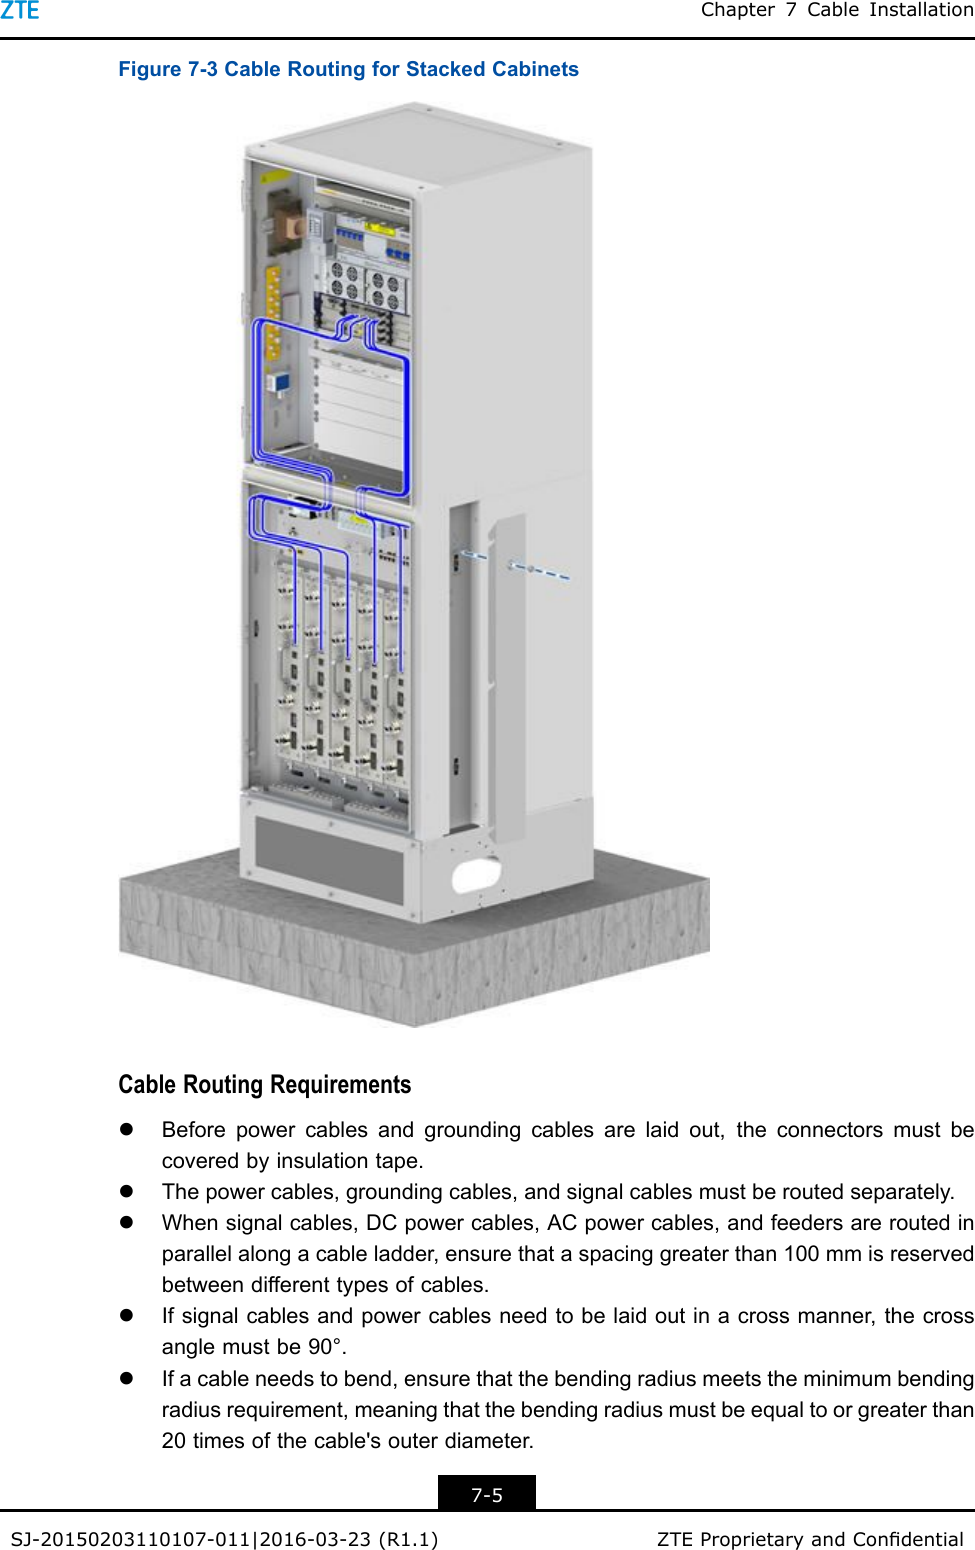
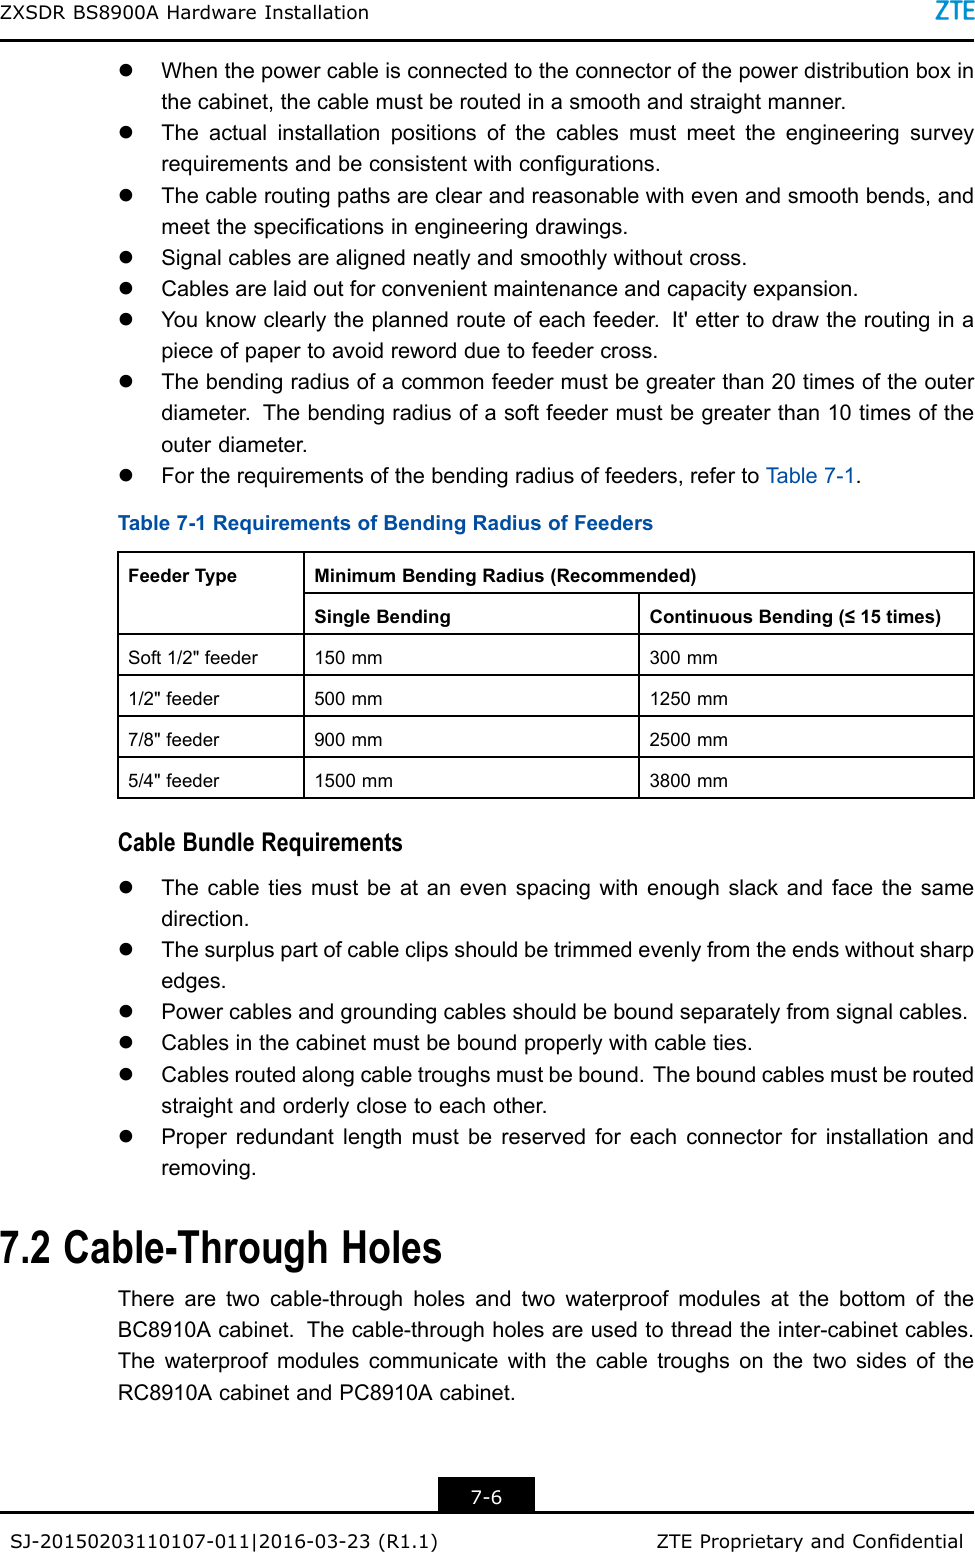
![ItalicsVariablesincommands.Itmayalsorefertootherrelatedmanualsanddocuments.BoldMenus,menuoptions,functionnames,inputelds,optionbuttonnames,checkboxes,drop-downlists,dialogboxnames,windownames,parameters,andcommands.ConstantwidthTextthatyoutype,programcodes,lenames,directorynames,andfunctionnames.[]Optionalparameters.{}Mandatoryparameters.|Separatesindividualparametersinaseriesofparameters.Danger:indicatesanimminentlyhazardoussituation.Failuretocomplywillresultindeathorseriouspersonalinjury.Warning:indicatesapotentiallyhazardoussituation.Failuretocomplycanresultindeathorseriouspersonalinjury.Caution:indicatesapotentiallyhazardoussituation.Failuretocomplycanresultinmoderateorminorpersonalinjury.Notice:indicatesequipmentorenvironmentsafetyinformation.Failuretocomplycanresultinequipmentdamage,dataloss,equipmentperformancedegradation,environmentalcontamination,orotherunpredictableresults.Note:providesadditionalinformationaboutatopic.IISJ-20150203110107-011|2016-03-23(R1.1)ZTEProprietaryandCondential](https://usermanual.wiki/ZTE/RSU82S1900.User-Manual-part-1/User-Guide-3501465-Page-6.png)