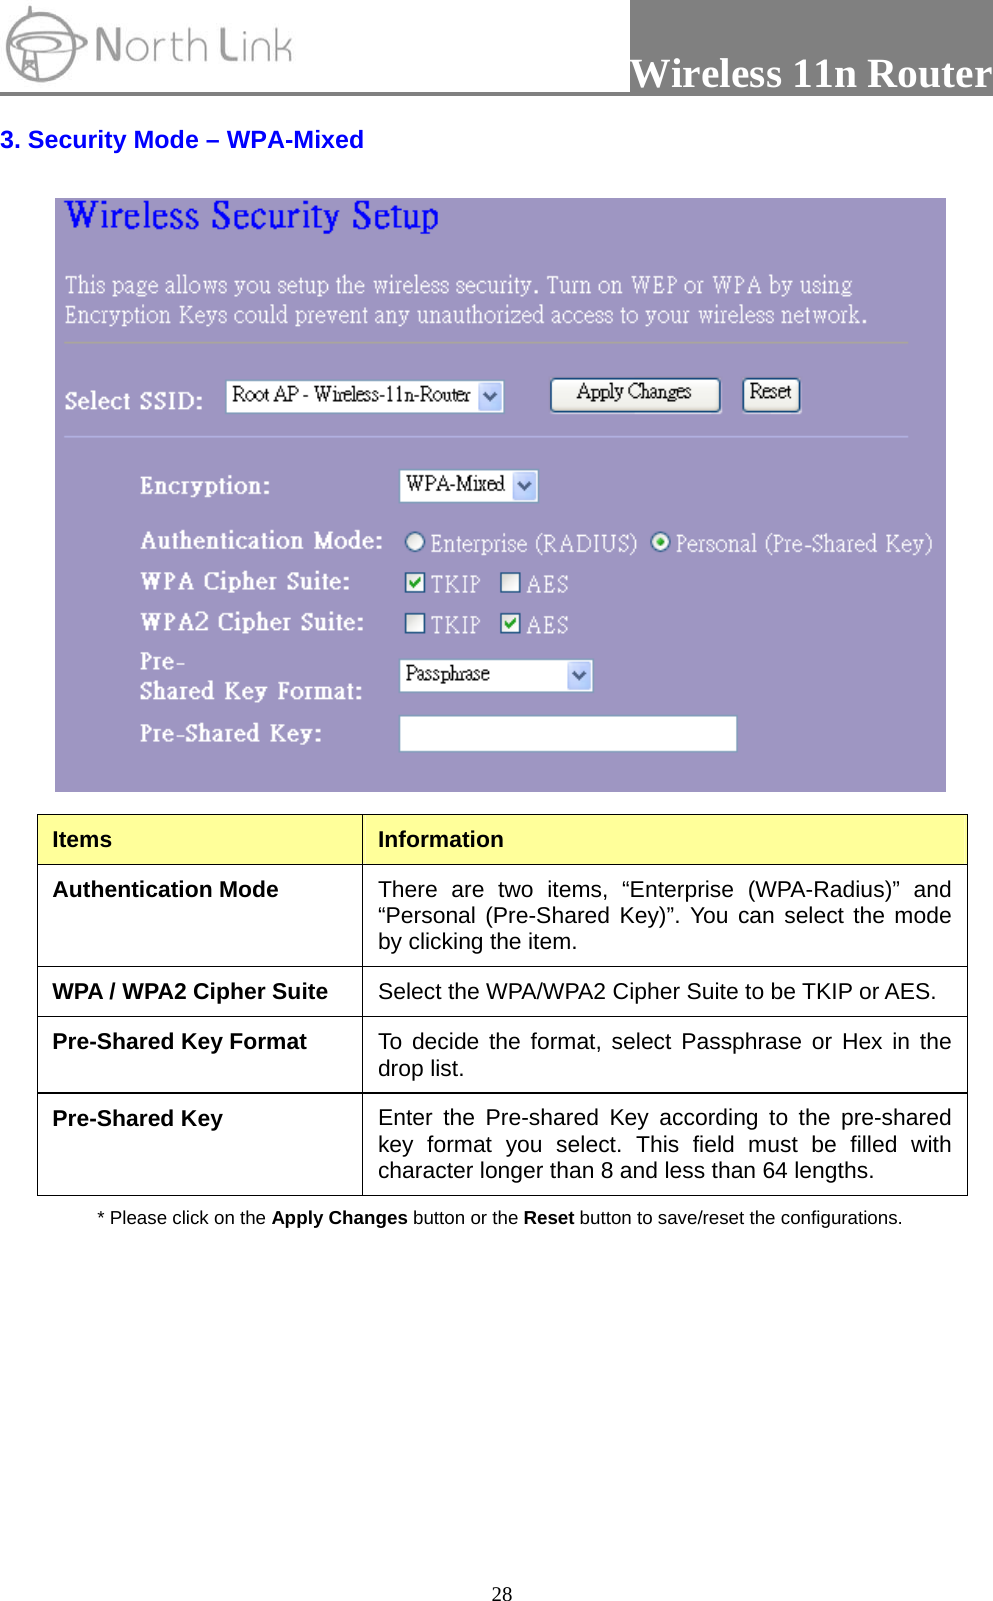
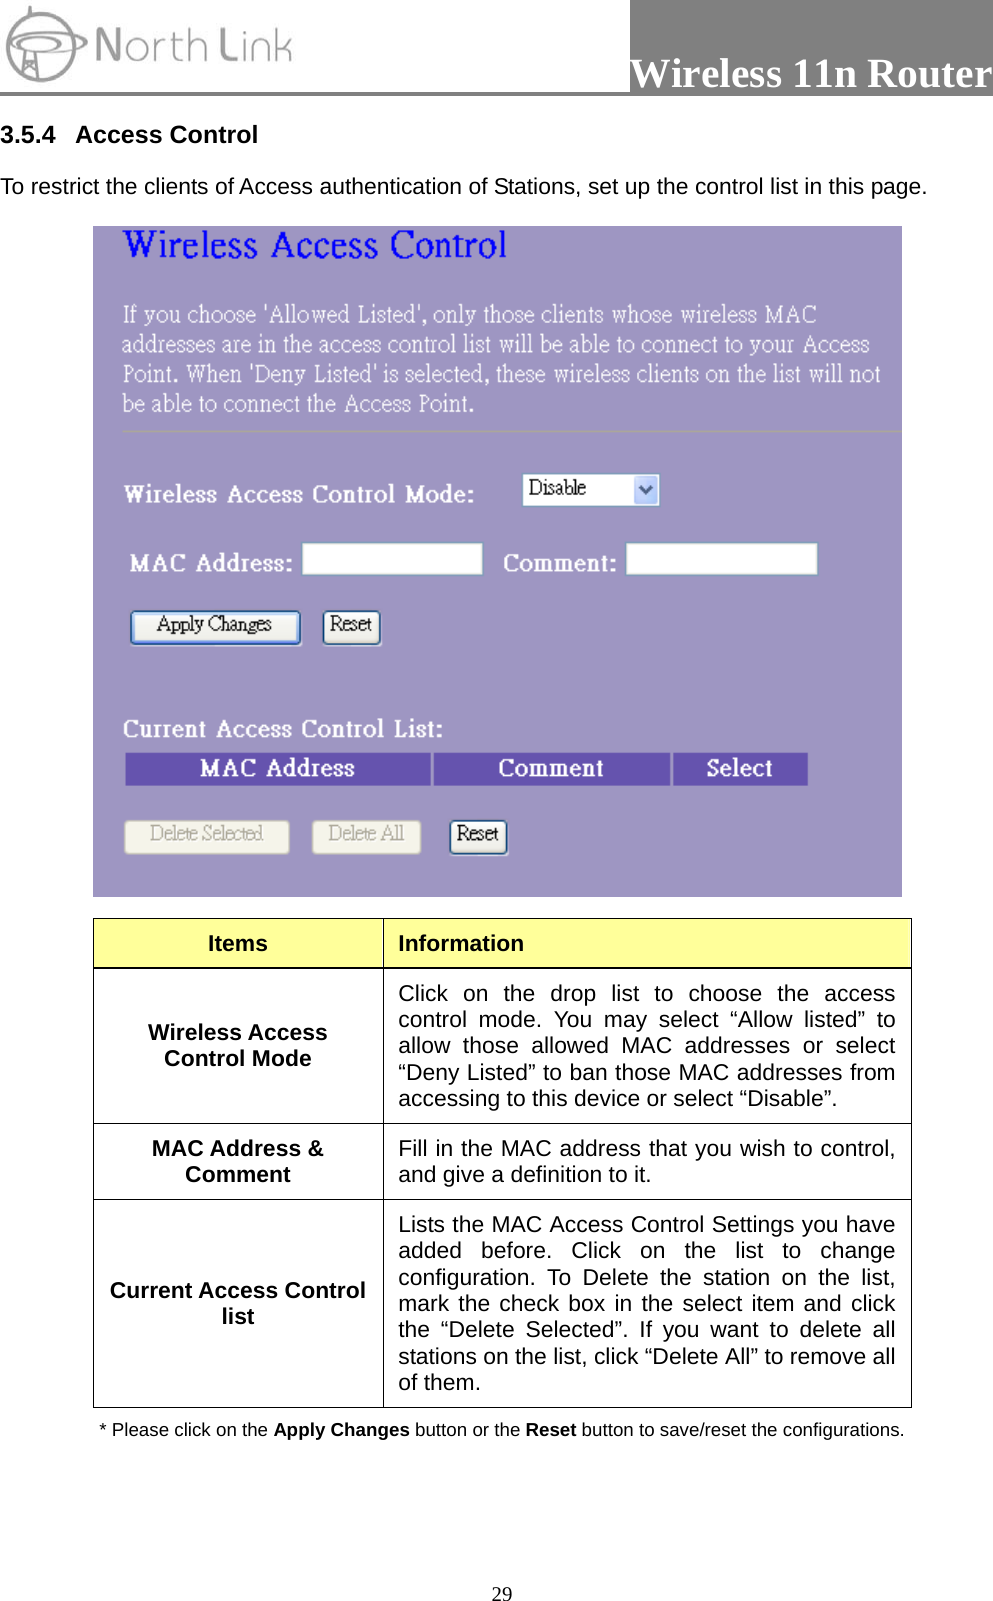
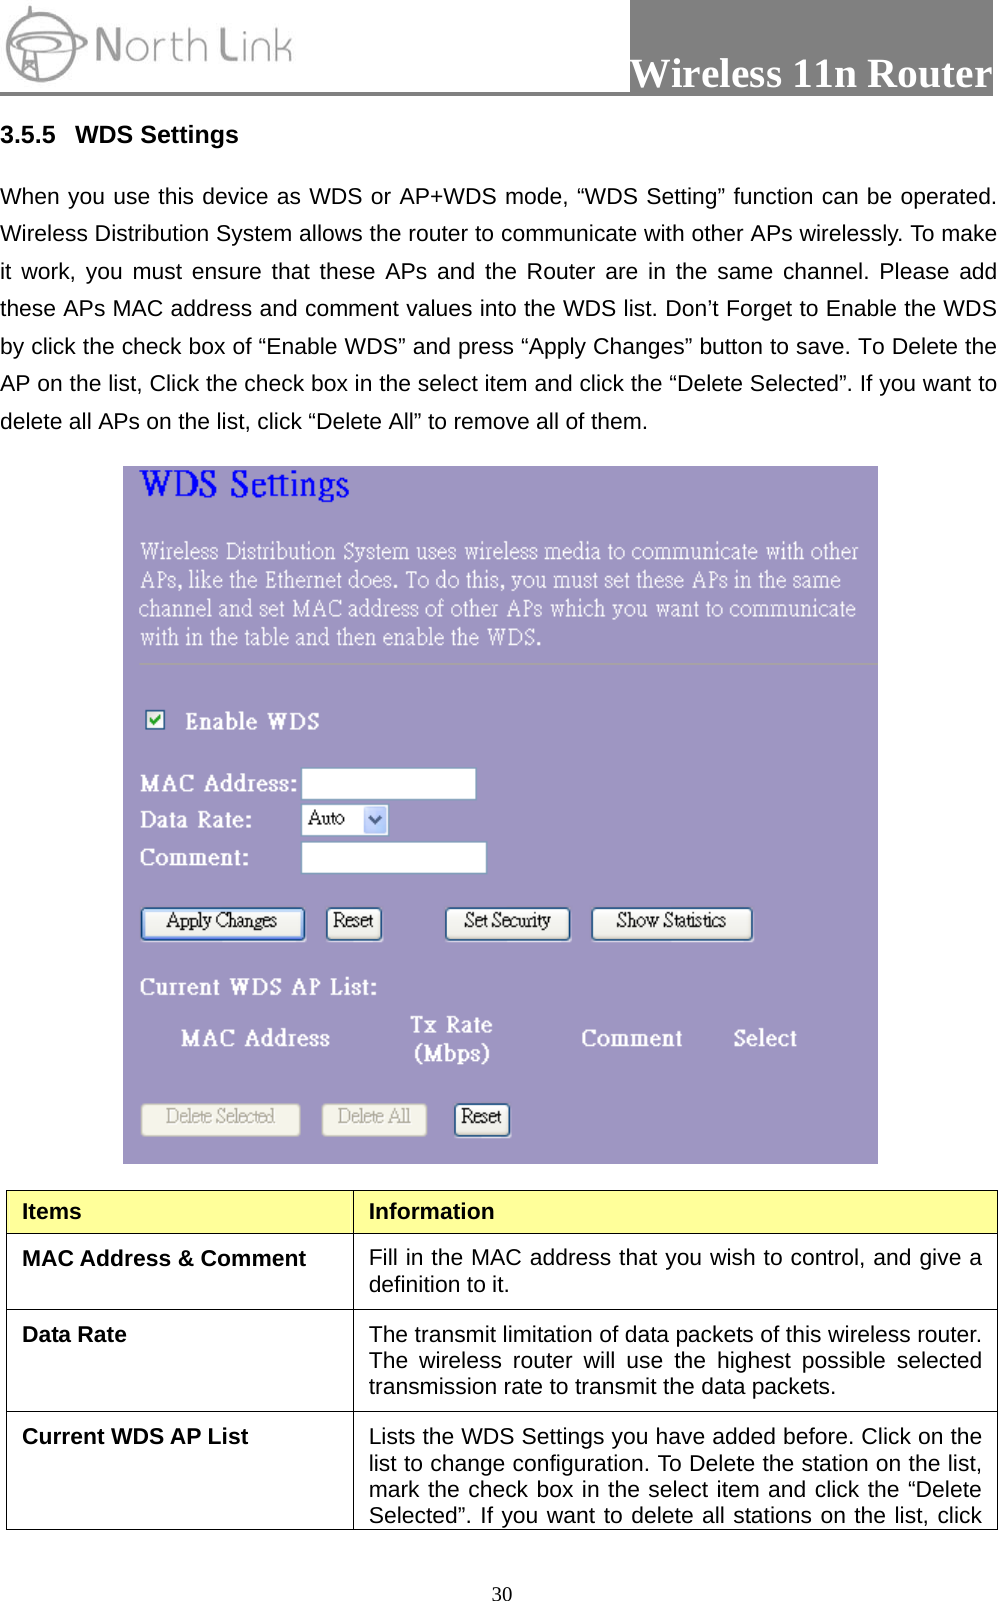
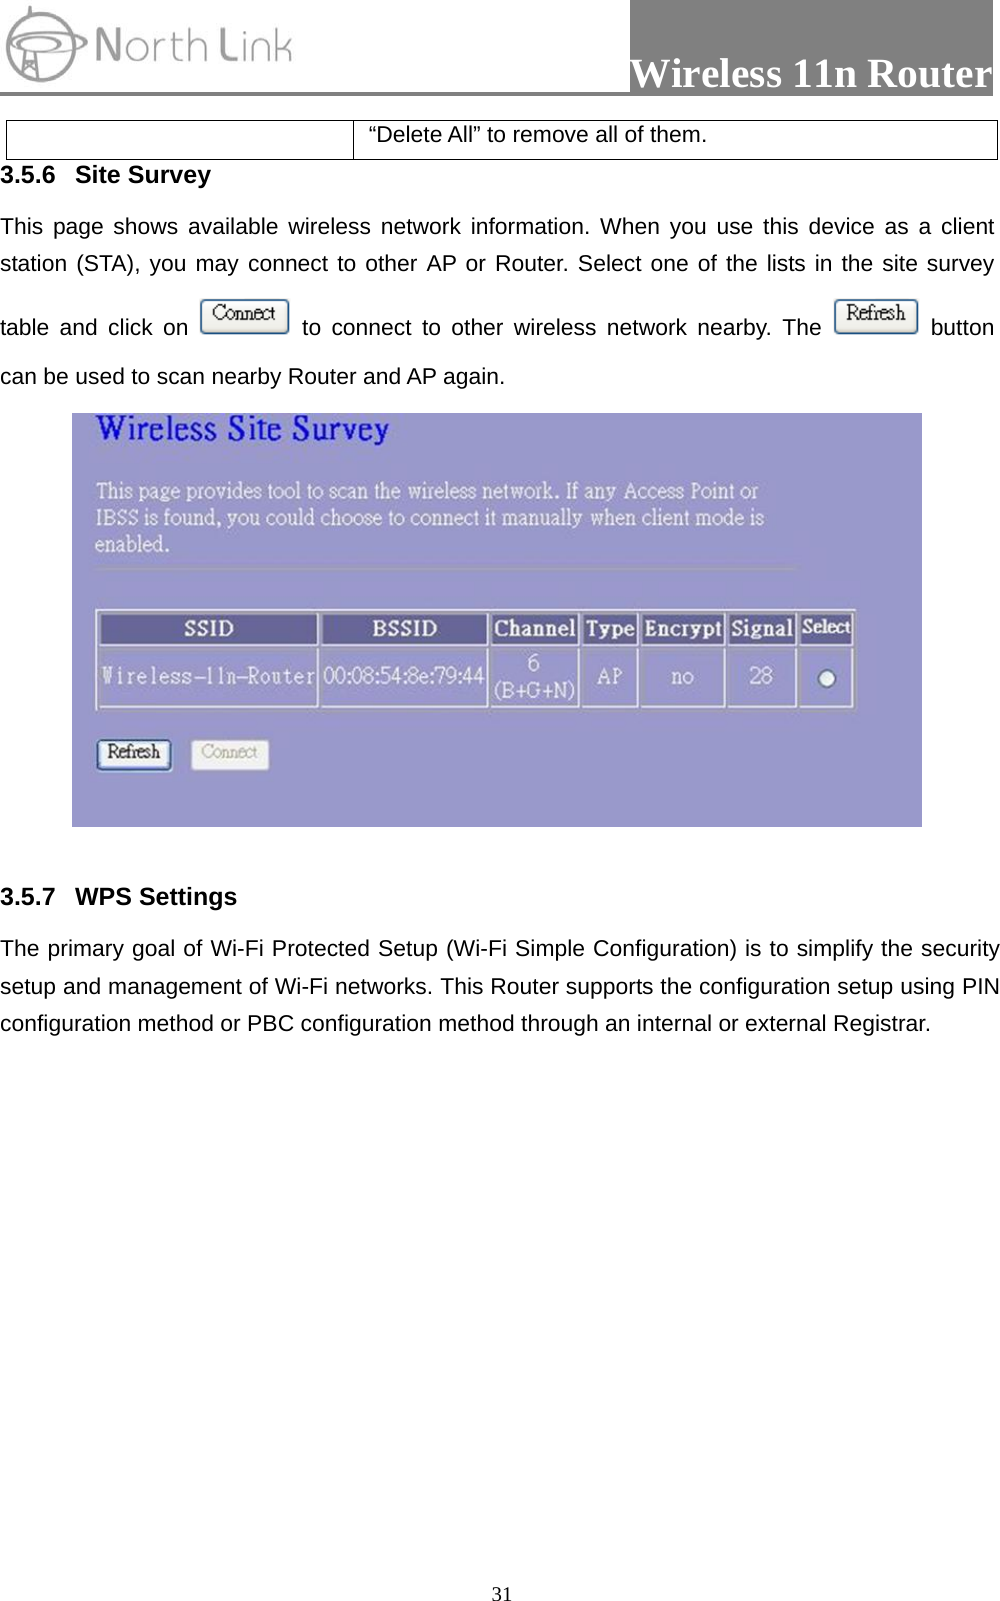
ZUNIDATA SYSTEMS R4020A Wireless IEEE802.11b/g/n 300Mbps Tiny Router User Manual R4020A Manual NorthLink
ZUNIDATA SYSTEMS, INC Wireless IEEE802.11b/g/n 300Mbps Tiny Router R4020A Manual NorthLink
UserManual.wiki
>
ZUNIDATA SYSTEMS
>
R4020A User Manual
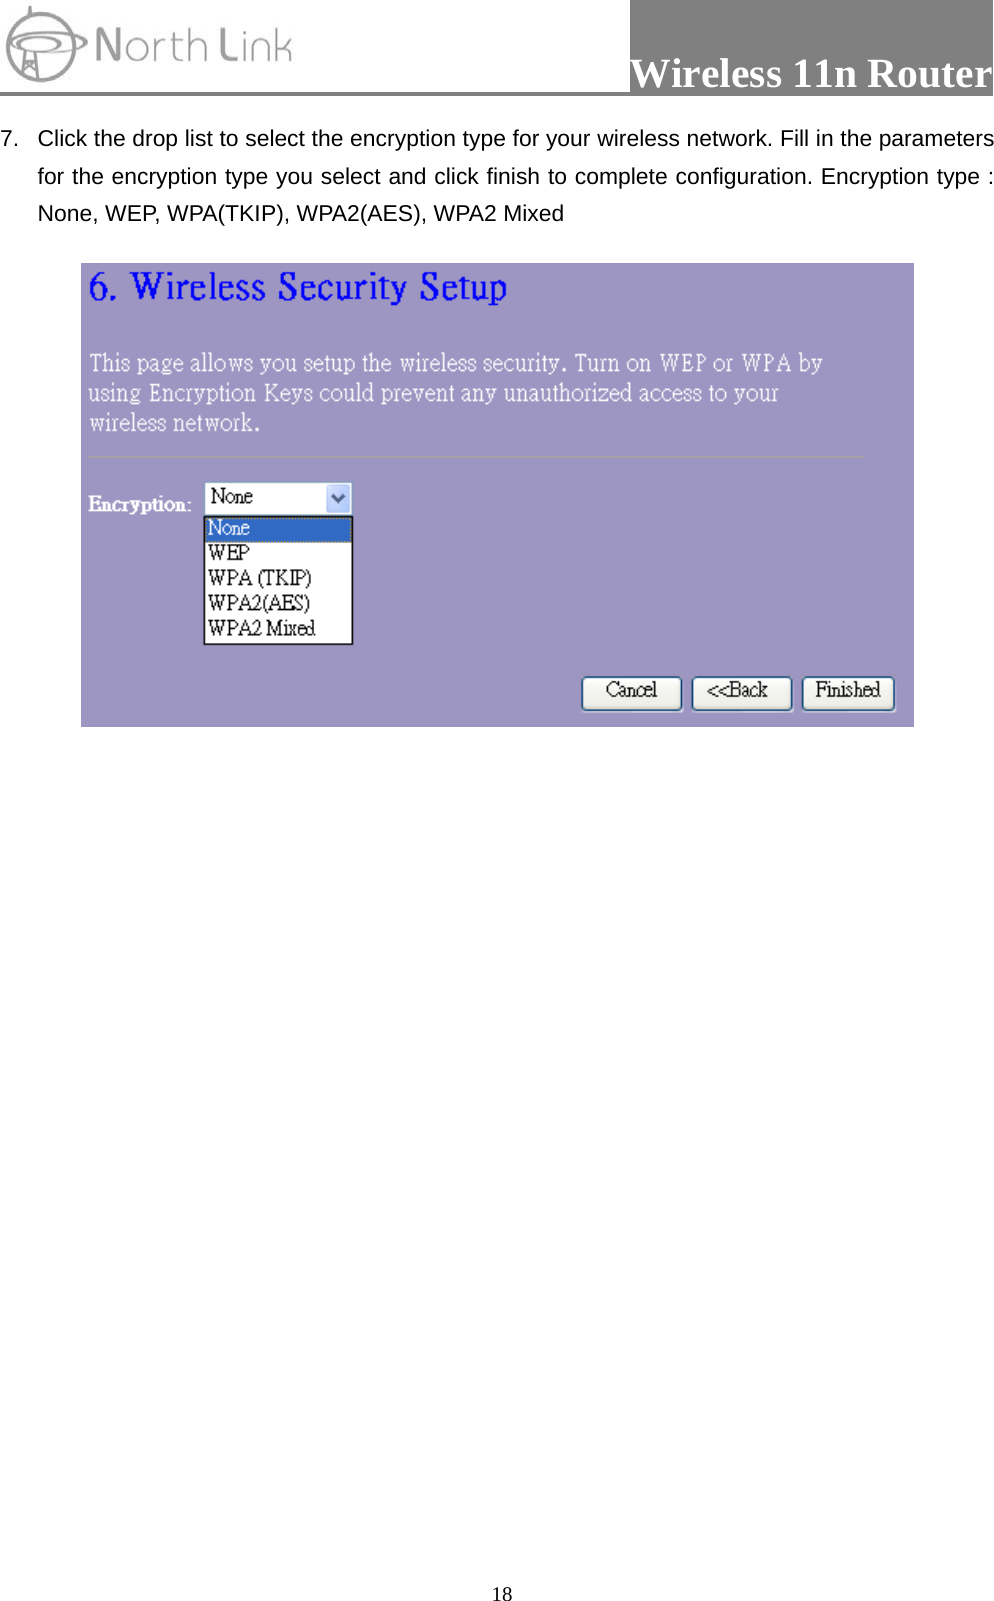
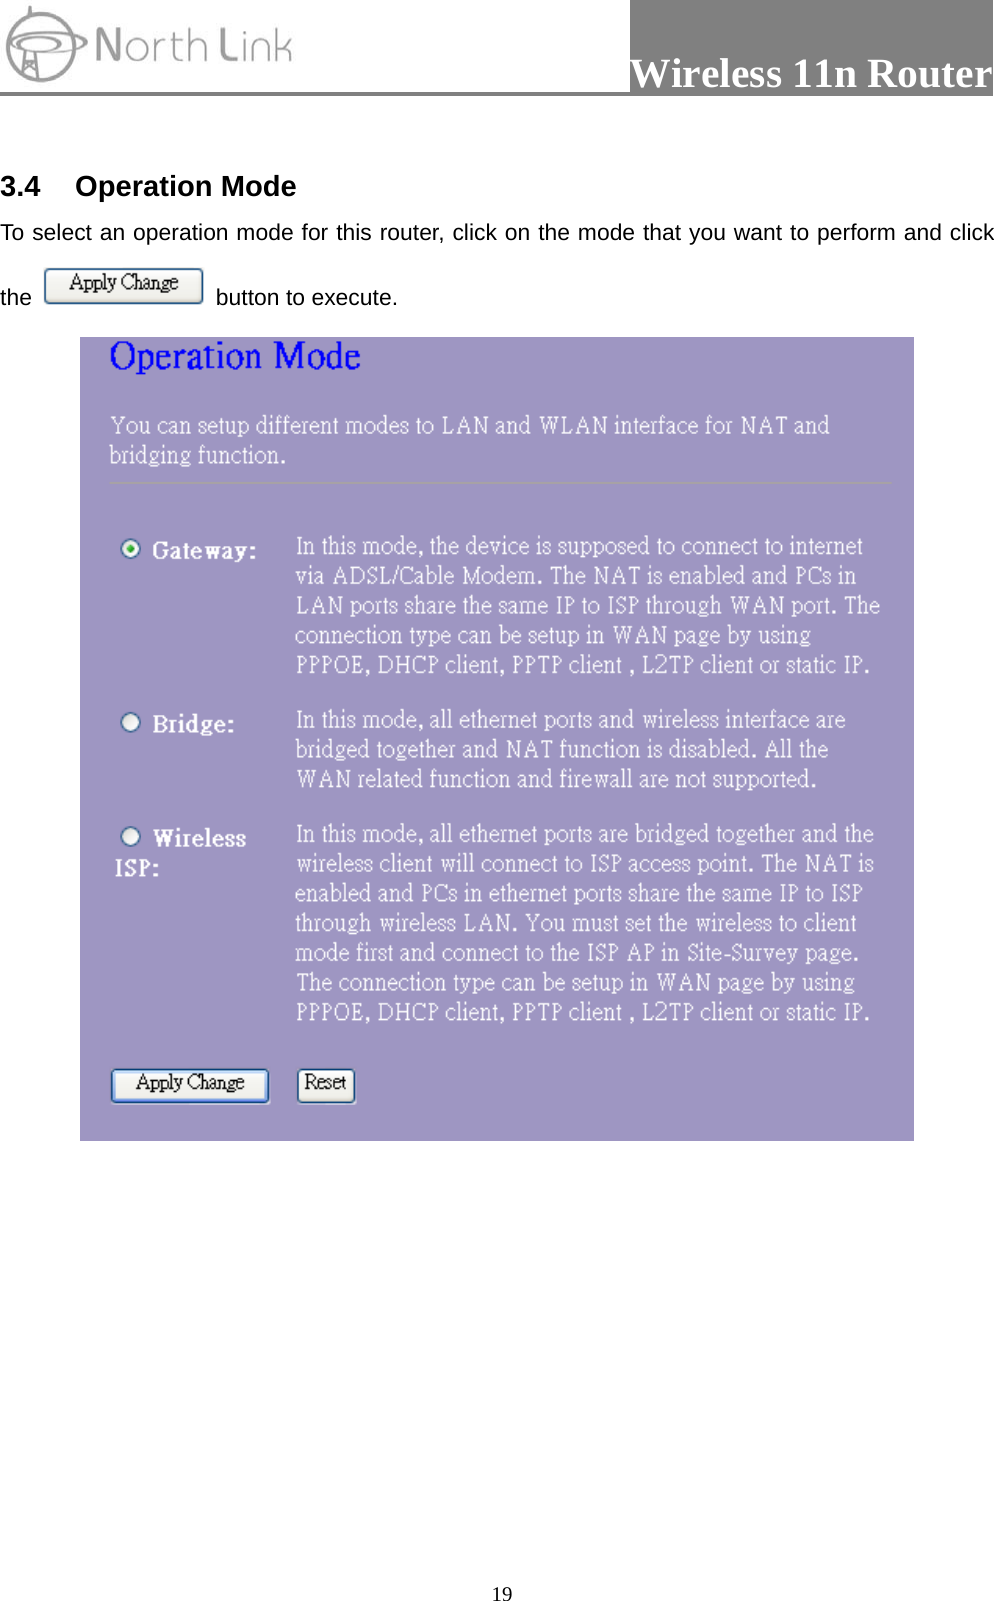
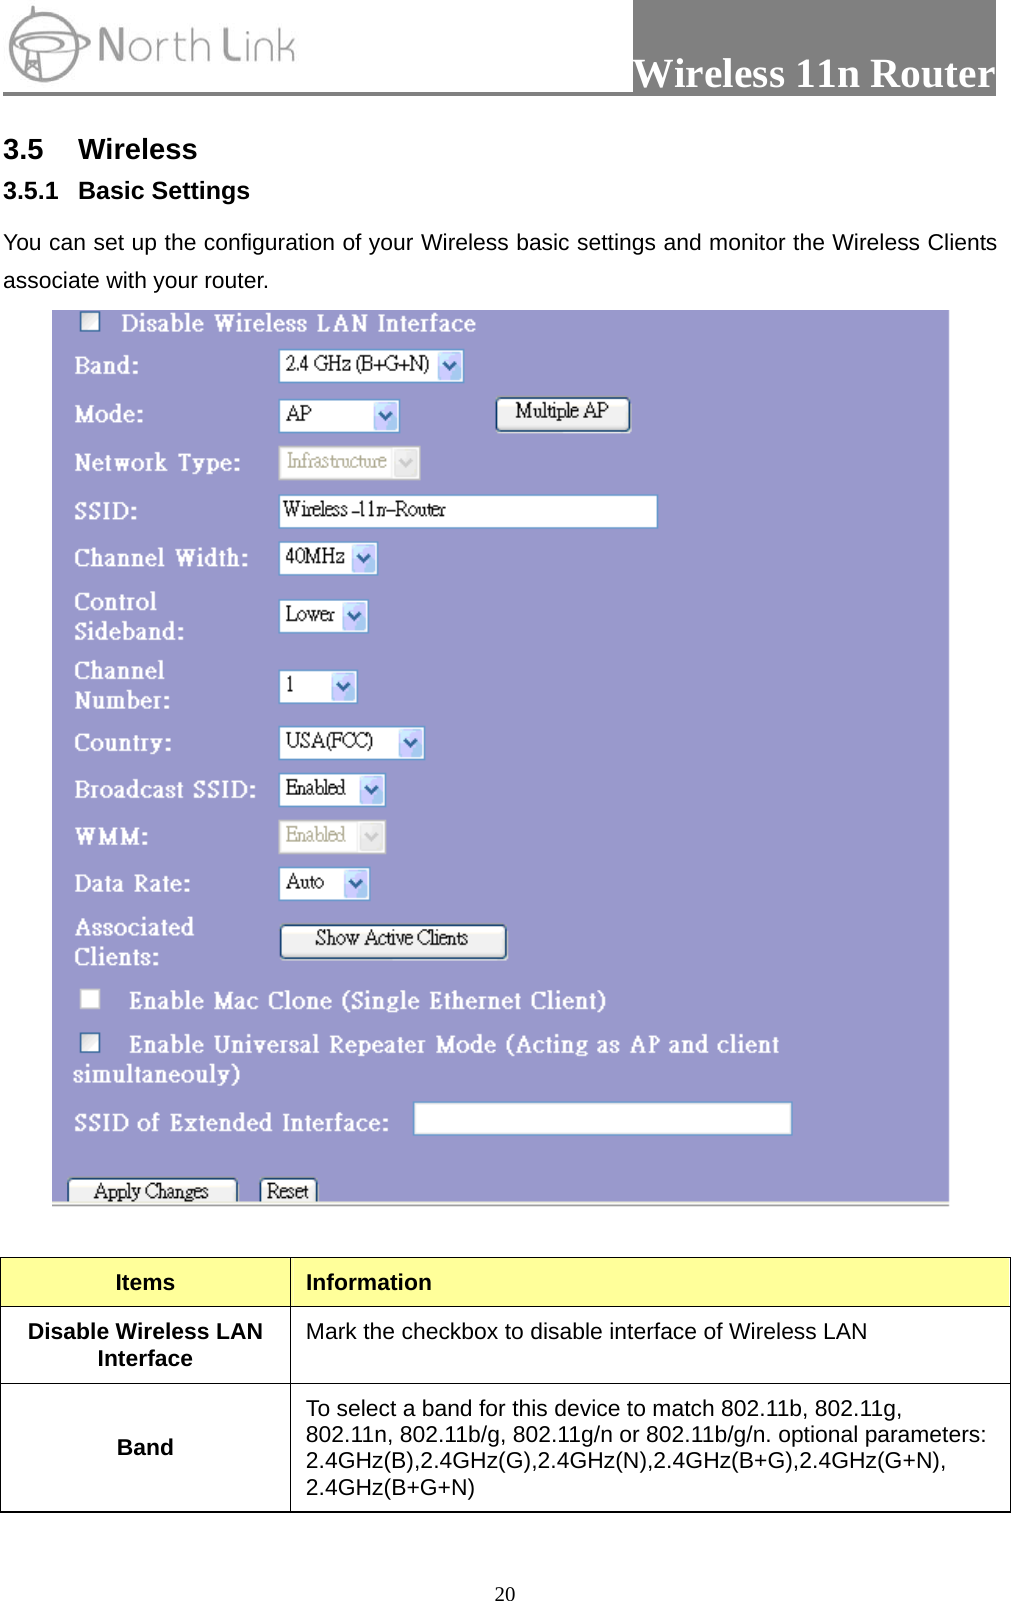
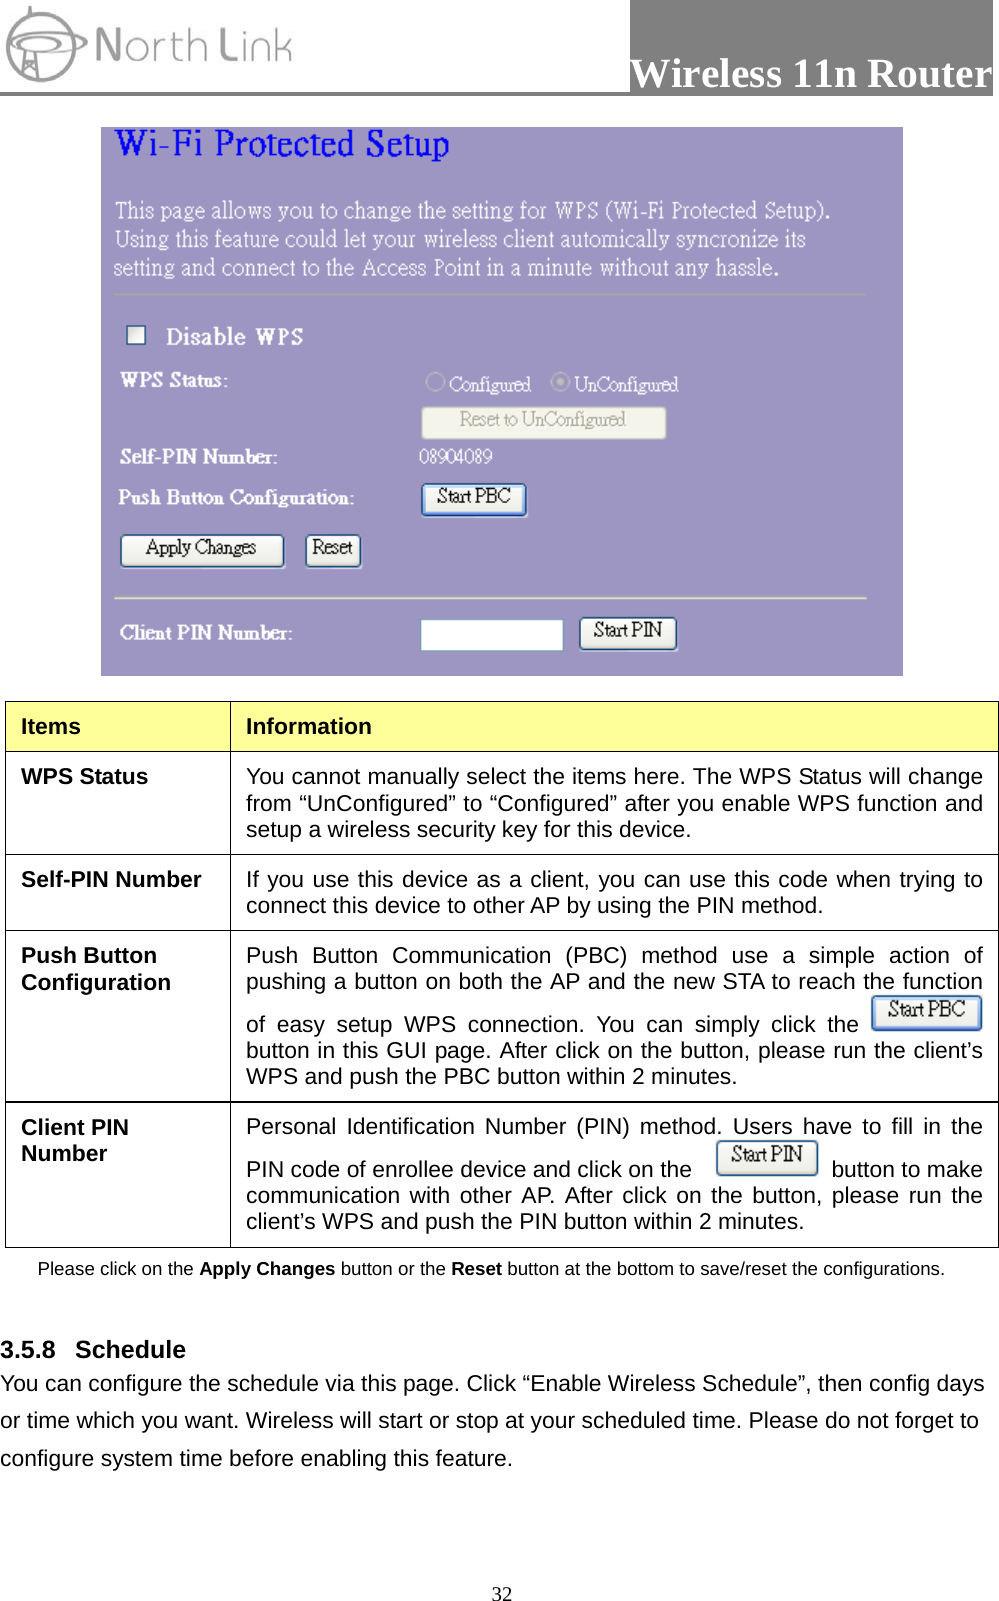
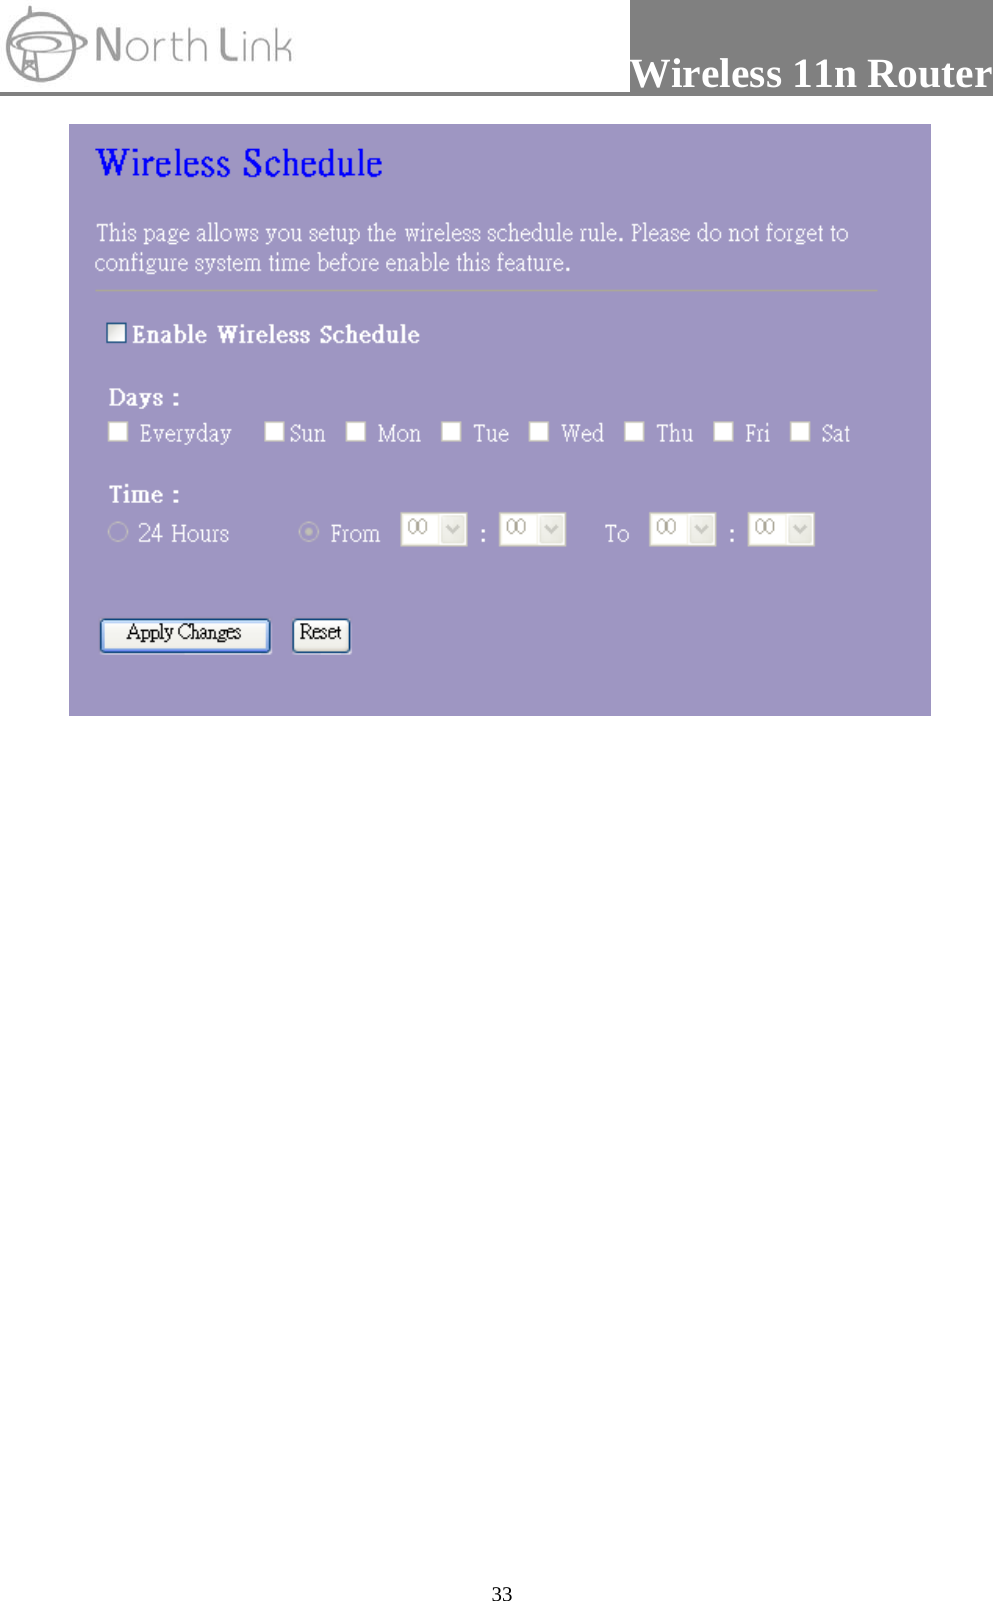
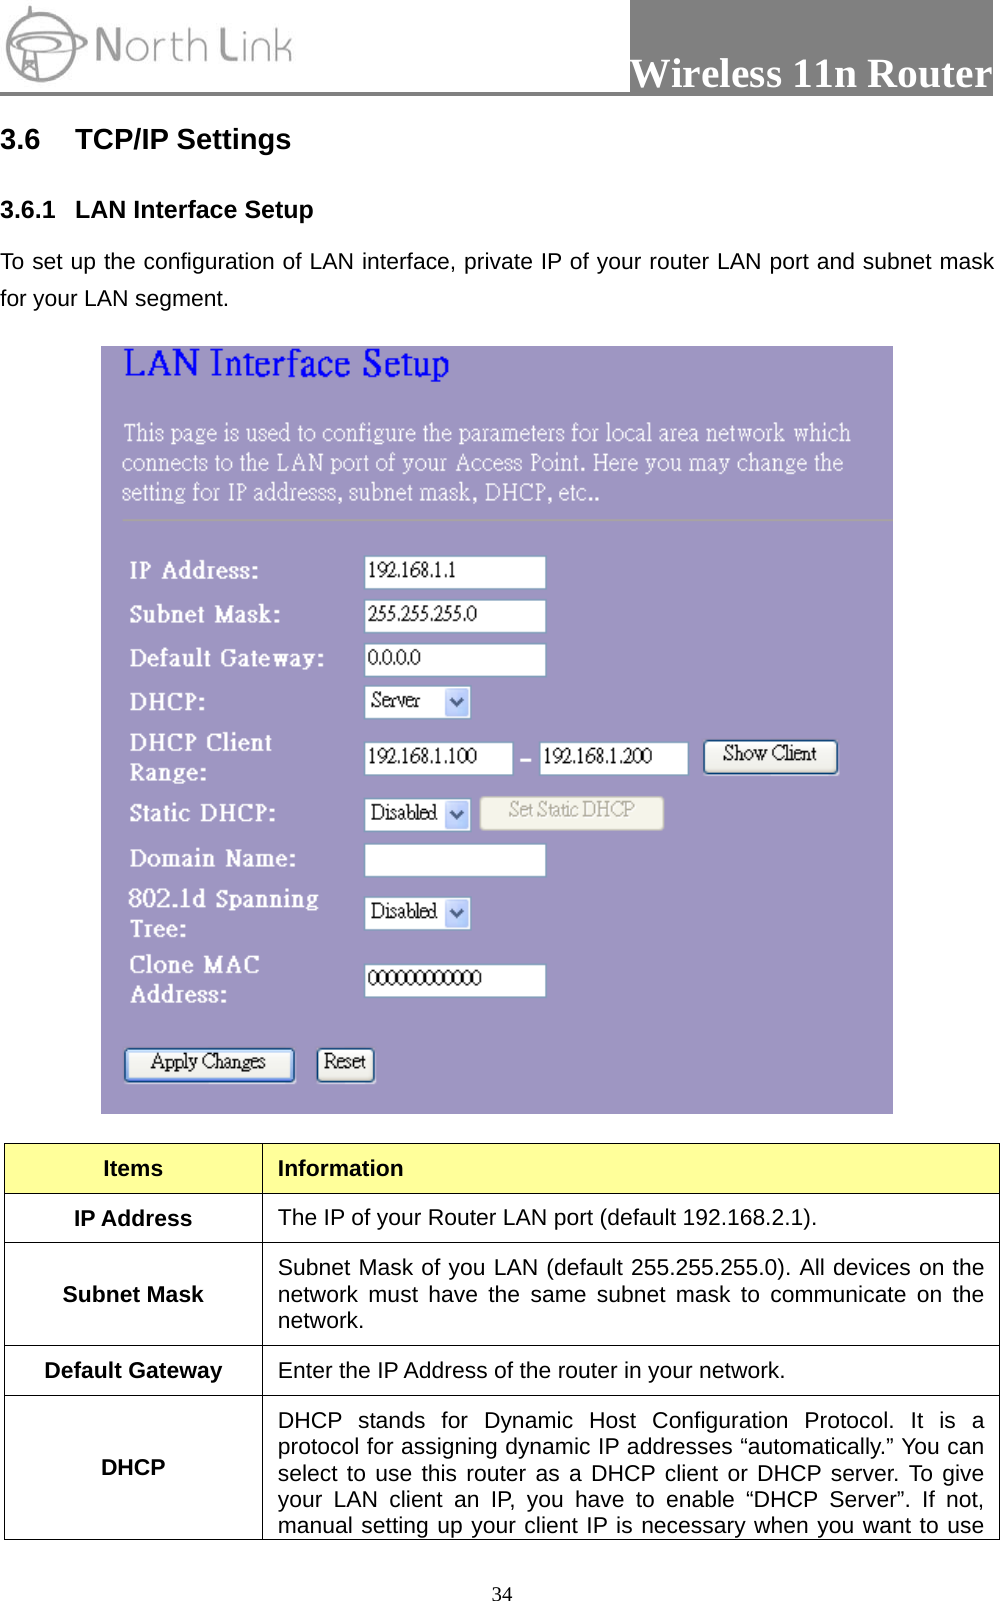
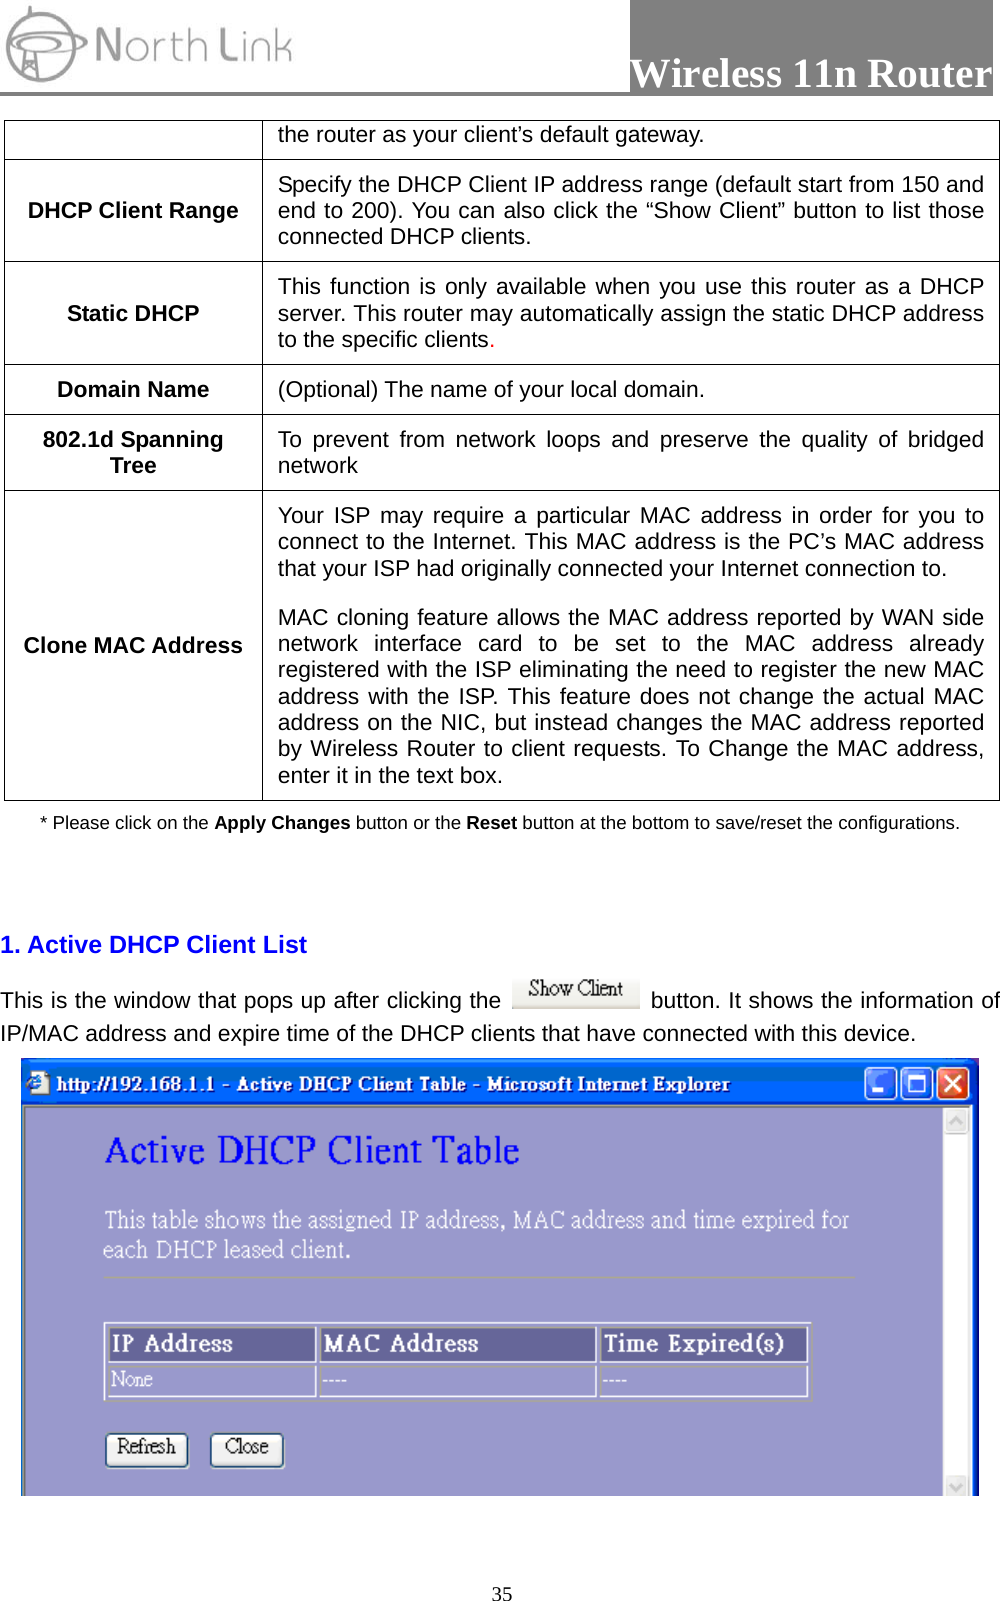
User Manual
Navigation menu
Upload a User Manual
Namespaces
Wiki Guide
HTML
PDF
Info
Views
User Manual
Discussion / Help
Navigation