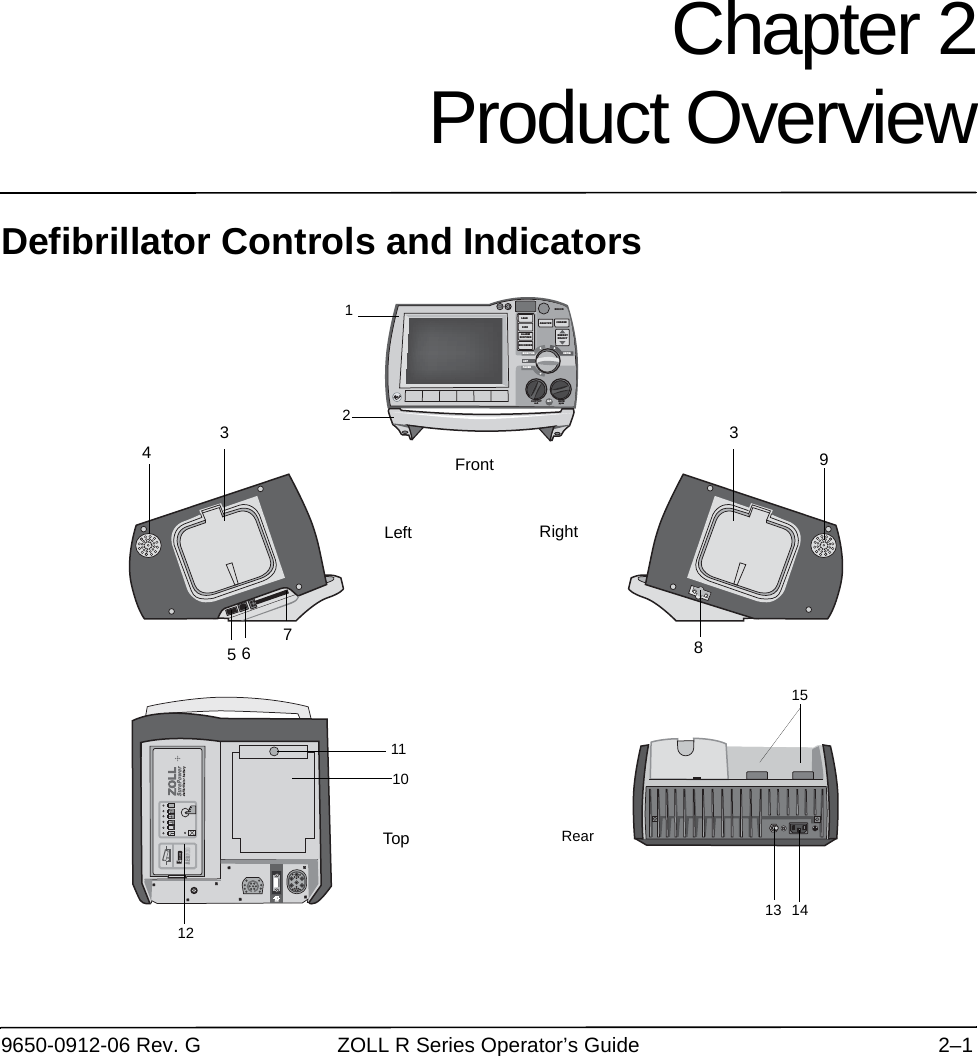
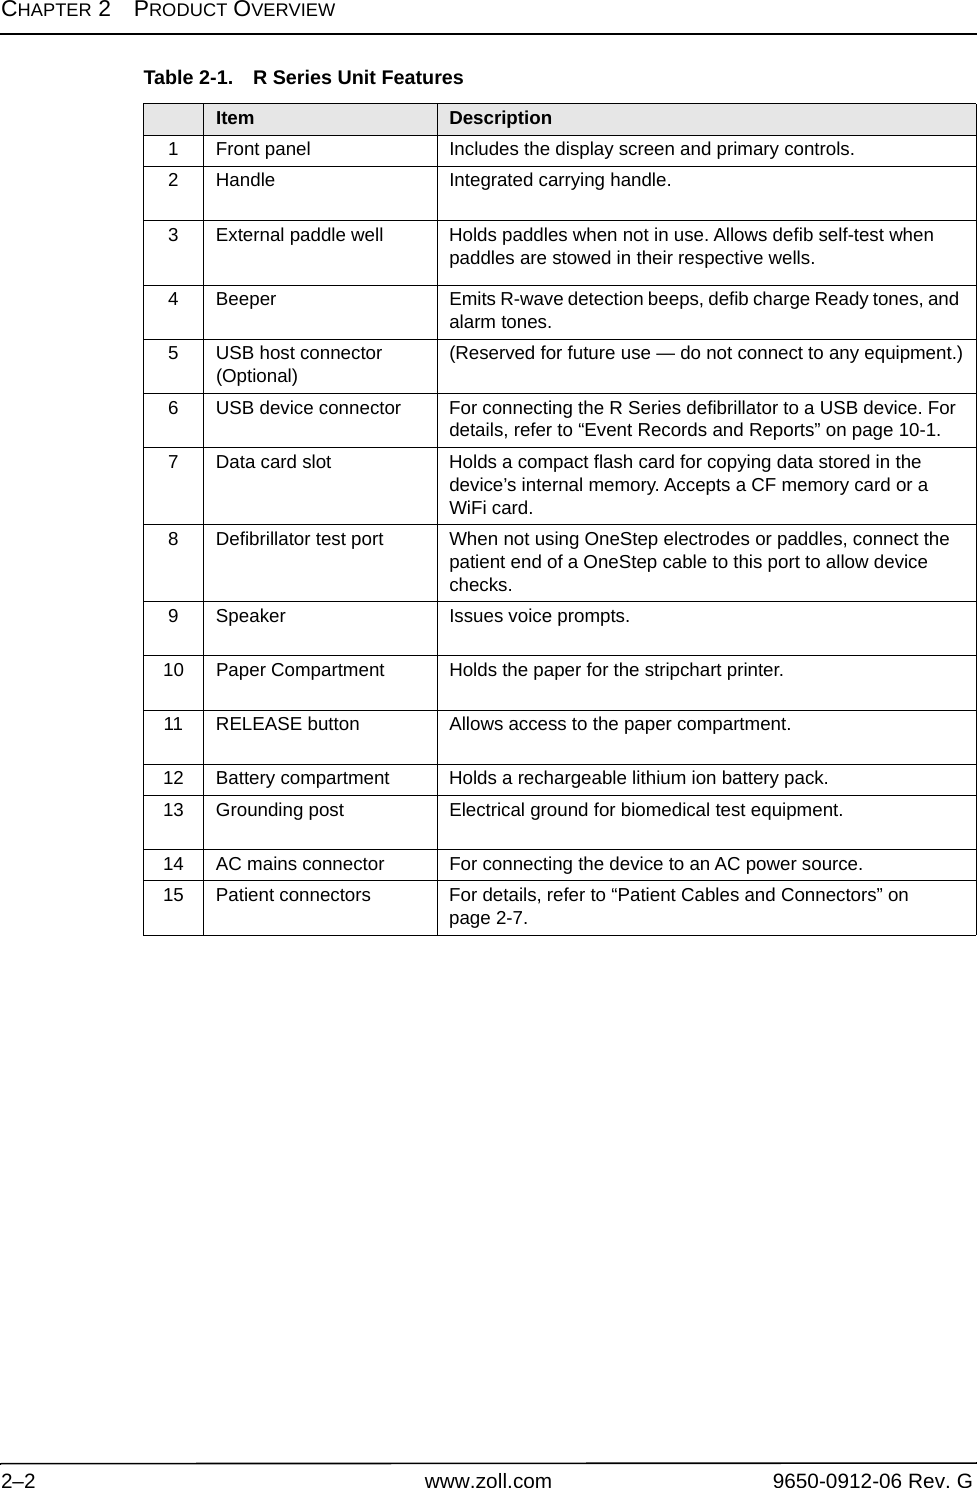
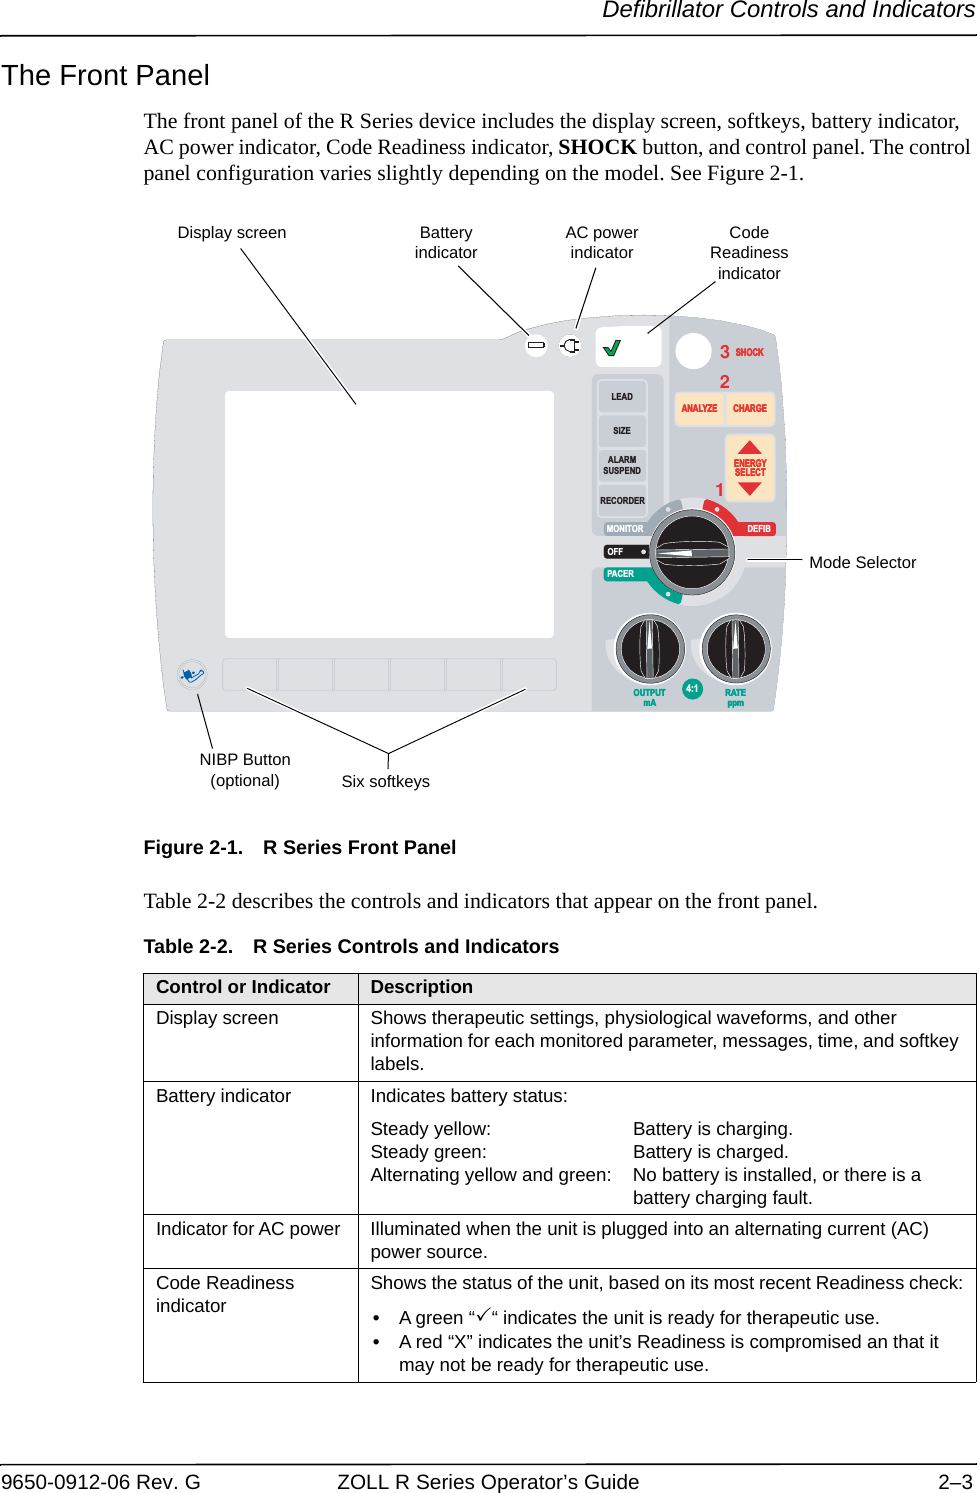
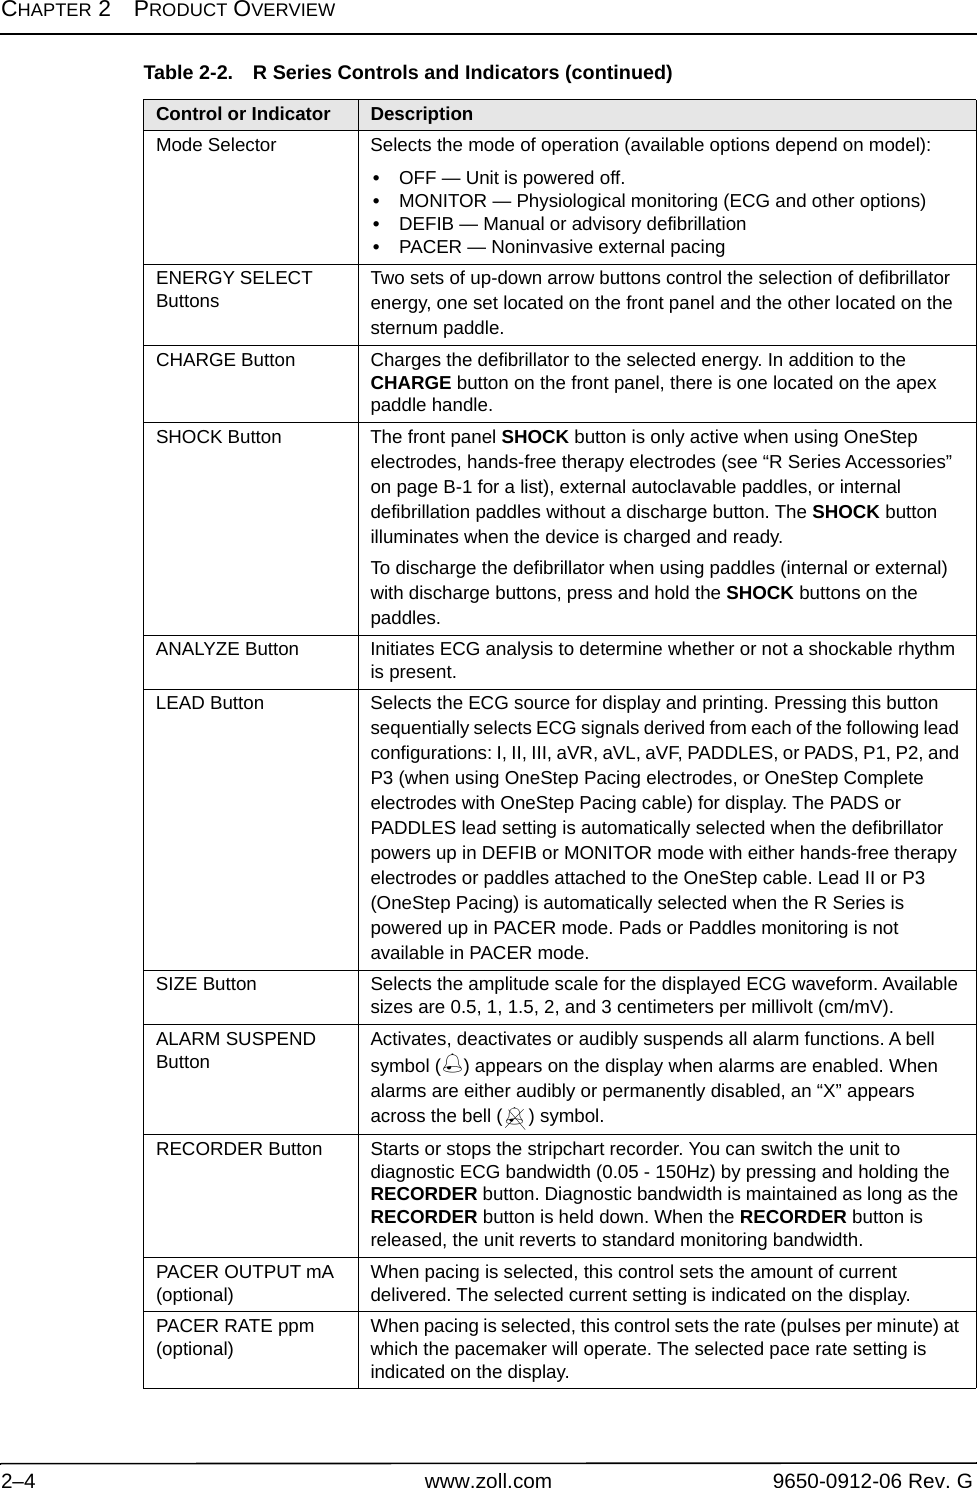
Zoll Medical RDC002 Z-RS-DC002 User Manual 9650 0912 06 SF G
Zoll Medical Corp Z-RS-DC002 9650 0912 06 SF G
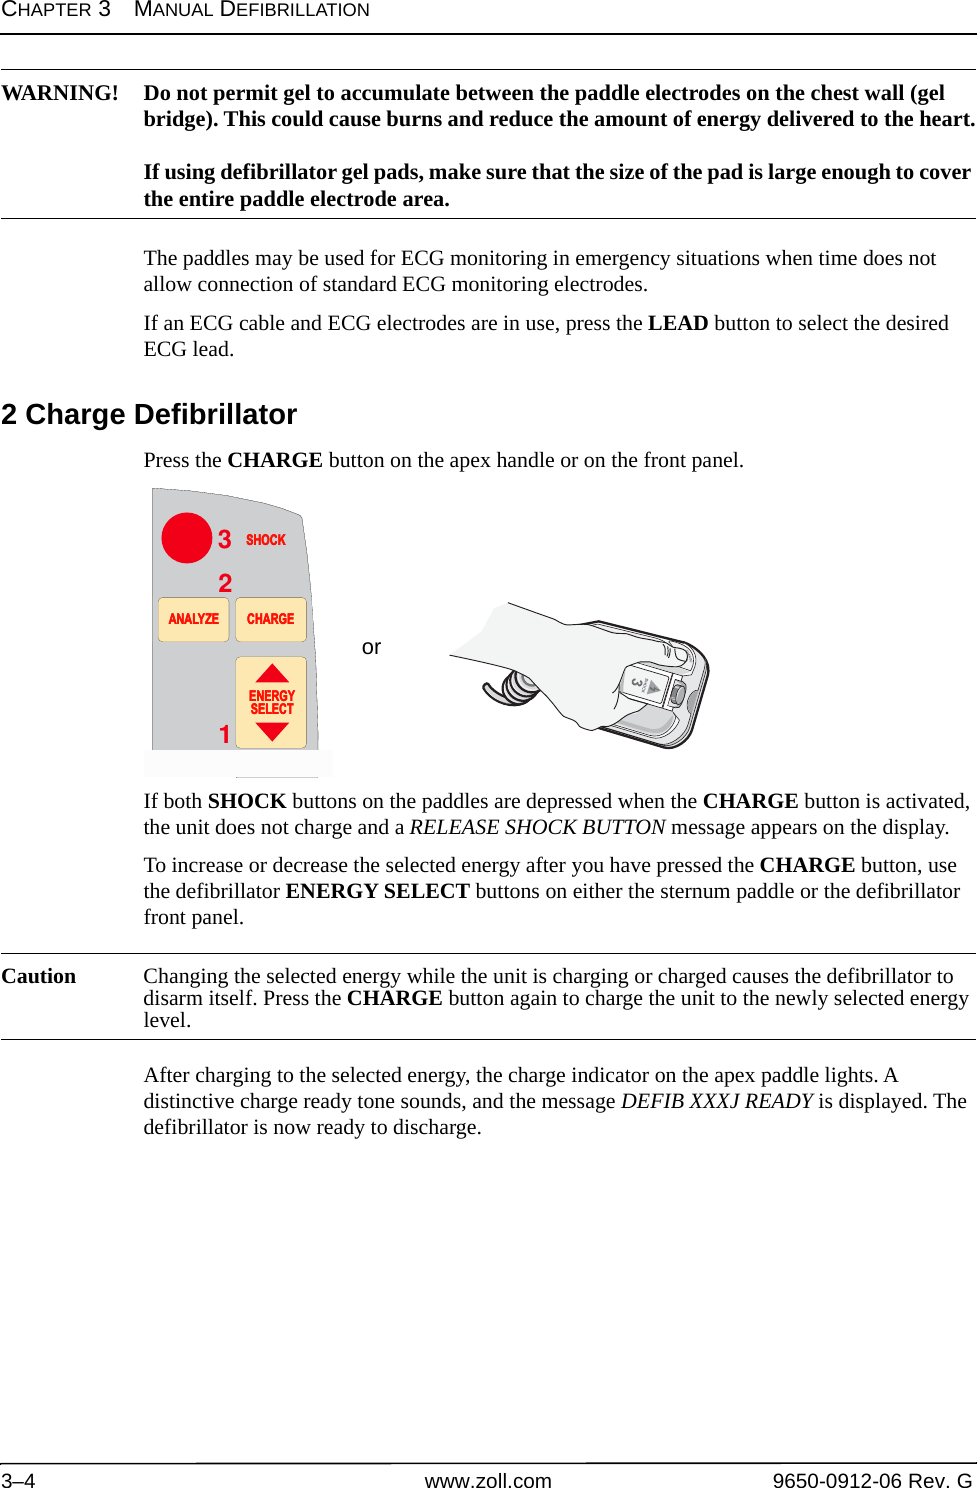
UserManual.wiki
>
Zoll Medical
>
RDC002 User Manual
>
user manual
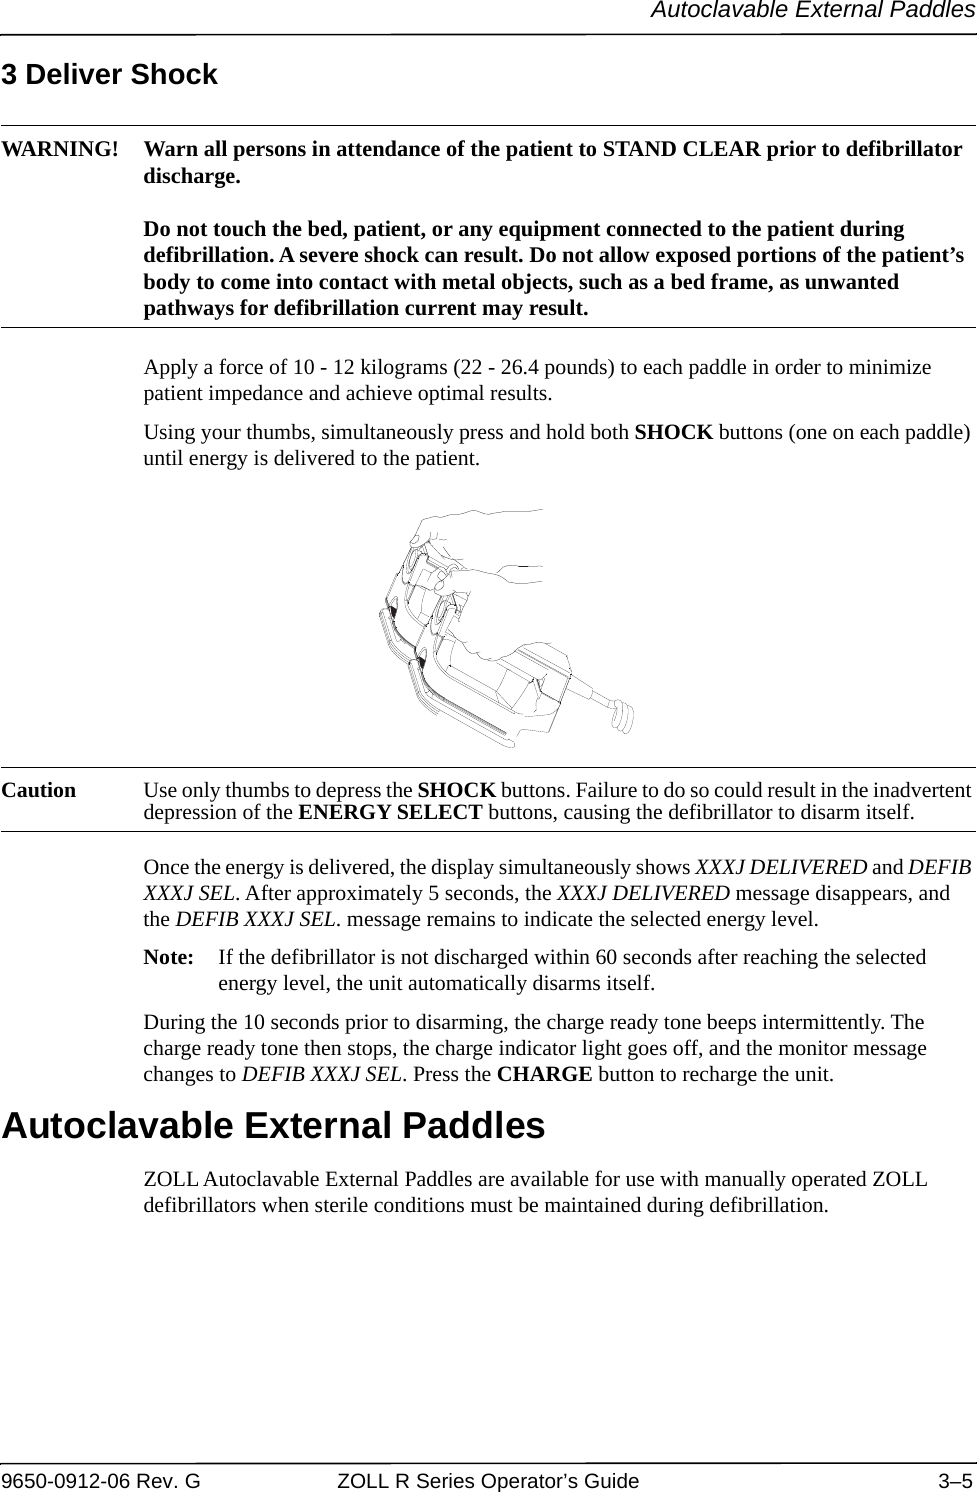
Contents
1.
User Manual
2.
user manual
user manual
Navigation menu
Upload a User Manual
Namespaces
Wiki Guide
HTML
PDF
Info
Views
User Manual
Discussion / Help
Navigation