ZyXEL Communications P660HNUF1 Wireless N ADSL2+ 4-port USB Gateway User Manual

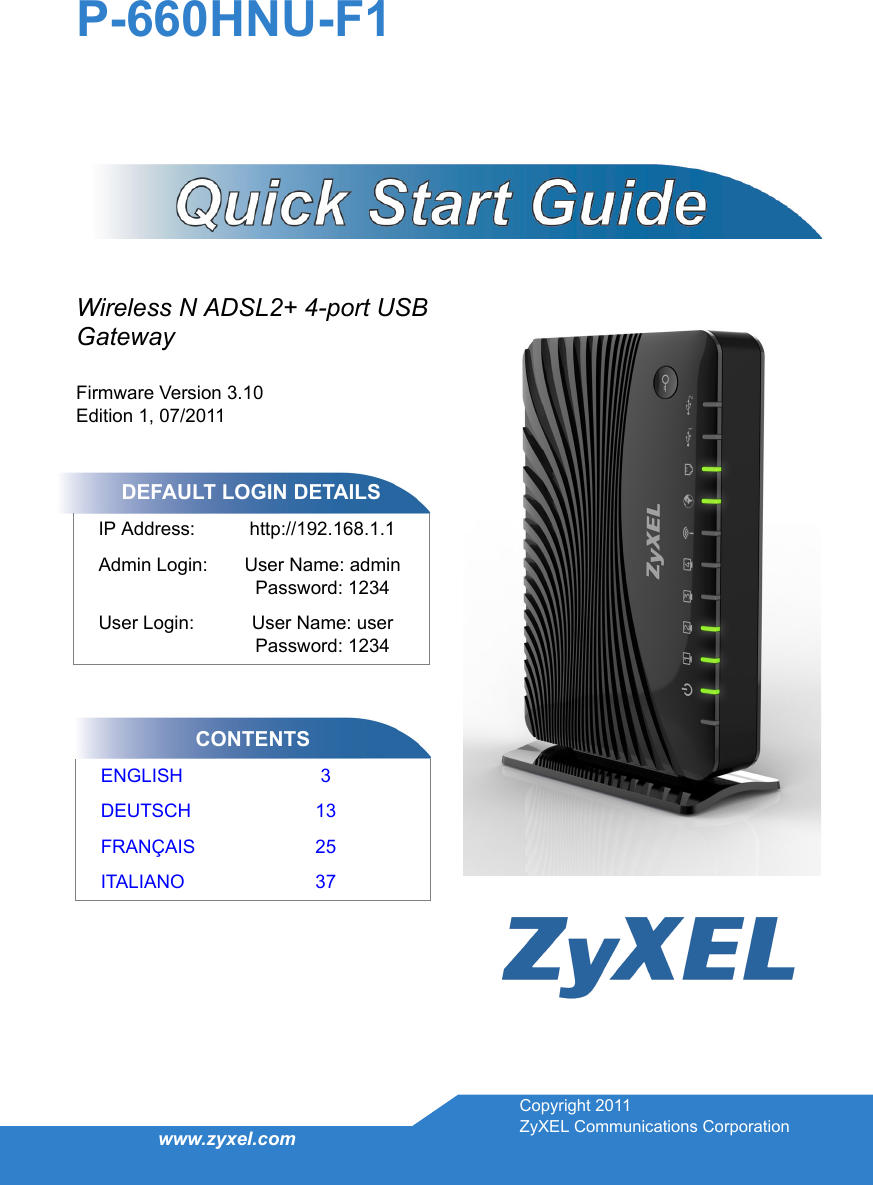
ZyXEL Communications Corporation Wireless N ADSL2+ 4-port USB Gateway

user manual

www.zyxel.comWireless N ADSL2+ 4-port USB GatewayFirmware Version 3.10Edition 1, 07/2011P-660HNU-F1DEFAULT LOGIN DETAILSIP Address: http://192.168.1.1Admin Login: User Name: adminPassword: 1234User Login: User Name: userPassword: 1234CONTENTSENGLISH 3DEUTSCH 13FRANÇAIS 25ITALIANO 37Copyright 2011ZyXEL Communications Corporation
2Device Panels WLAN/WPSON/OFF POWERLEDDSLINTERNETLEDWLAN/WPSLEDETHERNETLEDUSBLEDON/OFFRESETPOWERETHERNETPORTSDSLPORTUSBPORTCONNECTORSWITCH
3ENGLISHRequirementsMake sure you have the following things before you start.•  INTERNET ACCESS: You need an Internet account with an ISP (Internet Service Provider) and information such as user name, password, and so on.•  3G ACCOUNT: You need this if you want to use a 3G connection to access the Internet. The P-660HNU-F1 can also use this 3G connection as a backup if the DSL connection fails.•  WEB BROWSER: Internet Explorer 6.0 and later versions, with JavaScript enabled, or Mozilla Firefox 3 and later versions or Safari 2.0 and later versions. The browser will be used to access the Internet and/or access the P-660HNU-F1’s Web Configurator.ENGLISH
4Hardware ConnectionsRemove the P-660HNU-F1’s plastic wrapping before using it.1.  DSL: Use a telephone wire to connect this port to the telephone wall jack. If you are using a splitter, use a telephone wire to connect this port to the DSL/MODEM jack on the splitter. Use another telephone wire to connect the PHONE jack in the splitter to the telephone wall jack.2.  ETHERNET: If you want a wired connection to the P-660HNU-F1, use an Ethernet cable to connect a computer to one of these ports for initial configuration and/or Internet access.
5ENGLISH3.  USB 2.0: You only need to use this port if you are connecting a USB storage device, USB printer or a 3G adapter to the P-660HNU-F1.4.  POWER: Use the power adaptor provided with your P-660HNU-F1 to connect this socket to an appropriate power source.5.  Push the power button to the on position and look at the LEDs (lights) on the top panel of the P-660HNU-F1. •  The POWER light blinks during start-up and stays on once the P-660HNU-F1 is ready.•  The ETHERNET light turns on if the corresponding ETHERNET port is properly connected. If you do not connect a computer correctly to this port, the ETHERNET light will not turn on.•  The WLAN/WPS stays on when the wireless LAN is ready. The light will not turn on if the Wireless Connection is not activated.The ETHERNET and WLAN/WPS lights blink when the P-660HNU-F1 is sending or receiving data. If the POWER light does not turn on during start up, try turning the P-660HNU-F1 off, check the connections, wait a few seconds and then turn it back on. If the problem persists, you may have a hardware problem and you need to contact your vendor.
6Internet Access SetupThe DSL and INTERNET lights are on if you have internet access. Open your web browser and browse to www.zyxel.com. You may be prompted to enter your username and password.If one or both of these lights are not on, try turning the P-660HNU-F1 off, check the connections, wait a few seconds and then turn it back on. If the DSL light is not on, contact your service provider. If the DSL light is on but the INTERNET light is not, you need to enter your Internet access configuration using the Web Configurator - see page 10.Setting Up a Wireless ConnectionIf you want to set up a wireless connection using the P-660HNU-F1, use one of the following methods:1.  Use the wireless SSID (network name) and WPA-PSK encryption key if the device does not have the WPS logo - see page 7.2.  Use the WPS/WLAN Button if your wireless device has a Wi-Fi Protected Setup (WPS) logo - see page 9
7ENGLISHSetting Up a Wireless Connection using the Information on the LabelThe wireless function on your P-660HNU-F1 is enabled by default. Press the WLAN/WPS button on the P-660HNU-F1’s top panel for 1 second to turn this function on or off.To add a wireless client to the network, use the settings found in the rear panel of the P-660HNU-F1, such as the following:1.  Right-click the wireless adapter icon which appears in the bottom right of your computer monitor. Click View Available Wireless Networks.SSID: Zy_private_R9XP9PWPA2-PSK: 7WC3R7TVKWK3R
82.  Select the P-660HNU-F1’s SSID name and click Connect (A). The SSID “SecureWirelessNetwork” is given here as an example.3.  You are prompted to enter a password. Enter the WPA-PSK encryption key found in the rear panel of the P-660HNU-F1 and click Connect. 4.  You may have to wait several minutes while your computer connects to the wireless network.5.  You should now be securely connected wirelessly to the P-660HNU-F1.A
9ENGLISH If you cannot connect wirelessly to the P-660HNU-F1, check that you have selected the correct SSID and entered the correct security key. If that does not work, ensure that the WLAN/WPS LED on the front panel is turned on. Setting Up a Wireless Connection using WPS Follow these steps to add a WPS-enabled device to the wireless network using the WLAN/WPS button. You must use WPS one device at a time with the P-660HNU-F1. Place the devices you want to connect near one another.Press the WLAN/WPS button on top of the P-660HNU-F1 for more than 5 seconds to turn the WPS function on or off.The WLAN/WPS light blinks.Press the WPS button on a compatible device within 2 minutes of pressing the button on the P-660HNU-F1.The WLAN/WPS light on the P-660HNU-F1 shines steadily when connected.123
10The Web ConfiguratorThe Web Configurator is a web browser tool that allows you to configure the P-660HNU-F1. The computer and the P-660HNU-F1 need to be in the same IP address range to use this tool.1.  Open your browser and enter http://192.168.1.1 (the P-660HNU-F1's default IP address) as the address.2.  For administrator login, enter username admin and password 1234 (default). For user login, enter user as the username and 1234 as the password. Click Login. If the login screen does not open, make sure you allow web browser pop-up windows, JavaScript and Java permissions. Your computer should also be set to get an IP address automatically from a DHCP server. See your User’s Guide for more information.3.  If the INTERNET light is off, manually configure the Internet connection. Click Network Setting, then click on Broadband, and then click on Add new WAN Interface (Network Setting > Broadband > Add new WAN Interface).
11ENGLISH•  Select the Internet mode (Routing) and encapsulation (PPPoE) used by your ISP. •  Type your account username and password.•  Type your static IP address and DNS server if they are not assigned automatically to your account. Click Apply. InternetAccount
12•  To configure wireless access, go to Network Setting > Wireless.•  To configure the USB File Sharing feature, go to Network Setting > Home Networking > File Sharing.•  To configure the USB Printer Server feature, go to Network Setting > Home Networking > Print Server.•  If you have a 3G account and wish to configure 3G Settings, go to Network Setting > Broadband > 3G Backup•  To configure WPS using a PIN (Personal Identification Number) and the Web Configurator, go to Network Setting > Wireless > WPSSee the User’s Guide for details of these and other features of the P-660HNU-F1Viewing a Product’s Certifications1.  Go to www.zyxel.com.2.  Select your product from the drop-down list box on the ZyXEL home page to go to that product's page.3.  Select the certification you wish to view from this page.
DEUTSCH13SystemvoraussetzungenBevor Sie beginnen, müssen folgende Voraussetzungen erfüllt sein.•  INTERNETZUGRIFF: Sie benötigen ein Internetkonto bei einem Internetdienstanbieter und die dazugehörigen Daten wie Benutzername, Passwort usw.•  UMTS-KONTO: Dieses benötigen Sie, wenn Sie über eine UMTS-Verbindung auf das Internet zugreifen möchten. Der P-660HNU-F1 kann diese UMTS-Verbindung auch ersatzweise verwenden, wenn die DSL-Verbindung nicht zustande kommt.•  INTERNETBROWSER: Internet Explorer 6.0 mit aktiviertem JavaScript oder neuere Versionen, Mozilla Firefox 3 und neuere Versionen oder Safari 2.0 oder neuere Versionen. Der Browser wird benötigt, um auf das Internet und/oder den Web-Konfigurator des P-660HNU-F1 zuzugreifen.DEUTSCH
14Anschließen der HardwareNehmen Sie den P-660HNU-F1 aus der Kunststoffverpackung heraus. Entfernen Sie ggf. auch die Folie von dem Gerät.1.  DSL: Schließen Sie an diesen Port ein Telefonkabel an und verbinden Sie dieses mit einer Telefonbuchse. Wenn Sie einen Splitter verwenden, schließen Sie das eine Ende eines Telefonkabels hier und das andere Ende an die DSL/MODEM-Buchse des Splitters an. Schließen Sie ein anderes Telefonkabel an die PHONE-Buchse des Splitters und an die Telefonanschlussdose an.
DEUTSCH152.  ETHERNET: Für eine kabelgebundene Verbindung zum P-660HNU-F1 schließen Sie für die Erstkonfiguration und/oder den Internetzugriff an einen dieser Ports ein von einem Computer kommendes Ethernet-Kabel an.3.  USB 2.0: Diesen Port benötigen Sie nur, wenn Sie ein USB-Speichergerät, einen USB-Drucker oder einen UMTS-Adapter an den P-660HNU-F1 anschließen möchten.4.  ANTENNEN: Befestigen Sie die mitgelieferten Antennen.5.  POWER: Im Lieferumfang des P-660HNU-F1 ist ein Netzadapter enthalten, den Sie an diesen Anschluss und an eine geeignete Netzsteckdose anschließen müssen.6.  Drücken Sie die Ein/Aus-Taste in die Position ON. Auf der Oberseite des P-660HNU-F1 können Sie an den LED-Anzeigen den Status ablesen. •  Die POWER-LED blinkt, während das Gerät hochfährt, und sie leuchtet dauerhaft, wenn der P-660HNU-F1 betriebsbereit ist.•  Die ETHERNET-LED beginnt zu leuchten, wenn der entsprechende ETHERNET-Port richtig angeschlossen ist. Wenn Sie einen Computer nicht richtig an diesen Port angeschlossen haben, leuchtet die ETHERNET-LED auch nicht.
16•  Die WLAN/WPS-LED leuchtet dauerhaft, wenn die Wireless-LAN-Funktion aktiv ist. Die LED leuchtet nicht, wenn die Wireless-Verbindung nicht aktiviert ist.Die ETHERNET- und WLAN/WPS-LED blinken, während der P-660HNU-F1 Daten sendet oder empfängt. Wenn die POWER-LED beim Hochfahren nicht leuchtet, schalten Sie den P-660HNU-F1 aus, prüfen Sie die Verbindungen und schalten das Gerät nach einigen Sekunden wieder an. Wenn das Problem weiterhin bestehen bleibt, liegt die Ursache möglicherweise bei der Hardware. Wenden Sie sich an Ihren Händler.Einrichten des InternetzugriffsDie DSL- und INTERNET-LED leuchten, wenn eine Verbindung zum Internet besteht. Öffnen Sie Ihren Internetbrowser und rufen Sie die Website www.zyxel.com auf. Sie werden aufgefordert, Ihren Benutzernamen und das Passwort einzugeben.Wenn eine oder beide LEDs nicht leuchten, schalten Sie den P-660HNU-F1 aus, prüfen Sie die Verbindungen und schalten das Gerät nach einigen Sekunden wieder an. Wenn die DSL-LED nicht leuchtet, wenden Sie sich an Ihren Internetdienstanbieter. Wenn die DSL-LED leuchtet, die INTERNET-LED jedoch nicht, müssen Sie mit dem Web-Konfigurator die Internetzugriffskonfiguration aufrufen - siehe Seite 21.
DEUTSCH17Einrichten einer DrahtlosverbindungSie können mit dem P-660HNU-F1 auf eine der folgenden Arten eine Drahtlosverbindung einrichten:1.  Wenn das Gerät kein WPS-Logo hat, verwenden Sie die Wireless SSID (Netzwerkname) und den WPA-PSK-Schlüssel - siehe Seite 17.2. Wenn das Drahtlosgerät ein WPS-Logo (Wi-Fi Protected Setup) hat, verwenden Sie die WPS/WLAN-Taste - siehe Seite 20Einrichten einer Drahtlosverbindung mit den Daten des EtikettsDie Drahtlosfunktion des P-660HNU-F1 ist standardmäßig aktiviert. Drücken Sie 1 Sekunde lang auf die WLAN/WPS-Taste an der Oberseite des P-660HNU-F1, um diese Funktion ein- oder auszuschalten.Um einen Drahtlos-Client zum Netzwerk hinzuzufügen, verwenden Sie die Einstellungen, die an der Rückseite des P-660HNU-F1 angegeben sind, z. B.:SSID: Zy_private_R9XP9PWPA2-PSK: 7WC3R7TVKWK3R
181.  Klicken Sie auf das Symbol für drahtlose Netzwerke in Ihrem Betriebssystem wie hier für XP beschrieben.2. Wählen Sie den SSID-Namen des P-660HNU-F1, und klicken Sie auf Verbinden (A). Die SSID “SecureWirelessNetwork” ist hier nur als Beispiel angegeben.3. Sie werden nun aufgefordert, ein Passwort einzugeben. Geben Sie den WPA-PSK-Schlüssel ein, der an der Rückseite des P-660HNU-F1 angegeben ist, und klicken Sie auf Verbinden. A
DEUTSCH194. Es kann einige Minuten dauern, bis der Computer die Verbindung zum Drahtlosnetzwerk hergestellt hat.5. Jetzt besteht eine sichere Drahtlosverbindung zum P-660HNU-F1. Wenn Sie drahtlos keine Verbindung zum P-660HNU-F1 herstellen können, prüfen Sie, ob Sie die richtige SSID und den richtigen Schlüssel eingegeben haben. Ist das der Fall, prüfen Sie, ob die WLAN/WPS-LED an der Vorderseite des Geräts leuchtet.
20Einrichten einer Drahtlosverbindung mit WPS Führen Sie die folgenden Schritte aus, um ein Gerät mit aktivierter WPS-Funktion mit der WLAN/WPS-Taste zum Drahtlosnetzwerk hinzuzufügen . Mit dem P-660HNU-F1 können Sie jeweils mit nur einem Gerät WPS verwenden. Stellen Sie alle Geräte, die angeschlossen werden sollen, nahe beieinander.Drücken Sie länger als 5 Sekunden auf die WLAN/WPS-Taste auf dem P-660HNU-F1, um die WPS-Funktion ein- oder auszuschalten.Die WLAN/WPS-LED blinkt.Drücken Sie innerhalb von 2 Minuten, nachdem Sie auf die Taste des P-660HNU-F1 gedrückt haben, auf die WPS-Taste des kompatiblen Geräts.Sobald die Verbindung besteht, leuchtet die WLAN/WPS-LED des P-660HNU-F1 dauerhaft.123
DEUTSCH21Der Web-KonfiguratorDer Web-Konfigurator ist ein Internetbrowser-Tool, mit dem Sie den P-660HNU-F1 konfigurieren können. Der Computer und der P-660HNU-F1 müssen sich im selben IP-Adressbereich befinden, damit Sie dieses Tool verwenden können.1.  Öffnen Sie Ihren Browser, und geben Sie als Adresse http://192.168.1.1 (die IP-Standardadresse des P-660HNU-F1) ein.2. Geben Sie für die Anmeldung als Administrator den Benutzernamen admin und das Passwort 1234 (Standard) ein. Wenn Sie sich als Benutzer anmelden, geben Sie als Benutzernamen user und als Passwort 1234 ein. Klicken Sie auf Login (Anmelden). Sollte das Anmeldefenster nicht angezeigt werden, stellen Sie sicher, dass Ihr Internet-Browser Pop-up-Fenster, JavaScript und Java zulässt. Der Computer sollte außerdem so eingestellt sein, dass er eine IP-Adresse automatisch von einem DHCP-Server bezieht. Weitere Informationen finden Sie im Benutzerhandbuch.
223.  Wenn die INTERNET-LED nicht leuchtet, müssen Sie die Internetverbindung manuell konfigurieren. Klicken Sie auf Network Setting (Netzwerk Einstellungen) und dann auf Broadband (Breitband). Klicken Sie auf Add new WAN Interface (neuen WAN Anschluss hinzufügen)•  Wählen Sie den Internetmodus (Routing) und den WAN Service Typ (meist PPPoE) Ihres Internetdienstanbieters. •  Geben Sie den Benutzernamen und das Passwort Ihres Kontos ein.•  Falls Ihr Internetdienstanbiter die Nutzung einer statischen IP bzw, DNS Servers vorgibt, so geben Sie diese Daten bitte auch ein.
DEUTSCH23Klicken Sie auf Apply (Übernehmen). •  Um den Drahtloszugriff zu konfigurieren, gehen Sie zu Network Setting > Wireless (Netzwerk Einstellung > WLAN).•  Um die USB-Dateifreigabefunktion zu konfigurieren, gehen Sie zu Network Setting > Home Networking > File Sharing (Netzwerk Einstellung > Heimnetzwerk > Dateifreigaben).InternetKonto
24•  Um die USB-Druckerserverfunktion zu konfigurieren, gehen Sie zu Network Setting > Home Networking > Print Server (Netzwerk Einstellung > Heimnetzwerk > Drucker Server).•  Wenn Sie ein UMTS-Konto haben und die UMTS-Einstellungen konfigurieren möchten, gehen Sie zu Network Setting > Broadband > UMTS Backup (Netzwerk Einstellung > Breitband > UMTS Backup).•  Um WPS mit einer PIN (Persönliche Identifikationsnummer) und dem Web-Konfigurator zu konfigurieren, gehen Sie zu Network Setting > Wireless > WPS (Netzwerk Einstellung > WLAN > WPS).Weitere Informationen zu diesen und anderen Funktionen des P-660HNU-F1 finden Sie im Benutzerhandbuch.Produktzertifizierungen1.  Rufen Sie die Seite www.zyxel.com auf.2.  Wählen Sie Ihr Produkt aus der drop-down Liste in dem Feld auf der ZyXEL Homepage aus und gehen Sie auf diese Produktseite.3.  Wählen Sie die Zertifizierung, die Sie sehen möchten, auf dieser Seite aus.
25FRANÇAISConfiguration requiseVérifiez les éléments suivants avant de commencer.•  ACCÈS INTERNET: Vous avez besoin d'un compte Internet fourni par un fournisseur de service Internet (FSI) et des informations d'identification comme le nom d'utilisateur, le mot de passe, etc.•  COMPTE 3G: Ce compte est nécessaire si vous utilisez une connexion 3G pour accéder à Internet. Le P-660HNU-F1 peut également utiliser cette connexion 3G comme connexion de secours si la connexion DSL est interrompue.•  NAVIGATEUR WEB: Internet Explorer 6.0 et les versions ultérieures, avec JavaScript, ou Mozilla Firefox 3 et les versions ultérieures, ou Safari 2.0 et les versions ultérieures. La navigateur est utilisé pour accéder à Internet et/ou au P-660HNU-F1Web Configurator (Configurateur Web).FRANÇAIS
26Connexions matériellesRetirez le P-660HNU-F1 plastique d'emballage avant de l'utiliser.1.  DSL: Utilisez un fil téléphone pour connecter ce port à une prise téléphonique. Si vous utilisez un séparateur, utilisez un cordon de téléphone pour connecter ce port au connecteur DSL/MODEM du séparateur. Utilisez un autre fil de téléphone pour connecter la prise PHONE (TÉLÉPHONE) du séparateur à la prise téléphonique murale.
27FRANÇAIS2.  ETHERNET: Pour une connexion filaire au P-660HNU-F1, utilisez un câble Ethernet pour connecter l'ordinateur à un de ces  ports pour une configuration initiale et/ou un accès Internet.3.  USB 2.0: Ce port n'est nécessaire que si vous souhaitez connecter un périphérique de stockage USB, une imprimante USB ou un adaptateur 3G au P-660HNU-F1.4.  ANTENNES: Pour connecter les antennes fournies.5.  ALIMENTATION: Utilisez l'adaptateur d'alimentation fourni avec votre P-660HNU-F1 pour connecter la prise à une source d'alimentation adaptée.6.  Mettez l'interrupteur d'alimentation sur la position ON (MARCHE) et observez les voyants lumineux sur le panneau supérieur du P-660HNU-F1. •  Le voyant POWER (ALIMENTATION) clignote au démarrage et reste vert une fois que le P-660HNU-F1 est prêt•  Chaque voyant ETHERNET  s'allume si le port ETHERNET correspondant est correctement connecté. Si l'ordinateur n'est pas correctement connecté à ce port, le voyant ETHERNET ne s'allumera pas.•  Le voyant WLAN/WPS s'allume quand le LAN sans fil est prêt. Le voyant ne s'allumera pas si la connexion sans fil n'est pas activée.
28Les voyants ETHERNET et WLAN/WPS clignotent lorsque le P-660HNU-F1 envoie ou reçoit des données. Si le voyant POWER (ALIMENTATION) ne s'allume pas au moment du démarrage, éteignez le P-660HNU-F1, vérifiez les connexions, patientez quelques secondes, puis rallumez l'appareil. Si le problème persiste, vous avez probablement un problème de matériel. Veuillez contacter votre vendeur.Installation de l'accès à InternetLes voyants DSL et INTERNET s'allument lorsque l'accès à Internet est établi. Ouvrez votre navigateur Web et allez sur le site www.zyxel.com. Vous serez invité à saisir vos nom d'utilisateur et mot de passe.Si un de ces voyants (ou les deux) ne s'allume pas, éteignez le P-660HNU-F1, vérifiez les connexions, patientez quelques secondes, puis rallumez l'appareil. Si le voyant DSL n'est pas allumé, contactez votre fournisseur de service. Si le voyant DSL est allumé, mais que le voyant INTERNET ne l'est pas, entrez votre configuration d'accès Internet en utilisant le Web Configurator (Configurateur Web) - voir page 33.Configurer une connexion sans filPour configurer une connexion sans fil avec le P-660HNU-F1, utilisez l'une des méthodes suivantes:1.  Utilisez le SSID sans fil (nom du réseau) et la clé de cryptage WPA-PSK si l'appareil n'a pas le logo WPS - voir page 29.
29FRANÇAIS2.  Utilisez le bouton WPS/WLAN si votre appareil sans fil a le logo WPS (Wi-Fi Protected Setup) - voir page 32Configurer une connexion sans fil en utilisant les informations sur l'étiquetteLa fonction sans fil sur votre P-660HNU-F1 est activée par défaut. Appuyez sur le bouton WLAN/WPS sur le panneau supérieur du P-660HNU-F1 pendant 1 seconde pour activer ou désactiver cette fonction.Pour ajouter un client sans fil au réseau, utilisez les paramètres indiqués sur le panneau arrière du P-660HNU-F1, comme suit:1.  Cliquez avec le bouton droit sur l'icône de l'adaptateur sans fil qui apparaît en bas à droite de l'écran de votre ordinateur. Cliquez sur View Available Wireless Networks (Afficher les réseaux sans fils disponibles).SSID : Zy_private_R9XP9PWPA2-PSK: 7WC3R7TVKWK3R
302.  Sélectionnez le nom SSID du P-660HNU-F1 et cliquez sur Connect (Connecter) (A). Le SSID SecureWirelessNetwork (RéseauSansfilSécurisé) est donné ici en exemple.3.  Vous êtes invité à entrer un mot de passe. Entrez la clé de cryptage WPA-PSK indiquée sur le panneau arrière du P-660HNU-F1 et cliquez sur Connect (Connecter). 4.  Patientez quelques minutes pendant la connexion de votre ordinateur au réseau sans fil.A
31FRANÇAIS5.  Vous devriez maintenant être connecté de façon sécurisée et sans fil au P-660HNU-F1. Si vous n'arrivez pas à établir une connexion sans fil avec le P-660HNU-F1, vérifiez que vous avez sélectionné le bon SSID et saisi la bonne clé de sécurité. Si cela ne fonctionne pas, vérifiez que le voyant WLAN/WPS est allumé sur le panneau supérieur.
32Configurer une connexion sans fil en utilisant le WPS Suivez ces étapes pour ajouter un périphérique WPS au réseau sans fil en utilisant le bouton WLAN/WPS. Vous devez utiliser un seul appareil WPS à la fois avec le P-660HNU-F1. Rapprochez les uns des autres les périphériques que vous voulez connecter.Appuyez sur le bouton WLAN/WPS en haut du P-660HNU-F1 pendant plus de 5 secondes pour activer ou désactiver la fonction WPS.Le voyant lumineux WLAN/WPS clignote.Après avoir appuyé sur bouton du P-660HNU-F1 vous avez jusqu'à 2 minutes pour appuyer sur le bouton WPS du périphérique compatible.Le voyant lumineux WLAN/WPS P-660HNU-F1s'allume de manière continue une fois la connexion établie.123
33FRANÇAISLe Web Configurator (Configurateur Web)Le Web Configurator (Configurateur Web) est un outil de navigation Web qui vous permet de configurer le P-660HNU-F1. L'ordinateur et le P-660HNU-F1 doivent avoir la même plage d'adresse IP pour utiliser cet outil.1.  Ouvrez votre navigateur et entrez l'adresse http://192.168.1.1 (l'adresse IP par défaut du P-660HNU-F1).2.  Pour la connexion de l'administrateur, entrez le nom d'utilisateur admin et le mot de passe 1234 (par défaut). Pour la connexion d'utilisateur, entrez le nom d'utilisateur utilisateur et le mot de passe 1234. Cliquez sur Login (Ouvrir une session). Si l'écran d'ouverture de session n'apparaît pas, vérifiez que les fenêtres contextuelles du Web sont autorisées, et vérifiez les permissions de JavaScript et Java. De plus, votre ordinateur doit être paramétré de façon à obtenir automatiquement une adresse IP fournie par un serveur DHCP. Consultez votre guide de l'utilisateur pour plus d'informations.
343.  Si le voyant INTERNET est éteint, configurez manuellement la connexion Internet. Cliquez sur Network Setting (Configuration réseau), et cliquez sur Broadband (Large bande), puis cliquez sur Add new WAN Interface (Network Setting > Broadband > Add new WAN Interface) (Configuration réseau > Large bande > Ajouter une nouvelle interface WAN). •  Sélectionnez le mode Internet (Routing (Routage)) et l'encapsulation (PPPoE) utilisé par votre FSI (fournisseur de service Internet). •  Tapez le nom d'utilisateur et le mot de passe de votre compte.•  Tapez l'adresse IP statique et l'adresse du serveur DNS si elles ne sont pas attribuées automatiquement à votre compte. Cliquez sur
35FRANÇAISApply (Appliquer) •  Pour configurer un accès sans fil, allez à Network Setting > Wireless (Configuration réseau > Sans fil).•  Pour configurer la fonction USB File Sharing (Partage de fichier USB), allez à Network Setting > Home Networking > File InternetCompte
36Sharing (Configuration réseau > Réseau domestique > Partage de fichier).•  Pour configurer la fonction USB Printer Server (Serveur d'imprimante USB), allez à Network Setting > Home Networking > Print Server. (Configuration réseau > Réseau domestique > Serveur d'imprimante).•  Si vous avez un compte 3G et que vous souhaitez configurer les paramètres 3G, allez à Network Setting > Broadband > 3G Backup (Configuration réseau > Large bande > Connexion de secours 3G)•  Pour configurer le WPS en utilisant un code PIN (Personal Identification Number) et le Web Configurator (Configurateur Web), allez à Network Setting > Wireless > WPS (Configuration réseau > Sans fil > WPS)Consultez le guide d'utilisateur pour plus d'informations concernant ces fonctions et d'autres fonctions du P-660HNU-F1Afficher la certification d'un produit1.  Allez à www.zyxel.com.2.  Sélectionnez votre produit dans la liste déroulante dans la page d'accueil de ZyXEL pour accéder à la page de ce produit.3.  Sélectionnez la certification que vous désirez consulter dans cette page.
37ITALIANORequisitiPrima di iniziare assicurarsi di avere disponibile quanto elencato di seguito.•  ACCESSI A INTERNET: è necessario disporre di un account Internet con un fornitore di accesso (ISP, Internet Service Provider) e delle informazioni correlate quali nome utente, password e così via.•  ACCOUNT 3G: questo account è necessario se si desidera utilizzare una connessione 3G per accedere a Internet. Il P-660HNU-F1 è anche in grado di utilizzare questa connessione 3G come connessione di riserva in caso di problemi con la connessione DSL.•  BROWSER WEB: Internet Explorer 6.0 o versione successiva con JavaScript attivato, Mozilla Firefox 3 o versione successiva, oppure Safari 2.0 o versione successiva. Il browser sarà utilizzato per accedere a Internet e/o per accedere allo Strumento di configurazione Web del P-660HNU-F1.ITALIANO
38Collegamenti hardwareRimuovere l'imballo di plastica del P-660HNU-F1 prima di utilizzarlo.1.  DSL: utilizzare un cavo telefonico per connettere questa porta alla presa del telefono. Se si utilizza uno splitter, utilizzare un cavo telefonico per collegare questa porta al jack DSL/MODEM sullo splitter. Utilizzare un altro cavo telefonico per collegare il jack PHONE (telefono) dello splitter alla presa telefonica a muro.
39ITALIANO2.  ETHERNET: se si desidera un collegamento cablato al P-660HNU-F1, utilizzare un cavo Ethernet per collegare un computer a una di queste porte per la configurazione iniziale e/o per l'accesso a Internet.3.  USB 2.0: questa porta va utilizzata solo per collegare un dispositivo di archiviazione USB, una stampante USB o un adattatore 3G al P-660HNU-F1.4.  ANTENNE: fissare le antenne fornite con il prodotto.5.  POWER: utilizzare l'alimentatore fornito a corredo del P-660HNU-F1 per collegare questa presa a una sorgente di alimentazione appropriata.6.  Posizionare il pulsante Power sulla posizione di accensione e osservare i LED (spie luminose) sul pannello anteriore del P-660HNU-F1. •  Il LED POWER lampeggia durante l'avvio e resta acceso una volta che il P-660HNU-F1 è pronto.•  Il LED ETHERNET si accende se la porta ETHERNET corrispondente è connessa correttamente. Se non si collega correttamente un computer a questa porta, il LED ETHERNET non si accende.•  Il LED WLAN/WPS è acceso quando la LAN wireless è pronta. Il LED non si accende se la connessione Wireless è disattivata.
40I LED ETHERNET e WLAN/WPS lampeggiano quando il P-660HNU-F1 sta inviando o ricevendo dati. Se il LED POWER non si accende durante l'avvio, provare a spegnere il P-660HNU-F1, controllare bene i collegamenti e attendere qualche secondo e poi riaccenderlo. Se l'errore persiste, è possibile che vi sia un problema hardware e che occorra rivolgersi al venditore.Configurazione dell'accesso a InternetI LED DSL e INTERNET sono accesi se è presente un accesso a Internet. Aprire il browser e visitare la pagina www.zyxel.com. Potrebbe comparire la richiesta di immettere nome utente e password.Se una o entrambi questi LED non sono accesi, provare a spegnere il P-660HNU-F1, a controllare bene i collegamenti, attendere qualche secondo e poi riaccenderlo. Se il LED DSL non è acceso, rivolgersi al proprio service provider. Se il LED DSL è acceso ma il LED INTERNET non lo è, occorre entrare nella configurazione del proprio accesso a Internet utilizzando lo Strumento di configurazione Web (vedere pagina 45).Configurazione di una connessione wirelessPer configurare una connessione wireless con il P-660HNU-F1, adottare uno dei metodi seguenti:1.  Utilizzare il SSID wireless (nome della rete) e la chiave di crittografia WPA-PSK se il dispositivo non ha il logo WPS (vedere pagina 41).
41ITALIANO2.  Utilizzare il pulsante WPS/WLAN se il proprio dispositivo wireless ha il logo WPS (Wi-Fi Protected Setup) (vedere pagina 44)Configurazione di una connessione wireless utilizzando le informazioni presenti sull'etichettaLa funzione wireless del P-660HNU-F1 è attivata per impostazione predefinita. Tenere premuto il pulsante WLAN/WPS sul pannello anteriore del P-660HNU-F1 per 1 secondo per attivare/disattivare questa funzione.Per aggiungere un client wireless alla rete, utilizzare le impostazioni che si trovano sul pannello posteriore del P-660HNU-F1, che sono:1.  Fare clic con il pulsante destro del mouse sull'icona dell'adattatore wireless che appare in basso a destra della schermata del computer. Scegliere View Available Wireless Networks (visualizza reti wireless disponibili).SSID: Zy_private_R9XP9PWPA2-PSK: 7WC3R7TVKWK3R
422.  Selezionare il nome SSID del P-660HNU-F1 e fare clic su Connect (connetti) (A). Il SSID "SecureWirelessNetwork" presentato in questo documento è un esempio.3.  Viene richiesto di immettere una password. Immettere la chiave di crittografia WPA-PSK che si trova sul pannello posteriore del P-660HNU-F1 e fare clic su Connect (connetti). 4.  Il computer potrebbe impiegare alcuni minuti per connettersi alla rete wireless.A
43ITALIANO5.  Ora dovrebbe essere attiva una connessione wireless sicura al P-660HNU-F1. Se non è possibile connettersi al P-660HNU-F1 via wireless, controllare di aver selezionato l’SSID corretto e di aver immesso correttamente la chiave di sicurezza (Key). Se il problema persiste, controllare se il LED WLAN/WPS sul pannello anteriore è acceso.
44Configurazione di una connessione wireless utilizzando WPS Attenersi alle istruzioni seguenti per aggiungere un dispositivo compatibile WPS alla rete wireless utilizzando il pulsante WLAN/WPS. WPS va utilizzato un dispositivo alla volta con il P-660HNU-F1. Posizionare i dispositivi che si desidera collegare uno accanto all'altro.Tenere premuto il pulsante WLAN/WPS sul P-660HNU-F1 per più di 5 secondi per attivare/disattivare la funzione WPS.Il LED WLAN/WPS lampeggia.Premere il pulsante WPS di un dispositivo compatibile entro 2 minuti dalla pressione del pulsante sul P-660HNU-F1.Il LED WLAN/WPS del P-660HNU-F1 resta acceso quando il dispositivo è connesso.123
45ITALIANOStrumento di configurazione WebLo Strumento di configurazione Web è uno strumento per il browser che consente di configurare il P-660HNU-F1. Per poter utilizzare questo strumento, il computer e il P-660HNU-F1 devono trovarsi nello stesso intervallo di indirizzi IP.1.  Avviare il browser e digitare http://192.168.1.1 (l'indirizzo IP predefinito di P-660HNU-F1) nel campo dell'indirizzo.2.  Per accedere come amministratore, immettere il nome utente admin e la password 1234 (default). Per accedere come utente, immettere il nome utente user e la password 1234. Fare clic su Login (accedi). Se la schermata di accesso non viene aperta, assicurarsi di abilitare le finestre di pop-up, i JavaScript e il Java. Impostare inoltre l'acquisizione automatica dell'indirizzo IP da un server DHCP da parte del computer. Vedere la Guida utente per i dettagli.
463.  Se il LED INTERNET è spento, configurare manualmente la connessione a Internet. Fare clic su Network Setting (impostazioni di rete), quindi scegliere Broadband (banda larga) e fare clic su Add new WAN Interface (Network Setting > Broadband > Add new WAN Interface) (Impostazione di rete > Banda larga > Aggiungi nuova interfaccia WAN). •  Selezionare la modalità Internet (Routing) e l'incapsulamento (PPPoE) utilizzati dal proprio ISP. •  Immettere il nome utente dell'account e la relativa password.•  Immettere il proprio indirizzo IP statico e il server DNS se questi non vengono assegnati automaticamente al proprio account.
47ITALIANOFare clic su Apply (applica). •  Per configurare l'accesso wireless aprire Network Setting (impostazioni di rete)> Wireless.•  Per configurare la funzionalità di condivisione file USB, aprire Network Setting > Home Networking > File Sharing (Impostazione di rete > Rete domestica > Condivisione file).InternetAccount
48•  Per configurare la funzionalità di server di stampa USB, aprire Network Setting > Home Networking > Print Server (Impostazione di rete > Rete domestica > Server di stampa).•  Se si dispone di un account 3G e si desidera configurare le impostazioni 3G, aprire Network Setting > Broadband > 3G Backup (Impostazione di rete > Banda larga > Connessione di riserva 3G)•  Per configurare WPS utilizzando un PIN (Personal Identification Number) e lo Strumento di configurazione Web, aprire Network Setting (impostazioni di rete) > Wireless > WPSConsultare la Guida dell'utente per ulteriori dettagli su queste e su altre funzionalità del P-660HNU-F1Visualizzazione delle certificazioni di un prodotto1.  Aprire la pagina www.zyxel.com.2.  Selezionare il prodotto dall'elenco di riepilogo a discesa nella Home Page di ZyXEL per passare alla pagina del prodotto in questione.3.  Selezionare da questa pagina la certificazione che si desidera visualizzare.
Federal Communications Commission Statement This device complies with FCC Rules Part 15. Operation is subject to the following two conditions: ‧  This device may not cause harmful interference, and ‧ This device must accept any interference received, including interference that may cause undesired operation. This equipment has been tested and found to comply with the limits for a class B digital device, pursuant to Part 15 of the Federal Communications Commission (FCC) rules. These limits are designed to provide reasonable protection against harmful interference in a residential installation. This equipment generates, uses, and can radiate radio frequency energy and, if not installed and used in accordance with the instructions, may cause harmful interference to radio communications. However, there is no guarantee that interference will not occur in a particular installation. If this equipment does cause harmful interference to radio or television reception, which can be determined by turning the equipment off and on, the user is encouraged to try to correct the interference by one or more of the following measures:  ‧  Reorient or relocate the receiving antenna. ‧  Increase the separation between the equipment and receiver. ‧  Connect the equipment into an outlet on a circuit different from that to which the receiver is connected. ‧ Consult the dealer or an experienced radio/TV technician for help. The use of a shielded-type power cord is required in order to meet FCC emission limits and to prevent interference to the nearby radio and television reception. It is essential that only the supplied power cord be used. Use only shielded cables to connect I/O devices to this equipment. You are cautioned that changes or modifications not expressly approved by the party responsible for compliance could void your authority to operate the equipment. Note: Any changes or modifications not expressly approved by the grantee of this device could void the user's authority to operate the equipment. RF exposure warning  This equipment complies with FCC radiation exposure limits set forth for an uncontrolled environment. This equipment must be installed and operated in accordance with provided instructions and the antenna(s) used for this transmitter must be installed to provide a separation distance of at least 20 cm from all persons and must not be co-located or operating in conjunction with any other antenna or transmitter. End-users and installers must be provided with antenna installation instructions and transmitter operating conditions for satisfying RF exposure compliance.
ENGLISH DEUTSCH ESPAÑOL FRANÇAISGreen Product DeclarationRoHS Directive 2002/95/ECGreen Product DeclarationRoHS Directive 2002/95/ECDeclaración de Producto EcológicoDirectiva RoHS 2002/95/ECDéclaration de Produit GreenDirective RoHS 2002/95/EC WEEE Directive 2002/96/EC(WEEE: Waste Electrical and Electronic Equipment)2003/108/ECWEEE Directive 2002/96/EC (WEEE: Waste Electrical and Electronic Equipment)2003/108/ECDirectiva REEE 2002/96/EC (REEE : Residuos de Equipos Eléctricos y Electrónicos)2003/108/ECDirective DEEE 2002/96/EC(DEEE : Déchets des Equipements Electriques et Electroniques)2003/108/ECDeclaration Signature:Name/Title: Alan Cho / Quality Assurance DirectorDate (yyyy/mm/dd): 2009/3/24Unterschrift des Erklärenden:Name/Titel: Alan Cho / Quality Assurance DirectorDatum (JJJJ/MM/TT): 2009/3/24Firma de declaración:Nombre/Título: Alan Cho / Quality Assurance DirectorFecha (aaaa/mm/dd): 2009/3/24Signature de la déclaration :Nom/Titre : Alan Cho  / Quality Assurance DirectorDate (aaaa/mm/jj) : 2009/3/24ITALIANO NEDERLANDS SVENSKADichiarazione Green ProductDirettiva RoHS 2002/95/CEProductmilieuverklaringRoHS-richtlijn 2002/95/ECMiljödeklarationRoHS Direktiv 2002/95/EC Direttiva RAEE 2002/96/CE (RAEE: Rifiuti di Apparecchiature Elettriche ed Elettroniche)2003/108/CEAEEA-richtlijn 2002/96/EC(AEEA: Afgedankte Elektrische en Elektronische Apparaten)2003/108/ECWEEE Direktiv 2002/96/EC(WEEE: hantering av elektriskt och elektroniskt avfall)2003/108/ECFirma dichiarazione:Nome/titolo: Alan Cho / Quality Assurance DirectorData (aaaa/mm/gg):  2009/3/24Verklaringshandtekening:Naam/titel: Alan Cho  / Quality Assurance DirectorDatum(jjjj/mm/dd):  2009/3/24Deklaration undertecknad av:Namn/Titel: Alan Cho / Quality Assurance DirectorDatum (åååå/mm/dd):  2009/3/24

Navigation menu